Table of Contents
Advertisement
Quick Links
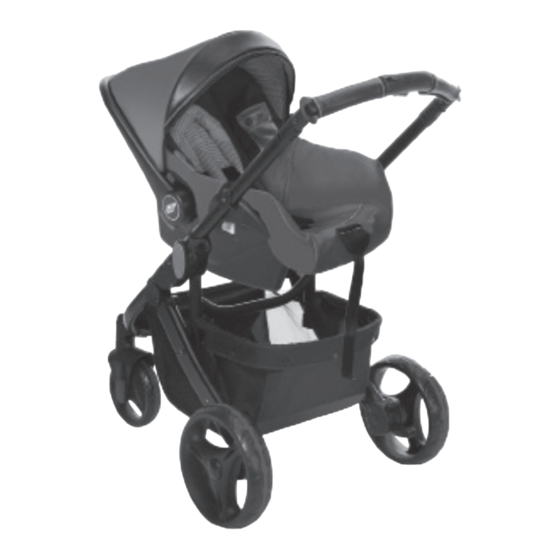
Willz Car Seat
For the Willz Travel System
Group 0+ child car seat.
Suitable for children from
birth to 13kg (approx 12
months).
Instructions:
Please read
carefully and keep for
future reference. Your
child's safety may be
affected if you do not
follow these instructions.
This product conforms to
ECE R44.04
This product is tested to
BS EN 1888:2003 (A1-
A3:2005)
User guide
kiddicare
Advertisement
Table of Contents

Related Manuals for Kiddicare KC18949


Summary of Contents for Kiddicare KC18949
- Page 1 Please read carefully and keep for future reference. Your child’s safety may be affected if you do not follow these instructions. This product conforms to ECE R44.04 This product is tested to BS EN 1888:2003 (A1- A3:2005) User guide kiddicare...
-
Page 2: Safety Comes First
Safety comes first WARNING: The correct fitting of the • Never make unauthorised vehicle seatbelt (following the guide alterations to the product. markings) is of vital importance for the • Child car seat parts may become safety of your child. See the labels on hot in direct sunlight. Cover with the seat itself. - Page 3 Safety comes first Vehicle seatbelt use the vehicle’s rear centre seat if the vehicle seat is fitted with a The product must only be used with a 3-point adult belt). 3-point vehicle seatbelt that has been • Do not use your child car seat on a approved to ECE R16 or equivalent. vehicle seat with lap belts only.
- Page 4 Safety comes first Safety advice when using with the Willz • Always check the buckle hole TS Chassis before you buckle up as it may contain crumbs or obstructions WARNING: To avoid injury ensure that that prevent a secure lock. • Keep your child car seat out of your child is kept away when unfolding reach of children when not in use.
- Page 5 Safety comes first WARNING: Do not load the basket with a weight in excess of 2kg. WARNING: Always apply the brakes when the pushchair is stationary, and when placing and removing children. WARNING: Taking children up or down stairs, escalators, steps, steep slopes and muddy/rough terrain could be dangerous and should not be attempted.
- Page 6 Inspection If you have a query with this product or require replacement parts, please 1) Check your child car seat regularly email hello@kiddicare.com for wear and tear. 2) The child car seat may have a slight Care and maintenance. rattle when not in use, this is normal.
-
Page 7: Part Checklist
Part checklist Part Head hugger Shoulder pads Harness buckle Harness adjuster button (under flap) Shoulder strap slots Insert cushion Crotch pad Harness adjuster strap... - Page 8 Part checklist Part Hood Handle adjuster button Diagonal seatbelt guide (on rear of shell) Carry handle Lap belt guides Shell...
-
Page 9: Positioning The Child Car Seat
Positioning the child car seat The child car seat can only be used with an automatic 3-point safety belt (A) and NOT with a 2-point lap belt (B). The child car seat can be secured on forward-facing back seats of the vehicle by using the existing seatbelts. -
Page 10: Adjusting The Carry Handle
Adjusting the carry handle The carry handle has 3 positions. (1) Feeding/non-rocking position. (2) Rocking position - keep away from the edge of surfaces e.g. tables, steps, etc. (3) Carrying/fitting position: Make sure handle is locked before lifting. Press both buttons (A) and rotate the handle to the desired position. -
Page 11: Adjusting The Shoulder Harness Height
Adjusting the shoulder harness height The harness should exit the child car seat at the same height as the child’s shoulder and should not exit higher or lower than the child’s shoulder. WARNING: You should not attempt to adjust the harness height with a child seated in the child car seat. - Page 12 Adjusting the shoulder harness height Pull the shoulder straps through to Then pass them back through at the the back of the seat (B). desired height (C). “click” Buckle up the harness. Connect the Pull the harness adjuster strap tight two shoulder strap connectors (D) and check straps are not twisted.
-
Page 13: Fitting The Harness
Fitting the harness “click” Press the belt adjuster button and Press the red release button (A), pull on the shoulder harness straps to unbuckle the harness and move the create slack. shoulder straps apart. Place the child in the child car seat and ensure there are no spaces under the child. - Page 14 Fitting the harness Place the shoulder harness over the shoulders. Note: Do not place your child in a sleeping bag, blanket or other bulky wrapping before putting the child in the child car seat. The shoulder straps will not fit snugly and the child will not be safe. “click”...
- Page 15 Fitting the harness The harness should allow 1 finger- width (1cm) of space at the top of the shoulders. This is the ideal tightness. Note: Check that the buckle is secured by tugging the shoulder and waist straps.
- Page 16 Fitting the child seat in a vehicle Place the child car seat on the Choose a seat suitable for fitting vehicle seat ensuring the carry the child car seat to. See page 8, handle is in the fitting position (3). ‘Positioning the child car seat’. “click” Buckle up the vehicle seatbelt (A). Place the vehicle lap belt across the child car seat, then slide the lap belt into the lap belt guides slots (B) on both sides of the child car seat.
- Page 17 Fitting the child seat in a vehicle Take the diagonal belt around the Once the seatbelts are in their correct back of the child car seat and slot it mounting points make sure the into the rear blue seatbelt guide (C). seatbelt buckle is secure and there are no twists in the belt and that all Make sure all the slack is taken out of...
-
Page 18: Fitting The Hood
Fitting the hood The hood is attached using press studs (A) located on the back and sides of the car seat. -
Page 19: Removing The Seat Cover
Removing the seat cover “click” Press the belt adjuster button and Press the red release button (A), pull on the shoulder harness straps to unbuckle the harness and move the create slack. shoulder straps apart. Remove the insert cushion (B). Loosen the seat cover all around the edges of the shell, unhook all plastic hooks. - Page 20 Attaching the child seat to the chassis “click” “click” “click” Note: The car seat should only be attached in the parent-facing position as illustrated above. DO NOT attach the car seat in the forward-facing position. Line up the connectors (A) on each side of the car seat with mounting points (B) on the chassis and lower the car seat onto the chassis, ensuring it clicks into place.
- Page 21 Removing the child seat from the chassis Grip the car seat on both sides and push down the release button (A), whilst at the same time lifting the seat from the chassis.
- Page 22 Notes...
- Page 23 Notes...
- Page 24 1 Club Way, Cygnet Park, Hampton, Peterborough, Cambridgeshire, PE7 8JA Email: hello@kiddicare.com...
Need help?
Do you have a question about the KC18949 and is the answer not in the manual?
Questions and answers