Table of Contents
Advertisement
Advertisement
Table of Contents

Related Manuals for Sheffield PLA0520

Summary of Contents for Sheffield PLA0520
-
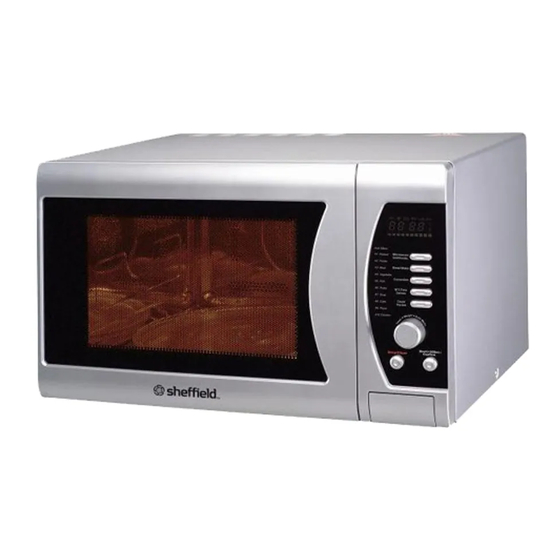
Page 1: Microwave Oven
Microwave Oven INSTRUCTION MANUAL MODEL: PLA0520 Read these instructions carefully before using your microwave oven, and keep them for future reference. If you follow the instructions, your oven will provide you with many years of good service. SAVE THESE INSTRUCTIONS IN A SAFE AND DRY PLACE... -
Page 2: Precautions To Avoid Possible Exposure To Excessive Microwave Energy
If the apparatus is not maintained in a good state of cleanliness, its surface could be degraded and affect the lifespan of the apparatus and lead to a dangerous situation. Specifications Model: PLA0520 Rated Voltage: 230-240V~50Hz Rated Input Power(Microwave): 1550W... -
Page 3: Important Safety Instructions Warning
IMPORTANT SAFETY INSTRUCTIONS To reduce the risk of fire, electric shock, injury to persons WARNING or exposure to excessive microwave oven energy when using your appliance, follow basic precautions, including the following: 1. Warning: Liquids and other foods must 13. Install or locate this oven only in not be heated in sealed containers since accordance with the installation they are liable to explode. -
Page 4: Read Carefully And Keep For Future Reference
23. Microwave heating of beverages can result in delayed eruptive boiling, therefore care must be taken when handling the container. 24.The appliance is not intended for use by persons (including children) with reduced physical , sensory or mental capabilities, or lack of experience and knowledge, unless they have been given supervision or instruction concerning use of the appliance by a person responsible for their safety. -
Page 5: To Reduce The Risk Of Injury To Persons Grounding Installation
To Reduce the Risk of Injury to Persons Grounding Installation DANGER Electric Shock Hazard This appliance must be grounded. In the event of Touching some of the internal an electrical short circuit, grounding reduces the components can cause serious risk of electric shock by providing an escape wire personal injury or death. -
Page 6: Materials You Can Use In Microwave Oven
UTENSILS See the instructions on "Materials you can use in microwave oven or to be avoided in microwave oven." There may be certain non-metallic utensils that are not CAUTION safe to use for microwaving. If in doubt, you can test the Personal Injury Hazard utensil in question following the procedure below. -
Page 7: Materials To Be Avoided In Microwave Oven
Materials to be avoided in microwave oven Utensils Remarks Aluminum tray May cause arcing. Transfer food into microwave-safe dish. Food carton with May cause arcing. Transfer food into microwave-safe dish. metal handle Metal or metal- Metal shields the food from microwave energy. Metal trim may trimmed utensils cause arcing. -
Page 8: Setting Up Your Oven
SETTING UP YOUR OVEN Names of Oven Parts and Accessories Remove the oven and all materials from the carton and oven cavity. Your oven comes with the following accessories: Glass tray Turntable ring assembly Instruction Manual A) Control panel B) Turntable shaft C) Turntable ring assembly D) Glass tray Warning: Do not use grill... - Page 9 Accessories Bread barrel This pan is placed in the middle of the oven, once the turntable, ring and driver have been withdrawn. It is fixed on the lugs inside the oven by means of its notches. Kneading paddle The function of this accessory, placed at the bottom of the barrel, is to mix all the ingredients present in the barrel.
-
Page 10: Turntable Installation
Turntable Installation a. Never place the glass tray upside down. The glass Hub (underside) tray should never be restricted. b. Both glass tray and turntable ring assembly must always be used during cooking. Glass tray c. All food and containers of food are always placed on the glass tray for cooking. -
Page 11: Clock Setting
OPERATION INSTRUCTION This microwave oven uses modern electronic control to adjust cooking parameters to meet your needs better for cooking. 1.Clock Setting When the microwave oven is electrified,the oven will display "0:00", buzzer will ring once. 1) Press " CLOCK/PRE-SET " to choose 12-hour or 24-hour. 2) Turn "... - Page 12 3. Grill Cooking 1) Press the "MICROWAVE/GRILL/COMBI. " key once, and "P100" display. 2) Press " MICROWAVE/GRILL/COMBI." or turn " " to select the grill power. Stop turning when "G-1" displays. 3) Press "START/+30SEC./CONFIRM " to confirm. 4)Turn " " to adjust the cooking time. (The time setting should be 0:05- 95:00.) 5) Press "...
-
Page 13: Convection Cooking( Without Pre-Heating Function)
1) Press the "CONVECTION " key once, "140" will flash. 2) Keep pressing "CONVECTION" or turn " " to select the convection function. Note:the temperature can be chosen from 140 degrees to 230 degrees. 3) Press the " START/+30SEC./CONFIRM " to confirm the temperature. 4) Press the "... -
Page 14: Pre-Set Function
5) Press "START/+30SEC./CONFIRM" to confirm; 6) Turn " " to adjust the cooking time of 7 minutes; 7) Press "START/+30SEC./CONFIRM" to start cooking. 8. Pre-set Function 1) Set the clock first. (Consult the instruction of clock setting.) 2) Input the cooking program. Three stages can be set at most. Defrosting should not be set in preset function.Auto menu can be set single stage only. - Page 15 Auto menu Chart Display Menu Power Weight(g) 100% Reheat 1 (about 230g) 2 (about 460g) 100% Potato 3 (about 690g) Meat 100% 100% Vegetable Fish 50(with water 450g) 100(with water 800g) Pasta 150(with water 1200g) 100% Soup A8 Cake Preheat at 160 degrees Pizza Chicken 1000...
-
Page 16: Defrost By Time
10. Defrost by W.T. 1) Press "W.T./TIME DEFROST" pad once,the oven will display "dEF1",. 2) Turn " " to select the weight of food.At the same time, "g" will lights, The weight should be 100-2000g. 3) Press "START/+30SEC./CONFIRM" key to start defrosting "... -
Page 17: Bread Baking
14. Bread Baking Remove the glass turntable, the ring bearing and the shaft. Fit the mixer in the bottom of the barrel. Add the ingredients in the pan in the recommended order. This is usually the liquid ingredients first, then the dry ones, and finally the yeast. -
Page 18: Cooking Guide
5) Press "START/+30SEC/CONFIRM" to confirm the weight. 6) ) Keep pressing "BREAD MAKER/SLICE BREAD" to choose browning the bread, "COL2","COL3" or "COL1" will display. "COL1" indicates for light color,"COL2" indicates for medium color and "COL3" indicates for dark color. 7) Press "START/+30SEC/CONFIRM" to confirm the color. At this time,the cooking time displays 8) Press "START/+30SEC/CONFIRM"... -
Page 19: Whole Wheat Bread
B.Ingredients and seasoning for 1000g turbo bread: 360 ml lukewarm water, 1.5 tbsp sunflower oil, 1.5 tsp salt, 1.5 tsp sugar, 2.5 tbsp powder milk, 565g flour, 4.0 tsp yeast. C.Ingredients and seasoning for 1200g turbo bread: 450 ml water, 2.0 tbsp sunflower oil, 2.0 tsp salt, 1.5 tsp sugar, 3.0 tbsp powder milk, 700g flour, 5.0 tsp yeast. -
Page 20: Specification
Dough Bread A. Ingredients and seasoning for 800g dough bread: 250 ml water, 1.5 tbsp olive oil, 2.0 tsp salt, 490 flour, 1.5 tsp yeast. B. Ingredients and seasoning for 1000g dough bread: 320 ml water, 1.5 tbsp olive oil, 2.0 tsp salt, 640 flour, 1.5 tsp yeast. C. -
Page 21: Troubleshooting
Trouble shooting It is forbidden to run the unit without any food inside. It is very dangerous. has tripped. According to Waste of Electrical and Electronic Equipment (WEEE) directive, WEEE should be separately collected and treated. If at any time in future you need to dispose of this product please do NOT dispose of this product with household waste.
Need help?
Do you have a question about the PLA0520 and is the answer not in the manual?
Questions and answers