Table of Contents
Advertisement
WARNING
For Outdoor Use Only (outside any enclosure)
WARNING
1. Improper installation, adjustment, alteration,
service or maintenance can cause injury or
property damage.
2. Read this instruction manual thoroughly
before installing or servicing this equipment.
3. Failure to follow these instructions could
result in fire or explosion, which could cause
property damage, personal injury or death.
4. This instruction manual contains important
information necessary for proper assembly and
safe use this appliance.
WARNING
1. Do not store or use gasoline or other
flammable vapors and liquids in the vicinity of
this or any other appliance.
2. An LP tank not connected for use should not
be stored in the vicinity of this or any other
appliance.
DANGER
If you smell gas:
1. Shut off gas to the appliance.
2. Extinguish any open flames.
3. Open the lid.
4. If the odor continues, keep away from the
appliance and immediately call your gas
supplier or fire department.
DANGER
Never operate this appliance unattended.
Save these instructions for future reference.
If you are assembling this unit for someone else,
give this manual to him or her to read save for
future reference.
DO NOT RETURN YOUR GRILL TO THE STORE
Question, problems, missing parts? Don't return the grill to stores, please call our customer service
department at 1-855-CHANT-US (1-855-242-6887) from 8:00am to 5:00pm Eastern time, Monday
through Friday for assistance.
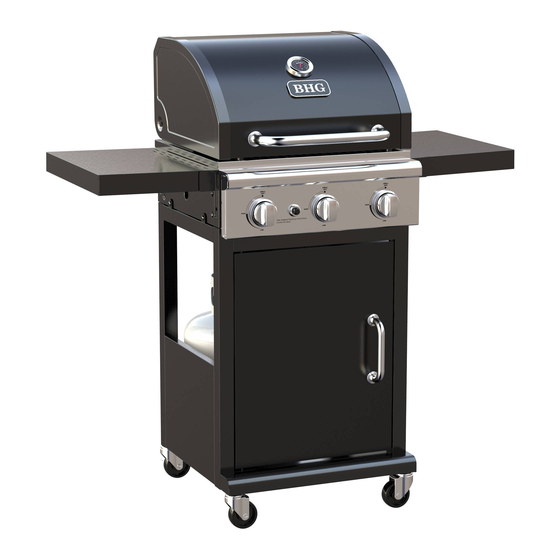
OUTDOOR 3 BURNER GAS GRILL
MODEL NO.:BG2503B-DG
VENDOR STOCK NO.: BH15-101-099-03
Call Customer Service Hotline
1-855-242-6887
1
BH15-101-099-08
BH15-101-099-09
BH15-101-099-10
Advertisement
Table of Contents

Related Manuals for Better Homes and Gardens BG2503B-DG


Summary of Contents for Better Homes and Gardens BG2503B-DG
- Page 1 OUTDOOR 3 BURNER GAS GRILL MODEL NO.:BG2503B-DG WARNING For Outdoor Use Only (outside any enclosure) VENDOR STOCK NO.: BH15-101-099-03 WARNING BH15-101-099-08 1. Improper installation, adjustment, alteration, service or maintenance can cause injury or BH15-101-099-09 property damage. 2. Read this instruction manual thoroughly BH15-101-099-10 before installing or servicing this equipment.
- Page 2 DANGER WARNING If you smell gas: 1. Do not store or use gasoline or other flammable liquids or vapors in the 1. Shut off gas to the appliance vicinity of this or any other appliance. 2. Extinguish any open flame 3.
-
Page 3: Table Of Contents
TABLE OF CONTENTS Cover …………….…………………………………….………...….………….………….….………...1 Table of contents……………………………………….………...….………….……………………..3 Safety Information…………………………………….………...….………….….…………………..4 Exploded View……………….………………………………………………......…..…..7 Parts list….……………..…..….……...…....……………..………………....8 Hardware Contents……………………………………………………………….……………………9 Assembly Instructions……………………..……………….………………………………………...11 Natural Gas Conversion…………………….. ……………….…………………… ………………17 L.P. Propane Gas Installation………….……...………………………….....20 Operating Instructions………… ………………...…………………………........24 Lighting Instructions………… ………………...…………………………........27 Care and Maintenance……………………………….………………………………………………28 Troubleshooting …………………………………………………………………..….……………...30 Warranty………………………………………………………………………………………………..32... -
Page 4: Safety Information
SAFETY INFORMATION Please read and understand this entire manual before attempting to assemble, operate or install the product. If you have any questions regarding the product, please call our customer service at 1-855-CHANT-US(1-855-242-6887) from 8:00am to 5:00pm Eastern time, Monday through Friday for assistance. The installation and repairs of this appliance must conform with local codes or, in the absence of local odes, with either the National Fuel Gas Code, ANSI Z223.1/NFPA 54, or Natural Gas and Propane Installation Code, CSA/CGA-B149.1. - Page 5 SAFETY INFORMATION Do not use the grill unless it is COMPLETELY assembled and all parts are securely fastened and tightened. Do not build this model of grill in any built-in or slide in construction. Ignoring this warning could cause a fire or an explosion that can damage properly and cause serious bodily injury or death This grill should be thoroughly cleaned and inspected on a regular basis.
- Page 6 SAFETY INFORMATION Use only a ground Fault Interrupter (GFI) protected circuit with this outdoor cooking gas appliance. Never remove the grounding plug or use with an adapter of 2 prongs; and use only extension cords with a 3 prong grounding plug, rated for the power of the equipment, and approved for outdoor use with a W-A marking.
-
Page 7: Exploded View
EXPLODED VIEW... -
Page 8: Parts List
PARTS LIST PART DESCRIPTION PART NO ※Temperature gauge 2406912 ※Logo plate 2403888 ※Lid assembly 2503B01 ※Lid handle 5204364 ※Lid handle bezel 5201176 ※Lid spacer 2404055 ※Side shelf support A 5204378 ※Side shelf support B 5204377 ※Tube burner 2409592 ※Ignition Pin 2409585 Side shelf assembly 5204376... - Page 9 PART DESCRIPTION PART NO Bottom panel 5204383 2300824 ※Magnet Top front door brace 5204379 ※Reinforcing bar 5207382 ※Hose clip hook 2405337 ※Gas cylinder hook 2406914 Grease tray assembly 5109447 ※Left grease tray Support 5202068 Left leg assembly 5204386 Grease cup 5201953 ※Regulator &...
-
Page 10: Hardware Contents
HARDWARE CONTENTS M6X12 mm Screw Wrench AA Battery Orifice orifice removal tool 一字螺丝批 ASSEMBLY PREPARATION Before beginning assembly of product, make sure all parts are present. Compare parts with package contents list and hardware contents list. If any part is missing or damaged, do not attempt to assemble the product. -
Page 11: Assembly Instructions
ASSEMBLY INSTRUCTIONS IMPORTANT: ASSEMBLE ON FLAT AND SOFT SURFACE TO AVOID SCRATCHING. Attach Left side Panel Assembly and 1. Attach Bottom Bar (23) at the front of Right side Panel Assembly on Bottom Bottom Panel (26), on the opposite edge Panel. - Page 12 ASSEMBLY INSTRUCTIONS 5. Attach Top Front Door Brace (28). 6. The Regulator & Hose (36) is located inside of the control panel. Please untie it before you put the firebox onto the cart like the picture shown. Then attach the Control Knobs (14) onto Bezels.
- Page 13 ASSEMBLY INSTRUCTIONS 9. Pull out the hose clip hook (30) and 10. Attach door (16) to the cart. secure the hose into the hook. 11. Hang Side Shelf Assembly (11) by aligning the slots into side table supports ( See Fig. 1). Lift the side shelf and slide it into the right position as per Fig.2 shows.
- Page 14 ASSEMBLY INSTRUCTIONS Fig. 2 Fig. 3 12. Insert Heat Tents (38), Cooking Grates (15) and Warming Rack (41). Place AA battery into the Igniter with the positive (+) end facing out. Your grill is now assembled.
-
Page 15: Natural Gas Conversion
NATURAL GAS CONVERSION PREPARATION: Before beginning conversion, make sure all parts are present. Compare parts with package contents. If any part is missing or damaged, do not attempt to convert. Please have your owner’s manual and part number available for reference, and contact customer service 1-855-242-6887 for replacement parts. - Page 16 NATURAL GAS CONVERSION IMPORTANT: After your grill is converted to natural gas, the working pressure for natural gas is 7 in. water column (WC). Gas pressure is affected by gas line size and the length of gas line run from house. Follow the recommendations in the chart below.
- Page 17 NATURAL GAS CONVERSION WARNING: Place the grill on a flat, level surface. Before the conversion, make sure all control knobs are in the OFF position, LP tank valve is closed, and tank is disconnected from regulator and removed from grill. 1, Open the lid and remove cooking grates and flame tamer.
- Page 18 NATURAL GAS CONVERSION 3, Loosen the screw from LPG setting, rotate the shutter opening counterclockwise, adjusting it from LP setting to NG setting. Re-tighten the screw into NG setting for securing the air shutter opening. 4, Unscrew the old LP orifice from each gas valve with the orifice removal tool. Put a new NG orifice into the valves and tighten with tool.
- Page 19 NATURAL GAS CONVERSION 5. Reinstall the main burners and R pin. Make sure to engage the burner valves. Then Put the flame tamer, cooking grates back to grill. 6, Step 1. Remove the Grease Tray out of the grill . Step 2.
- Page 20 NATURAL GAS CONVERSION 7, Remove the 3 main burner control knobs by grasping and pulling out. Insert slotted screwdriver (Not included) into the hole of each control valve shaft as shown. Rotate the shaft counterclockwise (to the left) as far as it will go (about 2 complete turns) until it stops.
-
Page 21: Propane Gas Installation
LIQUID PROPANE GAS INSTALLATION Gas grills that are set to operate with Liquid Propane Gas come with a high capacity hose and regulator assembly. (Note: Only use the pressure regulator and hose assembly supplied with the grill or a replacement pressure regulator and hose assembly specified by the manufacturer). This assembly is designed to connect directly to a standard 20 lb. - Page 22 LIQUID PROPANE GAS INSTALLATION 6. Open the tank valve fully (counterclockwise). Use a soapy water solution to check all connections for leaks before attempting to light your grill. See “Leakage Testing" on page 24. If a leak is found, turn the Tank Valve off and do not use your grill until the leak is repaired. As shown in Fig.
- Page 23 LIQUID PROPANE GAS INSTALLATION Disconnecting A Liquid Propane Gas Fig. 5 (LP Gas) Tank From Your Grill: 1. Turn the burner knobs and LP gas tank valve to the full OFF position. (Turn clockwise to close.) 2. Detach the hose and regulator assembly from the LP gas tank valve by turning the quick coupling nut counterclockwise.
-
Page 24: Operating Instructions
OPERATING INSTRUCTIONS • Cylinders must be stored outdoors out of the reach of children and must not be stored in a building, garage or any other enclosed area. WARNING • Only a qualified gas supplier should refill DO NOT store a spare L.P. gas cylinder under the L.P. - Page 25 OPERATING INSTRUCTIONS Please refer to diagram for proper installation (see Fig. 8). Visually check the connection between the burner venture pipe and orifice. Make sure the burner venture pipe fits over the orifice. Fig. 8 WARNING When leak testing this appliance, make sure to test and tighten all loose connections.
- Page 26 OPERATING INSTRUCTIONS Storage of an outdoor gas cooking appliance indoor is permissible only if the cylinder is disconnected and removed from the appliance. WARNING Heat and smoke exhaust out of the back of the grill hood opening. Make sure not to have the grill back facing your home or anything that could be damaged by heat or smoke.
-
Page 27: Lighting Instructions
LIGHTING INSTRUCTIONS Checking orifices alignment with burners Orifices may shift during assembly and movement. Check the orifices alignment with the burners according to the following illustrations before lighting. LIGHTING INSTRUCTIONS: Warning: Do not lean over grill when lighting. 1. Check that the control knobs are in the OFF position. 2. -
Page 28: Care And Maintenance
CARE AND MAINTENANCE However, there are steps you must take to prevent cracking of the burner's ceramic surfaces, which will cause the burners to malfunction. The following are the most common causes of cracks and the steps you must take to avoid them. Damage caused by failure to follow these steps is not covered by your grill warranty. - Page 29 CARE AND MAINTENANCE DRIP TRAY The drip tray should be cleaned periodically to prevent heavy buildup of debris. NOTE: Allow the drip tray to cool before attempting to clean. Important: Do not leave the grill outside during inclement weather unless it is covered. Rain water can collect inside of the grill, the grill cart or the drip tray if left uncovered.
-
Page 30: Troubleshooting
TROUBLESHOOTING Many solutions given here can make your grilling experience safer and more enjoyable. You can also call customer service department at 1-855-CHANT-US(1-855-242-6887) from 8:00am to 5:00pm Eastern time, Monday through Friday for assistance. PROBLEM POSSIBLE CAUSE CORRECTIVE ACTION 1. The ignition wire came off the 1. - Page 31 TROUBLESHOOTING PROBLEM POSSIBLE CAUSE CORRECTIVE ACTION 1. This model is set for 7 in. natural gas usage. Please check your natural gas supply system to have correct gas pressure. Regulator is not needed for Low heat 1. Low heat is found in natural NG model.
-
Page 32: Warranty
WARRANTY Proof of purchase is required to access this warranty program, which is in effect from the date of purchase. Customers will be subject to parts, shipping, and handling fees if unable to provide proof of the purchase or after the warranty has expired. If you have any questions or problems, you can call our customer service department at 1-855-CHANT-US(1-855-242-6887) from 8:00am to 5:00pm Eastern time, Monday through Friday for assistance.
Need help?
Do you have a question about the BG2503B-DG and is the answer not in the manual?
Questions and answers