Advertisement
Quick Links
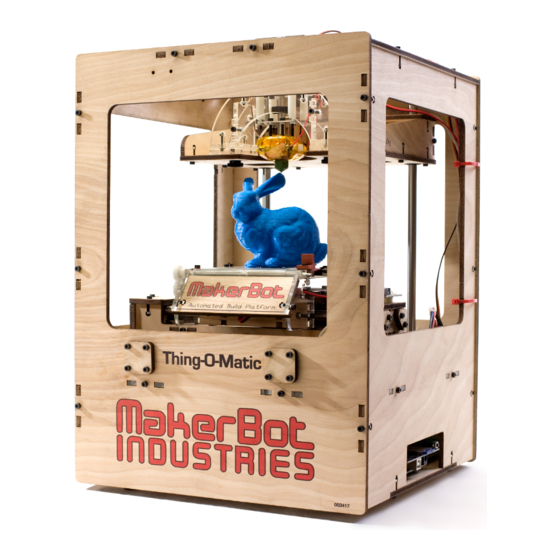
Makerbot Thing-O-Matic Quick Start Guide
IMPORTANT: Depending on where you are located in the world, you may need to switch the voltage
setting on you power supply. You should make sure it is in the correct position before turning your machine
on. It will most likely arrive in the 110V position. Change it accordingly.
Look over your Thing-O-Matic for any damage from shipment. If you're checking this page out after
assembling a Thing-O-Matic from a kit, just skip down to the section labeled "Install Software."
Open your boxes and take a look at what is inside.
There are a lot of extra nuts and bolts. You may never have to use them, but it doesn't hurt to have
them around.
120mm Wide Kapton Tape for your Heated Build Platform. The tape applied to the build platform will
eventually get scratched or torn. You can use this big roll to replace it.
Gen4 Interface Controller, which you can use to print without being connected to your computer.
USB A to B cable and Power Cord.
Tools: hex keys and wrenches for upkeep and maintenance.
Set up Hardware
It's time to unpack your MakerBot Thing-O-Matic! The Thing-O-Matic is fully assembled, but you will need
to set up a few things before you can start using your machine.
Bolt Extruder in Place
10/24/12 2:04 PM
Advertisement

Related Manuals for MakerBot Thing-O-Matic


Summary of Contents for MakerBot Thing-O-Matic
- Page 1 It will most likely arrive in the 110V position. Change it accordingly. Look over your Thing-O-Matic for any damage from shipment. If you’re checking this page out after assembling a Thing-O-Matic from a kit, just skip down to the section labeled “Install Software.”...
- Page 2 10/24/12 2:04 PM When you unpack your Thing-O-Matic, you’ll find the extruder just below the Z-stage, where it has been immobilized for shipping. All the wiring is complete; you’ll just need to bolt it in place. Put large white spacers between the extruder and Z-stage.
-
Page 3: Install Spool Holder
Next, it’s time to install the spool holder that came with your bot. This spool holder was printed on your Thing-O-Matic as a test before we shipped the machine out to you. Locate the spool holder and drop 4 M3 bolts in the holes. Then install the holder on the front upper left of... - Page 4 10/24/12 2:04 PM Once it’s in place, secure the spool holder with 4 M3 nuts. Then put the spool in place!
- Page 5 10/24/12 2:04 PM Good to go! Plug in Generation 4 LCD Interface Find your LCD Interface kit. You may need to attach the sides. If so, put the sides in place as shown and tighten them down with several M3 x 16 mm bolts. The nuts should already be in place.
- Page 6 10/24/12 2:04 PM Next locate the rainbow cable coming from the inside of the Thing-O-Matic.
- Page 7 10/24/12 2:04 PM Plug this into the back of the interface board like this.
-
Page 8: Install Software
Now your interface board is ready to go. We’ll come back to it later. Install Software The software that you’ll use to control your Thing-O-Matic is called ReplicatorG and is available at http://replicat.org. Go there for instructions on how to install the latest version. Note: Some parts of this section may be out of date. - Page 9 10/24/12 2:04 PM Install Drivers You may need to install drivers to be able to communicate with your Thing-O-Matic. To determine whether this is necessary, start ReplicatorG with your Thing-O-Matic unplugged and look at the contents of the the “Machine” -> “Connection (serial ports)” menu. Now plug in your Thing-O-Matic and choose “Rescan serial ports”...
-
Page 10: Calibration And Testing
10/24/12 2:04 PM Windows: Navigate to the device manager. The Arduino Mega should be listed under “Ports (COM & LPT).” If you see an orange icon with an exclamation point next to the Arduino Mega, then you should load your driver manually.To do this, right click on the Arduino Mega, and select “Update Driver Software”... -
Page 11: Calibration Routine
Make sure that each axis can run all the way to the endstop. Calibration Routine While your Thing-O-Matic was fully calibrated before leaving the factory, it’s a good idea to re-calibrate after shipping. Here’s a good video that explains the process. - Page 12 10/24/12 2:04 PM Loading Filament and Testing Extrusion On the right side of the control panel, you will find a tab labeled “Stepstruder MK7.” In this tab, you can see a realtime readout of the extruder and platform temperature, and you can set target temperatures. In the rolling readout, the blue line is the target temperature for the extruder head, the red line is the current temperature for the extruder head, the yellow line is the target temperature for the build platform, and the white line is the current temperature for the build platform.
- Page 13 10/24/12 2:04 PM...
- Page 14 10/24/12 2:04 PM Once the Current Temperatures reach the target temperatures, you can begin loading the filament into the extruder. Take the filament and push it into the hole that lines up with your extruder’s hot end.
-
Page 15: Your First Print
10/24/12 2:04 PM The filament will stop soon after you insert it. That’s because the drive gear is in the way. To get the filament into the heating chamber, check that motor speed “RPM” is set to 3, and “Extruder Duration” is set to 30 seconds. - Page 16 10/24/12 2:04 PM Choose file from directory...
- Page 17 10/24/12 2:04 PM Move and Resize your Model (if necessary) Let’s take a look at some of the tools we can use to manipulate the model in Replicator.“View” allows you to toggle around the printing space.
- Page 18 10/24/12 2:04 PM “Move” allows you to move the positon of the model in the space. Before generating Gcode for a model, it is a good idea to click the “Put on Platform” and “Center” buttons. This will make sure that the model is oriented correctly on the grid.
- Page 19 10/24/12 2:04 PM “Rotate” allows you to rotate the model over the XYZ axis.
- Page 20 10/24/12 2:04 PM “Mirror” allows you to mirror the model.
- Page 21 10/24/12 2:04 PM “Scale” allows you to scale the model. A number greater than 1.00 will increase the size. A number less than 1.00 will decrease the size.
-
Page 22: Generate Gcode
“Generate GCode” is one of the the main functions of Replicator G — this is where your 3d model will get converted into a toolpath, which is the series of movements your MakerBot will execute while printing the object.When the dialogue box opens, you should find the correct “Profile” that fits your machine. You should select the “SF35 Thingomatic HBP MK7.”... - Page 23 10/24/12 2:04 PM generate your Gcode based on your current settings each time you click the “Build” button. Use this once you’ve dialed in your Print-O-Matic settings. Print-O-Matic These are the default values for the Stepstruder MK7. “Object Infill (%)” can be used to make your print more dense or more hollow. A value of 0% will result in an empty or hollow print.
- Page 24 10/24/12 2:04 PM Under the “Extruder” tab, make sure the “Nozzle Diameter” is .4mm. Feel free to experiment with any of these settings. If you want to go back to the defaults, there are reset buttons on the “Defaults” tab.
- Page 25 10/24/12 2:04 PM Generate GCode!
- Page 26 There are a few ways to make your machine print your model. When connected to the Thing-O-Matic, press the “Build” button. This is the easiest way to print, although you are tethered to your computer. If you unplug the machine from the computer while printing, the print will...
- Page 27 10/24/12 2:04 PM You can also press the “Build From SD” button. This will allow you to print any .s3g files (Gcode processed for MakerBot) that are stored on the SD card in your Thing-O-Matic.
- Page 28 The final way to print is by using your Gen4 Interface Controller. This will allow you to print anywhere you can get electricity. Advanced MakerBotting Techniques: Using the Generation 4 LCD Interface and SD Card Using the Gen4 Interface The interface should happily display the word “Thing-O-Matic” when you start up your bot.
- Page 29 10/24/12 2:04 PM If the LCD ever shows strange or garbled text at start-up, just hit the reset button on the motherboard. This should clear things right up.
- Page 30 10/24/12 2:04 PM There are 9 white buttons that do different different things depending on the mode you’re in. However, the button in the center of the cross is usually the “do this” button, and the button second from the right on the central row is usually the “go back”...
- Page 31 Gen4 interface to print.Once the build is finished the file will be saved directly to the SD Card. The Gcode file will become a .s3g, and you’ll see it on the list if you’re using the interface or building from SD using ReplicatorG. Enjoy your MakerBot Thing-O-Matic!
Need help?
Do you have a question about the Thing-O-Matic and is the answer not in the manual?
Questions and answers