
Related Manuals for 3D Systems CubePro 3D Printer


Summary of Contents for 3D Systems CubePro 3D Printer
- Page 1 Published on Product Information Center | CubePro (http://infocenter.3dsystems.com/cubepro) Home > CubePro User Guide...
- Page 2 CUBEPRO USER GUIDE User Guide...
- Page 3 ©2016 by 3D Systems, Inc. All rights reserved. This document is subject to change without notice. This document is copyrighted and contains proprietary information that is the property of 3D Systems, Inc. The 3D Systems logo is a registered trademark of 3D Systems, Inc. CubePro is a trademark of 3D Systems, Inc. Use of the 3DSystems.com...
- Page 4 following two conditions: (1) this device may not cause interference, and (2) this device must accept any interference, including interference that may cause undesired operation of the device. Le présent appareil est conforme aux CNR d’Industrie Canada applicables aux appareils radio exempts de licence.
-
Page 5: Limitation Of Liability
CubePro 3D Printer. The warranty period for the CubePro 3D printer is the shorter of (i) 90 days from the date your CubePro 3D printer is activated or (ii) 24 months after the CubePro 3D Printer is shipped from 3D Systems to the end customer or intermediary. For consumers who are covered by consumer protection laws or regulations in their country of purchase or, if different, their country of... -
Page 6: Safety Symbols And Definitions
Do not modify any safety features or make modifications to the CubePro. Doing so is prohibited and voids the warranty. Use of print materials other than genuine 3D Systems components may void the warranty. WARNING: HAZARDOUS MOVING PARTS. KEEP FINGERS AND OTHER BODY PARTS AWAY. -
Page 7: Features And Benefits
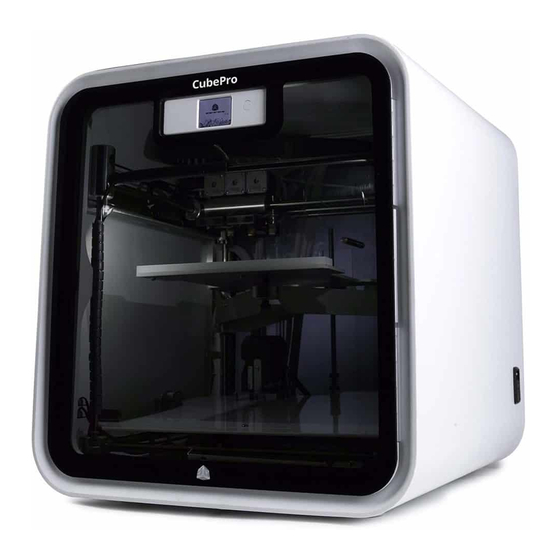
FEATURES AND BENEFITS The CubePro 3D printer prints the model by pulling material from the cartridge through the print jets via the delivery tubes. The material is then jetted through the print jet in a thin string of molten material. The print jet movement is coordinated by the print plate, which lowers incrementally after each layer is deposited so a new layer can be drawn on top of the last, building the part up. - Page 8 AT-A-GLANCE Get acquainted with your CubePro 3D printer before beginning your first print. This section identifies the important areas that will be discussed throughout this guide. CubePro Trio is depicted for illustration purposes only. Locations of important areas are the same for the CubePro and CubePro Duo.
- Page 9 Jet Wiper Assembly Material Cartridge 2 Material Cartridge 1 Material Cartridge 3 NOTE: The following image illustrates the second and third cartridge bays of a CubePro Trio. Material Tube Material Cartridge Mount Rings Clamp Rollers Material Cartridge Bay 2 Cartridge Recognition Material Cartridge Bay 3 Connections Material Cartridge Bay 2 Hinge...
-
Page 10: Dimensions And Weight
SPECIFICATIONS AND REQUIREMENTS Dimensions And Weight Dimensions 566.7 mm (w) x 581.0 mm (d) x 606.4 mm (h) (22 5/16” (w) x 22 7/8” (d) x 23 7/8” (h)) Weight Unboxed: 41 kg (90.7 lbs.) 43 kg (94.3 lbs.) Duo 44 kg (98 lbs.) Trio Weight Boxed: Maximum: 58.97 kg (130 lbs.) -
Page 11: Unpacking And Setting Up Your Cubepro
UNPACKING AND SETTING UP YOUR CUBEPRO Contents *The number of cartridges depends on the ordered configuration. NOTE: The appearance of some components may vary. -
Page 12: Unpacking And Initial Setup
UNPACKING AND INITIAL SETUP CAUTION: Due to the size and weight of the printer, this procedure may require more than one person. Ensure there are enough people to safely and comfortably move the printer to its final location. NOTE: Ensure that you save all foam and packing material for the future repacking of your CubePro. - Page 13 Remove the upper foam supports (A) from the printer. Pull the protective bag down around the printer and remove the printer assembly from the lower foam support. Position the printer where it will be used. NOTE: Ensure the printer is placed in a location where its size and weight will be properly supported.
- Page 14 Unpack the bottom layer of the accessories tray. NOTE: Depending on the printer configuration, the arrangement of the accessory boxes may differ. Unpack the print pad (A), the jet wiper assembly (B), and material cartridges (C). Your configuration may include 1, 2 or 3 cartridges. For configurations with fewer than three cartridges included, empty boxes may be used as spacers.
- Page 15 NOTE: Tighten the screws until the posts are secure. CAUTION: Do not over-tighten the screws. The jet wiper assembly can break if the screws are over-tightened. Move the jet wiper assembly to the back of the printer and locate the keyhole slots (A). Mount the jet wiper mounting posts to the back panel of the printer through the keyhole slots.
- Page 16 opening on the platform. Ensure the print pad is securely seated on the print plate. Connect the power cord to the power inlet port (B) on the right side of the printer and the other end to a wall outlet. Press the power on/off switch (A) to power on the CubePro.
-
Page 17: Setup And Activation
SETUP AND ACTIVATION Select your language. Press the checkmark to confirm your selection. Enter a name for your printer. Scroll to the letters you wish to select by pressing the arrow symbols on each side of the screen. Press the letters to select them. - Page 18 Select the checkmark to continue the warranty activation process. Log in to 3DSystems.com. Go to www.3dsystems.com/shop/account/login. NOTE: You must be logged in to www.3DSystems.com to activate your printer. If you have not activated an account, select SIGN UP or enter your information on the signup page.
- Page 19 NOTE: If the wrong activation code was entered, select RETRY and enter the activation code again. Select the checkmark to complete the activation process. Your printer is now ready to print a creation. To install cartridges and perform a test print, select START. NOTE: Install the cartridge in cartridge bay 1 on the left side of the printer.
- Page 20 Cut off 2”/5 cm of print material from the end. Select the checkmark to continue. NOTE: Ensure the material is not bent or creased. If the material is not straight, pull out the damaged material from the cartridge. Cut off and dispose the portion that is not straight.
- Page 21 To continue with the test print, select PRINT. NOTE: If the test print file uses a color that is not installed in the printer, select the checkmark to enable the printer to change the color of the print to a color currently installed.
- Page 22 NOTE: The printer will begin printing the welcome message test print. Select the checkmark to continue to go to the main menu. NOTE: Please wait while the print jet cools.
-
Page 23: Connecting Via Usb Cable
Once the driver has been installed, you can verify that it installed properly when you see the printer icon in the Devices and Printers section of the control panel. NOTE: You can also view 3D Systems CubePro under Printers in the Device Manager. -
Page 24: Menu Overview
MENU OVERVIEW Touchscreen Display After powering on the printer and turning on the touchscreen display, touch the display to continue. CAUTION: When using the touchscreen, use only light finger pressure to make selections. Using anything sharp will damage the touchscreen display and will void the manufacturer’s warranty. - Page 25 Print Plate Calibration MOVE JETS allows the user to manually move the print jets in the X and Y directions. LEVEL PLATE is a utility that assists in leveling the print pad to the print jets. Print Jet Calibration CONTROL JETS allows the user to test the operation of the extruders and print jets.
- Page 26 temperatures, and the name of the wireless network to which the printer is connected. Material Upgrades MATERIAL UPGRADES is a utility that activates the use of optional materials within the printer once the upgrade has been purchased. Once the upgrade has been purchased on www.cubify.com, you will receive an activation code that must be entered into the touchscreen display.
-
Page 27: Printing Your Creation
PRINTING YOUR CREATION There are many 3D creations available at 3dsystems.com/shop/cubepro/downloads. For more information about converting a .stl file into a .cubepro file which the printer can use, refer to the section titled CubePro Software. Printing Procedure The following steps illustrate how to print a creation. After powering up your printer and turning on your display, press the touchscreen to begin. - Page 28 NOTE: If the print file requires ABS material and PLA material is installed, the printer will prompt the user to change the cartridge(s). Select CHANGE CARTRIDGE and refer to the section titled Replacing A Material Cartridge. NOTE: If the print file requires ABS material but PLA is installed, the printer will prompt you to change the material cartridge.
- Page 29 Apply two (2) thin layers of glue to the center of the plate. Select the checkmark to continue. NOTE: For more information, refer to the section titled Applying Cube Glue. NOTE: For small print file sizes, use a light coating of glue. For larger parts, a slightly thicker coating of glue is recommended.
- Page 30 NOTE: The blue bar at the top is a progress indicator. Select PAUSE to temporarily stop printing. Select CANCEL if you wish to cancel the print job. NOTE: Once printing has been paused, select RESUME if you wish to continue printing. NOTE: To cancel the print job, select CANCEL to confirm your decision.
- Page 31 CAUTION: Do not touch the print jets until they have cooled to room temperature. Refer to the section Finishing Your Creation for information about removing your creation from the print pad and the procedure for cleaning the creation and the print pad.
-
Page 32: Removing Your Creation From The Print Pad
FINISHING YOUR CREATION Removing Your Creation From The Print Pad CAUTION: Before attempting to remove your creation from the print pad, ensure that the CubePro has finished printing. Once printing has completed, the print platform and print pad will move to the bottom of the printer. Grasp both sides of the print pad, lift upward and remove it from the print platform. -
Page 33: Removing Supports - Optional Ultrasonic Support Removal Tank
Removing Supports Supports are used when printing creations that need a supporting structure to print properly. When using PLA or ABS as a support material, peel the supports away from the part. Then, using wire cutters, cut away the support structure from your creation. Once the supports have been cut away, use fine-grade sandpaper (not included) to finish smoothing the part. -
Page 34: Caustic Soda Method
Place the models to be cleaned into the tank. Close the lid. Connect the power supply and press the power button to turn on the tank. Set the temperature to 80°C (176°F). Use the -5 and +5 buttons to lower or increase the temperature. Set an alarm for 48 hours. - Page 35 For best results, set the temperature to 60°C. Use the -5 and +5 buttons to lower or increase the temperature. WARNING: DO NOT SET THE TEMPERATURE ABOVE 60°C AS THE REACTION BETWEEN THE CAUSTIC SODA AND THE WATER IS EXOTHERMIC, AND WILL CONTINUE TO ELEVATE THE TEMPERATURE.
-
Page 36: Cubepro Software
CUBEPRO SOFTWARE CubePro software is an easy-to-use tool that simplifies the printing process. The software is available by logging in to your http://3dsystems.com/shop account. Downloads are available for Windows and Mac operating systems. Installing Windows Software Go to www.3dsystems.com/shop and log in with your username and password. Navigate to 3dsystems.com/shop/cubepro/downloads. -
Page 38: Software Overview
SOFTWARE OVERVIEW CubePro software enables the user to import .stl creation files, specify the material type and color, and then orient, scale, size and rotate the models. Before the printer can print a file, the software must slice it into layers during the build process. This process converts a .stl file to a .cubepro file which is the file type the printer can print. -
Page 39: Cad File Functions
HOME TAB Interface Tabs Tool Ribbon Model Size and Position Print Material Configuration Print Pad CAD File Functions Home Tab The main tab Close All Closes all open .stl files Open Model Opens a .stl file Save As Saves the current .stl file Open Model Check the box if the model will print using a single Opens a multi-part assembly of .stl files... -
Page 40: Color, Build, Print File And Help
Movement Scale the model by the specified Geometry Value Enter the appropriate values to move the model. Scale percentage. Fields Once a value has been entered, select the button to Undo the scaling and revert back to the Move X Button Revert move the model left or right. -
Page 41: View Tab
VIEW TAB Zoom And View Select the button to view the right side of Zoom In Zoom in on the model Right View the model Zoom Out Zoom out on the model Show Print Jet 1Show print jet 1 print path View Tab Contains Zoom, View and Print Path tools Show Print Jet 2Show print jet 2 print path... -
Page 42: Settings Tab
SETTINGS TAB Settings Toolbar Settings Tab Adjust the settings. Printer Configuration Set the printer type, number of print jets and printer materials. Build Settings View and select the build settings used when creating the tool path for the print file. Firmware Update Update the printer firmware. -
Page 43: Printer Configuration
PRINTER CONFIGURATION Printer Configuration Select the type and color of material installed in Printer Type Select your printer type Print Jet 1 Material cartridge bay 1 Select Nylon Options when Select the type and color of material installed in Nylon Options Print Jet 2 Material printing with nylon cartridge bay 2... -
Page 44: Build Settings
BUILD SETTINGS Build Settings The software has four modes including 3 set Selection of the types of materials used Print Mode Raft and Support modes and one custom mode. to create rafts, supports and sidewalks. Adjustments to print pattern fill and the Layer Resolution The detail and smoothness of a part. - Page 45 Print Pattern • Fastest print fill pattern Lines • Minimal cross bracing Diamonds Strong print pattern with 2-direction cross bracing Honeycomb Strong print pattern with 3-direction cross bracing...
- Page 46 ADVANCED BUILD SETTINGS The Advanced Build Settings utility allows you to customize the layer thickness of the Print Pattern Fill, Shell Options and Sidewalk Options as well as enabling or disabling Support Borders or Draw Fine Features. Print Pattern Fill Fill Spacing is the amount of space between interior supports.
- Page 47 Support Borders Support borders (A) reinforce supports (B) for overhanging parts and should not be used for holes and cavities (C). Draw Fine Features Select the enable checkbox when printing small parts with fine features. For larger parts needing more accuracy, this feature should not be enabled.
-
Page 49: Firmware Update
FIRMWARE UPDATE How to Update Firmware Instructions for updating firmware in your CubePro Download Firmware Download firmware to a mass storage device... -
Page 50: Printer Connection
PRINTER CONNECTION Printer Select Select the printer connection Discover Find an applicable printer on the network Add a printer using the printer’s IP address... - Page 51 NYLON MANUAL SUPPORTS Using Nylon Manual Supports When printing with nylon, parts with large, flat overhanging features may warp. CubePro software provides readily-accessible nylon supports for your nylon-printed parts. NOTE: The use of nylon manual supports requires INF support material to also be installed in the printer and used as a support material type when setting the build settings.
- Page 52 Select Move Model. Select the support you would like to move and drag it into position. NOTE: It may be helpful to zoom in to the image before positioning the supports. Move each support into position. When finished, select Move Model to deselect it.
- Page 53 NOTE: INF material will surround manual supports that are inset under an overhanging feature. NOTE: Taller manual supports feature a band (A) that enables INF material to print around it for added support. NOTE: You can place manual supports at the edge of your part and INF material will print to the band for additional support.
-
Page 54: Preparing And Printing A Creation
PREPARING AND PRINTING A CREATION WARNING: THE PRINT JETS BECOME EXTREMELY HOT DURING SETUP AND OPERATION. DO NOT TOUCH THE PRINT JETS. CAUTION: Do not change the material cartridge color or material type during printing. Doing so may damage the printer. The CubePro software client includes useful tools to place a creation in the optimum position for printing. - Page 55 Move the model into the preferred position on the print pad. NOTE: You can specify the distance you want to move the model by inputing values in the Move X or Move Y fields and then selecting Move X or Move Y. NOTE: Auto Place allows the software to place the model in an optimum position.
- Page 56 NOTE: The build file may take a few minutes to create. During this time, the file is being converted from a .stl file to a .cubepro file. NOTE: Once the build is complete, the estimated print time will appear. Select close the window.
- Page 57 Select PRINT on the printer touchscreen display. NOTE: Refer to the section titled Printing Your Creation for more information.
-
Page 58: Operation Procedures
OPERATION PROCEDURES Applying Cube Glue Cube Glue contains water-soluble glue that adheres the part to the print pad. It is important that glue is applied to the print pad before starting any print to ensure that the creation does not move during the printing process. - Page 59 USING ADVANCED MATERIAL Printing with advanced materials requires the purchase of both the advanced material upgrade and the nozzle upgrade kit. After purchasing the advanced material upgrade, you will receive an 8-digit activation code that will be required to activate the printer functionality. To print advanced materials, nozzle 2 must be replaced with the special nozzle designed specifically for advanced materials.
- Page 60 NOTE: IF the wrong activation code was entered, select RETRY. Select the checkmark to complete the upgrade activation. Select The Nozzle Type To print advanced materials, you need to set the nozzle type to UPGRADE NOZZLE in the menu. When nozzle 2 has been set to print advanced materials, only Flex, Wood and INF can be loaded in cartridge bay Select NOZZLE...
- Page 61 Select the checkmark to continue.
-
Page 62: Installing A Material Cartridge
INSTALLING A MATERIAL CARTRIDGE Before the printer will print a creation, the correct type of cartridge(s) must be installed in the printer. If the printer recognizes that no cartridge has been installed, the display will prompt you to install the appropriate cartridge. - Page 63 Cut off 2”/5 cm of material from the end. Select the checkmark to continue. NOTE: Ensure the material is not bent or creased. If the material is not straight, pull out the damaged material from the cartridge. Cut off and dispose the portion that is not straight.
- Page 64 NOTE: The print pad must be calibrated before printing your first creation. For more information, refer to the following section titled Calibrating The Print Pad.
-
Page 65: Replacing A Material Cartridge
REPLACING A MATERIAL CARTRIDGE The CubePro can utilize up to three installed cartridges depending on your printer model. The creation you wish to print may require a different color or material, or there may not be enough material left in the cartridge to complete your next print. - Page 66 NOTE: For printers that have three cartridge bays, the second cartridge bay is equipped with hinges so the cartridge can rotate counter-clockwise. This provides easier access to the third cartridge. Grasp the cartridge handle and pull the cartridge up and out from its mount. Pull out the remaining material from the feed tube. Select the checkmark continue.
- Page 67 NOTE: Ensure the material is not bent or creased. If the material is not straight, pull out the damaged material from the cartridge. Cut off and dispose the portion that is damaged. Insert the material under the clamp roller and into the material tube. Select the checkmark to continue.
- Page 69 INSTALLING AN AIR TIGHT MATERIAL CARTRIDGE Before the printer will print a creation, the correct type of cartridge(s) must be installed in the printer. If the printer recognizes that no cartridge has been installed, the display will prompt you to install the appropriate cartridge.
- Page 70 Remove the label securing the material cap to the side of the cartridge. Carefully pull the cap off of the end of of the material tube. Slide the eyelet seal backwards behind the set line on the tube. Pull out 12”/30 cm of material from the cartridge. Select the checkmark to continue.
- Page 71 Insert the material under the clamp roller and into the material tube. Select the checkmark to continue. Gently feed the print material into the print jet until print material extrudes into the jet wiper. Select the checkmark to continue. NOTE: When the material reaches far enough into the print jet area, a motor will assist with feeding the material into the print jet.
- Page 72 NOTE: The print pad must be calibrated before printing your first creation. For more information, refer to the following section titled Calibrating The Print Pad. Slide the eyelet seal over the tube and insert the tip into the eyelet to seal it from moisture.
- Page 73 REPLACING AN ADVANCED MATERIAL CARTRIDGE Replacing an advanced material cartridge is not the same procedure as replacing standard material cartridges. The formulation that enables advanced materials to print also makes the filament more fragile than ABS or PLA. Select CHANGE CARTRIDGE from the SETUP menu.
- Page 74 NOTE: The print material will begin to back out of the extruder. Once the print material has been extracted from the extruder, cut off the end of the print material. Select the checkmark to continue. Remove the cartridge from the printer. Select the checkmark to continue.
- Page 75 Open the packaging and remove the transit plug from the upper right side of the new cartridge. Select the checkmark to continue. Pull out 12”/30 cm of material from the cartridge. Select the checkmark to continue. Insert the filament under the cartridge clamp, through the eyelet and into the feed tube. Continue to feed the filament through the tube until it comes out of the eyelet near the extruder block.
- Page 76 As the material feeds into the extruder, insert the feed tube and eyelet into the extruder block. Select the checkmark to continue. After some print material has been purged, the nozzle will begin to cool. Select the checkmark to complete the cartridge installation.
-
Page 77: Setting Up An Ad Hoc Network
SETTING UP AN AD HOC NETWORK An ad hoc network is a temporary yet direct connection between a computer or device and the printer. It does not connect through a router or base station and the data transfer rates are slower than the transfer rate of standard wireless networks. - Page 78 NOTE: The Select WIFI Connection Type screen will display the ad hoc status as well as the IP address of the printer. In Windows®, select Start > Control Panel. Type network in the search box. Select Network and Sharing Center. Select Set up a new connection or network.
-
Page 79: Maintenance
MAINTENANCE General Cleaning Waste material from the printing process can accumulate inside the printer. Using a slightly damp, lint-free cloth, wipe the interior of the CubePro including the print plate, the print pad, cartridge bays and anywhere else you might find pieces of plastic waste material. RISK OF SHOCK: DO NOT WIPE DOWN ANY ELECTRICAL COMPONENTS. -
Page 80: Restoring Roughness To The Print Pad
RESTORING ROUGHNESS TO THE PRINT PAD If the print pad is too smooth, the print material and glue may not adhere properly. Using the sandpaper included in the toolkit, wipe the print pad diagonally across the print pad from corner to corner in both directions. - Page 81 ADJUSTING THE JET WIPER The jet wiper is designed to scrape the print jet tip, removing any waste material remaining after extrusion. Remove the lid from the top of the printer. Ensure the print pad is at its lowest position. Power off...
- Page 82 Once satisfied with the adjustment, you may connect your printer to utility power and power on the printer.
-
Page 83: Calibrating The Print Pad
CALIBRATING THE PRINT PAD The print pad is leveled at the factory and this adjustment may not be necessary for your printer. If your creations are not printing as expected, check the level of the print pad. Navigate to the Print Plate Calibration screen and select LEVEL PLATE. - Page 84 Select the lower middle triangle. Once the print jets have moved to the front center of the print pad, slide the paper between the print jets and the print pad. NOTE: If there is a slight resistance, proceed to step 8. If there is no resistance on the paper when sliding it between the print jets and the print pad, rotate the adjustment knob counter-clockwise (from the bottom) until there is a slight resistance.
- Page 85 CAUTION: If the print pad is set too high, damage to the print pad or print jets may occur. NOTE: If the paper can not be inserted between the print jets and the print pad, turn the adjustment knob clockwise (from the bottom) until there is a slight resistance on the paper.
-
Page 86: Calibrating The Z-Gap And Print Pad Level
CALIBRATING THE Z-GAP AND PRINT PAD LEVEL Leveling the print jet nozzles is very important to ensure quality prints especially after replacing a print jet, an extruder assembly or the print pad. The Print Jet Level Gap calibration files require cartridges to be installed in each cartridge bay. NOTE: Ensure the file used matches the material type installed in cartridge bay 1. - Page 87 Apply two thin layers of Cube Glue to the print pad in an area of 50 mm x 50 mm. Select the checkmark to continue. NOTE: For more information, refer to the section titled Applying Cube Glue. NOTE: It may take several minutes to print the file. When finished, remove the print pad and verify the Level Gap.
- Page 88 Correct Closed Z-Gap Referring to the illustration, the Closed Z-Gap bars (B) should touch the baseline (A). Incorrect Closed Z-Gap If there is a gap (B) between the Closed Z-Gap bars and the baseline (A), turn all three print pad adjustment knobs counter-clockwise (left) 1-step and then print the file again to verify the lines touch.
-
Page 89: Reading The Print Pad Level Calibration Print
Incorrect Open Z-Gap If there is no gap (B) between the Open Z-Gap bars (C) and the baseline (A), turn all three (3) print pad adjustment knobs clockwise (right) 1-step and print the file again to verify that the lines do not touch. If they touch on the second print, adjust all three (3) print pad adjustment knobs clockwise (right) 1-step and reprint the file. - Page 90 To correct the Print Pad Level in this instance, turn the front print pad adjuster knob counter-clockwise (left) 1-step. Reprint the file and verify that all four corner calibration points are correct. Acceptable Print Pattern The Print Pad Level calibration file should print with no gap between the Print Pad Level calibration lines and the baselines.
-
Page 91: Calibrating The Offset Jets
CALIBRATING THE OFFSET JETS WARNING: DO NOT USE THE OFFSET JETS MENU UNLESS YOU HAVE BEEN ADVISED TO DO SO BY CUBIFY SUPPORT. CHANGES TO THESE SETTINGS WILL AFFECT THE QUALITY OF MULTI-COLOR OR MULTI-MATERIAL PRINTS. CALIBRATION WAS PERFORMED BY THE FACTORY AND ANY CHANGES TO THESE SETTINGS MUST BE APPROVED AND GUIDED BY CUBIFY SUPPORT. - Page 92 prints the middle scale so the scales of print jets 2 and 3 can be easily compared to it. Print jet 2 prints above print jet 1 and print jet 3 prints below print jet 1. For printers with only two (2) print jets, the scale below the print jet 1 scale will not be printed.
- Page 93 Download the CALIBRATION FILES. Extract the files to your computer's hard drive. Navigate to the file location and copy the appropriate Nozzle Offset Calibration file to your USB mass storage device. NOTE: The Nozzle Offset Calibration files are specific for the model printer (CubePro Duo or CubePro Trio) and for the material type (ABS or PLA) currently installed in the printer.
- Page 94 Press the up arrow three times to increase the value to 22.30 mm. NOTE: Pressing the up arrow increases (+) the value. Pressing the down arrow decreases (-) the value. Pressing the value repeatedly will scroll through the digits left-to-right. NOTE: You can also select the Y-axis settings and adjust those settings the same way.
-
Page 95: Calibrating The Wipe Function
CALIBRATING THE WIPE FUNCTION WARNING: DO NOT USE THE OFFSET JETS MENU UNLESS YOU HAVE BEEN ADVISED TO DO SO BY CUBIFY SUPPORT. CHANGES TO THESE SETTINGS WILL AFFECT PRINTER OUTPUT. CALIBRATION WAS PERFORMED BY THE FACTORY AND ANY CHANGES TO THESE SETTINGS MUST BE GUIDED BY CUBIFY SUPPORT. -
Page 96: Testing The Print Jets And Extruders
TESTING THE PRINT JETS AND EXTRUDERS When material fails to come out of the print jets during a print, you may receive a warning message on the display. The CONTROL JETS function from the Print Jet Calibration menu is a utility that enables you to test the print jet heating elements and the extruder operation. - Page 97 Once you have finished, reduce the target speed to 0.0 RPM and the target temperature to 0.0°C. You can now select the next print jet and follow this procedure if necessary. NOTE: Pressing the values twice for target temperature and speed should change the values to 0.0.
-
Page 98: Moving The Print Jets
MOVING THE PRINT JETS The Print Plate Calibration menu provides a way to manually move the print jets and the print pad. The MOVE JETS utility can be useful to test the X, Y and Z motors to ensure they are working properly. To move the print jets or the print pad, select MOVE JETS. - Page 99 PRINT JET TEMPERATURE CALIBRATION New print jet extruders have temperature calibration values printed on a label attached to the extruder. After replacing an extruder, the values for the new nozzle should be entered into the printer for optimum printing results. Procedure Select SETUP.
- Page 100 Select the checkmark to save the settings.
-
Page 101: Updating The Printer Firmware
UPDATING THE PRINTER FIRMWARE The CubePro firmware can either be updated via wireless connection or by using a USB mass storage device. When using a USB mass storage device to update the firmware, go www.3DSystems.com/shop/cubepro/downloads and download the latest firmware to your device. Updating Firmware Using USB Select SETUP. -
Page 102: Updating Firmware Using Wi-Fi
NOTE: Wait until the update has been completed. WARNING: DO NOT POWER OFF OR DISCONNECT THE PRINTER FROM UTILITY POWER DURING THE UPDATE PROCESS. Press and release the touchscreen display ON/OFF button and the display will restart. Updating Firmware Using WI-FI To update the firmware using the wireless utility, the printer must be connected to a wireless network. - Page 103 NOTE: The printer will attempt to connect to the server. NOTE: If the printer can not connect to the server, select RETRY to connect to the server. Select CANCEL if you do not want to update the firmware. NOTE: The printer will check for a firmware update. NOTE: The printer will begin downloading new firmware.
- Page 104 NOTE: If the firmware download fails, select RETRY to start the download again. Select CANCEL if you do not want to update the firmware. NOTE: The firmware will begin to install. The blue bar is also a progress indicator. NOTE: This process could take a few minutes. WARNING: DO NOT POWER OFF OR DISCONNECT THE PRINTER FROM UTILITY POWER DURING THE UPDATE PROCESS.
-
Page 105: Replacing Fuses
REPLACING FUSES The printer has two (2) fuses that are designed to provide moderate circuit protection. If the fuses become defective, refer to the following procedure to replace the fuses. Caution: Double Pole/Neutral Fusing. Power off the printer and disconnect the power cord from the printer. Open the fuse door above the main power switch. - Page 106 Connect the printer power cord and power on the printer.
-
Page 107: Lubricating The Bearing Rods
LUBRICATING THE BEARING RODS After every 100 hours of operation, the bearing rods should be lubricated. Caution: Do not spray lubricant directly on the bearing rods. Applying too much lubricant can leave residue throughout the printer. The bearings only require a thin layer of grease to operate properly. -
Page 108: Error Codes
ERROR CODES Material Flow Errors Material flow errors that appear on the display contain two (2) digits. The first digit refers to the extruder number. (Ex. If your printer has two (2) extruders and you have code 13, the error refers to extruder 1.) The second character refers to the error type. -
Page 109: Troubleshooting
TROUBLESHOOTING Select the appropriate answer below to troubleshoot your printer. Cartridge Issues Remove the thumbscrew when testing the cartridge. Question: Can the print material (filament) be easily pulled out of the cartridge? Temperature Errors Question: Are the cables on each extruder PCB and the main extruder PCB fully inserted into the correct connectors? Filament Flow Errors Question: Does print material (filament) pull freely from the cartridge that is installed in the... - Page 110 CubePro 3D printers use eco-friendly plastics that can be recycled, re-purposed or composted responsibly. 3D Systems invites all CubePro consumers to partner in creating a cleaner world, one printed part at a time, by participating in the 3D Systems Sustainability Program.
Need help?
Do you have a question about the CubePro 3D Printer and is the answer not in the manual?
Questions and answers