Table of Contents
Advertisement
Advertisement
Table of Contents

Related Manuals for BALAY 508


Summary of Contents for BALAY 508
- Page 1 Downloaded from www.Manualslib.com manuals search engine...
-
Page 2: Table Of Contents
Table of contents Important information ..... . . Before installation ......Safety information . - Page 3 Table of contents Basic settings ......Changing the basic settings ....Childproof lock .
-
Page 4: Important Information
Important information Read this instruction manual carefully. Only then will you be able to operate your cooker safely and correctly. Please keep the instruction and installation manual in a safe place. Please pass on the instruction manual to the new owner if you sell the appliance. This instruction manual is for use with both, ovens and cookers. -
Page 5: Safety Information
Safety information This appliance is intended for domestic use only. Only use the cooker for food preparation. The oven door must remain closed when the oven is switched on. Hot oven Carefully open the oven door. The oven may let out steam. -
Page 6: Your New Cooker
Cooling with the oven door Only leave the oven to cool with the door closed. Do open not allow anything to become trapped in the oven door. Even if you only leave the oven door open slightly, the fronts of adjacent units may become damaged over time. -
Page 7: Function Selector
Function selector Use the function selector to select the type of heating for the oven. Settings Conventional heat Hot air Bottom heating à Hot air grilling Radiant grill small area á Radiant grill large area Defrosting When you select a function, the oven light switches Temperature selector Use the temperature selector to set the temperature... -
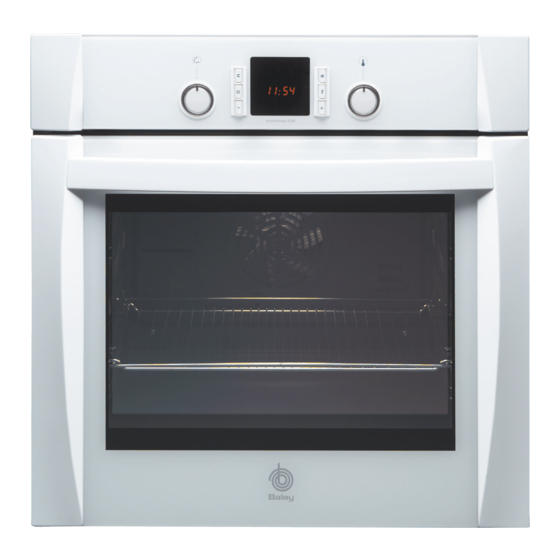
Page 8: Control Buttons And Display Panel
Control buttons and display panel Button ! Use this button to set the E function for the self cleaning components in the oven. Clock button j Use this button to set the time, the cooking time for the oven ? and the end time ! Minus button - Use this button to reduce the... - Page 9 Hot air A cooling fan in the oven's back wall distributes the heat in a uniform manner throughout the oven. Using hot air, it is possible to bake cakes and pizza on two shelves. When cooking on two levels, place the aluminium tray on the lower level.
-
Page 10: Oven And Shelving Accessories
Radiant grill large area The entire area under the grill element becomes hot. This is ideal if you wish to cook several steaks, sausages, fish or slices of toast. Defrosting A fan in the rear wall of the oven circulates the air in the oven around the frozen food. - Page 11 Push the baking tray with the sloping edge facing towards the oven door. Aluminium tray For cakes and biscuits. Push the baking tray as far as possible into the oven, with the sloping edge facing towards the oven door. Moussaka pan Ideal for bakes made from cooked or raw ingredients.
-
Page 12: Cooling Fan
Wire rack For grilling. Always place the wire grill in the baking tray. Fat and meat juices are collected. Cooling fan The oven is fitted with a cooling fan. It switches itself on and off as necessary. The warm air escapes above the door. -
Page 13: Pre Cleaning The Accessories
Pre cleaning the accessories Please wash the accessories thoroughly with soapy water and a cleaning cloth before using them. Setting the oven You have various options for setting the oven. Switching off the oven When your meal is ready, switch off the oven yourself. manually You can leave the kitchen for a long period. -
Page 14: If The Oven Is To Switch Off Automatically
Use the temperature selector to set the temperature or grill setting. Switch off the function selector when the meal is Switching off ready. Changing the setting You may change the temperature or grill setting at any time. If the oven is to switch off Perform the settings as described in items 1 and 2. -
Page 15: If The Oven Is To Switch On And Off Automatically
The cooking time has A signal sounds. The oven switches off. elapsed Press the j button twice and switch off the function selector. Press the j clock button. Change the cooking time Changing the setting using the + or - button. Press the j clock button. -
Page 16: Rapid Heating
The cooking time has A signal sounds. The oven switches off. elapsed Press the j button twice and switch off the function selector. Note You can change the setting while the symbol is flashing. The setting has been adopted if the symbol lights up permanently. -
Page 17: Time
Time When the oven is first connected, or following a power cut, the symbol and three zeros flash in the display. Set the time. The function selector must be switched off. Setting procedure Example: 13:00 Press the clock button. 12.00 appears in the display and the symbol flashes. -
Page 18: Timer
Timer You can use the timer as a kitchen timer. It operates independently of the oven. The timer has a special signal. This means that you can tell whether the set timer period has elapsed or the cooking time is complete. You can also set the timer if the childproof lock is active. -
Page 19: Basic Settings
Press the j clock button. Press the button until the Cancelling the setting display is at zero. The timer and cooking time The symbols light up. The timer period counts down count down simultaneously visibly in the display. To call up the remaining cooking time ?, end time ! or time j: Press the j clock button until the symbol in question flashes. -
Page 20: Changing The Basic Settings
Changing the basic settings Example: Hiding the time Press the j clock button and the + button at the same time until a 1 appears in the display. This is the basic setting for the time in the foreground. Change the basic setting using the + or - button. Confirm with the j clock button. -
Page 21: Childproof Lock
Childproof lock The oven has a childproof lock to prevent children from switching it on accidentally. Locking the oven Press the key button until the symbol appears in the display. This will take approximately 4 seconds. Press the key button until the goes out. -
Page 22: Oven
Appliances with stainless Always remove any flecks of limescale, grease, steel fronts cornflour and egg white immediately. Corrosion can form under such flecks. Use stainless steel care products. Follow the manufacturer's instructions. Try out the product on a small area first, before using on the whole surface. Oven Never use coarse scouring pads or cleaning sponges. - Page 23 Folding down the Fold down the grill element to facilitate cleaning of the grill element oven cover. Warning: the oven must be cold. There is a risk of burning. Pull the handle on the folding grill towards the front and push it upwards until you hear it click into place. At the same time, hold the grill element and fold it down.
-
Page 24: Limpia Function
Cleaning the oven floor, Use hot soapy water or a vinegar solution. It is best to use oven cleaner if the oven is very dirty. Only use oven cleaner in a cold oven. Never use oven cleaner on the self cleaning rear wall of the oven. -
Page 25: Cleaning The Glass Panels
Cleaning the glass panels The glass panel on the oven door can be removed to assist in cleaning. Remove the oven door and lay it on a cloth with the handle underneath. Unscrew the cover at the top of the oven door. To do this, undo the right and left hand screws (Fig. -
Page 26: Cleaning The Rails
Cleaning the rails The rails can be removed for cleaning. To unhook the rails: Lift the rails at the front in an upwards direction and unhook them, then pull the rails forward and remove Clean the rails using either washing up liquid and a sponge or a brush. -
Page 27: Troubleshooting
Troubleshooting Should a malfunction occur, it is often only due to a minor fault. Please read the following instructions before calling the after-sales service: Problem Possible cause Comments/remedy The oven does not work. Blown fuse. Look in the fuse box and check that the fuse is in working order. -
Page 28: After Sales Service
Replacing the glass cover The glass cover on the oven light must be replaced if it is damaged. Replacement glass covers may be obtained from the after sales service. To this end, please specify the E number and FD number of your appliance. -
Page 29: Packaging And Old Appliances
Packaging and old appliances Disposing in an Unpack the appliance and dispose of the packaging environmentally in an environmentally responsible manner. responsible manner This appliance is marked according to the European directive 2002/96/EC on Waste Electrical and Electronic Equipment (WEEE). This guideline is the frame of a European wide validity of return and recycling on Waste Electrical and Electronic Equipment. - Page 30 Meat, poultry, fish and gratins The tables apply to insertion into a cold oven. The time specifications are provided as guidelines only and depend on the type and quality of the meat.The weights indicated in the table Poultry" refer to oven ready poultry (without stuffing). Advice on roasting The roasting result depends on the type and quality of meat.
- Page 31 9000231850 (1W05SV) 00-8702 Downloaded from www.Manualslib.com manuals search engine...
Need help?
Do you have a question about the 508 and is the answer not in the manual?
Questions and answers