Table of Contents
Advertisement
Quick Links
Advertisement
Table of Contents

Related Manuals for Bernini Rechargeable Garden Fountain


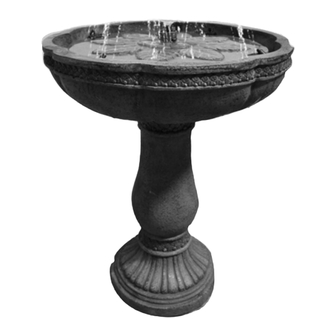
Summary of Contents for Bernini Rechargeable Garden Fountain
- Page 3 This product comes with a six (6) month limited warranty against materials and workmanship. Please review the list of accessories included with your Bernini™ fountain on the next page. Please note, images of parts are not to scale with one another.
-
Page 5: Table Of Contents
CONTENTS Step 1: Assembling Base & Large Bowl Bowl Locking System Step 2: Preparing The Large Bowl For The Floral Plate Attaching The Water Pump Tube Filling Your Fountain Step 3: Installing The Floral Plate Installing The Floral Plate Floral Plate Alignment Notches Step 4: Connection Port &... - Page 6 Parts for Your Parts for Your Bernini™ Fountain Parts for your Bernini Fountain: Bernini ™ Fountain: ™ Bird Attachments Finial Black Foam Spare Fine Ring Mesh Filter Floral Plate Extension Tube Water Pump Tube Dancing Water Battery Compartment Large Bowl...
-
Page 7: Step 1: Assembling Base & Large Bowl
Step 1: Assembling Base & Large Bowl You will need: Large Bowl (2 Water Pumps & LED Lights pre-installed) Base Remember if you need help contact Customer Care: 0203 617 1773... -
Page 8: Bowl Locking System
Bowl Locking System A look at how the bowl locking system works on your Fountain. Bottom of Large Bowl Top of Base Note: You will notice that there are two different sized tabs on the bottom of the Large Bowl and there are two corresponding grooves in the top of the Base. These tabs fit together and lock when turned clockwise. - Page 9 Refer to the picture below for correct positioning. At this point, your fountain should look like the image above. Go to the next page for the next step to setup your new Bernini™ Fountain. Remember if you need help contact Customer Care: 0203 617 1773...
-
Page 10: Step 2: Preparing The Large Bowl For The Floral Plate
Step 2: Preparing The Large Bowl For The Floral Plate You will need: Water Pump Tube Assembled Base & Large Bowl Remember if you need help contact Customer Care: 0203 617 1773... -
Page 11: Attaching The Water Pump Tube
1 inch (2.5 centimeters) from the top of the tabs. At this point, your fountain should look like the image on the right. Go to the next page for the next step to setup your new Bernini™ Fountain. Remember if you need help contact Customer Care: 0203 617 1773... -
Page 12: Step 3: Installing The Floral Plate
Step 3: Installing The Floral Plate You will need: Floral Plate Fountain Assembled Remember if you need help contact Customer Care: 0203 617 1773... -
Page 13: Installing The Floral Plate
Installing The Floral Plate After installing the Water Pump Tube, you are now ready to install the Floral Plate to the fountain. Step 1: The Floral Plate can Step 2: Align the Water Step 3: Position the Floral be heavy, hold it with both Pump Tube with the hole in Plate so that the curved cut hands. -
Page 14: Floral Plate Alignment Notches
& bowl. At this point, your fountain should look like the image on the left. Go to the next page for the next step to setup your new Bernini™ Fountain. Remember if you need help contact Customer Care: 0203 617 1773... -
Page 15: Step 4: Connection Port & Battery Installation
Step 4: Connection Port & Battery Installation You will need: Connection Port Battery Fountain Rechargeable Compartment Assembled Battery Door Remember if you need help contact Customer Care: 0203 617 1773... -
Page 16: Connecting The Battery
Connecting The Battery Step 1: In the open Battery Step 2: Connect the color Step 3: Place your Compartment, you will see coded cords from inside the connection port inside three cords hanging down Base to the corresponding the designated angled that you must connect to color coded receptacles on area located at the back... -
Page 17: Inserting The Battery Compartment Door
Battery Compartment the notch in the bottom of the position when the magnet locks Door. This is for the optional battery opening. the door in place. Bernini™ solar panel cord. Remember if you need help contact Customer Care: 0203 617 1773... -
Page 18: Removing The Battery Compartment Door
Bernini™ Fountain. At this point, your fountain should look like the image on the left. Go to the next page for the next step to setup your new Bernini™ Fountain. Remember if you need help contact Customer Care: 0203 617 1773... -
Page 19: Step 5: Water Spray Tip Alignment & Adjustment
Step 5: Water Spray Tip Alignment & Adjustment You will need: Fountain Assembled Remember if you need help contact Customer Care: 0203 617 1773... -
Page 20: Water Spray Tip Alignment & Adjustment
Water Spray Tip Alignment & Adjustment Next you will adjust the 4 water tips in the Large Bowl. If 1 or all the 4 water tips in the large bowl require adjustment please refer to the illustration bellow. Adjustment Points Adjustment Up/Down Point... -
Page 21: Led /Lights Adjustment
LED Light Adjustment LED/Lights Adjusted LED/Lights Adjusted Correctly: Incorrectly: Water Spray Water Spray will Not Touch LED Hits LED Light Note: The illustration above shows the correct and incorrect adjustment of the Water Spray Nozzle. For proper operation of fountain adjust Water Spray Nozzle so spray will not contact LED lights. -
Page 22: Step 6: Fountain Startup
Step 6: Fountain Startup You will need: Fountain Assembled Remember if you need help contact Customer Care: 0203 617 1773... -
Page 23: Prior To Startup
Operating Your Fountain The on-board control panel is located towards the top of the base, just below the Large Bowl. See the diagram below to see how the all-new on-board controls work for your Bernini™ Fountain. 1-4 Hour Daily Timer Manual On/Off... - Page 24 BUTTON DESCRIPTION Turns the fountain on and off without any timer. Can be used A (Manual On /Off) when extended run times are desired. Note: Fountain will run until the battery loses its charge. BUTTON DESCRIPTION One hour operation: press the B button once for your fountain to turn on with an automatic shut-off after one hour of operation.
- Page 25 You can now try your Bernini™ Fountain to see if everything is working correctly! Turn your fountain on and you should see water flowing from the outlet in the middle of the Floral Plate.
-
Page 26: Step 7: Installation Of The Dancing Water Attachment & Bird Finial
Step 7: Installation Of The Dancing Water Attachment & Bird Finial Choose your accent: Bird Attachments Dancing Water Bird Finial Attachment Remember if you need help contact Customer Care: 0203 617 1773... -
Page 27: Dancing Water Attachment Installation
Bird Finial Installation To install the Bird Finial you will need to use the clear extension tube included with your Bernini™ Fountain. Before installing the extension tube, pull the two ends of the extension tube apart to about 9 inches (22.8cm). - Page 28 Locking System Top of Floral Plate Step 5: Place the silicone Step 4: The Finial locks into ring on to the extension tube. place using a key system in the middle of the Floral Plate. Align the bottom of the Finial to the top of the Floral Plate and twist the Finial a quarter turn clockwise to lock it into place.
-
Page 29: Troubleshooting & Maintenance
Use a mild soap and a soft cloth to clean the parts of your Bernini™ fountain. Your fountain Large Bowl will form a natural patina finish which with time may appear lighter or whiter than the original color. This is normal. -
Page 30: Cleaning The Spray Nozzles
Cleaning The Spray Nozzles : If water spray is still not spraying properly try rubbing your finger over nozzles to clean off minor particles that may still be present. Cleaning The Spray Nozzles Holes Tip: Use a safety pen and carefully insert into holes of the Spray Nozzles. -
Page 31: Cold Storage
Cold Storage Drain the water from fountain prior to the first freeze of the season. Clean and dry the fountain of all water. Remove the Rechargeable Battery and bring it indoors. Be sure to store the battery upright. (Now is a great time to clean the pump to remove any debris that may have accumulated throughout the year. -
Page 32: Cleaning The Water Pumps
After about six weeks of usage, you may want to clean the water pump filter and impeller to keep your Bernini™ Fountain in tip-top shape. You will need to drain your fountain of all water prior to cleaning the water pumps’ parts. -
Page 33: Priming The Water Pump
Is your fountain making a loud noise or do you not see water flowing? Try Priming the Water Pump If you find the water pump is running, but water is not flowing from your fountain, or you hear a loud grinding noise coming from your fountain, not to worry, you can try priming the water pump: Begin by turning your fountain off. -
Page 34: Water Pump Tray
Water Pump Tray SIDE EMPTY WATER PUMP CENTER WATER PUMP Water Pump Tray Illustration #1 Water Pump Electrical Connectors The pump cables in the Large Bowl come pre-assembled. If for any reason they are disconnected, reassemble as follows. NOTE: Before reconnecting the cables make sure to drain water to prevent water from entering into the sealed cable connection in the Large Bowl. - Page 35 EMPTY SHORT CABLE SIDE PUMP LONG CABLE Refer to the illustration above for any questions. CENTER PUMP Step 2: This is how the two connectors should look. NOTE: Ensure all connections are tight. Note: The 2 water pump connections will be under water during operation and it is important to ensure that the connections are firmly pressed together to prevent corrosion by water entering the connections.
-
Page 36: Using Leveling Shims
If you are having trouble getting water to flow evenly off of the spouts on your Bernini™ Fountain, you may need to level the surface that your fountain is placed on. With the included leveling shims, you do not need to move your fountain, just follow the instructions below to get even water flow. - Page 37 (6) months from the date of original purchase. If within six (6) months this product fails due to defect in material or workmanship, Bernini will repair, replace or supply any defective part at their option. The purchaser must contact Bernini and provide a description of the defective part, including digital pictures if requested, with this original purchase documentation as validation of warranty coverage.
- Page 38 IMPORTANT BATTERY SAFETY INSTRUCTIONS DANGER: Do not store battery in an airtight container as it may cause an explosion. WARNING: When using electric devices, basic safety precautions should always be followed to reduce the risk of fire, electric shock and personal injury, including the following: WARNING: 1.
- Page 40 Facebook: berninifountains Twitter: @yrdllc © Yeiser Research & Development, LLC; 2016. All rights reserved. Bernini Fountain Company UK, Suite 114, 315 High Road Chiswick London W4 4HH United Kingdom Distributed by: QVC London Building 8 Chiswick Park 566 Chiswick High Road...
Need help?
Do you have a question about the Rechargeable Garden Fountain and is the answer not in the manual?
Questions and answers