
Subscribe to Our Youtube Channel
Related Manuals for Traktor kontrol s8


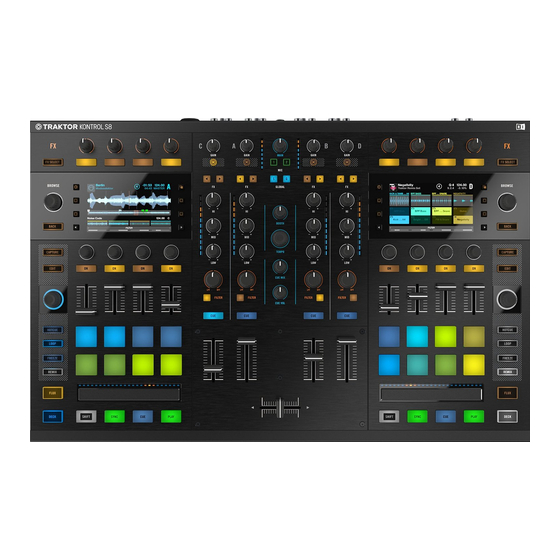
Summary of Contents for Traktor kontrol s8
- Page 1 Manual...
- Page 2 Disclaimer The information in this document is subject to change without notice and does not represent a commitment on the part of Native Instruments GmbH. The software described by this docu- ment is subject to a License Agreement and may not be copied to other media. No part of this publication may be copied, reproduced or otherwise transmitted or recorded, for any purpose, without prior written permission by Native Instruments GmbH, hereinafter referred to as Native Instruments.
- Page 3 Contact NATIVE INSTRUMENTS GmbH Schlesische Str. 29-30 D-10997 Berlin Germany www.native-instruments.de NATIVE INSTRUMENTS North America, Inc. 6725 Sunset Boulevard 5th Floor Los Angeles, CA 90028 www.native-instruments.com NATIVE INSTRUMENTS K.K. YO Building 3F Jingumae 6-7-15, Shibuya-ku, Tokyo 150-0001 Japan www.native-instruments.co.jp NATIVE INSTRUMENTS UK Limited 18 Phipp Street London EC2A 4NU www.native-instruments.com...
-
Page 4: Table Of Contents
Table of Contents Table of Contents Welcome to the World of TRAKTOR KONTROL S8! ............12 Where to Start ..........................12 Manual Conventions ........................14 Using Your S8—Getting Started ................. 18 Overview of TRAKTOR KONTROL S8 ..................... 19 Enabling Decks ........................... 20 Browsing with Your S8 ........................ - Page 5 Remixing with Remix Decks ......................101 3.6.1 Loading a Remix Set ....................102 3.6.2 Triggering Samples ....................104 3.6.3 Triggering Samples using Different Quantize Sizes ........... 109 3.6.4 Adjusting Levels and using Filters of Remix Slots ............. 111 TRAKTOR KONTROL S8 - Manual - 5...
- Page 6 Additional Help Actions ..................... 150 Hardware Reference ....................153 Overview of the Controller ......................153 4.1.1 Top View ........................154 4.1.2 Rear Panel ......................... 155 4.1.3 Front Panel ........................ 155 4.1.4 LED States ......................... 155 TRAKTOR KONTROL S8 - Manual - 6...
- Page 7 4.2.7.5 Performance Mode Button .................181 4.2.7.6 BROWSE Encoder ..................182 4.2.7.7 BACK Button ....................183 4.2.8 Performance Controls ....................183 4.2.9 Slot Volume Faders ....................186 4.2.10 Pads .......................... 186 4.2.11 Touch Strip ........................ 189 TRAKTOR KONTROL S8 - Manual - 7...
- Page 8 4.4.2.2 CUE VOL Knob ....................217 4.4.2.3 CUE MIX Knob ....................217 4.4.2.4 TEMPO Encoder ..................218 4.4.2.5 BOOTH Knob ....................219 4.4.2.6 GLOBAL Section ..................220 4.4.2.7 MIC 1 and 2 Buttons ..................221 4.4.2.8 MAIN Knob ....................222 TRAKTOR KONTROL S8 - Manual - 8...
- Page 9 Crossfader Curve Knob ....................229 Common Setups ......................231 Connecting Turntables ....................... 231 Connecting CD Players ....................... 234 Integrating External Audio Sources in your TRAKTOR Workflow ........... 235 Integrating External Sources as TIMECODE Controls ..............235 5.4.1 Final Preparations with Turntables ................235 5.4.2...
- Page 10 TRAKTOR Crashes ...................... 257 8.1.3 TRAKTOR Has Performance Issues ................258 8.1.4 Updates ........................259 Getting Help ..........................259 8.2.1 Knowledge Base ......................259 8.2.2 Technical Support ...................... 259 8.2.3 Registration Support ....................260 TRAKTOR KONTROL S8 - Manual - 10...
- Page 11 Table of Contents 8.2.4 User Forum ........................ 260 Technical Specification ..................... 261 TRAKTOR KONTROL S8 - Manual - 11...
-
Page 12: Welcome To The World Of Traktor Kontrol S8
Whether you intend to perform and remix live with TRAKTOR, use S8 as a stand-alone mixer with turntables or CD decks or a combination of both; S8 has you covered! S8 enables performance in various live situations, combining the power of computer-based DJing with the immediacy and flow you need to focus on your audience. - Page 13 Controller Editor Manual Besides using S8 with the dedicated TRAKTOR software, you can also use it as a powerful and highly versatile MIDI controller with any other MIDI-capable application or device. This is made possible by the Controller Editor software, an application which allows you to assign MIDI controller messages to S8's pads, knobs, faders and encoders.
-
Page 14: Manual Conventions
Welcome to the World of TRAKTOR KONTROL S8! Manual Conventions • Registration Support You will find more information on these in chapters ↑8.1, Troubleshooting ↑8.2, Getting Help. Manual Conventions This section introduces you to the signage and text highlighting used in this manual. This man- ual uses particular formatting to point out special facts and to warn you of potential issues. - Page 15 Results of actions are indicated by this smaller arrow. → Naming Conventions Throughout the documentation, we will refer to the TRAKTOR KONTROL S8 hardware control- ler either as the controller or simply S8. The TRAKTOR 2 software and TRAKTOR SCRATCH will be referred to as TRAKTOR.
- Page 16 Welcome to the World of TRAKTOR KONTROL S8! Manual Conventions Numbering scheme for FX and Performance controls Display Buttons On each side of a display, there are two buttons marked by a square icon. To differentiate them from each other, we'll refer to them as depicted here:...
- Page 17 Welcome to the World of TRAKTOR KONTROL S8! Manual Conventions Numbering scheme for Display Buttons Pads Each Deck comes with 4 multi color pads. Where necessary, we'll refer to them in this order: Numbering of the Pads in the PERFORMANCE section...
-
Page 18: Using Your S8-Getting Started
TRAKTOR software on your computer. By the end of this chapter you will be equipped with the fundamental knowledge to enjoy using your TRAK- TOR KONTROL S8, and begin to uncover the creative opportunities it presents to your DJ ses- sions. -
Page 19: Overview Of Traktor Kontrol S8
These give you hardware control over the software Decks in the TRAKTOR PRO software. Active TRAKTOR Decks always work in one of the Deck modes, as either Track Deck, Remix Deck or Live Input. The left hardware Deck section controls TRAKTOR's Decks A and C, the right Deck section controls Decks B and D. -
Page 20: Enabling Decks
Enabling Decks Enabling Decks By default, the Decks on your S8 are enabled after you start the TRAKTOR software for the first time. If, however, the Decks are not enabled (in Direct Thru mode), proceed as follows to enable the Decks. - Page 21 Deck C in Direct Thru mode To enable the Decks: Push the TRAKTOR buttons of each Deck. ► The TRAKTOR buttons light up in orange indicating the Deck is now in TRAKTOR mode. → The displays read No Track Loaded indicating the corresponding Decks are enabled.
- Page 22 Using Your S8—Getting Started Enabling Decks The following images show enabled Decks: Deck A enabled as Track Deck Deck C enabled as Remix Deck TRAKTOR KONTROL S8 - Manual - 22...
-
Page 23: Browsing With Your S8
Using Your S8—Getting Started Browsing with Your S8 Browsing with Your S8 The first tutorial will explain how to browse through TRAKTOR's music library and load tracks into Decks. The following section explains both—browse using regular interactions and browse using touch interactions. - Page 24 View shows your current location in the folder structure at the top of the display, e.g. BROWSER>PLAYLIST>DEMO TRACKS. To open folders and load tracks: Press the BROWSE encoder to open a folder. ► TRAKTOR KONTROL S8 - Manual - 24...
-
Page 25: Browse Using Touch Interactions
The Browser will be displayed in the respective display. ► To exit the Browser: Release the BROWSE encoder or stop interacting in the Browser. The display will return ► to Track view. TRAKTOR KONTROL S8 - Manual - 25... -
Page 26: Switching Deck Focus
Switching Deck Focus Switching Deck Focus Although you can mix four TRAKTOR Decks with the S8, it is only possible to have the focus on two of the Decks simultaneously. To access the respective other Decks, you have to switch the Deck focus. - Page 27 Using Your S8—Getting Started Switching Deck Focus • If Deck A is focused, the DECK button, the Mode Select Button and the LED ring around the LOOP encoder will be lit in blue. TRAKTOR KONTROL S8 - Manual - 27...
- Page 28 Using Your S8—Getting Started Switching Deck Focus • If Deck C is focused, the DECK button, the Mode Select Button and the LED ring around the LOOP encoder will be lit in white. TRAKTOR KONTROL S8 - Manual - 28...
-
Page 29: Switching Deck View And Zooming
Press the View button located in the top-right corner of the display area to toggle Deck ► View between Single View and Split View. The display now shows both Decks in Split View. → The focused Deck always acquires the majority of space in the display. TRAKTOR KONTROL S8 - Manual - 29... - Page 30 Changing Deck View does not change the Deck's focus. Zooming To get a more precise view of the waveform at the current Playhead position, you can zoom in or out of the waveform. TRAKTOR KONTROL S8 - Manual - 30...
- Page 31 Using Your S8—Getting Started Switching Deck View and Zooming To zoom into the waveform: Press Display button 3 repeatedly until you reach the desired zoom level. ► To zoom out of the waveform: TRAKTOR KONTROL S8 - Manual - 31...
-
Page 32: Playing Your First Track
Before you pro- ceed, ensure the following prerequisites are met: Prerequisites We assume your S8 is in the following state: TRAKTOR KONTROL S8 - Manual - 32... - Page 33 • On channel A, the channel fader is set to minimum, the EQ knobs, the GAIN knob, and the Filter knob are set to center position. • The MAIN knob is set to minimum. TRAKTOR KONTROL S8 - Manual - 33...
-
Page 34: Loading A Track
Let’s load the track “Techno 1” from the included demo tracks on to Deck A. Since Deck A is in the top-left part of the TRAKTOR window, we will use the left Deck on your S8. You can check this by looking at the left Deck’s display: you should see a blue indicator reading A: The Deck Display with DECK A indicator. - Page 35 Using Your S8—Getting Started Playing Your First Track Navigate to the folder FAVORITES > Demo Tracks. Scroll to track Techno Press the BROWSE encoder to load the track into Deck A. TRAKTOR KONTROL S8 - Manual - 35...
-
Page 36: Playing The Track
Using Your S8—Getting Started Playing Your First Track The track is loaded. Its waveform and info appear in the display. → 2.6.2 Playing the Track Once the track is loaded: TRAKTOR KONTROL S8 - Manual - 36... - Page 37 Deck. The PLAY button lights up. The waveform starts moving in the display. The track is assigned to MASTER. Gradually raise the channel A fader to maximum position. TRAKTOR KONTROL S8 - Manual - 37...
- Page 38 The audio playing on each Deck can be further shaped by the controls on the corresponding channel of the Mixer. Since the track is loaded on Deck A, you can control its sound on chan- nel A: TRAKTOR KONTROL S8 - Manual - 38...
-
Page 39: If You Don't Hear The Track
If You Don’t Hear the Track If the track is playing but the audio coming through your amplification system is not loud enough, or if there is no sound at all, check the following: TRAKTOR KONTROL S8 - Manual - 39... - Page 40 Playing Your First Track • At the bottom of your S8, verify that the Crossfader is moved all the way to the left: • Above, the channel fader should be raised in channel A: TRAKTOR KONTROL S8 - Manual - 40...
- Page 41 If you see some activity on the MAIN meters of your S8 but don’t hear any sound, then double- check the connection starting with the cable going from the S8’s Main Outputs to your PA. TRAKTOR KONTROL S8 - Manual - 41...
-
Page 42: Mixing In A Second Track
• The track “Techno 1” is loaded into Deck A. The track is playing and audible. • The right Deck is focused on Track Deck B. • The Channel B Crossfader Assign switch is set to the right position. • The Crossfader is all way to the left. TRAKTOR KONTROL S8 - Manual - 42... -
Page 43: Loading A Second Track
2.7.1 Loading a Second Track We will choose the track “Techno 2” and load it into the right Deck B, as we did for Deck A in the previous tutorial. TRAKTOR KONTROL S8 - Manual - 43... - Page 44 While looking at the right Deck display reading "No Track Loaded, Touch Browse Knob", do the follow- ing: Press the BROWSE encoder of the right Deck to open the Browser. The Browser resumes at the last selected item. TRAKTOR KONTROL S8 - Manual - 44...
-
Page 45: Playing The Second Track
Deck B. The track is loaded. Its waveform and info appear in the display. → 2.7.2 Playing the Second Track Press the PLAY button on the right Deck to start the playback. ► TRAKTOR KONTROL S8 - Manual - 45... - Page 46 If you followed the instructions above, the two tracks won't mix well, as they're not in sync. To mitigate this, we have to beat-match the track in Deck B to the track playing on Deck A as described in the following section. So for now: TRAKTOR KONTROL S8 - Manual - 46...
-
Page 47: Using Headphones To Prepare The Mix
B. The button lights up, indicating that Deck B is now sent to the channel. Gradually raise the CUE VOL knob. You will hear the cued track in your headphones. → TRAKTOR KONTROL S8 - Manual - 47... -
Page 48: Synchronizing The Second Track
Synchronizing the Second Track Before mixing in the track playing on Deck B, we will use TRAKTOR’s automatic Sync feature to adjust its tempo to that of Deck A. Since playback of Deck A was started first, it is automati- cally assigned the role of Tempo MASTER. - Page 49 You will hear the second track fade into the mix with both tracks in sync. → Note that you should always adjust the tempo of the cued track which is not audible to the audience! Mixing In the Second Track When your track is ready for mixing: TRAKTOR KONTROL S8 - Manual - 49...
-
Page 50: Interlude: In Case The Left Track Has Finished
Mixing In the Track by Using the Channel EQ and Filter Besides simply using the Crossfader or channel volume faders to mix tracks, you can use TRAKTOR KONTROL S8’s EQs and filters to make the mixes smoother and more interesting. TRAKTOR KONTROL S8 - Manual - 50... - Page 51 • The Crossfader is all the way to the left. • On channel B, the channel fader is set to minimum, the EQ knobs, the GAIN knob, and the Filter knob are set to center position. TRAKTOR KONTROL S8 - Manual - 51...
- Page 52 Using Your S8—Getting Started Mixing In a Second Track To prepare the cued track with EQ or Filter: Put on your Headphones. Enable on channel B. Press the FILTER button on Deck B. TRAKTOR KONTROL S8 - Manual - 52...
- Page 53 We will now carry out a first version of the mix “for real.” Thus, turn the CUE MIX knob fully clockwise to hear the main mix in your headphones (or put off your phones and listen to your mix coming through your amplification system). Do the following: TRAKTOR KONTROL S8 - Manual - 53...
- Page 54 A while simultaneously increasing that of channel Complete the transition by gradually moving the Crossfader all the way to the right. You did your first mix using EQs and filters of your TRAKTOR KONTROL S8. →...
-
Page 55: Adjusting Levels
To assist you in adjusting levels, S8's Mixer is equipped with various level meters and controls. Each level meter consists of a range of blue LEDs, indicating the safe signal range, along with an orange LED at the top indicating the clipping. TRAKTOR KONTROL S8 - Manual - 55... - Page 56 LEDs when playing the loudest section of a track, only occasionally reaching the orange LEDs. Letting your levels go “in the red” (or orange in this case) and using signal clipping to make your mix sound dirtier is definitely not recommended: to do this, make use of TRAKTOR's great FX selection instead! Checking the Level on Each Channel Each channel on the Mixer provides you with a vertical channel meter next to the fader.
- Page 57 Checking the Main Level in TRAKTOR The signals coming from all channels are mixed together according to the relative levels deter- mined by the channel faders and by the Crossfader. This mix is then sent from TRAKTOR’s main output to the Main section:...
-
Page 58: Using Cue Points
LEDs too often. For checking the level at the output of the TRAKTOR software, please refer to the meter in TRAKTOR's header. Set the channel levels so that the mix mostly stays in the blue safe range on the MAIN meter. -
Page 59: Setting And Deleting Cue Points (Hotcues)
We assume here that you already followed the instructions in the previous tutorials (see ↑2.2, Enabling Decks). TRAKTOR KONTROL S8 is in the following state: • The track “Techno 1” is loaded on Deck A. • The Deck A is set to HOTCUE mode (default state). - Page 60 In the display, a CuePoint will be highlighted by a blue indicator and the pad number. ► You can store up to eight CuePoints per track, including the first which is automatically set to the track start. The highlighted CuePoint in the display. To delete a Cue Point: TRAKTOR KONTROL S8 - Manual - 60...
-
Page 61: Aligning Tracks Using Hotcues
Again, you do not have to worry about pressing the pads with HotCues exactly on the beat: by default, TRAKTOR will make sure that the beats of both tracks are synchronized and that the jump does not ruin the beat matching. This is because the so-called Quantize mode is on, as you can see by the lit button located in the top-mid on the S8. -
Page 62: Adjusting Tempo
• The tracks are not in sync. 2.10.1 Global Tempo Adjustments Global tempo adjustments are made using the TEMPO encoder located in the center of the S8. The TEMPO encoder on the S8 TRAKTOR KONTROL S8 - Manual - 62... - Page 63 PLAY button on Deck A. The Deck will be assigned to MASTER. Turn the TEMPO encoder clockwise or counterclockwise to increase or decrease the tem- po of TRAKTOR's Master Clock in decimal steps. TRAKTOR KONTROL S8 - Manual - 63...
-
Page 64: Deck-Specific Tempo Adjustments
Adjusting Tempo Press any SHIFT button and turn the TEMPO encoder clockwise or counterclockwise to in- crease or decrease the tempo of TRAKTOR's Master Clock in whole steps. Release the Deck's SHIFT button. The global tempo has changed. → 2.10.2... - Page 65 Using Your S8—Getting Started Adjusting Tempo Adjusting the Deck-specific Tempo On a Deck press the Display Button 1. The BPM pop-up becomes visible on the display. TRAKTOR KONTROL S8 - Manual - 65...
- Page 66 Deck's BROWSE encoder counterclockwise to decrease the tempo in whole steps. Press the Display Button 1 again or press the View Button to close the BMP pop-up. The Deck-specific tempo has changed. → TRAKTOR KONTROL S8 - Manual - 66...
-
Page 67: Using Keylock
To avoid issues like these, TRAKTOR provides the Keylock feature which uncouples the pitch and the tempo of a track. This allows you to basically lock the pitch while adjusting the tempo or vice versa. In order to... - Page 68 Using Your S8—Getting Started Using Keylock On a Deck, press the Display Button 2. pop-up opens on the display. For tracks which have been analyzed by TRAKTOR, their key is displayed here. TRAKTOR KONTROL S8 - Manual - 68...
- Page 69 Now press Display Button 1 to open the pop-up and adjust the track's tempo by turn- ing the BROWSE encoder. You can hear the tempo change, but the track's key remains intact. → TRAKTOR KONTROL S8 - Manual - 69...
- Page 70 If you want to change just the key of a track without affecting its tempo, proceed as follows: On a Deck, press the Display Button 2. pop-up opens on the display. If the track has been analyzed by TRAKTOR, its key will be displayed here.
- Page 71 Press the Display Button 2 again to exit the window in the display. You will hear that the track's key has changed, while the tempo is preserved. → TRAKTOR KONTROL S8 - Manual - 71...
-
Page 72: Using Your S8-Getting Advanced
• The channel fader A is raised to the top. • The MAIN knob is set at an adequate level. 3.1.1 Using the Touch Strip to Seek Seeking within a track using Touch Strip On the left Deck, press the PLAY button. TRAKTOR KONTROL S8 - Manual - 72... - Page 73 LED strip above the recessed touch-sensitive area will display this: The three orange segments represent the current playhead position within the track. The LED segments represent the entire length of the track. TRAKTOR KONTROL S8 - Manual - 73...
- Page 74 Using Your S8—Getting Advanced Using Touch Strip While holding SHIFT, place your finger on the Touch Strip beneath the orange LEDs and drag your finger to the right to move forwards in the track's waveform. TRAKTOR KONTROL S8 - Manual - 74...
- Page 75 Using Your S8—Getting Advanced Using Touch Strip The three orange LEDs will follow your finger movement to the right, as does the Playhead in the waveform. TRAKTOR KONTROL S8 - Manual - 75...
- Page 76 Using Touch Strip Drag your finger to the left to move backwards in the track's waveform. The three orange LEDs will follow your finger movement to the left, just as the Playhead in the waveform. TRAKTOR KONTROL S8 - Manual - 76...
-
Page 77: Using The Touch Strip To Nudge/Pitchbend
If your timing was perfect, a single orange LED at the center of the LED strip lights up, → indicating the phase-alignment of both tracks is correct. If your timing was a little off, a few blue LEDs above the Touch Strip light up, indicating the amount of phase-misalignment. TRAKTOR KONTROL S8 - Manual - 77... - Page 78 If blue LEDs are shown above the left side of the Touch Strip on the Deck not assigned to MASTER: Drag your finger toward the right side of the Touch Strip until the blue LEDs disappear ► and a single orange LED is shown. TRAKTOR KONTROL S8 - Manual - 78...
-
Page 79: Using The Touch Strip To Scratch
Strip area allows you to create a scratch effect in a Track Deck or Remix Deck. A scratch effect can only be created when the track is stopped. Perform Scratching On a Deck's Touch Strip: TRAKTOR KONTROL S8 - Manual - 79... - Page 80 Using Your S8—Getting Advanced Using Touch Strip Drag your finger to the left. This will move the Playhead slightly forward in the track's ► waveform, and you will hear the typical scratch effect. TRAKTOR KONTROL S8 - Manual - 80...
- Page 81 Using Your S8—Getting Advanced Using Touch Strip Drag your finger to the right. This will move the Playhead slightly backward in the track's ► waveform and you will hear the typical scratch effect. TRAKTOR KONTROL S8 - Manual - 81...
-
Page 82: Playing With Loops In Hotcue Mode
→ position. Playing with Loops in HOTCUE Mode Now that we've covered all basic mixing techniques and how to use the Touch Strip, we will focus on S8’s looping facilities in HOTCUE mode. TRAKTOR KONTROL S8 - Manual - 82... -
Page 83: Engaging And Disengaging A Loop
Press the Deck's HOTCUE button to enable HOTCUE mode. Press the Deck's LOOP encoder. The LED ring around the LOOP encoder starts to rotate to indicate the loop is activated. TRAKTOR KONTROL S8 - Manual - 83... - Page 84 This will automatically add a loop at the current playback position in the track. → The example above shows an engaged loop of four beats. You can change the loop size while the loop is active: TRAKTOR KONTROL S8 - Manual - 84...
- Page 85 Note that you can adjust the loop size either before or after you’ve set the Loop! If you ad- just the loop size beforehand, the next loop you set will acquire the set loop size value. To deactivate the active Loop: Press the LOOP encoder again. ► TRAKTOR KONTROL S8 - Manual - 85...
-
Page 86: Moving A Loop
The step size you move the selection by is the same as the loop size, which is shown in the display. Turning the LOOP encoder when there is no Loop active lets you jump backward/forward through the track by the same step size. TRAKTOR KONTROL S8 - Manual - 86... -
Page 87: Storing A Loop
To store the active Loop, press an unlit pad. The pad lights up green. The display will show a green marker indicating the Loop. The marker also shows the number of the corresponding pad. TRAKTOR KONTROL S8 - Manual - 87... -
Page 88: Playing With Loops In Loop Mode
Beatjump sizes. Pads illuminated in Loop Mode. Prerequisites We assume here that the S8 is in the following state: • The track “Techno 1” is loaded on Deck A and is not playing. TRAKTOR KONTROL S8 - Manual - 88... -
Page 89: Looping By Pre-Defined Sizes
► The LED ring around the LOOP encoder starts to rotate to indicate a loop is active. Press the same green pad again or press the LOOP encoder to disengage the Loop. ► TRAKTOR KONTROL S8 - Manual - 89... -
Page 90: Beatjumping
While a loop is active, turn the LOOP encoder to alter the LOOP size for the active loop. ► This will produce some interesting sound variations. Loop sizes can be changed in TRAKTOR's software preferences: Preferences>TRAK- TOR KONTROL S8>Loop Mode Sizes>Loop. 3.3.2... -
Page 91: Using Freeze Mode
The pads are now lit blue, and the Freeze slices are shown on the track's waveform. The pad that is currently illuminated brightest represents the current playback position in the Freeze area (see the image above). TRAKTOR KONTROL S8 - Manual - 91... - Page 92 • The track “Techno 1” is loaded on Deck A and is not playing. • The Crossfader is all the way to the left. • The channel fader A is raised to the top. • The MAIN knob has an adequate level. TRAKTOR KONTROL S8 - Manual - 92...
-
Page 93: Engaging Freeze Mode On A Track
PLAY to trigger playback. Press the Deck's FREEZE button. The current playback position is "frozen" and a section defined by the loop size on the dis- play is automatically split into eight slices. TRAKTOR KONTROL S8 - Manual - 93... -
Page 94: Adjusting The Freeze Slice Size
If no further slice is triggered, the Playhead position will leave the frozen area and playback continues towards the end of the track. 3.4.2 Adjusting the Freeze Slice Size Hold the FREEZE button. The SLICE SIZE window pops up in the display. TRAKTOR KONTROL S8 - Manual - 94... - Page 95 Loop encoder to increase or decrease the slice size from a 1/4 of a beat to a range of 4 beats. Release the FREEZE button. The Slice size and zoom will change accordingly. → TRAKTOR KONTROL S8 - Manual - 95...
-
Page 96: Slicer Mode
Slicer Mode will play back just the corresponding slice repeatedly Slicer mode enabled. To enable Slicer Mode on a Deck: TRAKTOR KONTROL S8 - Manual - 96... - Page 97 Using Your S8—Getting Advanced Using FREEZE Mode Turn the Deck's Loop encoder to define the desired Loop size. Press the Deck's Loop encoder to engage a loop. TRAKTOR KONTROL S8 - Manual - 97...
- Page 98 Slicer mode to the active loop. The Slices appear in green. While Slicer mode is engaged you can perform the following actions: Press any of the pads to jump between the Slices. ► TRAKTOR KONTROL S8 - Manual - 98...
- Page 99 Using Your S8—Getting Advanced Using FREEZE Mode Hold a pad to retrigger its slice. ► Hold two pads simultaneously to loop the entire area between the first and last selected ► slice. TRAKTOR KONTROL S8 - Manual - 99...
-
Page 100: Using Flux Mode
• FREEZE mode: press and hold a pad to play back from a cue point. When you let go, play- back resumes at the second Playhead's position instead of continuing playback from the cue point. TRAKTOR KONTROL S8 - Manual - 100... -
Page 101: Remixing With Remix Decks
S8. In this tutorial, you will learn how to use the Remix Decks. With the Remix Decks you can play and perform with pre-defined Remix Sets as well as create your own Remix Sets by capturing samples of tracks. TRAKTOR KONTROL S8 - Manual - 101... -
Page 102: Loading A Remix Set
Deck C. Remix Deck should be shown in the left display. Press the Deck's BROWSE encoder to open the Browser. Navigate to the folder TRACK COLLECTION > All Remix Sets > Remix Deck Tutorial. TRAKTOR KONTROL S8 - Manual - 102... - Page 103 Using Your S8—Getting Advanced Remixing with Remix Decks Select the Remix Set Remix Deck Tutorial and press the BROWSE encoder to load it. TRAKTOR KONTROL S8 - Manual - 103...
-
Page 104: Triggering Samples
The pads now illuminate orange and green, corresponding to the Remix Deck page shown in the display. 3.6.2 Triggering Samples For a demonstration of how a Remix Deck works, please perform the actions listed below in the following order: TRAKTOR KONTROL S8 - Manual - 104... - Page 105 Raise the channel C fader. You should now hear the Sample playing. Press SHIFT + pad 1 to stop playback. Now press pad 1, pad 2, pad 3, and pad 4 to trigger their samples. TRAKTOR KONTROL S8 - Manual - 105...
- Page 106 The first four pads light up. → The samples play back. Select another Sample of a Remix Slot While the samples are playing, you can switch to other samples within the Remix Slots. For example: TRAKTOR KONTROL S8 - Manual - 106...
- Page 107 Select other Pages of a Remix Set A Remix Set can include up to 64 samples. On the S8 controller, the Remix Set is split into eight pages where each set of eight samples is stored. TRAKTOR KONTROL S8 - Manual - 107...
- Page 108 To select another page of a Remix Set: Press Display Button 4 or 3 to scroll a page downwards or upwards. ► Alternatively, hold the REMIX button while turning the Deck's LOOP encoder. TRAKTOR KONTROL S8 - Manual - 108...
-
Page 109: Triggering Samples Using Different Quantize Sizes
Using Your S8—Getting Advanced Remixing with Remix Decks 3.6.3 Triggering Samples using Different Quantize Sizes Press Display Button 2. QUANTIZE window opens in the display. TRAKTOR KONTROL S8 - Manual - 109... - Page 110 Now press the pads to trigger samples. After you press a pad, TRAKTOR will play out the currently playing sample to the end of → the 16 beats segment and then start playing back the sample assigned to the pad you pressed.
-
Page 111: Adjusting Levels And Using Filters Of Remix Slots
► ples. Moving toward the right will move the Remix Slot playhead position in the current Remix Deck row backward; moving toward the left will move the Remix Slot playhead po- sition forward. TRAKTOR KONTROL S8 - Manual - 111... -
Page 112: Capturing Samples From Track Decks (Using Remix Mode)
• All Slot Volume Faders are raised to the top. • The EQ knobs are set to center position. Capturing a Sample and Playback To capture a Sample of a track: On the left Deck, set the focus on Deck A. TRAKTOR KONTROL S8 - Manual - 112... - Page 113 Deck. While holding CAPTURE, turn the Deck's Loop encoder to select the capture Source "DECK A" in the pop-up window "CAPTURE". The pop-up window will close as soon you release the CAPTURE window. TRAKTOR KONTROL S8 - Manual - 113...
- Page 114 Capturing Samples from Track Decks (Using Remix Mode) Press the REMIX button of the left Deck to enable REMIX Mode. The pads should now be unlit because nothing is loaded into Remix Deck C. TRAKTOR KONTROL S8 - Manual - 114...
- Page 115 Turn the Deck's Loop encoder to define the Capture size. On Deck press the PLAY button to start playback. Press one of the unlit pads to capture a Sample from the current playback position. TRAKTOR KONTROL S8 - Manual - 115...
- Page 116 The pad now illuminates a new color and the captured Sample is shown in the display. Playback of Captured Samples from a Track Deck As soon a Sample is captured, you can perform the following actions: TRAKTOR KONTROL S8 - Manual - 116...
- Page 117 Capturing Samples from Track Decks (Using Remix Mode) Capture further samples from another Capture Source and/or using another Capture size. ► The pads now illuminate with new colors and the first four captured samples are shown in the display. TRAKTOR KONTROL S8 - Manual - 117...
- Page 118 TOR software and selecting Save Remix Set. Rename the set by clicking on the Deck head- er where New Remix Set is displayed. Saved Remix Sets will be added to: BROWSER>TRACK COLLECTION>ALL REMIXSETS. TRAKTOR KONTROL S8 - Manual - 118...
-
Page 119: Adding Fx
In this tutorial section, we will walk you through the basics of using the FX Units. By default, TRAKTOR provides you with control over two FX Units, which can be assigned to any of the Decks. You can set up two types of FX: Single FX and Group FX. The following sections will explain both. -
Page 120: Setting Up An Fx Unit To Group Fx Mode
Setting up an FX Unit to Group FX Mode To load a Group FX to FX Unit 1: Press the FX SELECT button of FX Unit 1 at the top left of the S8. The FX Unit 1 menu opens. TRAKTOR KONTROL S8 - Manual - 120... - Page 121 Apply the Group FX to the Track As soon you set up your Group FX, activate the effects slots with the FX buttons and control one parameter of each effect with the FX knobs: TRAKTOR KONTROL S8 - Manual - 121...
- Page 122 Using Your S8—Getting Advanced Adding FX The FX Knobs and FX buttons. As soon you touch any FX knob, the FX panel will drop down in the display. ► TRAKTOR KONTROL S8 - Manual - 122...
-
Page 123: Exchanging Effects In The Group Fx
You can activate/deactivate each effect slot individually by pressing the corresponding FX ► buttons 2 to 4 below. 3.8.3 Exchanging effects in the Group FX To exchange any of the effects slots in a Group FX setup: TRAKTOR KONTROL S8 - Manual - 123... - Page 124 In the FX Unit menu, press FX Button 3 to exchange the effect in effects slot 2. An over- view of available FX will be displayed. Turn the BROWSE encoder to select the Gater effect and press the BROWSE encoder to load it. TRAKTOR KONTROL S8 - Manual - 124...
-
Page 125: Setting Up An Fx Unit In Single Fx Mode
• The track "Techno 2" is loaded into Deck B. The track is playing and audible. • All FX knobs of FX Unit 2 on the right hand Deck are set to center position. To load a Single FX to FX Unit 2: TRAKTOR KONTROL S8 - Manual - 125... - Page 126 FX Unit 2's setup menu opens in the display. Press FX Button 1 to display the FX Unit 2 options. Ensure the options Single Insert are selected. Press FX Button 2 to display the list with available FX. TRAKTOR KONTROL S8 - Manual - 126...
- Page 127 FX. The FX Unit 2 menu closes. Press FX button 1 to activate the Delay. You will hear a delayed signal being added to the playing track. With the Delay enabled, you can perform the following actions: TRAKTOR KONTROL S8 - Manual - 127...
- Page 128 Turn FX Knob 1 clockwise. The Delay effect gets louder. The mix value in the FX drop- ► down panel in the display increases. Turn FX Knob 1 counter-clockwise. The Delay effect gets quieter. The mix value in the FX ► drop-down panel in the display decreases. TRAKTOR KONTROL S8 - Manual - 128...
- Page 129 Press FX button 3 to use the freeze feature (FRZ)of the Delay effect. Your track is muted ► and the Delay effect starts to decay. Press FX button 3 again to re-engage the track going into the Delay effect. TRAKTOR KONTROL S8 - Manual - 129...
-
Page 130: Storing A Snapshot
You can save a default state for any of the effects by doing the following: Adjust the FX knobs and buttons to your liking. Press the FX button 1 to display the FX Unit's options. TRAKTOR KONTROL S8 - Manual - 130... -
Page 131: Routing Fx
Using Four FX Units TRAKTOR provides you with a total of four FX Units. By default, only the first two FX Units are activated and can be controlled by the FX buttons and FX knobs above the display. You can activate FX Units 3 and 4 in the TRAKTOR Preferences, which are then controlled by the Per- formance knobs and buttons beneath the display. -
Page 132: Using Performance Modes On Remix Decks
Remix Slot channels to be processed by an effect/s. The Performance Modes are available for Remix Decks only. By default the Performance Mode Filter is applied to the Performance Con- trols below the display. TRAKTOR KONTROL S8 - Manual - 132... -
Page 133: Selecting And Applying A Performance Mode
FX SEND just above the Per- formance controls. Press the buttons to activate/deactivate the FX SEND per Remix Slot. Turn the Per- formance knobs to control the mix between unprocessed and effect signals. TRAKTOR KONTROL S8 - Manual - 133... -
Page 134: Using Performance Mode Pitch
When Performance Mode Pitch is enabled: Touch a Performance knob to expand the PITCH parameters overview in the display. Turn a Performance knob clockwise to pitch up or counterclockwise to pitch down the samples individually. TRAKTOR KONTROL S8 - Manual - 134... -
Page 135: Using Performance Mode Filter
You will hear the result in the audio and see the values change in the PITCH parameters → overview. 3.9.3 Using Performance Mode Filter When Performance Mode Filter is enabled: Touch a Performance knob to enlarge the FILTER parameters overview in the display. TRAKTOR KONTROL S8 - Manual - 135... -
Page 136: Using Performance Mode Fx Send
FX Unit/s. In this case, Deck C is assigned to FX Unit 2, which is set up as a Reverb. As soon as the Buttons are enabled in this Performance Mode, the audio effect from FX Unit 2 should become audible. When Performance Mode FX SEND is enabled: TRAKTOR KONTROL S8 - Manual - 136... - Page 137 You can hear a Reverb effect being added to the Remix Slots. Slot 1's value of 25% → means that you're listening to a mix of 75% unprocessed signal and 25% Reverb. TRAKTOR KONTROL S8 - Manual - 137...
-
Page 138: Using Performance Mode Fx
Using Your S8—Getting Advanced Using Performance Modes on Remix Decks 3.9.5 Using Performance Mode FX The Performance Mode FX is only available if four FX Units are enabled in TRAKTOR's prefer- ences as described in section ↑3.8.7, Using Four FX Units. -
Page 139: Changing Single Fx In Performance Mode
In the following section you will learn how to change the SINGLE FX in the FX Unit 3 or FX Unit 4. The workflow is the same for both. This tutorial will focus on FX Unit 3. To change the SINGLE FX in FX Unit 3: TRAKTOR KONTROL S8 - Manual - 139... - Page 140 The FX Unit 1 menu opens. On the left Deck press the Button 1 to switch to FX Unit 3 options. The FX Unit 3 options will open in the display. Ensure the entries Single Insert are selected. TRAKTOR KONTROL S8 - Manual - 140...
- Page 141 Press the FX Button 2, 3 or 4 to change the FX. This will display the FX Unit 3 menu with available FX. Turn the BROWSE encoder to select any FX and press the BROWSE encoder to assign the The FX Unit 3 menu closes. TRAKTOR KONTROL S8 - Manual - 141...
-
Page 142: Changing Group Fx In Performance Mode
In the following section you will learn how to change the GROUP FX in the FX Unit 3 or FX Unit 4. The workflow is the same for both. This tutorial will focus on FX Unit 3. To change the GROUP FX in FX Unit 3: TRAKTOR KONTROL S8 - Manual - 142... - Page 143 FX SELECT button. The FX Unit 1 menu opens. On the left Deck press the Button 1 to switch to FX Unit 3 options The FX Unit 3 options will open in the display. TRAKTOR KONTROL S8 - Manual - 143...
- Page 144 Press the FX Button 2, 3 or 4 where you want to change the FX. This will display the FX Unit 3 menu with available FX. Turn the BROWSE encoder to select an FX, and press the BROWSE encoder to load it. TRAKTOR KONTROL S8 - Manual - 144...
-
Page 145: Working With Beatgrids
S8 provides you with the controls to do this. 3.10.1 Checking a Beatgrid To guarantee that all Tempo, Loop and Move controls work as expected, you will have to verify the Beatgrid for your tracks: TRAKTOR KONTROL S8 - Manual - 145... - Page 146 Load a track into a Track Deck. The Track will be analyzed. Press Display Button 3 to zoom into the waveform and get a more precise view. Check the Beatmarker at the beginning of the track. TRAKTOR KONTROL S8 - Manual - 146...
-
Page 147: Correcting A Beatgrid Manually
If it a track is not correctly aligned to the beat, use Beatgrid mode to fix it. The following sec- tion will explain the required steps. Enabling the Beatgrid Mode To enable the Beatgrid mode: TRAKTOR KONTROL S8 - Manual - 147... - Page 148 While the track is playing with Beatgrid Mode enabled: Turn Performance knob 1 (OFFSET) to shift the entire waveform underneath the Beatgrid. ► Align the first Beatmarker with the first peak in the loop's waveform. TRAKTOR KONTROL S8 - Manual - 148...
- Page 149 Beatmarker. Turn Performance knob 3 (FINE) to fine-adjust the BPM value. ► Press SHIFT and turn Performance knob 2 (BPM) to double or halve the current BPM val- ► TRAKTOR KONTROL S8 - Manual - 149...
-
Page 150: Additional Help Actions
The Tick works like a metronome, giving you an audible pulse for every beat. Align the Tick and the beats in your track for perfect sync. You can only hear the Tick on the CUE (headphones), not the MAIN (audience). TRAKTOR KONTROL S8 - Manual - 150... - Page 151 Reset your edits If your edits do not produce the desired result, you can undo your edits: Press Display Button 4 (RST). ► This will reset your edits to the auto-detected values. → TRAKTOR KONTROL S8 - Manual - 151...
- Page 152 The stored tempo (BPM) is locked and cannot be changed until you unlock it by clicking LOCK again. All tracks with a locked Beatgrid will show a small Lock Icon within the Browser. TRAKTOR KONTROL S8 - Manual - 152...
-
Page 153: Hardware Reference
This chapter details the interface elements on your S8 and explains how they interact with the TRAKTOR software. This includes an overview of the main areas of the user interface, as well as a full reference for every button, knob, fader, and the color displays. -
Page 154: Top View
Top View Sections on S8's Top side The top view of the TRAKTOR KONTROL S8 is divided into five main areas: • Two identical Decks (1) are located to the left and right side of the controller. Section ↑4.2, The Deck gives an overview of a Deck. -
Page 155: Rear Panel
• Bright LED means that a feature is active. • Dim LED means that a feature is inactive. • LED off means that a button doesn't have a fixed function in the current context. TRAKTOR KONTROL S8 - Manual - 155... -
Page 156: Identical Decks
S8 features two identically equipped Deck sections at the far left and right sides of the unit. These give you hardware control over the software Decks in the TRAKTOR PRO software. Active TRAKTOR Decks always work in one of the Deck modes, as either Track Deck, Remix Deck or Live Input. - Page 157 In FLUX mode, the playhead continues to run towards the end of a track instead of being reset by looping a section of a track or by triggering a cue point. TRAKTOR KONTROL S8 - Manual - 157...
- Page 158 (12) TRANSPORT controls: Four dedicated buttons located along the bottom edge of a Deck Unit start/pause playback, start playback at the point or SYNC the corresponding Deck to the Master. SHIFT+SYNC assigns a Deck the Master function. See also 2 Loop Encoder [➙ 171] TRAKTOR KONTROL S8 - Manual - 158...
-
Page 159: Fx Units
4.1.6 FX Units S8 comes with dedicated controls for TRAKTOR PRO's two FX Units (four, if set in TRAKTOR's Preferences). Just like in the software, FX Unit 1 is located in the top-left corner, FX Unit 2 in the top-right. - Page 160 Overview of the Controller Let's take a quick look at the mixer's key hardware controls and their software equivalents. If you don't see the Mixer section in TRAKTOR software on your computer, select Mixer from the Layout menu in the software header.
-
Page 161: Rear Panel
FX 1 or FX2 effects configurations per channel. TRAKTOR provides up to four different FX setups. (3) 3-band EQ: S8's 3-band EQ works both, when connected to TRAKTOR, as well as in stand- alone mode. FILTER... - Page 162 USB 1 and USB 3-equipped computers. (9) POWER connector: requires the original 15V, 2.66A power supply to be connected for relia- ble operation of S8. For technical details about all the connections see chapter ↑9, Technical Specification. TRAKTOR KONTROL S8 - Manual - 162...
-
Page 163: Front Panel
Deck. 4.2.1 DECK Button DECK Button allows you to switch the focus (and controls) between the primary and sec- ondary Decks in a Deck section. TRAKTOR KONTROL S8 - Manual - 163... -
Page 164: Flux Button
• Loop mode: when leaving a loop, playback will continue at the position of the second play- head instead of the loop end position. TRAKTOR KONTROL S8 - Manual - 164... -
Page 165: Mode Select Buttons
When you set focus on Deck A, only HOTCUE, LOOP FREEZE light up blue to indicate they can be selected for Deck A. The REMIX button lights up white, indicating this mode is only available for Deck C. TRAKTOR KONTROL S8 - Manual - 165... -
Page 166: Hotcue Button
4.2.3.2 LOOP Button Press the LOOP button to activate LOOP mode. LOOP Button When Loop mode is activated, the first row of pads turns green, and the second row turns or- ange. TRAKTOR KONTROL S8 - Manual - 166... - Page 167 Preferences>Traktor Kontrol S8>Loop Mode Sizes > Loop For more information, see the TRAKTOR manual. • If Quantize is activated, TRAKTOR will loop from the next beat. • If Quantize is deactivated, looping starts immediately when you press the pad. The behavior of the pads changes when you activate FLUX mode. While FLUX is deactivat- ed, the loop will play back until you press that pad again.
-
Page 168: Freeze Button
• Jump forward 1 loop size (set per Deck) You can change the step sizes in TRAKTOR's S8 Preferences: Preferences:> Traktor Kontrol S8 > Loop Mode Sizes > Beatjump. For more information, see the TRAKTOR manual. • If Quantize is activated, TRAKTOR waits for the next beat before jumping. - Page 169 Adjust the size of the Freeze slices by pressing and holding the FREEZE button and then ► turning the Loop encoder. The waveform in the display adjusts its zoom level accordingly. You can vary slice sizes between 1/4 beat and 4 beats. TRAKTOR KONTROL S8 - Manual - 169...
-
Page 170: Remix Button
If the Deck you set as capture source is empty, S8's display shows Error while copying in the Deck header. For more detailed information on capturing samples, refer to section ↑4.2.6, CAPTURE Button. TRAKTOR KONTROL S8 - Manual - 170... -
Page 171: Loop Encoder
Moving the Playhead While a loop is inactive, press and hold SHIFT, then turn the Loop encoder to move the play- head in increments of the loop size. TRAKTOR KONTROL S8 - Manual - 171... -
Page 172: Edit Button
4.2.5 EDIT Button Pressing the EDIT button lets you adjust a track's Beat Grid. The TRAKTOR software can ana- lyze your music and apply a Beat Grid which allows automatic beat-matching and synchroniza- tion. EDIT Button In most cases (through its... -
Page 173: Display Area
(3) Settings Button: Press this button to open S8's device settings, allowing you to adjust calibration (color rendition) and screen brightness, as well as TOUCH sensitivity of the knobs. TRAKTOR KONTROL S8 - Manual - 173... -
Page 174: S8'S Deck View
Track Deck, Remix Deck or Beat Grid Edit. (5) Display: By means of the 4.3-inch color displays, you can use a lot of TRAKTOR's features without looking at your computer's display. Each of S8's displays provides information about the corresponding Deck, allowing you to: •... - Page 175 • The right display provides feedback about Decks and D. Every active TRAKTOR Deck is either a Track Deck, Remix Deck or Live Input Deck. If a mixer channel is set to Thru mode on S8, the corresponding TRAKTOR Deck is set to Thru mode, as well.
- Page 176 Deck header shows tempo deviation in percent from the file's original tempo. Remix Deck Remix Deck View A Remix Deck view on S8 provides information about: (1) Artwork graphic, Set title and Artist name. (2) Loop size: from 1/32 - 32 beats. TRAKTOR KONTROL S8 - Manual - 176...
-
Page 177: View Button
If you don't need to run an external device like turntable or CD player through a Deck, switch that mixer channel to Thru mode on S8 by pressing the TRAKTOR button. The signal is mixed in S8's mixer and never sent to TRAKTOR then. -
Page 178: Display Buttons
Whenever you open a pop-up from a Deck view (e.g. FX Selection Menu, Browser, BPM, or KEY), the View button starts flashing. Press the View button to close the pop-up. 4.2.7.3 Display Buttons These buttons provide different functionality depending on the view you're working in. TRAKTOR KONTROL S8 - Manual - 178... - Page 179 (2) Display Button 2: Press this button to open the QUANTIZE pop-up. Then turn the BROWSE coder to select the Quantize value which to apply to triggering the samples in your Remix Deck. Press the QUANTIZE button again to exit. TRAKTOR KONTROL S8 - Manual - 179...
-
Page 180: Settings Button
Within the settings, you can adjust the screens' color rendition (saturation of RED, GREEN BLUE colors), as well as the screen's BRIGHTNESS. Turn the Performance knobs beneath the display to adjust the parameters. ► Display Settings View TRAKTOR KONTROL S8 - Manual - 180... -
Page 181: Performance Mode Button
ENCODERS, ENDLESS KNOBS, KNOBS, and FADERS. Touch Settings View 4.2.7.5 Performance Mode Button The Performance Mode buttons are at the bottom on either side of the display, marked with left and right arrows. TRAKTOR KONTROL S8 - Manual - 181... -
Page 182: Browse Encoder
► PITCH, SEND), press one of the buttons repeatedly. If you activate 4 FX Units in TRAKTOR's preferences, the Performance Mode buttons allow you to select FX Units 3 and 4 as a fourth option. See also 2 Using Four FX Units [➙ 201] 4.2.7.6... -
Page 183: Back Button
Hardware Reference The Deck You can configure the Browse encoder to open the Browser on touch. To do so, activate the Auto Open Browser on Touch option in TRAKTOR's Traktor Kontrol S8 Preferences. 4.2.7.7 BACK Button Press the BACK button to navigate a level up in the folder structure, up to the Browser's ►... - Page 184 Performance pop- up at the lower end of the displays. Controlling Remix Slot Filters To engage a Remix Slot's Filter: Press the left Performance Mode button until the parameter on the display says FILTER. TRAKTOR KONTROL S8 - Manual - 184...
- Page 185 The Performance Controls work even if the Remix Deck isn't focused. If you set up TRAKTOR with 4 FX Units, the Performance knobs and buttons in Deck A control FX Unit 3, those in Deck B control FX Unit 4. By default, they have no function for Track Decks.
-
Page 186: Slot Volume Faders
Volume faders control the focused Deck's slots. Slot Volume Faders 4.2.10 Pads Each of S8's Decks comes with a set of 8 pads. Depending on the mode selected via the Mode Select buttons, these pads are assigned different functions. TRAKTOR KONTROL S8 - Manual - 186... - Page 187 In Loop mode, pressing a pad instantly loops playback for the number of bars set as Loop Mode Size in Preferences > Traktor Kontrol S8 > Loop Mode Sizes > Loop. These values are by default: • 1/8 Bar Loop •...
- Page 188 • If Quantize is deactivated, looping starts precisely when you press the pad. FREEZE and Slicer Mode In Freeze mode, TRAKTOR takes the playhead position, adds the number of bars set as loop size and splits this section of a track into eight equally sized slices. These are then mapped to the pads.
-
Page 189: Touch Strip
By tapping anywhere on the Touch Strip, you jump to the corresponding posi- tion within a track. 4.2.11.1 Touch Strip LEDs Above the Touch Strip, a number of LEDs provide visual feedback for the actions taken on the touch strip. Touch Strip LEDs TRAKTOR KONTROL S8 - Manual - 189... -
Page 190: 4.2.11.2 Touch Strip Functions
Just like in TRAKTOR's Decks, if the bar points to the right, the Deck is ahead, if it points to the left, it's behind the MASTER. So if the Deck is ahead of the MASTER, swipe to the left to slow down playback, so the MASTER can 'catch up'. - Page 191 Touch Strip. To simulate the behavior of a turntable, the swiping motion translates to move- ment of the playhead within the track. TRAKTOR plays back what's under the playhead, which is why the speeding up and slowing down of that motion produce similar pitch changes as us- ing an LP and turntable.
- Page 192 To move the playhead all the way to the end of the track, swipe all the way to the right. ► Note that when you release the SHIFT button, the Touch Strip will revert back to nudging and scratching. TRAKTOR KONTROL S8 - Manual - 192...
-
Page 193: 4.2.11.3 Customization Options
Hardware Reference The Deck 4.2.11.3 Customization Options This chapter details the Touch Strip's options in TRAKTOR's Preferences. Direction of Scratching If you didn't learn scratching with LPs and turntables, you may find inversing the Touch Strip's direction more intuitive. If you select this option, swiping to the right on the Touch Strip will move forward in the track's waveform. - Page 194 The Deck Direction of Tempo Bending In TRAKTOR's default setting, swiping your finger on the Touch Strip has a similar effect to speeding up or slowing down an LP with your hand: • Move to the left to speed up the LP.
-
Page 195: Transport Controls
Kontrol S8>Touchstrip. 4.2.12 Transport Controls The Transport buttons control playback of S8's Decks. These controls only relate to TRAKTOR mode, they have no function when the S8 is used as a stand-alone device. PLAY Button PLAY button starts/stops the playback of a Deck. - Page 196 Swiping your finger across the corresponding Touch Strip to re-align the beat phase. ► Pressing the SYNC button twice to snap back into SYNC with the Tempo Master. ► For further information about Deck SYNC MASTER Deck assignment, refer to section ↑4.4.2.4, TEMPO Encoder. TRAKTOR KONTROL S8 - Manual - 196...
-
Page 197: The Fx Unit
Above the Decks, the S8 features two FX Units which can be assigned to any of the Decks. Four knobs and buttons per FX Unit allow you to control effects parameters in real time. TRAKTOR KONTROL S8 - Manual - 197... -
Page 198: Fx Unit Overview
Touch any of them to open the FX drop-down menu that provides an overview of the effect(s) loaded along with control assignments and pa- rameter values. TRAKTOR KONTROL S8 - Manual - 198... - Page 199 • Single Mode: select one effect; the FX knobs let you control up to 4 parameters. • Group Mode: select up to three effects as an effects chain; the FX knobs let you control one parameter per effect. TRAKTOR KONTROL S8 - Manual - 199...
-
Page 200: Fx Select Button
FX 2 on the right one. FX SELECT Button This menu stays on the display until the FX SELECT button is pressed again. When disengag- ed, the FX SELECT button is dim. TRAKTOR KONTROL S8 - Manual - 200... -
Page 201: Fx Unit Assignment
4.3.4 Using Four FX Units By default, TRAKTOR is set up with two FX Units. In order to use all four of TRAKTOR'S FX Units, you need to change the following setting: In TRAKTOR's Preferences, select Effects>FX Unit Routing>4 FX Units. - Page 202 Units, S8's Performance controls are assigned to FX Units 3 and 4. They work in a fashion very similar to the dedicated controls in FX Units 1 and 2. Controls for 4 FX Units (1) FX Units 1 and 2 are available in any configuration. TRAKTOR KONTROL S8 - Manual - 202...
- Page 203 Overview of FX Unit 3's Controls Once activated in the Preferences, FX Units 3 and 4 work very much like FX Units 1 and 2. Here, S8 offers four knobs and four buttons per FX Unit, too. TRAKTOR KONTROL S8 - Manual - 203...
- Page 204 FX Settings, press (2) ON Button 1 to access the FX Unit Settings. Here, you can set up the FX Unit to either work in Single mode or Group mode. • Single Mode: select one effect; the Performance knobs let you control up to four parame- ters. TRAKTOR KONTROL S8 - Manual - 204...
-
Page 205: The Mixer
Control the 3rd effect in the FX Unit. The Mixer This is a brief overview of the mixer's layout, its function and operation. After that, the detailed hardware reference explains each and every component found in S8's mixer section. TRAKTOR KONTROL S8 - Manual - 205... - Page 206 Decks at the center and close to the Main section and Crossfader. • Each channel receives its input signal from TRAKTOR's corresponding virtual Deck or, al- ternatively, from an external source (e.g. turntables, CD players, or a microphone) via the inputs on S8's rear panel.
-
Page 207: Mixer Channel
• Also in the Mixer's Main section, you can set the global TEMPO and turn on/off Snap and Quantize 4.4.1 Mixer Channel All mixer channels are laid out identically. Let's have a look at one of them. TRAKTOR KONTROL S8 - Manual - 207... - Page 208 (1) GAIN knob: controls the level directly after the channel input so you can adjust the relative levels between Decks. (2) TRAKTOR button: switches between TRAKTOR mode and Direct Thru mode per channel. For more details about Direct Thru Mode, refer to ↑4.4.1.2, TRAKTOR...
-
Page 209: Gain Knob
The Mixer (3) FX Assign buttons: assign a channel to an FX Unit. A channel can only be assigned to an FX Unit when it's in TRAKTOR mode (indicated by the TRAKTOR button lighting up bright or- ange). (4) Input level meter: each channel has a dedicated Input level meter that displays the signal level before the channel fader. -
Page 210: Traktor Button
The Mixer 4.4.1.2 TRAKTOR Button Use this button bearing the TRAKTOR logo to switch a channel between TRAKTOR and Direct Thru mode. TRAKTOR Button Direct Thru mode allows you to use S8 as a stand-alone 4 channel mixer to mix turntables, CD- Players and other sources, apply EQ and Filter to each channel and route them to the outputs. -
Page 211: Eq Knobs
If you activate both FX assign buttons, your track will first run through FX1, then FX2. TRAKTOR's FX only work if a channel is set to TRAKTOR mode. If you need to run an exter- nal device through TRAKTOR's FX, set it to TRAKTOR mode and choose the... -
Page 212: Channel Fader
At the center position, the knobs have a detent, marking the position where the EQ doesn't change the frequency balance. S8's internal EQ sounds identical to the Z ISO which is the default in the TRAKTOR soft- ware. TRAKTOR provides you with various types of EQ, each of them with its own “personality.”... -
Page 213: Channel Meter
MAIN output has massive reserves to drive the P.A. even if you don't push the input as hard as you can. 4.4.1.7 FILTER Button and FILTER Knob FILTER button is an on/off switch for the on-board dual-mode filter. TRAKTOR KONTROL S8 - Manual - 213... -
Page 214: Cue Button
FILTER knob is in its center position, no filter is applied. TRAKTOR provides you with different types of dual-mode filters. You can choose the filter type in the Preferences > Mixer > Filter Selection. 4.4.1.8 CUE Button Press the button to send the channel’s signal to the cue channel in order to audition it... -
Page 215: Mixer Main Section
Using Headphones to Prepare the Mix. 4.4.2 Mixer Main Section This chapter gives a brief overview of the Mixer's Main section first and then an explanation of every control element. Mixer Main Section Details TRAKTOR KONTROL S8 - Manual - 215... -
Page 216: Crossfader
That way, when you actually mix it into the MAIN, you can be certain that it blends well. (4) TEMPO encoder: controls the global tempo. Only Decks operating in TRAKTOR mode can sync to the global tempo. -
Page 217: Cue Vol Knob
4.4.2.3 CUE MIX Knob CUE MIX knob determines whether you hear the MAIN mix only, the channel only, or a mix of both signals in your headphones. TRAKTOR KONTROL S8 - Manual - 217... -
Page 218: Tempo Encoder
4.4.2.4 TEMPO Encoder The central TEMPO knob controls TRAKTOR's Tempo Master in BPM. All synced Decks automati- cally follow tempo changes. TEMPO Encoder The TEMPO encoder changes tempo in increments of .01 BPM. Hold SHIFT to change in increments of 1 BPM. -
Page 219: Booth Knob
Deck or are synced to MASTER, S8 displays MASTER CLOCK BPM. If the Deck in focus is not in sync with TRAKTOR's Master Clock, the overlay shows the Track Deck's or Remix Deck's individual BPM. The BPM overlay can only be accessed on Track- or Remix Decks. -
Page 220: Global Section
(Hotcues, Beatjumps, etc.) are beat-accurate. If you trigger a jump before a beat, TRAKTOR delays the action so that the effect occurs on the beat. This way, your track always stays in sync, allowing a perfect real-time remixing. -
Page 221: Mic 1 And 2 Buttons
2) button to activate the connected microphone. The button and ► the assigned channel's TRAKTOR button light up bright green when enabled. If the microphone can't be assigned to the channel you select, the TRAKTOR and ► buttons flash alternately. Changing the channel assignment... -
Page 222: Main Knob
CD players. Rear Panel Sections (1) MAIN OUT: connects to the main P.A.. (2) BOOTH OUT: connects to a second pair of speakers, typically for use on stage. TRAKTOR KONTROL S8 - Manual - 222... -
Page 223: Main Out
(Ground post): When using a turntable, attach its ground lead here to avoid hum. (5) MIC inputs: run up to two microphones through TRAKTOR or S8's mixer. (6) Kensington lock slot: Attach your Kensington lock here to protect your device against theft. -
Page 224: Booth Out
This section contains: (1) LINE/PHONO switch: depending on the device you connect, set this switch to or PH. Turntables usually require PH, all line level audio sources LN. TRAKTOR KONTROL S8 - Manual - 224... -
Page 225: Mic Input Section
(2) MIC 2 input (balanced TRS): connect your microphone to this input via either XLR or bal- anced 6.3mm (or 1/4-inch) connector. For more information on connecting a microphone and setting up your S8 accordingly, refer to section ↑5.6, Connecting Microphones. TRAKTOR KONTROL S8 - Manual - 225... -
Page 226: Kensington Lock Slot
Use a Kensington-slot compatible lock to lock your S8 to a heavy object like a table to prevent theft. 4.5.6 MIDI Connectors MIDI Connectors Connect external MIDI devices for sync. 4.5.7 USB Connector USB Connector TRAKTOR KONTROL S8 - Manual - 226... -
Page 227: Power Section
USB 3-equipped computers. Due to the large amounts of data transmitted to the TRAKTOR KONTROL S8, it may not work properly when connected to a USB hub. Make sure to connect S8 directly to a USB port on your computer if possible. -
Page 228: The Front Panel
Crossfader Assign Switches Crossfader Assign Switches Each channel can be assigned to either the left or right side of the Crossfader. The center posi- tion (THRU) lets the channel bypass the Crossfader altogether. TRAKTOR KONTROL S8 - Manual - 228... -
Page 229: Phones Section
(2) Large Headphone Jack: Connect 6.3 mm (1/4-inch) stereo headphone plugs. Adjust the Headphone levels with the CUE VOL knob on S8's top panel. 4.6.3 Crossfader Curve Knob XF CURVE Knob This knob changes the crossfader curve. Different scenarios require different curves: TRAKTOR KONTROL S8 - Manual - 229... - Page 230 The Crossfader works almost like a switch at its left and right ends. You can also customize the fading curve of the Crossfader in Preferences > Mixer > Cross- fader. TRAKTOR KONTROL S8 - Manual - 230...
-
Page 231: Common Setups
Connecting Turntables Common Setups In addition to being a fully integrated TRAKTOR controller and audio interface, S8 can work in a mixed setup with turntables or CD players and can even serve as a pure 4-channel DJ mixer without any connection to TRAKTOR. - Page 232 Common Setups Connecting Turntables Connect your turntables to any of the Line/Phono INPUTS – on the rear panel of the S8 using a stereo RCA cable. TRAKTOR KONTROL S8 - Manual - 232...
- Page 233 If you want to use S8 as stand-alone DJ mixer, refer to section ↑5.5, Using Your S8 as a Stand-alone DJ Mixer. TRAKTOR KONTROL S8 - Manual - 233...
-
Page 234: Connecting Cd Players
↑5.4, Integrating Exter- nal Sources as TIMECODE Controls. Connecting CD Players To include CD players in your TRAKTOR set: Connect your CD players to any of the Line/Phono INPUTS – on the rear panel of the S8 using a stereo RCA cable. -
Page 235: Integrating External Audio Sources In Your Traktor Workflow
Integrating External Audio Sources in your TRAKTOR Workflow With turntables or CD players connected to a channel, you can either route them through TRAKTOR in order to add FX via a Live Input Deck, or mix them directly in S8's mixer in Direct Thru mode. - Page 236 For the designated SCRATCH Decks, press the TRAKTOR buttons on the S8 to enable TRAKTOR mode. This is essential to engaging SCRATCH Control. In the TRAKTOR software, click on the down arrow below the Deck letter to open the drop-down menu.
-
Page 237: Final Preparations With Cd Players
For the designated SCRATCH Decks, press the TRAKTOR buttons on the S8 to enable TRAKTOR mode. This is essential to engaging SCRATCH Control. In the TRAKTOR software, click on the down arrow below the Deck letter to open the drop-down menu. -
Page 238: Successful Calibration
5.4.3 Successful Calibration TRAKTOR detects which Timecode medium you are using, verifies the signal quality, and if the signal quality is adequate it completes the calibration process. The software platters will then spin at the same speed as the turntables; and the movement of the record will be followed ex- actly. - Page 239 (4) The status information at the bottom center. CALIBRATE button resets Timecode calibration. This is done automatically when you start TRAKTOR. Successful calibration using a Control MK2 CD TRAKTOR KONTROL S8 - Manual - 239...
-
Page 240: Using Your S8 As A Stand-Alone Dj Mixer
Remember to ensure that the LINE/PHONO switches are set accordingly, and mixer channels' TRAKTOR buttons are bright orange—to indicate they are set to TRAKTOR mode. If you have followed the information in this chapter and are still having difficulty getting... -
Page 241: Connecting Microphones
• The FILTER and EQ band knobs (HI, MID, LOW) are in center position. Although you can change TRAKTOR's internal EQ and filter characteristics, it is not possi- ble to change the EQs and filters in stand-alone operation. Connecting Microphones Connecting a microphone allows you to expand the scope of your performance. -
Page 242: Checking Microphone Assignments
1: Hold the MIC 1 button. ► Channel A and B's TRAKTOR buttons light up dim green, indicating that the is as- → signable to them. Channel D's button is off, indicating the channel which MIC 2 input is already assigned to. -
Page 243: Switching Between Live Input And Direct Thru
► TRAKTOR (Live Input) and mixing it directly inside S8's mixer (Direct Thru). In Live Input mode, you can process your microphone signal with TRAKTOR's FX Units, allow- ing you to add performance effects. TRAKTOR KONTROL S8 - Manual - 243... -
Page 244: Activating A Mic Input
S8's mixer, solving any latency issues you might have at the expense of not being able to add FX. In Direct Thru mode, TRAKTOR's FX Units don't have any effect on the signal, but the 3- band EQ and the Filter are still available. -
Page 245: S8 Preferences
S8 Preferences S8 Preferences Once configured via the Setup Wizard, a dedicated pane for S8 is added to TRAKTOR's Prefer- ences window, which lets you configure the behavior of the touch controls, as well as overall LED brightness for the back-lit buttons and the Loop and Beatjump Sizes assigned to each Deck's pads. -
Page 246: Restore Default
S8 Preferences Restore Default Restore Default This button recalls all factory default settings for the TRAKTOR KONTROL S8 and lets you choose its basic deck configuration via the Setup Wizard. Touch Controls A number of controls are sensitive to touch. TRAKTOR lets you activate touch functions, which will save you the dedicated press of a button for a few features. -
Page 247: Calibrate
The pad and button backlights on the S8 offer two distinct brightness levels to indicate On and Off states. Depending on your light conditions during a performance, it can be necessary to ad- just these. On State Brightness: sets the brightness level for engaged buttons and pads. TRAKTOR KONTROL S8 - Manual - 247... -
Page 248: Loop Mode Sizes
• Beatjump: For each of the four lower pads you can select a Beatjump size of: - LOOP, - 32, - 16, - 8, - 4, - 2, - 1, -/2, -/4, -/8, -/16, +/16, +/8, +/4, +/2, +1, +2, +4, +8, + 16, + 32, +LOOP. TRAKTOR KONTROL S8 - Manual - 248... -
Page 249: The S8 Audio Interface And Control Panel
Now increase the value again until the crackling disappears. Settings on Windows: The Control Panel On Windows, access the settings for the TRAKTOR KONTROL S8 audio interface via the TRAK- TOR KONTROL S8 Control Panel application. The Control Panel is automatically installed along with the S8 drivers during the TRAKTOR installation procedure. -
Page 250: Opening The Control Panel
TROL S8 > TRAKTOR KONTROL S8 Control Panel. If you cannot find the Control Panel, the driver is most likely not installed at all. In this case, please re-install the latest version of TRAKTOR and make sure the S8 driver is selected for in- stallation. - Page 251 Process Buffer alone. Lower the USB buffer size for smaller USB buffer packaging, which should further reduce the audible latency. If you notice any audio drop-outs, you should raise the buffer size until you have a clear sound. TRAKTOR KONTROL S8 - Manual - 251...
-
Page 252: Diagnostics Panel
This information can be helpful to see the results of Process Buffer value adjustments and may help troubleshooting in case you need to contact our technical support. TRAKTOR KONTROL S8 - Manual - 252... - Page 253 Reasons for underruns can be too many devices communicating on the USB bus at the same time or too high CPU load. Reset: Click this button to reset the error count. TRAKTOR KONTROL S8 - Manual - 253...
- Page 254 Provides information about whether or not your driver and firmware are up to date. Driver Version: See the currently installed driver version here. Firmware Version: See the currently installed firmware version here. Troubleshooting Guide: Click Show to open the Troubleshooting Guide. TRAKTOR KONTROL S8 - Manual - 254...
-
Page 255: Using The S8 Audio Interface With Other Music Applications
Default. Click to close the dialog. 7.4.2 Mac OS X For Mac OS X, you can define the TRAKTOR KONTROL S8 as your default audio interface as follows: From the Apple menu, select System Preferences. In the panel that opens, click Sound. - Page 256 TRAKTOR KONTROL S8 in the Play alerts and sound effects through menu. Click the Output tab, and select TRAKTOR KONTROL S8 from the Select a device for sound output list. Click the Input tab, and select TRAKTOR KONTROL S8 from the...
-
Page 257: Troubleshooting - Getting Help
• Try to rename the file collection.nml in the TRAKTOR 2 Root folder and restart TRAKTOR. This way, TRAKTOR will create a blank Collection. Re-import the renamed .nml file to re- store your Collection. -
Page 258: Traktor Has Performance Issues
Please check if your computer is suited for handling real-time audio processing without drop- outs. The TRAKTOR KONTROL S8 Control Panel application offers a tool for measuring System Performance and for monitoring the number of audio dropouts, which cause audible clicking noises. -
Page 259: Updates
Instruments. The Online Support Form will ask you to enter information about your hard- ware and software setup. This information is essential for our Support team to be able to pro- vide you with quality assistance. You can reach the Online Support via: http://www.native-instruments.com/suppform TRAKTOR KONTROL S8 - Manual - 259... -
Page 260: Registration Support
• The brand and specifications of your computer • The software version number The version number of your software is displayed in the TRAKTOR splash screen you see when the application launches. After startup, the same splash screen can be opened by clicking the TRAKTOR logo in the upper right corner of the user interface. -
Page 261: Technical Specification
K: One Kensington lock slot USB: One USB 2.0 Type B connector POWER: One power supply connector Audio Specifications Audio Inputs (A/D) Channels 4 Stereo Sample Rate 48 kHz Bit Resolution 24-bit Converter Cirrus Logic TRAKTOR KONTROL S8 - Manual - 261... - Page 262 DNR (a-weighted) @ 1 kHz 84 dB THD+N @ 1 kHz 0.002% Crosstalk @ 1kHz -105 dB Audio Outputs (D/A) Channels 2 Stereo Sample Rate 48 kHz Bit Resolution 24-bit Converter Cirrus Logic TRAKTOR KONTROL S8 - Manual - 262...
- Page 263 109 dB THD+N @ 1kHz 0.07 % Frequency response ±1 dB 20 Hz – 20 kHz (±0.2 dB) Crosstalk @ 1kHz -63 dB Power Supply • Input: 100-240VAC, 50/60Hz, 1.5A • Output: 15VDC, 2660mA TRAKTOR KONTROL S8 - Manual - 263...
- Page 264 • Operating temperature: +5 to +35 °C (41 to 95 °F), max 85% non-condensing humidity • Storage temperature: 0 to 40 °C (32 to 104 °F), max 85% non-condensing humidity Do not install this unit in locations exposed to high humidity or direct sunlight. TRAKTOR KONTROL S8 - Manual - 264...
Need help?
Do you have a question about the kontrol s8 and is the answer not in the manual?
Questions and answers