Table of Contents
Advertisement
Available languages
Available languages
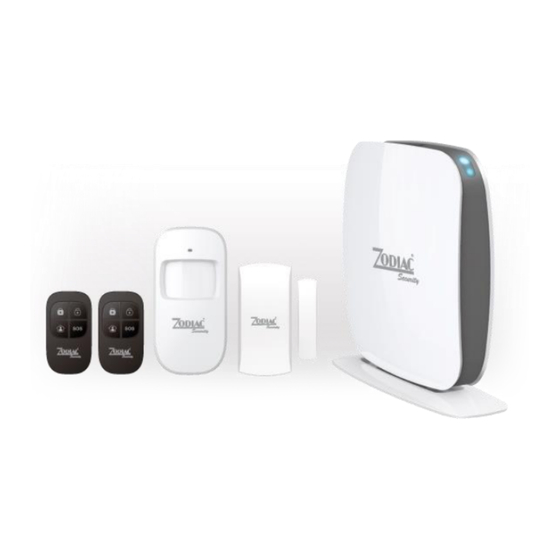
Z2
Sistema di sicurezza GSM / Alarm Security System
Manuale d'uso e di installazione
Installation and User Manual
1
Advertisement
Table of Contents

Related Manuals for Zodiac Z2

Summary of Contents for Zodiac Z2
- Page 1 Sistema di sicurezza GSM / Alarm Security System Manuale d’uso e di installazione Installation and User Manual...
- Page 2 CARATTERISTICHE - Processore a 16 bit affidabile e veloce - Configurazione totalmente senza fili, installazione semplificata - 1.000.000 di codici RF - Supporta 5 telecomandi e 99 sensori wireless (senza filo) - Controllo del sistema via telefono, SMS o App (iOS o Android) - Può...
- Page 3 INDICAZIONI DEI LED 1. Stato/Batteria scarica 2. Indicatore Alimentazione/Segnale GSM Off: il sistema è disinserito Verde (lampeggio veloce): ricerca rete GSM Verde (lampeggiante): batteria scarica Verde (lampeggio lento): segnale GSM ok Blu (fisso): sistema inserito Verde (fisso): modalità Connessione Blu (lampeggiante): allarme in azione Specifiche Nome prodotto Sensori wireless supportati...
- Page 4 Con App Per inserire l’allarme, cliccare su “Arm” nella App. Cliccare su “Disarm” per disinserire. È disponibile per il download su App Store e Google Play. Registrare i sensori wireless (senza filo) 1. Premere il tasto connessione sul retro del pannello di controllo per entrare nel modo Connessione.
- Page 5 Impostazione delle zone dei rilevatori wireless Ogni rilevatore può essere assegnato a 4 differenti categorie di zona: Zona Casa, Zona Ritardata, Zona Normale e Zona 24-H. per assegnare un rilevatore ad una zona, aprirlo e spostare i ponticelli come segue: A.
- Page 6 La lingua di fabbrica è l’inglese. Vedere a pag 12 per cambiarla. Memorizzare i numeri telefonici per le notifiche SMS Inviato: Risposta: Copia, incolla e poi modifica: Disinserire il sistema (disarm) Inviare: Inserire il sistema (arm) Inviare:...
- Page 7 Modo Home (a casa) Inviare: Richiesta impostazioni Inviare: Nota: i valori impostati in fabbrica saranno cambiati dopo la impostazione del sistema. Memorizzare i numeri telefonici Inviare:...
- Page 8 Copiare, incollare e modificare: Cambiare il nome a una zona Inviare “91~99”. Ad esempio, per zona 1, inviare: Copiare, incollare e modificare: Nota: le zone da 1 a 9 possono essere rinominate. Il nome può essere fino a 30 caratteri per linea, dovuto al limite degli SMS.
- Page 9 “Nome Zona+low battery”. Per sensori assegnati a zone che non sono state rinominate, verrà inviato un SMS con formato “Numero Zona+low battery” SMS di avviso per antimanomissione (per sensori di movimento) Per sensori assegnati a zone che sono state rinominate, verrà inviato un SMS con formato “Nome Zona+tamper alarm”.
- Page 10 Nota: Questa funzione è utile se n on si vuole portare con sé un telecomando. Quando il sistema viene armato, si sente un beep ogni secondo per ricordare di uscire. Il ritmo dei beep aumenta negli ultimi 10 secondi. Se viene rilevata una intrusione, l’allarme sarà ritardato di conseguenza. Volume e durata della sirena Inviare: Copiare, incollare e modificare:...
- Page 11 Numero di squilli Inviare: Copiare, incollare e modificare: Questa funzione permette di definire dopo quanti squilli la centrale risponderà alla chiamata. Sono regolabili da 0 a 9, e con 0 la centrale non risponderà. Ripetizione chiamate Se l’utente non risponde alla chiamata della centrale in caso di allarme, questa può richiamare un certo numero di volte.
- Page 12 Cancellare un sensore wireless Inviare: Cambiare la lingua del sistema Inviare il codice della lingua. Ad esempio, per l’inglese inviare “0001”. Lingue disponibili: 0001 Inglese 0008 Tedesco 0002 Francese 0009 Spagnolo 0003 Russo 0010 Finlandese 0004 Danese 0011 Norvegese 0005 Olandese 0012 Arabo 0006 Italiano 0013 Farsi...
- Page 13 Le impostazioni vengono ripristinate ai valori di fabbrica. I numeri telefonici e i sensori verranno cancellati. Solo i numeri memorizzati possono inviare SMS di ripristino. TELECOMANDO Disinserimento LED indicatore Modalità “a casa” Inserimento Inserire l’antifurto Premere il tasto Arm per attivare il sistema. Il LED si accende e la sirena emette un breve suono.
- Page 14 Indipendentemente dallo stato del sistema, l’antifurto suona quando viene premuto il tasto SOS. Allo stesso tempo il pannello di controllo invia un SMS e chiama i numeri memorizzati. Registrare un telecomando Premere il tasto connessione sulla parte posteriore del pannello di controllo per entrare nel modo Connessione.
- Page 15 Scheda interna Impostazione zona allarme LED indicatore Interruttore antimanomissione * Antenna Sensore infrarosso ** AA 1.5V batterie * Antimanomissione Quando l’antifurto è inserito, se il sensore viene aperto l’antifurto suona. ** Sensore infrarosso Rileva i raggi infrarossi rilasciati dal movimento del corpo umano. Non toccare la superficie e mantenerla pulita.
- Page 16 Premere il tasto Connection sul retro del pannello di controllo per entrare nel modo Connessione. Premere il tasto Connect sul retro del sensore di movimento o attivare il sensore (muovendosi davanti). Installazione Evitare di montare il sensore in prossimità di finestre, condizionatori d’aria, caloriferi, frigoriferi, forni, raggi solari diretti o luoghi dove la temperatura cambia rapidamente o vi siano flussi d’aria.
- Page 17 Vista superiore vista laterale Specifiche Alimentazione Corrente a riposo ≤30uA DC 3V (Batteria AA 1.5V x2) Corrente in allarme Fascia di rilevamento ≤15mA 8m / 110° Distanza Frequenza radio ≤80m (spazio aperto) 315MHz/433MHz (±75kHz) Materiale Condizioni operative Plastica ABS Temperatura : -10°C~55°C Umidità...
- Page 18 60x45x18 mm Umidità relativa: ≤80% (non condensante) Dimensioni supporto 45x19x17.5 mm REGISTRARE UNA SIRENA ADDIZIONALE Il pannello di controllo dispone di una sirena interna da 90 dB. L’antifurto Zodiac Security supporta una sirena aggiuntiva interna e/o esterna in funzione delle necessità.
- Page 19 Per aggiungere una sirena aggiuntiva, consultare il manuale fornito con la sirena stessa. RISOLUZIONE PROBLEMI E ISTRUZIONI DI SICUREZZA FAQ (domande frequenti) Domanda Possibile causa Rimedio Pannello spento Accendere il pannello Nessuna risposta Verificare l’impianto dal pannello Mancanza alimentazione AC di controllo Inserire l’adattatore AC nella presa Mancanza batterie di backup...
- Page 20 Questo prodotto è stato progettato e costruito seguendo le direttive 2011/65/EC del Parlamento Europeo sulla restrizione dell’utilizzo di sostanze pericolose in apparati elettrici ed elettronici (RoHS) e rispetta i valori massimi di concentrazione fissati dal Comitato Europeo di Adeguamento Tecnico. FEATURES - 16-bit high speed processor, reliable capability - 100% wireless configuration, D.I.Y.
- Page 21 Numbers” on page 24 of this manual. Change the language By default the language of the Z2 control panel is set to English. If you wish to change the system language, refer to the instructions “Change system language” on page 30 of this manual. “System language”...
- Page 22 The alarm system can be armed or disarmed by SMS, by App and by phone call. By SMS To arm the system: Send “1” by SMS to the number of your system’s SIM card. To disarm the system: Send “0” by SMS to the number of your system’s SIM card. By App Click no “Arm”...
- Page 23 Note In GSM mode, the audio monitoring is not limited in time. Hard Reset Press the Connect button and the Panic button (SOS) simultaneously. Release them after 3 beeps. Wait 10 seconds. The panel beeps twice: the system is restored to default setings. Stored phone numbers and accessories will also be deleted.
- Page 24 Important: before using for the first time Save a phone number for SMS notifications. (Refer to instructions on next page of this manual). Insert a SIM Card in the control panel before starting SMS operations. Make sure the SIM Card does not require any PIN code. Each SMS operation defined in this user manual will be illustrated as follows.
- Page 25 Home Mode Send: Settings Enquiry Send: Note: The value of default settings will be changed after having set up the system. Store Phone Numbers Send:...
- Page 26 Copy, paste, then Edit (case sensitive): Change Zone Name Send “91~99”. For example for zone 1, send: Copy, paste, then Edit (case sensitive): Note: Zone 1 to 9 can be renamed. The name of the zone cannot consist of more than 30 Latin characters per line due to SMS character limit.
- Page 27 SMS Alert for Accessory Low Battery (available for two-way accessories such as Motion Detectors) For accessories assigned to zones that have been renamed, as SMS will be sent under the format “Zone name + low battery”. For accessories assigned to zones that have not been renamed, an SMS will be sent under the format “Zone number + low battery”.
- Page 28 Note: This function can be used if you do not want to bring a remote control or RFID tag with you. When the system is armed, you hear one beep every second to remind you to leave. The beep rhythm speeds up during the last 10 seconds.
- Page 29 Copy, paste, then Edit (case sensitive): Set Ringing Times Send: Copy, paste, then Edit (case sensitive): This function enables you to define the number of times the control panel rings before taking the call. Ring times can be set from 0 to 9. When set to 0, the alarm system will not ring when being called.
- Page 30 Copy, paste, then Edit (case sensitive): The number of call repetitions can be set from 1 to 9. Delete all Wireless Accessories Send: Change System Language Send the code of the language. For example, for English, send “0001”. Refer to the table below for the full list of languages: 0001 English 0008 German 0002 French...
- Page 31 will also be deleted. Only stored numbers can send the SMS to restore factory settings. WIRELESS REMOTE CONTROL Disarm LED indicator Home Mode Arm the system Press the Arm button to arm the alarm system. The LED indicator lights up (the siren rings out once).
- Page 32 Emergency Mode Regardless the status of the system, the alarm is triggered when the SOS button “SOS” is pressed on the remote control. At the same time, the control panel sends a notification by SMS and dials the pre-stored phone numbers.
- Page 33 1. LED Indicator 2. Detection window 3. Bracket PCB Layout Alarm zone setup LED working indicator Tamper switch * Antenna Infrared sensor ** AA 1.5V LR6 * Tamper switch When the alarm system is armed, the tamper switch will trigger the alarmi f the case is opened. ** Infrared sensor Detects the infrared rays released by human body motion.
- Page 34 Press the Connection button at the back of the control panel to enter the Connection mode. Press the connect button at the back of the motion sensor or trigger the sensor (by moving in front of it). Installation Avoid mounting the detector close to windows, air conditioner, heater, refrigerator, oven, sunshine and places where the temperature changes fast or where the air steam flows frequently.
- Page 35 Power supply Static current ≤30uA DC 3V (AA 1.5V LR6 Batteries x2) Alarm current Detection scope ≤15mA 8m / 110° Operating distance Radio-frequency ≤80m (in open area) 315MHz/433MHz (±75kHz) Housing material Operating conditions ABS Plastic Temperature : -10°C~55°C Relative Humidity: ≤80% (non-condensing) Detector dimensions Bracket dimensions 107x53x32 mm...
- Page 36 Bracket dimensions 45x19x17.5 mm REGISTER AN ADDITIONAL SIREN The control panel of the Z2 features a built-in 100dB siren. Your Zodiac security system supports additional indoor and/or outdoor sirens so to enable you to extend your system according to your needs.
- Page 37 To register an additional Zodiac Siren, refer to the instructions provided in the manual that comes with your siren. TROUBLESHOOTING AND SAFETY INSTRUCTIONS Issue Cause of malfunction Solution The control panel is switched off Turn the power on No response following...
- Page 38 In compliance with European laws. This device has been tested and found to comply with Directive 1999/5 / EC of the European Parliament and the European Commission, about radio equipment and telecommunications and their mutual recognition. The declaration of conformity is available at the headquarters of the manufacturer This product was designed and manufactured in compliance with Directive 2011/65/EC of the European Parliament and of the Council on the restriction of use of certain hazardous substances in electrical and electronic equipment (RoHS Directive - RoHS) and is deemed to comply with the maximum concentration values set by the European...
Need help?
Do you have a question about the Z2 and is the answer not in the manual?
Questions and answers
Non riesco a massaggiare **** la base