
Related Manuals for Heat Line Solaris 30PC


Summary of Contents for Heat Line Solaris 30PC
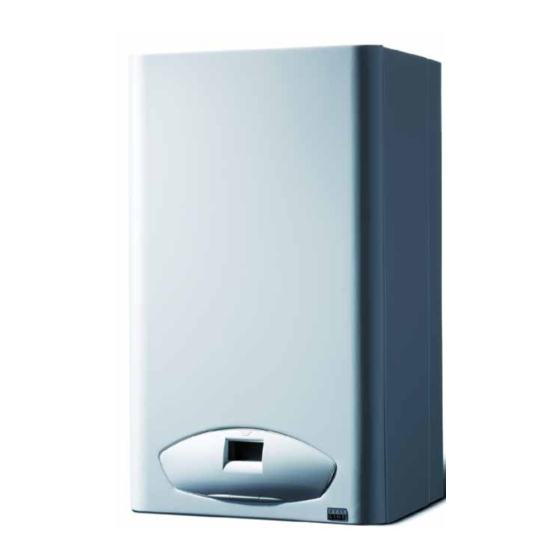
- Page 1 solaris 24PC, 30PC solaris 24PC 30PC Pre-Mix Condensing Combination Boiler Installation, Servicing & User Instructions...
- Page 2 Solaris 24PC G.C.No 47-157-04 Solaris 30PC G.C.No 47-157-05 'Benchmark' Log Book, Boiler Registration & SEDBUK The Heat Line™ range of heating boiler are manufactured from high quality materials, enabling reliability and As part of the industry-wide initiative the boiler comes complete optimum performance.
-
Page 3: Table Of Contents
solaris 24PC, 30PC Contents Section Page Section Page Preface 15. Onboard Adjustments 1. Installation Regulations 16. Safety Devices 2. Technical Data 17. Routine Servicing 3. Boiler Characteristics 18. Component Replacement 4. Operation 19. Gas Type Conversion 5. General Installation 20. Fault Finding Chart 6. -
Page 4: Preface
89/396 EEC (modified from 93/68) The boiler must be installed in accordance with these instructions and the regulations currently in Heat Line™ declares that the materials used in force. Read these instructions carefully before the manufacturer of this appliance are non- installing or using the appliance. - Page 5 solaris 24PC, 30PC The Signs on Box Access, warnings and connections on the boiler The sign of approval. This picture shows the terminal This appliance has been certified block, which is located at the by IMQ Room Thermostat bottom left hand side of the control panel cover, which...
-
Page 6: Installation Regulations
solaris 24PC, 30PC 1. Installation Regulations reserves the right to change any specification 1.1. This appliance must be installed by a of the appliance or make modifications to competent person as defined by the Gas these instructions, which meet current Safety (Installation and Use) Regulations. -
Page 7: Technical Data
solaris 24PC, 30PC 2. Technical Data C ∆T 12.20 14.35 Domestic Water Supply C ∆T 24PC 30PC 14.24 16.73 Output (liters/min.) C ∆T 17.08 20.10 Gas Category Capacity 2H3+ Expansion Vessel (litres) Pre-Charge mbar Gas inlet pressure G20 Expansion Vessel 0·5 (bar) Diameter... - Page 8 solaris 24PC, 30PC Figure 1 1 - D.H.W. Flow Sensor 2 - Water Pressure Sensor 3 -Pump 4 - Pressure Relief Valve 5 - Fan 6 - Air/gas mixer 7 - Air/gas mixer ring 8 - Supply transformer 9 - Expansion Vessel 10- Heat exchanger 11 - Ionisation electrode 12 - Burner...
-
Page 9: Boiler Characteristics
24PC, 30PC 3. Boiler Characteristics. 3.1 The Heat Line boiler is a fan flued, wall- permissible to utilise a non-thermostatic controlled mounted combination boiler that supplies both radiator as a by-pass. central heating and mains fed domestic hot water. Being room sealed the boiler may be 3.7 Room temperature can be controlled by the... -
Page 10: General Installation
solaris 24PC, 30PC continue to flow until the faucet is closed • It is important to keep the boiler clear of dust and the boiler automatically shuts down. during the installation. In particular, do not Note that the pump will continue to run for allow debris to enter the top of the boiler where a further 10secs to dissipate the residual the flue connection is made. - Page 11 solaris 24PC, 30PC 5.2 The boiler is designed to operate on fully • If you are able to obtain hot water but not pumped, pressurised sealed systems operating at a heating it is also advisable to check the maximum of 3bar pressure and maximum design clock connections and that the room flow temperature of 85 thermostat and time clock are calling for...
-
Page 12: Appliance Siting
solaris 24PC, 30PC for air and where possible, the system pipe 5.14 Although the boiler is designed to inhibit the work should have a gradient to ensure any formation of scale, in hard water areas above excess air is carried naturally to other purpose 200mg/l, a proprietary scale reduced should be made, air release points. -
Page 13: Flue Terminal Location
solaris 24PC, 30PC 7. Flue Terminal Location 6.6 A condensate drain pipe must be fitted to allow discharge of condensate to a drain or soakway. Note condensate is acidic and 7.1 The flue terminal must be sited with minimum should be discharged through plastic or clearances as specified in Figure 3. - Page 14 solaris 24PC, 30PC Figure 3 TERMINAL POSITION MINIMUM DISTANCE Directly below an openable window or other opening e.g. air brick 300 mm Below gutters, soil pipes or drain pipes 75 mm Below eaves 200 mm Below balconies or car front roofs 200 mm From vertical drain pipes and soil pipes 150 mm...
-
Page 15: Flue (General)
solaris 24PC, 30PC 8. Flue (General) Note. For each additional 90º elbow used the 8.1 The boiler utilises a concentric flue maximum flue length must be reduced by 1.5 arrangement which consists of a 60mm- m, whilst the use of 2 x 45º bends warrants a diameter inner flue and 100mm-diameter outer reduction of 2m. -
Page 16: Electrical Connections
solaris 24PC, 30PC Figure 6b 9.5 Mains powered thermostats must be connected directly to the mains circuit board as indicated in Figure 8. 9.6 Ensure that the polarity of the mains connection is correct as reversed polarity may cause the appliance to malfunction. 9.7 While the boiler's main PCB, pump, three-way valve and gas valve are supplied at 230V a.c., all other components and associated circuits are... - Page 17 solaris 24PC, 30PC This diagram is illegible and requires that the thermostat connections are clearly marked showing the live terminal of the mains thermostat connection clearly differenciated. Important Note. Connection to the mains electrical supply must be maintained at all times in order to provide domestic hot water, frost protection, anti seizure protection of the pump and pump over-run facility.
-
Page 18: Boiler Installation
solaris 24PC, 30PC Figure 9 10. Boiler Installation A: 430 mm 10.1 Manual Handling: This appliance is B: 128 mm heavy and it is suggested that it should be lifted by two people. When manoeuvring the boiler always use safe techniques truck if possible and obtain assistance if required –... - Page 19 solaris 24PC, 30PC 10.4 Position the supplied template on the 10.7 Mount the boiler onto the fixing bracket via wall, ensuring it is level both vertically and the boiler mounting tabs, (figure 12). horizontally (figure 10). Mark the boiler fixing jig locations (if used), wall bracket fixing 10.8 Connect the isolation valves to the boiler positions and flue outlet position (rear flue...
-
Page 20: Gas Supply
solaris 24PC, 30PC 10.15 The vertical system diagram is shown in If it is not practicable to install the filling loop in figure 15a and 15b. Note: Maximum vertical an obvious position please add a label on the flue length is 8m with a 60/100mm flue boiler to state where the filling loop can be found system. -
Page 21: Filling The System
solaris 24PC, 30PC 12. Filling the System may become contaminated with debris and fail to 12.1 The boiler must not be operated without re-seal. water. Important Note. 12.2 On completion of the boiler installation In order to maintain operation and the appliance’s and ensuring that all water connections are warranty;... - Page 22 solaris 24PC, 30PC Figure 18 1- C.Heating/D.H.W. water temperature and failure code indicator 1- Mechanical Timer 2- C.Heating water pressure value indicator 2- D.H.W. temperature control 3- Flame indication 3- C/Heating temperature control 4- Frost protection indicator 4- Function switch 5- Service computer connection indicator 5- LCD display 6- Failure indicator...
-
Page 23: Commissioning
solaris 24PC, 30PC central heating system to reach maximum 14. Commissioning operating temperature. Check that all the water connections throughout the system are sound and 14.1 The boilers have been tested and pre-set bleed each of the heating systems radiators and at the factory and is dispatched with its on purpose made air release points in turn. -
Page 24: Onboard Adjustments
solaris 24PC, 30PC Potentiometer adjustment cover 15. Onboard Adjustments 15.1 The boiler incorporates 4 potentiometers and a bank of dip switches to allow adjustment to its pre-set parameters. These are situated on the rear of the control panel. (figure 19) DIP SWITCHES POTENTIOMETERS 15.2 Setting the maximum c/heating flow... -
Page 25: Safety Devices
solaris 24PC, 30PC 15.7 Ignition fan ramp. The graduated 16.3 The boiler's control unit has an in-built frost opening of the gas valve for ignition rate is protection device that fires the boiler's burner governed by the 1 potentiometer P7 control, when the temperature of the primary hydraulic which is factory set to 4 o’clock. - Page 26 solaris 24PC, 30PC Figure 23 17.7 Disconnect the electrical leads and gas valve pipe connection from the fan (disconnect at the gas valve taking care not to damage the restrictor), remove the fan securing screws. Figure 26 Figure 27 17.6 Release the hermetic chamber cover by removing the two screws (figure 24) and then lifting the cover to release it from the retaining hooks at the top of the boiler.
- Page 27 solaris 24PC, 30PC Figure 29 17.10 Cleaning the Condensate trap. Extract the bottom part of condensate trap, by turning anti- clockwise. If this is difficult to remove then dependant on which trap is used either use an appropriate spanner or pull off the hose from the bottom of the trap and use an appropriate allen key in the socket provided.
-
Page 28: Component Replacement
solaris 24PC, 30PC Figure 31 18. Component Replacement CAUTION! While there are no substances harmful to health contained within this appliance, some component parts of the boiler (insulation pads, gaskets and rope seals) are manufactured from man made fibres. When damaged or broken these fibres may cause a temporary irritation. - Page 29 solaris 24PC, 30PC 18.7 Printed circuit board (PCB) Turn off and isolate electrical supply. Figure 34 Remove interface cover by lifting the two latches. (figure 33) Remove the electrical connections to the PCB, taking note of where the connections are fitted, by releasing the clips and carefully pulling off the connectors.
- Page 30 solaris 24PC, 30PC Figure 38 Figure 36 Remove the fixing screws on the pump and hydraulic block, located at the bottom right Remove the heat-exchanger after removing the of the boiler. (figure 37) diverter valve as described in section . Figure 37 Remove the pump body assembly.
- Page 31 solaris 24PC, 30PC Remove the fixing brackets on the heat- exchanger shown in figure 40 Figure 41 Remove the gas valve's two securing screws and washers from the bottom side of boiler. Figure 40 Figure 42 Remove the heat exchanger and burner by Rotate the gas pipe and withdraw the gas valve ...
- Page 32 solaris 24PC, 30PC Using a 4mm allen key adjust clockwise: order of removal ensuring the sealing washer to increase the CO setting, anticlockwise: is fitted to the pipe connection before to decrease the CO setting by means of a tightening.
- Page 33 solaris 24PC, 30PC 18.15 Pressure relief valve. Release the pump outlet pipe nut and rotate the pipe for ease of removal. Drain the boiler’s hydraulic circuit as detailed in 18.2. Remove the pump, motor and body together with the flow sensor housing as detailed in Disconnect the discharge pipe on the outlet 18.8.
- Page 34 solaris 24PC, 30PC 18.18 Filter Figure 49 Drain the boiler’s hydraulic circuit as detailed in 18.2. Remove the flow sensor housing as described in 18.8. Disconnect DHW sensor as described in 18.4. Remove the filter on the inlet of the housing. ...
-
Page 35: Gas Type Conversion
solaris 24PC, 30PC 19. Gas Conversion 18.20 Diverter valve Figure 44 Warning Ensure that the electric supply to the boiler is isolated from the mains supply. Gas conversion must be carried out by a competent person as defined in the Gas Safety (Installation Disconnect the electrical connection from ... - Page 36 solaris 24PC, 30PC NOTE: When installing, commissioning or servicing a gas appliance that incorporates a pre-mix burner and zero-set governor, because it is not possible to measure an operating pressure the engineer should first check that the gas supply is metered and ascertain whether it is possible to measure the gas rate.
-
Page 37: Fault Finding Chart
solaris 24PC, 30PC 20. Fault Finding Chart Page 36... - Page 38 solaris 24PC, 30PC Page 37...
- Page 39 solaris 24PC, 30PC Page 38...
-
Page 40: Appendices
solaris 24PC, 30PC Appendix 1 Spare Parts List PART DESCRIPTION ORDER CODE 3003200019 PRESSURE RELIEF VALVE 3003200022 PUMP ASSEMBLY 3002209497 EXPANSION VESSEL 3003200657 GAS VALVE 3003200658 AIR/GAS MIXER 3003200659 AIR/GAS MIXER RING (RED) PLASTIC DROP DOWN DOOR 3003200084 PCB BOX 3003200601 PCB MAIN CONTROL BOARD 3003200662... -
Page 41: User Instructions
solaris 24PC, 30PC SOLARIS 24/30PC Pre-mix Condensing Wall Mounted Combination Boiler User Instructions Page 40... - Page 42 Combination Boiler British Gas Service Listing Solaris 24PC G.C.No 47-157-04 Solaris 30PC G.C.No 47-157-05 The Heat Line™ range of heating boiler are manufactured from high quality materials, enabling reliability and optimum performance. 'Benchmark' Log Book, Boiler Registration & Heat Line™ are committed to the continual development of...
- Page 43 See section 6 for detail. Do not store IMPORTANT INFORMATION. flammable material or liquids near the boiler. The Heat Line™ boiler is a high efficiency gas fired boiler and represents the highest level of technology found in today’s gas boiler market.
- Page 44 solaris 24PC, 30PC within the boiler. DOMESTIC WATER ACCESS TO THE BOILER CONTROLS CENTRAL HEATING MODE: The boiler controls are found behind the control When heating demand is requested the boiler panel door, sited at the bottom of the boiler’s front will fire automatically.
- Page 45 solaris 24PC, 30PC temperature reaches 15 C, the boiler will shut down. Note: This device works irrespective of any room thermostat setting and will protect the boiler, but Figure 5 not necessarily the full system. Ensure that vulnerable sections of the circuit are adequately lagged.
- Page 46 solaris 24PC, 30PC OPERATING THE BOILER FURTHER ADVICE Prior to operating the boiler, check that the For further information or advice (UK) contact pressure reading, on the LCD panel, lies Heatlin between 1 and 2 bar. Service please call: 0870 777 8341 Spares please call: 0870 777 8402 Set the boiler's 'Central Heating' and 'Domestic...
- Page 47 solaris 24PC, 30PC OPERATING THE BOILER FURTHER ADVICE Prior to operating the boiler, check that the For further information or advice (UK) contact pressure reading, on the LCD panel, lies Heatlin between 1 and 2 bar. Service please call: 0870 777 8341 Spares please call: 0870 777 8402 Set the boiler's 'Central Heating' and 'Domestic...
- Page 48 Heatline Nottingham Road, Belper, Derbyshire, DE56 1JT Tel: 01773 596 099 Fax: 01773 828 123 Email: sales@heatline.co.uk...
Need help?
Do you have a question about the Solaris 30PC and is the answer not in the manual?
Questions and answers