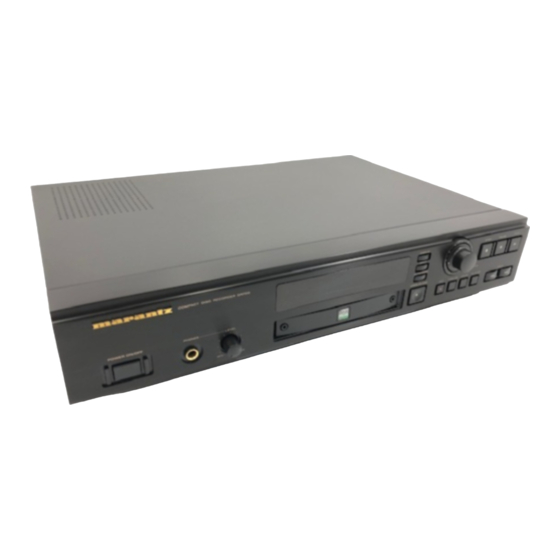
Marantz CDR630 Owner's Manual
Hide thumbs
Also See for CDR630:
- User manual (104 pages) ,
- Service manual (52 pages) ,
- Service manual (52 pages)
Table of Contents
Advertisement
Advertisement
Table of Contents

Summary of Contents for Marantz CDR630
- Page 1 MARANTZ CDR630 MODEL OWNER'S MANUAL...
-
Page 2: Player Front
ERASE....to erase last track or entire CD (flashes in Optical digital input erase-waiting setting) Optical digital output FINALIZE....to finalize recorded CD (flashes in finalize- AC mains voltage selector (only for 74 CDR630/02M waiting setting) and CDR630F H) RECORD....to record (flashes in record-pause setting) Connection to AC mains cord CDSYNC....CDSYNC recording... - Page 3 Unpacking First check the contents of the packaging. It should contain the fol- lowing: Congratulations on the acquisition of your CDR630 CD Recorder. – CD Recorder CDR630 This CD Recorder now enables you to record, play and erase your – Remote control with batteries packaged separately own audio Compact Discs.
-
Page 4: Digital Connections
CONNECTIONS XLR analog connections 1 For recording, connect (using analog balanced cables) the CD Recorder to a source based on the following diagram: The numbers between parentheses refer to the fold-out illus- tration. (PRE-) AMPLIFIER - CD PLAYER - DAT RECORDER This CD Recorder can be used to record directly or through a (pre-) amplifier from any digital or analog audio source. -
Page 5: Using The Recorder
Optical digital connections Using the remote control 1 For recording and playing (using a suitable fibre-optic cable, Inserting the batteries available from your supplier) connect the CD Recorder based 1 Open the battery lid. on the diagram below. To do so, remove the dust caps from the 2 Insert two ‘AAA’... -
Page 6: General Comments
Attention! Never switch the CD Recorder off when recording; this can damage the disc. CD RE If a power failure occurs during recording, the CD CO RD Recorder will attempt to repair the disc as soon as the PO W ER ON /O FF AU TO TRA TOT AL... - Page 7 AUTO TRACK REPEAT 1 TOTAL TRACK TIME CD SYNC AUTO TRACK REPEAT 1 TOTAL TRACK TIME CD SYNC RECORD ANALOG RECORD ANALOG FINALIZE FINALIZE ERASE PROG ERASE PROG RECORDABLE RECORDABLE OVER OVER REWRITABLE REWRITABLE PAUSE PAUSE To set the desired recording level, start playing the analog CXL SRC and OPT SRC are displayed in SRC-on mode (Sample source and adjust the recording level using the record level Rate Conversion).
- Page 8 2 Press the PLAY button (13) to start recording and immediately To start recording start the digital source. 1 To record a single track, press CD-SYNC (10) once to record one track; SYNC-1 will appear on the display. To record all The relevant track number and the recording time used will tracks, press CD-SYNC (10) twice in rapid succession to appear on the display.
-
Page 9: Finalizing A Disc
Attention! 2 From the STOP setting, press the ERASE button (9) once and If you want to play the disc on a different, regular CD then REC (7) within two seconds to erase the last track; TRACK and ‘ERASE’ will appear on the display. player, the disc must be finalized first. -
Page 10: Fixing Problems
R R E E C C O O V V E E R R ..recovery procedure performed automatically after Press R (43) or Q (36) on the remote to search forward or backward at twice the playing speed. power failure during recording. If this procedure fails, the CD-R disc - unlike the CD-RW disc - may Press FAST (45) and then R (43) or Q (36) on the no longer be usable... -
Page 11: Other Information
(such as a ball-point) If the ERROR message appears, your recorder is defective and because this could damage the recording. needs to be repaired. Consult your supplier or call the Marantz Consumer Line to find the nearest service centre. The number •... - Page 12 2 What type of disc should I use? The Marantz CDR630 CD Recorders are developed to record according to the Orange Book specifications. This is the specifica- tion for CD Recorders and CDR-media. Every CDR-disc sold, should perform according to Orange Book specification and there- fore be compatible with our recorder.
- Page 13 NOTAS...


Need help?
Do you have a question about the CDR630 and is the answer not in the manual?
Questions and answers