Advertisement
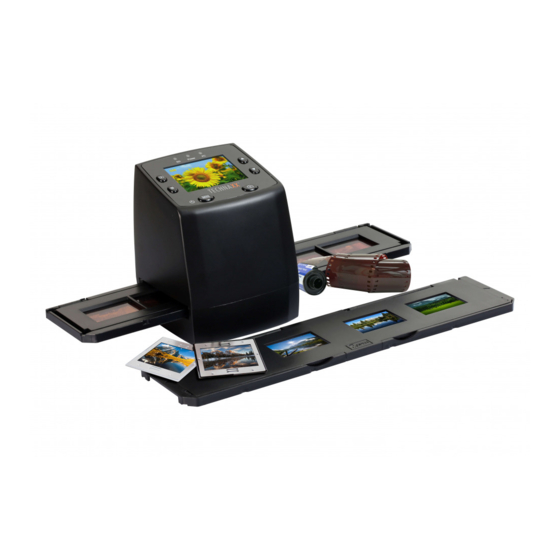
DigiScan DS-02
Portable Digital Image Scanner
User Manual
The Declaration of Conformity for this device is under the
Internet link: www.technaxx.de/
(in bottom bar "Konformitätserklärung"); Before using the
device the first time, read the user manual carefully.
Features
Portable, high-resolution scanner for negative
filmes and slide films
High brilliance of colour (white balance &
exposure compensation are automatically)
5 megapixle CMOS sensor
2.4" TFT display
SD / SDHC card slot up to 32GB
USB 2.0 interface (high speed)
Usable as stand alone device
Also usable with PC [Windows XP + Windows
Vista, Win7 + Win8 (32/64 bit)]
Small, light-weight, handy and easy to use
Advertisement
Table of Contents

Related Manuals for Technaxx DigiScan DS-02

Summary of Contents for Technaxx DigiScan DS-02
- Page 1 DigiScan DS-02 Portable Digital Image Scanner User Manual The Declaration of Conformity for this device is under the Internet link: www.technaxx.de/ (in bottom bar “Konformitätserklärung”); Before using the device the first time, read the user manual carefully. Features Portable, high-resolution scanner for negative filmes and slide films High brilliance of colour (white balance &...
-
Page 2: Description Of Parts
1. Description of Parts Positive Slide Holder 135-Negative Film Holder Rapid Slide Feeder... - Page 3 Cleaning Brush Place the scanner on its side and slide the Note: end of the brush into the opening on the right side. Then you can clean the backlight panel placed in the film scanner. 2. Using the included Holders Place the rapid slide feeder, like shown in the picture, into the FILM HOLDER SLOT.
- Page 4 Loading Slides Hold up the slide toward the light. Face the trademark slide of the slide away from you. The slide should not appear as a mirror image, but „normal“. Turn the the slide on it’s head (but it still need to be shown the same side).
- Page 5 Loading Negatives Hold up the negative toward the light. As you look through the negative, you should be able to read the small negative numbers normally (not a mirror image). Turn the the negative on it’s head (but it still need to be shown the same side).
- Page 6 Proper Operation Sequence (1) Slide or load film/negative film to board holder. (2) Insert board holder to scanner. (3) Connect scanner USB cable to PC. (4) Press button MENU to turn on scanner. (5) Press button SCAN (SMALL CAMERA) to start scanning. (6) Move the bracket by hand, slide for slide or negative for negative.
- Page 7 Capture Picture Once the video frequency is specified, the picture can be taken within 3 seconds. In the main menu select the recording mode to set slide style and EV value. Confirm always with the OK (SMALL CAMERA) button. Resolution Sign to card 00000 Number of scans available...
- Page 8 (1) Image Mirror & (2) Image Rotation (1) When picture is scanned press . The image alters from left to right, is adjusted, then captured. (2) Continue to press . The image alters from up to down, is adjusted, then captured.
-
Page 9: Main Menu
4. Main Menu Enter the main menu by pressing the button MENU. 1. Capture mode: Black/White film, Positive film, Negative film 2. Exposure: Exposure Compensation (EV -2~2) 3. Resolution: 5M /10M 4. Language: English, French, German, ltalian, Spanish, Chinese, Dutch, Japanese. 5. -
Page 10: Capture Mode
5. Capture Mode 6. Slide Style Press the button MENU to enter into main manual to choose slide style on shooting mode. Choose needed image type: 1. Black/White, 2. Positive film, 3. Negative film. -
Page 11: Exposure Compensation
7. Exposure Compensation Press the MENU button to enter the main menu and to select the exposure mode. Then setting exposure value of scanning picture. 8. Resolution 5M or 10M can be chosen after enter into subordinate manual of resolution... - Page 12 9. Language 10. USB MSDC (USB connection) Scanned images on the PC screen A: Connect the USB cable to the PC and turn on the scanner. Then enter to the main menu of the scanner. B: Choose “USB MSDC” storage by UP/DOWN key.
-
Page 13: Technical Specifications
10. Technical Specifications Sensor 1/3.2” 5 mega pixels CMOS Resolution 5 Mega pixels Storage media SD/SDHC card (up to 32GB) Sensitivity Automatically Lens Fixed focus F/6.0, F=6.34mm Focus range 5.6 cm JPEG, Resolution: 5M, 10M Still image (interpolated) Display 2.4” TFT TV output format NTSC / PAL Light source... - Page 14 Package Contents: DigiScan DS-02, USB cable, Video cable, 135-Negative film holder, Positive slide holder, Rapid slide feeder, DC 5V power adapter, Cleaning brush, User Manual Hints Environment Protection: Packages materials are raw materials and can be recycled. Do not disposal old devices into the domestic waste.
Need help?
Do you have a question about the DigiScan DS-02 and is the answer not in the manual?
Questions and answers