Table of Contents
Advertisement
Quick Links
Advertisement
Table of Contents

Related Manuals for Panasonic PT-LM2E


Summary of Contents for Panasonic PT-LM2E
-
Page 1: Operating Instructions
Before operating this product, please read the instructions carefully and save this manual for future use. LCD Projector Commercial Use Operating Instructions Model No. PT-LM2E POWER INPUT VIDEO AUTO MENU SETUP ENTER FREEZE SHUTTER VOLUME D.ZOOM INDEX WINDOW PROJECTOR TQBJ 0175-1... -
Page 2: Important Safety Notice
We hope it will help you to get the most out of your new product, and that you will be pleased with your Panasonic LCD projector. The serial number of your product may be found on its bottom. You should note it in the space provided below and retain this booklet in case service is required. - Page 3 IMPORTANT: THE MOULDED PLUG (U.K. only) FOR YOUR SAFETY, PLEASE READ THE FOLLOWING TEXT CAREFULLY. This appliance is supplied with a moulded three pin mains plug for your safety and convenience. A 13 amp fuse is fitted in this plug. Should the fuse need to be replaced, please ensure that the replacement fuse has a rating of 13 amps and that it is approved by ASTA or BSI to BS1362.
-
Page 4: Table Of Contents
Precautions with regard to safety ...5 Accessories ...9 Before use ...10 Location and function of each part...12 Getting started Setting-up...17 Projection methods, Projector position, Projection distances Connections...19 Connecting to computer, Connecting to video equipment Preparation for the remote control unit...21 Basic Operation Turning on the power...22... -
Page 5: Precautions With Regard To Safety
B Continued use of the projector in this condition may result in fire or electric shocks. B Contact an Authorised Service Centre for repairs. - Page 6 Do not place the projector on top of surfaces which are unstable. B If the projector is placed on top of a surface which is sloped or unstable, it may fall down or tip over, and injury or damage could result.
- Page 7 B Fire or electric shocks can result. Do not look into the lens while the projector is being used. B Strong light is emitted from the projector’s lens. If you look directly into this light, it can hurt and damage your eyes.
- Page 8 B If dust is left to build up inside the projector without being cleaned out, it can result in fire or problems with operation. B It is a good idea to clean the inside of the projector before the season for humid weather arrives. Ask your nearest Authorised Service Centre to clean the projector when required.
-
Page 9: Accessories
Accessories Check that all of the accessories shown below have been included with your projector. Card remote control unit (N2QADC000008 x1) POWER INPUT VIDEO AUTO MENU SETUP ENTER FREEZE SHUTTER VOLUME D.ZOOM INDEX WINDOW PROJECTOR Softcase (TPEP012 x 1) Lithium battery for... -
Page 10: Before Use
When moving the projector, use the accessory softcase. When placing the projector inside the softcase, position it so that the lens is facing upward. Attach the lens cover so that the direction of the “Panasonic” logo becomes as shown in the figure above. Cautions regarding setting-up Avoid setting up in places which are subject to vibration or shocks. -
Page 11: Notes On Use
10 hours or the power is frequently turned on and off. Liquid crystal panel The liquid crystal panel of the projector is built with very high precision technology to provide fine picture details. Occasionally, a few non-active pixels may appear on the screen as fixed points of blue, green or red. -
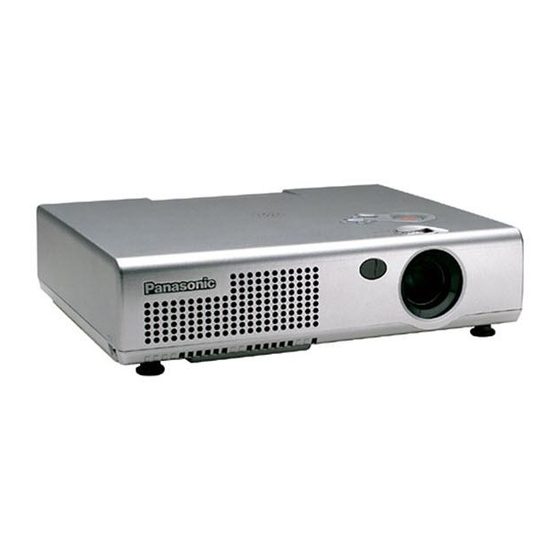
Page 12: Location And Function Of Each Part
# Focus ring (page 23) $ Zoom ring (page 23) % Speaker & Projector control panel (Top) (page 14) ' Remote control unit holder Store the remote control unit as shown in the figure above. ( Leg adjuster buttons (L/R) (page 23) These buttons are used to unlock the front adjustable legs. - Page 13 Projector <Back and bottom> # Connector panel (page 16) $ Air outlet port Do not cover this port. % Air inlet port Do not cover this port. & Lamp unit holder (page 50) ' Front adjustable legs (L/R) (page 23) ( Air inlet port, Air filter (page 49) Do not cover this port.
-
Page 14: Remote Control Unit
Projector control panel & Remote control unit 14-E NGLISH <Top> ˛ POWER INPUT VIDEO AUTO MENU SETUP ENTER FREEZE SHUTTER VOLUME D.ZOOM INDEX WINDOW PROJECTOR Menu operation <on connector panel:page 16>... - Page 15 $ TEMP indicator (page 47) This indicator illuminates if an abnormally high temperature is detected inside the projector or around it. If the temperature rises above a certain level, the power supply will be turned off automatically and the indicator will flash.
-
Page 16: Connector Panel
Connector panel # Menu operation (on connector panel) (page 14) $ RGB IN connector (pages 19 and 20) This connector is used to input RGB signals and YP % S-VIDEO IN connector (pages 20 and 39) This connector is used to input signals from a S-VIDEO-compatible equipment such as a video deck. -
Page 17: Setting-Up
Setting-up Projection methods In way of installing projector, any one of the following four projection methods are used. Select whichever projection method matches the setting-up method. (The projection method can be set from the “OPTION2” menu. Refer to page 43 for details.) -
Page 18: Projector Position
Projector position Top edge of screen Screen Bottom edge of screen Screen Projection distances Screen size (4:3) Diagonal Height length (SH) 0.84 m(33˝) 0.50 m(1´7˝) 1.01 m(40˝) 0.61 m(2´) 1.27 m(50˝) 0.76 m(2´6˝) 1.52 m(60˝) 0.91 m(3´) 1.77 m(70˝) 1.07 m(3´6˝) 2.03 m(80˝) -
Page 19: Connections
In such cases, it will be necessary to connect a TBC (time base corrector). B Refer to the list on page 58 for details on compatible signals which can be input to the projector. B Only one audio system circuit is available for the AUDIO IN L-R jacks, so if you change the audio input source, you will need to remove and insert the appropriate plugs. -
Page 20: Connecting To Video Equipment
Connecting to video equipment D-sub15-pin (male) - BNCx5 (male) adapter cable Red (connect to P Blue (connect to P Green (connect to Y signal connector) BNC/RCA adapter NOTE: B If the signal cables are disconnected or if the power supply for the computer or video deck is turned off while “D.ZOOM”(digital zoom) or “INDEX WINDOW”... -
Page 21: Preparation For The Remote Control Unit
Place the projector as far away from light sources as possible. B If facing the remote control unit toward the screen to operate the projector, the operating range of the remote control unit will be limited by the amount of light reflection loss caused by the characteristics of the screen used. -
Page 22: Turning On The Power
BThe power indicator on the projector will illuminate red. Press the POWER button. BThe power indicator on the projector will flash green. After a short period, the indicator will illuminate green, and a picture will be projected. Turn on the power of all connected devices. -
Page 23: Input Signal
BA picture will be projected in accordance with the selected input signal. BWhen a YP instead of “RGB”. Follow the procedure below when you set the projector up first, and when you change the setup place. Adjusting the angle BWhile pressing the adjuster buttons, adjust the forward/back angle of tilt of the projector. -
Page 24: Turning Off The Power
B You can also turn off the power by pressing the POWER button twice or by holding it down for at least 0.5 seconds. B When the projector is in standby mode (the power indicator on the projector is illuminated red), the projector continues to draw approximately 5 W of power even when the cooling fan has stopped. -
Page 25: Direct Power Off Function
B Do not put the projector in a bag while the cooling fan is operating. CAUTION If not using the projector for an extended period of time, disconnect the mains plug from the mains socket. -
Page 26: Correcting Keystone Distortion And Automatic Positioning
Correcting keystone distortion and automatic positioning (AUTO SETUP) This projector detects its degree of tilt and the input signal. Keystone distortion and the position of the image can then be corrected automatically in accordance with the input signal. POWER INPUT... -
Page 27: Turning Off The Picture And Sound Momentarily
(SHUTTER) The “SHUTTER” function can be used to momentarily turn off the picture and sound from the projector when the projector is not being used for short periods of time, such as during breaks in meetings or when carrying out preparation. -
Page 28: Enlarging The Picture
VOLUME D.ZOOM INDEX WINDOW PROJECTOR The remote control unit functions during D.ZOOM (digital zoom) Press the F,G,IandHbuttons to move the enlarged area which you want to project. Press the D.ZOOM +/- buttons to change the enlargement ratio. Press the MENU button to return to the normal screen. -
Page 29: Displaying Two Screens
SETUP ENTER FREEZE SHUTTER VOLUME D.ZOOM INDEX WINDOW PROJECTOR The remote control unit functions during INDEX WINDOW Press the F or G button to select a screen size. It can switch to three stages. Still Moving picture picture Press the I I or H H button to switch between the still picture screen and moving picture screen. -
Page 30: On-Screen Menus
On-screen menus Menu screens The various settings and adjustments for this projector can be carried out by selecting the operations from on-screen menus. The general arrangement of these menus is shown below. MAIN MENU M E N U K E Y S T O N E... - Page 31 POSITION menu (page 38) When an RGB/YP signal is being input P O S I T I O N P O S I T I O N D O T C L O C K C L O C K P H A S E A S P E C T 4 : 3 R E S I Z I N G...
-
Page 32: Menu Operation Guide
INPUT VIDEO AUTO MENU SETUP ENTER FREEZE SHUTTER VOLUME D.ZOOM INDEX WINDOW PROJECTOR Menu operation (on connector panel) NOTE: B Press the MENU button to return to the previous screen. 32-E NGLISH # Press the MENU button. The “MAIN MENU”... -
Page 33: Returning A Setting To The Factory Default
“STANDARD” from the menu screen and then press the ENTER button. Unavailable on-screen menu items This projector has unadjustable items and unusable functions depending on the signal being input. When an item cannot be adjusted or a function cannot be used, the... -
Page 34: Correcting Keystone Distortion
However, the greater the correction amount, the more the picture quality will deteriorate, and the harder it will become to achieve a good level of focus. To obtain the best picture quality, set up the projector and screen in such a way that the amount of keystone correction required is as minimal as possible. -
Page 35: Adjusting The Picture
Adjusting the picture Press the F or G button on the projector or remote control unit to select an item, and then press the I or H button to change the setting. For items with bar scales, press the ENTER button or the I or H button... -
Page 36: White Balance R/G/B, Ai
TV system. NOTE: B When set to “AUTO”, the projector automatically distinguishes between NTSC/NTSC 4.43/PAL/PAL60/ PAL-M/PAL-N/SECAM signals. O F F A U T O N T S C N T S C 4 . -
Page 37: Still Mode
STILL MODE S T I L L M O D E O F F To reduce flickering of still images (vertical flicker), set “STILL MODE” to “ON”. NOTE: B Do not set “STILL MODE” to “ON” when playing back moving images. SIGNAL MODE (RGB/YP only) -
Page 38: Adjusting The Position
SETUP” is carried out, adjust by the following procedure. Press the F or G button on the projector or remote control unit to select an item, and then press the I or H button to change the setting. For items with bar scales, press the... - Page 39 16:9 which include a detector signal. This detector signal is output by some sources such as wide-vision video decks. B When “ASPECT” is set to “AUTO”, the projector recognizes the detector signal and automatically switches the aspect ratio to 16:9. When a 4:3 signal is being input.
-
Page 40: Frame Lock
Keep this in mind when selecting the aspect ratio. B If using this projector in places such as cafes or hotels to display programmes for a commercial purpose or for public presentation, note that if... -
Page 41: Changing The Display Language
Changing the display language Press the F or G button on the projector or remote control unit to select a language, then press the ENTER button to accept the setting. L A N G U A G E E N G L I S H... -
Page 42: Option Settings
AUTO KEYSTN This should normally be set to “ON”. R E T R N During “AUTO SETUP”, the angle of tilt of the projector is detected and keystone distortion is corrected automatically. Use this setting when you do not want automatic keystone correction to be carried out during “AUTO... -
Page 43: Sxga Mode
B L A C K This sets the colour which is projected onto the screen when no signal is being input to the projector. FRONT/REAR F R O N T / R E A R F R O N T... -
Page 44: Lamp Runtime, Func
“ON” by using the remote control unit. AUTO POW.OFF If no signal is input to the projector for the duration of the period you set, the projector will return to standby mode. The period can be set from 15 minutes to 60 minutes in 5 minute intervals. -
Page 45: Setting Up The Security Function
Setting up the security function This projector is equipped with a security function. A password input screen can be displayed, or a company URL can be set up and displayed at the bottom of the projected image. Press the F or G button on the projector or remote control unit to select “SECURITY”, then press the... -
Page 46: Text Display/Change
NOTE: B The entered password will appear as . It will not be displayed on the screen. B If you enter the wrong password, the letters “PASSWORD” and “NEW” will become red. Enter the correct password again. 46-E NGLISH TEXT DISPLAY The setup letters can be displayed at the bottom of the projected image while an image is projected. -
Page 47: When The Temp Indicator And The Lamp Indicator Are Illuminated
problem. - Page 48 Problem unit. B Does “REPLACE LAMP” appear on Possible the screen after cause the projector is turned on? B This occurs when the operation time for the lamp unit is nearing 1 800 hours (when “LAMP POWER”...
-
Page 49: Cleaning And Replacing The Air Filter
Cleaning and replacing the air filter If the air filter becomes clogged with dust, the internal temperature of the projector will rise, the TEMP indicator will flash and the projector power will turn off. The air filter should be cleaned every 100 hours of use. -
Page 50: Replacing The Lamp Unit
B A Phillips screwdriver is necessary for removing the lamp unit. NOTE: B The projector is not supplied with a replacement lamp unit. Please ask your dealer for details. Lamp unit product no.: ET-LAM1 CAUTION:... -
Page 51: Lamp Unit Replacement Procedure
B If the lamp usage time has passed 2 000 hours (when “LAMP POWER” has been set to “HIGH”), the projector will switch to standby mode after approximately 10 minutes of operation. The steps ) to - on the next page should thus be completed within 10 minutes. -
Page 52: The Screen
NOTE: B If the mains lead was disconnected during projection when the projector was used the last time, projection will start after the mains lead is connected (when “POWER MEMORY” in the “OPTION2” menu is set to “ON”). -
Page 53: Before Calling For Service
B The lens cover may still be attached to the lens. fuzzy. B The lens focus may not have been set correctly. B The projector may not be at the correct distance from the screen. B The lens may be dirty. - Page 54 B There may be a problem with the video tape or other signal source. B A signal which is not compatible with the projector may be being input. Picture from B The cable may be too long. computer does B The external video output for the laptop computer not appear.
-
Page 55: Cleaning And Maintenance
Cleaning and maintenance Before carrying out cleaning and maintenance, be sure to disconnect the mains plug from the mains socket. Wipe the cabinet with a soft, dry cloth. If the cabinet is particularly dirty, soak the cloth in water with a small amount of neutral detergent in it, squeeze the cloth very well, and then wipe the cabinet. -
Page 56: Specifications
Specifications Power supply: Power consumption: Amps: LCD panel: Panel size (diagonal): Aspect ratio: Display method: Drive method: Pixels: Lens: Lamp: Luminosity: Scanning frequency (for RGB signals): Horizontal scanning frequency: 15 kHz – 91 kHz Vertical scanning frequency: 50 Hz – 85 Hz Dot clock frequency: signals: Colour system:... - Page 57 VIDEO IN: S-VIDEO IN: AUDIO IN: Cabinet: Dimensions: Width: Height: Length: Weight: Operating environment: Temperature: Humidity: Certifications: <Remote control unit> Power supply: Operating range: Weight: Dimensions: Width: Length: Height: <Options> Ceiling bracket Wireless remote control unit Single-line, RCA pin jack 1.0 V [p-p], 75 Ω...
-
Page 58: Appendix
Appendix List of compatible signals Display Mode resolution (dots)* NTSC/NTSC4.43/ 720 x 480i PAL-M/PAL60 PAL/PAL-N/SECAM 720 x 576i 525i 720 x 480i 625i 720 x 576i 525p 720 x 483 625p 720 x 576 HDTV60 1 920 x 1 080i HDTV50 1 920 x 1 080i 750p... -
Page 59: Connector Pin Wiring, Projection
Connector pin wiring B The pin layout and signal names for the S-VIDEO IN connector are shown below. & External view B The pin layout and signal names for the RGB IN connector are shown below. External view Pin & and + are spare. Pins ' –... -
Page 60: Dimensions
Dimensions 63.5(2-1/2) 257(10-3/32) Trademark acknowledgements B VGA and XGA are trademarks of International Business Machines Corporation. B Macintosh is a registered trademark of Apple Computer, Inc. B S-VGA is a registered trademark of the Video Electronics Standards Association. All other trademarks are the property of the various trademark owners. 60-E NGLISH <Units: mm (inch)>...