Table of Contents
Advertisement
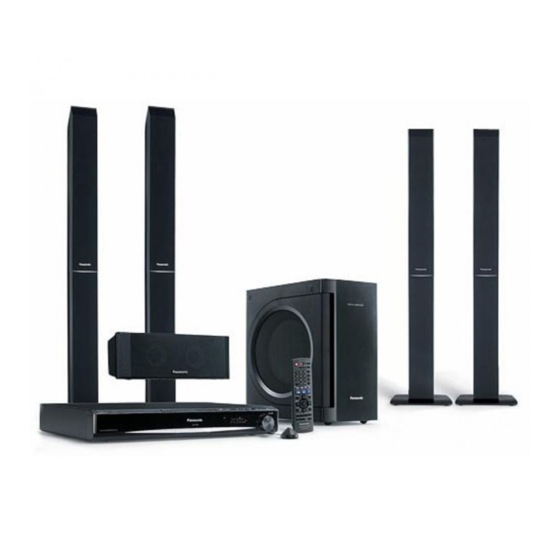
The illustration shows SC-PT560.
The illustrations shown may differ from your unit.
Region number
The player plays DVD-Video marked with labels
containing the region number "2" or "ALL".
Example:
2
ALL
[EB]
2
3
5
Operating Instructions
DVD Home Theater Sound System
Model No.
VIERA Link compatible
28
Enjoy high-quality picture and linked
operations with your VIERA TV.
Sound enhancement
options
31
Surround Enhancer, Dolby Pro
Logic II, and more.
iPod connectivity
35
Enjoy iPod music through the
speakers, view iPod photos or
videos on the TV.
Before connecting, operating or adjusting this
product, please read the instructions completely.
Please keep this manual for future reference.
[Note[
"EB" on the packaging indicates the United Kingdom.
SC-PT560
SC-PT860
RQTX0100-2B
Advertisement
Table of Contents

Related Manuals for Panasonic SC-PT860


Summary of Contents for Panasonic SC-PT860
-
Page 1: Operating Instructions
The illustration shows SC-PT560. Operating Instructions DVD Home Theater Sound System SC-PT560 Model No. SC-PT860 The illustrations shown may differ from your unit. VIERA Link compatible Region number Enjoy high-quality picture and linked The player plays DVD-Video marked with labels containing the region number “2”... - Page 2 Dear customer Indicates features applicable to: [] P T560] ] : SC-PT560 only [[ P T860[ ] : SC-PT860 only Thank you for purchasing this product. For optimum performance and safety, please read these instructions System SC-PT560 SC-PT860 carefully. This unit...
-
Page 3: Table Of Contents
TABLE OF CONTENTS Accessories ..... . . 4 step 4 AC mains lead connection ..11 Caution for AC Mains Lead ... 4 step 5 Preparing the Getting Glossary . -
Page 4: Accessories
Fuse cover ≥Most major credit and debit cards accepted. ≥All enquiries transactions and distribution facilities are provided directly by Panasonic UK Ltd. ≥It couldn’t be simpler! ≥Also available through our Internet is direct shopping for 2. Replace the fuse and close or attach the fuse cover. -
Page 5: Glossary
Glossary Decoder I/P/B A decoder restores the coded audio signals on DVDs to MPEG 2, the video compression standard adopted for normal. This is called decoding. use with DVD-Video, codes frames using these 3 picture types. Dolby Digital I: Intra coded picture This is a method of coding digital signals developed by This picture has the best quality and is the best to use Dolby Laboratories. -
Page 6: Step 1 Assembling The Speakers
step Assembling the speakers [[ P T560[ ] Front speakers [PT860] Front speakers and surround speakers Preparation ≥To prevent damage or scratches, lay down a soft cloth and perform assembly on it. ≥For assembly, use a Phillips-head screwdriver. ≥For optional wall mount, refer to page 8. Make sure you have all the indicated components before starting assembly, setup, and connection. -
Page 7: Step 2 Positioning
≥You can damage your speakers and shorten their You can enjoy surround speaker sound wirelessly useful life if you play sound at high levels over when you use the optional Panasonic wireless extended periods. accessory (example: SH-FX67). ≥Reduce the volume in the following cases to avoid For details, please refer to the operating instructions for the optional Panasonic wireless accessory. -
Page 8: Speaker Installation Options
Caution Caution ≥Do not touch the front netted area of the speakers. ≥This unit and the supplied speakers are to be used Hold by the sides. only as indicated in this setup. Failure to do so may e.g. Center lead to damage to the amplifier and/or the speakers, speaker and may result in the risk of fire. -
Page 9: Step 3 Cable Connections
step Cable connections Turn off all equipment before connection and read the appropriate operating instructions. Do not connect the AC mains lead until all other connections are complete. This unit SPEAKERS FM ANT (75 ) SUBWOOFER CENTER FRONT SURROUND Speaker connections Connecting the speakers to this unit: Connect to terminals of the same colour. -
Page 10: Audio And Video Connections
≥Set “VIDEO FORMAT” in Menu 4 (HDMI) (➜22). [[ N ote[ ] AV IN VIERA Link “HDAVI Control” ≥Non-HDMI-compliant If your Panasonic TV is VIERA Link cables cannot be utilized. compatible, you can operate it ≥It is recommended that synchronising with home theater you use Panasonic’s HDMI... -
Page 11: Step 4 Ac Mains Lead Connection
Other audio connections TV or external Cable required This unit terminal Features equipment terminal (not included) [\\\\\\OPTICAL\IN\\\\] This unit can decode the surround signals Optical digital audio cable received through the set top box, digital broadcasting or satellite broadcasts. Refer to your equipment’s operating instructions ≥Do not bend sharply when for details. -
Page 12: Step 6 Performing Quick Setup
step Performing QUICK SETUP The QUICK SETUP screen assists you to make necessary settings. Preparation Turn on the unit. Turn on your TV and select the appropriate video input mode (e.g. VIDEO 1, AV 1, HDMI, etc.). Select “DVD/CD”. ≥To change your TV’s video input mode, refer to its operating Show the setup menu. -
Page 13: Stations
step Presetting the radio stations Confirming the preset channels TV/AV iPod/USB Select “FM”. FM/EXT-IN ≥This unit: FM/EXT-IN FM/EXT-IN Press [SELECTOR]. ONE TOUCH PLAY Numbered buttons Select the channel. CANCEL ≥To select a 2-digit number SKIP SLOW/SEARCH e.g. 12: [S10] ➜ [1] ➜ [2] STOP PAUSE PLAY... -
Page 14: Control Reference Guide
< Select sound effect to set / Turn Whisper-mode Surround on/off (➜31) TOP MENU START = TV operations Aim the remote control at the Panasonic TV and DIRECT press the button. NAVIGATOR [Í]: Turn the TV on/off [TV/AV]: Change the TV’s video input mode... -
Page 15: Utilising The Start Menu
AC IN OPEN CLOSE BOOST SELECTOR TUNE TUNE MODE FM MODE MEMORY VOLUME 1 Standby/on switch [Í/I] 8 Play discs / Memorize the receiving radio stations Press to switch the unit from on to standby mode or (➜16, 30) vice versa. In standby mode, the unit is still 9 Connect USB device (➜34) consuming a small amount of power. -
Page 16: Basic Play
Basic play Preparation To display the picture, turn on your TV and select its video input mode (e.g. VIDEO 1, AV 1, HDMI, etc.) to suit the connections to this unit. Using this unit SELECTOR Turn on the unit. Select “DVD/CD”. (Stop) VOLUME , + VOLUME... -
Page 17: Using The Remote Control
If you are experiencing problems, refer to troubleshooting (➜ 38 to 41). Using the remote control Select TV/AV iPod/USB On-screen — FM/EXT-IN item select ONE TOUCH PLAY Numbered ONE TOUCH PLAY buttons Confirm CANCEL SKIP SLOW/SEARCH SLOW/SEARCH SKIP [DVD-VR] [DVD-V] [VCD] [CD] STOP PAUSE PLAY... -
Page 18: Other Playback Functions
Other playback functions Program play (up to 30 items) CANCEL CANCEL Select an item. SKIP SLOW/SEARCH e.g. [DVD-V] STOP PAUSE PLAY STOP PLAY DVD-V PROGRAM SELECT TITLE TITLE CHAP. TOP MENU START TITLE 1 TITLE 2 TITLE 3 TITLE 4 DIRECT NAVIGATOR MENU... -
Page 19: Using Navigation Menus
Using navigation menus ∫ Selecting the picture in Thumbnail menu [JPEG] TV/AV iPod/USB While a picture e.g. Group and FM/EXT-IN is displayed content number Group name ONE TOUCH PLAY TOP MENU JPEG images DIRECT CANCEL NAVIGATOR SKIP SLOW/SEARCH SKIP STOP PAUSE PLAY STOP... -
Page 20: Using On-Screen Menus
Using on-screen menus Items shown differ depending on the type of disc. ∫ Menu 1 (Disc/Play) TV/AV iPod/USB To start from a specific item FM/EXT-IN TRACK SEARCH ≥[VCD] This does not work when using Numbered ONE TOUCH PLAY TITLE SEARCH buttons playback control. - Page 21 ∫ Menu 2 (Video) [DVD-VR] [DVD-V] To change play speed NORMAL –from “k0.6” to “k1.4” (in 0.1-unit CINEMA1: Mellows images and steps) enhances detail in dark ≥Press [1 PLAY] to return to normal scenes. play. CINEMA2: Sharpens images and ≥After you change the speed enhances detail in dark –Dolby Pro Logic II has no effect.
- Page 22 Using on-screen menus ∫ Menu 3 (Audio) Confirming HDMI information e.g. To make the dialogue in movies HDMI --- INFORMATION easier to hear CONNECTED STATE CONNECTED AUDIO STREAM [DVD-V] (Dolby Digital, DTS, MPEG, MAX CHANNEL DIALOGUE 3-channel or higher, with the dialogue VIDEO FORMAT 720p ENHANCER...
-
Page 23: Changing The Player Settings
Changing the player settings Show the setup menu. SETUP Menu MAIN DISC VIDEO AUDIO TV/AV DISPLAY iPod/USB HDMI OTHERS FM/EXT-IN ONE TOUCH PLAY RETURN EXIT : SETUP Select the menu. CANCEL Display the current SKIP SLOW/SEARCH setting of the items below STOP PAUSE PLAY... - Page 24 Changing the player settings QUICK SETUP enables successive settings of the items in the shaded area. ∫ “DISC” menu (continued) [SETTING] ≥ PASSWORD Change the password for “RATINGS”. To change ratings (When level 0 to 7 is selected) ≥CHANGE: Follow the on-screen instructions. ∫...
- Page 25 QUICK SETUP enables successive settings of the items in the shaded area. ∫ “AUDIO” menu [BITSTREAM] § ≥ Select to suit the type of equipment you connected to the DOLBY DIGITAL ≥PCM HDMI AV OUT terminal. [BITSTREAM] § ≥ Select “BITSTREAM” when the equipment can decode the ≥PCM bitstream (digital form of 5.1 channel data).
- Page 26 Changing the player settings QUICK SETUP enables successive settings of the items in the shaded area. ∫ “HDMI” menu [ON] ≥ VIDEO PRIORITY : When using the HDMI AV OUT terminal for video output. The resolution of the video output from the HDMI AV OUT terminal is optimized according to the capability of the connected equipment (e.g.
-
Page 27: Selecting The Delay Time Of The Speakers
Selecting the delay time of the speakers (Effective when playing 5.1-channel sound) a Center speaker b Surround speaker (Center and surround speakers only) Difference Difference For optimum listening with 5.1-channel sound, all the Setting Setting (Approx.) (Approx.) speakers, except for the subwoofer, should be the same 30 cm 1 ms 150 cm... -
Page 28: Using The Viera Link
VIERA Link “HDAVI Control” is a convenient function that Start disc playback. ONE TOUCH PLAY offers linked operations of this unit, and a Panasonic TV This unit’s speakers will be (VIERA) under “HDAVI Control”. You can use this automatically activated (➜29). -
Page 29: Speaker Control
Speaker control VIERA Link Control only with TV’s remote control [for “HDAVI Control 2 (or later)”] You can select whether audio is output from this unit’s speakers or the TV speakers by using the TV menu You can control the playback menus of this unit with the settings. -
Page 30: Enjoying The Fm Radio
Enjoying the FM radio FM/EXT-IN RDS broadcasting FM/EXT-IN ONE TOUCH PLAY Numbered The unit can display the text data transmitted by the radio buttons data system (RDS) available in some areas. CANCEL If the station you are listening to is transmitting RDS SKIP SLOW/SEARCH signals, “RDS”... -
Page 31: Using Sound Effects
Using sound effects ∫ Real Center Focus (Effective when playing audio containing center channel sound or when Dolby Pro Logic II is on.) TV/AV iPod/USB You can make the sound of the center speaker seem FM/EXT-IN like it is coming from within the TV. ONE TOUCH PLAY R.C.FCS ON,------.R.C.FCS OFF CANCEL... -
Page 32: Adjusting The Subwoofer Level
Using sound effects Adjusting the speaker level You can adjust the surround sound levels. TV/AV iPod/USB Preparation FM/EXT-IN ≥Press [i ,` VOL] to adjust the volume to normal ONE TOUCH PLAY listening level. ≥Select “TEST TONE” from “SPEAKER SETTINGS” in CANCEL “AUDIO”... -
Page 33: Adjusting The Speaker Output Level Automatically: Auto Speaker Setup
Adjusting the Speaker output level Manufactured under license from Dolby Laboratories. Dolby, Pro Logic, and the double-D symbol are automatically: Auto speaker setup trademarks of Dolby Laboratories. [PT860] (For only) The speaker level settings can be optimized to “DTS” and “DTS Digital Surround” are registered accommodate your room’s listening conditions so that trademarks of DTS, Inc. -
Page 34: Operating Other Equipment
MP3 (Extension: “.mp3”, “.MP3”) 2 While the selected mode is displayed WMA (Extension: “.wma”, “.WMA”) Press [3, 4] to make the setting. MAIN/SAP mode (Only works with Dolby Dual Mono) § For Panasonic D-Snap/DIGA § § MAIN, SAP , MAIN+SAP (stereo audio) [[ N ote[ ] §... -
Page 35: Using The Ipod
§2 To select repeat modes Using the iPod Press and hold [—REPEAT] and then press the button repeatedly within 3 seconds. Preparation Each time you press the button: ≥To view photos/videos from the iPod : Repeat 1 track –Ensure the video connection to the SCART (AV) : Repeat all terminal on this unit and select “VIDEO/YPbPr”... -
Page 36: Discs That Can Be Played
Discs that can be played Commercial discs Indicated in these Disc Logo Remarks instructions by [DVD-V] DVD-Video High quality movie and music discs Music discs with video [VCD] Video CD Including SVCD (Conforming to IEC62107) [CD] Music discs — Recorded discs (±: Playable, : Not playable) Recorded on a DVD Recorded on a personal... -
Page 37: Maintenance
∫ Tips for making data discs Format Disc Extension Reference ≥Compatible compression rate: between 48 kbps and 320 kbps [WMA] CD-R/RW “.WMA” ≥You cannot play WMA files that are copy-protected. “.wma” ≥This unit does not support Multiple Bit Rate (MBR: an encoding process for audio content that produces an audio file encoded at several different bit rates). -
Page 38: Troubleshooting Guide
Troubleshooting guide Before requesting service, make the following checks. If you are in doubt about some of the check points, or if the solutions indicated in the chart do not solve the problem, consult your dealer for instructions. Power ≥Insert the AC mains lead securely. No power. - Page 39 General operation ≥This unit cannot play discs other than the ones listed in these operating No response when any buttons are pressed. instructions. ≥The unit may not be operating properly due to lightning, static electricity or — some other external factor. Turn the unit off and then back on. Alternatively, turn the unit off, disconnect the AC mains lead, and then reconnect it.
- Page 40 Troubleshooting guide Sound ≥Noise may occur when playing WMA. Sound is distorted. — ≥When using the HDMI output, audio may not be output from other terminals. — ≥Some audio effects do not work or have less effect with some discs. Effects do not work.
- Page 41 iPod operation ≥Check that the iPod is connected firmly. Cannot charge or operate. ≥The battery of the iPod is depleted. Charge the iPod, and then operate again. — ≥Ensure the video connection to the SCART (AV) terminal on this unit and Cannot display iPod select “VIDEO/YPbPr”...
-
Page 42: Specifications
Specifications §1 Conforming to IEC62107 AMPLIFIER SECTION §2 MPEG-1 Layer 3, MPEG-2 Layer 3 RMS Output Power: Dolby Digital Mode §3 Windows Media Audio Ver.9.0 L3 125 W per channel (3 ≠), 1 kHz, 10 % THD Front Ch Not compatible with Multiple Bit Rate (MBR) Surround Ch §4 Exif Ver 2.1 JPEG Baseline files... - Page 43 [Subwoofer\SB-HW560] SPEAKER SECTION Type 1 way, 1 speaker system (Kelton type) [Front\speakers\SB-HF560] Impedance 6 ≠ Speaker unit(s) Type 1 way, 1 speaker system (Bass reflex) 1. Woofer 16 cm Cone type Impedance 3 ≠ Speaker unit(s) 2. Passive Radiator 25 cm Full range 6.5 cm Cone type Input power (IEC)
-
Page 44: Safety Precautions
Matsushita Electric Industrial Co., Ltd. Web Site: http://panasonic.net Pursuant to at the directive 2004/108/EC, article 9 (2) Panasonic Testing Centre Panasonic Marketing Europe GmbH Winsbergring 15, 22525 Hamburg, F.R. Germany RQTX0100-2B F1107NP2018...