Table of Contents
Advertisement
Advertisement
Table of Contents

Related Manuals for ALDI md15694


Summary of Contents for ALDI md15694
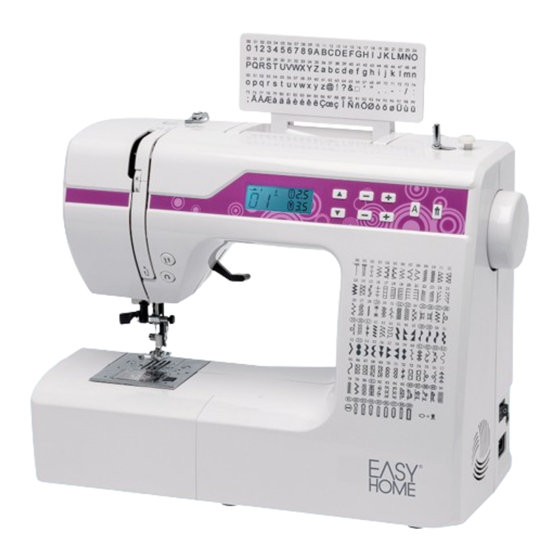
- Page 1 User Manual Spend a little Live a lot. DIGITAL SEWING MACHINE ID: #06000...
-
Page 2: Table Of Contents
Contents Overview ..................... 3 Device parts ..................6 About these operating instructions ..........9 Safety instructions ................11 Getting to know your appliance ............13 Preparatory work ................16 Settings ..................... 24 Sewing ....................26 Maintenance and cleaning ...............40 Faults ....................43 Fabric, thread and needle table............45 Programme selection ...............46 Disposal .....................48 Technical data ...................48... -
Page 6: Device Parts
Device parts Winding thread guide Mounting shaft for second cotton reel holder Thread take-up Needle holding screw Upper thread tension regulator Presser foot holder Display Presser foot release lever Bobbin spindle Presser foot holding screw Winding stop Presser foot Needle end position Fabric feeder Reverse lever Needle... - Page 7 Contents Contents Overview ..............................3 Device Parts ..............................6 About these operating instructions ......................9 Warning symbols and key words used in these operating instructions ............9 Proper use ................................9 Declaration of conformity ............................10 Safety instructions ............................11 Keep electrical equipment out of reach of children ..................11 Mains cable and mains connection ........................11 General information ..............................11 Never carry out repairs yourself .........................
- Page 8 Contents Setting the stitch types ............................29 Decorative stitches ..............................33 Image pattern stitches ............................33 Letter patterns ...............................33 Buttonholes ................................34 Sewing on buttons and hooks and eyes ......................35 Sewing in zips ............................... 36 Gathering ................................37 Appliqué .................................37 Sewing with a twin needle ..........................38 Sewing with the free arm ...........................
-
Page 9: About These Operating Instructions
About these operating instructions About these operating instructions Before using the device for the fi rst time, read these operating instructions thoroughly and follow the safety advice! This device is only to be used as described in the operating instructions. Please keep these instructions in a safe place for future reference. -
Page 10: Declaration Of Conformity
About these operating instructions Declaration of conformity Medion AG hereby declares that the product conforms to the following European requirements: • EMC Directive 2014/30/EC • Low Voltage Directive 2014/35/EC • Ecodesign Directive 2009/125/EC • RoHS Directive 2011/65/EU AFTER SALES SUPPORT www.medion.co.uk 0333 32 13 106 1 800 992508... -
Page 11: Safety Instructions
Safety instructions Safety instructions Keep electrical equipment out of reach of children • This appliance may be used by children over the age of 8 and by persons with reduced physical, sensory or mental abilities or by those without experience and/or knowledge, if they are supervised or have been instructed in the safe use of the device and have understood the potential risks. -
Page 12: Never Carry Out Repairs Yourself
Safety instructions Never carry out repairs yourself WARNING! Risk of electric shock! There is a risk of electric shock if repairs are not carried out by qualifi ed personnel! − Never try to open or repair the product yourself! − In the event of a fault or if the mains cable is damaged, contact the Service Centre or another suitable specialist workshop. -
Page 13: Getting To Know Your Appliance
Getting to know your appliance Getting to know your appliance Package contents When unpacking, ensure that the following parts are included: Sewing machine Table extension with accessories box Mains cable Foot pedal (type ES01FC) The following parts not shown in the diagram: •... -
Page 14: Contents Of The Accessories Box
Getting to know your appliance Contents of the accessories box Selection of needles Twin needle Un-picker Screwdriver (small) Special screwdriver for needle plate Oil can 4 spools (3 in the accessory compartment and 1 prefi tted) Thread arrester Cleaning brush Additional cotton reel holder Zip presser foot Satin stitch foot... -
Page 15: Electrical Connections
Getting to know your appliance Electrical connections Only used the supplied foot pedal model ES01FC. Power switch Connection Mains cable Connection Mains socket Foot pedal Mains cable Connection cable Foot pedal Foot pedal CAUTION! Risk of injury! Inadvertent operation of the foot pedal can lead to a risk of injury. -
Page 16: Preparatory Work
Preparatory work Accessories box The accessories box is integrated into the table extension. To open it, fl ip up the cover of the table extension. This provides access to the accessories inside. Preparatory work Fitting a cotton reel For most cotton reels, you can use the horizontal cotton reel holder . -
Page 17: Removing The Bobbin
Preparatory work Put the end of the thread through the bobbin hole as illustrated and wind the thread around the bobbin a few times by hand. Place the bobbin on the bobbin spindle , with the side of the bobbin containing the end of the thread facing upwards. -
Page 18: Inserting The Bobbin
Preparatory work Inserting the bobbin Hold the bobbin between the thumb and index fi nger and leave about 15 cm of the thread hanging out. Place the bobbin carefully into the bobbin cartridge so that the thread is wound down from the bobbin and the bobbin turns anticlockwise if you pull on the thread. -
Page 19: Threading The Upper Thread
Preparatory work For a better overview, pull the shuttle track ring with the two thread guide notches down again. Threading the upper thread Please read the following instructions carefully as an incorrect sequence or thread guiding can lead to broken threads, missed stitches and gathered fabric. - Page 20 Preparatory work Pass the thread under the front thread guide and upwards, which automatically pushes up the inner guide spring. Then insert the thread from right to left into the hook of the thread take-up If necessary, turn the hand wheel to raise the thread take-up ...
-
Page 21: Representation Of The Upper Thread Guide
Preparatory work Representation of the upper thread guide For a better overview, here is a schematic representation of the course of the upper thread. The numbers represent the sequence of steps during the threading process. AFTER SALES SUPPORT 0333 32 13 106 www.medion.co.uk 1 800 992508... -
Page 22: Auto Threader For The Needle
Preparatory work Auto threader for the needle The sewing machine has an auto threader that will help to thread the upper thread. The auto threader cannot be used for threading a twin needle. Turn the hand wheel to bring the needle into the upper position, if necessary. -
Page 23: Bringing Up The Lower Thread
Preparatory work Move the lever of the threader carefully back to its starting position. The thread hook A pulls the upper thread through the eye of the needle and creates a loop behind the needle. Push the lever of the threader back up again and pull the loop completely through the eye of the needle by hand to completely thread the upper thread. -
Page 24: Settings
Settings Settings Setting the thread tension If the thread tears while you are sewing, the thread tension is too high. If small loops are formed when you are sewing, the thread tension is too low. In both cases, you need to set the thread tension. The tensions of the upper and lower threads must be in the correct proportion to each other. -
Page 25: Checking The Thread Tension
Settings Checking the thread tension Correct stitches The tension of the upper and lower thread should be suffi cient to ensure that the threads interlace in the middle of the fabric. The fabric remains smooth and does not pucker. Bottom Incorrect stitches Upper thread is too tight and pulls the lower thread up. -
Page 26: Sewing
Sewing Sewing General information • Switch the main switch • When changing the stitch type, always move the needle to its highest position. Push the fabric suffi ciently far under the presser foot . Make sure there is a length of around 10 cm of the upper and lower thread behind the needle. -
Page 27: Reverse Stitching/Pattern Completion
Sewing Reverse stitching/ pattern completion Use reverse stitches to reinforce the start and the end of a seam. Reverse stitching with straight stitches, zigzag stitches and buttonholes Press and hold down the reverse button Press the foot pedal – the more pressure you apply to the foot pedal, the faster the machine runs. -
Page 28: Programme Selection
Sewing Programme selection On this sewing machine, you can select a number of different functional Increase and decorative stitches. You can use the programme selection buttons programme number to easily select the stitch pattern you want. Before changing the stitch, always make sure that the needle is at its highest position. -
Page 29: Setting The Stitch Types
Sewing Setting the stitch types You set the stitch types using the programme selection buttons Make sure that the needle is at its highest position before changing the stitch type. Test the stitching on a swatch before using a stitch programme for your actual work. -
Page 30: Display
Sewing Satin stitch Satin stitch, a zigzag stitch in which the stitches are very close together, is particularly suitable for appliqué, monograms, and various decorative stitches. As various programmes can be used for satin stitching, see the programme table in section „Programme selection“ on page 46 for the possible programmes. - Page 31 Sewing Shell hem The shell hem is a mirrored blind stitch for decorative seams. Particularly suitable for fabrics cut on the bias. Presser foot: ....................Standard foot Presser foot indicator: ....................... J Programme: ...........................8 Stitch length: ........................1 to 3 Stitch width: .........................1 to 7 ...
- Page 32 Sewing Diamond stitch or smock stitch The diamond stitch can be used in many different ways and is decorative, e.g. for attaching lace or elastic, or for sewing on stretchy or other elastic materials. Presser foot: ....................Standard foot Presser foot indicator: ....................... J Programme: ......................10 or 32 Stitch length: ......................
-
Page 33: Decorative Stitches
Sewing Decorative stitches Decorative stitches are stitch types with a decorative use similar to scallop stitches. Presser foot: .............standard foot or satin stitch foot Presser foot indicator: ....................J or Z Programme: ......................35 to 90 Stitch length: ......................0.3 to 4 Stitch width: ...................... -
Page 34: Buttonholes
Sewing Buttonholes The sewing machine has fi ve fully automatic buttonhole programmes that sew a buttonhole in a single step. To determine the correct stitch length, breadth and width, we recommend you sew a test buttonhole on a scrap of fabric. Presser foot: ................buttonhole presser foot Presser foot indicator: ......................B Programme: ......................92 to 99... -
Page 35: Sewing On Buttons And Hooks And Eyes
Sewing Buttonholes with yarn reinforcement For buttonholes that are subjected to higher strain, it makes sense to reinforce the buttonhole with a thread (crochet, darning yarn or buttonhole yarn). For buttonholes with darning yarn, use only a buttonhole programme with straight ends. ... -
Page 36: Sewing In Zips
Sewing Sewing buttons with a shank In the case of heavy fabrics, a button shank is often needed. Place a needle or, for a thicker shank, a matchstick on the button and then proceed to sew as for a normal button. ... -
Page 37: Gathering
Sewing Gathering Presser foot: ....................Standard foot Presser foot indicator: ....................... J Programme: ...........................1 Stitch length: .........................4 Stitch width: ..........................3 Reduce the upper thread tension (see Page 24) so that the lower thread lays loosely on the back of the fabric and is looped by the upper thread. -
Page 38: Sewing With A Twin Needle
Sewing Sewing with a twin needle Twin needles are available from well-stocked specialist retailers. When buying a twin needle, make sure that the distance between the two needles is no more than 4 mm. The twin needle can be used to create attractive, two-coloured patterns if you use different coloured threads when sewing. -
Page 39: Sewing With The Free Arm
Sewing Sewing with the free arm The free arm enables you to sew tube-shaped pieces more easily. This function is very useful e.g. when sewing sleeves and trouser legs. You can easily turn your sewing machine into a free-arm machine by removing the table extension and accessories box from the sewing machine. -
Page 40: Maintenance And Cleaning
Maintenance and cleaning Maintenance and cleaning CAUTION! Risk of injury! Inadvertent operation of the foot pedal can lead to a risk of injury. − Once you have fi nished working or before you start maintenance, always turn off and unplug the machine. Changing the needle ... -
Page 41: Removing And Fi Tting The Presser Foot
Maintenance and cleaning Removing and fi tting the presser foot Removing Turn the hand wheel towards you until the needle has reached its top position. Raise the presser foot by pushing up the presser foot lever If you press the presser foot release lever behind the presser foot holder ... - Page 42 Maintenance and cleaning Cleaning and oiling the feeder and the bobbin housing. It is necessary to keep the fabric feeder teeth clean at all times to ensure perfect stitching. Remove the needle and presser foot (see Page 40 f.). ...
-
Page 43: Faults
Faults Faults If faults occur, please read the operating instructions to determine whether you have followed all the instructions correctly. Please only contact our customer services if none of the solutions provided is successful. Malfunction Cause Page Machine does not run smoothly Machine needs to be oiled Page 42 Dust and threads in shuttle track... -
Page 44: Helpful Messages
Faults Malfunction Cause Page Puckering or gathering of seam Upper thread tension too high Page 24 Machine threaded incorrectly Page 19 Needle too large for the fabric Page 45 Thread makes loops Thread tension not adjusted Page 24 Upper thread not threaded correctly Page 18 and/or lower thread not wound onto bobbin correctly... -
Page 45: Fabric, Thread And Needle Table
Fabric, thread and needle table Fabric, thread and needle table As a general rule, fi ne threads and needles are used to sew thin fabrics, thicker threads and needles are used for heavier fabrics. Always test the thread and needle thickness on a scrap of the fabric you intend to use. Use the same thread for needle and bobbin. -
Page 46: Programme Selection
Programme selection Programme selection Stitch programmes Stitch patterns that are marked with an asterisk cannot be sewn with a twin needle. The table below lists all the stitch types and the respective programme number. Programme Number Stitch pattern Programme Number Stitch pattern Programme Number... -
Page 47: Letter Programmes
Programme selection Programme Number Stitch pattern Programme Number Stitch pattern Programme Number Stitch pattern Letter programmes The table below lists all the letters and the respective programme number. Programme Number Stitch pattern Programme Number Stitch pattern Programme Number Stitch pattern L M N O P Q R Programme Number... -
Page 48: Disposal
Disposal Programme Number Stitch pattern z @ ! & ‘ ” Programme Number Stitch pattern · Ä Å Æ à Programme Number Stitch pattern ä å è é ê ë Ç œ ç Ì Programme Number Stitch pattern Ñ ñ Ö Ø ò ö... -
Page 49: Legal Notice
Legal Notice Legal Notice Copyright © 2016 All rights reserved. This operating manual is protected by copyright. Mechanical, electronic and any other form of reproduction is prohibited without the written permission of the manufacturer. Copyright is owned by the company: Medion AG Am Zehnthof 77 45307 Essen... -
Page 50: Index
Index Index Pattern completion ............27 Presser foot ................. 41 Accessories box ..............16 Presser foot holder ............41 Acoustic signals ..............44 Programme selection ............28 Appliqué ................37 Auto threader ..............22 Raising and lowering the presser foot ......26 Auto threader for the needle ...........22 Removing the bobbin ............ -
Page 51: Warranty Card
WARRANTY CARD DIGITAL SEWING MACHINE Your details: Name ____________________________________________________________________________________________ Adress _________________________________________________________________________________________ _____________________________________________________________________________________________________ _____________________________________________________________________________________________________ _______________________________ E-Mail ____________________________________________________ Date of purchase* ________________________________________________________________________________ * We recommend you to keep the receipt with this warranty card. Location of purchase ______________________________________________________________________________ Discription of malfunction: If after contacting the manufacturer you AFTER SALES SUPPORT are requested to return the faulty product 0333 - 32 13 106... -
Page 52: Warranty Conditions
Warranty conditions Dear Customer, The ALDI warranty offers you extensive benefi ts: Warranty period: 3 years from date of purchase. Costs: Free repair/exchange. No transport costs. ADVICE: Please contact our service hotline by phone, e-mail or fax before sending in the advice. This allows us to provide support in the event of possible operator errors. - Page 53 PRODUCED IN CHINA FOR: ALDI STORES LTD. PO BOX 26, ATHERSTONE WARWICKSHIRE, CV9 2SH. ALDI STORES (IRELAND) LTD. PO BOX 726, NAAS, CO. KILDARE.
Need help?
Do you have a question about the md15694 and is the answer not in the manual?
Questions and answers