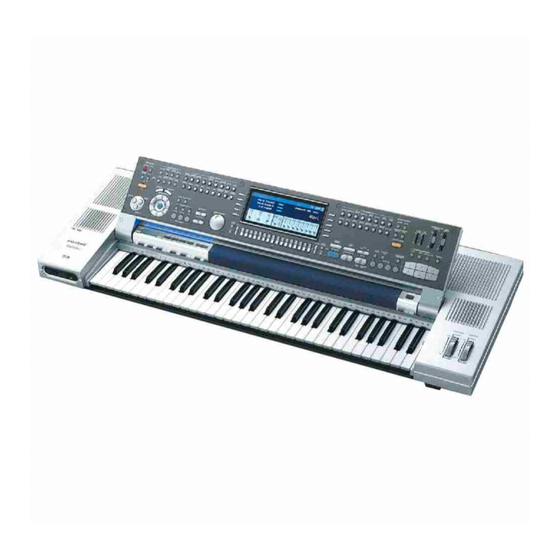

Related Manuals for Technics SX-KN7000


Summary of Contents for Technics SX-KN7000
-
Page 1: Operating Instructions
ENGLISH KN7000 Operating Instructions Before connecting, operating or adjusting this product, please read these instructions completely. Please keep this manual for future reference. KEYBOARD QQTG0671... - Page 2 • Most major credit and debit cards accepted. • All enquiries transactions and distribution facilities are provided directly by Panasonic UK Ltd. • It couldnüft be simpler! Customer Care Centre For UK customers: 08705 357357 For Republic of...
- Page 3 (2) this device must accept any interference received, including interference that may cause un- desired operation. Responsible Party: Matshshita Electric Corporation of America One Panasonic Way Secaucus, NJ, 07094 USA Telephone No.: 1-800-211-7262 The model number and serial number are found underneath the keyboard.
- Page 4 QQTG0671...
-
Page 5: Important Safety Instructions
IMPORTANT SAFETY INSTRUCTIONS Read these operating instructions carefully before using the unit. Follow the safety instructions on the unit and the safety precautions listed below. Keep these operating instructions handy for future reference. Safety Power Source—Connect the unit to a power source of the type described in these instructions or as marked on the unit. -
Page 6: Cautions For Safest Use Of This Unit
Cautions for safest use of this unit Installation location A well-ventilated place. Take care not to use this unit in a place where it will not receive sufficient ventilation, and not to permit the ventilation holes to be covered by cur- tains, or any similar materials. -
Page 7: Table Of Contents
Contents Cautions for safest use of this unit ........6 Controls and functions . - Page 8 Naming ............85 Panel Write .
- Page 9 Part IX Reverb & Effect ..........162 Outline of the Reverb &...
-
Page 10: Controls And Functions
Controls and functions MUSIC STYLIST You can choose to have all the settings of this instrument automatically set. (Refer to page 61.) MAIN APC/SEQUENCER VOLUME VOLUME VOLUME PERFORMANCE PADS DEMO AUTO SETTING BANK SOLO POWER PITCH BEND MODULATION DOWN PITCH BEND/MODULATION The PITCH BEND wheel allows a “sliding”... - Page 11 DISPLAY Displays performance information, function settings and other messages. (Refer to page 29.) • Adjust the readability with the CONTRAST buttons at the lower left side of the display. SOUND GROUP Various sounds are available for each sound group. (Refer to page 34.) MALLET &...
-
Page 12: Getting Started
Getting started Before you play RHYTHM GROUP MAIN APC/SEQUENCER VOLUME VOLUME AUTO PLAY CHORD 8 & 16 ROCK JAZZ & MOVIE & MODE OFF/ON BEAT & POP BALLAD SWING BALLROOM LINE IN VOLUME VOLUME SOUND ARRANGER MODERN SOUL & COUNTRY MARCH OFF/ON 60s &... - Page 13 Playing RHYTHM GROUP MAIN APC/SEQUENCER AUTO PLAY CHORD VOLUME VOLUME 8 & 16 ROCK JAZZ & MOVIE & MODE OFF/ON BEAT & POP BALLAD SWING BALLROOM SHOW LINE IN VOLUME VOLUME SOUND ARRANGER MODERN SOUL & COUNTRY MARCH LATIN OFF/ON 60s &...
-
Page 14: See And Listen To The Demonstration
See and listen to the demonstration RHYTHM GROUP MAIN APC/SEQUENCER VOLUME VOLUME AUTO PLAY CHORD 8 & 16 ROCK JAZZ & MODE OFF/ON BEAT & POP BALLAD SWING BALLROOM LINE IN VOLUME VOLUME SOUND ARRANGER MODERN SOUL & COUNTRY MARCH OFF/ON 60s &... -
Page 15: Add Effects
Add effects RHYTHM GROUP MAIN APC/SEQUENCER VOLUME VOLUME AUTO PLAY CHORD 8 & 16 ROCK JAZZ & MOVIE & MODE OFF/ON BEAT & POP BALLAD SWING BALLROOM SHOW ENTERTAINER ORGANIST LINE IN VOLUME VOLUME SOUND ARRANGER MODERN SOUL & COUNTRY MARCH LATIN OFF/ON... -
Page 16: Play Back Commercial Song Disks (Direct Play)
Play back commercial song disks (DIRECT PLAY) MAIN APC/SEQUENCER RHYTHM GROUP VOLUME VOLUME AUTO PLAY CHORD 8 & 16 ROCK JAZZ & MODE OFF/ON BEAT & POP BALLAD SWING BALLROOM LINE IN VOLUME VOLUME SOUND ARRANGER MODERN SOUL & COUNTRY MARCH OFF/ON 60s &... -
Page 17: Play Back Sd Cards (Sd-Audio Play)
Play back SD cards (SD-AUDIO PLAY) RHYTHM GROUP MAIN APC/SEQUENCER VOLUME VOLUME AUTO PLAY CHORD 8 & 16 ROCK JAZZ & MOVIE & MODE OFF/ON BEAT & POP BALLAD SWING BALLROOM SHOW ENTERTAINER ORGANIST LINE IN VOLUME VOLUME SOUND ARRANGER MODERN SOUL &... -
Page 18: Select The Registration For A Music Style (Music Stylist)
Select the registration for a music style MAIN APC/SEQUENCER RHYTHM GROUP VOLUME VOLUME AUTO PLAY CHORD 8 & 16 ROCK JAZZ & MOVIE & MODE OFF/ON BEAT & POP BALLAD SWING BALLROOM SHOW ENTERTAINER ORGANIST LINE IN VOLUME VOLUME SOUND ARRANGER MODERN SOUL &... - Page 19 MAIN APC/SEQUENCER RHYTHM GROUP VOLUME VOLUME AUTO PLAY CHORD 8 & 16 ROCK JAZZ & MOVIE & MODE OFF/ON BEAT & POP BALLAD SWING BALLROOM SHOW ENTERTAINER ORGANIST LINE IN VOLUME VOLUME SOUND ARRANGER MODERN SOUL & COUNTRY MARCH LATIN OFF/ON 60s &...
-
Page 20: Automatic Panel Settings (One Touch Play)
Automatic panel settings (ONE TOUCH PLAY) RHYTHM GROUP MAIN APC/SEQUENCER VOLUME VOLUME AUTO PLAY CHORD 8 & 16 ROCK JAZZ & MODE OFF/ON BEAT & POP BALLAD SWING BALLROOM LINE IN VOLUME VOLUME SOUND ARRANGER MODERN SOUL & COUNTRY MARCH OFF/ON 60s &... - Page 21 RHYTHM GROUP MAIN APC/SEQUENCER VOLUME VOLUME AUTO PLAY CHORD 8 & 16 ROCK JAZZ & MOVIE & MODE OFF/ON BEAT & POP BALLAD SWING BALLROOM SHOW LINE IN VOLUME VOLUME SOUND ARRANGER MODERN SOUL & COUNTRY MARCH LATIN OFF/ON 60s & 70s DANCE R&B &...
-
Page 22: Store Your Panel Settings (Panel Memory)
Store your panel settings (PANEL MEMORY) RHYTHM GROUP MAIN APC/SEQUENCER VOLUME VOLUME AUTO PLAY CHORD 8 & 16 ROCK JAZZ & MODE OFF/ON BEAT & POP BALLAD SWING BALLROOM LINE IN VOLUME VOLUME SOUND ARRANGER MODERN SOUL & COUNTRY MARCH OFF/ON 60s &... -
Page 23: Recall Your Favorite Panel Settings At The Press Of A Single Button (Custom Panel)
Recall your favorite panel settings at the press of a single button (CUSTOM PANEL) MAIN APC/SEQUENCER RHYTHM GROUP VOLUME VOLUME AUTO PLAY CHORD 8 & 16 ROCK JAZZ & MOVIE & MODE OFF/ON BEAT & POP BALLAD SWING BALLROOM SHOW LINE IN VOLUME VOLUME... -
Page 24: Record Your Performance (Sequencer)
Record your performance (SEQUENCER) RHYTHM GROUP MAIN APC/SEQUENCER VOLUME VOLUME AUTO PLAY CHORD 8 & 16 ROCK JAZZ & MOVIE & MODE OFF/ON BEAT & POP BALLAD SWING BALLROOM SHOW LINE IN VOLUME VOLUME SOUND ARRANGER MODERN SOUL & COUNTRY MARCH LATIN OFF/ON... -
Page 25: Playing Back Your Recorded Performance
RHYTHM GROUP MAIN APC/SEQUENCER VOLUME VOLUME AUTO PLAY CHORD 8 & 16 ROCK JAZZ & MOVIE & MODE OFF/ON BEAT & POP BALLAD SWING BALLROOM SHOW ENTERTAINER ORGANIST LINE IN VOLUME VOLUME SOUND ARRANGER MODERN SOUL & COUNTRY MARCH LATIN OFF/ON 60s &... -
Page 26: Save Data On An Sd Card
Save data on an SD card RHYTHM GROUP MAIN APC/SEQUENCER VOLUME VOLUME AUTO PLAY CHORD 8 & 16 ROCK JAZZ & MOVIE & MODE OFF/ON BEAT & POP BALLAD SWING BALLROOM SHOW LINE IN VOLUME VOLUME SOUND ARRANGER MODERN SOUL & COUNTRY MARCH LATIN... - Page 27 RHYTHM GROUP MAIN APC/SEQUENCER VOLUME VOLUME AUTO PLAY CHORD 8 & 16 ROCK JAZZ & MOVIE & MODE OFF/ON BEAT & POP BALLAD SWING BALLROOM SHOW LINE IN VOLUME VOLUME SOUND ARRANGER MODERN SOUL & COUNTRY MARCH LATIN OFF/ON 60s & 70s DANCE R&B &...
-
Page 28: Load Rhythm Data From A Technics Pattern Disk (Composer Load)
Load rhythm data from a Technics pattern disk RHYTHM GROUP MAIN APC/SEQUENCER VOLUME VOLUME AUTO PLAY CHORD 8 & 16 ROCK JAZZ & MODE OFF/ON BEAT & POP BALLAD SWING BALLROOM LINE IN VOLUME VOLUME SOUND ARRANGER MODERN SOUL & COUNTRY MARCH OFF/ON... -
Page 29: About The Display
About the display A large-size display, easy to operate with excellent readability, is used for displaying various information such as the names of the selected sounds and rhythms etc. and when setting the functions. Let’s take a look. • The display illustrations shown in this User’s Manual are examples for the sake of clarification; the actual displays on your instrument may differ from the illustrations. -
Page 30: Menu Display
OTHER PARTS/TR If you press the OTHER PARTS/TR button, the display changes to show the volumes of PART (PT) 1– 16. You can then adjust the volumes of these parts. These parts are active when playing back a song disk or when this instrument is con- nected to external MIDI equipment and is used as a multi-timbre sound generator. - Page 31 Setting display When you select an item from the menu display, the setting display for the item is shown. The buttons to the right, left and/or directly below the display are used to select and adjust the set- tings. Example of setting display: MASTER TUNING MUTE Press the button corresponding to the...
-
Page 32: Favorites
HELP You can find an explanation of each button’s function on the display. Press the HELP button. HELP • The following display appears. Use the buttons below the display to select a language. Press the OK button. Favorites You can record four different special displays of your favorite sounds and rhythms, functions, etc. Press the FAVORITES button to turn it on. - Page 33 • The PANIC function interrupts the sound, for example, when it fails to cease during a MIDI performance. While pressing the SET button, specify where you wish to paste (put) the item. • While the SET button is depressed, the display appears as shown below.
-
Page 34: Part I Sounds And Effects
Part I Sounds and effects Overview of sounds and effects The following is an overview of the sound parts and the SOUND DSP (the basic effects) of this in- strument. NX SOUND NX SOUND is the Technics original sound gen- erator format which evokes realtime perform- ance quality and expressive power, and dramatically expands the number of sounds and... -
Page 35: Selecting Sounds
Part I Selecting sounds Select the sounds for the three parts you can play on the keyboard— RIGHT 1, RIGHT 2 and LEFT. After first selecting a part and a SOUND GROUP, choose the desired sound from the display. Select a sound In the PART SELECT section, choose RIGHT 1, RIGHT 2 or LEFT. -
Page 36: Digital Drawbar
Part I ∧ ∨ Use the buttons to select a GROUP of sound. Use the buttons on both side of the display to select the sound. • The numerical value that is displayed for each sound is the MIDI [BANK MSB, LSB]-PRO- GRAM CHANGE number. -
Page 37: Organ Tabs
Part I About foot marks The foot indication (for example 8’) refers to the pitch of a rank of pipes in a pipe organ. If 8’ is used as the standard (the pitch as played on the keyboard), a 16’ rank pitch will be one octave below the 8’... -
Page 38: Accordion Register
Part I TREMOLO Tremolo is a rapid oscillation in volume, like the effect of a rotating speaker. The tremolo speed can be changed while you are playing. • The SOUND DSP (ROTARY SPEAKER/ ROCK ROTARY) is used for the tremolo effect. This effect does not work if the SOUND DSP button is turned off. -
Page 39: Assigning Parts To The Keyboard
Part I Assigning parts to the keyboard The CONDUCTOR buttons are used to assign the parts (RIGHT 1, RIGHT 2, LEFT) to the keyboard in many different ways. For example, you can split the keyboard into right and left sections (SPLIT), and assign a different sound to each section. - Page 40 Part I SPLIT POINT When the keyboard is divided into left and right sections, the split point is indicated by the lit in- dicator. You can change the location of the split point. G2 C3 G3 SPLIT POINT • Each time the SPLIT POINT button is pressed, the indication moves to the next split point in the following order.
- Page 41 Part I RIGHT 1/RIGHT 2 OCTAVE During your performance you can quickly change the octave of the RIGHT 1 and RIGHT 2 parts. Use this convenient function to expand the oc- tave range of the keyboard, especially during a split-keyboard performance. Use the R1/R2 OCTAVE buttons (+ and –...
-
Page 42: Effects (Part)
Part I Effects (PART) You can achieve even fuller and stirring sounds by adding various effects for each part. SUSTAIN SUSTAIN is the gradual fading out of musical tones after the key is released. In the CONDUCTOR or PART SELECT sec- tion, turn on the part to which this effect will be applied. - Page 43 Part I SOUND DSP The SOUND DSP works like a studio effects pro- cessor, providing effects such as CHORUS, PHASER, DELAY and DISTORTION. • There are five SOUND DSP groups, consisting of three for RIGHT 1, RIGHT 2 and LEFT, and two for the automatic accompaniment or SEQUENCER.
-
Page 44: Effects (Global)
Part I Effects (GLOBAL) You can apply effects to the whole instrument. REVERB REVERB applies a reverberation effect to the sound. Press the REVERB button to turn it on. REVERB Type and parameter settings Press and hold the REVERB button for a few seconds. - Page 45 Part I MULTI Various effects can be applied. Press the MULTI button to turn it on. MULTI Type and parameter settings Press and hold the MULTI button for a few seconds. • The display looks similar to the following. ∧ ∨...
-
Page 46: Controller
Part I MULTI EFFECT SET You can select other types that can be set with MULTI. Select the types by pressing this button. • If a type other than a VOCAL group type is selected, the normal REVERB, not the MIC REVERB, may be applied. -
Page 47: Transpose
Part I Transpose The TRANSPOSE buttons are used to change the key of the entire instrument in semi-tone steps across an entire octave. Suppose you learn to play a song— in the key of C, for example— and decide you want to sing it, only to find that it’s either too high or too low for your voice. -
Page 48: Techni-Chord
Part I Techni-chord TECHNI-CHORD turns your single note melodies into full chords and offers you a choice of different types from a simple duet which adds one harmony note to your melody note, to big band reeds which adds four harmony notes to your melody note. If TECHNI-CHORD is part of a ONE TOUCH PLAY or MUSIC STYLIST registration, a suitable TECHNI-CHORD type will be selected automatically. -
Page 49: Part Ii Playing The Rhythm
Part II Playing the rhythm Overview of rhythm performance An explanation follows of the terms related to this instrument’s rhythm performance. Rhythm and accompaniment pattern Each rhythm is comprised of not only a DRUMS pattern, but also of accompaniment patterns called BASS and ACCOMP. -
Page 50: Selecting Rhythms
Part II Selecting rhythms Many exciting rhythms are stored in the memory of this instrument. First select one of the rhythm groups and then choose the desired rhythm. Select a rhythm In the RHYTHM GROUP section, select a rhythm group. RHYTHM GROUP 8 &... - Page 51 Part II Start the rhythm There are two ways to start the rhythm. Normal start Select a rhythm. Press the START/STOP button to turn it on. START/STOP 4 BEAT • The selected rhythm pattern immediately begins to play. • You can stop the rhythm by pressing the START/STOP button again to turn it off.
-
Page 52: Playing The Rhythm
Part II Playing the rhythm Intro, fill-in and ending patterns fitting each different rhythm pattern are permanently recorded in your Keyboard, thus allowing a versatile rhythm performance. INTRO Begin the rhythm performance with an intro pat- tern. Press the INTRO & ENDING 1 or INTRO & ENDING 2 button to turn it on. -
Page 53: Auto Play Chord
Part II ENDING Finish the rhythm performance with an ending pattern. Select a rhythm and press the START/STOP button. Press the INTRO & ENDING 1 or INTRO & ENDING 2 button to turn it on. INTRO & ENDING • An ending pattern is produced, and then the rhythm performance stops. - Page 54 Part II Playing chords Choose from three ways of playing chords. BASIC mode In the BASIC mode, a major chord can be played just by pressing the key for its root note. Example: C chord Minor, seventh and minor seventh chords are also easily produced. minor chord Play the root note plus a Play the root note plus a...
- Page 55 Part II How to use the AUTO PLAY CHORD Select the desired rhythm and sound(s), and set the tempo. Press the AUTO PLAY CHORD’s OFF/ON button to turn it on. AUTO PLAY CHORD MODE OFF/ON Press the AUTO PLAY CHORD’s MODE but- ton to turn it on.
-
Page 56: Left Hold
Part II Left Hold This setting determines how the LEFT part sounds when the LEFT button in the CONDUC- TOR is on during a performance with the BASIC or FINGERED mode. Press the MODE button to turn it on. • The display changes to the following. Use the LEFT HOLD: ON/OFF button to set the mode to on or off. - Page 57 Part II CHORD FINDER The CHORD FINDER can help, for example, when you do not know which keys to press to specify a given chord. When you input the chord name, the CHORD FINDER shows you which keys to press and even lets you hear the notes that make up.
-
Page 58: Fade In/Fade Out
Part II BREAK function With the break function, the rhythm starts when the left keyboard is played and stops when the fingers are removed from the keys. Select an AUTO PLAY CHORD mode. • At this time, the MEMORY button should be OFF. - Page 59 Part II FADE OUT At the end of the song, the volume of each part gradually fades to nothing. Start the performance. Turn on the FADE OUT button at the point you want the fade-out to start. FADE • The volumes of all the parts slowly fade to 0. •...
-
Page 60: Sound Arranger
Part II Sound Arranger The SOUND ARRANGER feature lets you select other sounds for the AUTO PLAY CHORD parts of each rhythm. Select the rhythm whose sound you wish to change. • Do not select the MEMORY or CUSTOM but- ton. -
Page 61: One Touch Play
Part II One Touch Play ONE TOUCH PLAY automatically sets a suggested combination of sounds and an appropriate tempo for your chosen rhythm style. Select a rhythm pattern. • Do not select the MEMORY button. Press and hold the ONE TOUCH PLAY button for a few seconds. - Page 62 Part II • The AUTO PLAY CHORD and the SYNCHRO & BREAK turn on, and the sounds, effects, volume balances, rhythm and tempo etc. which are best suited for the selected music style are automatically selected. Play the keyboard. • When you specify a chord, the automatic rhythm begins to play immediately.
- Page 63 Part II Setup by organ style You can select a style from those suitable to play using the organ sounds. Press the MUSIC STYLIST button to turn it Select ORGAN STYLIST. • The display looks similar to the following. Custom style selection You can select a style stored in CUSTOM, or a style loaded to CUSTOM from a disk/an SD card.
-
Page 64: Music Style Arranger
Part II Music Style Arranger The MUSIC STYLE ARRANGER helps you to make professional registration changes during your performance. Select between four contrasting registrations at the push of a button, or let your instrument change the registration automatically for you when you use FILL IN 1 or 2. The MUSIC STYLE ARRANGER will also alter the accompaniment in character with the registration change creating a polished sounding arrangement. -
Page 65: Panel Memory
Part II PANEL MEMORY: The PANEL MEMORY number (BANK A: 1 to 4) changes. You can store your desired panel settings in the PANEL MEMORY beforehand and switch from one to another quickly. • After a few seconds, the display exits the set- ting mode. - Page 66 Part II Assign a name to the bank/memory You can assign names to the banks and memo- ries. Select a bank or memory. Use the PAGE buttons to go to the PAGE 3/3 page on the display. Press the BANK NAMING button to assign a name to the bank, or the MEMORY NAMING button for the memory.
- Page 67 Part II PANEL MEMORY mode You can define which panel settings are recalled when the PANEL MEMORY is used. Press and hold the SET button for a few sec- onds. • The display changes to the following. Select the mode. NORMAL: The sounds and volume balance, and CON- DUCTOR status are stored.
-
Page 68: Part Iii Performance Pads
Part III Performance Pads Playing phrases During your performance, you can insert a short recorded phrase or effect sounds by pressing a pad button. A different group of phrases is recorded in each bank. Press the BANK button. BANK Select the desired bank from the display. •... -
Page 69: Copying Phrases
Part III Copying phrases You can copy the desired data, as phrases, from the SEQUENCER to each pad memory of a “User Bank”. • Chord data also can be copied to pad buttons 5 and 6 (SOLO). PHRASE COPY Copy a phrase from one pad to another. Press the PROGRAM MENUS button to turn it on. -
Page 70: Performance Pads
Part III SEQ TO PAD COPY Record a phrase in the SEQUENCER, or load data from a disk. • After this procedure, please do not change the song number. • For details about SEQUENCER operation, refer to page 74. • For information about loading data, refer to pages 125, 140. -
Page 71: Compile
Part III Compile You can assign desired phrases from different banks in “Compile Bank” 1 and 2. Press the PROGRAM MENUS button to turn it on. PROGRAM MENUS • The display looks similar to the following. Select PERFORMANCE PADS. • The display looks similar to the following. Select COMPILE SET. -
Page 72: Record A Phrase
Part III Record a phrase “User Bank” A, B and C are reserved for storing your original phrases. • You can also copy phrases which are recorded in the SEQUENCER. Press the PROGRAM MENUS button to turn it on. • The display looks similar to the following. Select PERFORMANCE PADS. - Page 73 Part III PLAY SETTING Select a playback mode. On the PAD RECORDING display, press the PLAY SETTING button. • The display looks similar to the following. ∧ ∨ Use the START buttons to select a playback mode. SYNCHRO: During a rhythm performance, the phrase playback begins in time with the beat.
-
Page 74: Part Iv Sequencer
Part IV Sequencer Outline of the Sequencer A sequencer records your performance in a similar way to a tape recorder. This instrument’s SEQUENCER allows you to record up to 10 performances in a variety of ways. You may want to record your entire performance in one go (especially if you are using AUTO PLAY CHORD to provide the accompaniment), or to build up a complex arrangement with several different parts playing together, like an orchestral score. - Page 75 Part IV SEQUENCER menu The configuration of the SEQUENCER setting display is as follows. Press the PROGRAM MENUS button to turn it on. PROGRAM MENUS • The display looks similar to the following. Select SEQUENCER. • The display looks similar to the following. ∧...
- Page 76 Part IV Summary of the SEQUENCER menu items RECORD & EDIT These functions are recording and editing operations used for creating a new perform- ance. REALTIME RECORD (page 80) Record each part of your performance just as you play it on the keyboard. PUNCH RECORD (page 86) Correct a selected portion of your re- corded performance.
-
Page 77: Slide Show
Part IV Slide Show This instrument can show various images which change automatically corresponding to the music progression just like the DEMO performance. Using the Slide Show function, you can create a multi-media show of images synchronizing with the sound. Schematic PICTURE 1 PIC #1... -
Page 78: Sequencer Parts
Part IV Sequencer parts The following summary explains what is stored in each SEQUENCER part. Part name [name on display] RIGHT1 [RT1] Recording the perform- RIGHT2 [RT2] ance of each part LEFT [LFT] (REALTIME/STEP) PART1 [P 1] – PART9 [P 9] PART11 [P 11] –... -
Page 79: Easy Record
Part IV Easy Record Suppose you are playing the Keyboard and you wish to record and play back your performance to hear how it sounds. You can bypass the set-up procedures of the full-scale sequencer and begin recording quickly and easily. •... -
Page 80: Realtime Record
Part IV Realtime Record With REALTIME RECORD, your performance is recorded with the timing exactly as you played it on the keyboard. Use this mode to record your performance in up to 16 tracks and create your own orchestra or band. Recording procedure Press the PROGRAM MENUS button to turn it on. - Page 81 Part IV Use the TEMPO/PROGRAM to adjust the re- cording tempo. • The tempo is shown on the display as • If you wish to record the tempo setting and tempo changes, store them in the control (CTL) part, or use the step record to store them in the rhythm (RHY) part.
- Page 82 Part IV CYCLE RECORD This mode allows you to have specified recording measures continuously repeated. Thus you can record measures by adding notes during any cycle. On the REALTIME RECORD display, specify “REC” for a track number you are going to record, and “PLAY”...
-
Page 83: Sequencer Play
Part IV Sequencer Play Play back your recorded performance. Press the SEQUENCER PLAY button to turn it on. SEQUENCER PLAY EASY REC • The display looks similar to the following. ∧ ∨ Use the SONG button to select the song number you wish to play back. Use the balance buttons below the display to show “PLAY”... - Page 84 Part IV CYCLE PLAY You can have specified measures played back repeatedly. On the SEQUENCER PLAY display, specify “PLAY” for track numbers you wish to have played back. Press the CYCLE button. • The display looks similar to the following. ∧...
-
Page 85: Naming
Part IV SEQUENCER VOLUME When playing the keyboard along with a recorded performance, you can adjust the total volume of all the playback parts as one. Use the APC/SEQUENCER VOLUME slide con- trol to adjust the volume. APC/SEQUENCER VOLUME Naming Here is the way to assign a name to your recorded song. -
Page 86: Panel Write
Part IV Panel Write You can change the panel status which is in effect at the beginning of the song. These are the settings which are recalled when the SEQUENCER RESET button is pressed. On the SEQ MENU display, use the SONG ∨... -
Page 87: Punch Record
Part IV Punch Record If you make a playing error during REALTIME RECORD or would like to change the recording for some other reason, you can use the punch recording feature to correct a selected portion of the performance without having to redo the whole part. Recording the performance Playback On the SEQ MENU display, use the SONG... -
Page 88: Step Record
Part IV Use the COUNT IN MEASURE tons to specify the number of lead-in measures you wish to have played back before the punch-in measure. • Set the metronome to on or off with the ON or OFF button. Press the EXIT button. •... - Page 89 Part IV ∧ ∨ Use the MEAS buttons to select the measure. • This step is not necessary if you are recording from measure 1 of a blank track. < > Use the CURSOR buttons to move the cursor to the note position (dot) you are going to store.
- Page 90 Part IV Correcting the data In the STEP RECORD mode, specify the track you wish to correct. Use the MEAS buttons to go to the measure you wish to modify. Use the CURSOR buttons to move the cursor to the point ( to edit.
- Page 91 Part IV When you have finished assigning, press the PROGRAM MENUS button to turn it off. • When you play back the song, the images appear on the display and change automat- ically corresponding to the music progression (Slide Show). •...
- Page 92 Part IV Store a chord progression Store the chord progression for the AUTO PLAY CHORD in the track for the CHORD part. Then, when the AUTO PLAY CHORD is used during playback, even if you do not specify the chords with your left hand, the chords change automatically.
- Page 93 Part IV <Measure 3> (1) While playing an Am chord, press the one time. (2) While playing an F chord, press the key one time. <Measure 4> (1) While playing a D7 chord, press the one time. (2) While playing a G7 chord, press the one time.
- Page 94 Part IV Store a rhythm progression Changes in the rhythm selection and tempo, as well as the intro, fill-ins and the ending, can be stored by measures with the step recording method. On the SEQ MENU display, use the SONG ∧...
-
Page 95: Track Assign
Part IV Track Assign Each SEQUENCER part is already assigned to a track number. However, you can use the TRACK ASSIGN function to assign parts to tracks as you wish. On the SEQ MENU display, use the SONG ∧ ∨ SELECT buttons to select the song number. -
Page 96: Quantize
Part IV Quantize The QUANTIZE function can correct the timing of your performance after it has been recorded. If the rhythm is slightly out of sync or inexact, it will automatically be corrected to the specified quantize level. On the SEQ MENU display, select RECORD &... -
Page 97: Song Clear
Part IV Song Clear Erase the recorded contents of all tracks. On tne SEQ MENU display, select RECORD & EDIT. On the RECORD & EDIT display, selct SONG CLEAR. • The display looks similar to the following. ∧ Use the SONG No./ALL specify the number of the song to erase. -
Page 98: Note Edit
Part IV Note Edit You can edit performance (NOTE) data on a piano roll display. This differs from the normal STEP RECORD edit procedure, and is a convenient way to check the data for each note. • Data other than NOTE data cannot be corrected or recorded. To correct or record other types of data, use the STEP RECORD display. -
Page 99: Drum Edit
Part IV CYCLE PLAY You can aurally check the data you are editing by accessing the CYCLE PLAY display from the NOTE EDIT display. • If you wish other tracks to be played back, they should be selected beforehand on the SEQUENCER PLAY display. -
Page 100: After Touch Setting
Part IV Example: 10.2.48 indicates a point in measure 10, beat 2, point 48 (one point is 1/96 of a quarter note [ • is shown at the point where the END com- mand is stored. Select the data to edit (it changes to a long bar). -
Page 101: Copy And Paste The Recorded Data
Part IV Copy and paste the recorded data You can copy and paste specific portions of the recorded data. Select the function On the SEQ MENU display, use the SONG ∧ ∨ SELECT buttons to select the number of the song. Then select COPY & PASTE. •... - Page 102 Part IV TRACK MERGE Merge the recorded contents of two tracks (source tracks) and store the merged contents in a third track (destination track). • When the TRACK MERGE function is ex- ecuted, the data is erased from the two source tracks.
- Page 103 Part IV MEASURE ERASE Erase the recorded contents of specific meas- ures. You can also specify which type of data is to be erased. • Note that only the contents of the measures are erased, not the measures themselves; the length of the performance remains the same.
- Page 104 Part IV MEASURE INSERT Insert specified measures at a specified point. • The length of the performance accordingly in- creases by the number of inserted measures. Specify the measures you wish to copy from the source track. • On the FROM side, specify the settings with the corresponding buttons.
-
Page 105: Changing The Note Position Etc. Of The Recorded Data
Part IV Changing the note position etc. of the recorded data You can change the note pitch and position etc. of recorded data. Select the function On the SEQ MENU display, use the SONG ∧ ∨ SELECT buttons to select the number of the song. - Page 106 Part IV VELOCITY CHANGE Modify the recorded velocity in specific measures of specific tracks. ∧ ∨ Use the TRACK buttons to select the track you wish to edit. • You cannot select the track for the CONTROL, RHYTHM or CHORD part. •...
- Page 107 Part IV ADVANCE/DELAY Speed up or delay the sound production of specified performance data. ∧ ∨ Use the TRACK buttons to select the track you wish to edit. • You cannot select the track for the CONTROL, RHYTHM or CHORD part. •...
-
Page 108: Part V Composer
Part V Composer Outline of the Composer The COMPOSER enables you to create your own accompaniment patterns. A pattern is comprised of 8 parts: DRUMS 1, 2, BASS and ACCOMP1– 5 parts. These parts would form the backing of a song. Rhythm components which can be stored Different INTRO 1, 2, VARIATION 1 to 4, ENDING 1, 2 patterns can be created for each... - Page 109 Part V COMPOSER menu Press the PROGRAM MENUS button to turn it on. • The display looks similar to the following. Select COMPOSER. • The display looks similar to the following. Summary of the COMPOSER menu items RECORDING MEMORY-A Create a memory in the MEMORY A bank. RECORDING MEMORY-B Create a memory in the MEMORY B bank.
-
Page 110: Simple Recording Method
Part V Simple recording method With EASY COMPOSER you can easily create a unique rhythm pattern by selecting a different style for each part of the rhythm. On the COMPOSER MENU display, select EASY COMPOSER. • The display looks similar to the following. ∧... - Page 111 Part V • To assign a name to each VARIATION, press the VARIATION button and select a number. On the RECORD MEMORY display, press the OK button. • The display looks similar to the following. Press the CLEAR THE ENTIRE PATTERN button.
-
Page 112: Recording Procedure
Part V Recording procedure In the START RECORDING area on the dis- play, select the rhythm part you want to record first. BAS: BASS AC1– 5: ACCOMP 1– 5 DR1, 2: DRUMS 1, 2 • The metronome sound starts and the display looks similar to the following. -
Page 113: Chord Modify Change
Part V Use the buttons below the display to switch to a different recording part, and proceed to re- cord each part in turn. When you have finished recording the rhythm, turn off the PROGRAM MENUS button. Chord Modify Change For data that has already been recorded, you can select the type of pattern progression for the bass and accomp parts. -
Page 114: Part Setting
Part V Part Setting You can make detailed settings for each part. On the REALTIME RECORDING display, press the PART SETTING button. • The settings comprise two pages of the dis- play. Use the PAGE buttons to switch pages. ∧ ∨... -
Page 115: Playback
Part V DSP SET Press the DSP SET button if you wish to make detailed settings for the ACCOMP DSP effect. • Two types of DSP can be used for the auto- matic accompaniment. • You can specify whether or not to apply DSP1 to each part or to apply it to all the automatic accompaniment parts. -
Page 116: Step Record
Part V Step Record Use STEP RECORD to store the notes one-by-one on the display. This is a convenient way to store complicated patterns that are difficult to play. Recording procedure While you are recording, press the STEP RE- CORD button. •... -
Page 117: Measure Edit
Part V Measure Edit You can edit the recorded data one measure at a time. Select the function you wish to edit. During recording, press the MEASURE EDIT button. • The display looks similar to the following. Select the function. Follow the procedure to edit the function (see below). - Page 118 Part V MEASURE ERASE Erase the recorded contents of specific meas- ures. • Note that only the contents of the measures are erased, not the measures themselves; the length of the performance remains the same. MEASURE DELETE Delete specified measures from all parts at once. •...
-
Page 119: Pattern Copy
Part V Pattern Copy Use this function to copy a pattern from a rhythm or from SEQUENCER data. PATTERN COPY Copy a rhythm to the COMPOSER. • You can also copy a pattern from the MEMORY. On the COMPOSER MENU display, select PATTERN COPY. - Page 120 Part V SEQ TO COMPOSER COPY Data from the SEQUENCER can be copied to a COMPOSER memory. For example, you can use a rhythm pattern on a song disk as the automatic accompaniment for your own performance. Play back the song you wish to copy from SEQUENCER to confirm the tracks, the meas- ures and the time signature you wish to copy.
-
Page 121: Custom Style Copy
Part V Custom Style Copy 20 settings (STYLE) including COMPOSER patterns can be stored in the CUSTOM memory area of the RHYTHM GROUP, one MEMORY (BANK) at a time. The patterns stored in CUSTOM are retained even when the power to this instrument is turned off. You can use them during your performance, just like the preset rhythms. -
Page 122: Part Vi Disk Drive
Part VI Disk Drive Outline of the Disk Drive function The Disk Drive enables you to store recorded and stored data from this instrument’s memories on disks, as well as play commercial recorded disks on this instrument. Internal memory and Disk Drive The storable internal memory of this instrument as well as the backup time are limited. -
Page 123: Disk Drive
Part VI Using commercial song disks Not only disks recorded on this instrument, but also data from commercial song disks can be read on this instrument. • This instrument accepts the following file for- mats: TECHNICS File format Standard MIDI File format Loading Technics File format disks Using Technics file format disks allows you load new SOUND EDIT, rhythm &... -
Page 124: Outline Of The Procedure
Part VI Outline of the procedure Insert the disk into the Disk Drive slot. Push it all the way in until you hear a click. • On this instrument, if the normal display is active, it automatically changes to the DISK MENU display when a disk is inserted into the Disk Drive (initialized settings). -
Page 125: Loading Data
Part VI Loading data Recall (load) the data from the disk to this instrument’s memories. • Note that the load procedure causes any data which is currently stored in the relevant memories to be erased. LOAD Load data that saved to a disk into this instru- ment’s memory. - Page 126 Part VI SINGLE LOAD You can specify which data to load from a disk into a specific PANEL MEMORY, COMPOSER (MEMORY), SOUND MEMORY, MEMORY or SEQUENCER (when SONG SAVE was executed) memory. Use the PAGE buttons to access the PAGE 3/3 SINGLE LOAD display.
-
Page 127: Direct Play
Part VI COMPOSER LOAD Load COMPOSER data only from a disk. In the RHYTHM GROUP section, press and hold the LOAD (MEMORY) button for a few seconds. RHYTHM GROUP 8 & 16 ROCK JAZZ & MOVIE & BALLAD BALLROOM BEAT &... - Page 128 Part VI The display during playback <Example: SMF> Next song Fast forward Play/pause Stop Previous song • During playback, the buttons below the display are used for player functions such as fast forward, pause, etc. • During playback, if you press the MIXER but- ton you can change the settings for each part.
-
Page 129: Song Medley
Part VI Song Medley Songs saved from the SEQUENCER to a disk (disk data) in the TECHNICS FORMAT can be played back in a medley. On the DISK MENU display, select SONG MEDLEY from the display. • The display looks similar to the following. Select the order of files in the medley. -
Page 130: Saving Data
Part VI Saving data The recorded data and panel settings of this instrument can be saved on a disk. Disks You can use 3.5 inch 2DD (720KB) or 2HD (1.44MB) disks. • How to distinguish the two disk types: 2 D D No hole Hole •... - Page 131 Part VI SAVE Insert a formatted disk into the Disk Drive slot. Push it all the way in until you hear a click. • A disk which is used with this instrument for the first time must first be formatted. On the DISK MENU display, select SAVE.
- Page 132 Part VI <SAVE OPTION> Specify the kind of data you wish to save to the disk. To maximize effective use of disk memory or to minimize the save time, select only the type of data you wish to save. Use the PAGE buttons to access the 2/3 SAVE OPTION display.
- Page 133 Part VI SMF FORMAT 0 This instrument’s SEQUENCER data can be saved in the “Standard MIDI File” format (FOR- MAT 0) for use on other instruments. • What you can save in the SMF format (FOR- MAT 0) is ordinary performance data, such as note data.
-
Page 134: Custom Style Load/Save
Part VI Custom Style Load/Save Load and save each style data of the CUSTOM in a special file. • All CUSTOM styles are backed up in a Technics file as ALL CUSTOM STYLE. Insert the disk to load from or save to in the disk drive. -
Page 135: Disk Management
Part VI Disk management Various disk management procedures, such as file erase, file copy, and disk format, are available from the DISK TOOLS menu. DISK TOOLS Insert the disk into the Disk Drive slot. On the DISK MENU display, select DISK TOOLS from the display. -
Page 136: Set The Automatic Display When A Disk Is Inserted
Part VI Set the automatic display when a disk is inserted When a disk is inserted in the Disk Drive, the display automatically changes to a disk-procedure display. Follow this procedure to customize the automatic display. PREFERENCES On the DISK MENU display, select PREFER- ENCES. -
Page 137: How To Use The Style Convert Disk
Part VI How to use the Style Convert Disk Style data from commercial manufacturers can be loaded into the COMPOSER and used by this instrument. Turn on the DISK button. DISK DISK IN USE LOAD On the DISK MENU display, select STYLE CONVERT. -
Page 138: Part Vii Sd Card
Part VII SD Card Outline of the SD card The SD card can be used to save and manage stored data in this instrument, as well as to play audio or SMF data saved on the card with the instrument. Structure of the SD card format SD-AUDIO Music (audio) data... - Page 139 Part VII SD IN USE • This indicator lights when accessing to the SD card. To prevent data loss, do not eject the card or turn off the power while this indicator is lit. Removing the SD card When the SD IN USE indicator is not lit, while opening the lid, push the center of the card to unlock it.
-
Page 140: Loading Data
Part VII Loading data Load the data from the SD card to this instrument’s memories. • Note that the load procedure causes any data which is currently stored in the relevant memories to be erased. SD LOAD Load data that saved to a card into this instru- ment’s memory. - Page 141 Part VII ALPHABET Load the file from an alphabetical list of all songs saved in TECHNICS format on the SD card. ∧ ∨ Use the buttons to change the alpha- betical letter or the display page. Use the L and M buttons to specify the song to be loaded.
- Page 142 Part VII SD-SOUND LOAD (SMF) Load SD-SOUND (SMF) data from the SD card. On the LOAD (PAGE 1/3) display, press the SD-SOUND button. • The display looks similar to the following. • For cards which contain SD-SOUND data only, this display appears automatically when LOAD is selected on the SD MENU display.
-
Page 143: Sd-Audio Play
Part VII SD-Audio Play Play back audio data on the SD card saved by a PC, etc. Insert the SD card with the stored data to be played into the SD slot. (See page 138.) • Close the lid securely after inserting the card. Press the SD button to turn it on. -
Page 144: Sd-Sound Play
Part VII SD-Sound Play Play back SMF data saved on the SD card (SD-SOUND). • Lyrics of the SMF with LYRICS files can be also displayed. Insert the SD card with the stored data to be played into the SD slot. (See page 138.) •... -
Page 145: Playlist
Part VII Playlist The instrument handles the SD-AUDIO/SD-SOUND files in PLAYLIST units. The explanation of the PLAYLIST is as follows. PLAYLIST type There are two types of PLAYLIST. < DEFAULT PLAYLIST: (Total list)> A collection of all data saved in an SD card. If you delete a song from the default PLAYLIST, the song data itself will be deleted on the card. -
Page 146: Sd Song Medley
Part VII SD Song Medley Songs saved from the SEQUENCER to an SD card in the TECHNICS FORMAT can be played back in a melody. On the SD MENU display, select SD SONG MEDLEY. • The display looks similar to the following. Press the MODE button to select the type of medley list. -
Page 147: Saving Data
Part VII Saving Data The internal data of this instrument can be saved on the SD card. SAVE Insert an SD card for saving into the SD slot. (See page 138.) Press SD button to turn it on. On the SD MENU display, select SAVE. •... - Page 148 Part VII <SAVE OPTION> Specify the kind of data you wish to save to the SD card. To maximize effective use of SD card memory or to minimize the save time, select only the type of data you wish to save. Use the PAGE buttons to access the 2/3 dis- play.
- Page 149 Part VII Use the buttons below the display to assign a name. Press the OK button. • The display returns to the SAVE display. Use the FROM SONG buttons to select the SEQUENCER song number you wish to save. • The song name to save from is shown below the FROM SONG button.
-
Page 150: Create An Album Of Your Favorite Songs
Part VII Create an album of your favorite songs The FAVORITE SONGS display allows you to create an album of your favorite songs which are aligned in a desired order, making it easy to load your favorite song to play back immediately. FAVORITE SONGS Insert the SD card which contains the songs into the SD slot. -
Page 151: Sd Card Management
Part VII ∧ ∨ • Use the FROM buttons to select the file number to load. Use the TO buttons to select the CUSTOM number to load to. Press the LOAD button. SAVE ∧ ∨ Use the FROM buttons to select the CUSTOM number to save, and press the SAVE button. -
Page 152: Set The Priority Of Displays
Part VII SD-SOUND EXPORT: Convert SD-SOUND data to generic SMF data for use on an external instrument. • SONGs in a specified PLAYLIST except for DEFAULT PLAYLIST are exported to the “IMEXPORT” directory at one time. • Pressing ALL DELETE will delete all files; however, “read only”... -
Page 153: Part Viii Sound
Part VIII Sound Outline of the Sound The SOUND mode is used for making fine adjustments to the functions related to sound, such as tone, and tuning. Press the PROGRAM MENUS button to turn it on. PROGRAM MENUS • The display looks similar to the following. Select SOUND. -
Page 154: Part Setting
Part VIII Part Setting Set the various sound attributes for each part. Selecting an attribute On the SOUND MENU display, select PART SETTING. ∧ Use the PART SELECT select the part. <PAGE 1> SOUND: ∧ ∨ Use the SOUND buttons to select a sound. - Page 155 Part VIII <PAGE 2> REVERB: ∧ ∨ Use the REVERB buttons to adjust the depth of the REVERB (0 to 127). DIGITAL EFFECT: Use the DIG. EFFECT ON/OFF buttons to set the DIGITAL EFFECT to on or off. SOUND DSP: Use the SOUND DSP ON/OFF button to set SOUND DSP to on or off.
- Page 156 Part VIII <PAGE 4> FILTER RESONANCE: ∧ ∨ Use the RESONANCE buttons to adjust the amount of resonance (0 to 127). BRIGHTNESS: ∧ ∨ Use the BRIGHTNESS buttons to adjust the brightness of the sound (0 to 127). ATTACK TIME: ∧...
-
Page 157: Mixer
Part VIII Mixer Use the MIXER display to visually adjust the major settings of each part. Use this display to make broad, general changes to the settings. On the SOUND MENU display, select MIXER. • The MIXER display consists of 5 pages. Use the PAGE buttons to switch among the pages. - Page 158 Part VIII EQUALIZER HIGH: Sound quality correction in the high range. Select EQUALIZER HI FC; use the buttons below the display to set the standard frequency. Select EQUALIZER HI GAIN; use the buttons below the display to set the ratio of change.
-
Page 159: Master Tuning
Part VIII Master Tuning This setting is used to fine-tune the pitch of the entire instrument. This is convenient when the Keyboard is played with other instruments or with a recorded performance. SOUND MENU display, MASTER TUNING. • The display changes to the following. ∧... -
Page 160: Sound Load Option
Part VIII ORIGINAL tuning Each instrument of each sound has its own orig- inal tuning data. This setting affects the tuning curve that spans the entire keyboard. So, for ex- ample, the acoustic piano-type sounds duplicate those of a real piano, in that the high notes are tuned slightly higher and the low notes slightly lower. -
Page 161: Separate Setting
Part VIII Separate Setting You can output a desired part or parts through the two SUB OUT terminals. On the SOUND MENU display, select SEPA- RATE SETTING. • The display looks similar to the following. Use the MODE button to select desired output mode. -
Page 162: Part Ix Reverb & Effect
Part IX Reverb & Effect Outline of the Reverb & Effect In the REVERB & EFFECT mode, you can make detailed settings related to this instrument’s effects. Press the PROGRAM MENUS button to turn it on. PROGRAM MENUS • The display looks similar to the following. Select REVERB &... -
Page 163: Equalizer
Part IX Equalizer You can apply a 5-band equalizer to the final output of this instrument. • The equalizer is applied to both the L and R outputs. On the REVERB & EFFECT display, select EQUALIZER. • The display looks similar to the following. Use the buttons to the left of the display to select the preset type. -
Page 164: Part X Sound Edit
Part X Sound Edit Outline of the Sound Edit SOUND EDIT enables you to create your own new sound by altering one of the this instrument’s preset sounds. Your new sound can be stored in one of the sound memory locations. SOUND EDIT has two methods of use. -
Page 165: Easy Edit
Part X • When DRUM KIT sounds are selected and the SOUND EDIT is activated, the setting display looks different from that for other sounds, but the basic operation is the same. (To specify the percussion instrument you wish to edit, ∧... -
Page 166: Tone Edit
Part X Tone Edit Modify the separate tones which comprise the sound. About tones A sound may be made up of at most four tones. 1st tone 2nd tone SOUND 3rd tone 4th tone TONE SELECT On the SOUND EDIT menu, select TONE. •... - Page 167 Part X CHORD: The sound is emphasized when chords are played (like the cutting sound of a guitar, for example). TONE COPY You can copy the tone of a particular sound to a specified tone in the sound you are editing. On the 1/4 display, press the TONE COPY button.
- Page 168 Part X VELOCITY LAYER Adjust these settings to regulate the tone output relative to the velocity. Use the PAGE buttons to view the 3/4 display. • The display looks similar to the following. Use the buttons to the left of the display to select a tone (1st, 2nd, 3rd or 4th).
-
Page 169: Pitch Edit
Part X Pitch Edit Adjust the settings related to the pitch of the sound. KEY SHIFT & DETUNE On the SOUND EDIT menu display, select PITCH. • The display looks similar to the following. Use the buttons to the left of the display to select a tone (1st, 2nd, 3rd or 4th). -
Page 170: Filter Edit
Part X PITCH ENVELOPE TOUCH & KEY FOLLOW Specify how the pitch envelope changes in rela- tion to note pitch. Use the PAGE buttons to view the 3/3 display. Use the buttons to the left of the display to select a tone. ∧... - Page 171 Part X ∧ ∨ Use the CUTOFF buttons to set the frequency range which is cut by the filter. ∧ ∨ Use the RESO buttons to specify the resonance value (dB). • Resonance is effect which adds character to the sound by emphasizing the harmonic com- ponents of frequencies close to the cut-off frequency.
-
Page 172: Amplitude Edit
Part X FILTER ENVELOPE TOUCH & KEY FOLLOW Specify how the filter envelope (curve) changes relative to touch or note pitch. Use the PAGE buttons to view the 4/4 display. • The display looks similar to the following. Use the buttons to the left of the display to select a tone. - Page 173 Part X ENVELOPE Specify how the volume changes over time, from the time the key is played to the time the sound dies out. Use the PAGE buttons to view the 2/3 display. • The display looks similar to the following. Use the buttons to the left of the display to select a tone.
-
Page 174: Lfo (Cyclic Modulation) Edit
Part X (cyclic modulation) LFO can be applied to the pitch, amplitude, filter and/or pan to produce a cyclic modulation of the sound. • Twelve LFO groups can be used. On the SOUND EDIT MENU display, select LFO. • The display looks similar to the following. Use the PAGE buttons to select the respective characteristics. -
Page 175: Effect Edit
Part X Effect Edit These are settings related to the various effects applied to your edited sound. EFFECT On the SOUND EDIT menu display, select EFFECT. • The display looks similar to the following. Use the respective SOUND DSP buttons to specify the effect type and how the SOUND DSP is applied. -
Page 176: Controller Edit
Part X Controller Edit Specify how operation of the controllers, such as the wheels, etc., affects the sound. CONTROLLER On the SOUND EDIT menu display, select CONTROLLER. • The display looks similar to the following. Use the buttons to the left of the display to select a controller. - Page 177 Part X Use the buttons below the display to assign a name. • Press the ABC button to enter alphabetical characters. While SHIFT pressed, upper case letters are entered. • Press the 123 button to enter numbers, etc. While the SHIFT button is pressed, you can enter symbols.
-
Page 178: Part Xi Control
Part XI Control Outline of Control functions Various settings related to the operation of this instrument are adjusted with the CONTROL functions. Press the PROGRAM MENUS button to turn it on. PROGRAM MENUS • The display looks similar to the following. Select CONTROL. -
Page 179: Overall Touch Sensitivity
Part XI Overall Touch Sensitivity This instrument features INITIAL TOUCH (the volume, for example, changes depending on how hard the keyboard is played) and AFTER TOUCH (effects are added by pressing the keys harder). On the CONTROL MENU display, select OVERALL TOUCH SENSITIVITY. - Page 180 Part XI P. MEM BANK DEC.: Change to the previous PANEL MEMORY bank in order. PANEL MEMORY 1 to 8: The specified PANEL MEMORY number is turned on. P. MEM INC.+DEC.: Press the switch to increment the PANEL MEMORY number selection by one; release the switch to return to the previous number.
-
Page 181: Part Xii Customize
Part XII Customize Outline of Customize functions Many of this instrument’s settings can be customized for maximum playing convenience and ease. Press the CUSTOMIZE button to turn it on. CUSTOMIZE • The display looks similar to the following. Select a function. HOME PAGE SETTING (page 182) Modify the layout of the normal display (home page). -
Page 182: Home Page Setting
Part XII Home Page Setting Arrange the contents of the normal display to suit your tastes. On the CUSTOMIZE MENU display, select HOMEPAGE. • The display looks similar to the following. ∧ ∨ Use the TYPE buttons to select a type. -
Page 183: Display Time Out
Part XII Display Time Out Numerous message displays and setting displays conveniently guide you through the operation steps of this instrument. Once you become familiar with the operation of your instrument, however, you may wish to shorten or even suspend the display time of the message displays. On the CUSTOMIZE display, select DISPLAY TIME OUT. -
Page 184: Wallpaper Setting
Part XII Wallpaper Setting You can change the background pattern (WALLPAPER) on your display. On the CUSTOMIZE MENU display, select WALLPAPER SETTING. • The display looks similar to the following. Use the buttons to the left of the display to select a display category. -
Page 185: Custom Panel Mode
Part XII Custom Panel Mode Specify the range of settings which are recalled by the CUSTOM PANEL button. On the CUSTOMIZE MENU display, select CUSTOM PANEL MODE. • The display looks similar to the following. MIDI Setting Load Option Specify how MIDI data is handled when data is loaded from a disk. On the CUSTOMIZE MENU display, select MIDI SETTING LOAD OPTION. -
Page 186: Video Out Mode Setting
Part XII Video Out Mode Setting Select the output mode for the VIDEO OUT terminal when viewing display images, such as SLIDE SHOW or lyrics, on your external video monitor or TV. On the CUSTOMIZE MENU display, select VIDEO OUT MODE SETTING. •... -
Page 187: Part Xii Midi
Part XIII MIDI What is MIDI? MIDI (Musical Instrument Digital Interface) is the international standard for digital communication of electronic musical instrument data. This means that any equipment which has a MIDI terminal— such as electronic musical instruments and personal computers— can easily exchange digital data with other MIDI equipment without resorting to complicated conversions or connections. -
Page 188: Midi Channels
Part XIII MIDI channels Many different kinds of performance data are sent using just one MIDI cable. This is possible because MIDI signals are sent and received through 16 different “basic channels” (numbered 1 to 16). In order for the exchange of data to take place, the channels on the transmission side must match the channels on the receiving side. -
Page 189: Outline Of Midi Functions
Part XIII Outline of MIDI functions Press the PROGRAM MENUS button to turn it on. • The display looks similar to the following. Select MIDI. • The display looks similar to the following. Summary of the MIDI menu items PART SETTING (page 190) Set the MIDI CHANNEL, OCTAVE and LOCAL CONTROL settings for each part. -
Page 190: Part Setting
Part XIII Part Setting Follow this procedure to set the functions which can be set for each part: MIDI CHANNELs, the OCTAVE data to NOTE data during transmission, and LOCAL CONTROL (whether or not the sound generator of this instrument is active during transmission). On the MIDI MENU display, select PART SET- TING. -
Page 191: Control Messages
Part XIII Control Messages Enable or disable the exchange of various control data. On the MIDI MENU display, select CONTROL MESSAGES. • The display looks similar to the following. • The CONTROL MESSAGES display consists of 3 pages. Use the PAGE buttons to switch between pages. -
Page 192: Common Setting
Part XIII Common Setting Set the functions which are common to all parts. On the MIDI MENU display, select COMMON SETTING. • The display looks similar to the following. Use L and M buttons to select the item. NOTE ONLY: Of the performance data, specify whether or not only note data is exchanged. -
Page 193: Mode Setting
Part XIII Mode Setting Initialize the settings for when the NX SOUND or GM LEVEL 2 mode is ON. On the MIDI MENU display, select MODE SETTING. • The display looks similar to the following. Input/output Setting Make the settings which determine how various performance data is treated during data transmission and reception. -
Page 194: Midi Presets
Part XIII DRUM PATTERN OUTPUT ON: Data from the DRUMS part is transmitted. OFF: Data from the DRUMS part is not trans- mitted. AUTO PLAY CHORD OUTPUT ON: The data for the ACCOMP, BASS and CHORD parts is transmitted. OFF: The data for the above parts is not trans- mitted. -
Page 195: Program Change Midi Out
Part XIII Storing user settings After you change the MIDI settings, you can store your customized settings in USER preset memo- ries (3 USER memories). Adjust the various MIDI settings. Go to PAGE 4/4 of the MIDI PRESETS display. • The display looks similar to the following. Use the L and M buttons to select the memory in which to store the settings (USER SETTING 1, 2, 3). -
Page 196: Panel Memory Output
Part XIII Panel Memory Output These are settings affect the transmission data when the PANEL MEMORY buttons are operated. On the MIDI MENU display, select PANEL MEMORY OUTPUT. • The display looks similar to the following. ∧ ∨ Use the P.MEM buttons to select a PANEL MEMORY number. -
Page 197: Initialize
Initialize This Keyboard has many settable functions and storable memories. However, you can return the settings and memory to the factory-preset status. INITIAL Press the PROGRAM MENUS button to turn it on. PROGRAM MENUS • The display changes to the following. Select CONTROL. -
Page 198: About The Backup Memory And Performance Data
About the backup memory and performance data When the power to this instrument is turned off, the various settings and memory contents of this instrument are maintained in the backup memory as follows: CURRENT PANEL settings PANEL MEMORY PERFORM- SEQUENCER ANCE COMPOSER (MEMORY contents) PERFORMANCE PADS (USER memories) -
Page 199: Terminals
Terminals Back panel terminals (Left side) VIDEO OUT The display images or lyrics when playing songs, and the image of the display are output through this terminal. • The output mode (NTSC/PAL) selected. (See page 186.) This terminal allows connection to a personal computer with a USB cable (commercially avail- able type AB cable). - Page 200 (Right side) A microphone can be connected to this terminal. (Refer to page 45.) LINE IN This terminal receives input signals from an ex- ternal instrument. To receive a monaural signal, connect to the R/MONO terminal. • The input signal volume can be adjusted using the LINE IN VOLUME controller on the control panel unit.
-
Page 201: Symptoms Which Appear To Be Signs Of Trouble
Symptoms which appear to be signs of trouble The following changes in performance may occur in the Technics Keyboard but do not indicate trouble. Phenomenon The buttons, keys, etc. malfunction. No sound is produced when the keys are pressed. • The MAIN VOLUME is at the minimum setting. Adjust Only percussive instrument sounds are produced when the keyboard is played. - Page 202 Phenomenon Storage is not possible. Setting the time signature is not possible. The playback timing of the rhythm pattern is different from the timing with which it was recorded. The Disk Drive produces a noise during recording or playback. When the procedure to load from a disk/SD card is performed, the contents of the keyboard memory are erased.
-
Page 203: Error Messages
Error messages Contents The data on the disk that you are using is for a different product. An error has occurred while the disk was loading. Please try again! There is no disk in the Disk Drive. The file that you tried to load is empty. An error has occurred while the disk was saving. - Page 204 Contents Special tracks such as CHORD (APC), RHY and CTL exist in the song from which copying incompatible with the destination song because it is in the GM mode. AUTO PUNCH recording has been unsuccessful because operation was interrupted before the PUNCH OUT measure was reached.
-
Page 205: Index
Index ACCORDION REGISTER ......38 AMPLITUDE ........172 APC CONTROL (MIDI) . - Page 206 MODULATION ....... . . 46 MULTI ........45 Music stand .
-
Page 207: Specifications
Specifications KEYBOARD SOUND GENERATOR MAX. POLYPHONY NUMBER OF SOUNDS SOUND GROUP SOUND EXPLORER PART EFFECT GLOBAL WHEEL PART SELECT TRANSPOSE NUMBER OF RHYTHMS RHYTHM GROUP FAVORITES CONTROLS PERFORMANCE PADS AUTO PLAY CHORD MUSIC STYLE ARRANGER SOUND ARRANGER MUSIC STYLIST ONE TOUCH PLAY TECHNI-CHORD PANEL MEMORY SEQUENCER... - Page 208 SD CARD SOUND SETTING SOUND EDIT REVERB & EFFECT CONTROL CUSTOMIZE MIDI DISPLAY HELP DEMO TERMINALS OUTPUT SPEAKERS POWER REQUIREMENT DIMENSIONS (W × H × D) NET WEIGHT ACCESSORIES • Design and specifications are subject to change without notice. QQTG0671 SX-KN7000 LOAD, SAVE, FAVORITES SONGS, TECHNICS SONG MEDLEY, SD-AUDIO PLAY, SD-SOUND PLAY, CUSTOM STYLE LOAD/SAVE,...
- Page 209 Panasonic/Technics Musical Instrument Limited Warranty Coverage If your product does not work properly because of a defect in materials or workmanship, Panasonic Consumer Electronics Company or Panasonic Sales Company (collectively referred to as “the warrantor”) will, for the length of the period indicated on the chart below, which starts with the date of original purchase (“warranty period”), at its option either (a) repair your product with new or refurbished...
- Page 210 MEMO QQTG0671...
- Page 211 Matsushita Electric Industrial Co., Ltd. Web Site: http://www.panasonic.co.jp/global/ QQTG0671 ENGLISH Se0402S0...
Need help?
Do you have a question about the SX-KN7000 and is the answer not in the manual?
Questions and answers