Table of Contents
Advertisement
Advertisement
Table of Contents

Related Manuals for Garmin VIRB Ultra 30


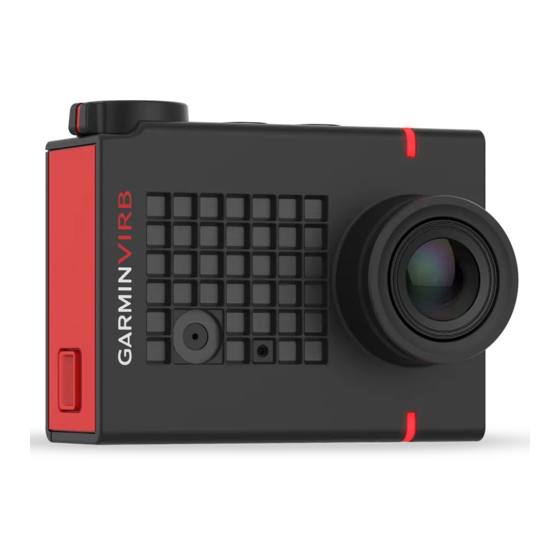
Summary of Contents for Garmin VIRB Ultra 30
- Page 1 VIRB ULTRA 30 ® Owner’s Manual August 2016 190-02069-00_0A...
- Page 2 All rights reserved. Under the copyright laws, this manual may not be copied, in whole or in part, without the written consent of Garmin. Garmin reserves the right to change or improve its products and to make changes in the content of this manual without obligation to notify any person or organization of such changes or improvements.
-
Page 3: Table Of Contents
Connecting to a Composite Video Display ......10 G-Metrix................. 10 G-Metrix Data ................10 Remote Operation and Garmin VIRB Mobile App..10 Operating the Camera Using the Garmin VIRB App ....10 Wi‑Fi Networks and Devices ............. 11 Table of Contents... -
Page 5: Introduction
You must install a compatible microSD ™ memory card to use your device. For more information about compatible memory cards, go to garmin.com/VIRBcards. Slide the latch to open the battery compartment door. Hold to turn the device on or off. -
Page 6: Turning On The Camera
NOTE: The battery will not charge when outside the approved charging temperature range (Specifications, page 14). Turn off the camera. Most power sources do not provide enough power to charge the camera while it is on. Plug the small end of the USB cable into the USB port the camera. -
Page 7: Camera Case
A desiccant pack kit is included in the damage to the removable camera case or gasket and allow product box. Go to www.garmin.com/VIRB to purchase water to leak into the case during use. Exposing the camera to additional desiccant packs. -
Page 8: Attaching The Device To The Mount
Commands You can also purchase additional mounts for your device, such Say OK, Garmin to activate the voice control feature. as wearable mounts, vehicle mounts, or a tripod mount. Go to The camera plays a tone and starts listening for a command. -
Page 9: Video Modes
Mode: The active video mode appears at the top of the Video From the main menu, select Video > Mode > Expansive > menu. You can touch it to change the video mode (Video Type. Modes, page 5). Additional settings vary based on the Tall: In tall expansive mode, the camera uses the full camera active video mode. -
Page 10: Video Mode Specifications
White Balance: Adjusts the color tone based on your the whole frame. This is especially useful for scenes with surroundings. The device can automatically adjust the white high contrast or a large variation in lighting conditions. When balance, or you can manually adjust the white balance. You using spot metering, the most important content or subject can use the 2800K option for incandescent light, the 4000K should be centered in the frame. -
Page 11: Photos
When you connect an external microphone or line-in audio Interval: Sets the time interval between photos for time-lapse source, the device records audio from the external source mode, or the distance interval between photos in instead of the built-in microphone. Travelapse mode. -
Page 12: Recording A Time-Lapse Video
, and the number of camera in your vehicle. photos the camera has taken in this time-lapse session Go to www.garmin.com/VIRB to purchase mount Select the photo key to stop taking photos. accessories. Taking Extended Time-Lapse Photos From the main menu, select Photo or Video. -
Page 13: Presets
From the Playback screen, select > Delete. Select Export Preset to SD. Select an option: The preset is exported to the Garmin/Presets folder on your memory card. • To delete specific photos and videos, select Select, select the items to delete, and select Repeat steps 2 and 3 for all the presets you want to copy. -
Page 14: Wirelessly Playing Video On Another Device
II sensors. You can control video and photo recording, change video and You can use the Garmin VIRB mobile app or the VIRB Edit photo settings, view a real-time remote viewfinder, and view desktop application to overlay G-Metrix data onto your video battery and sensor status information. -
Page 15: Wi-Fi Networks And Devices
Wi‑Fi Networks and Devices From the main menu, select Wireless > Wi-Fi > Status to The Garmin VIRB app and some Garmin devices, such as a turn on Wi‑Fi wireless technology. compatible chartplotter, can control the camera using a Wi‑Fi Select Mode >... -
Page 16: Controlling Multiple Virb Cameras Using Ant+ Wireless Technology
From the main menu, select Wireless > Bluetooth. information about compatibility and purchasing optional sensors, Select a wireless device. go to http://buy.garmin.com. Select Forget > Yes. Pairing ANT+ Sensors When you pair a compatible ANT+ sensor with your device, the VIRB Edit sensor data is recorded as G-Metrix data. -
Page 17: Device Information
NOTE: Your camera records GPS position data at all times additional options. when GPS is on. This data is not collected by Garmin. Grid: Turns on grid lines to frame and balance your shot in Language and Region: Sets the on-screen text language, units preview mode. -
Page 18: Cleaning The Device
(garmin.com/express) provides easy access 40 m. When properly installed, the camera case with the to these services for Garmin devices. altimeter door withstands incidental exposure to water of up to 1 m for up to 30 min. For more information, go to www.garmin.com... -
Page 19: My Camera Feels Warm While It Is Operating
Title, ownership rights, and intellectual property recording video. rights in and to the Software remain in Garmin and/or its third- • Install the altimeter door on the camera case to record more party providers. -
Page 20: Index
2, 4, 6, 8 files, transferring 14 settings 2, 4–6, 9 time lapse 8 videos 9 G-Metrix 10 voice control 4 Garmin Express tips 4 registering the device 14 updating software 14 GPS 2, 10 water rating 3, 14 settings 2, 13 Wi‑Fi 1, 2, 11 access point 11 connecting 10, 11 hdmi 10... - Page 22 +34 93 275 44 97 +27 (0)11 251 9800 + 46 7744 52020 +886 2 2642-9199 ext 2 +49 (0) 89 858364880 0808 238 0000 zum Ortstarif - Mobilfunk +44 870 850 1242 kann abweichen 913-397-8200 1-800-800-1020 © 2016 Garmin Ltd. or its subsidiaries...
Need help?
Do you have a question about the VIRB Ultra 30 and is the answer not in the manual?
Questions and answers