Table of Contents
Advertisement
Advertisement
Table of Contents

Summary of Contents for Contour ShuttleXpress
- Page 1 Contour Shuttle Device Control Panel...
-
Page 2: Table Of Contents
Troubleshooting / Frequently Asked Questions (FAQ) ............ 20 General topics ...................... 20 Applications specific topics ..................21 Glossary of Terms and Components................23 Contour Customer Care....................24 Technical Support ....................24 Warranty Statement....................24 Software License Agreement ................. 25 Appendix 1: Example on how to program Global Settings ............. 27 Programs and products names mentioned herein are Trademarks or Registered Trademarks of their owners. -
Page 3: Introduction To Shuttle Devices
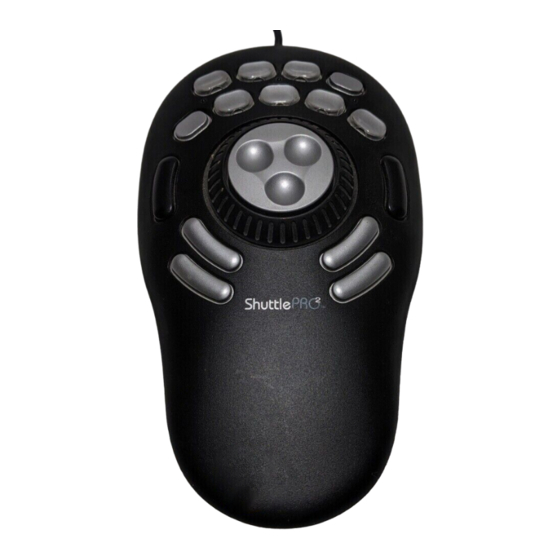
The ShuttlePRO has the same layout of the ShuttlePRO v2 but it doesn't have the left-side and the right-side buttons. The ShuttleXpress has one single row of five buttons above the Jog Wheel and Shuttle Ring. Buttons are numbered 1 to 5 from left to right. - Page 4 Fig. 1-2 ShuttlePRO Layout Fig. 1-3 ShuttleXpress Layout The Shuttle device software allows you to manage a specific configuration of your Shuttle device for every application you have on your computer. The software will automatically select the appropriate configuration according to the current active application.
-
Page 5: Installing Shuttle Device Software
System running Mac OS 8.6 – 9.2. • Available USB port. (A direct USB port connection is desirable, but a hub connection will also work. Contour recommends using powered hubs and against using conversion devices, such as USB adapters.) •... -
Page 6: Shuttle Device Control Panel
The software automatically detects the program you are using and automatically switches to the correct application settings associated with the application. Control Panel Overview The Shuttle device Control Panels are shown in the figure below: Target Application Menu User Action Menu Computer Response Menu Keystroke Field Comment Field Contour Shuttle Multimedia Controllers... -
Page 7: Opening The Shuttle Device Control Panel
Click and move down the list to the Control Panels submenu. Step 3. In the Control Panels submenu locate and click on Contour ShuttlePRO or Contour ShuttleXpress. Note for ShuttlePRO series users: the Shuttle device Control Panel can also be accessed through the Control Strip: Step 1. -
Page 8: Control Panel Components
Global settings or the current application selected in the Target Application Menu. Import Settings • allows you to add a new setting created by Contour, or another Shuttle user, to the existing settings list. Export Settings •... -
Page 9: User Action Menu
• allows you to open any file or application. Scroll Up, Down, Left, Right • will allow you to associate a scrolling. In the following paragraphs, a detailed description of the Computer Response functions is given. Contour Shuttle Multimedia Controllers... - Page 10 2.3.3.2 Type Keystroke Choosing this action allows you to type into the Keystroke Field the keyboard shortcuts that you want a button or Jog Wheel or Shuttle position or transition to perform. Keystroke Field Contour Shuttle Multimedia Controllers...
- Page 11 Shuttle component. You can choose from 1 to 9 lines at a time or scroll by an entire page. For Shuttle positions the scrolling frequency can be set through the Frequency Menu. Contour Shuttle Multimedia Controllers...
-
Page 12: Comment Field
2.3.4 Comment Field The Comment Field allows you to write a comment about a command. Click the field and type in a description then click Contour Shuttle Multimedia Controllers... -
Page 13: Using Your Shuttle Device
1. Click on the Target Application Menu and select the application setting you want to modify. 2. Through the User Action Menu, select the Shuttle component you want to assign the function to. You can choose between: button Shuttle position Shuttle transition. Contour Shuttle Multimedia Controllers... -
Page 14: Modifying Existing Settings
4. Once you have completed the desired changes, close the Shuttle device Control Panel and use your Shuttle device. The new settings will immediately take effect. (There is no need to restart the computer.) Note: you can always remove the setting and re-import it to reverse your changes later. Contour Shuttle Multimedia Controllers... -
Page 15: Programming Global Settings
Global Settings can be modified the same way you would when you modify any other setting, by following the steps of paragraphs 3.4 and 3.3. In Appendix 1, you will find a step-by-step example on how to program Global Settings on the ShuttlePRO, performing the above associations. Contour Shuttle Multimedia Controllers... -
Page 16: Multiple Application Settings (Shuttlepro Series Only)
Multiple application settings (ShuttlePRO series only) Some applications, such as Adobe Premiere or Final Cut, allow multiple modes of usage. Contour Shuttle devices address some of them by providing multiple sets of application settings for these applications in the installation package. -
Page 17: Programming Your Shuttle Device
Refer to paragraph 3.3 for guidance on how to modify their function. 6. Once you have completed the desired changes, close the Shuttle device Control Panel. You are ready to use the setting(s) within the selected application of your choice. Contour Shuttle Multimedia Controllers... -
Page 18: Create Empty Settings
Note: It is strongly recommended that you set up all of the Shuttle positions. If you do not want a Shuttle Knob position to perform a function, then set that position to Nothing Same as Lower Value Contour Shuttle Multimedia Controllers... -
Page 19: Import Settings
Note: you can import the same setting again later as we maintain a list of settings available for download on our website. This is sometimes useful as well when Contour releases a new version of settings for a particular application that we have found a better solution for. -
Page 20: Rename Settings
3. Enter a name of your choice (up to 31 characters) in the Target Application field. You MUST use a different name for each setting. 4. Press OK on your keyboard to save the new name. Contour Shuttle Multimedia Controllers... -
Page 21: Updating Or Uninstalling Your Shuttle Device Software
This section describes how to uninstall the Shuttle Device software. Step 1. Open the System Folder. Step 2. Open the Control Panels folder and move to the trash Contour ShuttlePRO or Contour ShuttleXpress. Step 3. Open the Preferences folder and move to the trash the following items: Contour... -
Page 22: Troubleshooting / Frequently Asked Questions (Faq)
A good example for this is if you are going from Edit to Digitize mode in Media 100. The controls are entirely different in these modes and you must be in the correct ShuttlePRO mode for the Shuttle to operate properly. Contour Shuttle Multimedia Controllers... -
Page 23: Applications Specific Topics
Logic Preferences via the steps outlined below, you will be erasing all user-made key assignments. If you want to utilize the Shuttle device with your pre-existing key commands, it is of course quite easy to change the key assignments that the Shuttle device sends accordingly. Contour Shuttle Multimedia Controllers... - Page 24 Macro or QuickKey function. Make sure that when you do this, that the QuickKey function you program, is targeted for the application it is used in, and not for all applications. (You can do the same for KeyQuencer as well.) Contour Shuttle Multimedia Controllers...
-
Page 25: Glossary Of Terms And Components
Shuttle Knob in either direction. In most cases transitions will not be used unless you have sequential operations to perform. User Action Menu To select which Shuttle component to program Wheel See Jog Wheel Zone See Position Contour Shuttle Multimedia Controllers... -
Page 26: Contour Customer Care
Privacy Statement: Contour Design, Incorporated’s strict policy is NOT to sell, rent, or otherwise make available to anyone outside of Contour Design, any information regarding our Customers. We may use the data you provide, however, to announce future Contour Products, including information on subsequent releases of the Shuttle devices Driver Software and/or upgrades and updates to the application settings folder. -
Page 27: Software License Agreement
Software License Agreement By installing the downloaded software you agree to the following license agreement: Grant of License - Contour Design, Inc. (“Contour”) grants you this non-exclusive license to use the accompanying downloaded software subject to the restrictions set forth below. - Page 28 RESTRICTED RIGHTS. Use, duplication, or disclosure by the Government is subject to restrictions as set forth in subdivision (b)(3)(ii) of The Rights in Technical Data and Computer Software clause 252.227-7013. Contractor / manufacturer is Contour Design, Inc, 10 Industrial Drive, Windham, New Hampshire, 03087.
-
Page 29: Appendix 1: Example On How To Program Global Settings
• the left and right arrows to the Shuttle positions by varying the frequency. Step 1 Open the Contour Shuttle Control Panel. Click on the Target Application Menu and select Global Settings. Step 2: programming Button 13 (Bottom Right Button) Select the Button 13 (Bottom Right Button) in the User Action Menu. - Page 30 Select 6 Times per Second in the Frequency Menu. Click on the Comment field; write “Right Arrow - 6 t/s” and click OK. Select Shuttle Zone 3 in the User Action Menu. Select Type Keystroke from the Computer Response Menu. Contour Shuttle Multimedia Controllers...
- Page 31 Select Export Settings Info from the list. Type ShuttlePRO Configuration Info as name of the file and choose the desktop as destination folder. Click on Save. Locate and double-click the newly created file. The Global Settings assignments should be: Contour Shuttle Multimedia Controllers...
- Page 32 Step 6: using Global Settings Place the focus on the Finder. Open your Applications folder. Double-click on SimpleText. Open a file. Turn the Jog and Shuttle to move across the text. Press the bottom right button when you are done. Contour Shuttle Multimedia Controllers...
Need help?
Do you have a question about the ShuttleXpress and is the answer not in the manual?
Questions and answers