Table of Contents
Advertisement
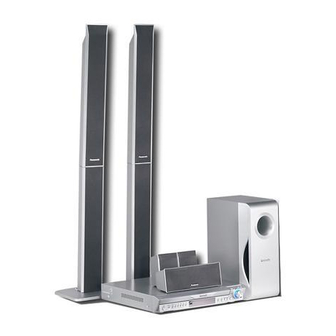
The illustration shows SC-HT740.
Operating Instructions
DVD Home Theater Sound System
SC-HT740/SC-HT940/
Model No.
SC-HT743
Region number
The player plays DVD-Video marked with labels containing the region
number "1" or "ALL".
Example:
1
[U.S.A.[and[Canada[
As an ENERGY STAR Partner,
Panasonic has determined that
this product meets the ENERGY STAR
guidelines for energy efficiency.
§
For Canada only: The word "Participant" is used in place of the word
"Partner".
P
PC PX
1
2
ALL
4
®
®
High-quality
picture
HDMI capability, Advanced
progressive scan and more.
U.S.A. and Canada
Wireless-ready
surround sound
Optional wireless surround
speaker connection.
High-performance
sound effects
Sound quality enhancement,
Bass enhancement and more.
Before connecting, operating or adjusting this product,
please read the instructions completely.
Please keep this manual for future reference.
If you have any questions contact
In the U.S.A.: 1-800-211-PANA (7262)
In Canada: 1-800-561-5505
8
page
8
page
28
page
RQT8582-4P
Advertisement
Table of Contents

Related Manuals for Panasonic SC-HT743


Summary of Contents for Panasonic SC-HT743
-
Page 1: Operating Instructions
“1” or “ALL”. Example: [U.S.A.[and[Canada[ ® As an ENERGY STAR Partner, Panasonic has determined that this product meets the ENERGY STAR guidelines for energy efficiency. § For Canada only: The word “Participant” is used in place of the word “Partner”. -
Page 2: Important Safety Instructions
(1) This device may not cause harmful interference, and (2) this device must accept any interference received, including interference that may cause undesired operation. Responsible Party: Panasonic Corporation of North America One Panasonic Way Secaucus, NJ 07094 Telephone No.: 1-800-211-7262 IMPORTANT SAFETY INSTRUCTIONS Read these operating instructions carefully before using the unit. -
Page 3: Table Of Contents
TABLE OF CONTENTS IMPORTANT SAFETY INSTRUCTIONS ..2 Simple Setup Getting STEP 1 Started Assembling the front speakers ..4 Speaker installation options ... . . 6 STEP 2 Positioning the speakers . -
Page 4: Assembling The Front Speakers
Pull gently. Connect the speaker cable. Slide the speaker cable into the groove. The supplied stands are specially designed for attachment to Panasonic SB-FS740 or SB-FS940 front speakers. Use only as indicated in this setup. 8 Screws Ridges the speaker cable and position it between the ridges. - Page 5 [HT940] 2 Front speakers 2 Stands (with cable) Attach the speaker to the stand. Place the polyfoam underneath the speaker for stability while attaching the speaker to the stand. 1 Feed the speaker cable (the shorter part) into the bottom of the speaker and through the slot at the rear.
-
Page 6: Speaker Installation Options
Speaker installation options ∫ Attaching to a wall You can attach all of the speakers (except subwoofer) to a wall. ≥ The wall or pillar on which the speakers are to be attached should be capable of supporting over 10 kg (22 lbs) [[HT940] 15 kg (33 lbs) for the front speakers] per screw. -
Page 7: Positioning The Speakers
Positioning the speakers STEP How you set up your speakers can affect the bass and the sound field. Note the following points: ≥ Place speakers on flat secure bases. ≥ Placing speakers too close to floors, walls, and corners can result in excessive bass. Cover walls and windows with thick curtains. ≥... -
Page 8: Television With An Hdmi Terminal
Set your surround sound free! Optional Panasonic wireless accessory (e.g. SH-FX60) You can enjoy surround speaker sound wirelessly when you use the optional Panasonic wireless accessory (e.g. SH-FX60). For details, please refer to the operating instructions for the optional Panasonic wireless accessory. -
Page 9: Basic Audio Connection
2 Set “Video Output Mode” to “480p”, and then follow the instructions on the menu screen (➜ page 21, Picture Menu). S-VIDEO ≥ All Panasonic televisions that have 480p input connectors are compatible. Consult the manufacturer if you have another brand of VIDEO television. -
Page 10: Preparing Remote Control
Radio and AC cord connections STEP AM loop antenna ≥ Connect the AC power supply cord after all other connections are complete. ≥ Using an outdoor antenna (optional) (➜ page 27). AM loop antenna Stand the antenna up on its base. Place the antenna where reception is best. -
Page 11: Control Reference Guide
Performing QUICK SETUP STEP The QUICK SETUP screen assists you to make necessary settings. To display the picture from the main unit, turn on your television and change its video input mode (e.g. VIDEO 1, AV 1, etc.). ≥ To change your television’s video input mode, refer to its operating instructions. ≥... -
Page 12: Discs That Can Be Played
≥ [DVD-VR] Recorded with devices using Version 1.1 of the Video Recording Format (a unified video recording standard), such as DVD video recorders, DVD video cameras, personal computers, etc. ≥ [JPEG] Recorded with Panasonic SD multi cameras or DVD video recorders using the DCF (Design rule for Camera File system) Standard Version 1.0. -
Page 13: Product Service
For product information or assistance with product operation: In the U.S.A., refer to “Customer Services Directory” on page 37. In Canada, contact the Panasonic Canada Inc. Customer Care Centre at 1-800-561-5505, or visit the website (www.panasonic.ca), or an authorized Servicentre closest to you. -
Page 14: Using The Main Unit
Basic play Power on. Select “DVD/CD”. ≥Select “AUX” ([HT940] “TV” or “AUX”) to enjoy video cassette recorder, television or cable TV programs. (Refer to page 9 for the necessary connections.) SURROUND MUSIC POWER MUSIC PORT SURROUND MUSIC 5 DISC SELECTOR Start play. -
Page 15: Using The Remote Control
If you are experiencing problems, refer to troubleshooting (➜ page 32 to 34). Using the remote control VIDEO VOLUME MUSIC Numbered buttons VOLUME DISC SLOW SEARCH SKIP SKIP STOP, PAUSE STOP PAUSE PLAY GROUP QUICK OSD [HT740] [HT743] GROUP TOP MENU, ENTER DIRECT NAVIGATOR MENU... -
Page 16: Displaying Current Playback Condition
Convenient functions VIDEO MUSIC Numbered buttons DISC DISC SLOW SEARCH SKIP STOP STOP PAUSE GROUP ENTER MENU ENTER PLAY LIST CANCEL PLAY MODE REPEAT CANCEL WOOFER PLAY MODE LEVEL SLEEP ZOOM DISPLAY ZOOM SETUP TEST SELECT Checking the disc type in each tray You can select the disc after checking the discs loaded with the Disc Information screen. -
Page 17: Program And Random Play
Program and Random play Press [PLAY MODE] while stopped. Program and random playback screens appear sequentially. Program__-----------------------------------------------------) Random ^------------------------ off (Normal play) (__-----------} § “RANDOM 1” and “RANDOM 2” (➜ right) are displayed on the main unit’s display when CD Mode is on (➜ page 16). To exit the program and random mode Press [PLAY MODE] several times while stopped. -
Page 18: Playing Data Discs Using Navigation Menus
Playing data discs using navigation menus MUSIC Numbered buttons DISC SLOW SEARCH SKIP STOP STOP PAUSE GROUP TOP MENU, ENTER DIRECT NAVIGATOR MENU MENU, PLAY LIST PLAY LIST CANCEL PLAY MODE REPEAT WOOFER LEVEL SLEEP ZOOM SETUP TEST Playing data discs [WMA] [MP3] [JPEG] Selecting “Play as Data Disc”... -
Page 19: Playing Ram And Dvd-R/-Rw (Dvd-Vr) Discs
Playing HighMAT discs [WMA] [MP3] [JPEG] Press [TOP MENU]. ≥ To exit the screen, press [∫ STOP]. ≥ To change the menu background to the one recorded on the disc, press [FUNCTIONS]. Press [3, 4, 2, 1] to select the item, and then press [ENTER]. -
Page 20: Using On-Screen Menus
≥ On iR/iRW, a subtitle number may be shown for subtitles that are not displayed. ≥ [DVD-VR] “On” or “Off” appears only with discs that contain subtitle on/off information (Subtitle on/off information cannot be recorded using Panasonic DVD Recorders). [DVD-VR] To recall a marker recorded on DVD-Video recorders Press [3, 4] ➜... -
Page 21: Other Settings
Other Settings [DVD-A] (Motion picture part) [DVD-VR] [DVD-V] To change play speed – from “k0.6” to “k1.4” ≥ Press [1 PLAY] to return to normal play. ≥ After you change the speed – Dolby Pro Logic II and Sound Enhancement have Play Speed no effect. -
Page 22: Display Menu
Using on-screen menus Other Settings ∫ Picture Menu (Continued) This works when the HDMI connection is being used and “Video Output” (➜ page 24, “HDMI” tab) is set to “On”. HD Picture To sharpen the “720p” and “1080i” picture quality Enhancer Off,------. -
Page 23: Changing The Player Settings
Changing the player settings VIDEO VOLUME MUSIC Numbered buttons VOLUME DISC SLOW SEARCH SKIP STOP PAUSE PLAY GROUP QUICK OSD ENTER MENU RETURN PLAY LIST CANCEL PLAY MODE REPEAT MODE WOOFER H.BASS LEVEL SLEEP ZOOM DISPLAY C.FOCUS SETUP TEST SELECT MUTING SETUP Setup... - Page 24 Changing the player settings QUICK SETUP enables successive settings of the items in the shaded area. ∫ “Video” tab TV Aspect Choose the setting to suit your television and preference. TV Type Select to suit the type of television. Time Delay When connected with a Plasma display, adjust if you notice the audio is out of sync with the video.
-
Page 25: Changing The Delay Time Of The Speakers
Changing the delay time of the speakers (Effective when playing multi-channel audio) (Center and surround speakers only) For optimum listening with 5.1-channel sound, all the speakers, except for the subwoofer, should be the same distance from the seating position. If you have to place the center or surround speakers closer to the seating position, adjust the delay time to make up for the difference. -
Page 26: Using The Radio
Using the radio FM/AM Numbered buttons DISC SKIP STOP PAUSE GROUP ENTER ENTER MENU PLAY LIST CANCEL PLAY MODE WOOFER LEVEL SLEEP ZOOM SETUP TEST -TUNE MODE/ Presetting stations automatically ain unit only Up to 15 stations can be set in each band, FM and AM. Press [SELECTOR] to select “FM”... -
Page 27: Using An Outdoor Antenna (Optional)
∫ FM frequency step ain unit only The step is factory-set to 0.2-MHz, but you can change it to receive broadcasts allocated in 0.1-MHz steps. 1 Press [SELECTOR] to select “FM”. 2 Press and hold [SELECTOR]. After a few seconds the display changes to show the current minimum frequency. -
Page 28: Changing The Sound Quality: Sound Field Control
Using sound effects DISC SKIP [HT940] STOP PAUSE SRD ENH GROUP SRD ENH ENTER MENU PLAY LIST CANCEL PLAY MODE WOOFER SUB WOOFER LEVEL LEVEL SLEEP ZOOM SETUP TEST TEST [Note] ≥ The following sound effects may not be available or have no effect when the Rear Music Port or headphones are used (➜... -
Page 29: Adjusting The Volume Of Each Speaker Speaker Level Adjustments
Enhancing the bass sound: H.BASS You can enhance low-frequency sound so that heavy bass sound can be heard clearly, even if the acoustics of your room are not optimal. The unit automatically selects the most suitable setting according to the type of playback source. -
Page 30: Changing The Remote Control Code
What is HDAVI Control? HDAVI Control is a convenient function that offers linked operation of this VOLUME unit and Panasonic TV (VIERA) with HDAVI Control. You can use this function by connecting the equipment with the HDMI cable. For operational SLOW SEARCH details, see the operating instructions of the connected equipment. -
Page 31: Using Other Useful Functions
^""""""""""""" AUX(""""""""___} \U.S.A.\and\Canada] “REAR MUSIC P.” can be selected only if the § optional Panasonic wireless accessory (e.g. SH-FX60) is set up with your home theater system. For details, please refer to its operating instructions. Adjust the external device volume to a normal listening level, and then adjust the volume of the main unit with [VOLUME]. -
Page 32: Troubleshooting Guide
Troubleshooting guide Before requesting service, make the following checks. If you are in doubt about some of the check points, or if the solutions indicated in the chart do not solve the problem, refer to “Customer Services Directory” on page 37 if you reside in the U.S.A., or refer to “Product information” on page 13 if you reside in Canada. - Page 33 Marker ≥ You cannot add markers with DVD-RAM or DVD-R/-RW (DVD-VR) discs. Cannot add markers. ≥ If the disc’s elapsed play time does not appear on the unit’s display, you cannot add markers. A-B repeat ≥ The end of an item becomes point B when it is reached. Point B is automatically set.
- Page 34 Troubleshooting guide Unit displays The display is dark. “NOPLAY” “NODISC” “F61” “DVD U11” “ERROR” “DVD H∑∑” “DVD F∑∑∑” ∑ stands for a number. \U.S.A.\and\Canada] “[W]” is flashing. (When using optional wireless accessory) “D.MIX” is flashing. [DVD-A] “U701” “U70∑” ∑ stands for a number. The actual number following “U70”...
-
Page 35: Specifications
Specifications AMPLIFIER SECTION [HT740] \U.S.A.\and\Canada] RMS Output Power: Dolby Digital Mode 90 W per channel (4 ≠), 1 kHz, 10 % THD Front Ch 90 W per channel (4 ≠), 1 kHz, 10 % THD Surround Ch 320 W per channel (4 ≠), 1 kHz, 10 % THD Center Ch 320 W per channel (4 ≠), 100 Hz, 10 % THD Subwoofer Ch... -
Page 36: Speaker Section
Specifications SPEAKER SECTION [HT740] [HT743] [Front\speakers\SB-FS740] Type 2 way, 2 speaker system (Bass reflex) Speaker unit(s) 1. Woofer 2. Tweeter Input power (IEC) Output sound pressure Cross over frequency Frequency range Dimensions (WtHtD) Mass [HT740] [HT743] [Surround\speakers\SB-FS741] Type 1 way, 1 speaker system (Bass reflex) Speaker unit(s) Full range Input power (IEC) -
Page 37: Limited Warranty (Only For U.s.a.)
Monday-Friday 9 am-9 pm; Saturday-Sunday 10 am-7 pm, EST. For hearing or speech impaired TTY users, TTY : 1-877-833-8855 Accessory Purchases Purchase Parts, Accessories and Instruction Books online for all Panasonic Products by visiting our Web Site at: http://www.pasc.panasonic.com or, send your request by E-mail to: npcparts@us.panasonic.com... -
Page 38: Limited Warranty (Only For Canada)
Limited Warranty (ONLY FOR CANADA) Panasonic Canada Inc. warrants this product to be free from defects in material and workmanship and agrees to remedy any such defect for a period as stated below from the date of original purchase. Technics Audio Product Panasonic Audio &... -
Page 39: Listening Caution
EST. 1924 Selecting fine audio equipment such as the unit you’ve just purchased is only the start of your musical enjoyment. Now it’s time to consider how you can maximize the fun and excitement your equipment offers. This manufacturer and the Electronic Industries Association’s Consumer Electronics Group want you to get the most out of your equipment by playing it at a... - Page 40 Tokyo Panasonic Sales Section 32nd Floor, World Trade Center 4-1, Hamamatsu-cho, 2-Chome, Minato-Ku, Tokyo 105-6132, Japan Panasonic Marketing Europe G.M.B.H. Wiesbaden N. (a Division of Panasonic Marketing G.M.B.H.) Military Sales Department 6200 Wiesbaden-Biebrich, Hagenauerstr. 43 Germany ∏ 1 AC power supply cord \U.S.A.\and\Canada]...
Need help?
Do you have a question about the SC-HT743 and is the answer not in the manual?
Questions and answers