Table of Contents
Advertisement
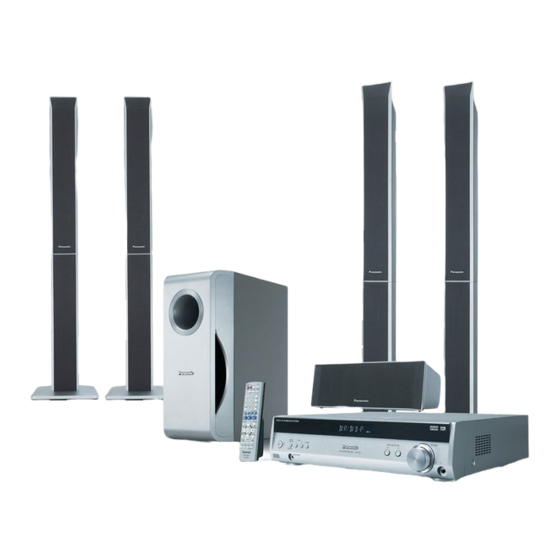
SC-HT60
Operating Instructions
Home Theater Audio System
Dear customer
Thank you for purchasing this product.
Please read these instructions carefully before connecting,
operating or adjusting this product.
Please keep this manual for future reference.
SC-HT60 is used in the illustrations unless otherwise
mentioned.
GN
SC-HT40
Model No.
SC-HT60
Table of contents
Before use
Safety precautions .........................................2
Supplied accessories ....................................3
The remote control .........................................3
Operations
Basic operations ..........................................12
Control guide ................................................13
Making a recording ......................................15
The RESET function .....................................15
MENU operation ...........................................16
The radio .......................................................17
Sound field ....................................................18
Other functions ............................................20
Other settings ...............................................21
Remote control operation guide .................22
Specifications ...............................................23
Reference
Troubleshooting guide .................Back cover
Maintenance ..................................Back cover
4
8
9
10
RQTV0110-1B
Advertisement
Table of Contents

Related Manuals for Panasonic SC-HT60


Summary of Contents for Panasonic SC-HT60
-
Page 1: Table Of Contents
Thank you for purchasing this product. Please read these instructions carefully before connecting, operating or adjusting this product. Please keep this manual for future reference. SC-HT60 is used in the illustrations unless otherwise mentioned. Table of contents Before use Safety precautions ...2 SC-HT40 Supplied accessories ...3... -
Page 2: Safety Precautions
Safety precautions Placement Set the unit up on an even surface away from direct sunlight, high temperatures, high humidity, and excessive vibration. These conditions can damage the cabinet and other components, thereby shortening the unit's service life. Do not place heavy items on the unit. Voltage Do not use high voltage power sources. -
Page 3: Supplied Accessories
1 AC mains lead 1 FM indoor antenna 1 AM loop antenna 1 speaker sticker sheet 2 Batteries 1 Remote control (N2QAYB000010) SC-HT60 16 Screws 4 Stand bases 1 Speaker cable 2 Speaker stands with short cables 2 Speaker stands with... -
Page 4: Step 1 Speaker Setup
Step Speaker setup Placement of speakers. Example: SC-HT60 Front Center speaker speaker (L) Place the front, center, and surround speakers at approximately the same distance from the seating position. The angles in the diagram are approximate. Front speakers (left, right) Place on the left and right of the TV at seated ear height so that there is good coherency between the picture and sound. - Page 5 Consult with a qualified housing contractor concerning the appropriate procedure when attaching to a concrete wall or a surface that may not have strong enough support. Improper attachment may result in damage to the wall or speakers. SC-HT60 Fasten the speaker cable to the base.
-
Page 6: Connect The Speakers To The Receiver
Attach the stickers to the speaker cables. Front speaker (L) SC-HT40: SB-PF41 (center) (subwoofer) SC-HT60: SB-FS61 FRONT FRONT SURROUND SURROUND FRONT FRONT SURROUND SURROUND (center) (subwoofer) (center) (subwoofer) Front speaker (R) FRONT FRONT SURROUND SURROUND FRONT FRONT SURROUND SURROUND (center) -
Page 7: Attaching To A Wall
The stands must be stable even if the speakers are in a high position. Attaching to a wall Center speaker SC-HT40 200 mm SC-HT60 Wall or pillar 7.5 - 9.4 mm 3.0 - 4.0 mm Front and surround speakers SC-HT40... -
Page 8: Step 2 Home Theater Connections
Step Home theater connections Stereo phono cable Other (not included) accessories Left Right Turn off all components before making any connections. To connect equipment, refer to the appropriate operating instructions. Changing the digital input settings You can change the input settings for the digital terminals if necessary. -
Page 9: Step 3 Other Connections
Step Other connections AC mains lead Supplied accessories FM indoor antenna (included) Adhesive tape Fix the end of the antenna where reception is best. LOOP LOOP AUDIO GAME/AUX DVR/DVD-P 75 Ω LOOP The cooling fan operates at high power output levels only. Household AC mains socket (AC 230-240 V/50 Hz) Conserving power... -
Page 10: Step 4 Settings
Step Settings Change the settings to suit your equipment to the environment in which you are using it. Before making any changes, read the descriptions of the settings, note the factory settings and ranges, and refer to the equipment's instructions. DISTANCE Change the distance so that the sound from all the speakers (except... - Page 11 Switch on. MENU SETUP RETURN Select the speaker. TUNE ENTER 3.0m Press once to enter. 3.0m 1.5m Repeat for each speaker channel Select the input position. TUNE ENTER Press OPT1 once to enter. DVR OPT2 Repeat for other input positions Adjust the main Select the speaker volume.
-
Page 12: Basic Operations
Basic operations MENU TUNE SETUP ENTER RETURN MUSIC PORT INPUT SELECTOR Select input. Switch on. TUNER FM MUSIC PORT GAME/AUX Adding surround effects to stereo sources Using Dolby Pro LogicΙΙ Dolby Pro LogicΙΙ processor works not only on sources recorded with Dolby Surround, but also on any stereo source. -
Page 13: Control Guide
Control guide Remote control This page describes the buttons used to control this unit. See the guide at page 22 for the buttons that control other units. [^, RECEIVER] Standby/on button. [TUNER, ―BAND] For switching the remote control to TUNER mode and selecting TUNER. After selecting TUNER, press and hold to switch between FM and AM. - Page 14 Control guide Main unit Standby indicator [^] When the unit is connected to the AC mains supply, this indicator lights up in standby mode and goes out when the unit is turned on. Standby/on switch [8] Press to switch the unit from on to standby mode or vice versa.
-
Page 15: Making A Recording
[INPUT SELECTOR, <, >] For selecting input. INPUT SELECTOR Headphone jack Plug type: 3.5 mm stereo • Sound does not come from the speakers if you connect headphones. • Avoid listening for prolonged periods of time to prevent hearing damage. [PCM, C. -
Page 16: Menu Operation
MENU operation This is an outline of the operations you can perform with the MENU. Press [ MENU] once. Main menu TUNE ENTER TUNER The radio ➡ page 17 BASS Adjust the bass ➡ page 18 TREBLE 0 Adjust the treble ➡ page 18 BALANCE You can adjust the balance of the front speakers ➡... -
Page 17: The Radio
The radio TUNER RECEIVER SYSTEM BAND VOLUME TUNER DVR/DVD-P BAND TV/AV MUTING VOLUME -/-- -/-- SUBWOOFER > > SKIP SLOW/SEARCH SKIP STOP PAUSE PLAY DIRECT NAVIGATOR FUNCTIONS TOP MENU TUNER TUNER DIRECT TUNING DIRECT TUNING ENTER SUB MENU/ RETURN PLAY LIST -EFFECT -LEVEL C.FOCUS... -
Page 18: Sound Field
The radio (cont.) Reducing excessive noise During FM stereo reception You can improve FM reception by switching reception to monaural. Main unit 1. Press [-MENU] to select "TUNER" 2. Press [TUNE - or +] to select "MONO" Select "AUTO" to cancel. During AM reception When there is a lot of noise interference with an AM broadcast, try switching this mode. - Page 19 RECEIVER SYSTEM TUNER DVR/DVD-P BAND -/-- SUBWOOFER > SKIP SLOW/SEARCH STOP PAUSE DIRECT NAVIGATOR TOP MENU ENTER SUB MENU/ PLAY LIST -EFFECT C.FOCUS -EFFECT C.FOCUS MUSIC VOLUME Dimension Control "DIMEN" You can adjust the effect of the Dolby Pro LogicΙΙ MUSIC and PANORAMA modes (➡...
-
Page 20: Other Functions
Other functions MENU TUNE SETUP RETURN MENU TUNE SETUP ENTER RETURN MUSIC PORT Sleep timer The SLEEP timer can turn the unit off after a set time. It does not control any other components. Main unit 1. Use the menus to select "SLEEP". ➡... -
Page 21: Other Settings
Other settings MENU SETUP RETURN MENU SETUP RETURN Setting descriptions INPUT MODE (Input mode) This unit automatically detects whether input is digital or analog, but you can fix the input mode. AUTO: The unit automatically detects whether input is digital or analog. -
Page 22: Remote Control Operation Guide
Remote control operation guide This remote control can operate Panasonic DVD recorders, DVD players, and televisions. Note that this remote control cannot operate some equipment and that it may not be able to perform some operations. Before using a Panasonic DVD recorder or player DVD recorder Change the remote control code to match the remote control code of the DVD recorder. -
Page 23: Specifications
Output sound pressure level Frequency range Dimensions (W x H x D) 92 mm x 135 mm x 95.4 mm Mass Front speaker (SC-HT60: SB-FS61) Type Speaker unit 90 W per channel (4 Ω) Full range 90 W per channel (4 Ω) Tweeter 220 W per channel (6 Ω) -
Page 24: Troubleshooting Guide
Never use alcohol, paint thinner or benzine to clean this unit. • Before using chemically treated cloth, carefully read the instructions that came with the cloth. Matsushita Electric Industrial Co., Ltd. Web Site: http://www.panasonic.co.jp/global/ Common problems • Ensure the AC mains lead is connected.