Table of Contents
Advertisement
Advertisement
Table of Contents

Related Manuals for Rational CombiMaster Plus 61


Summary of Contents for Rational CombiMaster Plus 61
- Page 1 Original operating instructions CombiMaster Plus ®...
- Page 2 RATIONAL SERVICE PARTNERS Our appliances are reliable and have a long service life. However if you should encounter technical difficulties, the RATIONAL SERVICE PARTNERS can provide swift and efficient help. Guaranteed spare parts supply and a weekend call-out team included: Tel. +44 1582...
- Page 3 We offer a 24-month warranty valid from the date of initial installation, provided that your appliance is fully and correctly registered with us. You can do this comfortably online at www.rational-online.com/warranty or by sending us the postcard attached to this manual. The warranty excludes glass damage, light bulbs and seals as well as damage caused by improper installation, use, maintenance, repair or descaling.
- Page 4 We give a 24 month warranty calculated from the date of initial installation, providing you have filled in the warranty registration for your appliance completely and correctly. You can do this conveniently online at www.rational-online.com/warranty or using the enclosed postcard. The warranty excludes glass damage, light bulbs and seals as well as damage caused by improper installation, use, maintenance, repair or descaling.
-
Page 5: Table Of Contents
Contents Explanation of the pictograms Initial start-up Safety Instructions Liability Care, inspection, maintenance and repair Features Notes on using your unit Working with the core temperature probe Working with the hand shower Controls General notes ClimaPlus ® Overview of the cooking modes Steam mode Dry heat mode Combination mode... - Page 6 Contents Settings Celsius/Fahrenheit Settings Time/Date Cleaning Descaling the steam generator Emptying the steam generator Maintenance Air filter service Replacing the door seal Replacing the halogen lamp Service messages Before you call Service: EU Declaration of Conformity for electrical appliances EU Declaration of Conformity for gas appliances...
-
Page 7: Explanation Of The Pictograms
Explanation of the pictograms Danger! Warning! Caution! Imminently hazardous Potentially hazardous Potentially hazardous situation, which, if not situation, which, if not situation, which, if not avoided, will result in severe avoided, may result in avoided, may result in slight injuries or death. serious injury or death. -
Page 8: Initial Start-Up
Initial start-up During initial start-up of your new device, you will be requested to start an automatic self- test. This self-test takes about 45 minutes and is used to adapt the device to the specific environmental conditions. Please note the following: - For the self-test to be carried out, all the packaging materials must have been removed from the device;... - Page 9 Initial start-up step info/button instructions The following test will take place automatically. The display indicates “self” “test”. The self-test is completed after approx.. 45 minutes. Where gas appliances are used, exhaust gas measurement must always be carried out when the self-test has been completed. 9 / 85...
-
Page 10: Safety Instructions
Safety Instructions Keep this manual handy so that it can always be consulted by anyone using the unit. This unit may not be used by children or anyone with limited physical, sensory or mental abilities or a lack of experience and/or knowledge, unless these people are supervised by someone responsible for safety. - Page 11 In case of damage to the glass plate, please replace the entire plate immediately. Warning! Smoking food in unit Smoking food in the unit may only be performed using the original RATIONAL smoking accessory, the VarioSmoker. 11 / 85...
- Page 12 Safety Instructions Warning! Gas units only - If your appliance is installed under an extractor hood, this must be switched on when the appliance is in use – Combustion gases! - If your appliance is connected to a chimney, the flue duct must be cleaned in compliance with specific regional regulations –...
- Page 13 Safety instructions and liability Warning! Safety instructions during use - If containers are filled with liquid or contents which liquefy during cooking, only use rack levels at a height at which the user can see into the slide-in containers – risk of burns. There is a warning sticker enclosed with the unit.
-
Page 14: Liability
Safety instructions and liability Liability Installations and repairs that are not carried out by authorised specialists or using genuine spare parts, and any technical change that is not approved by the manufacturer will invalidate the manufacturer’s warranty and product liability. 14 / 85... -
Page 15: Care, Inspection, Maintenance And Repair
Care, inspection, maintenance and repair Your unit must be cleaned every day or when a request for cleaning appears to maintain the high quality of the stainless steel, for hygiene reasons and to avoid operating faults. To do this, follow the instructions in the “Efficient CareControl” section. Continuous operation at high cooking cabinet temperatures (≥260°C) or the use of high browning levels (brown 4/5) and a production with predominantly high-fat and gelatin- containing foods may lead to more rapid wear of the door seal. - Page 16 Care, inspection, maintenance and repair Warning! Servicing the incoming air filter. The device automatically recognises when the air filter is soiled. You receive a service message and a request to clean or replace the air filter when the air filter is soiled. The unit must not be operated without air filter. Please heed the following when replacing the air filter: Unit size 6 x 1/1 GN, 6 x 2/1 GN, 10 x 1/1 GN and 10 x 2/1 GN Air filter part number: 40.03.461...
- Page 17 Care, inspection, maintenance and repair Inspection, maintenance and repair Danger – high voltage - Inspection, maintenance and repair work may only be carried out by trained technicians. - The unit must be switched off at the mains on-site when cleaning (except CleanJet ®...
-
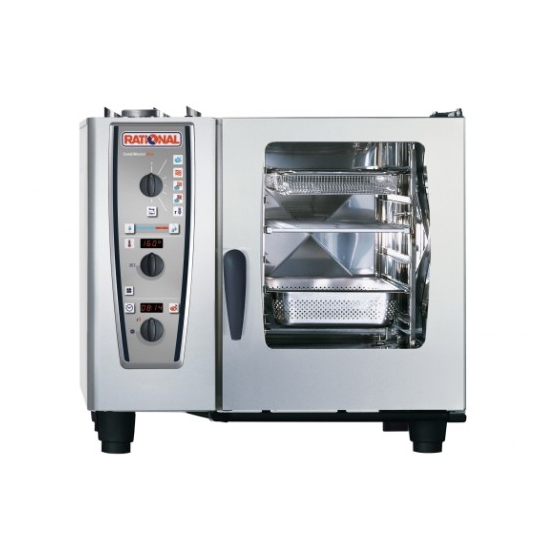
Page 18: Features
(inside) Integrated and self-emptying door drip pan (inside) Drip collector connected directly to unit drain CombiMaster Plus 61 on thermocabinet Unit feet (height-adjustable) Rating plate (contains important data such as power consumption, type of gas, voltage, number of phases and frequency, as well... -
Page 19: Notes On Using Your Unit
Notes on using your unit - Avoid having heat sources (e.g. grill plates, deep fryers etc.) near the unit. - Only use the unit in areas with a room temperature > 5 °C. For ambient temperatures of less than + 5 °C, you must heat the unit to a temperature > + 5 °C before starting. - As soon as you open the cooking cabinet door, the heating and fan wheel shut down automatically. - Page 20 Notes on using your unit Exceeding the maximum load size can lead to damage of the device. Please note the specifications for maximum load sizes for food in the “Manual cook book”. Table-top units with hanging racks (6 x 1/1 GN, 6 x 2/1 GN, 10 x 1/1 GN, 10 x 2/1 GN) - To remove, raise the hanging rack slightly in the middle.
- Page 21 Notes on using your unit Working with mobile oven racks, mobile plate racks and transport trolleys for table-top units (option)) - Remove the hanging rack as described above. - Place the run-in rail on the fixing provided on the unit's base.
-
Page 22: Working With The Core Temperature Probe
Notes on using your unit Working with the core temperature probe Caution! The core temperature probe can be hot – Risk of burns. Always insert the core temperature probe into the thickest point on the product. Make sure that a large part of the probe needle is in the product. Insert the core temperature probe at an angle into the product. - Page 23 Notes on using your unit Into the breast meat At the thickest point on the product - Always correctly position the core temperature probe in the park position provided – Risk of damage.! - Do not let the core temperature probe hang out of cooking cabinet – risk of damage. - Remove the core temperature probe from the food before you take the food from the cooking cabinet –...
-
Page 24: Working With The Hand Shower
Notes on using your unit Working with the hand shower - If you use the hand shower, please pull the hose at least 20 cm out of the park position. - You can select 2 jet strengths by pressing the control button. - Always let the hand shower slide slowly back into the park position. -
Page 25: Controls
Controls Switch off Steam (30 °C to 130 °C). Dry heat (30 °C to 300 °C) Combination of steam and dry heat (30 °C to 300 °C) Finishing (30 °C to 300 °C) Cool down Programming/program start button Humidity setting Cooking cabinet temperature setting Selection button for cooking... - Page 26 Controls Cooking time setting (0 to 23 hours 59 min) Core temperature setting (0 °C to 99 °C) Cooking time/core temperature display Selection button for cooking time/ core temperature 26 / 85...
-
Page 27: General Notes
General notes Operation: Choose the required Choose the required Choose the required cooking cabinet cooking time/core cooking mode. temperature. temperature. The cooking time can be set in minutes for times between 0 and 2 hours, in 5-minute intervals for times between 2 and 3 hours, in 15-minute intervals for times between 3 and 6 hours and in 30-minute... - Page 28 General notes Notes: A buzzer signals the end of cooking. The cooking mode display Button lights up when the flashes when the cooking heating is active. cabinet is too hot (see the “Cool Down” section on cooling the cooking cabinet). Fault messages: ...
-
Page 29: Climaplus
ClimaPlus ® ClimaPlus® measures and regulates the humidity in the cooking cabinet. You can set the exact product-specific climate for each food in the climate window. Steam: Dry heat: Steam + dry heat: The factory setting for You can set the mixture ClimaPlus allows you to ®... - Page 30 ClimaPlus ® Press the cooking time or core temperature button to display the current humidity in the cooking cabinet. For continuous operation that is as resource friendly as possible, we recommend using standard cooking cabinet humidity e.g. 100% for dry heat. 30 / 85...
-
Page 31: Overview Of The Cooking Modes
Overview of the cooking modes “Steam” cooking mode (30 °C to 130 °C) The high-performance fresh steam generator with new steam control always produces hygienic fresh steam. You can cook without adding water and without waiting for the water to boil. The constant cooking cabinet temperature and the maximum steam saturation guarantee a uniform and very gentle cooking process. - Page 32 Overview of the cooking modes “Cool down” You can use the cool down function to cool down the heated cooking cabinet quickly and gently, e.g. for low-temperature cooking or manual cleaning. “Programming/program start” You use the programming function to create and save programs manually. There are 50 program slots available with up to 6 cooking steps each for repeat cooking processes.
-
Page 33: Steam Mode
Steam mode In the “steam” cooking mode, the steam generator generates hygienic fresh steam. You can set the cooking cabinet temperature from 30 °C to 130 ℃ . Cooking methods: Steaming, stewing, blanching, simmering, soaking, vacuum cooking, thawing, preserving step info/button instructions Choose the “steam”... - Page 34 Steam mode - After preheating and loading, an acoustic signal and the 00:00 setting in the display will remind you that you still have to set the required cooking time or core temperature. - If no further action takes place after the preheat temperature is reached, heating mode is switched off after 10 minutes.
- Page 35 Steam mode Sample dishes Mise en place Tomatoes concassé, garnishes (vegetables, fruit), mushrooms, blanching juliennes and brunoises, blanching vegetables for stuffings, roulades etc., peeling onions and chestnuts, soaking pulses, blanching bacon and ham, poaching fish dishes, soups, sauces, stocks, fumets etc.
- Page 36 Steam mode To get the most out of your appliance, check daily the types of food which can be cooked together using “steam” . Remember that fish, meat, vegetables, side dishes and fruit can be cooked together (as long as they are all being prepared by the same method).
-
Page 37: Dry Heat Mode
Dry heat mode In “dry heat” cooking mode, powerful heating elements heat up the dry air. You can set the cooking cabinet temperature from 30 °C to 300 °C . You can limit the cooking cabinet humidity if necessary. Cooking methods: Baking, roasting, grilling, deep-frying, gratinating, glazing. step info/button instructions... - Page 38 Dry heat mode - After preheating and loading, an acoustic signal and the 00:00 setting in the display will remind you that you still have to set the required cooking time or core temperature. - If no further action takes place after the preheat temperature is reached, heating mode is switched off after 10 minutes.
- Page 39 Dry heat mode Sample dishes Mise en place Sweating bacon, roasting bones, allowing dough (yeast) to rise. Starters Meatballs, vegetarian bakes, vegetables au gratin, vegetable pasties, pies, sirloin, chicken wings, finger food, duck breasts, quiches, shortcrust pastry, tartlets. ...
- Page 40 Dry heat mode Cooking times Cooking times will depend on product quality, weight and height. Do not overload grids or containers so that air can circulate evenly. General notes on pan-frying - Preheat to as high a temperature as possible (300 °C) to build up sufficient stored heat. - load as quickly as possible, in order to minimise cabinet temperature drop.
-
Page 41: Combination Mode
Combination mode The two operating modes “steam” and “dry heat” are combined. This combination creates a hot humid cabinet climate for especially intensive cooking. You can set the cooking cabinet temperature from 30 °C to 300 °C . You can set the cooking cabinet climate if necessary. Cooking methods: Roasting, baking, finishing. - Page 42 Combination mode - After preheating and loading, an acoustic signal and the 00:00 setting in the display will remind you that you still have to set the required cooking time or core temperature. - If no further action takes place after the preheat temperature is reached, heating mode is switched off after 10 minutes.
- Page 43 Combination mode Sample dishes Mise en place Roasting bones. Starters Quiche Lorraine, vegetable soufflés, flans, moussaka, lasagne, canneloni, paella, pasta bakes. Main courses Roasts (beef, veal, pork, lamb, poultry, game), roulades, stuffed vegetables (peppers, aubergines, cabbage, onions, kohlrabi), vegetable gratins (cauliflower), turkey legs, stuffed breast of veal, ham with noodles, leg of pork, belly of pork, various omelettes.
- Page 44 Combination mode Do not place joints too close together to allow even cooking. Joints with rinds or larger joints should be steamed for approximately 1/3 of the cooking time. Collect condensate in a container (additional rail) and make the gravy by adding it to the lightly roasted bones.
-
Page 45: Finishing Cooking Mode
Finishing ® cooking mode The two operating modes steam and dry heat are combined. This produces the ideal cooking climate, both preventing the food drying out and the formation of unwanted puddles. You can set the cooking cabinet temperature from 30 °C to 300 ℃ . step info/button instructions... - Page 46 Finishing ® cooking mode step info/button instructions - After preheating and loading, an acoustic signal and the 00:00 setting in the display will remind you that you still have to set the required cooking time or core temperature. - If no further action takes place after the preheat temperature is reached, heating mode is switched off after 10 minutes.
- Page 47 Finishing ® cooking mode Sample dishes Starters All types of spaghetti, canneloni, lasagne, vegetable dishes, cheese and herb noodles, quiche Lorraine, spring rolls, vegetarian cutlets, onion flans. Main courses All types of roast, meat loaves, bakes, ready-to-serve meals, roulades, stuffed vegetables. ...
- Page 48 Finishing ® cooking mode Finishing utensils Porcelain plates, earthenware, glass, silverware, copper pans, stainless steel, aluminium dishes (brought in). Banqueting service/tour groups Reheat plates in the mobile plate rack. – Large quantities in next to no time. – Fast loading and unloading. –...
-
Page 49: Cool Down
Cool down You have been operating your appliance at high cooking cabinet temperatures at first and then want to continue working at low cabinet temperature. You can cool the cooking cabinet down quickly but gently using “cool down”. Warning! - Do not use the “cool down” function unless the air baffle has been locked correctly – risk of injury. -
Page 50: Program Mode
Program mode You use the programming function to create and save programs manually. There are 2x50 program slots available with up to 6 cooking steps each for repeat cooking processes. So that you can guarantee constant quality – even when you have assistants doing the cooking. Create program step info/button... - Page 51 Program mode step info/button instructions Press the button to set the cooking time. Set the required cooking time Press the button. Select a further cooking mode e.g. “dry heat”, and this is confirmed by “S2” appearing on the display. Set the required cooking time Select the required cooking cabinet humidity or work with the default setting.
- Page 52 Program mode step info/button instructions Choose the required core temperature. Press the button. Use the selection button to set “prog/start” to save the program. - Activate the “prog/start” button for programming again if it has gone out. - If you would like to keep the same cooking mode in the next program step, choose another cooking mode briefly in order to be able to start the next program step.
-
Page 53: Check Program
Program mode Check program step info/button instructions Use the selection button to set “prog/start”. Choose the required program. Start the program by pressing “prog/start”. 53 / 85... - Page 54 Program mode - If the display flashes, it means the program slot is vacant. - The remaining cooking time is shown during operation in the “cooking time/core temperature” display. If the program includes a step with core temperature, the remaining time is only shown when this step has been finished.
-
Page 55: Check Program
Program mode Check program step info/button instructions Use the selection button to set “prog/start”. Choose the required program. Press “prog/start” to show the first program step. Press the button again to request the next step. The cooking cabinet door should be open. - If the display flashes, it means the program slot is vacant. -
Page 56: Delete Program
Program mode Delete program step info/button instructions Use the selection button to set “prog/start”. Select a program, e.g. P4. Keep the “prog/start” button pressed for 5 seconds. A flashing program slot confirms deletion. Individual program steps can neither be deleted nor changed. 56 / 85... -
Page 57: Download Programme
Download Programme Use the download function to save your own programs to a USB stick. The USB stick should be connected when the unit is switched off. step info/button instructions Switch the unit off and insert the USB stick in the slot underneath the control panel. -
Page 58: Upload Programme
Upload Programme - Connection of energy optimisation system. Copy your individual cooking porgrams to the unit with the upload function. The USB stick should be connected when the unit is switched off. step info/button instructions Switch the unit off and insert the USB stick in the slot underneath the control panel. - Page 59 Upload Programme When the upload function is used, all program slots on the unit are overwritten. Back up existing programs on a USB stick before you transfer programs from another unit. 59 / 85...
-
Page 60: Haccp
HACCP The data is stored for a period of 10 days and can be output via the USB interface on the unit as required.. To save HACCP data permanently on a USB stick, please follow the instructions. The USB stick should be connected when the unit is switched off. step info/button instructions... - Page 61 HACCP The following data is logged: - Batch no. - Time - Cooking program name - Cooking cabinet temperature - Core temperatura - -Door open /door closed - Change of cooking mode - Connection of energy optimisation system. - 1/2 energy 61 / 85...
-
Page 62: Software Update
Software update The unit software can be updated with a USB-Stick. The USB stick should be connected when the unit is switched off. step info/button instructions Switch the unit off and insert the USB stick in the slot underneath the control panel. Keep the “ClimaPlus”®... -
Page 63: Settings Celsius/Fahrenheit
Settings Celsius/Fahrenheit The temperatures of your unit can be shown in Celsius or Fahrenheit. To change the display, proceed as follows. step info/button instructions "Prog/Start" press Turn the selection button clockwise. Appears on the display. Press the button. The temperatures of your unit can be shown in Celsius or Fahrenheit. -
Page 64: Settings Time/Date
Settings Time/Date You can set the time and date on your unit for correct evaluation of HACCP data. Carry out the settings as follows. step info/button instructions "Prog/Start" anwählen Turn the selection button clockwise. Appears on the display. Press the button. Shown on the upper display for the hour setting. - Page 65 Settings Time/Date step info/button instructions Turn the lower selection button to set the hour and save this using the “prog/start” button. Shown on the upper display for the minute setting. The current month appears in the lower display. Turn the lower selection button to set the hour and save this using the “prog/start”...
-
Page 66: Cleaning
Cleaning Warning! - For hygiene reasons and to prevent malfunctions it is essential to clean the unit every day - risk of fire. - Please note that your unit must be cleaned every day, even if only “steaming” mode is used. - Follow the safety instructions on the spray bottle and cleaner canister. - Page 67 Cleaning step info/button instructions Spray the space behind the air baffle, cooking cabinet, door seal and inside of the door with cleaner. Reset and lock the air baffle and hanging rack in place, close the cooking cabinet door. Warning! Do not open the cooking cabinet door while cleaning is in progress –...
- Page 68 Cleaning step info/button instructions At the end of the cleaning time, you will be prompted to open the doors. When the cleaning program has finished, rinse the unit down, including behind the air baffle. Wipe the cooking cabinet and cooking cabinet seal with a damp cloth.
- Page 69 Cleaning If there is a power failure during cleaning, the following warning appears: The cleaning program must be cancelled in these circumstances. This is achieved by pressing the Prog/Start button. The device must then be rinsed manually! Warning! Aggressive chemical fluid – risk of chemical burns. It is essential that you use: protective clothing, safety goggles, gloves and facemask.
-
Page 70: Descaling The Steam Generator
Descaling the steam generator Your unit is equipped with the patented automatic SelfClean system. Automatic SelfClean significantly extends the period between descaling intervals. The steam generator in your unit still needs regular descaling, depending on water hardness and use. We recommend the following descaling intervals (based on 8 hours use of steam mode per day) - up to 18 °dH (up to 3.2 mmol/litre) at least 1x year - up to 24 °dH (up to 4.3 mmol/litre) at least 2x year... - Page 71 Descaling the steam generator step info/button instructions You will be asked to fill up with descaling fluid. Open the cooking cabinet door. Remove left hanging rack and air baffle. Guide hose into steam inlet opening as far as the mark shown. ...
- Page 72 Descaling the steam generator step info/button instructions Warning! Aggressive chemical fluid – risk of chemical burns. There may be residues of the descaling fluid in the hoses. Rinse the descaling accessories thoroughly with water. Wear: protective clothing, safety goggles, gloves and facemask.
- Page 73 Descaling the steam generator Amounts of descaler for gas appliances 6 x 1/1 GN 10 x 1/1 GN 20 x 1/1 GN 4 litre 7 litre 8 litre 6 x 2/1 GN 10 x 2/1 GN 20 x 2/1 GN 6.5 litre 9 litre 11 litre...
- Page 74 Descaling the steam generator You need: Electric descaler pump – Article no.: 60.70.409 Descaler, 10 litre canister – Article no.: 6006.0110 Cancel descaling process If necessary you can discontinue the descaling process. Before filling with descaling fluid step info/button instructions Please keep the core temperature button pressed for 10 seconds.
- Page 75 Descaling the steam generator step info/button instructions Descaling is discontinued if the If the core temperature button is not pressed within 30 seconds descaling will continue. The steam generator is automatically drained and thoroughly rinsed. “End” appears in the cooking time/core temperature display.
-
Page 76: Emptying The Steam Generator
Emptying the steam generator You have the possibility of emptying the steam generator before transport or as protection from frost. step info/button instructions Close the water tap and open the door Use the selection switch to set "Prog/Start". Turn the selection switch clockwise. "ESG"... -
Page 77: Maintenance
Maintenance Air filter service Table-top units type 6 x 1/1 GN, 6 x 2/1 GN, 10 x 1/1 GN and 10 x 2/1 GN: Loosen the air filter by pressing the frame in the two roughened spots. Tilt the filter down and remove it completely from the unit. -
Page 78: Replacing The Door Seal
Maintenance Replacing the door seal The door seal is fitted in a groove on the cooking cabinet. - Pull the old seal out of the groove. - Clean the guide rail. - Insert new seal into the groove (moisten the retaining lips with soapy water). -
Page 79: Service Messages
Service messages If faults occur on your unit, they are indicated on the display. step info/button instructions Faults in your appliance which allow you to carry on cooking can be suppressed by pressing the clock button. fault indication when and how remedial action When it has been The unit can be used for cooking. - Page 80 Service messages fault indication when and how remedial action service message persists, notify Customer Service. Displayed Humidity control not working. The unit can continuously be used for cooking with limitations. - Notify Customer Service! When it has been Core temperature probe is defective. The switched on for 30 unit can be used for cooking without the seconds,...
-
Page 81: Before You Call Service
Before you call Service: error possible cause Rectification Water dripping out of Door is not closed If the door is closed correctly, the door the unit’s door. correctly. handle will point down on floor units. Door seal is worn or Replace the door seal (see the damaged. - Page 82 Before you call Service: of fat are cooked frequently or if the drop on the outlet pipe is too shallow. To remedy: Run the outlet pipe as described in the installation instructions. The unit does not External main switch is Switch on at the main switch indicate a function switched off...
-
Page 83: Eu Declaration Of Conformity For Electrical Appliances
EU Declaration of Conformity for electrical appliances 83 / 85... -
Page 84: Eu Declaration Of Conformity For Gas Appliances
EU Declaration of Conformity for gas appliances 84 / 85... - Page 88 80.05.001 V-05 MDS/Ad 02/16...
Need help?
Do you have a question about the CombiMaster Plus 61 and is the answer not in the manual?
Questions and answers
I need trouble shooting manually
To manually troubleshoot the Rational CombiMaster Plus 61, follow these steps:
1. Cooking Cabinet Light Not Working
- Cause: Halogen lamp is defective.
- Solution: Replace the lamp (refer to the “Maintenance” section of the manual).
2. Low Water Warning ("OPEn H2O" on Display)
- Cause: Water tap is closed or the water intake filter is clogged.
- Solution:
- Open the water tap.
- Check and clean the water intake filter:
- Close the water tap.
- Unscrew the water intake on the unit.
- Remove and clean the filter.
- Reinsert the filter, reconnect the intake, and check for leaks.
3. Water Running Out from the Bottom of the Unit
- Cause: The unit is not level or the drain is blocked.
- Solution:
- Level the unit using a spirit level (refer to the Installation Manual).
- Remove and clean the outlet (HT pipe) at the back of the unit.
- If blockages recur, ensure the outlet pipe is installed correctly according to the installation instructions.
4. Unit Not Functioning
- Cause: External main power issue or other faults.
- Solution:
- Check the external power supply and ensure the unit is connected properly.
- If the issue persists, further troubleshooting or service may be required.
For additional troubleshooting, refer to the manual or contact professional service if necessary.
This answer is automatically generated