Table of Contents
Advertisement
Advertisement
Table of Contents

Related Manuals for DigiTech XC-0389


Summary of Contents for DigiTech XC-0389
- Page 1 Digital Voice Recorder User Manual XC-0389...
- Page 2 Box Contents: 1 x Digital Voice Recorder 1 x Earphones 1 x Tie Clasp External 1 x Micro B USB Cable...
- Page 3 Product Diagram:...
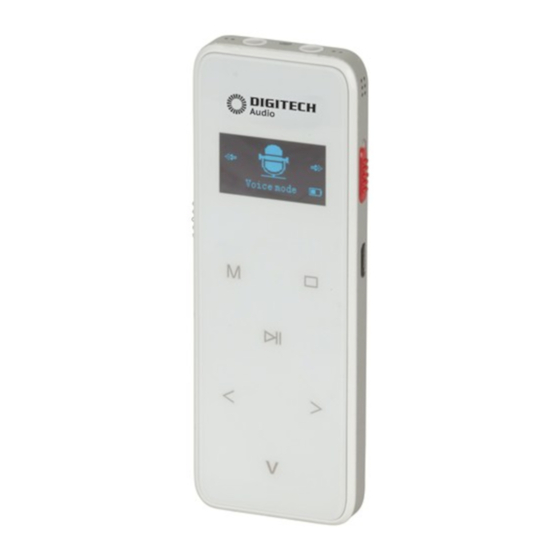
- Page 4 1. Left In-built Microphone 9. Play/Pause Button 2. Right In-built Microphone 10. Menu Button 3. LCD Display 11. Stop/Return Button 4. Record 12. Volume Button 5. Recording LED Indicator 13. Vol+ / Previous / Rewind 6. Lanyard Slot 14. Vol- / Next / Fast Forward 7.
- Page 5 LCD Diagram:...
- Page 6 1. Current Time 8. File Name 2. Recording State 9. Play Mode 3. Recording File Name 10. Equalizer Mode 4. Recording Balance Time 11. Repeat Mode 5. Current File Number/ Total File 12. A-B Repeat Mode Number 13. Play/Pause/Stop 6. Battery Percentage Voice Activated Recording...
- Page 7 Power On: In power off mode; slide the “Power“ button to the “ON/OFF” position and hold for 2 seconds until the screen displays the Digitech Audio symbol. Power Off: In standby mode; slide the “Power” button to the “ON/OFF” position and hold for 2 seconds until the screen displays “Power Off”...
- Page 8 One-Key Recording: In any state including being powered off, slide the Red “REC” recording switch from “STOP” to “REC”; the device will start recording. Modes: 1. Voice Mode: In any state including being powered off, slide the Red “REC” recording switch from “STOP”...
- Page 9 to resume recording. Slide the record switch to “ ” Stop to end the recording and the device will return to the stopped playing interface of the current recorded file. Please Note: Up to 200 recorded files can be stored on this device, if the number reaches 200 then the recordings will stop.
- Page 10 confirmation of deleting the file. Press the “M” Menu button again to select,“NO” for cancelling the file deletion. Press the “M” Menu or “ ” Stop button to return to standby mode. Record Type: In the Voice standby mode; press the “M” Menu button, right“>” and “<” Left arrow buttons to select “PCM”...
- Page 11 Recording Format & File Save Locations: REC Format File Format REC Quality Save Location Default Stereo /DVR/ST REC***. MP3 Phone /DVR/ST LIN***. MP3 FM Record /DVR/ST RFM***. MP3 Noise C REC /DVR/PCM RNC***. PCM REC /DVR/PCM PCM***. Segmented Recording: This function is used for long duration recording. You can save one long file in to certain sections.
- Page 12 Press the “M” Menu button again to confirm and the right “>” or “<” left arrow buttons to select between “30mins”,” 60mins”, and “Close”, Press the “M” Menu button to confirm and press the “ ” Stop button to exit. Set Light, Voice Activated Recording (VOR/VA) &...
- Page 13 Press the “M” Menu button again and you can select “Repeat All, Repeat One, or Random” with the right">” or “<" left arrow buttons. Press the “M” Menu button to confirm and then press the “ ” Stop button to exit. Equalizer: When you are playing a recorded file”;...
- Page 14 Repeat Play: A-B Replay: When you are playing a recorded file; press the "M" Menu button and the right "> or <" left arrow buttons to select “A-B replay”. Press the “M” Menu button return to the playing interface, "A" will flash, Press the right “>”...
- Page 15 Press the “M” Menu button to cancel the A-B repeat and back to playing normally. Press the “ ” Stop button to cancel the A-B repeat and playing will stop. Replay Times/Replay gap: While you are playing a recorded file; press the "M" Menu button and the right "> or <"...
- Page 16 2. Music Mode: In standby mode; press and hold the “M” Menu button, the LCD will display “Voice M” Music mode, FM mode and System Setting. Select the “Music” setting with “>” and “<” left and right arrow buttons, press the “M” Menu button to confirm. Press the "...
- Page 17 Press and hold the "<"Left Arrow button to rewind, press the ">" Right Arrow button to Fast Forward. VOL+/ VOL-: When the file is playing or has stopped, press the “V " Volume Button first, and the +" and "-" buttons to adjust the volume of the track. 3.
- Page 18 Mode”, ”Radio Mode” and “Setting”. Press the ">, <" left and right arrow buttons to select “Radio Mode”. Press the “M” Menu button to enter after you are ready to listen once you have plugged in the earphones. Please Note: The FM radio mode can only be heard through the earphones, the earphones act as an antenna and will not allow you to play through the voice recorder’s speaker.
- Page 19 stop at your required radio station. Auto Search: In the FM state; press the "M" Menu Button,”<” left and “>” right arrow buttons to select "Auto Search", Press the “M” Menu button to confirm and press the “>” “<” left and right arrow buttons to select “YES”...
- Page 20 Press the “M” Menu button to confirm. Please Note: The voice record can store up to 40 radio stations at one time. Saved radio stations can be seen from the channel list. Press the “<” or “>” left and right arrows to switch among the list of saved radio stations in sequence from 1 to 40.
- Page 21 Save Recordings: In FM recording mode; press the “ ” Stop button to save the radio station ,the screen will display “Radio” and “Voice”. Press the Left “<” and “>” Right arrow buttons to select “Radio” which will go back to the FM mode The “Voice”...
- Page 22 Press and hold the “M” Menu button to exit from FM mode. 4. Setting: Press and hold the “M” Menu button to enter into menu mode including Voice, Music, FM and Setting. Press the left “<” and “>” right arrow buttons to choose the setting, press the “M”...
- Page 23 9. Firmware Version 11. Reset Default Setting 10. Clear Memory Press the “M” Menu button, Left”<” and ”>” right arrow to select your required setting. Time & Date: System Time: Press the “M” Menu button, Left “>” and “<” right arrows to select set date or time.
- Page 24 Please connect the voice recorder to your pc using the included Micro B cable. The name XC-0389 will automatically pop up as a removable storage device. If it does not open automatically then go to my computer, it should show up as a...
- Page 25 Specifications: Memory: 4GB Internal Recording Modes: PCM, HQ Recording Format: WAV (PCM), MP3 (HQ) Recording Time: 12hrs PCM 69hrs HQ Battery: 3.7V, 350mAh Li-Ion Rechargeable Battery Battery Life: Up to 17hrs PCM, 15hrs HQ Recharge Time: Up to 3 hrs Compatibility: Windows 10, 8.1, 8, 7, Vista, XP, 2000, Mac OS X®...
- Page 26 Distributed By: TechBrands by Electus Distribution Pty. Ltd. 320 Victoria Rd, Rydalmere NSW 2116 Australia Ph: 1300 738 555 Int’l: +61 2 8832 3200 Fax: 1300 738 500 www.techbrands.com Made in China...
Need help?
Do you have a question about the XC-0389 and is the answer not in the manual?
Questions and answers