
Related Manuals for Novexx XLP 504

Summary of Contents for Novexx XLP 504
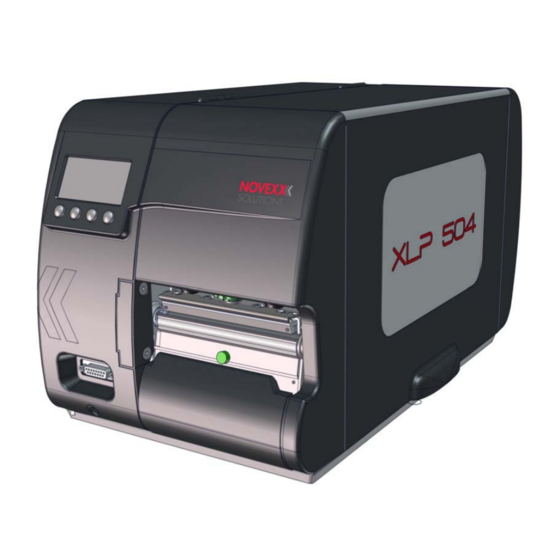
- Page 1 USER MANUAL XLP 504 Label printer Edition 3 - 9/2016 - Translation of original version...
-
Page 3: Table Of Contents
Icons overview Technical data Dimensions Performance Data Label Stock Thermotransfer Ribbon Connections, device data Interfaces Electronic Configuration Specifications only for XLP 504 dispenser Ambient Conditions Certificates and Markings Parameter menu Overview Alphabetical Parameter list Parameter Reference Commissioning Scope of delivery... - Page 4 Label Material Thermal Transfer Ribbon Insertion Diagrams -100 XLP 504 standard -100 XLP 504 with internal rewinder -100 XLP 504 with internal rewinder and dispensing edge -101 Inserting Label Material -102 XLP 504 Standard -103 XLP 504 with internal rewinder -105...
- Page 5 XLP 504 User manual Printhead -161 Important Handling Notes -161 Finding out the printhead resolution -161 Cleaning the Printhead -162 Changing the Printhead -164 Print Roller -165 Cleaning the Print Roller -165 Changing the Print Roller -166 Punch Sensor -167...
-
Page 6: Please Note
XLP 504 User Manual Please note GENERAL NOTES Validity of this manual and required compliance Contents The complete operating manual for the label printer XLP 504 consists of the following parts: Manual Target group Medium Availability Quick reference guide, Lieferung mit der... -
Page 7: How Information Is Represented
XLP 504 User Manual Manufacturer Novexx Solutions GmbH Ohmstrasse 3 D-85386 Eching, Germany Tel.: +49-8165-925-0 Fax: +49-8165-925-231 www.novexx.com How information is represented Explanation of symbols To enhance readability and make information easier to find, different types of information are iden- tified: ... - Page 8 XLP 504 User Manual Parameters Parameters in the parameter menu are represented in the format Menu name > Parameter name in grey type. 09/2016 | 02 Please note...
-
Page 9: For Your Safety
FOR YOUR SAFETY Intended use The XLP 504 label printer is designed for printing label material, using the thermal or thermal trans- fer printing process. In addition, the dispenser version of the printer can dispense self-adhesive la- bels and can rewind the remaining backing paper (ar alternatively the complete label material). It is possible to use a wide range of label materials and thermal transfer ribbons. - Page 10 XLP 504 User Manual Protection against injuries by electrical current • Only operate the printer using the system voltage indicated on the nameplate! • Only connect the printer to a grounded power socket fitted to authorized standards! • Connect only devices to the interfaces at the printer that fulfil SELV (safety extra-low voltage)
- Page 11 Warning notes on the printer provide important information for the operating personnel. Do not remove warning notes. Replace missing or illegible warning notes. [1] Warning notes on the XLP 504. Warning note Meaning Article no. The ´Pinch point´ warning note warns you of the danger po- sed by the machine´s rotating parts;...
-
Page 12: Product Description
OVERVIEW Intended Use The XLP 504 printer is designed for printing label material, using the thermal or thermal transfer printing process. In addition, the dispenser versions of both printer types can dispense self-adhe- sive labels and can rewind the remaining backing paper (ar alternatively the complete label mate- rial). - Page 13 (option) with endless material. XLP 504 dispenser The XLP 504 dispenser allows freshly printed labels to be dispensed or rewound in the printer en- closure. • When used as a dispenser, the label material is drawn around the dispensing edge and only the backing paper is rewound (Prerequisites: Dispensing edge + Rewinder).
-
Page 14: Device Types
Device types The XLP 504 is available in the following versions: Basic XLP 504 equipped with serial, USB and Ethernet interface and SD card slot. Possible upgrade to „peripheral“ version. The following options can be integrated: • Reflex sensor (bottom side) •... -
Page 15: Ports And Connections
Using poor quality auxiliary equipment can damage the printer. Only connect original accessories. [3] The rear side of the XLP 504 with I/O board (option) installed. A Start/stop signal input: Connections for a foot switch (signal starts printer) or stacker (signal stops printer) B Memory card slot: For SD cards where you can store fonts, logos, graphics, etc. -
Page 16: Operating Controls
[4] Outside view of XLP 504 “peripheral”. A Control panel: LCD screen; 4 buttons; displays operating status of printer; allows parameter menu settings. B (Only to XLP 504 “peripheral”) Connection for additional devices: – Cutter („Cutter 2000“) – Rewinder („Rewinder 2000“) –... - Page 17 XLP 504 User manual [5] Operating controls of XLP 504. A Ribbon unwinding mandrel: Holds the new ribbon roll B Ribbon winding mandrel: Holds the cardboard core that rewinds the spent ribbon C Connection flange for additional devices: You can fasten either a cutter or rewinder here. To do this, you first have to remove the plastic cover.
- Page 18 XLP 504 User manual Operating controls at the XLP 504 with dispenser option [6] Additional operating controls on XLP 504 dispenser. A Dispensing edge: This is where the labels are separated from the backing paper. B Plugs: Connector for dispensing edge sensor.
- Page 19 User manual Operating controls of the XLP 504 with rewinding option [7] Additional operating controls of XLP 504 with rewinding option. A Baffle plate: Deflects the printed labels without dispensing any of them. B Deflecting shaft: This deflects the labels.
-
Page 20: Operation Panel
User manual OPERATION PANEL Operating controls The operation panel of the XLP 504 consists of a graphic display and four keys below the display. The current functions of the keys are displayed by icons [8B] above the keys. Ready [8] Operation panel of the XLP 504. - Page 21 Same as „Error“, with the following differences: • The current printjob is not stopped • The warning is displayed with yellow background • The warning dissappears after some seconds [Tab. 2] Display colors and corresponding states of the XLP 504 09/2016 | 01 Product description...
-
Page 22: Icons Overview
XLP 504 User manual Icons overview Home: Toggle to the „Home“ screen Start: Starting an operation, e. g. printing Contrast: Setting the print contrast during Halt: Stopping an operation, e. g. printing printing Printing: Toggle to the „Ready“ screen Cutter: Triggers a cut of the optional cut- Keys 1-4: For typing in of key codes, the ter („Cutter 2000“) -
Page 23: Technical Data
TECHNICAL DATA Dimensions Measures 275 x 266 x 463 mm (H x W x D) (266) (463) [10] Dimensions of the XLP 504 (H=Height, W=Width, D=Depth). Weight Printer Weight XLP 504 basic / peripheral 14.0 kg XLP 504 „basic“ dispenser / „peripheral“ dispenser 14.7 kg... - Page 24 XLP 504 User manual Label sensor Setting range Punch length Sensor type Punch width (Size a) (Size c) (Size b) Transmission sensor 0–60 mm 0.8–14 mm min. 4 mm (Standard) 12 mm Reflex-sensor 4 mm 6–66 mm (optional) (recommended) (recommended) [Tab.
- Page 25 XLP 504 User manual Impression accuracy [12] The impression accuracy depends on the print position on the label: the longer the distance to the gap is, the lower is the impression accuracy. The maximum impression accuracy is at the gap position with +/- 1 mm.
- Page 26 XLP 504 User manual Bar codes Codabar Code 128 A, B, C Code 128 Code 128 UPS Code 128 pharmacy Code 2/5 matrix Code 2/5 interleaved EAN 8 Code 2/5 5-line EAN 13 add-on 2 Code 2/5 interleaved ratio 1:3...
-
Page 27: Label Stock
XLP 504 5 mm max. print width XLP 504 dispenser 30 mm 200 mm XLP 504 dispenser (With optional label sensor for short labels) 5 mm 200 mm [Tab. 7] Overview label length. Max. print length on page 24. -
Page 28: Thermotransfer Ribbon
25 mm (1”) Width 25 -110 mm Corresponds for example to 450 m standard ribbon type Novexx 4903 Generally counts: The thermal transfer ribbon must overlap the label 2 mm on each side. For labels width > max. print width count the foil width: 110 mm. -
Page 29: Specifications Only For Xlp 504 Dispenser
XLP 504 User manual Specifications only for XLP 504 dispenser Speed, while the rewinding-Ø is calculated: 75 mm/s (3“/s) Speed, while the material is fed back: 75 mm/s (3“/s) Distance dispensing edge - print zero line: 25 mm Distance punch sensor - print zero line: 71 mm Max. -
Page 30: Parameter Menu
XLP 504 User manual Parameter menu OVERVIEW Click on a link in the table to get to the parameter description. Print Options System Print contrast Selection ├ Start offset Language X - Printadjust └ Periph. device ... - Page 31 XLP 504 User manual Printer Language Print interface Tools Print Interpret. Print interface Diagnostic EasyPlug Setting Network ├ Store Parameters ├ Character filter ├ IP Addressassign ├ Gen.Support Data ├ Character sets ├...
- Page 32 XLP 504 User manual Info Model ID └ Memory Data Language Status Printouts ├ RAM memory size Access authoriz. ├ Demo label ├ Flash mem size Factory settings ├ Printer Status ├...
-
Page 33: Alphabetical Parameter List
XLP 504 User manual ALPHABETICAL PARAMETER LIST #VW/I Interface Display serialNr Head resistance Access authoriz. Display Version Head run length Application mode Double cut Head strobes Bar code multip. Drive C Head temperature Baud rate Drive D Image Save Path Board part numb. - Page 34 XLP 504 User manual Print interface Roll number Store Parameters Print Interpret. Roll run length System date Print speed Rotated barcodes System revision Print test SD card System version Printer ID no. Sensor Test Temp. reduction Printer Status Serial number...
-
Page 35: Parameter Reference
XLP 504 User manual PARAMETER REFERENCE Print contrast Setting range Default setting Step width Easy-Plug [1...105] % #!H, #PC2045 CAUTION! The parameter Print contrast affects directly the life durance of the printhead. It counts: „The higher the setting of Print contrast is, the lower is the life durance of the printhead“. -
Page 36: Print Speed
XLP 504 User manual Y - Printadjust Setting range Default setting Step width Easy-Plug [-15...15] mm 0.0 mm 0.1 mm #PC1021 The zero point of the mask is moved in relation to the edge of the label on the Y-axis, i. e. in the feed direction. -
Page 37: Punch Offset
XLP 504 User manual Punch offset Setting range Default setting Step width Easy-Plug -8...max. label length 0 mm 0.1 mm #PC1008, #PO The max. label length depends on several factors, e. g. the memory configuration. The zero position can be determined offset in millimetre steps from the detected gap position [1]. - Page 38 XLP 504 User manual Materiallength Settings Default setting Step width Easy-Plug [5...max. label length 100 mm 0.1 mm The max. label length depends on several factors, e. g. the memory configuration. The material length (label length) is the distance between the gaps, measured from the front edge (beginning) of a label to the front edge of the next label.
-
Page 39: Bar Code Multip
• Reflex: Reflex photoelectric switch (for black marks on the bottom side) • Reflex (upper): n. a. • Short label opt.: Activates the optional short label sensor Appears only in XLP 504 printers which are equipped with the short label sensor. Mat. end detect. (Material end detection) Settings... -
Page 40: Ean Readline
XLP 504 User manual Tradit. Imaging Setting range Default setting Step width Easy-Plug No, Yes Only in service mode Up to firmware version x.31, the barcode height was calculated with the formula: x Barcodehight Barcodehight Print Layout Print >... -
Page 41: Rotated Barcodes
XLP 504 User manual Rotated barcodes Setting range Default setting Step width Easy-Plug Normal, Optimized Optimized #PC1013, #YB Improves readability of rotated (90° and 270°) bar codes. • Normal: „Normal“ printing without special processing of rotated bar codes. • Optimized: The line and gap widths of rotated bar codes are modified to improve readability. -
Page 42: Feed Speed
XLP 504 User manual Feed speed Setting range Default setting Step width Easy-Plug [2.0...6.0] Inch/s 4.0 Inch/s 1 Inch/s #PC1004, #PR Setting: The value for the feed speed should not be set too high for print applications with long calculating units (e. -
Page 43: Start Print Mode
XLP 504 User manual • Dispenser: Activates the dispensing option (requires internal rewind option + dispensing edge). • Intern. rewinder: Activates the internal rewind option (requires internal rewind option + deflec- tion plate). Start print mode Settings Default setting Step width... -
Page 44: Pause Input
XLP 504 User manual • On: Feeding of one label on the falling signal edge. The display shows „I/O board feed“ during feeding. Requirements are: – Offline mode or „stopped mode“ or „I/O pause mode“. – Online mode and no print job loaded. -
Page 45: Error Polarity
XLP 504 User manual Error polarity Settings Default setting Step width Easy-Plug Level high activ, Level Level low active #PC3208 low active Only with an I/O board mounted. Switches the polarity of the ERROR signal • Level high activ: The output is high when it is active, otherwise low. -
Page 46: Cut Mode
XLP 504 User manual • Mode0 inactive: No print end signal. • Mode1 low level: Low, if the print module is just printing a label, otherwise high. The output is also deactivated (= low) as long as labels are fed with “Feed Button” or “Feed Signal”. -
Page 47: Cut Speed
XLP 504 User manual 1. Printing Novexx Novexx 2. Stop printing + Novexx Novexx Novexx 3. Continue printing [4] Printing process in Batch mode (schematic). • Normal 1:1 mode: In N1:1 mode, cutting takes place during printing. The zero-line of the printing is shifted 18 mm in y-direction. -
Page 48: Cut Position
= „Cutter“). The values for MAX_CUT_WIDTH depend on printer type and printhead: Printer MAX_CUT_WIDTH XLP 504 with 203 dpi XLP 504 with 300 dpi The values for MAX_CUT_WIDTH don´t equate to the real cut width (no linear relation between value and cut width). -
Page 49: Dispensing Edge
XLP 504 User manual Normal 1:1 mode • The printer cannot print on the whole label surface. A stripe at the label beginning stays unprint- ed. The width of the unprintable stripe is calculated as follows: Distance print line to dispensing edge (25 mm) + Dispense position See also: Parameter Options >... -
Page 50: Rewind Direction
XLP 504 User manual Real 1:1 mode • The printer can print the whole label surface. • After dispensing a label, the beginning of the next label is drawn back under the print head. • The output volume is lower than in Batch Mode or Normal 1:1 Mode. -
Page 51: Display Mode
XLP 504 User manual The setting follows in both cases this scheme: 1. Bring the dancer arm to its loose position. 2. Press key 3. 3. Pull the dancer arm tight. 4. Press key 2. Rewinder Values Setting range Default setting... -
Page 52: Application Mode
XLP 504 User manual There are two ways of setting back the counter: • Set the parameter Display mode (see above) to "Job rest quant." , then back to "Dispense coun- ter" and confirm by pressing the o. k. key. -
Page 53: Start Offset
XLP 504 User manual Selecting a material initialization procedure: • Auto negotiation: Material initialization is done automatically. Therefore, the label material is fed forwards and backwards several times. There is a risk of the dispensing edge roller getting jammed by labels sticking to it, which were dispensed by the forward/backward movement. -
Page 54: External Signal
XLP 504 User manual Keyboard Settings Default setting Step width Easy-Plug German, English, French, Spa- nish, Danish, Finnish, Swedish, English #PC2063 Polish, Setting the keyboard layout country version for standalone operation. External signal Settings Default setting Step width Easy-Plug Off, Singlestart, Stacker... -
Page 55: Factory Settings
XLP 504 User manual Entering a key code: Type the corresponding buttons of the control panel in succession. A valid key code switches the printer into the appropriate mode. Mode Key code Impact Operator 1-1-3-2 Access is limited to the Info menu... -
Page 56: Head Resistance
XLP 504 User manual Turn-on mode Settings Default setting Step width Easy-Plug Offline, Online, Standalone Online #PC2020 Operating mode of the printer after it has been switched on. • Online: Printer starts in online mode (display „Ready“). • Offline: Printer starts in offline mode (display „Home“). -
Page 57: Ram Disk Size
XLP 504 User manual Ram disk size Setting range Default setting Step width Easy-Plug [128...MAX ] KBytes 512 KBytes 128 KBytes #PC2046 Maximum size, depends on the memory equipment and usage of the printer A part of the printer memory can be identified as a RAM disk. The RAM disk can be used in the same way as the Compact Flash Card, e.g. -
Page 58: Data Blocks Del
XLP 504 User manual Data blocks del. (Delete data blocks) Settings Default setting Step width Easy-Plug All, Bxx Only appears, if at least one data block is in the flash memory. • Bxx: The selected data block number xx is deleted: „B01“: Block number 01... -
Page 59: Reprint Function
XLP 504 User manual Singlestartquant Setting range Default setting Step width Easy-Plug [1...10] #PC2033 Determines the label quantity, which will be printed after a start signal. Reprint function Settings Default setting Step width Easy-Plug Off, On #PC2050 • Off: Reprinting is not possible. -
Page 60: Print Info Mode
XLP 504 User manual Single-job mode Settings Default setting Step width Easy-Plug Off, On #PC2023 In single job mode (also stop mode) the printer stops after every job and waits until the operator restarts the print process. • Off: Single job mode is switched off. -
Page 61: Character Filter
XLP 504 User manual • Hexdump: Print-out in hexadecimal format. In Lineprinter and Hex Dump, commands are printed out in the form of a list with the character set 12. When setting Lineprinter or Hex Dump, Easy Plug commands which have not yet been pro- cessed are deleted! •... - Page 62 XLP 504 User manual • 16Bit: UTF-8 coding • 8Bit: Choose between IBM and ANSI character set. • 7Bit: Additionally to the IBM and ANSI character sets, some country specific character sets are provided, which have some characters allocated differently (see table below).
-
Page 63: Spooler Mode
XLP 504 User manual Spooler mode Settings Default setting Step width Easy-Plug Mult. print jobs, Single print job Mult. print jobs #PC1102 The operating mode of the spooler determines whether print series are processed individually, or whether the spooler can receive print data when printing several series. -
Page 64: Printer Id No
XLP 504 User manual Printer ID no. (Printer identification number) Setting range Default setting Step width Easy-Plug [0...31] #PC1103 Determines the identification number of the printer. In such a way, the printer can be addressed by the Easy Plug command #!An (n=printer ID). -
Page 65: Left Position
XLP 504 User manual Left Position Setting range Default setting Step width Easy-Plug [-9999...9999] Print > X-Druckversatz, which will be ig- Left position offset (x-offset) in dots. Equals the parameter nored, when ZPL printjobs are printed Error Indication Settings Default setting... -
Page 66: Label Invert
XLP 504 User manual Label Invert Settings Default setting Step width Easy-Plug Disable, Enable Disable Print > Format > Print direction, which will be ignored, Rotates the printout by 180°. Equals the parameter when ZPL printjobs are printed Printer Printout [8] Orientation of the printout: Setting „Disable“... - Page 67 XLP 504 User manual Command ^PR Settings Default setting Step width Easy-Plug Disable, Enable Enable • Disable: The print rate sent in the ZPL printjob is ignored. • Enable: The print rate is not ignored. Command ^MT Settings Default setting...
-
Page 68: Net Mask
XLP 504 User manual IP address Setting range Default setting Step width Easy-Plug [0...255] 192.168.0.99 #PC1502 for each xxx-value in xxx.xxx.xxx.xxx Print interface > IP Addressassign, appears one of the following: Depending on the setting of parameter • an unchangeable info field (setting „DHCP“) or •... -
Page 69: Dhcp Host Name
XLP 504 User manual DHCP host name Setting range Default setting Step width Easy-Plug #PC1513 Host name of the printer. Default setting: „Device name“ + the last 3 figures of the MAC adress WEB server Settings Default setting Step width... -
Page 70: Web Display Refr
XLP 504 User manual • On: Switches the web server on. • Off: Switches the web server off. WEB display refr (Web server display refresh) Setting range Default setting Step width Easy-Plug [0...20] s #PC1510 Print interface > Network > Services > WEB server Only appears, if = „On“. -
Page 71: Baud Rate
XLP 504 User manual Time zone Setting range Default setting Step width Easy-Plug [-12:00…+12:00] 00:00 00:30 #PC1533 Correction of the time received by the time server by a value expressed in hours (hh) and minutes (mm). Only appears if Print interface >... -
Page 72: Stop Bits
XLP 504 User manual Stop bits Settings Default setting Step width Easy-Plug [1..2] #PC1204 #PC1355 Print interface > Serial Port 1 > Baud rate Print interface > Serial Port 3 > Baud rate (only with I/O board) Data synch. Setting range... -
Page 73: Frame Error
XLP 504 User manual Frame error Settings Default setting Step width Easy-Plug #PC1207 Display, Ignore Display #PC1358 Print interface > Serial Port 1 > Baud rate Print interface > Serial Port 3 > Baud rate (only with I/O board) • Display: An error message is displayed, if a framing error is detected while the printer is receiv- ing serial data. -
Page 74: Log Files Delete
XLP 504 User manual Gen.Support Data (Generate support data) Generates the folder „SupportData“ on the selected memory medium and stores the following di- agnosis files therein: • Setup.for (for details see Tools > Diagnostic > Store Parameters) Tools > Diagnostic > Store Parameters) •... -
Page 75: Ep Monitor Mode
XLP 504 User manual The parameter activates the logging of received Easy Plug data. Data is transmitted to the serial interface (Com1). • Off: The monitor function is disabled. • Serial Com1: The Easy-Plug monitor data is transmitted to the serial interface (Com1). - Page 76 XLP 504 User manual Demo label Prints a demonstration label in format 100 mm x 100 mm that is especially sized for the demo foil and demo material, which is supplied temporarily. [9] Printout „Demo label“. 09/2016 | 01 Parameter menu...
-
Page 77: Printer Status
XLP 504 User manual Printer Status A protocol can be printed to get an overview of customer-specific parameter settings [10]. A material width of 100 mm is necessary to print the reports. The status print-out is approx. 200 mm long. -
Page 78: Memory Status
XLP 504 User manual Memory Status Prints an overview over: • Internal Memory Configuration [11A] • Files that are stored on the internal memory (RAM disc) [11B] • Files that are stored on an external memory medium [11C] (if any) ... - Page 79 XLP 504 User manual [12] Print sample „Font Status“, section „Font Library“. Internal Line Styles: Use the line style number (fist column) with one of the Easy Plug commands #YL or #YR to print lines in the matching style.
- Page 80 XLP 504 User manual [13] Print sample „Font Status“, section „Barcode Library“. • Onedimensional bar codes are printed with the Easy-Plug command #YB, see manual Easy- Plug, topic section „Command description“. • Two-dimensional bar codes are printed by means of special Easy-Plug commands (Tab. 6).
- Page 81 XLP 504 User manual [14] Print sample „Font Status“, section „Barcode Library“: Listing of RSS-Codes and 2-dim. bar codes. 09/2016 | 01 Parameter menu...
-
Page 82: Flashdata Status
XLP 504 User manual Flashdata Status Prints a list of all fonts stored in the flash memory. This can be e. g. customized fonts or diagnose data. For detailed information about diagnosis data refer to the service manual, topic section „Fault location“, „Reading out diagnosis data“. -
Page 83: Service Status
XLP 504 User manual Service Status Print the Service status report to read about operation time, no. of services, no. of exchanged parts and other matters of service interest (one page). Tools > Service > Serv. data reset, to set all the counters to zero, which are listed on Use the parameter the printout. -
Page 84: Reference Label
XLP 504 User manual Reference label Prints a label with some examples of barcodes, fonts, logos. The table at the bottom end of the label contains the settings or print contrast and print speed, with which the label was printed. The empty fields can be filled with the applied printhead pressure and the applied ribbon and label material (for purpose of comparison). -
Page 85: Cuts On Knife
XLP 504 User manual Cuts on knife No setting option - Only display Easy-Plug #!PG30020 Only with mounted and activated cutter. Shows the number of cuts done by one knife. The counter is reset with each calling of the parameter Tools >... -
Page 86: Head Strobes
XLP 504 User manual Tot. mat. length No setting option - Only display Easy-Plug #!PG30021 Shows the total "covered distance" of the feed roller. Other than the counter Roll run length, this coun- ter is not reset after a roller exchange. -
Page 87: System Date
(Internal rewinder) No setting option - Only display Easy-Plug #!PG30057 „XLP 504 peripheral with internal rewinder“ only. Shows the applied PIC version on the internal rewinder motor output stage board. RAM memory size No setting option - Only display Easy-Plug #!PG30007 Shows the available RAM memory size. -
Page 88: Flash Mem Size
XLP 504 User manual Flash mem size No setting option - Only display Easy-Plug #!PG30008 Shows the available Flash memory size. The abbreviation which is displayed behind the memory size indicates the manufacturer of the applied Flash-RAM. Abbreviation Manufacturer Macronix Fuji [Tab. -
Page 89: Pcb Revision
XLP 504 User manual Custom defaults No setting option - Only display Easy-Plug #!PG30013 There are customer specific parameter settings available that can be used for factory reset pur- System > Factory settings. pose. See parameter CPU identifier No setting option - Only display... -
Page 90: Pcb Part Number
XLP 504 User manual PCB part number No setting option - Only display Easy-Plug #!PG30042 Shows the part number of the board without components. Board part numb. No setting option - Only display Easy-Plug #!PG30043 Shows the part number of the board with components. -
Page 91: Head Temperature
XLP 504 User manual Head temperature No setting option - Only display Easy-Plug #!PG30071 Shows the current printhead temperature in °C 09/2016 | 01 Parameter menu... -
Page 92: Commissioning
XLP 504 User manual Commissioning SCOPE OF DELIVERY [18] Scope of delivery of the XLP 504 peripheral. A Core adapters (2 pairs) B Cardboard core for rewinding thermotransfer ribbon C Mains connection cable D Quick reference guide E Booklet with safety notes... -
Page 93: Setting Up The Printer
XLP 504 User manual SETTING UP THE PRINTER WARNING Lethal hazard from mains power, if any liquid gets into the printer! Protect the printer from liquid penetration. CAUTION The printer and printing materials will be damaged by moisture and wetness! ... -
Page 94: Electrical Connections
XLP 504 User manual ELECTRICAL CONNECTIONS Connecting to the mains power supply WARNING! This unit operates at mains voltage! Contacting electrically live components can cause lethal electrical shocks and burns. Make sure that the printer is switched off before connecting the power cable. -
Page 95: Connecting To A Data Host
User manual Connecting to a data host According to the factory settings, the XLP 504 is set for data transfer via USB interface. Print data can also be transferred via serial interface or Ethernet interface. Alternatively to transmitting via data line, the printjobs can be stored on a storage medium (SD card, USB thumb drive) and be started from there. -
Page 96: Basic Settings
Cancel Switching the rewind function on/off Prerequisites Only for XLP 504 with internal rewinder and baffle plate. Insert label material before activating the rewinder, otherwise an error message will appear! Switching on Options > Selection > Periph. device to „Intern. -
Page 97: Switching The Dispense Function On/Off
XLP 504 User manual Switching the dispense function on/off Prerequisites Only for XLP 504 with internal rewinder and dispensing edge Insert label material before activating the rewinder, otherwise an error message will appear! Switching on Options > Selection > Periph. device to „Dispenser“. -
Page 98: Operation
CHOOSING THE MATERIALS Label Material Material specification The XLP 504 can process rolls as well as leporello fold (= fold-out or accordion fold material). The label rolls must be wound with the printable side facing outwards. For more information on the material specifications, refer to chapter Label Stock ... -
Page 99: Thermal Transfer Ribbon
XLP 504 User manual Quality criteria Pay attention to the following 3 factors when selecting the quality of label material: • The abrasive behaviour of the surface structure of the material • The chemical properties of the material that affect how ink is printed •... -
Page 100: Insertion Diagrams
– Solid line = printed side wound inwards – Dashed line = printed side wound outwards XLP 504 standard [22] Material and ribbon path in XLP 504. XLP 504 with internal rewinder [23] Material and ribbon paths in XLP 504 with internal rewinder. 09/2016 | 01 Operation... -
Page 101: User Manual Xlp
XLP 504 User manual XLP 504 with internal rewinder and dispensing edge [24] Material and ribbon movement in XLP 504 with internal rewinder and dispensing edge. 09/2016 | 01 Operation... -
Page 102: Inserting Label Material
XLP 504 User manual INSERTING LABEL MATERIAL WARNING! Danger of crushing fingers when closing the front hood. Always use the grip to open or close the front hood [25]. Danger of rotating parts drawing items in. Don´t wear loose long hair (if necessary, wear a hairnet). -
Page 103: Xlp 504 Standard
XLP 504 User manual XLP 504 Standard Inserting a label roll 1. Open the front hood. 2. Open the pressure lever [26A] on the printhead. 3. Remove the guiding disk [26B] of the material roller. [26] Remove the guiding disk (B). - Page 104 XLP 504 User manual 8. Push the sensor arm using the handle [30A] until the indicator [30B] is above the punches on the ma- terial. The optional reflex light sensor is located 6 mm to the right of the indicator. That means, that the in- dicator has to be placed 6 mm left of the middle of the reflex mark.
-
Page 105: Xlp 504 With Internal Rewinder
XLP 504 User manual XLP 504 with internal rewinder Prerequisite: • Printer is switched on • Rewinding function is switched on (see Switching the rewind function on/off on page 96) Procedure: 1. Insert the label material, see Inserting a label roll ... -
Page 106: Xlp 504 With Internal Rewinder And Dispensing Edge
XLP 504 User manual XLP 504 with internal rewinder and dispensing edge Prerequisites: • Printer is switched on • Dispensing function is switched on (see Switching the dispense function on/off on page 97) Procedure: 1. Press the red button [35A] on the dispensing edge to unlock the dispensing roll. -
Page 107: Inserting Ribbon
XLP 504 User manual INSERTING RIBBON WARNING! Danger of crushing fingers when closing the front hood. Always use the grip to open or close the front hood. Danger of rotating parts drawing items in. Don´t wear loose long hair (if necessary, wear a hairnet). -
Page 108: Inserting A New Ribbon Roll
XLP 504 User manual Inserting a new ribbon roll 1. Open the front hood. 2. Open the pressure lever [39C] on the printhead. 3. Push the ribbon roll onto the unwinding mandrel un- til it stops [39A]. Push the empty ribbon sleeve onto the rewinding mandrel [39B]. -
Page 109: Alternating Use Of Different Sorts Of Ribbon
Store your frequently used ribbons as pairs of rolls [44]. You can insert another pair of rolls as follows: [42] XLP 504 with ribbon inserted, pressure lever open. 1. Push the ribbon between the rolls sideways below the printhead [43]. -
Page 110: Setting And Monitoring The Printer
XLP 504 User manual SETTING AND MONITORING THE PRINTER Settings in parameter menu The settings described below are generally included in the print job, in which case they do not need to be made. Manual settings that were made before a print job was transferred will be overwritten by the settings in the print job. -
Page 111: Adjusting The Degree Of Blackness
XLP 504 User manual Material width 1. Measure the width of the material web [47D] (including backing paper). Print > Material > Material width 2. Call and enter the measured value in millimetres. Material type If the automatic material length measurement function is used, the material type is automatically set to „Punched“. -
Page 112: Printhead Support For Narrow Labels
XLP 504 User manual Printspeed Max. print contrast 178 mm/s (7 inch/s) 203 mm/s (8 inch/s) [Tab. 8] Max. print contrast for printheads with 203 dpi resolution. Printspeed Max. print contrast <= 76 mm/s (3 inch/s) 120% 102 mm/s (4 inch/s) -
Page 113: Monitoring Functions
XLP 504 User manual Therefore activate the printhead support, when using narrow labels! Narrow means here that the label width is less than 75 mm. The printhead support setting is indicated by the position of the thumb wheel [50A]. For wide labels, we recommend the “0”... - Page 114 XLP 504 User manual Ribbon reserve The ribbon reserve is displayed during printing as remaining diameter of the ribbon roll [51A]: Ready [51] Display of the ribbon roll Ø (A, here: 40 mm). The display of the roll diameter only begins after some rotations of the ribbon roll.
-
Page 115: Printing
The label layout is described by a sequence of Easy-Plug commands saved in a text file. Installing the printer driver You can find a driver for the XLP 504 and an installation instruction on our web page . The driver supports the following Windows operation systems: Vista / Windows 7 / Windows 8 / Windows 8.1 / Windows 10 / Windows Server 2008 / Windows... - Page 116 USB port or the TCP/IP port. Enter the ShareName as follows: 1. Open START > „Devices and Printers“. 2. Right click on the XLP 504 symbol, then left click on „Printer Properties“. 3. Open the „Sharing“ tab [53]. 4. Enter a „Share name“.
- Page 117 XLP 504 User Manual A file selection dialog with the stored printjobs opens: [54] File selection in standalone mode. 5. Select a printjob with the keys 2 and 3. Press key 4 to load the printjob. Another selection dialog appears. As a standard, it offers to change the print amount, which is initially defined in the printjob [55 left].
-
Page 118: Monitoring A Printjob
XLP 504 User Manual Monitoring a printjob The printer starts to print, as soon as the following conditions are met: • The printer is switched on • The display shows the „Ready“ screen • A printjob has been transmitted and interpreted Printing... -
Page 119: Troubleshooting
XLP 504 User manual TROUBLESHOOTING Print misalignment using the internal rewinder As soon as a job is received, the rewinder controller calculates the main initialisation values for the rewinding process based on the given material width and printspeed. These values are suitable for a wide range of applications. -
Page 120: Malfunctions
XLP 504 User manual Malfunctions STATUS REPORTS General information about status reports Display of status reports During operation, tests are continually carried out to determine whether a malfunction has oc- curred. If a malfunction is detected, the corresponding status report appears on the display. - Page 121 XLP 504 User manual Locking error messages are messages that are caused by serious errors. This state can be can- celled by a restart (press the keys 1+2+3) or by switching the printer off. General software errors Errors in the firmware can never be completely ruled out. Such errors are described in the error directory as "General software errors".
-
Page 122: Reference Of Status Reports
XLP 504 User manual Reference of status reports 1000 No new command General software error, read chapter General software errors on page 121. 1001 Parameter Table General software error, read chapter General software errors on page 121. 1002 Comm. sorting General software error, read chapter General software errors ... - Page 123 XLP 504 User manual 1013 Comm. flag inc. General software error, read chapter General software errors on page 121. 1014 Uninit integer General software error, read chapter General software errors on page 121. 1015 Uninit float General software error, read chapter General software errors ...
- Page 124 XLP 504 User manual 1029 Param. incorr. Incorrect parameter in the Easy-Plug command. Check Easy Plug sequence. Please read the notes in chapter Easy-Plug errors on page 121. 1030 Command incorr. Error during the command interpretation. ...
- Page 125 XLP 504 User manual 1091 Wrong var field An error occured while interpreting the text string of a variable data field. The error could e.g. be caused by a #YT or a #YB command (Easy Plug). Self-acknowledging error. Check the text strings of variable data fields.
- Page 126 XLP 504 User manual Check the Easy Plug command on admissible values and correct them if necessary. Please read the notes in chapter Easy-Plug errors on page 121. 1115 > Limit value A sent Easy Plug command contains a value which exceeds the admissible range at the top limit.
- Page 127 XLP 504 User manual 1130 Float overflow Number of figures is too high for a floating comma variable. Reduce the number of figures. 1131 Logo cache full A logo or several logos was/were sent which is/are too huge for the logo buffer.
- Page 128 XLP 504 User manual Check value for Y position for signs. Please read the notes in chapter Easy-Plug errors on page 121. 1174 Max width: right Maximum label width, right, reached. Elements such as character, line or logo do not fit into the physical print format (self-acknowledging) Result: Only elements which completely fit into the print format are printed.
- Page 129 XLP 504 User manual Please read the notes in chapter Unspecific errors on page 121. 1242 New FE in job Faulty memory assignment for print jobs. Please read the notes in chapter Unspecific errors on page 121.
- Page 130 XLP 504 User manual 1277 Wrong #!S.. Faulty Easy-Plug code. Faulty use of the immediate command "#!S..". The specified parameter val- ue exceeds the admissible value range (P, R). Specify an admissible parameter value. Please read the notes in chapter Easy-Plug errors ...
- Page 131 XLP 504 User manual Please read the notes in chapter Easy-Plug errors on page 121. 1321 Bar Code Object Faulty Easy-Plug code regarding the declaration of a bar code. Please read the notes in chapter Easy-Plug errors ...
- Page 132 XLP 504 User manual 1333 Logo not there Selected logo does not exist. Check file name / existence of the logo. 1334 #YV Data incorr. Illegal entries for a #YV field (variables data field). Acknowledge by pressing the Online button.
- Page 133 XLP 504 User manual Refer to chapter „Technical specifications“ for the maximum label width. Reduce the label width set by the #IM-command in the concerned print job, until the label width matches the maximum print width. Please read the notes in chapter Easy-Plug errors ...
- Page 134 XLP 504 User manual 1502 MLI Hash Error Error level1 General software error, read chapter General software errors on page 121. 1503 Filename Too Long Error level1 Filename is too long. Rename the file with a shorter name.
- Page 135 XLP 504 User manual 1511 Bar Parm Error Error level1 Parameters to a barcode command is wrong or does not conform with specs. Modify the bar code command. 1512 Code128 Mode Err Error level1 Code128 barcode command specifying mode type other than 'AUTO'.
- Page 136 XLP 504 User manual 1520 Unsupported Cmd Error level1 Non critical commands that is not supported by this printer. Check and modify the commands in the printjob. 1521 Unsupported: x Error level2 Critical commands that is not supported by this printer.
- Page 137 XLP 504 User manual 1530 Inc free str mem Error level2 Not enough free store memory. System > Memory > Free store size Increase the value set in (at least 2048 Kbytes). 1531 Inc RAM disc Error level2 Not enough RAM disc.
- Page 138 XLP 504 User manual 2005 Exp. comma pos. Unexpected comma in the expression. Check the syntax of the expression regarding commas. 2006 Exp.functionname A wrong function name is used in the expression. Check, if the function names used in the expression are spelled correctly and if the functions exist.
- Page 139 XLP 504 User manual 3010 Spooler Overflow Fault which is caused by a faulty handshake at an interface. The consequence is an overflowing data buffer at the printer, because the host doesn´t stop to send data to the printer. ...
- Page 140 5004 Rewinder mat. tear Label material at the backing paper rewinder is torn off. (XLP 504 with rewinder) The backing paper sleeve was too large during material initialization; the backing paper web could not be tightened. Acknowledge the status message.
- Page 141 XLP 504 User manual Secure label material to the rewinder. 5005 Knife-fault Faults at the cutter. Acknowledge the status message. 5006 Head-fault Print head lifting malfunction (head sensor). Check whether dirt is preventing the head contact lever from moving freely,if necessary clean.
- Page 142 XLP 504 User manual 5026 Motorprotect CPU The motor driver board (output stage board) is overheated or defective. Switch printer off and then back on again after 30 sec. If the error message continues to appear: Replace the motordriver board.
- Page 143 Acknowledge by pressing key 4. 5300 BLDC EEPROM err. General EEPROM read/write error on the BLDC driver board (XLP 504 with internal rewinder). Switch printer off and than on again after 30 seconds. If the status message continues to appear, change the BLDC board.
- Page 144 XLP 504 User manual Check the setting of the printhead resistance (parameter System >Hardware Setup > Head resistance) , before you press the Online button – possibly the value is faulty. Confirm error by pressing the Online button. All parameters are set back to the factory settings.
- Page 145 XLP 504 User manual 6030 Param. checksum Wrong parameter checksum. None. The message is merely informativ. 6031 New Parameters By loading a new firmware version, some new parameters have been added to the parameter menu. None. The message is merely informativ.
- Page 146 XLP 504 User manual 6208 Drive xx full Writing on drive xx failed, because there is not enough free space. Acknowledge by pressing the Online button. Free space on the drive. 6300 Out of memory Not enough free memory available, to load additional print jobs. The job buffer is completely filled with print jobs.
- Page 147 XLP 504 User manual 8108 Symbol set General software error, read chapter General software errors on page 121. 8109 TT-specifications General software error, read chapter General software errors on page 121. 8110 Unknown char. Character is not included in the character set (character set does not support all characters).
- Page 148 XLP 504 User manual 8303 Bar code sample Error during calculation of the bar code sample. Check whether the transmitted data is permitted for the bar code type; if necessary alter the da- 8304 Bar c. plain-copy Error during integration of the plain-copy line in the bar code sample.
- Page 149 XLP 504 User manual 8403 PDF417 Style Bar code PDF417: incorrect style. Alter style. 8404 PDF417 Command Bar code PDF417: incorrect command. Acknowledge by pressing the on-line button. Check and alter commands. 8405 PDF417 Size Bar code PDF417: incorrect size.
- Page 150 XLP 504 User manual 8703 IDM Self-test Bar code IDM: error during self-test. 8704 IDM Init. error Bar code IDM: error during initialising. Check and correct the sent barcode data. 8705 IDM rows/columns The input data does not match the given matrix or the number of rows/columns is invalid.
- Page 151 XLP 504 User manual 8830 Cod49 Datalength The user data string is too long. Not all characters can be coded in the bar code. The bar code is not printed. Shorten the data string. 8031 Cod49 wrong data The data string contains wrong characters. The bar code is not printed.
- Page 152 XLP 504 User manual Too much memory requested by parameters. The following parameters request more or less mem- ory: System > Memory > Ram disk size • System > Memory > Font downl. area • • System > Memory > Free store size •...
- Page 153 9007 Bad MAC Address This error message is displayed, if an invalid MAC address is programmed to the CPU board. Valid means, the MAC address matches the range 00.0a.44.xx.xx.xx., which is reserved for NOVEXX Solutions. In this case, the network will not be initialised. To enable work with the network, a valid MAC ad- dress must be programmed on the board.
- Page 154 XLP 504 User manual 9013 Head voltage Faulty 5 V print head supply voltage. Possible causes are: • Printhead was connected to the wrong connector on the CPU board. • Short circuit, possibly is the printhead defective. Check if the printhead is connected to the correct connector on the CPU board. Change the con- nector, if necessary.
- Page 155 XLP 504 User manual Check, if the network connector is plugged in properly. 9023 Filename: Functionname() Line: xxx This status message indicates a software error. The error source is located in the source file “File- name” in function “Functionname()” in line xxx.
- Page 156 XLP 504 User manual 9040 No Time Server Comes up one times at startup, if Print interface > Network > Services > Time client is set to “On” and there is no response from the set time server. Check the time server availability respectively the time server settings.
- Page 157 XLP 504 User manual 9110 Flash Write Err. Occurs during a download. The flash memory can´t be accessed for writing. Switch printer off and on again. 9111 PIC Update Fail. Occurs during a firmware update or a PIC-controlled device, if the update failed.
- Page 158 XLP 504 User manual 9122 Checksum error Checksum error while loading a firmware file. The checksum of the loaded data doesn´t match the calculated checksum. Repeat the download. If the error continues to occur, the file is probably damaged or corrupted. Check/ exchange the firmware file.
-
Page 159: Cleaning & Maintenance
XLP 504 User Manual Cleaning & Maintenance CLEANING INSTRUCTIONS Safety WARNING! Dangerous situations may arise during maintenance and cleaning work. Accidents may occur due to mechanical or electrical effects if the relevant safety instructions are not observed! Switch off the device before cleaning or maintenance and pull out the mains power connec- ting line! ... -
Page 160: General Cleaning
XLP 504 User manual GENERAL CLEANING Dust particles are especially likely to accumulate in the area of the print mechanics. Remove dust particles with a soft brush or a vacuum cleaner. Clean the housing with a cloth and a standard com- mercial neutral cleaner. -
Page 161: Printhead
XLP 504 User manual PRINTHEAD Important Handling Notes CAUTION! Printhead can be damaged. Protect the printhead [62] from electro- static discharges when performing main- tenance work or cleaning. Do not touch the thermal edge [62C]. Do not use sharp or hard objects to clean the printhead. -
Page 162: Cleaning The Printhead
XLP 504 User manual Cleaning the Printhead WARNING! Risk of burning injuries from a hot printhead. Ensure that the printhead has cooled down before cleaning it. Impurities such as lint and color particles from the ther- motransfer foil may collect on the printhead during printing. - Page 163 XLP 504 User manual Cleaning with cleaning paper 1. Cut a strip of cleaning paper matching the printhead width. 2. Insert the cleaning paper [64A] into the printer with the rough side facing upwards. 3. Close the pressure lever. 4. Move the cleaning paper back and forth repeatedly [64].
-
Page 164: Changing The Printhead
XLP 504 User manual Changing the Printhead WARNING! Risk of burning injuries from a hot printhead. Ensure that the printhead has cooled down before cleaning it. [65] Printhead (A) and bracket (B) were adjusted exactly by me- CAUTION! ans of special positioning tools. -
Page 165: Print Roller
XLP 504 User manual PRINT ROLLER Cleaning the Print Roller WARNING! Risk of burning injuries from a hot prin- thead. Ensure that the printhead has cooled down before cleaning it. Contamination on the print roller can degrade the qual- ity of the print and the transport of the material. -
Page 166: Changing The Print Roller
XLP 504 User manual Changing the Print Roller WARNING! Risk of burning injuries from a hot prin- thead. Ensure that the printhead has cooled down before cleaning it. The print roller is held in plase by a bayonet coupling and can be replaced without any tool. -
Page 167: Punch Sensor
XLP 504 User manual PUNCH SENSOR During printing the punch sensor can become contam- inated with lint. Large amounts of dirt can lead to prob- lems with perforation recognition. To free the punch sensor from dust and abraded parti- cles: 1. -
Page 168: Material Guiding: Setting The Movability
XLP 504 User manual MATERIAL GUIDING: SETTING THE MOVABILITY Tools Torx screwdriver of size 10 If the material guiding [76A] shifts during the printing, the sliding friction has to be increased: 1. Unscrew the cover [77C]. 2. Tighten the set screw [77A] in the material guide to increase the driving force. -
Page 169: Disposal
XLP 504 User manual Disposal SCRAPPING THE PRINTER Before scrapping WARNING! The printer operates at mains voltage! Contacting electrically live components can cause poten- tially lethal electrical shocks and burns. Before disposing of the printer, disconnect all cables. Disposal measures During the production of the individual components, the manufacturer ensures that as little an im- pact is made on the environmental as possible. - Page 172 Novexx Solutions GmbH Ohmstraße 3 85386 Eching Germany +49-8165-925-0 www.novexx.com...
Need help?
Do you have a question about the XLP 504 and is the answer not in the manual?
Questions and answers