Advertisement
RO Buddie
®
& Maintenance Guide
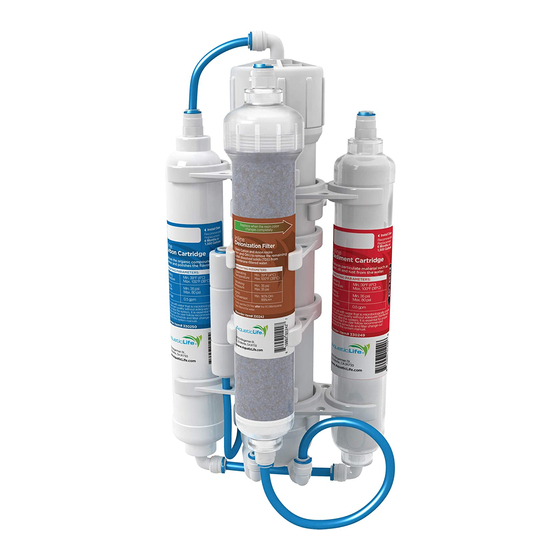
OVERVIEW
The RO Buddie uses replaceable Sediment, Carbon
and RO Membrane cartridges. The Sediment and
Carbon cartridges are self-contained pre-filters that
remove particulate matter and some compounds
found in the water supply, including chlorine.
The RO Membrane is located in the center canister,
separating the water into a more purified water
and a concentrated waste water.
PARTS LIST
Micron Cartridge
Carbon Cartridge
RO Unit Housing with Mounting Brackets
and Screws
Canister Cap Wrench
Faucet Adapter
¼" Tubing
Reverse Osmosis Membrane
Installation & Maintenance Guide
WARNING:
Please read carefully before proceeding with
installation. Failure to follow these instructions or
operating parameters may lead to the product's
failure and possible property damage.
TIP FOR AQUARIUM OWNERS:
Using the RO Buddie to top off evaporation or for
makeup water will significantly reduce the amount
of impurities going into your aquarium. Reduction
of impurities in your water should greatly increase
your success.
Visit www.AquaticLife.com
for helpful videos.
Installation
1
8
7
3
REPLACEMENT PARTS
DIAGRAM
ITEM
NUMBER
NUMBER
1
9000345
2
9000474
3
9000703
4
9000705
5
9000706
6
500255
7
500258
8
500297
9
500259
10
9000352
w w w . a q u a t i c l i f e . c o m
2
4
10
5
6
PART DESCRIPTION
Cap Membrane
Gasket - Cap Membrane
Flow Restrictor
Bracket - Membrane to Cartridge (2 PK)
Bracket - Wall Mount (2 PK)
Fitting Press Fit Elbow w Clip (6 PK)
Fitting Press Fit Straight w/Clip (7 PK)
Tubing Blue 1/4 IN. (50 FT.)
Faucet Adapter (2 PK)
Wrench - Membrane Cap
9
Advertisement
Table of Contents

Related Manuals for AquaticLife RO Buddie


Summary of Contents for AquaticLife RO Buddie
- Page 1 9000345 Cap Membrane TIP FOR AQUARIUM OWNERS: 9000474 Gasket - Cap Membrane Using the RO Buddie to top off evaporation or for 9000703 Flow Restrictor makeup water will significantly reduce the amount of impurities going into your aquarium. Reduction 9000705...
-
Page 2: Installation
The RO Membrane is located in the center canister and will need to be installed. Mount the RO Buddie to a solid surface using the two brackets included. A set of screws have been included, but depending on the mounting surface different screws may be required. - Page 3 10. Replace the membrane housing lid and tighten with the supplied wrench. Reattach the tubing and replace the blue clip to secure Correct the tubing to the elbow connection on the membrane housing. 11. Run the RO Buddie for 30 minutes to remove the preservative from the membrane. ✗ Incorrect NOTE: If you are using a DI resin filter cartridge, install it after flushing the membrane.
- Page 4 RO Buddie Installation ® & Maintenance Guide How to Use the Buddie Fit ™ Press Fittings Making the connections with the ¼” tubing is easy with the Buddie Fit™ press fittings included. To properly connect the ¼" tubing to the press fittings, follow...
-
Page 5: Troubleshooting
The 1500 gallon threshold is TOTAL water that passes through turned OFF. Remove the tubing from the elbow on top the unit. The RO Buddie has an average rejection ratio of 1:4.5. of the membrane housing, direct the tubing into a That means for every 1 gallon of good water produced you will container and turn on the water. - Page 6 This warranty will be void if defects occur due to failure to observe the following conditions: • DO NOT leave the RO Buddie unattended during use. • The RO Buddie should only be connected to a potable municipal or well cold water supply. • Incoming water to the RO cannot exceed 100°F.
Need help?
Do you have a question about the RO Buddie and is the answer not in the manual?
Questions and answers