Table of Contents
Advertisement
Quick Links
Advertisement
Table of Contents

Summary of Contents for AIBOTIX Aibot X6 V2
- Page 1 Aibot X6 V2 User Manual Version 5.4 English...
- Page 2 Always refer to this information when you need to contact your agency or Aibotix authorised service workshop. Validity of this This manual applies to the Aibotix Aibot X6 V2 with firmware version 2.4 or manual higher. Contact Aibotix GmbH Ludwig-Erhard-Straße 14...
- Page 3 Aibot X6 V2 User All instructions required in order to operate the product Manual to a basic level are contained in the Aibot X6 V2 User Manual. Provides an overview of the product together with technical data and safety directions.
- Page 4 Quality of Magnetic Field Outside Air Temperature Position Hold Angle of Pitch Point of Interest Radio Control Radio Frequency Angle of Roll Quantity of Satellites STANDARD Standard GPS True Airspeed Visual Flight Rules Velocity Never Exceed Waypoint Aibot X6 V2, Introduction...
-
Page 5: Table Of Contents
2.2.2 Dimensions RC Transmitter Graupner MC 32 2.3.1 General about the RC Transmitter 2.3.2 Configuration of the RC Transmitter 2.3.3 Binding the RC Transmitter to the Aibot X6 V2 2.3.4 Telemetry Menu 2.3.5 Controls Battery charger Battery Operation General ground handling 3.1.1... - Page 6 Lost RC communication 3.8.6 Unfamiliar Noise 3.8.7 Ditching - Emergency landing on water 3.8.8 Lost visual contact 3.8.9 Unknown Orientation of the Aibot X6 V2 3.8.10 Finding a Lost Aibot X6 V2 3.8.11 Incident Report Care and Transport Transport Storage...
- Page 7 Cleaning and Drying Maintenance Plan Service Intervals Accessories Camera Gimbal On-top Mount Camera Connection Live Video Package Aibot X6 V2, Table of Contents...
-
Page 8: Safety Directions
Important paragraphs which must be adhered to in prac- tice as they enable the product to be used in a technically correct and efficient manner. Aibot X6 V2, Safety Directions... -
Page 9: Definition Of Use
Measuring raw data and computing coordinates using carrier phase and code signal from GNSS satellites (GNSS Systems). Reasonably fore- • Operate the product without certification by Aibotix or an approved seeable misuse partner. • Use of the product without instruction. -
Page 10: Responsibilities
Hazards of Use General The Aibot X6 V2 may only be operated after instruction, training and certifica- tion by Aibotix or an approved partner, regardless which mode of use or config- uration is selected. - Page 11 WLAN interference The Aibot X6 V2 may not carry any WLAN enabled equipment. This restriction includes cellphones or similar devices. Anything operating wirelessly on other frequencies may only be used with the express written consent of Aibotix.
- Page 12 Land immediately if a temperature warning appears. Crash due to mental fatigue of the operator DANGER The operation of the Aibot X6 V2 causes considerable mental fatigue. Failure to observe these precautions may cause the operator to lose concentration and lead to an accident.
- Page 13 Pressure Sensor, Ultrasonic Sensor, GPS, Magnetic Compass. Precautions: • Be aware that sensors may provide wrong data and always be ready to take over manual control. Aibot X6 V2, Safety Directions...
-
Page 14: Electromagnetic Compatibility Emc
Although the product meets the strict regulations and standards which are in force in this respect, Aibotix cannot completely exclude the possibility that the product may be disturbed by intense electromagnetic radiation, for example, near radio transmitters, two-way radios or diesel generators. -
Page 15: Description Of The System
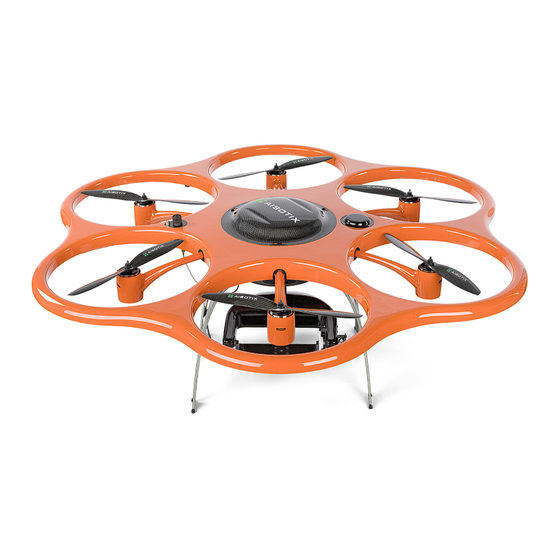
The Aibot X6 V2 is an unmanned aerial vehicle. It comes with six electric powered rotor blades. The Aibot X6 V2 is operated by a ground control unit and is able to fly in Manual Mode or Assisted Mode. The Aibot X6 V2 serves as a mount for measuring instruments. -
Page 16: Rc Transmitter Graupner Mc 32
In stick mode 2, the throttle is on the left side of the RC transmitter. It is only allowed to operate the Aibot X6 V2 in stick mode 2. By default the system comes already configured with stick mode 2. -
Page 17: Binding The Rc Transmitter To The Aibot X6 V2
By default the system comes already bound correctly. Before using the Aibot X6 V2, it is necessary to check if it is bound to the RC Transmitter in a proper way. If you cannot get communication to the Aibot X6 V2, you may have to bind the RC Transmitter again. -
Page 18: Controls
2.3.5 Controls Joysticks a) Yaw b) Throttle c) Pitch d) Roll Sliders a) Camera zoom function (if equipped) b) Manual camera pitch function c) Not used Aibot X6 V2, Description of the System... - Page 19 3-way-switch: FREE, PH, CH. GPS position hold and coming home functions. On-top controls a) Not used b) Not used c) Not used d) Speaker e) Antenna Power ON or OFF g) Indicator lights h) Camera roll function Not used Aibot X6 V2, Description of the System...
-
Page 20: Battery Charger
• Read and follow the enclosed Battery Safety Sheet. • The Aibot X6 V2 can only be operated with two batteries. Never operate the Aibot X6 V2 with one battery only. • Do not store the LiPo batteries at a voltage below 19 V. -
Page 21: Operation
8) Press and hold the start button for a short time to start the charging process. Overheating Batteries WARNING Risk of explosion or fire. Precautions: • Protect batteries against high temperatures. • Always use the provided battery charger. Aibot X6 V2, Operation... -
Page 22: Transfer Software To The Aibot X6 V2
Transfer software to the Aibot X6 V2 Connection To run a software update, the Aibot X6 V2 can be connected to a computer by the provided cable. After an update, perform a test flight in a safe area and without payload. - Page 23 1) Make sure that the batteries are disconnected. 2) Grab and hold the propeller with one hand. 3) With your other hand fasten the screw nut with the provided torque wrench. Repeat the previous steps for all 6 propellers. Aibot X6 V2, Operation...
-
Page 24: Assembly Of The System
3.1.4 Assembly of the system Inserting the Always operate the Aibot X6 V2 with two batteries. batteries To insert the batteries, follow the steps below: 1) Rotate the battery cover anticlockwise. If necessary, loosen (but do not remove) the 3 hex head screws using a 2.5 mm hex key wrench. Lift the battery cover to open the battery compartment. -
Page 25: Preparation Of The Launch Site
3) Reattach the battery cover. Rotate the battery cover clockwise to close the battery compartment. 4) Attach the telemetry antenna at the designated threaded socket between the propellers on the bottom of the Aibot X6 V2. 5) Tighten the antenna by rotating it clockwise. 3.1.5... -
Page 26: Compass Calibration
Verify with an analogue compass. 2) Use a magnetic compass to make sure that the front of the Aibot X6 V2 is aligned northwards. 3) To start the compass calibration, pull the function switch and push the right joystick to the top left corner. - Page 27 7) Turn the Aibot X6 V2 3 times around its longitudinal axis and place it on the ground. This is the connection between the front and the back of the Aibot X6 V2. 8) To finish the calibration, pull the function switch and push the right joystick in the upper right corner.
-
Page 28: General Limitations
Radio Signal Limitation A payload attached to the Aibot X6 V2 is not allowed to send out any radio signals, unless explicitly authorised by Aibotix. This especially applies to camera devices with WLAN or Bluetooth connections. Check before flight execution, that no payload emits disturbing signals. -
Page 29: Temperatures
3.2.3 Temperatures Limitation The operation temperatures for a safe use of the Aibot X6 V2 are limited. Adhere to the stated temperature ranges. Aibot X6 V2 Temperature °C Outside air temperature (OAT) −10 … +40 * Storage temperature 0 … +40 Dry conditions and not in direct sunlight * Maximum temperature for flights above 5.5 kg takeoff weight is +30 °C... -
Page 30: Center Of Gravity
• Never operate the Aibot X6 V2 above 3000 m density altitude. 3.2.8 Operation type Limitation It is only allowed to operate the Aibot X6 V2 under Visual Flight Rules (VFR) under daylight conditions. 3.2.9 Wind Limitation Never operate the Aibot X6 V2 when wind speed is above the following limits. -
Page 31: Flight Execution In Rain
Limitation Flight execution in rain is not recommended. If the Aibot X6 V2 got wet, store it in a dry and warm place and ensure an exten- sive ventilation of all equipment. Due to local regulations a flight execution in rain may not be allowed. Always comply the rules of local authorities. -
Page 32: User Interface
User Interface 3.3.1 Status LEDs Safety features The Aibot X6 V2 has 6 multi-colored status LEDs mounted at the bottomside between the propellers. The Status LEDs show the orientation and can display warning signals. a) Front LEDs b) Right LED... -
Page 33: Acoustic Buzzer
If a an abnormal situation occurs, the acoustic buzzer will beep. 3.3.3 Voice Response Safety Features The RC transmitter Graupner MC-32 for the Aibot X6 V2 has a voice response system. The following outputs can occur: Normal Operation Signals Output... - Page 34 "3.8.5 Lost RC communication" Warning! GPS quality is Current GPS quality is Monitor the behaviour of low. the Aibot X6 V2. If unusual, follow the emergency procedure for GPS disturbance: "3.8.2 Disturbance of GPS" Warning! GPS fix lost...
- Page 35 Cannot start the engines Motors cannot start. Check the telemetry Possible causes: display for the "ready" - Aibot X6 V2 is not ready sign. Unplug the for takeoff. batteries, switch the - The operator stated to takeoff location and take off in Position Hold power-up again.
-
Page 36: Safety Features
The Aibot X6 V2 may change the level if there are changes in air pressure. If there are obstacles above the Aibot X6 V2 or when flying indoor, it is preferred to use Manual Mode. For example when inspecting the underside of a bridge. -
Page 37: Automatic Takeoff And Landing
Automatic Takeoff In automatic takeoff mode, the Aibot X6 V2 will increase the motor power for takeoff and climb to the configured altitude (refer to configuration settings in AiProFlight). When in GPS FREE mode, the position has to be steered by the operator. -
Page 38: Care Free
Aibot X6 V2 orientation, and adjust inputs accordingly. Care Free ON If Care Free is switched ON, the Aibot X6 V2 will always fly according to the starting orientation, regardless of the current orientation. The Care Free mode simplifies the inputs for the operator, nevertheless remember the starting orientation carefully before flight. -
Page 39: Gps Assistance
Make sure that it may take some time for the Aibot X6 V2 to emit the correct wind compensation. Do not switch from GPS Free to GPS Dynamic Position Hold while flying aggressive manoeuvres. -
Page 40: Gps Cage
The Aibot X6 V2 has a GPS cage mode for training purposes. In GPS cage mode, a virtual cage around the Aibot X6 V2 is built. The cage is specified by a radius, minimum altitude and maximum altitude above ground. The Aibot X6 V2 does not leave the cage during the flight execution. -
Page 41: Start Prevention System
Start Prevention System Safety Features The Aibot X6 V2 has a start prevention system. The motors cannot be started if the charge of the battery does not guaranty a save flight execution. If the present battery voltage is lower than a predefined value, the start is prevented and an acoustic error signal sounds. -
Page 42: Rc Lost Failsafe
Be aware that sensors may provide wrong data and always be ready to take over manual control. Safety Features In case the Aibot X6 V2 looses communication link with the RC transmitter, it automatically runs the configured lost communication failsafe procedure. Refer to AiProFlight user manual for further information on the configuration). All procedures interrupt automatically once the communication link is re-estab- lished or if the Battery failsafe conditions are reached. -
Page 43: Blackbox
3.4.10 Blackbox Safety Features The Aibot X6 V2 stores all relevant flight information in regular intervals to a logging module (Blackbox). This feature enables the Aibotix service to conduct a detailed error analysis. Aibotix does not assume any responsibility for technical defects or crashes in... - Page 44 • Check weight and balance • Cables and connections without damages • Configuration set • WLAN/Bluetooth switched off Aibot X6 V2 Config- • General unit configuration uration • Camera and Gimbal configuration and functionality • RC Lost Failsafe configuration •...
-
Page 45: Pre-Flight Check
3.5.2 Pre-Flight Check Pre-Flight Check Perform the pre-flight checks prior to each flight execution. List GE = General interactions X6 = Interactions with the Aibot X6 V2 RC = Interactions with the RC transmitter Description Condition/Action Flight preparation Complete Launch site... -
Page 46: Before Transportation
After connecting the batteries, the Aibot X6 V2 needs time to perform an auto- matic system check and a calibration of the internal sensors. Do not move the Aibot X6 V2 during that period and wait, until the “wait” signal on the RC trans- mitter telemetry menu has switched to “ready”. -
Page 47: Normal Procedures (Gps And Assist Mode)
Normal Procedures (GPS and Assist Mode) General This chapter contains all relevant steps for a safe operation of the Aibot X6 V2. It is recommended to use Assist Mode whenever the conditions will allow it. The operation in Assist Mode is much easier and therefore safer. -
Page 48: Climb
The climb operation can be performed until the desired altitude is reached. For good orientation, it is helpful to move in a forward direction at the same time as climbing. So you can better monitor the flight path of the Aibot X6 V2. Also a flight above the operator is prevented. -
Page 49: Landing
Be aware of the downwash of your own rotor blades when flying near ground. 3.6.5 Abort Landing (Assist Mode) Normal Procedures It may be necessary to control the position of the Aibot X6 V2 manually with the RC Transmitter while abort an automatic landing procedure. Description Condition/Action Flight Mode... -
Page 50: After Landing (Assist Mode)
3.6.7 Dynamic Position Hold Normal Procedures This procedure can be activated during flight execution. The Aibot X6 V2 will automatically hold the current position. Description Condition/Action Flight Plan Care Free... -
Page 51: Waypoint Flight
3.6.8 Waypoint Flight Normal Procedures This procedure can be activated during flight execution. The Aibot X6 V2 will automatically fly the pre-defined flight path. Verify that the flight plan is uploaded via AiProFlight prior using this procedure. Description Condition/Action Care Free... -
Page 52: Dynamic Point Of Interest
In POI mode with Care Free OFF, the familiar commands are now different. The Aibot X6 V2 will move relative to the defined POI. Pitch commands will move the Aibot X6 V2 towards or against the POI. Roll commands will move the Aibot X6 V2 on a circular flight path around the POI. -
Page 53: Coming Home
Release toggle switch to initial posi- tion 3.6.10 Coming Home Normal Procedures This procedure can be activated during flight execution. The Aibot X6 V2 will automatically fly back to the start position. Description Condition/Action Coming Home flight path Free from any obstacles... -
Page 54: Normal Procedures Manual Mode
Normal Procedures Manual Mode General This chapter contains all relevant steps for a safe operation of the Aibot X6 V2 in Manual Mode. Manual flying (especially without Assist Mode) is only recom- mended to experienced operators and should be trained carefully. Indoor flying is limited to the Manual Mode procedures. -
Page 55: Manual Climb
The climb operation can be performed until the desired altitude is reached. For good orientation, it is helpful to move in a forward direction at the same time as climbing. So you can better monitor the flight path of the Aibot X6 V2. Also a flight above the operator is prevented. -
Page 56: Manual Landing
5 minutes in a shady (cool) place. At temperatures above 25 °C a cool down phase of at least 15 minutes is recommended. The cool down phase may vary and depends on many factors. Aibot X6 V2, Operation... -
Page 57: Abnormal And Emergency Procedures
Automatic detection of disturbances CAUTION The Aibot X6 V2 can detect magnetic disturbances on its own. A warning signal and the voice response: "Magnetic field disturbed" will be issued. In that case the modes for Flight Plan, GPS, POI and Care Free will be deactivated automat- ically. -
Page 58: Disturbance Of Gps
Do not fly with GPS-based flight modes in narrow valleys, below or very near to mountains and slopes. • Use GPS planning software as part of flight planning to ensure adequate satellite availability in the flight area. Aibot X6 V2, Operation... -
Page 59: Battery Warning
Perform as soon as possible. Automatic descent CAUTION To prevent a crash due to low batteries, the Aibot X6 V2 starts an automatic descent depending on the actual altitude. Once started, this procedure cannot be interrupted. Controlling the position and heading is possible. -
Page 60: Ultrasonic Sensor Failure
3.8.4 Ultrasonic Sensor Failure Abnormal Identification Procedures • Voice Response: “Distance measurement failure!” • The Aibot X6 V2 descends below the defined minimum altitude. • Automatic takeoff and automatic landing are not working. Recommended Procedure Description Condition/Action Assist Mode Altitude Control the altitude manually with the throttle joystick. -
Page 61: Lost Rc Communication
Plug off the LiPo Batteries immedi- ately. RC Lost Failsafe CAUTION If the communication to the Aibot X6 V2 is lost, the RC Lost Failsafe will be performed automatically. Refer to "3.4.9 RC Lost Failsafe" for more informa- tion. Prevention •... -
Page 62: Unfamiliar Noise
Landing Perform as soon as possible Unfamiliar noises CAUTION The Aibot X6 V2 is only allowed to fly, when the reason for the noise has been identified and fixed. If you have any doubts, contact Aibotix service. Prevention •... -
Page 63: Ditching - Emergency Landing On Water
No operation after landing in water CAUTION Do not operate the Aibot X6 V2 after a landing into the water. Dry the Aibot X6 V2 at high room temperature. Immediately contact Aibotix service to discuss about the next steps and prevent consequential damage. -
Page 64: Lost Visual Contact
Battery Voltage Monitor Try to find the Aibot X6 V2 based on the last known position. If possible, a climb to a higher altitude may help to find the Aibot X6 V2. If the loss of visual contact cannot be re-established or the battery power is... -
Page 65: Unknown Orientation Of The Aibot X6 V2
Prevention • Do not perform a flight execution far away from you or in a low altitude. Status LEDs of the Aibot X6 V2 must be visible at any time. • Use the Care Free mode to prevent orientation problems. -
Page 66: Finding A Lost Aibot X6 V2
3.8.11 Incident Report If something unexpected happens during flight, land immediately and contact Aibotix service to determine the cause. Fill in the Incident report found on the USB flash drive and send to: service@aibotix.com. Aibot X6 V2, Operation... -
Page 67: Care And Transport
Cleaning and Drying General Only use a damp microfibre cloth to clean the Aibot X6 V2. Do not use strong detergent on carbon fibre parts. Use a brush to remove loose dust. Damp products Dry the product, the transport container, the foam inserts and the accessories at a temperature not greater than 40 °C and clean them. -
Page 68: Service Intervals
For professional maintenance, Aibotix offers various service and repair plans which guarantee proper flight condition. We highly recommend these service plans when purchasing the Aibot X6 V2. Contact Aibotix in case of questions regarding these service plans. Aibot X6 V2, Care and Transport... -
Page 69: Accessories
Installation To install the on-top mount, use the supplied knurled screws. Remove the battery cover and place the on-top mount on the Aibot X6 V2. Attach the on- top mount with the 3 knurled screws and fasten them hand-tight. Aibot X6 V2, Accessories... -
Page 70: Camera Connection
Installation Attach the 14-pin connection cable to your connection port at the bottom of the Aibot X6 V2 for regular use or on the top with On-top camera mount. Connect your camera using a standard camera connection connector to the standard camera port. - Page 71 Step Description Attach the antenna to the landing gear: Aibot X6 V2, Accessories...
- Page 72 Aibotix Ludwig-Erhard-Straße 14 34131 Kassel Germany Phone +49 561 473949-0 www.aibotix.com...
Need help?
Do you have a question about the Aibot X6 V2 and is the answer not in the manual?
Questions and answers