
Related Manuals for Yamaha WXA-50


Summary of Contents for Yamaha WXA-50
- Page 1 Wireless Streaming Amplifier Owner's Manual (Advanced) Read “IMPORTANT SAFETY INSTRUCTIONS” described in the Owner's Manual (Basic) before using the unit.
-
Page 2: Table Of Contents
CONTENTS BEFORE USING THE UNIT PLAYBACK Accessories....................4 Playing back music with MusicCast CONTROLLER....... 17 Preparing the remote control.............................. 4 Music on a mobile device..............................17 Preparing the wireless antenna............................4 Internet radio..................................17 Music stored on media servers (PCs/NAS)........................18 About this manual.................. - Page 3 APPENDIX Updating the unit's firmware via the network........35 Updating with MusicCast CONTROLLER........................35 Updating with a USB memory device..........................35 Setting up the wireless connection manually........36 Restarting the unit.................. 36 Restoring the default settings............... 36 Troubleshooting..................38 General...................................... 38 Network.....................................
-
Page 4: Before Using The Unit
BEFORE USING THE UNIT Preparing the wireless antenna Accessories Connect the wireless antenna and stand it upright. Confirm that all the following items are included in the package. £ Remote control £ Wireless antenna Notice £ Stand x 2 £ Non-skid pad (6 pads, including 2 spares) ▪... -
Page 5: Features
Features The unit is equipped with full of useful functions. • Play back music files stored on a USB storage device Note Enjoying music easily In order to select music files in PCs and DLNA servers or music files stored on a USB storage device, the dedicated application “MusicCast CONTROLLER”... -
Page 6: Part Names And Functions
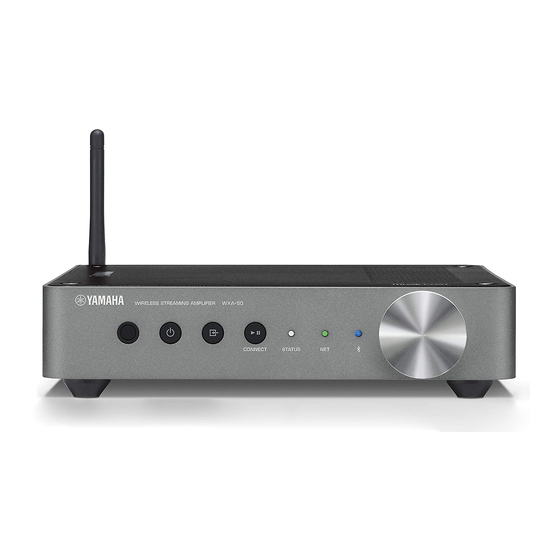
Part names and functions The part names and functions of the unit and the supplied remote control are as follows. Front panel Remote control sensor STATUS indicator Receives remote control signals. Indicates the selected input source and unit status depending on its color and whether it is lit or flashing. z (power) key Note Turns the unit's power to on/standby. -
Page 7: Rear Panel
Rear panel AC IN jack AUX OUT jacks OPT IN jack For connecting the supplied power cable (p.13). For connecting to audio components (such as pre-main For connecting to audio components equipped with optical amplifiers) equipped with analog input. digital output (p.12). TRIGGER IN/OUT jacks REMOTE IN jack NETWORK jack... -
Page 8: Remote Control
Remote control Adjusts the volume for playback. Replacing the battery Mutes the speaker output. (Mute) Note While pushing the release tab in To adjust the maximum volume, see “CONFIGURING direction “A”, slide out the battery ADVANCED FEATURES” (p.28). holder in direction “B” as shown below. PRESET keys Presets PC/NAS albums or songs, Internet radio stations Check the “+”... -
Page 9: Indicators On The Front Panel
Indicators on the front panel The selected input source and unit status are indicated by three indicators on the front Unlit Standby panel. Indications depending on their color and condition (lit or flashing) are shown Bluetooth connected below. Blue Flashing Performing pairing Note For details on Bluetooth connections, see “Playing back music with Bluetooth... -
Page 10: Preparations
PREPARATIONS Vertical placement Placing the unit When placing the unit vertically, loosen the screws to remove the feet and attach the Place the unit horizontally or vertically according to the place in your room. stands to the unit. Note Allow ventilation space of at least 10 cm (4 in.) on the top, side and back of the unit. Horizontal placement When placing the unit horizontally, affix the non-skid pads on the feet. -
Page 11: Connecting Speakers
Connecting speakers Notice Improper connecting of the speaker cables may cause a short circuit and also damage the unit or the speakers. Connect the speakers (L:left, R:right) to the unit with commercially available speaker ▪ Twist the bare wires of the speaker cables firmly together. cables. -
Page 12: Connecting A Subwoofer
▪ You can adjust the volume or high frequency cut off control when the subwoofer is equipped with those functions. ▪ If a Yamaha subwoofer has system connection support, its power can be controlled in synchronization with the unit's power through the trigger function. If the subwoofer is connected to the unit with a commercially available mini-plug cable, switching the unit between on and standby will automatically turn the subwoofer on and off. -
Page 13: Connecting The Power Cable
Connecting with a wired router Connecting the power cable • Connect using the automatic setup function of the router – Connect to a network by simply connecting to it with a cable (p.15) After all the connections are complete, plug the supplied power cable into the AC IN jack on the rear panel, and then plug the power cable to an AC wall outlet. - Page 14 Sharing the Wi-Fi settings on an iOS device (WAC) Select the network (access point) of which you want to share the settings with the unit. You can easily setup a wireless connection by applying the connection settings with WAC (Wireless Accessory Configuration) on iOS devices (iPhone/iPad/iPod touch). When the sharing process finishes, the unit is automatically connected to Before proceeding, confirm that your iOS device is connected to a wireless router the selected network (access point).
-
Page 15: Connecting To A Wired Network
Connecting to a wired network Press the WPS button on the wireless router (access point). Connect the unit to your router with a commercially-available STP network cable When the connection process finishes, the NET indicator changes to lit in (CAT-5 or higher straight cable). green. -
Page 16: Setting The Musiccast
You can operate the unit easily as well as enjoy music from your smartphone, PC, NAS drive and music streaming service anywhere in your house with one easy-to-use application: “MusicCast CONTROLLER” for mobile devices. For more details and a lineup of MusicCast compatible products, visit the Yamaha website. Installing MusicCast CONTROLLER to your mobile device When the connection is established, the NET indicator on the front panel Search for the free application “MusicCast CONTROLLER”... -
Page 17: Playback
PLAYBACK Playing back music with MusicCast CONTROLLER Selecting an Internet radio station You can play back music with the MusicCast CONTROLLER (p.16) on your mobile Select “Net Radio”. device. On the MusicCast CONTROLLER screen, select the room name that was specified for the unit, and then play back contents. -
Page 18: Music Stored On Media Servers (Pcs/Nas)
Music stored on media servers (PCs/NAS) Select “Library”, then “Media Sharing”. The unit can play back music files stored on PCs and Network Attached Storage (NAS) Check the “Share my media to” box, select the unit’s icon, and devices that are connected to the network. click “Allow”. -
Page 19: Music Stored On A Usb Storage Device
Selecting a streaming service by its station name Select “USB”. Select a streaming service on the MusicCast CONTROLLER screen. Select the music file to be played back. Note Stop playback of the USB storage device before disconnecting it from the USB jack. Select the station to be tuned into. -
Page 20: Playing Back Music From Other Devices
Recalling a registered song/station by remote control Hold down any of the PRESET keys 1 to 6 on the remote control for 3 seconds. On the remote control, press the PRESET key where the song/ station is registered. When the registration is finished, the STATUS indicator on the front panel flashes once in blue. -
Page 21: Playing Back Music With Bluetooth
For an external device with digital optical audio output For an external device with analog stereo audio output Press OPT on the remote control. Press AUX on the remote control. The STATUS indicator on the front panel lights up in purple. The STATUS indicator on the front panel lights up in white. - Page 22 Notice Press (Bluetooth) on the remote control. When you use the controls of Bluetooth devices (such as smartphones) to adjust volume, the volume may be unexpectedly loud. This could result in damage to the unit or speakers. If the volume suddenly increases during playback, stop playback on the Bluetooth device immediately.
-
Page 23: Playing Back Music With Airplay
Turn on the Bluetooth function on the Bluetooth device, and on the playback screen. select “WXA-50 XXXXXX Bluetooth” in the Bluetooth device list on the device. Select “Bluetooth Transmission” and enable the “Bluetooth transmission” function. “XXXXXX” represents a unique sequence of numbers and letters for your unit. - Page 24 Notice Select a song and start playback on the iTunes/iPhone. When you use iTunes/iPhone controls to adjust volume, the volume may be unexpectedly loud. This could result in damage to the unit or speakers. If the volume suddenly increases during playback, stop The unit automatically selects “AirPlay”...
-
Page 25: Operating The Unit From A Web Browser
Follow the procedure below to display the Web Control screen on a PC with Windows or Mac OS. Note Enable Network Discovery in advance to display the Web Control screen on a PC with Windows via Network folder. Configuring with Windows Open the “Network” folder. Select all check boxes for Bonjour. WXA-50 XXXXXX... - Page 26 Select the room name (the unit) from the Bookmarks menu list. WXA-50 XXXXXX The Web Control screen for the unit appears.
-
Page 27: Operating On The Web Control Screen
Operating on the Web Control screen The Main screen of the Web Control screen appears first. Input Info/Operation Displays information about the selected input source and controls playback. SETTINGS1 Moves to the settings1 screen (p.28). SETTINGS2 Moves to the settings2 screen (p.29). POWER Turns the unit's power to on/standby. -
Page 28: Configuring Advanced Features
CONFIGURING ADVANCED FEATURES Configuration from a web browser Using a PC, the following items can be displayed and configured on the Web Control screen. SETTINGS1 SETTINGS (Menu) Item Setting values Default Explanation Rename Sets the network name of the unit and sets the zone name. Displays information about the current network connection of the Current Network Connection unit. -
Page 29: Settings2
SETTINGS (Menu) Item Setting values Default Explanation Enables/disables the MAC address filter function. Note When enabling the MAC address filter, be sure to check the MAC MAC filter Mode Off / On addresses carefully before clicking “APPLY”. Configuring the filter incorrectly may result in the unit becoming inaccessible. - Page 30 SETTINGS (Menu) Item Setting values Default Explanation Adjusts the volumes for the low-frequency, middle-frequency, and Bypass / Auto / high-frequency ranges of the audio. When this is “Auto”, they stay Equalizer Auto Manual synchronized with the main volume and perform hearing correction for the auditory response of the human ear.
- Page 31 SETTINGS (Menu) Item Setting values Default Explanation Enables/disables operation using the front panel (other than the Front Panel Operation Off / On power key). Enables/disables operation using the remote control. When this is Sensor Off / On “Off”, the unit can still be operated by other means. Changes the ID of the remote control from which the unit receives signals.
-
Page 32: Configuration On Advanced Settings Screen In Mobile Device App
Configuration on Advanced Settings screen in mobile device app Using your mobile device, the following items can be displayed and configured on the Advanced Settings screen in the MusicCast CONTROLLER. To display the Advanced Settings screen, hold down the room name (the unit) on the MusicCast CONTROLLER screen and tap “Room Settings”, then tap “Advanced Settings” in the “Room Settings”... - Page 33 SETTINGS (Menu) Item Settings Default Explanation Enables/disables setting of the initial volume when the unit is Mode Off / On turned on. Initial Volume Mute, Level -40.0 dB Sets the initial volume for when the unit is turned on. -80 dB to +0.0 dB (0.5 dB steps) Volume -20 dB to +0.0 dB Sets an upper limit for the volume levels to which the unit can be...
- Page 34 SETTINGS (Menu) Item Settings Default Explanation Bluetooth Audio Send Transmitter Off / On Enables/disables transmission of Bluetooth audio. Wired / Wireless Wired Sets the method of connecting to the network (p.36). Type Sets the SSID (network name) for the access point to which the SSID unit is connected.
-
Page 35: Appendix
You can update the firmware using a USB memory device. Download the firmware update file from the Yamaha website to a USB memory device on a PC, and then connect the USB memory device to the USB jack on the unit. -
Page 36: Setting Up The Wireless Connection Manually
When the update is finished, press z (power) on the front panel Specify the network settings. to turn the unit on again. Switches the DHCP function on/off. When set to “Off”, some DHCP network settings, such as the IP address and subnet mask, can be specified manually. - Page 37 Hold down (INPUT) and (CONNECT) on the front panel for 5 seconds at the same time. When restoring is finished, the unit is turned on and all settings are returned to their factory default configurations.
-
Page 38: Troubleshooting
(p.11). The power turns off immediately after the power has been turned on. Contact your nearest authorized Yamaha dealer or service center to request The inner power supply circuit is malfunctioning. repair. Hold down the z (power) key on the front panel for at least 15 seconds to restart The internal microcomputer is frozen, due to an external electric shock the unit. -
Page 39: Network
Network Problem Cause Remedy Connect the mobile device to the wireless router and start MusicCast The mobile device is not connected to the wireless router at your CONTROLLER. home. Disable the cellular data transmission of your mobile device. Wait a moment while making sure that your mobile device does not go into sleep It takes time for the application to detect the unit. -
Page 40: Bluetooth
Problem Cause Remedy The unit cannot connect to the Internet via a The unit and the wireless router (access point) are too far apart or Place the unit and the wireless router (access point) closer to each other or move wireless router (access point). -
Page 41: Error Table Of Status Indicator
As a safety precaution, capability to turn on the unit is disabled. Contact your Flashing, and the power does not turn on 4 - 8 times nearest authorized Yamaha dealer or service center to request repair. Fast flashing Once No presets have been registered. -
Page 42: Glossary
LAN access point. App Store is a service mark of Apple Inc. Wi-Fi MusicCast is a trademark or registered trademark of Yamaha Wi-Fi (Wireless Fidelity) is a technology that allows an Corporation. electronic device to exchange data or connect to the Internet wirelessly using radio waves. -
Page 43: Supported Devices And File Formats
Up to 48 kHz 8 to 320 • Bluetooth devices that support A2DP Up to 48 kHz 8 to 320 – Yamaha does not assure the connections of all Bluetooth devices. MPEG-4 AAC Up to 48 kHz 8 to 320 USB devices 2.8 MHz/... -
Page 44: Specifications
Specifications The specifications of the unit are as follows. Source Function • Unit to Sink Device (ex. Bluetooth Headphone) Input jacks • Supported profile – A2DP, AVRCP Analog Audio • Supported codec • Stereo Audio (RCA) x 1 – SBC Digital Audio (Supported frequencies: 32 kHz to 192 kHz) Bluetooth version •... - Page 45 * The contents of this manual apply to the latest specifications as of the publishing date. To obtain Rated Output Level / Output Impedance the latest manual, access the Yamaha website then download the manual file. • Subwoofer (30 Hz) (Except for China model) 4.0 V/470 Ω...
- Page 46 Yamaha Global Site http://www.yamaha.com/ Yamaha Downloads http://download.yamaha.com/ Manual Development Department © 2016 Yamaha Corporation Published 05/2016 NV-B0 WXA-50OM/EN...