Table of Contents
Advertisement
Operator's Manual
22" SNOW THROWER
Model No. 247.881980
CAUTION: Before using this product,
read this manual and follow all safety
rules and operating instructions.
Sears Brands Management Corporation, Hoffman Estates, IL 60179, U.S.A.
Visit our website: www.craftsman.com
• SAFETY
• ASSEMBLY
• OPERATION
• MAINTENANCE
• ESPAÑOL
Form No. 769-10063A
(July 28, 2015)
Advertisement
Table of Contents

Related Manuals for Craftsman 247.881980


Summary of Contents for Craftsman 247.881980
- Page 1 Operator’s Manual 22” SNOW THROWER Model No. 247.881980 • SAFETY • ASSEMBLY • OPERATION • MAINTENANCE • ESPAÑOL CAUTION: Before using this product, read this manual and follow all safety rules and operating instructions. Sears Brands Management Corporation, Hoffman Estates, IL 60179, U.S.A.
-
Page 2: Table Of Contents
WITH PROOF OF SALE, a defective product will receive free repair or replacement at option of seller. For warranty coverage details to obtain free repair or replacement, visit the web page: www.craftsman.com/warranty This warranty covers ONLY defects in material and workmanship. Warranty coverage does NOT include: •... -
Page 3: Safety Instructions
SAFETY INSTRUCTIONS WARNING DANGER This symbol points out important safety instructions which, if not This machine was built to be operated according to the safe operation followed, could endanger the personal safety and/or property of practices in this manual. As with any type of power equipment, yourself and others. -
Page 4: Clearing A Clogged Discharge Chute
SAFETY INSTRUCTIONS • To reduce fire hazards, keep machine free of grass, leaves, or other debris • Use only attachments and accessories approved by the manufacturer (e.g. build-up. Clean up oil or fuel spillage and remove any fuel soaked debris. wheel weights, tire chains, cabs etc.). - Page 5 SAFETY INSTRUCTIONS • Check fuel line, tank, cap, and fittings frequently for cracks or leaks. Replace if necessary. • Do not crank engine with spark plug removed. • According to the Consumer Products Safety Commission (CPSC) and the U.S. Environmental Protection Agency (EPA), this product has an Average Useful Life of seven (7) years, or 60 hours of operation.
-
Page 6: Safety Symbols
SAFETY INSTRUCTIONS SAFETY SYMBOLS This page depicts and describes safety symbols that may appear on this product. Read, understand, and follow all instructions on the machine before attempting to assemble and operate. Symbol Description READ THE OPERATOR’S MANUAL(S) Read, understand, and follow all instructions in the manual(s) before attempting to assemble and operate . -
Page 7: Assembly
ASSEMBLY NOTE: Reference to right, left, front or rear of the unit is from the operating position, facing forward, unless otherwise stated. Removing From Carton Cut the corners of the carton and lay the sides flat on the ground. Remove all packing inserts. -
Page 8: Fuel Recommendations
ASSEMBLY Set-Up Fuel Recommendations Use automotive gasoline (unleaded or low leaded to minimize combustion chamber Shear Pins deposits) with a minimum of 87 octane. Gasoline with up to 10% ethanol or 15% A pair of replacement auger shear pins and bow tie cotter MTBE (Methyl Tertiary Butyl Ether) can be used. - Page 9 ASSEMBLY Adjustments Remove the oil filler cap/dipstick and wipe the dipstick clean. See Figure 5. Skid Shoe The snow thrower skid shoes are adjusted at the factory to be approximately 1/8” below the bottom surface of the shave plate. Adjust them downward, if desired, prior to operating the snow thrower.
-
Page 10: Discharge Chute
ASSEMBLY Discharge Chute Auger Control Test Loosen the wing knob on the upper chute. IMPORTANT: Perform the following test before operating the snow thrower for the first time and at the start of each winter season. Adjust chute and chute control to desired operating position. Tighten the wing knob on the upper chute making sure the carriage bolt is correctly Check the adjustment of the auger control as follows: positioned. -
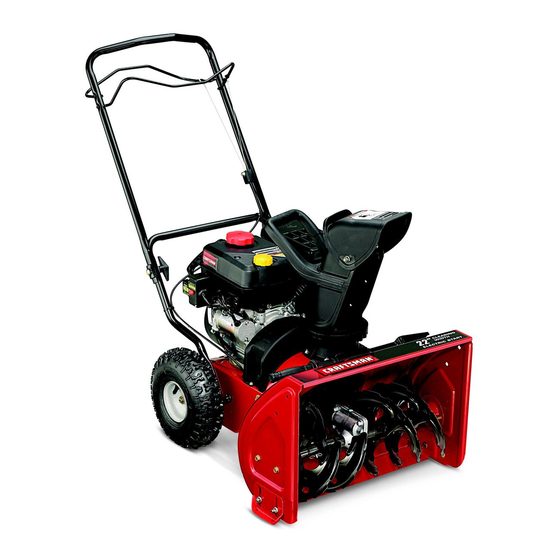
Page 11: Operation
OPERATION Upper Handle Auger Control Drive Control Chute Handle Upper Chute Fuel Cap Muffler Chute Assembly Recoil Choke Starter Control Clean-Out Tool Handle Oil Cap Primer Safety Throttle Control Chute Knob Auger Shave Plate Oil Drain Skid Shoe Figure 9 WARNING Be familiar with all the controls on the snow thrower and their proper operation. -
Page 12: Chute Assembly
OPERATION Auger Clean-Out Tool When engaged, the auger rotates and draws snow towards the center of the auger WARNING housing. Never use your hands to clear a clogged chute assembly. Shut OFF engine and Chute Assembly remain behind handles until all moving parts have stopped before using the clean-out tool to clear the chute assembly. - Page 13 OPERATION Gasoline Pull gently on the starter handle until it begins to resist, then pull quickly and forcefully to overcome the compression. Engine should start. Do not Use automotive gasoline (unleaded or low leaded to minimize combustion chamber release the handle and allow it to snap back. Return rope SLOWLY to original deposits) with a minimum of 87 octane.
-
Page 14: Replacing Shear Pins
OPERATION Using Snow Thrower to Clear Snow Replacing Shear Pins The auger is secured to the spiral shaft with two shear pins and bow-tie clips. If CAUTION the auger should strike a foreign object or ice jam, the snow thrower is designed Check the area to be cleared for foreign objects. -
Page 15: Maintenance Schedule
MAINTENANCE & SERVICE WARNING Follow the maintenance schedule given below. This chart describes service Before servicing, repairing, lubricating or inspecting, disengage all controls guidelines only. Use the Service Log column to keep track of completed and stop engine. Wait until all moving parts have come to a complete stop. maintenance tasks. - Page 16 MAINTENANCE & SERVICE Changing Engine Oil NOTE: Change the engine oil after the first 5 hours of operation and once a season or every 50 hours thereafter. Drain fuel from tank by running engine until the fuel tank is empty. Be sure fuel fill cap is secure.
-
Page 17: Auger Shaft
MAINTENANCE & SERVICE Lubrication Visually inspect the spark plug. Discard the spark plug if there is apparent wear, or if the insulator is cracked or chipped. Clean the spark plug with a For a view of the lubrication points on the snow thrower, see Figure 15. wire brush if it is to be reused. - Page 18 MAINTENANCE & SERVICE Shave Plate and Skid Shoes Check Belts The shave plate and skid shoes on the bottom of the snow thrower are subject to Follow instructions below to check condition of the belts every 50 hours of wear. These should be checked periodically and replaced when necessary. operation.
-
Page 19: Drive Belt
MAINTENANCE & SERVICE Auger Belt Drive Belt IMPORTANT: Because gas could leak from the carburetor when servicing IMPORTANT: Because gas could leak from the carburetor when servicing auger belt, auger belt, run the engine until the fuel tank is empty, as instructed in run the engine until the fuel tank is empty as instructed in Replacing Belts. -
Page 20: Off-Season Storage
OFF-SEASON STORAGE If the snow thrower will not be used for 30 days or longer, or if the end of the snow season, the equipment needs to be stored properly. Follow storage instructions below to ensure top performance from the snow thrower for future use. Preparing Engine Preparing Snow Thrower Engines stored over 30 days need to be drained of fuel to prevent deterioration and... -
Page 21: Troubleshooting
TROUBLESHOOTING WARNING Disconnect the spark plug wire and ground it against the engine to prevent unintended starting. Before performing any type of maintenance/service, disengage all controls and stop the engine. Wait until all moving parts have come to a complete stop. Always wear safety glasses during operation or while performing any adjustments or repairs. - Page 22 FEDERAL and/or CALIFORNIA EMISSION CONTROL WARRANTY STATEMENT YOUR WARRANTY RIGHTS AND OBLIGATIONS MTD Consumer Group Inc, the United States Environmental Protection Agency (EPA), and for those products certified for sale in the state of California, the California Air Resources Board (CARB) are pleased to explain the emission control system (ECS) warranty on your 2014- 2015 small off-road spark-ignited engine and equipment (outdoor equipment) .
- Page 23 10 . Add-on or modified parts that are not exempted by the Air Resources Board may not be used . The use of any non-exempted add-on or modified parts by the ultimate purchaser will be grounds for disallowing a warranty claim . MTD Consumer Group Inc will not be liable to warrant failures of warranted parts caused by the use of a non-exempted add-on or modified part .
-
Page 24: Repair Protection Agreement
REPAIR PROTECTION AGREEMENT Congratulations on making a smart purchase. Your new Craftsman® product is designed and manufactured for years of dependable operation. But like all products, it may require repair from time to time. That’s when having a Repair Protection Agreement can save you money and aggravation.