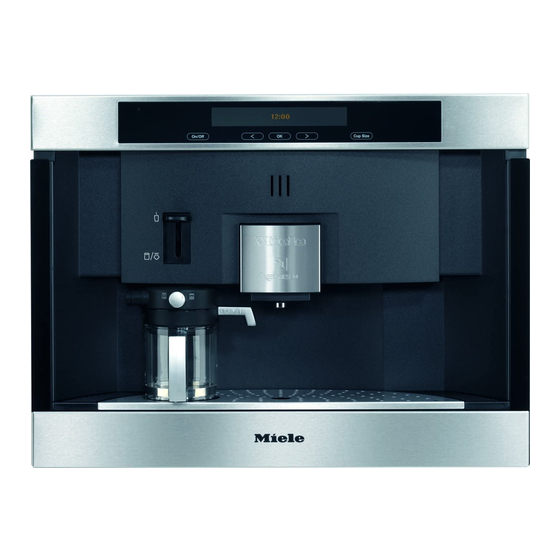
Miele CVA 2650 Technical Information
Hide thumbs
Also See for CVA 2650:
- Operating instructions manual (105 pages) ,
- Specification (2 pages) ,
- Operating instructions manual (69 pages)

Related Manuals for Miele CVA 2650


Summary of Contents for Miele CVA 2650
-
Page 1: Technical Information
TECHNICAL INFORMATION CVA 2650, CVA 2652, CVA 2660, and CVA 2662 Coffee Systems © 2012 Miele USA... -
Page 2: Table Of Contents
1 Technical Data ....................8 2 Nespresso Capsule Overview ................. 9 D Layout of Electrical Components ..............9 1 Appliance Overview (CVA 2650/2660) ............9 2 Appliance Overview (CVA 2652/2662) ............10 3 Electrical Components .................. 12 010 Casing ........................ 14 ... - Page 3 CVA 265x & CVA 266x Technical Information 1 Technical Data ....................36 2 Function ......................37 2.1 Water Paths ..................37 4 Service ......................39 4.1 Pressure Test ..................39 4.2 Carrier Panel Removal ..............39 4.3 Coffee/Hot-Water Heater (2R1) Removal .......... 42 4.4 ...
- Page 4 Fault Code F71 .................. 67 3.13 Fault Code F72 .................. 67 3.14 F72, F71, F75, F76 (CVA 2650/2660 Only) ........70 3.15 Fault Code F73 .................. 70 3.16 Fault Code F74 .................. 71 3.17 Fault Code F75 .................. 71 ...
- Page 5 List of Figures Figure D-1: CVA 2650/2660 Appliance Overview (Front) ..........9 Figure D-2: CVA 2650/2660 Appliance Overview (Front Door Open) ......10 Figure D-3: CVA 2652/2662 Appliance Overview (Front) ..........10 Figure D-4: CVA 2652/2662 Appliance Overview (Front Door Open) ......11 Figure D-5: Component Overview (CVA 2650/2660) ............
- Page 6 Figure 060-10: Connection Piece and Holding Bracket ..........91 Figure 060-11: Pressure-Measuring Instrument and Valve ..........92 Figure 060-12: Removing the Power Electronic .............. 93 Figure 060-13: CVA 2650/2660 Wiring Diagram ............. 94 Figure 060-14: CVA 2652/2662 Wiring Diagram ............. 95 List of Tables Table C-1: Technical Data ....................
-
Page 7: A Warning And Safety Instructions
Modification History When? Who? What? 1/30/2012 Jessica Naples Tech service bulletins added 9/19/2011 Jessica Naples CVA 2652/2662 service mode corrected 12/3/2009 Jessica Naples CVA 2652/2662 information added 9/00/2004 Miele USA Updated for US use 8/00/2004 Miele USA Initial conversion to English... -
Page 8: C Technical Data
CVA 265x & CVA 266x Technical Information Technical Data Technical Data Model CVA 2650/2652 CVA 2660/2662 Built-in Type Appliance dimensions Height 13.8” (35cm) Width 19.7” (50cm) 23.6” (60cm) Depth 11.8” (30cm) Niche dimensions (tall cabinet) Height 14.2” (36cm) Width 18.1” – 18.4” (46 – 46.8 cm) 22.0”... -
Page 9: Nespresso Capsule Overview
Finezzo Pale yellow Large cup (110mL) Table C-2: Nespresso Capsule Overview Layout of Electrical Components Appliance Overview (CVA 2650/2660) Figure D-1: CVA 2650/2660 Appliance Overview (Front) Left display Drain grill Left control dial Drip tray cover Right control dial Coffee spout... -
Page 10: Appliance Overview (Cva 2652/2662)
CVA 265x & CVA 266x Technical Information Figure D-2: CVA 2650/2660 Appliance Overview (Front Door Open) Main switch Carousel runners Capsule plate Water container Perforator (not visible) Drip tray (w/ grid) Capsule carousel Waste container Appliance Overview (CVA 2652/2662) Figure D-3: CVA 2652/2662 Appliance Overview (Front) -
Page 11: Figure D-4: Cva 2652/2662 Appliance Overview (Front Door Open)
CVA 265x & CVA 266x Technical Information Figure D-4: CVA 2652/2662 Appliance Overview (Front Door Open) Main switch Carousel runners Capsule plate Water container Brew unit Drip tray (w/grid) Capsule carousel Waste container... -
Page 12: Electrical Components
CVA 265x & CVA 266x Technical Information Electrical Components Figure D-5: Component Overview (CVA 2650/2660) Door switch (S4) Flow meter (B3/4) Display electronic (EPWZ) (N5) Waste container optical sensor (receiver) (N1) Water tank level switch (S7) Coffee/hot-water pump (2M7) w/temp. limiter (4F1) Brew unit position encoder (E1) Steam pump (1M7) w/ temp. -
Page 13: Figure D-6: Component Overview (Cva 2652/2662)
CVA 265x & CVA 266x Technical Information Figure D-6: Component Overview (CVA 2652/2662) Door switch (S24) Flow meter (B3/4) Display electronic (EPWZ) (N5) Waste container optical sensor (receiver) (1B3/16) Water tank level switch (S12/1) Coffee/hot-water pump (2M7) w/ temp. limiter (2F3) Position sensor (B10) Steam pump w/ temp. -
Page 14: Casing
CVA 265x & CVA 266x Technical Information Casing... -
Page 15: Function
CVA 265x & CVA 266x Technical Information Function Main Power (On/Off) Switch The main power switch is located on the front left of the casing; see Figure D-5 or D-6, Item 14. Danger! Even with the switch set to 0 (“off”), voltage remains applied to some components. -
Page 16: Figure 010-1: Drip Tray Contact Springs
CVA 265x & CVA 266x Technical Information Figure 010-1: Drip Tray Contact Springs The two associated contacts are on the rear of the drip tray (Figure 010-2). The power electronic registers whether the drip tray is present via the left contact (Figure 010-2, Item 1) and the two “drip tray present”... -
Page 17: Waste Container Optical Sensors
CVA 265x & CVA 266x Technical Information Note: If Please empty drip tray is still displayed after the drip tray has been emptied and replaced, see Section 060-3.25. Waste Container Optical Sensors There are two electronic components for the waste container light barrier: the infrared transmitter and the receiver. -
Page 18: Service
CVA 265x & CVA 266x Technical Information Service Appliance Removal for Service Note: Before any service work is started, the water tank, waste container, drip tray with wave damper and drawer with capsule magazine must be removed from the appliance. 1. -
Page 19: Water Tank Level Switch Removal
CVA 265x & CVA 266x Technical Information 1 Connection plug 2 Right cover 3 Door reed switch Figure 010-4: Door Switch Water Tank Level Switch Removal 1. Remove the appliance for service; see Section 010-4.1. 2. Remove the right side panel. 3. -
Page 20: Placing Appliance In Service Setting
CVA 265x & CVA 266x Technical Information Figure 010-5: Water Tank Level Switch Removal Placing Appliance in Service Setting 1. Remove the appliance for service; see Section 010-4.1. 2. Remove the left and right side panels. 3. Remove the rear panel. 4. -
Page 21: Figure 010-6: Top Casing Retaining Screws
CVA 265x & CVA 266x Technical Information Figure 010-6: Top Casing Retaining Screws 8. Re -install two of the screws in the holes in the bottom casing (Figure 010-7, Item 1). Tilt the top casing and position it against the retaining screws. -
Page 22: Top Casing Removal
CVA 265x & CVA 266x Technical Information Top Casing Removal 1. Remove the appliance for service; see Section 010-4.1. 2. Remove the left and right side panels. 3. Remove the rear panel. Remove the top casing retaining screws (Figure 010-6, Items 2 and 3). 4. -
Page 23: Valve Housing Seal Removal
CVA 265x & CVA 266x Technical Information 9. Disconnect or unscrew all necessary connections and ground leads. 10. Move the front casing forward. Lift to remove. Figure 010-9: Front Casing Retaining Screws Valve Housing Seal Removal 1. Disconnect the appliance from the power supply. 2. -
Page 24: Figure 010-10: Valve Housing Seal Removal
CVA 265x & CVA 266x Technical Information Figure 010-10: Valve Housing Seal Removal... -
Page 25: Door
CVA 265x & CVA 266x Technical Information Door... -
Page 26: Function
The appliance has an optical interface for diagnostic support or program updating; see Figure 020-1, Item 1. Its location can be found by using the optical interface search function of the Miele Diagnostic Support unit (MDU). (a) CVA 2650/2660 (b) CVA 2652/2662... -
Page 27: Cups Filled Unevenly
CVA 265x & CVA 266x Technical Information Cups Filled Unevenly Cause: Grinding grade and quantity variations in capsules. 1. Grinding grade variations in capsules. The grinding grade varies depending on coffee type. Even with the same coffee type the grinding grade of the ground coffee may vary slightly (tolerance). -
Page 28: Steam Not Available
Select the Heating with steam function and allow it to operate for 1.5 to 2 minutes. Switch Knobs Do Not Always Operate Correctly (CVA 2650/2660 Only) Symptom: Pressure applied to the switch knob is not always transferred to the switch on the electronic. -
Page 29: Machine Operates Automatically, Beeps When Door Is Opened
CVA 265x & CVA 266x Technical Information Quantity Mat. No. Description 8228771 Switch knob - Stainless-look 8228791 Switch knob - Black 8228801 Switch knob - Aluminum-look Replace the switch knobs. Machine Operates Automatically, Beeps when Door is Opened (CVA 2652/2662 Only) Cause: Faulty grounding of front fascia. -
Page 30: Service
Approx. 1.7 fl.oz. (50 mL) Coffee Approx. 1 to 5.8 fl.oz. (30 to 175 mL) Approx. 3.3 fl.oz. (100 mL) Table 020-2: Drink Sizes, CVA 2650/2660 4.1.2 CVA 2652/2662 1. Switch on the machine. 2. Press the < or > touchpads until Settings is displayed. -
Page 31: Removing The Coffee Dispensing Nozzle
3. Remove the coffee dispensing nozzle; see Section 020-4.2. 4. Remove the cover retaining screws; see Figure 020-3, Item 1. 5. Remove the cover. Figure 020-3: Display Electronic Cover Removal (CVA 2650/2660 Shown) Note: The display electronic cover on CVA 2652/2662 models has one additional... -
Page 32: Display Electronic Removal
7. Remove the display electronic retaining screws; see Figure 020-4, Item 3, or Figure 020-5, Item 5. 8. Carefully remove the display electronic. Figure 020-4: Display Electronic Removal, CVA 2650/2660 Figure 020-5: Display Electronic Removal, CVA 2652/2662 Note: When installing a new display electronic, be sure to remove the protective... -
Page 33: Door Removal
CVA 265x & CVA 266x Technical Information Door Removal 1. Disconnect the appliance from the power supply. 2. Open the door. 3. Remove the coffee dispensing nozzle; see Section 020-4.2. 4. Remove the display electronic cover; see Section 020-4.3. 5. Disconnect the power electronic connection to the display electronic (Figure 020-4, Item 1). -
Page 34: Removing The Serving-Area Leds
4. Remove the display electronic cover; see Section 020-4.3. 5. Disconnect the LED connection from the display electronic (Figure 020-8, Item 1). Carefully remove each LED assembly from its holder (Figure 020-8, Item 2). Figure 020-8: Removing the Serving-Area LEDs (CVA 2650/2660 shown) -
Page 35: Component Bracket, Flow-Through Heaters, Pumps
CVA 265x & CVA 266x Technical Information Component Bracket, Flow-Through Heaters, Pumps... -
Page 36: Technical Data
CVA 265x & CVA 266x Technical Information Technical Data Coffee/Hot-Water Heater (2R1) Version With stainless-steel water pipe Voltage 120VAC Power rating 1200W Up to index 13/…: 2 fuses (2F8, 3F8) 421°F, 363°F (216°C, 184°C) After index 14/…: 1 fuse (2F8) 421°F (216°C) 1 temperature limiter (2F1 or F1/8) 241°F (116°C) -
Page 37: Function
CVA 265x & CVA 266x Technical Information Function Water Paths Figure 030-1: Water Path – Overview of Components Ceramic valve Steam pump (1M7) Brew unit Flow meter (B3/4) Steam valve Pressure relief valve Water tank Coffee/hot-water pump (2M7) Decompression vessel Steam flow-through heater (1R1) Drip tray Coffee/hot-water flow-through heater (2R1) - Page 38 CVA 265x & CVA 266x Technical Information 2.1.3 Water Path - Steam Refer to Figure 030-1. If Heating with steam is selected and the steam valve (Item 3) is opened, the steam pump (Item 7) takes in water from the water tank (Item 4) and pumps it via the pressure relief valve (Item 9) through the steam heater (Item 11).
-
Page 39: Service
CVA 265x & CVA 266x Technical Information Service Pressure Test See Section 060-4.6. Carrier Panel Removal 1. Remove the appliance for service; see Section 010-4.1. 2. Remove the left and right side panels. 3. Remove the rear panel. 4. Remove the top casing (Section 010-4.5). 5. -
Page 40: Figure 030-3: Hose Connections
CVA 265x & CVA 266x Technical Information 12. Disconnect the hoses from the decompression vessel (Figure 030-3, Items 4, 5 and 6). 13. Disconnect the hose from the steam pump connection (Figure 030-3, Item 8). 14. Disconnect the hose from the flow meter (Figure 030-3, Item 7). 15. -
Page 41: Figure 030-4: Component Locations On Carrier Panel
CVA 265x & CVA 266x Technical Information Figure 030-4: Component Locations on Carrier Panel Steam heater Coffee/hot-water heater Steam pump Coffee/hot-water pump Decompression vessel Flow meter... -
Page 42: Coffee/Hot-Water Heater (2R1) Removal
CVA 265x & CVA 266x Technical Information Coffee/Hot-Water Heater (2R1) Removal 1. Remove the appliance for service; see Section 010-4.1. 2. Remove the left and right side panels. 3. Remove the rear panel. 4. Remove the top casing (Section 010-4.5). 5. -
Page 43: Decompression Vessel Removal
CVA 265x & CVA 266x Technical Information 3. Remove the rear panel. 4. Remove the top casing (Section 010-4.5). 5. Remove the carrier panel (Section 040-4.2). 6. Disconnect the hoses from the flow meter (Figure 030-4, Item 6). 7. Lift the flow meter up and off its support to remove. 8. -
Page 44: Containers, Drip Tray, Cappuccinatore
CVA 265x & CVA 266x Technical Information Containers, Drip Tray, Cappuccinatore... -
Page 45: Technical Data
CVA 265x & CVA 266x Technical Information Technical Data Capacities 1.5 liters (0.4 gallons) Water tank Approximately 40 capsules Waste container 800 milliliters (0.2 gallons) Drip tray Table 040-1: Container Capacities Function Water Tank The water tank has a capacity of 0.4 gallons (1.5 liters). When the water level drops below 0.13 gallons (500 milliliters), the magnet in the float activates the water tank level switch;... -
Page 46: Figure 040-1: Steam Valve Positions
CVA 265x & CVA 266x Technical Information Cause: Incorrect milk or milk that is too warm was used. Remedy: To achieve an optimal milk froth, use cold (less than 55°F or 13°C) full-cream milk (approximately 3.5% fat) only. Cause: Steam supply valve incorrectly positioned. Remedy: Turn the steam supply valve to position 2 (see Figure 040-1). -
Page 47: Water Tank Drains Empty
CVA 265x & CVA 266x Technical Information Remedy: Note: The cappuccinatore components are easier to assemble when they are slightly damp. 1. Rinse all cappuccinatore components under cold water. 2. Reassemble the cappuccinatore; see Section 040-4.1. Water Tank Drains Empty Symptom: The water tank drains empty and the drip tray is full to the brim even though the water tank has been firmly pushed in as far as possible and has clipped... -
Page 48: Service
CVA 265x & CVA 266x Technical Information Service Cappuccinatore Assembly Important! In order to prepare good milk froth, all parts (especially openings) must be thoroughly cleaned. Rinse all parts under cold water. If the cappuccinatore is too dry, it will not be sealed correctly and will thus draw in too much air. -
Page 49: Brew Unit, Capsule Magazine, Dc Motors, Valves
CVA 265x & CVA 266x Technical Information Brew Unit, Capsule Magazine, DC Motors, Valves... -
Page 50: Technical Data
CVA 265x & CVA 266x Technical Information Technical Data Motor Voltages Motor Operating Voltage Ceramic valve motor (M1) 12VDC Brew unit motor (M2) 0 –12 VDC PWM Capsule transport motor (M3) 9VDC PWM Capsule magazine motor (M4) 9 VDC PWM Table 050-1: Motor Technical Data Pulse-width modulation Function... -
Page 51: Figure 050-1: Brewing Procedure
CVA 265x & CVA 266x Technical Information then passes through the tiny holes in the pyramid piercers and flows via the spout into the cup. After the brewing cycle, the capsule cage is raised and the capsule plate tips to eject the used capsule, which then falls into the waste container. -
Page 52: Fault Repair
CVA 265x & CVA 266x Technical Information Fault Repair Capsule Magazine Drawer Can’t Be Removed from Appliance Cause: The capsule transport slide has jammed. Remedy: 1. Slightly lift the capsule magazine drawer. 2. Using a small flathead screwdriver, lift the capsule transport lever (Figure 050-2, Item 1). -
Page 53: Brew Unit Motor Removal
CVA 265x & CVA 266x Technical Information 8. Disconnect the electrical connections from the brew unit. 9. Remove the brew unit. Figure 050-3: Brew Unit and Retaining Screws Brew Unit Motor Removal 1. Remove the appliance for service; see Section 010-4.1. 2. -
Page 54: Ceramic Valve Removal
CVA 265x & CVA 266x Technical Information Figure 050-4: Brew Unit Motor Assembly Ceramic Valve Removal 1. Remove the appliance for service; see Section 010-4.1. 2. Remove the left and right side panels. 3. Remove the rear panel. 4. Remove the top casing (Section 010-4.5). 5. -
Page 55: Steam Valve Removal
CVA 265x & CVA 266x Technical Information Steam Valve Removal 1. Remove the appliance for service; see Section 010-4.1. 2. Remove the left and right side panels. 3. Remove the rear panel. 4. Remove the top casing (Section 010-4.5). 5. Remove the front casing (Section 010-4.6). 6. -
Page 56: Capsule Magazine Motor Removal
CVA 265x & CVA 266x Technical Information Capsule Magazine Motor Removal 1. Remove the appliance for service; see Section 010-4.1. 2. Remove the left and right side panels. 3. Remove the rear panel. 4. Remove the top casing (Section 010-4.5). 5. -
Page 57: Figure 050-8: Capsule Transport Motor Assembly
CVA 265x & CVA 266x Technical Information Figure 050-8: Capsule Transport Motor Assembly Refer to Figure 050-9 for component locations during re-assembly. 1 Capsule transport motor 2 Cam 3 Capsule transport lever Figure 050-9: Capsule Transport Motor Assembly Components... -
Page 58: Intermediate Plate Assembly Removal
CVA 265x & CVA 266x Technical Information Intermediate Plate Assembly Removal The intermediate plate must be removed to replace the capsule magazine optical sensor (N3) and the waste container optical sensors (N1 and N2). 1. Remove the appliance for service; see Section 010-4.1. 2. -
Page 59: Capsule Magazine Optical Sensor Removal
CVA 265x & CVA 266x Technical Information Capsule Magazine Optical Sensor Removal 1. Remove the appliance for service; see Section 010-4.1. 2. Remove the intermediate plate assembly; see Section 050-4.7. 3. Carefully lever up the glass cover (Figure 050-11, Item 1). 4. -
Page 60: Power Electronic, Interference Suppression Filter, Connection Cable
CVA 265x & CVA 266x Technical Information Power Electronic, Interference Suppression Filter, Connection Cable... -
Page 61: Function
CVA 265x & CVA 266x Technical Information Function Appliance Status after a Power Failure After a power failure, the appliance remains switched off (standby). The fault memory, as well as all customer settings (except for time of day), remain unaffected. EPL 85x Power Electronic - Plug and Pin Connections Figure 060-1: EPL 85x Connectors and Pin Locations Contact Spring –... -
Page 62: Table 060-1: Epl 85X Power Electronic Plug And Pin Connections
CVA 265x & CVA 266x Technical Information House Bus +5V House Bus Common 1 ST 3 House Bus Common 2 House Bus GND Brew Unit Encoder (position sensor) GND Brew Unit Encoder (position sensor) chan. 1 Brew Unit Encoder (position sensor) chan. 2 ST 4 Brew Unit Encoder (position sensor) +5V Capsule Transport Motor (−) -
Page 63: Fault Repair
CVA 265x & CVA 266x Technical Information Fault Repair Display Message Summary Display Message Cause Remedy Chamber empty - Please Selected chamber is empty Refill with coffee capsules refill Reminder to fill water tank with Fill water tank with fresh Please fill with fresh water fresh water water... -
Page 64: Fault Code Summary
CVA 265x & CVA 266x Technical Information Fault Code Summary Fault Cause See Section Code Coffee/hot-water NTC temperature sensor short-circuited 060-3.3 Coffee/hot-water NTC temperature sensor open-circuited 060-3.4 Steam NTC temperature sensor short-circuited 060-3.6 Steam NTC temperature sensor open-circuited 060-3.6 No water intake Water tank not installed Hose/connections blocked or crimped Water tank valve jammed/blocked... -
Page 65: Fault Code F2
CVA 265x & CVA 266x Technical Information Fault Code F2 Cause: Coffee/hot-water NTC open-circuited. Remedy: Check/replace the coffee/hot-water NTC. Cause: Ambient temperature colder than 10°C (50°F) for a long period of time. With temperatures less than 10°C, the resistance of the temperature sensor increases to such a level that the electronic control registers an open circuit. -
Page 66: Fault Code F17
CVA 265x & CVA 266x Technical Information 1 Hot water out 2 Hot water in Figure 060-2: Ceramic Valve Hose Connections Cause: Software fault. The threshold for registering sufficient pulses from the flow meter has been programmed too narrowly in the software or has been too narrowly registered. -
Page 67: Fault Code F42
CVA 265x & CVA 266x Technical Information Fault Code F42 Symptom: The fault displays for about 3 seconds when the appliance is switched on. Cause: Main power frequency (50Hz/60Hz) not set correctly. Remedy: Set the main power frequency to 60 hertz. See Section 060-4.4. Cause: Frequency fluctuations or power supply interference. -
Page 68: Figure 060-3: Capsule Transport Assembly
The capsule support ring under the capsule plate collar on the hinged ramp has worked loose. Series modification (CVA 2650/2660 only): Since machine no. 10/65379376, a modified capsule magazine has been installed as standard. Since machine no. 14/65391607, the capsule transport slide has been shortened by 0.04 inches (1 millimeter) and is now white. -
Page 69: Figure 060-4: Modified Capsule Transport Arm With 55° Bezel (2650/2660)
(e.g., after a capsule has exploded) and the slide (Figure 060-3, Item 2) is stuck. The capsule transport arm (Figure 060-3, Item 1) can also get stuck. Series modification (CVA 2650/2660 only): Since machine no. 16/65408179, a different power electronic with modified rinse method has been used. -
Page 70: F72, F71, F75, F76 (Cva 2650/2660 Only)
Replace the capsule transport switch. 3.14 F72, F71, F75, F76 (CVA 2650/2660 Only) A fault message, usually F72 (Capsule transport fault), is displayed. In the fault memory, additional faults (F71: Capsule magazine fault, F75: Capsule not ejected, or F76: Capsule jammed during pressing) were saved. -
Page 71: Fault Code F74
CVA 265x & CVA 266x Technical Information 3.16 Fault Code F74 Cause: Ceramic valve fault. Remedy Check the ceramic valve Check the ceramic valve position switch 3.17 Fault Code F75 Cause: Capsule not ejected after coffee preparation. Remedy: 1. Switch the appliance off using the main switch. 2. -
Page 72: Fault Code F76
CVA 265x & CVA 266x Technical Information 3.18 Fault Code F76 Cause: Capsule could not be pressed correctly onto the capsule plate or capsule not transported correctly to the brew unit. Remedy: 1. Switch the appliance off using the main switch. 2. -
Page 73: Fault Code F81
CVA 265x & CVA 266x Technical Information 2. As previous damage cannot be ruled out, the temperature sensor on the coffee/hot water flow-through heater should also be replaced. 3.21 Fault Code F81 Cause: Steam heater is not heating - temperature is below 140°F. Remedy: Check the steam heater in service mode;... -
Page 74: Please Insert Drip Tray" Is Displayed (Drip Tray Installed)
CVA 265x & CVA 266x Technical Information 3.24 “Please Insert Drip Tray” is Displayed (Drip Tray Installed) Cause: Contacts dirty, corroded, or coated with film (e.g., dishwasher rinse aid). Remedy: Clean and dry the contacts. Cause: The spring pressure of the corresponding contacts in the appliance is insufficient. -
Page 75: Please Empty Drip Tray" Is Displayed (Drip Tray Not Full)
CVA 265x & CVA 266x Technical Information Figure 060-6: Base Plate Removal 5. Check the connections to the springs and correct them if necessary; see Figure 060-7. 1 Contact springs – “Drip tray present” sensor connections: Red or orange 2 Contact spring - Drip tray level sensor connection: Brown Figure 060-7: Contact Springs in Housing 3.25... -
Page 76: Warming Up - Please Wait" Is Displayed, Even Though Appliance Is Ready For Operation
CVA 265x & CVA 266x Technical Information Cause: The spring pressure of the corresponding contacts in the appliance is insufficient. Remedy: Refer to Section 060-3.24 for more information. 3.26 “Warming Up - Please Wait” is Displayed, Even Though Appliance is Ready for Operation Cause: The steam system is switched off. -
Page 77: Appliance Is In Standby Mode And Cannot Be Switched On Again
Modified EPL 85x power electronic (EPL 850: mat. no. 06216475; EPL 855: mat. no. 07280682). Install the new power electronic. See Section 060-4.7. Service Customer Programming 4.1.1 CVA 2650/2660 Initial requirements: Switch on the machine. Accessing: Turn the left switch knob until SETTINGS is displayed. Acknowledgement indicator: The right display shows LANGUAGE. - Page 78 CVA 265x & CVA 266x Technical Information Back: Turn the right switch knob until Back is displayed. Press the right switch knob. Save: Press the right switch knob. Quit: Turn the left switch knob. The appliance can be operated again normally.
-
Page 79: Table 060-4: Customer Programming, Cva 2650/2660
Section 060-4.2 Reset to standard Reset Factory default settings Table 060-4: Customer Programming, CVA 2650/2660 If the language is set incorrectly, search for the flag symbol to enter the language setting area. Since machine no. index 14. Only settings adjusted within the programming mode will be reset (the language setting remains unchanged). - Page 80 CVA 265x & CVA 266x Technical Information Option Setting Description Standard Setting čeština dansk deutsch English español français hrvatski italiano magyar Nederlands The language norsk setting remains Language setting polski unchanged when the Language standard settings português are reset. slovenčina slovenščina suomi svenska...
- Page 81 CVA 265x & CVA 266x Technical Information Option Setting Description Standard Setting Arpeggio Capriccio Cosi Decaffeinato Decaf Intenso Decaf Lungo Finezzo Limited Chamber Edition Allocate Coffee type allocation 1 to 5 Livanto type Ristretto Roma Special Club Vivalto Volluto Empty Rename type Delete Espresso...
-
Page 82: Capsule Cage Replacement
CVA 265x & CVA 266x Technical Information Option Setting Description Standard Setting Perform capsule cage Carry out replacement; see Maintenance Section 060-4.2. The appliance can be Demo program operated but does not Showroom heat up. prog. The demo program is deactivated. -
Page 83: Temperature Adjustment For Espresso, Coffee And Hot Water
CVA 265x & CVA 266x Technical Information Temperature Adjustment for Espresso, Coffee and Hot Water (CVA 2650/2660 Only) Temperatures can be modified to suit individual tastes. 1. Switch off the machine. 2. Press and hold the right switch knob. 3. Press the left switch knob once. The appliance is switched on. -
Page 84: Service Mode Summary
Hot water drink type. Table 060-7: Service Programming, CVA 2652/2662 Service Mode Summary 4.5.1 CVA 2650/2660 Initial requirements: Switch off the machine. Accessing: Note: The service mode must be accessed within 2 seconds. 1. Press and hold the right switch knob. - Page 85 CVA 265x & CVA 266x Technical Information Function Option/Component Activated Description ID no. of display and EPWZ 850 ID no. 1: control electronic Program index ID no. of EPL 850 power ID no. 2: electronic Page 1 Faults 1 - 6 The last 12 fault codes registered are shown.
-
Page 86: Table 060-8: Service Functions, Cva 2650/2660
Sets mains (line) frequency 60Hz (all US models) Table 060-8: Service Functions, CVA 2650/2660 To save the fault memory, press and hold the left switch knob until the service mode is deactivated. The fault memory is not deleted. To clear the fault memory, turn the right switch knob until Back is displayed, and then press the right control knob. -
Page 87: Table 060-11: Flow Meter Pulse Rates
CVA 265x & CVA 266x Technical Information Number of Pulses Explanation About 15 Water intake in order (w/o capsule) <2 (for more than 7 seconds) Insufficient water intake (F17: Section 060-3.8) 0 (for more than 7 seconds) No water intake (F10: Section 060-3.7) Table 060-11: Flow Meter Pulse Rates Display Explanation... - Page 88 CVA 265x & CVA 266x Technical Information Function Option/Component Activated Description ID no. and version of EPWZ EPWZ 855 control/display electronic ID number ID no. and version of EPL 855 power electronic See Table 060-2 for fault code Fault codes are listed, one at a time. descriptions.
-
Page 89: Table 060-13: Service Functions, Cva 2652/2662
CVA 265x & CVA 266x Technical Information Function Option/Component Activated Description The pump passes residual Release water/steam along the water path, see Section 030-2.1. The pump passes coffee along M26 (Brew unit) the water path, see Section 030- 2.1. 2M7 (Coffee/hot-water The pump passes hot water pump) Cappuccinatore... -
Page 90: Pressure Test
CVA 265x & CVA 266x Technical Information Display Position Position Explanation Value (Approx.) Rest Eject Press (with capsule plate only) Service Raised end position Lower end position (with capsule plate only) Table 060-14: Brew Unit Position Sensor (B10) Display Codes Number of Pulses Explanation About 15... -
Page 91: Figure 060-9: Capsule Plate And Rubber Insert
CVA 265x & CVA 266x Technical Information Figure 060-9: Capsule Plate and Rubber Insert 5. Insert the connection piece (Figure 060-10, Item A). 6. Clamp the connection piece firmly in place with the holding bracket (Figure 060-10, Item B). Figure 060-10: Connection Piece and Holding Bracket 7. -
Page 92: Figure 060-11: Pressure-Measuring Instrument And Valve
CVA 265x & CVA 266x Technical Information Figure 060-11: Pressure-Measuring Instrument and Valve 10. Access service mode as outlined in Section 060-4.5.1 or 060-4.5.2. 11. Select COMPONENT TEST. 12. Select Brew unit (M26), then Cont. downwards. Press and hold the right switch knob (or the OK touchpad) until the brew unit has been lowered as far as possible. -
Page 93: Power Electronic Removal
CVA 265x & CVA 266x Technical Information b. Continue to press and hold the right switch knob (2560/2660) until a pressure of 232 to 276 pounds per square inch (16 to 19 bar) is achieved. The time required for this should be no more than 50 seconds maximum. -
Page 94: Wiring Diagrams
CVA 265x & CVA 266x Technical Information Wiring Diagrams Figure 060-13: CVA 2650/2660 Wiring Diagram... -
Page 95: Figure 060-14: Cva 2652/2662 Wiring Diagram
CVA 265x & CVA 266x Technical Information Figure 060-14: CVA 2652/2662 Wiring Diagram... -
Page 96: Technical Service Bulletins
Remind the customer about the importance of proper cleaning, i.e. disassembling and cleaning in the dishwasher. The customer can purchase a GCEO cappuccinatore insert for their Miele dishwasher, part number 06229800, to help make this task easier. Should the small parts be heavily encrusted with milk solids, it’s recommended that the parts be soaked in hot water for a few hours before washing. -
Page 97: Power Electronic Triac Failure
Some machines will display no obvious symptoms. Models affected: CVA 4062, CVA 4066, CVA 2652, CVA 2662. If a CVA 2650 or CVA2660 was upgraded with a heater conversion kit, this behavior may be seen on these models. Serial number ranges: CVA 406X: 81485399 –... -
Page 98: Cva & French Roast Coffee
CVA 265x & CVA 266x Technical Information CVA TRIAC failure parts matrix: Coffee heater: Description CVA 4062 CVA 4066 CVA 2652 CVA 2662 Electronic 7330534 7330544 7312672 7312672 7270620 7270620 7270620 7270620 Temp limiter 6670260 6670260 6580130 6580130 Heater 6913330 6913330 6913330 6913330... -
Page 99: Understanding Coffee System Temperature Fuses
CVA 265x & CVA 266x Technical Information Understanding Coffee System Temperature Fuses All CVA and CM coffee systems have temperature fuses on both the coffee and steam heaters. (The CM5s have two fuses on one heater.) These fuses are SODs (single-operation devices) designed to protect the system from a “runaway heater”... - Page 100 CVA 265x & CVA 266x Technical Information heater. Remember, there is no bimetal thermostat in a CM5, so one single temperature overrun will permanently disable the heater. If you find a heater with an open temperature fuse: During the diagnosis process, if you find that a temperature fuse has opened, all of the other parts in this circuit should be suspect.