
Related Manuals for EnGenius DuraFon


Summary of Contents for EnGenius DuraFon
- Page 1 User Manual DuraFon-SIP System Durable, Long-Range Cordless Phone EnGenius Customer Service http://www.engeniustech.com/...
-
Page 2: Table Of Contents
Table of Contents Safety Instructions ................. 5 General Safety Instructions ..............5 Product Safety Instructions ..............5 Battery Safety Instructions ..............7 Regulatory Information ................8 Equipment Checklist ................11 Handset Illustration ................12 Basic Handset Features ..............13 Additional Handset Features ............15 Base Illustration................ - Page 3 Advanced Operations................36 Handset Registration ............... 36 Handset Group Subscription............. 37 Call Transfer ..................38 Phonebook Operations ..............39 Programmable Feature Call .............. 43 Caller ID ..................45 Call Manager ................... 46 Incoming ..................47 Outgoing ..................47 Call Barring..................48 Visual Message Waiting Indicator (VMWI).........
- Page 4 Technical Specifications ............... 68 Base Station ..................70 Index ....................75...
-
Page 5: Safety Instructions
Safety Instructions Caution: Your wireless telephone gives you freedom and flexibility to stay in touch while you move around. However, when using your phone equipment, safety instructions should be followed to avoid the risks of fire, electric shock, injury to person, and damage to property. General Safety Instructions 1. - Page 6 manufacturer will void the warranty and the FCC authorization to operate the equipment. Use only manufacturer provided accessories. Do not use the telephone near water. Never spill liquid of any kind on this product. Unplug the product from the wall telephone jack and power outlet before cleaning.
-
Page 7: Battery Safety Instructions
17. Do not install the base station or the handset charger near microwave ovens, radios, TV sets, speakers, or other electrical equipment. These appliances may cause interference to the product or experience interference from th e product. 18. Unplug the base station or the charger adaptor from the power outlet and refer to an authorized service center under the following conditions: If liquid has been spilled into the product. -
Page 8: Regulatory Information
Regulatory Information DuraFon-SIP System FCC ID: A8J-SP935 IC: 10103A-SP935 This device complies with Part 15 of the FCC Rules. Operation is subject to the following two conditions: 1) This device may not cause harmful interference, and 2) This device must accept any interference received, including interference that may cause undesired operation. -
Page 9: Portable Handset
IMPORTANT NOTE: FCC Radiation Exposure Statement: This equipment complies with FCC radiation exposure limits set forth for an uncontrolled environment. This equipment should be installed and operated with minimum distance 20cm between the radiator & your body. This transmitter must not be co-located or operating in conjunction with any other antenna or transmitter. - Page 10 - Connect the equipment into an outlet on a circuit different from that to which the receiver is connected. - Consult the dealer or an experienced radio/TV technician for help. FCC Caution: Any changes or modifications not expressly approved by the party responsible for compliance could void the user's authority to operate this equipment.
-
Page 11: Equipment Checklist
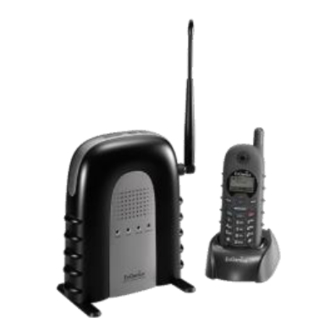
Equipment Checklist In a Base + Handset package, please find the following components: Base Station x 1 (antenna installed) Base AC/DC Adapter x 1 Handset x 1 (antenna installed) Handset Antenna x 1 (Long ×1) Desktop Charger x 1 Charger AC/DC Adapter x 1 1700mA Li-Ion Battery Pack x 1 Telephone Cord x 1 Quick Guide... -
Page 12: Handset Illustration
Handset Illustration Antenna Bel t Cl ip Hol der Receiver 4-l i ne LCD Vol ume control / Scrol ling Broa dcast key END & Power ON/OFF key 2-WAY/ INTERCOM TALK/FLASH/ (For SIP) Mi crophone Ba ttery pa ck Tra vel charger jack Hea dset ja ck (2.5mm) -
Page 13: Basic Handset Features
Handset Features Basic Handset Features 4-Line LCD (Liquid Crystal Display) a. The LCD display has LED (Light Emitting Diode) for backlighting. b. The 1 line of LCD consists of icons . Icons explanation from left to right RSSI l evel (Receive Signal Strength Indicator) Duri ng a call, the number of bars is proportional to the ra dio s ignal strength received. - Page 14 The last line displays the left and right soft keys. Ringer a. Rings to an incoming call and intercom call. b. Distinctive alert sounds indicating various events: Si ngle beep: s uccessful key entry. Double beep: i ndicates power on/off. Tri pl e beep: failed operation.
-
Page 15: Additional Handset Features
Up ( ) /Down ( ) Scrolling Keys a. Scroll through records and menu selections. b. Adjust receiver voice volume when in the Talk mode. Press to enter received call log when in the Standby mode. d. Press to enter phonebook when in the Standby mode. END;... - Page 16 DND (Do Not Disturb, i.e., Silent Ring) Call Logs Redial: Stores 10 phone numbers (up to 26-digits each) dialed most recently. Can perform last-number redial on all 10 numbers. Received and New Call Log: Total 50-entries (16-digit phone number, 16- character names, and Date/Time stamp), needs Caller ID service from local telephone company.
- Page 17 b-3. Off: Disable the capability to make an outgoing call. Call Barring c-1. Block users from dialing long distance or international calls. c-2. Up to 5-digits of each Call Barring setting, up to 5-entries allowed. Changing requires you to enter the “Call Settings ” (MENU-4-3). Note: You must key in the accurate user ID and password to perform this feature.
- Page 18 20. Group Setting Allows the handset to subscribe to one or several groups. Re: Up to 7 groups (1~7) can be subscribed. 21. Custom Name Change the “DuraFon-SIP” screen to the desired wording or info, such as ~18~...
- Page 19 the handset user’s name. Re: Up to 32-characters can be entered. 22. Change Pwd Change the handset password, which requires entering the Call Barring (MENU-4-3) and Menu Display (MENU-8). Re: Default PIN is “0000.” 23. DTMF Duration (from web) 24. Programmable Flash Key Timing (from web) 25.
- Page 20 This requires entering the “Phone Settings” (MENU-5-1). 30. Headset Ring Change the ringer emitting either from the handset speaker or the headset receiver. This requires entering the “Phone Settings ” (MENU-5-8). 31 Base Intercom Auto-Answer (from web) From Web, “System-Base Settings-Base Intercom Auto-Answer” to turn On/Off the Intercom Auto-Answer feature.
-
Page 21: Base Illustration
Base Illustration REGISTER DC In CONSOLE AUDIO IN LINE RESET GROUND Vol ume Intercom Broa dcast Antenna Receiver Mi crophone ~21~... -
Page 22: Base Features
Base Features Basic Base Station Features Audio-In Jack (3.5mm) Connect to an external device for music on hold. FXO Jack (L1) Standard RJ-11 connector to plug in the telephone line. Ethernet Jack Standard RJ-45 connector to plug in the Ethernet (LAN) line. Console Jack Jack for console (Type-B USB connector). -
Page 23: Charger Illustration
Charger Illustration DC In Spa re Battery Cha rging Sl ot Spa re Battery Cha rging Indicator Ha ndset Charging Slot ~23~... -
Page 24: Charger Features
Charger Features DC In Connects to Charger AC Adapter. Handset Charging Slot Charges handset battery when handset is placed in the cradle. Refer to the handset LCD for charging status . (1) Cha rgi ng: battery s tatus bar is running and the LCD s creen shows: “Cha rging.” (2) Ful ly Cha rged: battery s tatus bar stands s till a nd the LCD s creen displays “Cha rge Complete.”... -
Page 25: Getting Started
Getting Started Base Station Installation Plug the transformer end of the base station AC/DC adapter into a standard AC electrical power outlet, plug the other end into the “DC In” jack on the back of the base station. Plug the phone cord into the “RJ11” FXO jack. Plug the Ethernet cord into the “RJ45”... -
Page 26: Handset And Charger Installation
Handset and Charger Installation Plug the transformer end of the Charger AC/DC adapter into a standard AC electric power outlet, plug the other end into the “DC In” jack on the back of the Charger. Install the battery pack onto the handset. Install the handset antenna. -
Page 27: Basic Operations
Basic Operations Operation Modes Both the base station and handset have feature levels that can only be accessed when in certain modes. A. Base Operation Modes STANDBY mode- this is the default mode. The page key is active in standby mode only. -
Page 28: Menu Tree
3. Menu Tree Menu 1.KeyGuard 2.PhoneBook 3.Sounds 1.Ring Volume 2.Ring Tone 3.Key Voulme 4.Key Tone 1.PA On/Off 4.Call Settings 1.Dial Prefix 2.Group Setting 2.Line On/Off 3.Call Manager Incoming 3.Int. On/Off 4.Feature Call Outgoing 1.Auto 2.Manual 3.Off Call Barring 5.Phone Settings 1. -
Page 29: Making A Telephone Call
Making a Telephone Call Press , wait for dial tone, then enter the phone Press REDIAL number. or dial number REDIAL MENU 2. Alternatively, you can enter the phone number first, then press key. When using this method, you can use the CLEAR (Left) and DELETE... -
Page 30: Making A 2-Way/ Intercom Call
Making a 2-Way/ Intercom Call The DuraFon-SIP Cordless Phone System offers private, Intercom/ 2-Way Radio calls independent of the base station. Intercom/ 2-Way communication can be placed between handsets. 1. Press key followed by a two-digit handset ID or Enter Ext #: Group ID. -
Page 31: Redial
Enter the Group ID and then press and hold key. b. Start speaking the broadcast message once you hear the key tone; the speakerphone of destination handsets will open when it receives the voice. Re: the initiating handset needs to press and hold key while speaking or broadcasting. -
Page 32: Receiving A Telephone Call
Receiving a Telephone Call 1. When an incoming call arrives, the LCD will show the Caller ID message, and the ringer will ring or vibrate unless the 033289289 ringer has been turned off. SILENT 2. If the handset is on the charger cradle (ringer will be temporarily switched to “Ring”... -
Page 33: Ending A Call
3. If the handset is not on the cradle and MENU-5-2 “Any Key Talk” setting is “On,” press any key (except and the SILENT soft key) to answer. Notes: The LCD di splays the caller’s Handset ID. You ca n press the SILENT (Left) s oft key i f you choose to ignore the call. -
Page 34: Placing A Call On Hold
Placing a Call On Hold 1. When a call is in progress, it can be put on hold by pressing You have a * OPTION (Right ) soft key and the key. call on hold UNHOLD OPTION 2. To return to the conversation, press UNHOLD (Left) soft key. -
Page 35: Key Guard
Key Guard 1. To prevent accidental dialing, you can press MENU (Right) soft key, then press “1” to select Key Guard option. The Locked No new calls handset keypad is now locked. No key entry is accepted. UNLOCK 2. To unlock the keypad, press UNLOCK (Left) soft key, then, Press * to... -
Page 36: Advanced Operations
Advanced Operations Handset Registration If your handset(s) is purchased as part of a system, it has been pre-registered with the base station at the factory. If the Handset ID is “00,” this means it is a new handset or the ID has been erased. -
Page 37: Handset Group Subscription
de-registration process. Upon successful de- registration, the handset display will show “Please register.” Notes: The ba se station has a 30-second registration timeout s tarting when you pres s the REG button. The handset has a 6-second registration ti meout starting when the registration or de -registration option has been selected. -
Page 38: Call Transfer
Notes: The ha ndset ca n change group a ffiliations a t any ti me. The ba se station is not responsible for group assignments. Cons equently, i t ca nnot de-subscribe a handset from a group. When a n i ntercom caller enters a group ID, all handsets subscribed to thi s group will ri ng. -
Page 39: Phonebook Operations
Press the of the destination handset to answer the intercom call, you can now talk to the destination handset. After talking, press to end the intercom call, and then the destination handset is able to pick up the incoming call automatically. - Page 40 d. After entering the number, press the SAVE (Left) soft key to save this entry into phone book. e. Enter a phone book entry without a name; all records without a name will be placed on the top of the phone book list.
- Page 41 Phone Book mode. Press a key that corresponds to the first character of the name you are looking for. For example, you are looking for “EnGenius,” then press the number twice. scrolling key to locate the exact record you are looking for.
- Page 42 b. Press OPTION (Right) soft key to enter the option menu. c. Press to erase the desinated phone entry. Delete entry? d. LCD shown “Delete entry?” Press (Left) soft key to 12345678 confirm your change. 8. To edit phone book: a.
-
Page 43: Programmable Feature Call
50-entries. Programmable Feature Call 1. If DuraFon-SIP base station is installed behind a PBX system, it is feasible to pre- program some call features along with the PBX’s feature code into the system. 2. Up to 10 most frequently used feature call codes can be pre-programmed. - Page 44 e. Key in the feature call code of the correspondening PBX feature, i.e. F*70. Press SAVE (Left) soft key to confirm. Re: “F” represent the Flash signal. f. The 1 feature call and corresponding feature call code you entered will appear on the LCD screen. g.
-
Page 45: Caller Id
Notes: Thi s feature ca ll would be useful if the DuraFon-SIP base s tation is adjunct to a PBX s ys tem or If you ha ve not pre-programmed any feature call into the system, only “#.Phonebook” in the OPTION menu. -
Page 46: Call Manager
(2) Use Number? key to scroll the number, and 4231234_ press DELETE to edit the number. Then press SAVE (Left) soft key to save the number. DELETE SAVE (3) After the above process, the call log is saved into the phone book. -
Page 47: Incoming
Incoming Press MENU (Right) soft key followed by to enter the Call Settings mode. Press to select Call Manager, then enter handset’s password (4-digits). a. Press to enable receiving PA On/Off. Re: Default setting is “ON.” b. Press to enable receiving Line On/Off which includes FXO line only. -
Page 48: Call Barring
b. Press to “Manual.” When pressing key in standby mode, the handset LCD will show the available line. Press to scroll the options: 1. SIP, 2. Line. Press 1, you can select the SIP line 1 to make a call. c Press to “Off.”... -
Page 49: Visual Message Waiting Indicator (Vmwi)
b. Press OPTION (Right) soft key to delete or edit the Call Call Barring Barring codes. 1212 Up to 5 sets of Call Barring codes can be programmed. OPTION “* * * c. If you want to block all outgoing calls, enter **”... -
Page 50: Adjust Headset Ring
Adjust Headset Ring When using the headset, you can change the ringer to emit from either the handset speaker or receiver of headset to avoid missing call s. a. Press MENU (Right) soft key while the handset is in the standby mode. b. -
Page 51: Sip Configuration
SIP base from the web. Application Typically, the DuraFon-SIP is able to connect to a legacy PBX (or PSTN line) via a telephone jack, and in addition, with an IP-PBX via a networking jack. These two interfaces are perfectly suitable for adjunct telephone systems in enterprise environments as shown in the following figure. -
Page 52: Default Settings
The default username and password are admin. Once you have entered the correct username and password, click the Login button to open the web-base configuration page. If successful, you will be logging in and see the configuration of DuraFon-SIP. ~52~... -
Page 53: Lan Configuration
LAN Configuration Note: When you change the LAN IP to DHCP, once you click Apply, the change will take effect. You will now know the new IP of the DuraFon-SIP in advance of accessing the web configuration next time. Base Settings Note: When you change any of the Base Settings, click Apply for the change to take effect. -
Page 54: Phone Book
Phone Book You can store up to 50-entries in the phone book on the DuraFon-SIP base. - Click the Add phone book button to add entries. Click the Export phone book button to export this phone book to a specific file in .csv format. -
Page 55: Sip Configuration
SIP Configuration SIP Server Note: The Enable Terminate Key is used for dialing pound (#) digit or not. When you enable it, the # digit is to call out the previous digits immediately. If you disable it, the # digit is regarded as a one of normal digit. SIP Account Enter VoIP->... -
Page 56: Individual Account
Individual Account - Note: You should register every handset on the DuraFon-SIP base before you start setting the SIP configuration. The default SIP number is set according to handset ID, which means SIP number 10 is set for handset ID 10, and accordingly. You will need to enter the Edit button for each account. -
Page 57: Group Account
Group Account When you want to assign one SIP account to ring many handsets at the same time, you can use the “Group Acc” setting. DuraFon-SIP supports 7 SIP accounts for group(s), which are used for incoming call s only. -
Page 58: Audio Setting
Click the Apply button to save the setting as the screen shows: After you finish these account settings, you need to click the Apply button as shown in red to activate the setting. Audio Setting In Audio Setting, after you change the setting and click Apply, you will need to power cycle the base in order for any changes take effect. -
Page 59: Tools
Tools Admin This page allows you to change the username and password. By default, the username is admin and the password is admin. The password can contain 0 to 12 alphanumeric characters and is case sensitive. Admin Login Name Enter a new username for logging into the New Name entry box. Old Password Enter the old password for logging into the Old Password entry box. -
Page 60: Time
Click Apply to apply the changes or Cancel to return to previous settings. Ping Test This page allows you to analyze the connection quality of DuraFon-SIP and trace the routing table to a target in the network. Ping Test Address to Ping Enter the IP address you would like to search. -
Page 61: Firmware
“Restore Settings” from A File section. If extreme problems occur or if you have set up the DuraFon-SIP wrong, you can use the “Reset” button in the “Restore to factory default” section to restore all the configurations of the DuraFon-SIP to the original default settings. - Page 62 Reset button Reg. button These features (Reset, Reboot, and Registration) can be performed from this web setting: ~62~...
-
Page 63: Menu Operations
Menu Operations Menu 1.KeyGuard 2.PhoneBook 3.Sounds 1.Ring Volume 2.Ring Tone 3.Key Voulme 4.Key Tone 1.PA On/Off 4.Call Settings 1.Dial Prefix 2.Group Setting 2.Line On/Off 3.Call Manager Incoming 3.Int. On/Off 4.Feature Call Outgoing 1.Auto 2.Manual 3.Off Call Barring 5.Phone Settings 1. Mic. Gain 2.Any Key Talk 3.Contrast 4.Backlight... - Page 64 Press MENU (Right) soft key to enter menu mode while the phone is in standby mode. Re: You can either press , followed by SELECT (Left) soft key to confirm the selected menu. Or press the digit directly to confirm the selected menu.
- Page 65 Press to turn on or off the dial prefix feature. Default = Off. If “On” is selected, the handset is prompted to enter the prefix number, up to 14-digits can be entered. Delete (Left) soft key to edit prefix number. Press SAVE (Left) soft key to confirm the selection.
- Page 66 (Left) soft key to confirm setting. Re: Once entering the custom name, the greeting of the LCD in standby mode will be changed as entered. Default greeting is “DuraFon-SIP” Press to Change Password: Enter original (4-digits) of handset then press (Left) soft key when entering this menu.
- Page 67 Enter 2-digit handset ID, then press (Left) soft key. The base will erase the handset ID from the system. Press to Change PIN: Enter the new Base PIN followed by (Left) soft key. Re: Default Base PIN is “0000.” Press to register, de-register handset : see Handset Registration operation on Page 36.
-
Page 68: Technical Specifications
Technical Specifications Electrical Specifications Base Station Portable Handset Frequency 902-928 MHz 902-928 MHz RF Power Peak: 708 mW Peak: 708 mW Average: 354 mW Average: 88.5 mW Channel Spacing 200 kHz 200 kHz Number of Channels 128 Modulation MSK Multiple Access Frequency Hopping TDMA Frequency Hopping TDMA Frequency Hopping Rate 100 per second... - Page 69 Storage Temperature -10 – 70 C -10 – 70 C Humidity 20 – 75 % 20 – 75 % Dimension without 161W x 42D x 188H (mm) 141 x 58 x 31 mm antenna 6.3” x 16.5” x 7.4” Weight 14.1 ounces 6.17 ounces ~69~...
- Page 70 Base Station Federal Communication Commission Interference Statement This equipment has been tested and found to comply with the limits for a Class B digital device, pursuant to Part 15 of the FCC Rules. These limits are designed to provide reasonable protection against harmful interference in a residential installation.
- Page 71 Access to the telephone network shall occur only if the code transmitted by the handset matches the code set in the base unit. Similarly, ringing of the handset shall occur only if the code transmitted by the base unit matches the code set in the handset.
- Page 72 Radiation Exposure Statement: This equipment complies with IC radiation exposure limits set forth for an uncontrolled environment. This equipment should be installed and operated with minimum distance 20cm between the radiator & your body. This device has been designed to operate with an antenna having a maximum gain of 2dBi.
- Page 73 This equipment may not be used on coin service provided by the telephone company. Connection to party lines is subject to state tariffs. Company: EnGenius Technologies Address: 1580 Scenic Avenue, Costa Mesa, CA 92626 Tel no.: 888.735.7888 ext. 827...
- Page 74 condition que la somme d'indicesd'équivalence de la sonnerie de tous les dispositifs n'excède pas 5. » ~74~...
- Page 75 Index 2-WAY INTERCOM, 14 Adjust Handset Microphone Gain, 49 Adjust Headset, 50 Adjusting Handset Receiver (Earpiece) Voice Volume, 33 Adjusting Handset Speakerphone Voice Volume, 33 Auto Hang Up, 19 Base Illustration, 21 Base Operation, 27 Base PIN, 66, 67 Base Station, 11, 13, 22, 25, 26, 30 Battery Recharge a nd Replacement, 35 Battery Strength, 13 Broadcast, 30...
- Page 76 DTMF Duration, 19 Equipment Checklist, 11 Feature Call, 18, 43, 65 Flash, 14, 44 FCC, 8, 68 Group ID, 15, 30 Group Selections, 37 Group Setting, 18 Handset and Charger Installation, 26 Handset Charging Slot, 24 Handset Features, 13, 15, 21 Handset Group Subscription, 30, 37, 65 Handset ID, 13, 15, 31, 33, 36, 42 Handset Registration, 26, 36, 67...
- Page 77 Name tagging with caller ID, 15 Outdoor Antenna, 11 Outgoing, 16, 46, 47 Phone Settings, 18, 19, 20, 49, 50, 65, 67 Phonebook, 17, 39, 45, 64, 66 Placing a Call On Hold, 34 Programmable Feature Call, 43 Programmable Flash, 19 Receiving a Telephone Call, 32 Receiving an Intercom Call, 32 Redial, 16, 31...
Need help?
Do you have a question about the DuraFon and is the answer not in the manual?
Questions and answers