palmOne Tungsten T5 User Manual
Palm pda user guide
Hide thumbs
Also See for Tungsten T5:
- Getting started (172 pages) ,
- Read this first manual (12 pages) ,
- Read this first (2 pages)
Table of Contents
Advertisement
Advertisement
Table of Contents

Related Manuals for palmOne Tungsten T5


Summary of Contents for palmOne Tungsten T5
- Page 1 User Guide...
-
Page 2: Copyright And Trademark
Tungsten, the Tungsten logo, “T” (Stylized), Addit, Blazer, Graffiti, HotSync, the HotSync logo, Palm, Palm Powered, Palm OS, the Palm logo, and VersaMail are among the trademarks or registered trademarks owned by or licensed to palmOne, Inc. All other brand and product names are or may be trademarks of, and are used to identify products or services of, their respective owners. -
Page 3: Table Of Contents
Table of Contents About This Guide ...xx Tips for viewing this guide...xx What’s in this guide? ...xxi Step-by-step instructions... xxi Links... xxi Sidebars...xxii Chapter 1: Setting Up Your Handheld and Your Computer .1 What’s in the box? ...2 System requirements ...2 Step 1: Charging your handheld...4 What you should know about your handheld’s battery... - Page 4 Application controls ... 25 What software is on my handheld?...26 What’s on the CD? ...28 Related topics...31 Chapter 3: Moving Around in Applications...33 Opening applications...34 Using Favorites... 34 Using Applications ... 35 Using Files... 36 Working with files and folders ... 38 Sorting Files ...
- Page 5 Choosing whether application information is updated ...88 Installing applications to your handheld ... 93 Installing applications from a Windows computer... 93 Using Quick Install from within Palm Desktop software ...94 Using the palmOne Quick Install icon ...95 Using the palmOne Quick Install window ...96 Installing applications from a Mac computer ...97...
- Page 6 Installing the additional software from the CD ... 110 Checking space and version numbers ...111 Removing information ...113 Removing an application from your handheld ... 113 Removing Palm Desktop software from your computer ... 114 Related topics...116 Chapter 6: Managing Your Contacts ... 117 Adding a contact ...118 Entering additional contact information ...121...
- Page 7 Scheduling an event that is longer than a day ...145 Entering a location or a note for an event ...146 Scheduling an event with a time zone ...148 Color-coding your schedule ...149 Managing your color-codes ...150 Assigning a color-code to an event ...152 Setting an alarm ...153 Rescheduling an event ...154 Deleting events ...156...
- Page 8 Viewing a slide show ... 186 Rotating a photo ... 188 Viewing and editing photo or video details ... 189 Organizing photos and videos ...191 Organizing photos and videos in albums... 191 Moving a photo or video within and between albums ...193 Sorting photos and videos ...
- Page 9 Deleting all your completed tasks ...232 Customizing your Tasks list ...233 Working with Tasks on your computer ...235 Related topics...236 Chapter 12: Writing Memos...237 Creating a memo ...238 Viewing and editing a memo ...239 Moving memos in your memos list ...240 Deleting a memo ...241 Working with Memos on your computer...242 Related topics...243...
- Page 10 Allowing your handheld to wake up when it is turned off ...274 Related topics...275 Chapter 15: Sending and Receiving Email Messages ...276 Upgrading an existing email account ...277 About email accounts ...278 Account and connection types ... 278 Using an email provider ... 278 Using a corporate email account ...
- Page 11 Entering an address using Contacts ...314 Entering an address using Smart Addressing ...315 Attaching a personal signature ...316 Send retry ...317 Send retry notifications... 317 Modifying messages in the Outbox... 318 Outbox icons in the VersaMail applications... 318 Working with email folders ...319 Viewing another folder ...319 Customizing the appearance of the message list ...320 Moving messages between folders ...322...
- Page 12 Synchronizing an account ... 358 Synchronizing multiple accounts... 358 Using SSL with the conduit ... 359 Advanced VersaMail application features ...359 Setting preferences for getting, sending, and deleting email ...360 Adding or updating a contact directly from a message ...362 Creating and using filters...
- Page 13 Finding information on a web page ...401 Quickly jumping to a page ...402 Following a link... 402 Returning to your home page or a page you recently visited ... 402 Changing how you view a page ...403 Bookmarking your favorite pages ...405 Adding a bookmark ...405 Viewing a bookmarked or saved page ...406 Editing information about a bookmark or saved page ...407...
- Page 14 Chapter 18: Dialing Phone Numbers from Your Handheld ... Dialing a number ...430 Entering a number ...430 Redialing the most recently used number ...431 Dialing a number from the Call History List ...432 Using speed dial ...433 Adding a speed dial entry ...433 Dialing a number using speed dial ...434 Editing a speed-dial entry ...435 Related topics...436...
- Page 15 Deleting an entire category of expenses ...458 Customizing the expense list ...459 Working with Expense on your computer ...460 Related topics...461 Chapter 21: Performing Calculations ...462 Calculator buttons...463 Viewing recent calculations ...464 Accessing different calculators ...465 Related topics...466 Chapter 22: Keeping Your Information Private...467 Choosing a security level ...468 Marking information as private ...469 Setting the level of privacy ...470...
- Page 16 Deleting a category ...493 Placing information into a category ...494 Placing an entry into a category ...494 Placing an application into a category ...496 Viewing information by category ...497 Related topics...498 Chapter 24: Managing Clock Settings ...499 Checking the current date and time ...500 Setting the primary location ...501 Setting the date and time for the primary location ...502 Choosing secondary locations for other time zones ...504...
- Page 17 Customizing the way you enter information ...531 Customizing the input area ...531 Using the full-screen writing area ...532 Customizing Graffiti 2 strokes ...534 Setting up ShortCuts ...535 Changing ShortCuts ...537 Correcting problems with tapping ...538 Selecting sound settings ...539 Entering your owner information ...540 Conserving battery power ...541 Preventing your handheld from turning on by accident ...541 Selecting power-saving settings ...542...
- Page 18 Opening files on an expansion card ...572 Viewing card information...573 Renaming a card ...574 Copying applications to an expansion card ...575 Removing all information from a card ...576 Related topics...577 Chapter 27: Maintaining Your Handheld ...578 Handheld do’s and don’ts ...578 Handheld do’s...
- Page 19 Chapter 29: Getting Help ...615 Self-help resources ...615 Technical support ...616 Product Regulatory Information ...617 FCC Statement ...617 Canada - Industry Canada (IC) ...618 CE Compliance Statement ...618 Declaration of Conformity ...618 Battery Warning ...619 Static Electricity, ESD, and your palmOne™ handheld ...620 Index ...622 Tungsten™...
-
Page 20: About This Guide
About This Guide This guide tells you everything you need to know about your handheld: the things you’ll do every day, the advanced features that let you get the most out of your handheld, and the things that make your handheld not only useful, but fun. Tips for viewing this guide Here are some helpful tips for making it easier to read and find information in this guide as you view it in Adobe Reader:... -
Page 21: What's In This Guide
What’s in this guide? The info in this guide includes step-by-step instructions, links to cross-references, and sidebars. Step-by-step instructions Here you’ll find how-to information. Look for these cues in instructions: Continued [ ! ] IMPORTANT [ & ] OPTIONAL NOTE WINDOWS ONLY MAC ONLY Links... -
Page 22: Sidebars
Sidebars [ ! ] Before You Begin Things you must complete before you can do the steps described in a procedure or group of procedures. A suggestion on how to use a feature more fully; a shortcut; a pointer to a related feature. Did You Know? An interesting fact about the topic being described;... - Page 23 CHAPTER 1 Setting Up Your Handheld and Your Computer In this chapter Congratulations on the purchase of your new palmOne™ Tungsten™ T5 What’s in the box? handheld! You’re about to discover so System requirements many things about your handheld that will help you better manage your life Step 1: Charging your handheld...
-
Page 24: Chapter 1: Setting Up Your Handheld And Your Computer
System requirements The installation CD contains Palm and use your handheld. To use Palm Desktop software, your desktop computer must meet these requirements: WINDOWS ONLY • A PC with a Pentium II processor or later, and one of the following operating systems: •... - Page 25 • One available USB port • USB sync cable (included with your handheld) • CD or DVD drive for installing Palm Desktop software from the CD that came with your handheld; or you can download Palm Desktop software by visiting our website at www.palmOne.com/intl/support...
-
Page 26: Step 1: Charging Your Handheld
CHAPTER 1 [ ! ] Before You Begin If you’re upgrading from another Palm Powered device, synchronize your old handheld with your old desktop software. After the initial charge, charge your handheld at least half an hour every day. Tungsten™ T5 Handheld... -
Page 27: What You Should Know About Your Handheld's Battery
CHAPTER 1 Setting Up Your Handheld and Your Computer What you should know about your handheld’s battery While your handheld is charging, take a minute to learn about the battery: • If you see an alert on the screen warning you that the battery is low, recharge your handheld. Also recharge your handheld if it doesn’t turn on when you press the power button. -
Page 28: Step 2: Turning On Your Handheld For The First Time
CHAPTER 1 [ ! ] Before You Begin Be sure to fully charge your handheld, as described in the preceding procedure. After you set up your handheld, review the Quick Tour on your handheld and take the tutorial on the CD to learn the basics. -
Page 29: Step 3: Installing Your Software
Tungsten™ T5 Handheld Insert the CD into your computer. NOTE You need administrator rights to install Palm Desktop software on a computer running Windows 2000/XP or Mac OS X. WINDOWS ONLY Follow the onscreen instructions. If you’re upgrading, select the username that you assigned to your old handheld. -
Page 30: Step 4: Connecting Your Handheld To Your Computer
OK. Key Term Third-party application A software program that runs on a Palm Powered device, but is not created or supported by palmOne, Inc. If you have problems with your new handheld after... - Page 31 CHAPTER 1 Setting Up Your Handheld and Your Computer Tungsten™ T5 Handheld Press the power button to turn on your handheld. Continue with the onscreen instructions. Synchronize your handheld with your computer by pressing the HotSync button on the USB sync cable. Done...
-
Page 32: Switching To Another Desktop Software Application
During CD installation, you chose a desktop software application to synchronize with your handheld. You may have chosen Palm Desktop software at that time. But if Microsoft Outlook already contains all of your contacts, appointments, tasks, and notes, you can change your synchronization method so that your handheld synchronizes with Outlook instead. -
Page 33: Using User Profiles
CHAPTER 1 Setting Up Your Handheld and Your Computer Using user profiles [ ! ] IMPORTANT an IT manager, you can skip this section. Suppose your sales organization wants to distribute two dozen handhelds that all have a common company phone list, a set of memos, and several key applications. A user profile can be created to install this information before the handhelds are distributed to employees. -
Page 34: Creating A User Profile
Tungsten™ T5 Handheld Open the New Profile screen: a. Open Palm Desktop software. b. From the Tools menu, select Users. c. Click Profiles, and then click New. Enter a unique name for the profile, and click OK twice. - Page 35 Setting Up Your Handheld and Your Computer MAC ONLY Tungsten™ T5 Handheld Open the New Profile screen: a. Open Palm Desktop software. b. From the User pop-up menu, select Edit Users. c. Click New Profile. Create the profile: a. Enter a unique name for the profile, and click OK.
-
Page 36: Synchronizing With A User Profile
WINDOWS ONLY Tungsten™ T5 Handheld Select the profile from the User pop-up menu, and create the info in Palm Desktop software for the profile. Set the profile’s conduit settings: a. From the HotSync menu, select Conduit Settings. b. Select the conduit settings for the profile. - Page 37 Click Profiles. b. Select the profile you want to load on the handheld, and click OK. c. Click Yes. Done The next time you synchronize that handheld, Palm Desktop software prompts you to assign a username to the handheld.
- Page 38 Press the HotSync button on the USB sync cable. Select the profile you want to load on the handheld, and click OK. Done The next time you synchronize that handheld, Palm Desktop software prompts you to assign a username to the handheld.
-
Page 39: Related Topics
Customizing Common Questions Tungsten™ T5 Handheld • Synchronizing your handheld with Palm Desktop software or Microsoft Outlook on your computer • Synchronizing wirelessly using Bluetooth technology on your handheld • Using your company’s network to synchronize information • Choosing whether or not to synchronize information for a specific application •... -
Page 40: Chapter 2: Basics
CHAPTER 2 Basics In this chapter Whether you’re at work, at home, or on the go, you’ll quickly understand why Locating the controls on handhelds are also called personal your handheld digital assistants (PDAs). Like a good Using the status bar personal assistant, your handheld Rotating the screen helps you keep track of your schedule,... -
Page 41: Locating The Controls On Your Handheld
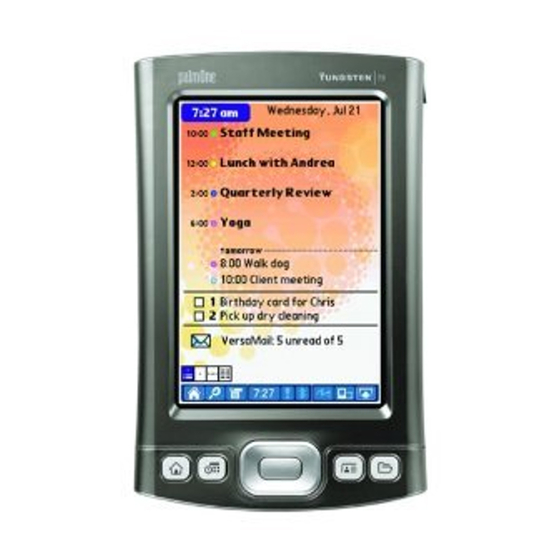
CHAPTER 2 Basics Locating the controls on your handheld Front panel controls Screen Favorites Calendar Screen 5-way navigator Quick buttons Tungsten™ T5 Handheld 5-way navigator Files Quick buttons Contacts Displays the applications and information on your handheld. The screen is touch-sensitive. Display the input area by tapping the Input icon Use the input area to enter info with Graffiti®... -
Page 42: Top And Side Panel Controls
CHAPTER 2 Basics Top and side panel controls Key Term IR port IR Short for infrared. Expansion Beaming uses infrared card slot technology to send information between two IR ports that are within a few feet of each other. Did You Know? Beaming lets you quickly share appointments, addresses, phone... -
Page 43: Back Panel Controls
CHAPTER 2 Basics Back panel controls Key Term USB Short for Universal Serial Bus; the type of connector or cable that’s commonly used to Speaker connect accessories to a computer. AC connector (part of Multi-connector) Multi-connector Speaker Reset button Multi-connector Bluetooth radio (internal) Tungsten™... -
Page 44: Using The Status Bar
CHAPTER 2 Basics Using the status bar Use the Find dialog box to The status bar at the bottom of the handheld screen gives you access to valuable tools and is locate specific items of accessible in all views. information in your handheld’s program Home memory—for example, a... -
Page 45: Rotating The Screen
CHAPTER 2 Basics Rotating the screen You can switch between landscape and portrait view by tapping Screen rotation Did You Know? bar. Landscape view is useful for viewing spreadsheets, email, web pages, and photos. You can customize which way the screen rotates in landscape mode by choosing right- or left- handed rotation. -
Page 46: What's On The Screen
CHAPTER 2 Basics What’s on the screen? Your handheld includes many features that make it easy to use. Among them are the input area and the common elements that appear on the screen in each of the applications. Once you learn You can select an input how to use them in one application you can easily use them in all the others. -
Page 47: Application Controls
CHAPTER 2 Basics Application controls Key Term Slider The solid area on the scroll bar. The slider moves to indicate the relative position within the entry or list. You can also use the 5- way navigator to select an item from a pick list and to select some command buttons. -
Page 48: What Software Is On My Handheld
CHAPTER 2 Basics What software is on my handheld? Your handheld comes with many applications preinstalled and ready to use. Can’t find some of these applications? Press the Favorites Home button twice to view all applications in Files Applications View. Calendar Contacts Documents... - Page 49 Connect your handheld as a removable USB drive on a Mac computer or when you are at a Windows computer that does not have the Tungsten T5 software installation CD installed. Open files stored on your handheld on the computer,...
-
Page 50: What's On The Cd
Contacts, Calendar, Tasks, and Memos is synchronized with Outlook. Information for Expense, Note Pad, and Media is still synchronized with Palm Desktop software. Install applications from your Windows computer to your handheld or to an expansion card that is seated in the expansion card slot for use on your handheld. - Page 51 Keep the Getting Started Guide with you and view it on your handheld. You can also install this file on your handheld to carry it with you on the go; it installs to the Palm Desktop Help automatically during the initial CD installation process.
- Page 52 CHAPTER 2 Basics QuickTime Java Technologies link Handmark Solitaire Adobe Reader for Palm OS eReader VPN Client Software Tutorial Tungsten™ T5 Handheld Works with the palmOne Media desktop application. Required to prepare videos in certain formats for viewing on your handheld.
-
Page 53: Related Topics
• Using File Transfer and Drive Mode to manage information between your handheld and your computer • Installing additional software from the CD • Beaming information and applications to other Palm Powered devices • Sending information and applications to other Bluetooth devices by using Bluetooth technology on your handheld Viewing the current date and time •... - Page 54 CHAPTER 2 Basics Maintaining Common Questions Tungsten™ T5 Handheld • Caring for your handheld • Resetting your handheld Answers to frequently asked questions about your handheld...
-
Page 55: Chapter 3: Moving Around In Applications
Using the 5-way navigator and the avenues run east/west? Learning to move around your Using menus handheld is similar. Most Palm OS Finding information applications use the same set of Related topics application controls. So once you learn how to use these standard controls, you’ll be driving all over town and you... -
Page 56: Opening Applications
CHAPTER 3 Moving Around in Applications Opening applications You can open applications from Favorites View or Applications View, or by using the Files application. Press Home once to open Favorites; press Home NOTE twice to open example, the Photos & Videos entry in Favorites opens the Media application, which is listed as Applications. -
Page 57: Using Applications
CHAPTER 3 Moving Around in Applications Using Applications Applications View shows all of the applications on your handheld. Use the category pick list in the upper-right corner of the screen to view applications by category or to see all applications. From You can customize the the pick list, you can also select to view the contents of your handheld’s internal flash drive or of an Home button to open... -
Page 58: Using Files
CHAPTER 3 Moving Around in Applications Using Files The Files application enables you to easily open, view, and move among the files and folders on your handheld’s internal drive or on an expansion card inserted into your handheld’s expansion You can also open Files slot. - Page 59 CHAPTER 3 Moving Around in Applications Navigate within Files by doing any of the following: Did You Know? If you select a file from within Files, it automatically opens in the correct application on your handheld. If there is no application for that file, a beep alert sounds.
-
Page 60: Working With Files And Folders
CHAPTER 3 Moving Around in Applications Working with files and folders You can work with the files and folders in the Files application—create new folders; copy, beam, and delete files and folders; and more. You can work with one file or folder at a time. Did You Know? If you select Open With, only applications that can... - Page 61 CHAPTER 3 Moving Around in Applications Did You Know? If you select Delete, you Cont’d. receive a confirmation asking if you are sure you want to delete the file or folder. Tungsten™ T5 Handheld Copy Copy the item to another location on the internal drive or an expansion card.
-
Page 62: Sorting Files
CHAPTER 3 Moving Around in Applications Sorting Files You can sort your files and folders by icon, name, date, or size. Tungsten™ T5 Handheld Open Files. Select your sort options: Sort display Select the column Sort by you want to sort by. From the left icon side of the screen, the columns are icon, name, and size/date. -
Page 63: Opening Files And Folders From Within An Application
CHAPTER 3 Moving Around in Applications Opening files and folders from within an application In certain applications—for example, Documents, palmOne Media, and RealPlayer from Did You Know? palmOne—you can open a file or folder directly from within the application. The application If you use a command to automatically displays files located in the appropriate folder on your handheld’s internal drive—for open a file from within an... -
Page 64: Moving Around In Favorites View
CHAPTER 3 Moving Around in Applications Moving around in Favorites View Right or Left Up or Down Center Moving around in Applications View Up or Down Right or Left Center Tungsten™ T5 Handheld Displays the next or previous page of favorites. -
Page 65: Moving Around List Screens
CHAPTER 3 Moving Around in Applications Moving around list screens In list screens, use the 5-way to select and move between entries such as notes, memos, contacts, or photos. Up or Down Center Tungsten™ T5 Handheld Scrolls an entire screen of entries, as long as there’s nothing highlighted. -
Page 66: Moving Around Entry Screens
CHAPTER 3 Moving Around in Applications Moving around entry screens In entry screens, use the 5-way to scroll within the current entry or between entries. Up, Down, Right, or Left Center Moving around dialog boxes Dialog boxes appear when you select a button or option that requires you to provide additional information. -
Page 67: Moving Around Menus
CHAPTER 3 Moving Around in Applications Up, Down, Right, or Left Center [ ! ] IMPORTANT action or delete information. Moving around menus After you open the menus you can use the 5-way to move between and to select menu items: Up or Down Right or Left Center... -
Page 68: Using Menus
CHAPTER 3 Moving Around in Applications Using menus Menus let you access additional features and settings. They are easy to use, and once you master them in one application, you know how to use them in all your applications. You can also open the handheld menus by tapping the application title in the upper-left... -
Page 69: Using The Command Stroke
CHAPTER 3 Moving Around in Applications Using the Command stroke Most menu items also have a menu shortcut, which is similar to the keyboard shortcuts used on computers. The menu shortcut appears to the right of the menu item. Command mode is active for just a few seconds, so To use a menu shortcut, first write the Graffiti 2 Command stroke on the left side of the input area write the menu shortcut... -
Page 70: Finding Information
CHAPTER 3 Moving Around in Applications Finding information You can use Find to locate any word or phrase in any application—either as part of a file name or within a file—in your handheld’s program memory. Find also locates words that begin a file name If you select text in an only (not within a file) on your handheld’s internal drive or on an expansion card. -
Page 71: Related Topics
• Entering information with Graffiti 2 characters and shortcuts • Entering contact information in other applications • Beaming information and applications to other Palm Powered devices • Sending information and applications to other Bluetooth using Bluetooth technology on your handheld... -
Page 72: Chapter 4: Entering Information On Your Handheld
CHAPTER 4 Entering Information on Your Handheld In this chapter Whether you’re scheduling a meeting with your daughter’s teacher or adding How can I enter information a new restaurant to your Contacts list, on my handheld? you need to get that information into Entering information with your handheld. -
Page 73: How Can I Enter Information On My Handheld
CHAPTER 4 Entering Information on Your Handheld How can I enter information on my handheld? • Graffiti® 2 writing • The onscreen keyboard • Phone Lookup • Note Pad The most popular methods are using Graffiti 2 writing and the onscreen keyboard. NOTE information between your handheld and your computer. -
Page 74: Using Full-Screen Writing
CHAPTER 4 Entering Information on Your Handheld Your handheld has two different input area displays that you can use to enter Graffiti 2 characters. To open them, tap and hold Input Select the top icon to you want. open the onscreen keyboard. - Page 75 CHAPTER 4 Entering Information on Your Handheld You can write letters or characters in the following areas: You can choose whether Left side of the screen Write letters or characters that are assigned to the abc input area. the Graffiti 2 strokes you enter appear as white Right side of the screen Write numbers or characters that are assigned to the 123 input area.
-
Page 76: Writing Graffiti 2 Characters
CHAPTER 4 Entering Information on Your Handheld Writing Graffiti 2 characters Did You Know? Graffiti 2 writing automatically capitalizes the first letter of a sentence or a new entry. Tungsten™ T5 Handheld Open an application you use to enter information, like Calendar. Tap the screen where you want your character to appear. -
Page 77: Keys To Success With Graffiti 2 Writing
• Write large characters. Did You Know? If you’re already familiar with Graffiti writing from an older Palm Powered device, Graffiti 2 writing Write uppercase letters will be easy to master. Characters are entered in exactly the same way, except for i, t, k, and the the same way you write number 4. -
Page 78: Graffiti 2 Alphabet
CHAPTER 4 Entering Information on Your Handheld Graffiti 2 alphabet You can select alternate ways to write some Graffiti 2 characters. Choose the method that’s Letter most natural for you. Customize your handheld so that you can use the entire screen to enter Graffiti 2 characters, not just the input area. -
Page 79: Graffiti 2 Numbers
CHAPTER 4 Entering Information on Your Handheld Graffiti 2 numbers Number Tungsten™ T5 Handheld Write numbers on RIGHT side of input area Stroke Number Stroke... - Page 80 CHAPTER 4 Entering Information on Your Handheld Graffiti 2 punctuation marks Apostrophe Question mark Exclamation Tungsten™ T5 Handheld Write these marks on LEFT side of input area Mark Stroke Mark Period Ampersand & Comma Carriage return ‘ Space Quotation mark “...
- Page 81 CHAPTER 4 Entering Information on Your Handheld Tungsten™ T5 Handheld Write these marks on RIGHT side of input area Mark Stroke Mark Period Backslash Comma Slash Tilde Left ñ parenthesis Dash Right – parenthesis Plus Equal sign Asterisk Stroke...
- Page 82 CHAPTER 4 Entering Information on Your Handheld Graffiti 2 accented characters For accented characters, write the letter on the left side of the input area, and then write the accent on the right side of the input area. Get help writing any of the Graffiti 2 characters in most applications.
-
Page 83: Graffiti 2 Gestures
CHAPTER 4 Entering Information on Your Handheld Graffiti 2 gestures Gesture Copy Tungsten™ T5 Handheld Write gestures on LEFT side, or across the middle of input area Stroke Gesture Paste Undo Stroke... -
Page 84: Writing Graffiti 2 Symbols And Other Special Characters
CHAPTER 4 Entering Information on Your Handheld Writing Graffiti 2 symbols and other special characters Symbols and other special characters can be written on either side of the input area, using the Punctuation Shift stroke: If you accidentally enter the Punctuation Shift stroke, enter it again to cancel it, or wait a moment and it... -
Page 85: Graffiti 2 Symbols And Special Characters
CHAPTER 4 Entering Information on Your Handheld Graffiti 2 symbols and special characters Tungsten™ T5 Handheld Write symbols on EITHER side of input area... -
Page 86: Writing Graffiti 2 Shortcuts
CHAPTER 4 Entering Information on Your Handheld Writing Graffiti 2 ShortCuts Graffiti 2 contains several ShortCuts to make entering common information easier. For example, when you write the ShortCut stroke followed by dts, you automatically enter the current date and time. -
Page 87: Graffiti 2 Shortcuts
CHAPTER 4 Entering Information on Your Handheld Graffiti 2 ShortCuts Date stamp Date/time stamp Tungsten™ T5 Handheld Write ShortCuts on LEFT side, or across MIDDLE of input area Entry ShortCut Entry Time stamp Meeting Breakfast Lunch Dinner ShortCut... -
Page 88: Entering Information With The Onscreen Keyboard
CHAPTER 4 Entering Information on Your Handheld Entering information with the onscreen keyboard You can use the onscreen keyboard in any application where you need to enter text, numbers, or symbols on your handheld. Key Term Entry An item in an application such as a contact in Contacts or an appointment in Calendar. - Page 89 CHAPTER 4 Entering Information on Your Handheld When a keyboard is open, you can tap abc, 123, or Int’l to open any of the other keyboards. Tungsten™ T5 Handheld [ & ] OPTIONAL Select from among four different keyboards. abc - lowercase Caps shift Tap here to display lowercase keyboard...
-
Page 90: Entering Info From Contacts Into Another Application
CHAPTER 4 Entering Information on Your Handheld Entering info from Contacts into another application Having lunch with someone whose info you have in Contacts? Use Phone Lookup to quickly enter their name and phone number into the appointment you create in Calendar. This feature is In the applications that available in Calendar, Memos, Tasks, and Expense. - Page 91 CHAPTER 4 Entering Information on Your Handheld Cont’d. Tungsten™ T5 Handheld d. Select the contact, and then select Add. [ & ] OPTIONAL To add another contact, repeat step 2. Done The name and phone number of the contact are automatically entered.
-
Page 92: Editing Information
CHAPTER 4 Entering Information on Your Handheld Editing information Editing information on your handheld is similar to editing with word-processing applications on your computer. Select the information, and then apply the correct command. Selecting information There are several ways to select information that you want to edit or delete. Selecting text Selecting a word Selecting a line... -
Page 93: Copying And Pasting Information
CHAPTER 4 Entering Information on Your Handheld Copying and pasting information Copying and pasting information on your handheld is similar to editing with word-processing applications on your computer. There are even faster ways to copy and paste information: • Use Graffiti 2 gestures. •... -
Page 94: Deleting Information
CHAPTER 4 Entering Information on Your Handheld Deleting information Delete all or part of an entry with the Cut command. Delete information with Graffiti 2 writing. Select the information, and then draw a line from right to left in the input area. Tungsten™... -
Page 95: Related Topics
Tungsten™ T5 Handheld • Opening applications • Using menus Beaming or sending information to another Palm Powered device • Selecting alternate ways to write some Graffiti 2 characters • Creating your own Graffiti 2 ShortCuts Answers to frequently asked questions about entering information... -
Page 96: Chapter 5: Moving And Managing Info Between Your Handheld And Your Computer
CHAPTER 5 Moving and Managing Info Between Your Handheld and Your Computer You can do a lot with your handheld on In this chapter its own: enter or look up a contact, Program memory and the write a memo, keep track of your internal drive appointments. -
Page 97: Program Memory And The Internal Drive
The info for each Palm OS application—for example, individual contact entries—may be stored in your information is lost. your handheld’s program memory, or it may be stored on your handheld’s internal flash drive. You Simply recharge to can view and work with this information from within the application itself. -
Page 98: How Can I Work With Information
On Windows computers, Palm Desktop software includes both palmOne™ Media, which you can you cannot open on your use to transfer photos and videos to your handheld, and palmOne Quick Install, which installs handheld, to work with applications (PRC or PDB) for use on your handheld when you synchronize. -
Page 99: When Would I Use Each Method
Applications (PRC or PDB file) Use Quick Install from within Palm Desktop (Windows) or drag the application to the Send To Handheld droplet icon on your desktop (Mac), and then synchronize to install the application to your... - Page 100 Photos and videos Method 1: Use the desktop Media application from within Palm Desktop (Windows) or drag the files to the Send To Handheld droplet icon on your desktop (Mac). Synchronize to install the files to the Photos & Videos folder on your handheld’s internal drive.
-
Page 101: Synchronizing Information
Entering information using desktop software technology on your handheld. Use Palm Desktop or Outlook to enter information on your computer. When you synchronize, the information is updated on your handheld. Did You Know? If you use the default settings, information from all the following applications is transferred each... - Page 102 Palm Desktop Help. Tungsten™ T5 Handheld Open an application in Palm Desktop software: a. Double-click the Palm Desktop icon on your computer desktop. b. Click the icon in the launch bar to open the application. Launch bar Edit Do one of the following: •...
- Page 103 CHAPTER 5 Moving and Managing Info Between Your Handheld and Your Computer Tungsten™ T5 Handheld Enter the information, and then click OK. Synchronize your handheld with your computer. Done...
- Page 104 MAC ONLY Tungsten™ T5 Handheld Open an application: a. Double-click the Palm Desktop icon in the Palm folder on your computer. b. Click the icon in the toolbar to open the application. Do one of the following: • Click New in the upper-left corner of the screen to create a new entry.
-
Page 105: Synchronizing Your Handheld With Your Computer
OK. lower-right corner of your screen. If the icon is not there, turn it on by clicking Start and then Or create a new selecting Programs. Navigate to the Palm Desktop software program group, and select HotSync Manager. username. -
Page 106: Synchronizing With A Cable
CHAPTER 5 Moving and Managing Info Between Your Handheld and Your Computer Synchronizing with a cable If you need help with synchronizing, see I can’t synchronize my handheld with my computer. View the HotSync log to see what applications were successfully synchronized and whether any problems took place during... -
Page 107: Customizing Your Synchronization Settings
CHAPTER 5 Moving and Managing Info Between Your Handheld and Your Computer Customizing your synchronization settings You can set the following options for synchronization: • Choosing how your computer responds when you initiate synchronization on your handheld (Windows only) • Enabling or disabling synchronization on your computer, setting whether synchronization is enabled automatically when you start your computer, and choosing how much information to include in the synchronization troubleshooting log (Mac only) •... - Page 108 Always available HotSync Manager runs automatically every time you initiate synchronization on your handheld. Available only when the Palm Desktop software is running You must open Palm Desktop software in order for HotSync Manager to run. Manual You must manually turn HotSync Manager on each time you want your computer to respond to a synchronization request.
-
Page 109: Setting Synchronization Options
Moving and Managing Info Between Your Handheld and Your Computer Setting synchronization options MAC ONLY Tungsten™ T5 Handheld Open the synchronization options screen: a. Double-click the HotSync Manager icon b. Click the HotSync Controls tab. Select the synchronization options you want: Continued in the Palm folder. -
Page 110: Choosing Whether Application Information Is Updated
CHAPTER 5 Moving and Managing Info Between Your Handheld and Your Computer Cont’d. Choosing whether application information is updated Key Term By default, when information in each application is updated in one place (your handheld or your computer), it is updated in the other. However, for an application included during synchronization, Conduit The you can choose whether information that has been updated in one place is updated in the other synchronization software... - Page 111 CHAPTER 5 Moving and Managing Info Between Your Handheld and Your Computer WINDOWS ONLY Windows For information on choosing whether application information is updated if you are synchronizing your handheld with Outlook, see the online Outlook synchronization Help. Click the HotSync Manager icon in the taskbar in the lower-right corner of your screen,...
- Page 112 CHAPTER 5 Moving and Managing Info Between Your Handheld and Your Computer You should generally keep the default setting (Synchronize the files) for all applications. Choose an overwrite option only if you have a specific reason for sending updates only one way. Choose Do Nothing if you never use an application.
- Page 113 Click OK, and then click Done. Done Select the application you want to customize: a. Double-click the Palm Desktop icon in the Palm folder. b. From the HotSync menu, select Conduit Settings. c. From the User pop-up menu, select the appropriate username.
- Page 114 CHAPTER 5 Moving and Managing Info Between Your Handheld and Your Computer You should generally keep the default setting (Synchronize the files) for all applications. Choose an overwrite option only if you have a specific reason for sending updates only one way. Choose Do Nothing if you never use an application.
-
Page 115: Installing Applications To Your Handheld
You can install applications by using Quick Install from within Palm Desktop software, by dragging videos to your handheld. and dropping onto the palmOne Quick Install icon, or by using the commands in the palmOne Quick Install window. -
Page 116: Using Quick Install From Within Palm Desktop Software
CHAPTER 5 Moving and Managing Info Between Your Handheld and Your Computer Using Quick Install from within Palm Desktop software WINDOWS ONLY A confirmation dialog box shows whether the items will be copied to your handheld or to an expansion card. You can... -
Page 117: Using The Palmone Quick Install Icon
CHAPTER 5 Moving and Managing Info Between Your Handheld and Your Computer Using the palmOne Quick Install icon WINDOWS ONLY You can also install files on your handheld by right-clicking them on your computer. Select Send To palmOne Quick Install, and the files are placed on your handheld the next time you synchronize. -
Page 118: Using The Palmone Quick Install Window
CHAPTER 5 Moving and Managing Info Between Your Handheld and Your Computer Using the palmOne Quick Install window WINDOWS ONLY Use the Add Folder command to copy all the files in a folder on your computer—but not the folder itself—to your handheld. -
Page 119: Installing Applications From A Mac Computer
Drag and drop the files onto the Send To Handheld droplet: a. Drag and drop the file(s) or folder onto the Send To Handheld droplet in the Palm folder. b. In the Send to Handheld dialog box, select your username and click OK. -
Page 120: Using Commands In The Hotsync Menu
Copy or download the application you want to install onto your computer. Select the files to install on your handheld: a. In the Palm folder, double- click the HotSync Manager. b. Select the HotSync menu, and then select Install Handheld files. -
Page 121: Using File Transfer To Transfer Info To Your Handheld
Drive Mode, from another computer (computer must support standard drive—copying, moving, USB removable drives). and so on. You can also copy and move files File Transfer installs automatically when you install Palm Desktop software. between the internal drive and the card. [ ! ] IMPORTANT Transfer are not automatically backed up during synchronization. - Page 122 CHAPTER 5 Moving and Managing Info Between Your Handheld and Your Computer Use File Transfer to back up the contents of your handheld’s internal drive to your main computer. In the File Transfer window, right-click the folder next to the handheld icon, and then click Save to PC.
- Page 123 CHAPTER 5 Moving and Managing Info Between Your Handheld and Your Computer Cont’d. Tungsten™ T5 Handheld NOTE File Transfer recognizes any security preferences you set for your handheld. For example, if your handheld is locked, File Transfer displays an alert message stating that you must unlock your handheld before using File Transfer.
- Page 124 CHAPTER 5 Moving and Managing Info Between Your Handheld and Your Computer Did You Know? You can work with files and folders in the File Transfer window in many of the same ways that you work with files and folders in Windows Explorer.
-
Page 125: Using Drive Mode To Work With Info On Another Computer
CHAPTER 5 Moving and Managing Info Between Your Handheld and Your Computer Using Drive Mode to work with info on another computer On a Mac computer, use Drive Mode to move files between a computer and your handheld’s internal drive. If you are at a Windows computer that doesn’t have File Transfer installed—a computer at a hotel or your friend’s house, for example—use Drive Mode to open, move, or copy files on your When you use File... - Page 126 CHAPTER 5 Moving and Managing Info Between Your Handheld and Your Computer If you are formatting your handheld’s internal drive or an expansion card while in Drive Mode, be sure to select the file system type FAT—do not select FAT32 or any other file system type.
- Page 127 CHAPTER 5 Moving and Managing Info Between Your Handheld and Your Computer Did You Know? You can work with files and folders on your handheld in Drive Mode in exactly the same way that you work with any other file or folder in My Computer, Windows Explorer, or Finder.
-
Page 128: Other Ways Of Managing Information
You can move and manage information on your handheld and your computer in the following additional ways: • Importing information from other applications into Palm Desktop software • Restoring archived info on your computer • Installing additional applications from the software installation CD •... -
Page 129: Importing Information From Other Applications
Importing information from other applications Do you have information on your computer in spreadsheets or databases and want to transfer it to your handheld? Don’t spend time retyping it. Instead, import the info into Palm Desktop software. Palm Desktop Help has... - Page 130 Tungsten™ T5 Handheld c. Click File, and then click Import. Imported fields d. Follow the onscreen instructions to map the fields in your file to the fields in Palm Desktop software, and import the file. Synchronize your handheld with your computer. Done...
-
Page 131: Restoring Archived Items On Your Computer
You can restore individual entries or an entire archive file to the related application in your desktop software. The Palm Desktop online Help and the Microsoft Outlook online Help have lots of info about how to restore archived files. Refer to these Help files for details. -
Page 132: Installing The Additional Software From The Cd
CHAPTER 5 Moving and Managing Info Between Your Handheld and Your Computer Installing the additional software from the CD Your handheld comes with many applications that are already installed and ready to use. The CD that came with your handheld includes lots of other applications to make your handheld even more useful and more fun. -
Page 133: Checking Space And Version Numbers
CHAPTER 5 Moving and Managing Info Between Your Handheld and Your Computer MAC ONLY Checking space and version numbers Before you install a file or an application, it’s important to make sure you have enough space for it. You may also want to check the version number of applications that are already on your handheld or expansion card, in case you’re interested in upgrading them. - Page 134 CHAPTER 5 Moving and Managing Info Between Your Handheld and Your Computer Tungsten™ T5 Handheld Open the Info dialog box: a. Go to Applications and select HotSync b. Open the menus. c. Select Info on the App menu. View space info and version numbers: Pick list a.
-
Page 135: Removing Information
Moving and Managing Info Between Your Handheld and Your Computer Cont’d. Removing information You can remove applications from your handheld, and remove Palm Desktop software from your computer. Removing an application from your handheld If you run out of memory or decide that you no longer want some applications you installed, you can remove them from your handheld or from an expansion card. -
Page 136: Removing Palm Desktop Software From Your Computer
NOTE If you think you’ll never want to synchronize your handheld with your computer again, you can remove Palm Desktop software from your computer. This process removes only the application files. The information in your Users folder remains untouched. [ ! ] IMPORTANT software and can no longer synchronize your information. - Page 137 CHAPTER 5 Moving and Managing Info Between Your Handheld and Your Computer another personal information manager, like Microsoft Outlook, you must leave Palm Desktop software installed on your computer. NOTE computer. Tungsten™ T5 Handheld You may have to modify these steps to correspond with the operating system on your Open Add/Remove Programs: a.
-
Page 138: Related Topics
VersaMail Common Questions Tungsten™ T5 Handheld Switching between Palm Desktop software and Microsoft Outlook • Opening applications • Using menus • Transferring files from a CD to your handheld or to an expansion card • Listening to audio files on your handheld... -
Page 139: Chapter 6: Managing Your Contacts
CHAPTER 6 Managing Your Contacts In this chapter Say good-bye to a paper address book that you need to update manually Adding a contact every time someone moves, changes Copying contact information their email address, or gets a new work into multiple contacts extension. -
Page 140: Adding A Contact
CHAPTER 6 Managing Your Contacts Adding a contact If the first character you enter in the Last Name or Company field is an asterisk (*) or another symbol, that record always appears at the top of the Contacts list. That’s useful for an entry like “If Found Call [your phone number]. - Page 141 CHAPTER 6 Managing Your Contacts To learn how to download Cont’d. photos to your handheld, see palmOne™ Media. If multiple contacts share information, such as a company name and address, you can enter the first contact, and then copy the information into other contacts.
- Page 142 CHAPTER 6 Managing Your Contacts If you want a reminder about a birthday, check the Reminder box, enter the number of days before the birthday that you want to see the reminder, and then select Did You Know? Birthdays you enter in Contacts appear as untimed events in Calendar.
-
Page 143: Entering Additional Contact Information
CHAPTER 6 Managing Your Contacts Entering additional contact information The Contact Edit screen displays certain fields by default. You can customize the Contact Edit Additional fields appear screen to display additional fields. in a contact only if you enter info into them. If you leave a field blank, it does not appear the next time you open the... -
Page 144: Selecting Contact Field Types
CHAPTER 6 Managing Your Contacts Selecting contact field types You can select the types of phone numbers (work, home, mobile, pager, and so on), as well as specify the instant messenger (IM) account, that you associate with a contact. Any changes you make to field types apply only to the current contact. -
Page 145: Defining Custom Fields
CHAPTER 6 Managing Your Contacts Defining custom fields You can define the custom fields that appear at the end of the Contact Edit screen to display any additional contact information you want, such as spouse’s or children’s names, favorite color, or any other information. -
Page 146: Selecting A Contact As Your Business Card
CHAPTER 6 Managing Your Contacts Selecting a contact as your business card You can create a contact with your own information and select it as your business card by opening the Record Menu and selecting Business Card. other handhelds. To beam your business card quickly, press and hold the Contacts application button for approximately two seconds. -
Page 147: Copying Contact Information Into Multiple Contacts
CHAPTER 6 Managing Your Contacts Copying contact information into multiple contacts You can quickly make a copy of a contact so that you can edit only the fields you need to change. For example, if two of your contacts have the same work address or phone number, duplicating You can also duplicate a the first contact simplifies entering information in the second. -
Page 148: Locating A Contact On Your List
CHAPTER 6 Managing Your Contacts Locating a contact on your list You can also press Right on the 5-way navigator (or select the Quick Look Up icon at the top of the screen) to open the Quick Look Up line. Press Up and Down to select the letter of the name you want in each box, and... -
Page 149: Deleting A Contact
CHAPTER 6 Managing Your Contacts Deleting a contact You never know when you’re going to need to look up an old business associate. If you save an archive copy of your deleted contacts, you can refer to them later by importing them. -
Page 150: Customizing The Contacts List
CHAPTER 6 Managing Your Contacts Customizing the Contacts list By default, the Contacts list displays the work phone number for a contact; if no work phone number is entered, another entry is displayed. You can customize a contact’s settings to display different information on the Contacts list. - Page 151 CHAPTER 6 Managing Your Contacts Tungsten™ T5 Handheld Customize the appearance of the Contacts list: a. From the Contacts list, open the menus. b. Select Options, and then select Preferences. c. Select the display options you want: Remember last category Check the box if you want Contacts to display the last category shown when you return to it from another application.
-
Page 152: Making Connections From Contacts
CHAPTER 6 [ ! ] Before You Begin You must complete all the prerequisites for the email and messaging applications. To use Quick Connect with your handheld’s built-in Bluetooth technology, you must set up a phone connection. To use it with your handheld’s IR port, run Phone Link Updater, and then use the Phone Link... - Page 153 CHAPTER 6 Managing Your Contacts Tungsten™ T5 Handheld Make a connection using Quick Connect: a. Select the contact you want. b. Press Right on the 5-way or select the Quick Connect icon the screen to open the Quick Connect dialog box. c.
-
Page 154: Customizing Quick Connect Settings
CHAPTER 6 Managing Your Contacts Customizing Quick Connect settings You can specify which application opens when you choose a Contacts record field, and whether to add a prefix to each phone number. Tungsten™ T5 Handheld Press Contacts Customize Quick Connect settings: a. -
Page 155: Using Tap-To-Connect
CHAPTER 6 [ ! ] Before You Begin You must have a compatible mobile phone (sold separately) that includes Bluetooth wireless technology, and you must complete all the prerequisites for the email and messaging applications. To use Tap-to-Connect with your handheld’s built-in Bluetooth technology, you must set up a phone connection. - Page 156 CHAPTER 6 Managing Your Contacts Tungsten™ T5 Handheld Make a connection with Tap-to-Connect: a. Select the contact you want. b. Select the entry you want to use to connect. For example, to dial a phone number, select the number you want to dial. To address an email message, select an email address.
-
Page 157: Working With Contacts On Your Computer
To open Contacts on your computer, double-click the Palm Desktop icon on the Windows desktop, and then click Contacts on the launch bar. MAC ONLY To open Contacts on your computer, launch Palm Desktop software from the Palm folder, and then click Addresses. Tungsten™ T5 Handheld ®... -
Page 158: Related Topics
VersaMail Tungsten™ T5 Handheld • Opening applications • Using menus • Synchronizing with Palm Desktop software and Outlook Organizing contacts by type and sorting them Transferring contact information from other applications such as databases, spreadsheets, and other organizer software Keeping contacts private by turning on security options... -
Page 159: Chapter 7: Managing Your Calendar
CHAPTER 7 Managing Your Calendar In this chapter Staying on top of your schedule is an important part of being productive Scheduling events both at work and at home. Calendar Color-coding your schedule can help you remember appointments and spot schedule conflicts. You can Setting an alarm view your calendar by day, week, or Rescheduling an event... -
Page 160: Scheduling Events
CHAPTER 7 Managing Your Calendar Scheduling events Use Calendar to manage your schedule. You can enter appointments, events without a start time, Key Term events that repeat at regular intervals, and events that span a period of time. Event The name for an entry in the Calendar application, including Scheduling an appointment... - Page 161 CHAPTER 7 Managing Your Calendar Did You Know? You can color-code your calendar to file events in categories. Each category has its own color. You can also mark events as private to hide them from prying eyes. Did You Know? If you are synchronizing with Outlook on your PC, you can select a time...
-
Page 162: Scheduling An Event Without A Start Time
CHAPTER 7 Managing Your Calendar Scheduling an event without a start time Keep track of events that take place on a particular date but not at a particular time. For example, Did You Know? you may want to enter holidays, anniversaries, and deadlines. Need to reserve a date before you know the details of the... - Page 163 CHAPTER 7 Managing Your Calendar You can change an event without a time to a scheduled appointment. Select the event description, select Details, select the Time box, and select the start and end times. Tungsten™ T5 Handheld Add an unscheduled event line: a.
-
Page 164: Scheduling A Repeating Event-Standard Interval
CHAPTER 7 Managing Your Calendar Scheduling a repeating event—standard interval There’s no need to re-enter events that take place on a regular basis. Just set up a repeating event. This is a great way to block out time for things like a daily walk with the dog, a weekly team To select intervals such as meeting, a monthly game night with friends, and annual events like anniversaries and holidays. -
Page 165: Scheduling A Repeating Event-Unusual Interval
CHAPTER 7 Managing Your Calendar Scheduling a repeating event—unusual interval Some events don’t fit neatly into the preset repeat intervals, so you need to set up your own repeat intervals. For example, set aside time for a trip to the gym every other day, schedule a class that meets on the 1st Wednesday of each month, or enter annual holidays that occur during a particular time of month such as the 1st Monday in September or the 3rd week of November. - Page 166 CHAPTER 7 Managing Your Calendar To enter holidays such as Labor Day or Thanksgiving, select Month, enter 12 on the Every line, and then select Day as the Repeat By setting. Tungsten™ T5 Handheld Set the repeat interval: a. Select Day, Week, Month, or Year as the repeat unit. b.
-
Page 167: Scheduling An Event That Is Longer Than A Day
CHAPTER 7 Managing Your Calendar Scheduling an event that is longer than a day Reserve a block of time for events that span several days such as a vacation, conference, training Did You Know? class, or an extended project. Reserve a specific block of time during the day or use events without times to flag a series of dates. -
Page 168: Entering A Location Or A Note For An Event
CHAPTER 7 Managing Your Calendar Entering a location or a note for an event Enter a description of the event’s location such as a restaurant, a conference room, or your friend’s house. Enter a note such as dial-in info for a conference call or directions to a location. Tungsten™... - Page 169 CHAPTER 7 Managing Your Calendar Tungsten™ T5 Handheld [ & ] OPTIONAL Enter the note: a. Select Note b. Enter the note text. c. Select Done. Select OK. Done The location name and a note icon appear next to the event description in the Agenda View and in the Day View.
-
Page 170: Scheduling An Event With A Time Zone
Tungsten™ T5 Handheld Time zones only work if you are synchronizing with Outlook. Palm Only events that have a time zone setting adjust when you change the primary time Press Calendar Continued ®... -
Page 171: Color-Coding Your Schedule
CHAPTER 7 Managing Your Calendar Color-coding your schedule Use color-coding to quickly spot different types of events. For example, make all your family appointments green, your work appointments blue, and your appointments with friends yellow. Tungsten™ T5 Handheld Set the time and the time zone: a. -
Page 172: Managing Your Color-Codes
CHAPTER 7 Managing Your Calendar Managing your color-codes Each color-code represents a category of events. You can assign each category a name and select which color you want to assign to it. Tungsten™ T5 Handheld Open Day View: a. Press Calendar b. - Page 173 CHAPTER 7 Managing Your Calendar Tungsten™ T5 Handheld Select the color-code for the category: a. Select New or select a category, and then select Edit. b. Enter or edit the category name. c. Select the color you want to give this category. d.
-
Page 174: Assigning A Color-Code To An Event
CHAPTER 7 Managing Your Calendar Assigning a color-code to an event Did You Know? In Day View and Month View you can set the Display Options to show the category list so that you can view all your events or just the events for a single color-code. -
Page 175: Setting An Alarm
CHAPTER 7 Managing Your Calendar Setting an alarm You can customize your alarm settings in the Calendar Preferences dialog box. Did You Know? If you set your alarms in World Clock instead of Calendar, you have different alarm sound choices. Keep in mind that since World Clock alarms aren’t tied to a specific event, you won’t... -
Page 176: Rescheduling An Event
CHAPTER 7 Managing Your Calendar Rescheduling an event You can also use the Event Details dialog box to change the alarm, location, category, repeat, and privacy settings. Tungsten™ T5 Handheld Press Calendar Go to the event you want to reschedule: a. - Page 177 CHAPTER 7 Managing Your Calendar Tungsten™ T5 Handheld If you’re changing a repeating event, select one of the following to select the event(s) you want to apply the changes to: Current Apply your changes to only the selected instance of the repeating event.
-
Page 178: Deleting Events
CHAPTER 7 Managing Your Calendar Deleting events If an appointment is cancelled, you can delete it from your schedule. When deleting a repeating event, you can indicate you want to delete just the selected event, or to include other instances of You can also delete a the event. - Page 179 CHAPTER 7 Managing Your Calendar Tungsten™ T5 Handheld [ & ] OPTIONAL Check the box to save an archive copy of the event on your computer. Select OK. If you’re deleting a repeating event, select one of the following to select the event(s) you want to delete: Current Delete only the selected instance of the repeating event.
-
Page 180: Deleting All Your Old Events
CHAPTER 7 Managing Your Calendar Deleting all your old events When you need more space on your handheld, or you just want to do some “housekeeping, ” you can delete all your old events. Tungsten™ T5 Handheld Press Calendar Open the Purge dialog box: a. -
Page 181: Checking Your Schedule
CHAPTER 7 Managing Your Calendar Checking your schedule Sometimes you want to look at your schedule for a particular date, while other times you want to see an overview of a week or month. Press the Calendar button repeatedly to cycle through the four different Viewing your appointments and tasks together views. - Page 182 CHAPTER 7 Managing Your Calendar Tungsten™ T5 Handheld Do one of the following to view your schedule: • Select an appointment to go to it in Day View. • Select a task to go to it in Tasks. Category marker No-time icon Agenda View icon Done...
-
Page 183: Viewing Your Daily Schedule
CHAPTER 7 Managing Your Calendar Viewing your daily schedule Day View shows your daily schedule one day at a time. You can scroll between days in the current week or jump to any other date. Tungsten™ T5 Handheld Open Day View: a. - Page 184 CHAPTER 7 Managing Your Calendar Tungsten™ T5 Handheld Do any of the following to view your daily schedule: • Select the day selector to view another day in the same week, select the arrows to scroll to the previous or next week, or select Go To to choose a specific date.
-
Page 185: Viewing Your Weekly Schedule
CHAPTER 7 Managing Your Calendar Viewing your weekly schedule Week View shows your schedule for an entire week. The time frames that appear on the screen are based on the Start Time and End Time settings in Calendar Preferences. You can also press Right and Left on the 5-way to scroll to the next or previous week. -
Page 186: Viewing Your Monthly Schedule
CHAPTER 7 Managing Your Calendar Viewing your monthly schedule Month View shows your schedule for a whole month. You can scroll between months or jump to any other month. You can also press Right and Left on the 5-way to scroll to the next or previous month. -
Page 187: Viewing A Yearly Calendar
CHAPTER 7 Managing Your Calendar Viewing a yearly calendar Year View shows a calendar for an entire year. You can scroll between years or jump to any other year. You can also press Right and Left on the 5-way to scroll to the next or previous month. -
Page 188: Finding Events That Overlap
CHAPTER 7 Managing Your Calendar Finding events that overlap When an event starts before a previous event finishes, the events overlap. You can spot events that overlap in Week View and in Day View. Customizing your calendar Control the appearance of your Calendar screens. Select display options for the Agenda View, Day View, and Month View. -
Page 189: Customizing Display Options For Your Calendar
CHAPTER 7 Managing Your Calendar Customizing display options for your calendar Tungsten™ T5 Handheld Press Calendar Open the Display Options dialog box: a. Open the menus. b. Select Options, and then select Display Options. Select the Default View pick list and select the view you want to see when you open Calendar. - Page 190 CHAPTER 7 Managing Your Calendar If the text is difficult to see against your new background, select a different Color Theme to change the text color. If you want to see the hours when you have nothing scheduled as well as your appointments, deselect Compress Day View.
- Page 191 CHAPTER 7 Managing Your Calendar Tungsten™ T5 Handheld Select Month and set any of the following Month View options: Show Category List Display the category pick list. By default, the Category pick list doesn’t appear. Timed Events Show events that are scheduled for a specific time.
-
Page 192: Setting Alarm And Time Options
CHAPTER 7 Managing Your Calendar Setting alarm and time options You can view and schedule events in time slots that are before or after the start or end time. You just need to scroll to those time slots. Tungsten™ T5 Handheld Press Calendar Open the Preferences dialog box: a. - Page 193 CHAPTER 7 Managing Your Calendar Tungsten™ T5 Handheld Set any of the following alarm settings: Alarm Preset Set an alarm for each new event. When you check this box, you also need to enter the default number of minutes, days, or hours before the event that the alarm sounds.
-
Page 194: Working With Calendar On Your Computer
To open Calendar on your computer, double-click the Palm Desktop icon on the Windows desktop, and then click Calendar on the launch bar. MAC ONLY To open Calendar on your computer, double-click the Palm Desktop icon in the Palm folder, and then click Date Book. Tungsten™ T5 Handheld ®... -
Page 195: Related Topics
VersaMail Privacy Categories Common Questions Tungsten™ T5 Handheld • Beaming events to other Palm Powered devices ® • Sending events to other Bluetooth devices by using Bluetooth wireless technology on your handheld • Synchronizing with Palm Desktop software and Outlook... -
Page 196: Chapter 8: Managing Your Office Files
CHAPTER 8 Managing Your Office Files In this chapter With its ability to store large amounts of important information, your How can I create and handheld lets you take your office with manage Office files? you—including your Microsoft Office Related Topics files. -
Page 197: How Can I Create And Manage Office Files
CHAPTER 8 Managing Your Office Files How can I create and manage Office files? The Documents application provides powerful editing and file management features for Office files on your handheld. What’s more, Documents makes it easy for you to share files between your The Documents computer and your handheld, using either File Transfer or synchronization. -
Page 198: Opening Files From Within Documents
CHAPTER 8 Managing Your Office Files Opening files from within Documents In the Documents application, you can view and open any Word, Excel, or PowerPoint file on your handheld. When you are working on a file, save it to a specific location on your handheld’s internal drive by opening the menus,... -
Page 199: Related Topics
CHAPTER 8 Managing Your Office Files Related Topics Support Click the link below to learn about these related topics: If you’re having problems with Documents, click the VersaMail Documents To Go icon on your computer, and then click Help; or go to www.dataviz.com. -
Page 200: Chapter 9: Viewing Photos And Videos
CHAPTER 9 Viewing Photos and Videos In this chapter A picture may be worth a thousand words, but what happens when you Supported file types have lots of pictures—or videos—that Viewing photos or videos you are trying to keep organized? Or maybe just a few that are so Organizing photos and videos... -
Page 201: Supported File Types
On a Windows computer, when you copy a photo in a popular format to your handheld into your handheld’s using the Media desktop application from within Palm expansion slot, the photo handheld in its original format. If you copy a photo in a different format, it is saved on your remains in its original handheld in JPG format. -
Page 202: Viewing Photos Or Videos
CHAPTER 9 Viewing Photos and Videos Viewing photos or videos You can view photos and videos in the following ways: Did You Know? Photos and videos Thumbnail View miniature preview versions of your photos and videos. located in the Photos & Videos folder on your List View names and dates of photos and videos on your handheld or an expansion card. - Page 203 CHAPTER 9 Viewing Photos and Videos Tungsten™ T5 Handheld Select the pick list in the upper- right corner and select the location on your handheld or an expansion card of the photo or video you want to view: • If the photo or video is in the Photos &...
- Page 204 CHAPTER 9 Viewing Photos and Videos Can’t remember what album your photo or video is in? Select All from the pick list. Quickly switch between thumbnails of photos on your handheld and photos on an expansion card by selecting the icons in the upper-right corner of the screen.
- Page 205 CHAPTER 9 Viewing Photos and Videos Did You Know? When a photo is zoomed out, the size of the photo appears above the Rotate and Send icons. You can also select Done in the zoomed-out view to return to the Thumbnail or List View.
-
Page 206: Viewing A Photo Or Video In The List View
CHAPTER 9 Viewing Photos and Videos Viewing a photo or video in the List View Tungsten™ T5 Handheld Go to Favorites and select Photos & Videos Select the pick list in the upper-right corner and select the location on your handheld or an expansion card of the photo or video you want to view: •... - Page 207 CHAPTER 9 Viewing Photos and Videos If a photo is larger than your handheld’s screen— either because of its original size or because you have zoomed in—tap and drag with the stylus to view different parts of the photo. Tungsten™ T5 Handheld To see a full-screen view of the photo or to play a video, select the item from the list.
-
Page 208: Viewing A Slide Show
CHAPTER 9 Viewing Photos and Videos Viewing a slide show By default, both photos and videos in an album are displayed during a slide show. To view photos only, select Preferences from the Options menu, and then uncheck the Show videos in Slide Show You can set how long a box. - Page 209 CHAPTER 9 Viewing Photos and Videos Tungsten™ T5 Handheld In the Thumbnail or List View, select Slide Show Press Center or tap a photo or video to stop the slide show and return to the Thumbnail or List View. Done Slide Show...
-
Page 210: Rotating A Photo
If you receive a message that the photo is too large to rotate on your handheld, synchronize, and then open and rotate the photo in Palm Desktop software. Synchronize again to send the rotated photo back to your handheld (Windows only). Tungsten™ T5 Handheld Go to Favorites and select Photos &... -
Page 211: Viewing And Editing Photo Or Video Details
CHAPTER 9 Viewing Photos and Videos Viewing and editing photo or video details You can also view details for an entire album— including last date changed, number of items in the album, and size—by opening the Album menu and selecting Album Details. Tungsten™... - Page 212 CHAPTER 9 Viewing Photos and Videos Select the scroll arrows at the bottom of the Media Details screen to view other photos in the album. Tungsten™ T5 Handheld View photo or video details: a. Open the menus. b. Select Edit Details from the Media menu.
-
Page 213: Organizing Photos And Videos
CHAPTER 9 Viewing Photos and Videos Organizing photos and videos You can organize your photos and videos in the following ways: If a photo is stored on • Create albums and place your photos and videos in those albums. your handheld, you can only add it to an album •... - Page 214 CHAPTER 9 Viewing Photos and Videos Drag the stylus across multiple photos and/or videos to add or remove them all at once. Did You Know? If you remove a photo or video from an album, it is moved to the Unfiled category.
-
Page 215: Moving A Photo Or Video Within And Between Albums
CHAPTER 9 Viewing Photos and Videos Moving a photo or video within and between albums Move photos within albums to easily put the slide show of your child’s birthday party in the sequence you want. Tungsten™ T5 Handheld Select Done. Done Go to Favorites and select Photos &... - Page 216 CHAPTER 9 Viewing Photos and Videos You can also move a photo or video by adding it to a different album. The item is removed from the original album. Tungsten™ T5 Handheld Move a photo or video between albums: a. Select the pick list in the upper- right corner and select the album containing the photo or video you want to move.
-
Page 217: Sorting Photos And Videos
CHAPTER 9 Viewing Photos and Videos Sorting photos and videos You must be in an album to sort manually; it does not work when All is selected from the pick list. Tungsten™ T5 Handheld Go to Favorites and select Photos & Videos Sort photos and videos: a. -
Page 218: Personalizing A Photo
CHAPTER 9 Viewing Photos and Videos Personalizing a photo Use the drawing tool to add a personal touch to a photo. Did You Know? Create multicolored art: Select a color and draw on a photo, and then select a different color and draw some more. - Page 219 CHAPTER 9 Viewing Photos and Videos Tungsten™ T5 Handheld Select one of the following to save or reject changes: Replace Original Saves the photo with drawing in place of the original photo with no drawing; the original photo is lost. Save as New Picture Saves both the photo with drawing and the original photo with no drawing.
-
Page 220: Copying A Photo Or Video
CHAPTER 9 Viewing Photos and Videos Copying a photo or video You can copy photos and videos from your handheld to an expansion card, and vice versa. Copy an entire album by opening the Album menu, selecting Album, and then selecting Copy Album to Card or Copy Album to Handheld. -
Page 221: Deleting A Photo Or Video
CHAPTER 9 Viewing Photos and Videos Deleting a photo or video Delete an entire album by opening the Album menu and selecting Album Details. Select the album you want, and then select Delete on the Album Details screen. You can also delete a photo or video from the Media Details screen by selecting Delete on that... -
Page 222: Sharing Photos And Videos
• Attach a photo or video to an email message. Palm Desktop Help for information. • Beam a photo or video to other Palm Powered devices. • Copy a photo or video from your handheld to your desktop computer, or from computer to You can also beam or handheld, by synchronizing. -
Page 223: Working With Palmone Media On Your Computer
• Creating slide shows of photos and videos • Sorting photos and videos • Organizing your photos and videos into albums To open Media on your computer, double-click the Palm Desktop icon on the Windows desktop, and then click Media on the launch bar. NOTE Tungsten™... -
Page 224: Related Topics
Tungsten™ T5 Handheld • Opening applications • Using menus • Beaming photos and videos to other Palm Powered devices • Sending photos and videos to other Bluetooth wireless devices using the Bluetooth technology on your handheld Sending photos and videos as attachments to email messages... -
Page 225: Chapter 10: Listening To Music
CHAPTER 10 Listening to Music In this chapter Are you tired of listening to small talk during that long commute on the bus Transferring MP3 files to your or train? Do you need something handheld smaller than a CD player when you’re Transferring music from a CD out for a walk or at the gym? to your handheld... -
Page 226: Transferring Mp3 Files To Your Handheld
CHAPTER 10 [ ! ] Before You Begin Windows: Install the RealPlayer desktop application on your computer. Insert the software installation CD and follow the onscreen instructions for installing extra software. You must install this software, even if you already have a version of RealPlayer installed on your computer. - Page 227 CHAPTER 10 Listening to Music For tips on using RealPlayer on your computer, go to the Help menu in RealPlayer or visit www.real.com. Tungsten™ T5 Handheld Prepare your handheld: a. Go to Favorites and then select Music b. Connect your handheld to your computer using the USB sync cable. [ ! ] IMPORTANT Do not press the HotSync button on your cable.
- Page 228 CHAPTER 10 Listening to Music You can also transfer MP3 files by dragging a folder of files or individual files to the File Transfer application on your desktop, and then dragging the item(s) to the Music folder in the File Transfer window.
- Page 229 Drag and drop the files onto the Send To Handheld droplet: a. Drag and drop the file(s) or folder onto the Send To Handheld droplet in the Palm folder. b. In the Send To Handheld dialog box, select your username and click OK.
-
Page 230: Transferring Music From A Cd To Your Handheld
CHAPTER 10 Listening to Music Transferring music from a CD to your handheld If your songs are on a CD and you want to listen to them on your handheld, use RealPlayer on your computer to convert and transfer the files. NOTE computer. - Page 231 CHAPTER 10 Listening to Music If you want to select only a few songs, click Deselect All and then check the box next to the songs you want to select. If you want to download songs from the Real Music Store (U.S. only; additional fees may apply), you need to download and install a...
- Page 232 CHAPTER 10 Listening to Music For tips on using RealPlayer on your computer, go to the Help menu in RealPlayer or visit www.real.com. Tungsten™ T5 Handheld Prepare your handheld: a. Go to Favorites and then select Music b. Connect your handheld to your computer using the USB sync cable. [ ! ] IMPORTANT Do not press the HotSync button on your cable.
- Page 233 CHAPTER 10 Listening to Music On your handheld, tap Songs to view a list of the songs available for you to play. The songs you just transferred are at the bottom of the list. Tungsten™ T5 Handheld Transfer the selected songs to your handheld: a.
-
Page 234: Playing Music On Your Handheld
CHAPTER 10 Listening to Music Playing music on your handheld If RealPlayer reaches the period of inactivity you set before you exit the application, the screen turns off and the music continues playing. To set the period of inactivity, open the Options menu and select Preferences. -
Page 235: Managing Playlists
CHAPTER 10 Listening to Music Managing playlists You can create dozens of playlists with your favorite songs. Creating a playlist For tips on using RealPlayer, open the Options menu and select Help. Tungsten™ T5 Handheld On your handheld, go to Favorites and then select Music Open the Edit Playlist screen: a. - Page 236 CHAPTER 10 Listening to Music To quickly select all the songs in the list, select Select All. To quickly deselect all the songs, select Select None. Did You Know? The Add Songs to Playlist screen displays all songs located in the Music file on your handheld’s internal drive.
-
Page 237: Playing Songs From A Playlist
CHAPTER 10 Listening to Music Playing songs from a playlist Tungsten™ T5 Handheld On your handheld, go to Favorites and then select Music Select a song from a playlist: a. Tap Playlists. b. Select the playlist you want to play. c. -
Page 238: Editing A Playlist
CHAPTER 10 Listening to Music Editing a playlist Tungsten™ T5 Handheld On your handheld, go to Favorites and then select Music Open the playlist you want to edit: a. Tap Playlists. b. Select the playlist you want to edit. c. Select Edit. Continued... - Page 239 CHAPTER 10 Listening to Music Tungsten™ T5 Handheld Select Edit and do any of the following: Delete a song Select a song and tap Remove to delete the song from the playlist. Add a song Tap Add, check a song’s box, and then tap Done. Move a song Select a song and select the up or down arrow to move the song up or down one slot.
-
Page 240: Deleting A Playlist
CHAPTER 10 Listening to Music Deleting a playlist Tungsten™ T5 Handheld On your handheld, go to Favorites and then select Music Open the playlist you want to delete: a. Tap Playlists. b. Select the playlist you want to delete. Delete the list: a. -
Page 241: Viewing Song Info
CHAPTER 10 Listening to Music Viewing song info You can view details for the song that is currently playing. Tungsten™ T5 Handheld On your handheld, go to Favorites and then select Music Select a song to play and view: • To play and view the current song, tap Play. -
Page 242: Working With Realplayer On Your Computer
CHAPTER 10 Listening to Music Did You Know? You can also view song details by opening the Music menu and selecting Song Details. Working with RealPlayer on your computer WINDOWS ONLY Use RealPlayer on your computer to play and manage your songs. Check out the online Help in RealPlayer to learn how to use RealPlayer on your computer. -
Page 243: Related Topics
CHAPTER 10 Listening to Music Related topics Support Click the link below to learn about these related topics: If you’re having problems with RealOne Mobile Player Expansion or RealOne Player on your Cards computer, go to www.real.com. Managing Info Common Questions Tungsten™... -
Page 244: Chapter 11: Managing Your Tasks
CHAPTER 11 Managing Your Tasks In this chapter Some of the most successful people in the world are also the busiest. When Creating a task asked how they manage to do it all, Organizing your tasks busy people usually say, “I make lists. ” The Tasks application on your Marking a task complete handheld is the perfect place to make a... -
Page 245: Creating A Task
CHAPTER 11 Managing Your Tasks Creating a task If no task is currently selected, you can create a new task by writing Graffiti® 2 characters in the input area. Add a note to a task. Select the Note button, enter the note text, and then select Done. -
Page 246: Setting An Alarm
CHAPTER 11 [ ! ] Before You Begin Create a task and assign it a due date. A task must have a due date before you can set an alarm. You can customize the alarm sound for your tasks in the Task Preferences dialog box. -
Page 247: Scheduling A Repeating Task-Standard Interval
CHAPTER 11 Managing Your Tasks Scheduling a repeating task—standard interval Repeating tasks are a great way to add tasks that happen over and over again, like taking out the trash every Thursday night or making monthly mortgage or rent payments. To select intervals such as the 2nd Tuesday of every month or the 3rd... - Page 248 CHAPTER 11 Managing Your Tasks Tungsten™ T5 Handheld Set the repeat interval: a. Select the task description, and then select Details. b. Select the Repeat pick list and select how often the task repeats: Daily until, Every week, Every other week, Every month, or Every year.
-
Page 249: Scheduling A Repeating Task-Unusual Interval
CHAPTER 11 Managing Your Tasks Scheduling a repeating task—unusual interval For tasks that don’t fit neatly into the preset repeat intervals, you can set up your own repeat intervals. For example, enter tasks for paying a quarterly insurance bill or a credit card bill that is due every 28 days, or changing your smoke detector battery every six months. - Page 250 CHAPTER 11 Managing Your Tasks To schedule an annual task, such as decorating for a holiday on the first Sunday of a particular month, select Month as the repeat unit, enter 12 on the Every line, and then select Day as the Repeat By setting.
-
Page 251: Organizing Your Tasks
CHAPTER 11 Managing Your Tasks Organizing your tasks Sometimes you want to look at all the things you need to do, while at other times you want to see Did You Know? only certain types of tasks. Overdue tasks have an exclamation point (!) next to the due date. -
Page 252: Marking A Task Complete
Options menu and select Preferences. NOTE differently. Palm Desktop software checks off all overdue instances of the task, and Microsoft Outlook checks off only the oldest instance of the task. Tungsten™ T5 Handheld Go to Applications and select Tasks Check the box on the left side of the task. -
Page 253: Deleting Tasks
CHAPTER 11 Managing Your Tasks Deleting tasks If a task is cancelled, you can delete it from your Tasks list. When you delete a repeating task, you delete all other instances of the task. You can also delete all your completed tasks. You can also delete a specific task by selecting the task, selecting Details,... -
Page 254: Deleting All Your Completed Tasks
CHAPTER 11 Managing Your Tasks Deleting all your completed tasks Many people find it useful to refer to old tasks for tax purposes. If you save an archive copy of your deleted tasks, you can refer to them later by importing them. -
Page 255: Customizing Your Tasks List
CHAPTER 11 Managing Your Tasks Customizing your Tasks list Did You Know? Control which tasks show up in the Tasks list and how they are sorted. These settings also affect tasks in Calendar’s Agenda View. You can also choose the alarm sound for your tasks. Calendar’s Agenda View also displays your tasks. - Page 256 CHAPTER 11 Managing Your Tasks Tungsten™ T5 Handheld Change any of the following settings, and then select OK: Sort by Select the order in which the tasks appear in the Tasks list. Show Completed Tasks Display your finished tasks in the Tasks list. If you turn off this setting, your finished tasks disappear from the list when you check them off, but they stay in your handheld’s memory until you purge them.
-
Page 257: Working With Tasks On Your Computer
Working with Tasks on your computer Use Tasks on your computer to view and manage your tasks. Check out the online Help in Palm Desktop software to learn how to use Tasks on your computer. The online Help includes info about the following topics: •... -
Page 258: Related Topics
Categories Common Questions Tungsten™ T5 Handheld Sending tasks as attachments to email messages • Beaming tasks to other Palm Powered devices ® • Sending tasks to other Bluetooth devices by using Bluetooth wireless technology on your handheld • Synchronizing with Palm Desktop software and Outlook... -
Page 259: Chapter 12: Writing Memos
CHAPTER 12 Writing Memos In this chapter Your handheld contains applications for storing the most common types of Creating a memo information: contact names and Viewing and editing a memo numbers, appointments, and so on. Memos is the tool to use for capturing Moving memos in your memos list information that is meaningful to you... -
Page 260: Creating A Memo
CHAPTER 12 Writing Memos Creating a memo In the Memos list, you can also just start writing to create a new memo. The first letter is automatically capitalized. Use Phone Lookup to quickly add a name and phone number to a memo. -
Page 261: Viewing And Editing A Memo
CHAPTER 12 Writing Memos Viewing and editing a memo The Memos list shows the first line of each memo, so make sure that first line is something you will recognize. Did You Know? You can connect your handheld to a portable keyboard and type your memos on the go without carrying around a heavy... -
Page 262: Moving Memos In Your Memos List
You can move memos up or down in your memos list. For example, you might want to keep all Did You Know? memos on a certain topic grouped together. ® If you use Palm Desktop software for synchronizing, you can... -
Page 263: Deleting A Memo
CHAPTER 12 Writing Memos Deleting a memo Need to retrieve that holiday recipe you stored? If you save an archive copy of your deleted memos, you can refer to them later by importing them. Tungsten™ T5 Handheld Go to Applications and select Memos Open the Delete Memo dialog box: a. -
Page 264: Working With Memos On Your Computer
To open Memos on your computer, double-click the Palm Desktop icon on the Windows desktop, and then click Memos on the launch bar. MAC ONLY To open Memos on your computer, launch Palm Desktop software from the Palm folder, and then select Memos. Tungsten™ T5 Handheld ®... -
Page 265: Related Topics
Adding a phone number or other contact information to a memo using Phone Lookup Organizing memos by arranging them into categories and sorting them Keeping memos private by turning on security options • Beaming memos to other Palm Powered devices ® • Sending memos to other Bluetooth devices using the Bluetooth wireless technology on your handheld •... -
Page 266: Chapter 13: Writing Notes In Note Pad
CHAPTER 13 Writing Notes in Note Pad In this chapter Need to jot down a phone number or a reminder to yourself? Avoid fumbling Creating a note for scraps of paper, and write Viewing and editing a note important reminders in Note Pad. You can use Note Pad to do everything you Deleting a note might do with a piece of paper and a... -
Page 267: Creating A Note
CHAPTER 13 [ ! ] Before You Begin Make sure full-screen writing is turned off. You cannot create or edit notes in Note Pad when full-screen writing is on. Select the pen selector to change the pen width or to select the eraser. To clear the screen completely, select the note (anywhere but the... -
Page 268: Choosing The Pen And Paper (Background) Colors
CHAPTER 13 Writing Notes in Note Pad Choosing the pen and paper (background) colors Tungsten™ T5 Handheld Go to Applications and select Note Pad Open the Select Colors dialog box: a. Select Done to display the Note Pad list. b. Open the menus. c. - Page 269 CHAPTER 13 Writing Notes in Note Pad Tungsten™ T5 Handheld Select the pen and paper colors: a. Select Pen, and then select the ink color you want to use. b. Select Paper, and then select the background color you want to use. c.
-
Page 270: Setting An Alarm
CHAPTER 13 Writing Notes in Note Pad Setting an alarm To use a note as a reminder, set an alarm for that note. Change the alarm sound by opening the Options menu, selecting Preferences, and then selecting a sound from the Alarm Sound pick list. - Page 271 CHAPTER 13 Writing Notes in Note Pad You can also open the Set Alarm dialog box by selecting a note and tapping the right edge of the screen next to the note title. Tungsten™ T5 Handheld Set the alarm: a. Open the menus. b.
-
Page 272: Viewing And Editing A Note
CHAPTER 13 Writing Notes in Note Pad Viewing and editing a note Sort the Note Pad list alphabetically, by date, or manually. Open the Options menu, select Preferences, and then select the Sort by pick list. If you sort manually, you can rearrange the list by dragging notes to another position in the... -
Page 273: Deleting A Note
CHAPTER 13 Writing Notes in Note Pad Deleting a note You can also delete a note by opening the Record menu and selecting Delete Note. Want to get rid of those deletion confirmation messages? Open the Options menu, select Preferences, and then uncheck the Confirm note delete box. -
Page 274: Working With Note Pad On Your Computer
• Sorting notes • Sharing notes WINDOWS ONLY To open Note Pad on your computer, double-click the Palm Desktop icon on the Windows desktop, and then click Note Pad on the launch bar. MAC ONLY To open Note Pad on your computer, double-click the Note Pad icon in the Palm folder. -
Page 275: Related Topics
Common Questions Tungsten™ T5 Handheld • Opening applications • Using menus • Beaming notes to other Palm Powered devices ® • Sending notes to other Bluetooth devices by using Bluetooth wireless technology on your handheld Sending notes as attachments to email messages... -
Page 276: Chapter 14: Connecting Wirelessly To Other Devices
CHAPTER 14 Connecting Wirelessly to Other Devices In this chapter Your handheld helps keep your world organized by storing contact What can I do with the built- information, recording appointments, in Bluetooth technology? and so on. Now your handheld can Entering basic Bluetooth actually connect you to the world—... -
Page 277: What Can I Do With The Built-In Bluetooth Technology
CHAPTER 14 Key Term Bluetooth Technology that enables devices such as handhelds, mobile phones, and computers to connect wirelessly to each other. [ ! ] Before You Begin Any device you connect to must also be a Bluetooth device. Check the user guide for your device to enable the Bluetooth features. -
Page 278: What Is Device Discovery
CHAPTER 14 Connecting Wirelessly to Other Devices What is device discovery? Discovery is the process in which your handheld searches for other Bluetooth devices within its range (approximately thirty feet). As each device is discovered, it shows up in your Discovery Results. -
Page 279: Entering Basic Bluetooth Settings
CHAPTER 14 Connecting Wirelessly to Other Devices Entering basic Bluetooth settings Key Term Discoverable Setting that allows other Bluetooth devices to find and connect with your handheld. Your handheld must be on to be discoverable. If you are trying to conserve battery life, turn Discoverable mode off. -
Page 280: Setting Up A Phone Connection
CHAPTER 14 [ ! ] Before You Begin If you have an IR phone, you must download the Phone Link application from the web. Go to http:// www.palmOne.com/us/ support/downloads/ phonelink.html to download the software. You can also launch the above link from Phone Link Updater in the palmOne folder located under the Windows Start... - Page 281 CHAPTER 14 Connecting Wirelessly to Other Devices If you receive a message that your phone is not ready to accept a connection, check to make sure that your phone is prepared to make a Bluetooth connection. See the instructions included with your phone.
- Page 282 CHAPTER 14 Connecting Wirelessly to Other Devices Key Term Passkey Like a password, the passkey is a security measure. Your handheld can only connect with a device that has the same passkey. For example, to connect to your mobile phone, you need to enter the same passkey on your handheld and on your...
- Page 283 CHAPTER 14 Connecting Wirelessly to Other Devices Key Term GPRS Acronym for General Packet Radio Service, a method of sending information wirelessly at high speeds. Select Yes in step 7 only if you have a GPRS account for your mobile phone. Tungsten™...
- Page 284 CHAPTER 14 Connecting Wirelessly to Other Devices Contact your ISP or your wireless carrier if you are not sure about these settings. Tungsten™ T5 Handheld If you selected Yes in step 7: a. Select the pick lists and select the correct information for your cellular carrier.
-
Page 285: Accessing Email And The Web Wirelessly
CHAPTER 14 Connecting Wirelessly to Other Devices Accessing email and the web wirelessly After you set up a connection with a mobile phone, you can send and receive email or browse the web wirelessly using this connection. NOTE set up an email account on your handheld before you can send or receive email messages. Did You Know? You can tap Bluetooth on the status bar to quickly... - Page 286 CHAPTER 14 Connecting Wirelessly to Other Devices Key Term Service Way of connecting to a mobile phone to send information wirelessly, for example, through a high-speed (GPRS) carrier or a dial-up account with an Internet service provider (ISP). When you enter a URL in the Web browser or select Get and Send in the ®...
-
Page 287: Setting Up A Connection For Wireless Synchronization
CHAPTER 14 Connecting Wirelessly to Other Devices Setting up a connection for wireless synchronization Tungsten™ T5 Handheld Go to Favorites and select Bluetooth Open the PC Setup dialog box: a. Select Setup Devices. b. Select PC Setup. c. Select Bluetooth HotSync. d. - Page 288 CHAPTER 14 Connecting Wirelessly to Other Devices To synchronize with your computer, go to HotSync Manager and select the pick list below the HotSync icon to select your computer from the list. Select the HotSync icon to begin synchronization. Tungsten™ T5 Handheld Set up a connection for wireless synchronization: a.
-
Page 289: Setting Up A Connection To Your Windows Desktop Computer
CHAPTER 14 Connecting Wirelessly to Other Devices Setting up a connection to your Windows desktop computer Once you have set up your PC as a trusted device, you can set up your handheld and desktop computer to synchronize wirelessly. To access the Internet through the desktop computer's network connection, you must... - Page 290 CHAPTER 14 Connecting Wirelessly to Other Devices To access the Internet through the desktop computer's network connection, you must allow Internet Sharing on your computer. For more information, see the documentation that came with the computer or the operating system. Tungsten™...
-
Page 291: Setting Up A Connection To A Network
CHAPTER 14 [ ! ] Before You Begin You must get the passkey, username, and password for the LAN from the system administrator. Key Term LAN Acronym for local area network. LAN refers to a local network that connects computers located in your home or business. - Page 292 CHAPTER 14 Connecting Wirelessly to Other Devices Tungsten™ T5 Handheld Create a trusted connection. a. Select Yes to add the LAN as a trusted device. b. Select Next. c. Enter the passkey number for the LAN and select OK. Enter the username and password for the LAN and select Next.
-
Page 293: Creating Trusted Pairs
CHAPTER 14 Connecting Wirelessly to Other Devices Creating trusted pairs After you have set up your phone and computer as trusted devices, you may want to set up other Did You Know? trusted devices, such as a friend’s handheld. When your device recognizes a trusted device, your When your handheld and device automatically accepts communication, bypassing the discovery and authentication Bluetooth are on and the... - Page 294 CHAPTER 14 Connecting Wirelessly to Other Devices You can delete a trusted device or view the details about a trusted device, such as the device address and your most recent connection. In Bluetooth Manager, select Setup Devices, and then Trusted Devices. Select the appropriate device and select Details.
-
Page 295: Setting Advanced Bluetooth Features
CHAPTER 14 Connecting Wirelessly to Other Devices Setting advanced Bluetooth features These advanced settings are used in special circumstances. Storing recently found device names When you enable or disable the device name cache you control whether or not your handheld retrieves the names of remote devices each time the discovery process takes place. -
Page 296: Allowing Your Handheld To Wake Up When It Is Turned Off
CHAPTER 14 Connecting Wirelessly to Other Devices Allowing your handheld to wake up when it is turned off You can set your handheld to receive information through Bluetooth connections when your handheld is turned off. The radio remains on, but your device is not discoverable. For another Bluetooth device or application to wake up your handheld, it must know your device name. -
Page 297: Related Topics
CHAPTER 14 Connecting Wirelessly to Other Devices Related topics Support Click a link below to learn about these related topics: If you’re having problems with Bluetooth or with Moving anything else on your Around handheld, go to www.palmOne.com/intl/ support. Managing Info Contacts VersaMail Common... -
Page 298: Chapter 15: Sending And Receiving Email Messages
CHAPTER 15 Sending and Receiving Email Messages In this chapter If you already know how efficient email is for staying in touch with personal Upgrading an existing email and business contacts, the VersaMail account application brings you a new level of About email accounts convenience: email on the go. -
Page 299: Upgrading An Existing Email Account
CHAPTER 15 [ ! ] Before You Begin Before you can set up an email account on your handheld, you must do the following: • If you don’t already have one, establish an account with an Internet service provider such as Earthlink or a wireless carrier such as Cingular. -
Page 300: About Email Accounts
CHAPTER 15 Sending and Receiving Email Messages About email accounts The VersaMail application is software that lets you access email on your handheld from an account with an email provider (such as Earthlink or Yahoo!) or from your corporate email account. -
Page 301: Using A Corporate Email Account
CHAPTER 15 Sending and Receiving Email Messages • The name of the outgoing mail (Simple Mail Transfer Protocol, or SMTP) server Key Term Firewall A system set up • Your account’s security feature (if it has one), such as Secure Sockets Layer (SSL), Authenticated to protect against Post Office Protocol (APOP), or Extended Simple Mail Transfer Protocol (ESMTP) unauthorized access into... -
Page 302: Vpns
CHAPTER 15 Sending and Receiving Email Messages Incoming and outgoing mail server settings Check with your company’s system administrator to obtain these settings. With a corporate email account, you may be able to access the following types of mail servers, among others: •... -
Page 303: Creating An Account
CHAPTER 15 Sending and Receiving Email Messages Creating an account The steps for creating an account are different depending on how you plan to send and receive email: Wireless only If you plan only to send and receive email wirelessly from your handheld, set up the account on your handheld by following the procedures below. -
Page 304: Setting Basic Account Options
CHAPTER 15 Sending and Receiving Email Messages Setting basic account options Tungsten™ T5 Handheld Go to Favorites and select VersaMail Open the Account Setup screen: a. Open the menus. b. Select Accounts, and then select Account Setup. c. Select New. Continued... - Page 305 CHAPTER 15 Sending and Receiving Email Messages Key Term Protocol Settings your email provider uses to receive email messages. Most providers use the Post Office Protocol (POP); a few use the Internet Message Access Protocol (IMAP). If your email provider appears on the Mail Service pick list, you don’t need to select a protocol.
- Page 306 CHAPTER 15 Sending and Receiving Email Messages Your username is usually the part of your email address appearing before the @ symbol, not your entire email address. Check with your ISP if you are not sure what username to enter. Did You Know? Your incoming mail server is also called your...
- Page 307 CHAPTER 15 Sending and Receiving Email Messages Tungsten™ T5 Handheld Do one of the following: Finish setup Select Done to finish setup and go to the Inbox of the account you set up, where you can begin getting and sending email. Set additional mail options Select Next to set advanced mail options.
-
Page 308: Setting Advanced Mail Options
CHAPTER 15 Sending and Receiving Email Messages Setting advanced mail options Did You Know? The POP protocol does not support retrieval of unread mail only from the server. If you have a POP email account, the VersaMail application downloads all messages from the server regardless of whether you have read them (for... - Page 309 CHAPTER 15 Sending and Receiving Email Messages Cont’d. Tungsten™ T5 Handheld Port Number The port number setting defaults to 110 for POP and to 143 for IMAP servers. You may need to change the port number if you choose to retrieve incoming mail over a secure connection (see the next item).
- Page 310 CHAPTER 15 Sending and Receiving Email Messages Tungsten™ T5 Handheld Set outgoing mail options: a. Select any of the following: Display Name Enter the name you want to appear on your outgoing messages, such as “Joe Smith. ” Reply To Address Enter the email address that you want recipients to see and reply to on your email messages, only if this is different from the email address from which you are...
- Page 311 CHAPTER 15 Sending and Receiving Email Messages Use a signature to add your name and phone number to all outgoing messages. Tungsten™ T5 Handheld Add a signature: a. Check the Attach Signature to messages box, and then enter the text of the signature. b.
-
Page 312: Testing Your New Account
CHAPTER 15 Sending and Receiving Email Messages If you need to enter new authentication information, enter your username, tap the Password box, enter a password, and then select OK. Check with your email service provider for authentication username and password information. -
Page 313: Managing Email Accounts
CHAPTER 15 Sending and Receiving Email Messages If you set up a synchronize-only email account, you need to configure this account on your computer. You can’t synchronize email on your handheld with email on your computer unless you configure the account on your computer. Managing email accounts After you create an account, you can edit or delete it, or customize the account by adding ESMTP authentication, selecting a specific service to connect to your network, and more. -
Page 314: Deleting An Email Account
CHAPTER 15 Sending and Receiving Email Messages Deleting an email account When you delete an account in the VersaMail application, the account is removed from your handheld. The account still exists on the server. For example, deleting your Yahoo! account from the VersaMail application deletes the account only from your handheld. -
Page 315: Selecting A Different Service For An Email Account
CHAPTER 15 Sending and Receiving Email Messages Selecting a different service for an email account When you set up a phone connection on your handheld, you pair each connection with a network service. You also select one of these services to be the default for all network activity on your handheld, including sending and receiving email. - Page 316 CHAPTER 15 Sending and Receiving Email Messages If there is an existing service connection, it is disconnected and the new connection is initiated. The VersaMail application sends and checks for any new email using the new connection. Tungsten™ T5 Handheld Open the Account Details dialog box: a.
-
Page 317: Adding Esmtp To An Account
CHAPTER 15 Sending and Receiving Email Messages Adding ESMTP to an account Some services require ESMTP authentication to validate your username and password on an SMTP server. If you aren’t sure if your ISP or web email provider supports ESMTP , check with your email provider. - Page 318 CHAPTER 15 Sending and Receiving Email Messages If you need to enter new authentication information, enter your username, tap the Password box, enter a password, and then select OK. Check with your email service provider for authentication username and password information.
-
Page 319: Getting And Reading Email
CHAPTER 15 Sending and Receiving Email Messages Getting and reading email You can choose to see only the subjects of your email (which includes message size, sender, and Did You Know? subject), so that you can decide if you want to download the entire message. Or you can choose to You can set up your get the entire message for all of your incoming email. -
Page 320: Getting Email Messages
CHAPTER 15 Sending and Receiving Email Messages Getting email messages If you have set up the account to synchronize email on your handheld with email on your computer only, you must synchronize your handheld with your computer to download messages to your handheld. - Page 321 CHAPTER 15 Sending and Receiving Email Messages For IMAP accounts, you have the option of synchronizing IMAP folders from the Get Mail Options dialog box. With wireless IMAP folder synchronization, you can synchronize email messages between a folder in an email account on your handheld and a folder with the same name on your email...
-
Page 322: Auto Get Mail With Notification
CHAPTER 15 Sending and Receiving Email Messages Auto get mail with notification You can set up the VersaMail application to automatically get new email messages and download them to your handheld with the auto get feature. If auto get downloads any new messages, your handheld lets you know with a blinking light or a Did You Know? beep. - Page 323 CHAPTER 15 Sending and Receiving Email Messages You should perform a manual get mail after setting up a scheduled auto get. Then only new messages are retrieved during auto get. Or if you have configured an email account to synchronize messages on your handheld with messages on your computer, you can...
-
Page 324: Auto Get Notifications
CHAPTER 15 Sending and Receiving Email Messages Auto get notifications The auto get mail feature provides three types of alerts during and after it gets messages: Status messages Depending on the connection type, a series of status messages may appear during the auto get connection and mail retrieval process. -
Page 325: Setting Notification Options
CHAPTER 15 Sending and Receiving Email Messages Setting notification options You can choose a sound—such as a bird, a phone, or an alarm—to let you know when new email arrives. Did You Know? Any custom sound you install on your handheld appears on the Notify Sound pick list. -
Page 326: Viewing And Using The Reminders Screen
CHAPTER 15 Sending and Receiving Email Messages Viewing and using the Reminders screen The Reminders screen on your handheld shows info about new email messages. It also shows alerts from other applications, such as Calendar appointments. To view the Reminders screen, tap the blinking asterisk corner of any screen. -
Page 327: Auto Get Mail Retries
CHAPTER 15 Sending and Receiving Email Messages the Inbox, scheduled auto get #2 takes place and finds three more new messages, the Reminders screen notification indicates five new messages for that account. If auto get discovers new messages but then fails for any reason, the Reminders screen shows the account name and an error message. -
Page 328: Resource Issues With Auto Get Mail
CHAPTER 15 Sending and Receiving Email Messages Resource issues with auto get mail The auto get mail feature can cause the following resource constraints: Decreased battery life If you set the auto get interval for more often than once per hour, your handheld’s battery charge may drain more quickly, and you may need to recharge the battery more frequently. -
Page 329: Reading Email Messages
CHAPTER 15 Sending and Receiving Email Messages Reading email messages To read email, select the email message in the Inbox or the folder where the message is located. If you use the 5-way navigator to select and open a message, press Center after reading the message to close it and return to the folder where... -
Page 330: Selecting Whether To Receive Messages As Html Or Plain Text
CHAPTER 15 Sending and Receiving Email Messages Selecting whether to receive messages as HTML or plain text By default, the VersaMail application is set to receive mail in HTML format. This means that any email messages sent as HTML are displayed on your handheld with basic HTML formatting intact, including the following: •... - Page 331 CHAPTER 15 Sending and Receiving Email Messages Tungsten™ T5 Handheld Open VersaMail Preferences: a. Open the menus. b. Select Options, and then select Preferences. Select message format: a. Select the Receive Format pick list, and then select HTML or Plain Text. The default is HTML.
-
Page 332: Customizing The Font Of Messages You Are Reading
CHAPTER 15 Sending and Receiving Email Messages Customizing the font of messages you are reading You can change the font, size, or style of incoming messages to make them easier to read. Did You Know? The font settings you choose apply to all incoming messages, not just the current one. -
Page 333: Sending An Email Message
CHAPTER 15 Sending and Receiving Email Messages Sending an email message If you set up the account to synchronize email on your handheld with email on your computer only, you must synchronize so that messages you compose on your handheld can be sent out through your computer’s email application. - Page 334 CHAPTER 15 Sending and Receiving Email Messages Subjects longer than one line are shown on a single line with an ellipsis symbol to the right of the subject line. Select the subject to see the full subject. Did You Know? Open the Edit menu to access the editing features available for a...
-
Page 335: Entering An Address Directly In The To Field
CHAPTER 15 Sending and Receiving Email Messages Entering an address directly in the To field You can’t see the whole list of addresses in a field if the list is longer than two lines. To see the whole list, tap the word To, cc, or bcc. -
Page 336: Entering An Address Using Contacts
CHAPTER 15 Sending and Receiving Email Messages Entering an address using Contacts You can enter a recipient’s address by using the Lookup screen to select the address. The names and addresses on the Lookup screen come from Contacts. Did You Know? Addresses longer than one line are shown on a single line with an ellipsis... -
Page 337: Entering An Address Using Smart Addressing
CHAPTER 15 Sending and Receiving Email Messages Entering an address using Smart Addressing Smart Addressing completes a recognized email address. Smart Addressing automatically fills in fields when the recipient’s name and email address are in your Contacts list. Smart Addressing is turned on by default. -
Page 338: Attaching A Personal Signature
CHAPTER 15 Sending and Receiving Email Messages Attaching a personal signature You can attach a personal signature, with info like your company’s address and fax and telephone numbers, to the bottom of all messages you send. Tungsten™ T5 Handheld Open the VersaMail Preferences: a. -
Page 339: Send Retry
CHAPTER 15 Sending and Receiving Email Messages Send retry If a send attempt fails for any reason after you select Send (for example, your handheld is out of Did You Know? range, or the application cannot connect to the mail server), you can choose to have the Send retry doesn’t work application move the message to the Outbox and keep trying to send the message every 30 for VPN or SSL... -
Page 340: Modifying Messages In The Outbox
CHAPTER 15 Sending and Receiving Email Messages Modifying messages in the Outbox A message in the Outbox waiting for the next automatic send retry can be edited, moved, or deleted. However, if you edit the message, you must manually send the message. If the manual If you perform a soft reset send fails, you can choose to store the message in the Outbox to wait for the next automatic send or synchronize during... -
Page 341: Working With Email Folders
CHAPTER 15 Sending and Receiving Email Messages Working with email folders By default, the VersaMail application displays the messages in a given account’s Inbox folder. You can easily view the messages in a different folder. You can also customize the appearance of the message list in your email folders, move messages between folders, and create and edit folders. -
Page 342: Customizing The Appearance Of The Message List
Font Tap the Font field. Select each pick list in the Select Font dialog box (Font, Size, Style) and select the option you want. Default is Palm 9 Plain. Read and unread message color Select the Read and Unread pick lists, and then select the color you want for each type of message. - Page 343 CHAPTER 15 Sending and Receiving Email Messages Tungsten™ T5 Handheld Select OK. If you selected one-line summary view in step 2, change the size of columns in the message list: a. Tap the column divider. b. Drag the column divider to change the width of the column.
-
Page 344: Moving Messages Between Folders
CHAPTER 15 Sending and Receiving Email Messages Moving messages between folders You can move one or more email messages between folders. You can use the 5-way to move a single message. Select the message you want to move, press Right to open the Message menu, and then select Move To. - Page 345 CHAPTER 15 Sending and Receiving Email Messages Tungsten™ T5 Handheld Move a single message: a. Tap the envelope icon to the left of the message you want to move, and then select Move To from the list. b. On the folders list, select the destination folder you want. Move multiple messages: a.
-
Page 346: Creating And Editing Mail Folders
CHAPTER 15 Sending and Receiving Email Messages Creating and editing mail folders The VersaMail application has certain preset folders, such as Inbox, Outbox, Drafts, and Trash. You can create new folders so that you can store email messages by subject, person, or project. Tungsten™... - Page 347 CHAPTER 15 Sending and Receiving Email Messages Tungsten™ T5 Handheld Select any of the following: a. To create a new folder, select New, and then enter the new folder name. b. To rename a folder, select the folder name from the list on the screen, select Rename, and then enter the new folder name.
-
Page 348: Working With Email Messages
CHAPTER 15 Sending and Receiving Email Messages Working with email messages When you receive an email message, you can reply to it or forward it to someone else. You can also open web addresses (URLs) within messages. Forwarding an email message Did You Know? You can forward email messages from any... -
Page 349: Replying To An Email Message
CHAPTER 15 Sending and Receiving Email Messages Replying to an email message You can reply to an email message as you are reading it, or you can start the reply when you are viewing messages in the message list. Did You Know? Replies are always sent as text only, even if you received the original... -
Page 350: Working With Urls
CHAPTER 15 Sending and Receiving Email Messages Working with URLs You can tap a URL in a received message to view the web page or file associated with the URL. Did You Know? Tapping the URL opens your handheld’s web browser to view the page or file. Email addresses appear in the form “username@ You can also tap an embedded email address to open a new message screen with the address in... -
Page 351: Deleting Old Messages
CHAPTER 15 Sending and Receiving Email Messages To delete messages on the server when you empty the trash on your handheld, select the Delete Msgs on Server setting in the VersaMail Preferences. Many email providers have size restrictions for mail storage. - Page 352 CHAPTER 15 Sending and Receiving Email Messages Messages you delete from a folder move to the Trash folder and remain there until you empty the trash. Tungsten™ T5 Handheld Choose settings for deleting old messages: a. Select the Folder pick list, and then select the folder that contains the messages you want to delete.
-
Page 353: Emptying The Trash
CHAPTER 15 Sending and Receiving Email Messages Emptying the trash When you delete a message, it moves to the Trash folder. Deleted email accumulates in the Trash folder and takes up space on your handheld. To increase memory, you should empty the trash regularly. -
Page 354: Setting The Trash To Be Emptied Automatically
CHAPTER 15 Sending and Receiving Email Messages Setting the trash to be emptied automatically Did You Know? By default, Auto-Empty Mail from Trash is selected, and the time interval is set at Older Than 1 Week. Tungsten™ T5 Handheld Open the VersaMail Preferences: a. -
Page 355: Marking Messages As Read Or Unread
CHAPTER 15 Sending and Receiving Email Messages Marking messages as read or unread When you select a message to read it, it is automatically marked as read. You can also manually mark messages as read or unread. Did You Know? In one-line view, read messages appear in plain text in the message list;... - Page 356 CHAPTER 15 Sending and Receiving Email Messages Selecting Both and then OK also processes any other pending actions on the server, such as deleting messages not yet deleted. Tungsten™ T5 Handheld For IMAP accounts only, select one of the following: To mark the messages as read or unread on your handheld only Select Handheld.
-
Page 357: Working With Attachments
CHAPTER 15 Sending and Receiving Email Messages Working with attachments You can easily download, view, and send attachments with email messages. You can also save downloaded files to an Downloading an attachment to your handheld expansion card. Email may contain attached files, such as Microsoft Word or text files, that you want to view or install on your handheld. -
Page 358: Working With A Downloaded Attachment
CHAPTER 15 Sending and Receiving Email Messages PRC (PRC) This is a Palm OS® application that you can install and run on your handheld. PDB (PDB) This is a file that works with specific Palm OS applications. ZIP (ZIP) These are compressed files that contain other types of files, for example, text files or Word documents. - Page 359 CHAPTER 15 Sending and Receiving Email Messages Tungsten™ T5 Handheld Tap the red paper clip icon in the upper-right corner. If the attachment is not downloaded, a paper clip icon doesn’t appear even though the message was sent with an attachment. You must download the attachment for the paper clip icon to appear.
- Page 360 If there is only one viewer registered for the attachment file type, the viewer is shown without a list. Palm OS application or database file (PRC or PDB) Select the name of the attachment you want, and then select Install. The file is installed automatically.
-
Page 361: Downloading Large Attachments
CHAPTER 15 Sending and Receiving Email Messages Downloading large attachments Downloading and viewing a message with a single attachment that exceeds your maximum message size, or a message with multiple attachments whose total size exceeds your maximum message size, requires some extra steps. When you see both a red paper clip icon and the More button in the... -
Page 362: Attaching Files
CHAPTER 15 Sending and Receiving Email Messages Attaching files You can attach files on your handheld (in program memory or on the internal drive) to email messages you send. For example, you can attach photos or videos; Word, Excel, and PowerPoint If you open a message files;... - Page 363 CHAPTER 15 Sending and Receiving Email Messages NOTE for attaching other types of files. Did You Know? You can attach any file type from your handheld’s internal drive or an expansion card. Tungsten™ T5 Handheld The procedure for attaching photos and videos is slightly different from the procedure Open the Attachments screen: a.
- Page 364 CHAPTER 15 Sending and Receiving Email Messages Did You Know? If you select Files on Card, the VersaMail application displays all file types on the card. You can select a particular file type, or select All Files to view all files on the card.
-
Page 365: Attaching Photos And Videos
CHAPTER 15 Sending and Receiving Email Messages Attaching photos and videos To attach a photo or video from an expansion card, select the card name from the Album pick list. To select adjacent items, drag the stylus across each item. Tungsten™... -
Page 366: Synchronizing Email On Your Handheld With Email On Your Computer344
On a Windows computer, the VersaMail conduit is installed your handheld with email automatically when you install Palm on your computer and to send and receive email To synchronize email for a given account, do the following:... -
Page 367: Enabling Synchronization On Your Computer
CHAPTER 15 Sending and Receiving Email Messages Microsoft Exchange account Select IMAP in the Protocol pick list. Lotus Notes If you want to synchronize to a local mail file instead of a server mail file, select POP in the Protocol pick list. If you are synchronizing your corporate email and your corporate mail server does not use IMAP , select POP . - Page 368 CHAPTER 15 Sending and Receiving Email Messages Did You Know? An active account is an account you’ve set up for synchronization. Check the box Enable Informational Logging if you want the HotSync log to record information, such as errors encountered, about the conduit during synchronization.
-
Page 369: Setting Synchronization Options For Your Email Account
CHAPTER 15 Sending and Receiving Email Messages Setting synchronization options for your email account NOTE Read the Setup Notes box handheld with your computer, many of the synchronization options are already filled in. for helpful setup information or error messages. You can set advanced synchronization options such as how many days’... - Page 370 CHAPTER 15 Sending and Receiving Email Messages Tungsten™ T5 Handheld Select synchronization options: a. Check the box to include this account when you synchronize. [ ! ] IMPORTANT You must check this box; otherwise, the account cannot be synchronized. b. Select your mail client synchronization options. Click Save on the toolbar to save the settings for this account.
-
Page 371: Setting Mail Client Synchronization Options
CHAPTER 15 Sending and Receiving Email Messages Setting mail client synchronization options Select the mail client to use for synchronization based on the type of account, mail client, or connection you use. Use the following criteria to determine which client to select. If you select Direct IMAP for Lotus Notes NOTE... - Page 372 CHAPTER 15 Sending and Receiving Email Messages If you want to synchronize to a local mail file instead of a server mail file, check the Synchronize to local (replicated) mail file box. You must do all of the following to synchronize to a local mail file: The conduit does not support SSL for accounts •...
-
Page 373: Setting Microsoft Outlook As Your Default Email Program
CHAPTER 15 Sending and Receiving Email Messages Setting Microsoft Outlook as your default email program To synchronize Microsoft Outlook 97/98/2000/XP with a VersaMail email account, you must set Microsoft Outlook as the default email handler. You must check your username and password. Make sure your username and password are set up correctly within... -
Page 374: Setting Advanced Email Synchronization Options
CHAPTER 15 Sending and Receiving Email Messages Setting advanced email synchronization options For each email account you set up on your handheld, you can set options for synchronizing email on your handheld with email on your computer. You can also synchronize email folders on your handheld with folders on your computer. - Page 375 CHAPTER 15 Sending and Receiving Email Messages Cont’d. Tungsten™ T5 Handheld Maximum message size (KB) Enter the maximum message size that can be synchronized from your computer to your handheld—from 1 to 5000KB (5MB). The smaller the maximum size, the faster the synchronization, but any messages over that size are cut.
- Page 376 CHAPTER 15 Sending and Receiving Email Messages Did You Know? You can synchronize your Cont’d. Outbox, Sent, Trash, and any other folders you create. Tungsten™ T5 Handheld Days To Synchronize Mail Set how many days’ worth of email should be synchronized.
- Page 377 CHAPTER 15 Sending and Receiving Email Messages Tungsten™ T5 Handheld [ & ] OPTIONAL You can synchronize email folders. This means that any changes you make to a folder on your handheld—for example, creating a new folder or moving messages between folders—are automatically updated in the mail client on your computer, and vice versa.
-
Page 378: Account Information Screens
CHAPTER 15 Sending and Receiving Email Messages Account information screens Two screens in the VersaMail conduit provide summary information on your accounts: Account Overview The Account Overview screen indicates whether the account is active; whether the account has been synchronized and, if so, the last synchronization date; the mail client for this account;... -
Page 379: Versamail Conduit Shortcuts
CHAPTER 15 Sending and Receiving Email Messages To view the Handheld Settings Overview screen, under the selected account name, click Handheld Settings. VersaMail conduit shortcuts You can use the icons on the toolbar to perform certain tasks quickly, such as saving account configuration settings. -
Page 380: Excluding One Or More Accounts During Synchronization
CHAPTER 15 Sending and Receiving Email Messages Excluding one or more accounts during synchronization By default, HotSync time you synchronize. You can choose to exclude a specific account from synchronization, or to Select Set Selection As exclude all email accounts. Default to apply the options you selected each To exclude a specific account Uncheck the box Select this check box to synchronize this email... -
Page 381: Using Ssl With The Conduit
CHAPTER 15 Sending and Receiving Email Messages Using SSL with the conduit When you set up an email account, you can choose to use a secure connection (Secure Sockets Layer, or SSL) for sending and receiving email messages. The VersaMail conduit supports SSL when synchronizing with an email account only if that account uses Outlook, Outlook Express, or Eudora. -
Page 382: Setting Preferences For Getting, Sending, And Deleting Email
CHAPTER 15 Sending and Receiving Email Messages Setting preferences for getting, sending, and deleting email Because mailboxes on the server usually have size restrictions, it is a good idea to delete messages on the server regularly. Tungsten™ T5 Handheld Open the VersaMail Preferences: a. - Page 383 CHAPTER 15 Sending and Receiving Email Messages Cont’d. Tungsten™ T5 Handheld Download Attachments Causes files attached to email to be automatically downloaded to your handheld. Attachments that exceed the maximum message size cannot be downloaded. Receive Format Lets you retrieve messages in HTML or plain text format. If you choose HTML, any messages sent to you in HTML format are displayed with basic HTML formatting intact.
-
Page 384: Adding Or Updating A Contact Directly From A Message
CHAPTER 15 Sending and Receiving Email Messages Adding or updating a contact directly from a message You can add an email address in Contacts directly from the body of a received email message. You can also update an existing Contacts record with a new email address, or create a second Contacts record for a... -
Page 385: Creating And Using Filters
CHAPTER 15 Sending and Receiving Email Messages Creating and using filters Filters provide efficient ways to manage email retrieval and storage. When you select Get Mail or Get & Send, filters determine which email messages are downloaded to your handheld and in Create a filter, for which folder the downloaded messages are stored. - Page 386 CHAPTER 15 Sending and Receiving Email Messages Did You Know? Filters you create on your handheld also apply when you synchronize email on your handheld with email on your computer. Tungsten™ T5 Handheld Enter the filter information: a. Enter a short description of the filter in the Name field.
-
Page 387: Turning Filters On And Off
CHAPTER 15 Sending and Receiving Email Messages Turning filters on and off A filter that is turned on applies to all subsequent downloads of email until you deselect it. More than one filter can be in effect at once. Before you download email, be sure to turn on the filters you want and turn off those you don’t want. - Page 388 CHAPTER 15 Sending and Receiving Email Messages Tungsten™ T5 Handheld Turn filters on or off: a. Select the pick list in the upper-left corner and select one of the following: Connected Applies a filter to messages downloaded to your handheld over a network connection.
-
Page 389: Editing Or Deleting A Filter
CHAPTER 15 Sending and Receiving Email Messages Editing or deleting a filter Edit a filter to change either its name or any of its criteria. Tungsten™ T5 Handheld Select the folder to edit or delete: a. In the Inbox or on another folder screen, open the menus. b. -
Page 390: Managing Settings For Incoming And Outgoing Mail
CHAPTER 15 Sending and Receiving Email Messages Managing settings for incoming and outgoing mail You can configure advanced mail settings such as server information, incoming and outgoing mail server options, and more, for each email account. Tungsten™ T5 Handheld Select the account whose settings you want to manage: a. - Page 391 CHAPTER 15 Sending and Receiving Email Messages Your username is typically the first part of your email address, which appears before the @ symbol. Did You Know? The VersaMail application provides strong 128-bit AES encryption for your password. Select a service for this account only if you want it to be different from the default service you use to...
- Page 392 CHAPTER 15 Sending and Receiving Email Messages Tungsten™ T5 Handheld Manage address and server settings: a. On the Mail Servers screen, select Details. b. Select the Options pick list, and then select Address/Servers. c. Do any of the following: Email address Enter the email address of the account you are accessing, such as examplename@yahoo.com.
- Page 393 CHAPTER 15 Sending and Receiving Email Messages Did You Know? The POP protocol does not support retrieval of unread mail only from the server. If you have a POP email account, the VersaMail application downloads all messages from the server regardless of whether you have read them (for example, on your desktop...
- Page 394 CHAPTER 15 Sending and Receiving Email Messages Advanced incoming mail options are different depending on the connection type you selected and the server protocol: POP or IMAP . The Deleted Mail and Sent Mail fields are case sensitive, and the folder name should be spelled exactly as it is on the server.
- Page 395 CHAPTER 15 Sending and Receiving Email Messages If you are using the Cont’d. VersaMail conduit and have an IMAP account, you must configure the outgoing mail settings to send mail. Tungsten™ T5 Handheld Deleted Mail (IMAP only) Stores deleted email in the folder you specify on the server.
- Page 396 CHAPTER 15 Sending and Receiving Email Messages Cont’d. Tungsten™ T5 Handheld c. Do any of the following: Display Name Enter the name you want to appear on your outgoing messages, such as “Joe Smith. ” Reply To Address Enter the email address that you want recipients to see and reply to on your email messages, only if it is different from the email address from which you are sending the message.
- Page 397 CHAPTER 15 Sending and Receiving Email Messages If you need to enter new authentication information, enter your username, tap the Password box, enter a password, and then select OK. Check with your email service provider for authentication username and password information.
- Page 398 CHAPTER 15 Sending and Receiving Email Messages Cont’d. Tungsten™ T5 Handheld My server requires authentication (ESMTP) Check this box if the outgoing server (SMTP) requires ESMTP authentication. Check with your system administrator before selecting this option. If you select this option, username and password fields appear.
-
Page 399: Adding Apop To An Account
CHAPTER 15 Sending and Receiving Email Messages Adding APOP to an account To encrypt your username and password when they travel over the network, some services require APOP to work properly, while others do not work properly if APOP is used. APOP works only with accounts that use the POP protocol. -
Page 400: Setting Advanced Account Preferences
CHAPTER 15 Sending and Receiving Email Messages Setting advanced account preferences Any advanced preferences you set are account-specific; they apply only to the account you are currently in. Tungsten™ T5 Handheld Open the Advanced Preferences screen: a. In the Inbox or on another folder screen, open the menus. b. - Page 401 CHAPTER 15 Sending and Receiving Email Messages The default Timeout Cont’d. setting is 45 seconds. It can be any number greater than 0 seconds; however, if you set the number too low, your connection attempt may time out before you make a connection with the email service provider.
-
Page 402: Changing Email Header Details
CHAPTER 15 Sending and Receiving Email Messages Changing email header details When viewing a message in any folder, you can change the view of the message header. The email header options are as follows: • Short header: Shows sender’s name or address (From field) and subject line (Subj field). •... -
Page 403: Backing Up Mail Databases
CHAPTER 15 Sending and Receiving Email Messages You can also switch between a short header and a full header for a message you are composing. Short header shows the To and Subject fields only; full header shows the To, cc:, bcc:, and Subject fields. - Page 404 CHAPTER 15 Sending and Receiving Email Messages By default, your handheld is set to back up mail databases. In most cases your email is on your server, so you do not need to back up your email database from your handheld. Uncheck the Backup ALL Databases box to make synchronizing go faster.
-
Page 405: Synchronizing Imap Mail Folders Wirelessly
CHAPTER 15 Sending and Receiving Email Messages Synchronizing IMAP mail folders wirelessly If you create an IMAP folder in an account on your handheld that matches a folder on the mail Did You Know? server, you can wirelessly synchronize email messages that you move into or out of the IMAP You can synchronize folder, or delete in the folder. -
Page 406: Turning Imap Folder Synchronization On Or Off
CHAPTER 15 Sending and Receiving Email Messages Turning IMAP folder synchronization on or off Synchronizing handheld/mail server IMAP folders from the Options menu Did You Know? After you select the folders to synchronize, a connection is made to your email service provider to update the server with changes from your handheld, and to... -
Page 407: Working With Root Folders
CHAPTER 15 Sending and Receiving Email Messages Working with root folders For IMAP accounts, if you want to synchronize email messages on your handheld with messages on the mail server folder, you need to enter the root folder for the account on your handheld. Depending on your email provider, the root folder could be a single folder, or it could be a subfolder of the Inbox. -
Page 408: Related Topics
CHAPTER 15 Sending and Receiving Email Messages Related topics Support Click a link below to learn about these related topics: If you’re having problems with the VersaMail Moving application or with anything Around else on your handheld, go to www.palmOne.com/intl/ Entering Info support. -
Page 409: Chapter 16: Sending And Receiving Text Messages
CHAPTER 16 Sending and Receiving Text Messages In this chapter If you need to get a short message to a friend or coworker fast, send a text Creating and sending a text message from your handheld via your message mobile phone (GSM phone required; Receiving and viewing a text sold separately) to their mobile phone. -
Page 410: Creating And Sending A Text Message
CHAPTER 16 [ ! ] Before You Begin Before you can send and receive text messages, you must set up a phone connection on your handheld to send and receive information wirelessly. Key Term SMS Abbreviation for Short Message Service. More commonly known as text messages, SMS messages can be... - Page 411 CHAPTER 16 Sending and Receiving Text Messages If you are concerned about the length of your messages, you can have a warning appear when multipart messages exceed the specified number of parts. Open the Options menu and select Preferences. Select Details and then select the number of parts from the Warn over pick list.
- Page 412 CHAPTER 16 Sending and Receiving Text Messages Tungsten™ T5 Handheld Send your message: Select Send Sends the current message now. Selecting Send does not send any of the other messages in your Outbox. Select Outbox Sends your message to the Outbox to be sent later. Done...
-
Page 413: Receiving And Viewing A Text Message
CHAPTER 16 Sending and Receiving Text Messages Receiving and viewing a text message If you want to check your messages but you don’t want to send the messages stored in your Outbox, open the Messages menu and select Check. You can also send all the messages in your Outbox by opening the Messages menu and selecting Send. - Page 414 CHAPTER 16 Sending and Receiving Text Messages Did You Know? You can change how your messages are listed. You can sort the messages in order of one of the following: Alphabetic, Date, Phone Number, and Status. You can also choose to display the date the message was received.
-
Page 415: Editing A Draft Text Message
CHAPTER 16 Sending and Receiving Text Messages Editing a draft text message Did You Know? You can store your message in your Draft folder and work on it later by opening the Message menu and selecting Draft. Tungsten™ T5 Handheld Go to Applications and select SMS Edit the message: a. -
Page 416: Setting Advanced Messaging Features
CHAPTER 16 Sending and Receiving Text Messages Setting advanced messaging features Tungsten™ T5 Handheld Go to Applications and select SMS Go to the Preferences menu: a. Open the menus. b. Select Preferences on the Option menu. elect [ & ] OPTIONAL Set the following parameters: Confirm Deleted Message Indicates whether a confirmation message appears each time you delete a message or you select the Empty Trash option from the... - Page 417 CHAPTER 16 Sending and Receiving Text Messages Did You Know? Outgoing SMS message settings may depend on the service offered by your SMS carrier. Tungsten™ T5 Handheld [ & ] OPTIONAL Select Details and set the following parameters: Leave Messages on Phone Indicates whether messages are deleted from your phone after you download them to your handheld.
-
Page 418: Related Topics
CHAPTER 16 Sending and Receiving Text Messages Related Topics Support Click the link below to learn about these related topics: If you’re having problems with SMS or with anything Moving else on your handheld, go to Around www.palmOne.com/intl/ support. Categories Privacy Sharing Connecting... -
Page 419: Chapter 17: Browsing The Web
CHAPTER 17 Browsing the Web In this chapter You use the web for so many things: checking email, finding driving Accessing a web page directions, getting news, buying gifts. Quickly jumping to a page Now you can take the web with you almost anywhere you go. -
Page 420: Accessing A Web Page
CHAPTER 17 [ ! ] Before You Begin To browse the web, you must set up a connection to the Internet from your handheld. If you are accessing a VPN network, you need to install VPN software and set up VPN access. You can turn on VPN from the web browser by opening the Options menu and... -
Page 421: Accessing A Web Page Using The Address Field
CHAPTER 17 Browsing the Web Accessing a web page using the address field You can also hide the address field to show more of the web page. Open the Options menu and select Preferences. Uncheck the Show Address Bar box. Tungsten™... -
Page 422: Using A Password To Access A Web Page
CHAPTER 17 Browsing the Web Using a password to access a web page Some websites require you to use a password to gain access to information. Some websites allow you to check a box to have your sign-in name automatically entered each time you visit a particular web page. -
Page 423: Finding Information On A Web Page
CHAPTER 17 Browsing the Web Finding information on a web page Did You Know? Find locates any text, whether it is letters or numbers. Find is not case-sensitive. Because of the limited space on the handheld screen, sometimes the current web address (URL) is not fully visible. -
Page 424: Quickly Jumping To A Page
CHAPTER 17 Browsing the Web Quickly jumping to a page The action bar icons allow you to quickly move from page to page. Following a link Many web pages contain underlined links, which are text or pictures that, when clicked, take you to another web page or to another part of the same page. -
Page 425: Changing How You View A Page
CHAPTER 17 Browsing the Web Changing how you view a page You can change how you view web pages by selecting different display views and dragging the screen to view different parts. You can change your font size for easier viewing. Did You Know? In the Optimized mode, use the navigator to... - Page 426 CHAPTER 17 Browsing the Web Tungsten™ T5 Handheld [ & ] OPTIONAL If the web page is larger than your screen, you can tap and drag the stylus to move the web page in any direction to view different parts of the web page.
-
Page 427: Bookmarking Your Favorite Pages
CHAPTER 17 Browsing the Web Bookmarking your favorite pages Bookmarking your favorite web pages allows you to quickly return to those pages. Key Term Bookmark A pointer to a web page. The actual Adding a bookmark page is not stored, only the URL. -
Page 428: Viewing A Bookmarked Or Saved Page
CHAPTER 17 Browsing the Web Viewing a bookmarked or saved page Bookmarks and saved pages both appear in the Bookmarks View. Saved pages are indicated by a You can also view your small triangle in the upper-right corner of the bookmark. list of bookmarks by selecting View Bookmarks from the Page... -
Page 429: Editing Information About A Bookmark Or Saved Page
CHAPTER 17 Browsing the Web Editing information about a bookmark or saved page You can edit or delete any bookmark or saved page that does not have a lock icon next to it. You can clean up your bookmark list by deleting old bookmarks or saved pages you no longer use. -
Page 430: Arranging The Bookmark List
CHAPTER 17 Browsing the Web Arranging the bookmark list The web browser includes ten pages so that you can arrange bookmarks and saved pages in a logical fashion. For example, you can store travel links on one page, stock links on another, and business links on a third page. - Page 431 CHAPTER 17 Browsing the Web Tungsten™ T5 Handheld Arrange the bookmarks: a. Use the stylus to drag and drop bookmarks into different slots on the current page to organize them. b. Move a bookmark to a different page by dragging and dropping it onto the Page icon.
-
Page 432: Disconnecting From And Connecting To The Internet
CHAPTER 17 Browsing the Web Disconnecting from and connecting to the Internet While you’re working with stored information in the web browser, such as saved pages, stored versions of pages, and so forth, you can disconnect from the Internet to reduce usage charges. You can connect to the Internet again when you need access. -
Page 433: Connecting To The Internet
CHAPTER 17 Browsing the Web Connecting to the Internet If the connection is not established, do one of the following: Select Cancel to stop the connection process. Select Change Network to select a different service to connect to. Tungsten™ T5 Handheld Go to Favorites and select Web Connect to the Internet: a. -
Page 434: Downloading Files And Pages
CHAPTER 17 Browsing the Web Downloading files and pages You can download files or save files for viewing when you are not connected to the Internet. If you decide that the Downloading a file download process is taking too long, you can stop it. -
Page 435: Saving A Web Page
CHAPTER 17 Browsing the Web Saving a web page If you want to save a web page (such as a travel itinerary or Internet order receipt) indefinitely, you can create a saved page. The copy is stored on the handheld until you delete it. Did You Know? Saved pages are listed with the bookmarks in the... -
Page 436: Viewing A Saved File
CHAPTER 17 Browsing the Web Viewing a saved file You can use the web browser to view web pages or image files that are on the handheld’s internal drive or an expansion card. The types of file that can be viewed include HTML, HTM, GIF , and JPG. Suppose you have an HTML file on your desktop computer that... -
Page 437: Communicating With Other Users
CHAPTER 17 Browsing the Web Communicating with other users You can communicate with others by means of email or beaming. Sending email by means of an Internet email account You can use your Internet email account to send an email message and attachments. Tungsten™... -
Page 438: Returning To A Web Page You Recently Visited
CHAPTER 17 Browsing the Web Returning to a web page you recently visited Using the Back and Forward icons to browse through the pages you recently visited, one page at a time, can be tedious. Instead, open the History list to go to a page you recently visited. You can go You can delete all pages back to a page you remember visiting but did not bookmark. -
Page 439: Changing Your Home And Start Pages
CHAPTER 17 Browsing the Web Changing your Home and start pages You can change the page that your Home Page icon browser starts with when it is first opened. Changing your Home page You can choose a Home page from any web address. Tungsten™... - Page 440 CHAPTER 17 Browsing the Web Tungsten™ T5 Handheld Select the Home Page box. Enter the URL you want as your Home page by doing one of the following: • To make the page currently displayed your Home page, select Current URL. •...
-
Page 441: Changing Your Start Page
CHAPTER 17 Browsing the Web Changing your start page You can select the start page you want your handheld to open to when you first open web browser. Tungsten™ T5 Handheld Go to Favorites and select Web Open the Preferences Page dialog box: a. -
Page 442: Setting Advanced Browser Options
CHAPTER 17 Browsing the Web Setting advanced browser options You can change options on your handheld to improve the speed, ease of use, and security of your browsing experience. Changing how images are downloaded Images in web pages can be very large. You can set an option to make web pages download faster by removing images altogether. -
Page 443: Setting Whether To Automatically Complete Web Addresses And Form Fields
CHAPTER 17 Browsing the Web Setting whether to automatically complete web addresses and form fields Your handheld can store information, such as web addresses and form fields. If autofill is enabled, when you enter the first few letters of a URL you’ve entered before in the URL Entry field, your Filling out an order form handheld completes the URL for you. -
Page 444: Allowing Websites To Remember Personal Information
CHAPTER 17 Browsing the Web Allowing websites to remember personal information By default, your handheld saves the cookies it receives. If you want more privacy, you can tell your Key Term handheld not to accept cookies. Cookie Some websites store information in a small text file, called a cookie, that is saved on your handheld. -
Page 445: Setting Preferences For Storing Web Pages
CHAPTER 17 Browsing the Web Setting preferences for storing web pages Your handheld stores web pages automatically in cache. Key Term Cache The cache in your handheld is a block of memory that stores web pages so you can view them again without accessing the Internet. - Page 446 CHAPTER 17 Browsing the Web Tungsten™ T5 Handheld Change the size and content of the cache by using the following options: Set memory limit for storing pages Sets the amount of memory used for your cache. Pages are cached so they load faster the next time you view them.
-
Page 447: Setting Preferences For Using A Proxy Server
CHAPTER 17 Browsing the Web Setting preferences for using a proxy server Your handheld comes with the proxy server turned off. You can turn the proxy server on and Key Term configure a proxy server. Proxy Server A server that provides access to files from other servers by retrieving them either from its local cache or... - Page 448 CHAPTER 17 Browsing the Web Tungsten™ T5 Handheld Set your proxy server preferences: a. Select Set Proxy. b. Check or uncheck the Use proxy server box to use or not use a proxy server. c. If you want to use a proxy server, select the Use Proxy box and enter the appropriate server address and port number.
-
Page 449: Setting Whether To Accept Javascript
CHAPTER 17 Browsing the Web Setting whether to accept JavaScript You can choose to bypass JavaScript elements on the web pages you view. JavaScript is often used on web pages for interactive content. Tungsten™ T5 Handheld Go to Favorites and select Web Open the General Preferences dialog box: a. -
Page 450: Related Topics
CHAPTER 17 Browsing the Web Related topics Support Click a link below to learn about these related topics: If you’re having problems with the web browser or with Moving anything else on your Around handheld, go to www.palmOne.com/intl/ support. Categories Connecting VersaMail Tungsten™... -
Page 451: Chapter 18: Dialing Phone Numbers From Your Handheld
CHAPTER 18 Dialing Phone Numbers from Your Handheld In this chapter You have been using Quick Connect in Contacts to set up client meetings and Dialing a number you now you are feeling hungry. You Using speed dial can quickly dial the local pizza parlor, even if their number is not in your Related topics Contacts list. -
Page 452: Dialing A Number
CHAPTER 18 [ ! ] Before You Begin Before you can dial a number, you must set up a phone connection on your handheld. Tungsten™ T5 Handheld Dialing Phone Numbers from Your Handheld Dialing a number Tapping in a number on your handheld is sometimes easier than using your mobile phone. Entering a number Go to Applications and select Dialer Tap the telephone number on the keypad. -
Page 453: Redialing The Most Recently Used Number
CHAPTER 18 Dialing Phone Numbers from Your Handheld Redialing the most recently used number Tungsten™ T5 Handheld Go to Applications and select Dialer Dial the most recently used number: a. Select Dial to display the most recently used number. The most recently dialed number is displayed Select Dial b. -
Page 454: Dialing A Number From The Call History List
CHAPTER 18 Dialing Phone Numbers from Your Handheld Dialing a number from the Call History List Did You Know? Dialer keeps a list of 11 of the most recently dialed numbers. Did You Know? If the number is a speed dial entry, the name from the speed dial entry appears in the Call... -
Page 455: Using Speed Dial
CHAPTER 18 Dialing Phone Numbers from Your Handheld Using speed dial Speed dial allows you to store ten of your most commonly used numbers and to dial one with a single tap. Adding a speed dial entry Tungsten™ T5 Handheld Go to Applications and select Dialer Add a speed dial entry: a. -
Page 456: Dialing A Number Using Speed Dial
CHAPTER 18 Dialing Phone Numbers from Your Handheld Dialing a number using speed dial Tungsten™ T5 Handheld Go to Applications and select Dialer Dial the number: a. Select Speed. b. Select one of the named speed-dial buttons. Done... -
Page 457: Editing A Speed-Dial Entry
CHAPTER 18 Dialing Phone Numbers from Your Handheld Editing a speed-dial entry You can go directly to the Edit Entry dialog box by tapping and holding a speed dial button. Tungsten™ T5 Handheld Go to Applications and select Dialer Edit an entry: a. -
Page 458: Related Topics
CHAPTER 18 Dialing Phone Numbers from Your Handheld Related topics Support Click a link below to learn about these related topics: If you’re having problems with Dialer or with anything Moving else on your handheld, go to Around www.palmOne.com/intl/ support. Connecting Contacts Tungsten™... -
Page 459: Chapter 19: Sharing Information
CHAPTER 19 Sharing Information In this chapter You have to get this memo to your boss—now. Or the photo of the Using the Send command grandkids in their Halloween costumes Beaming to your mom. After you’ve used your handheld to create or capture that Other ways of sharing information important business and personal... -
Page 460: Using The Send Command
Using the Send command You can send information from within an application, such as a photo or video, a contact, or an ® appointment, to other Palm OS handheld users. You can also send a category of information or even an entire application. - Page 461 CHAPTER 19 Sharing Information Did You Know? In most applications, the leftmost menu is named Record. Tungsten™ T5 Handheld Select the information you want to send: a. Open an application. b. Select the entry you want. Select a sending method: a.
-
Page 462: Sending A Category
CHAPTER 19 Sharing Information Sending a category Create a category of Calendar events such as your child’s soccer schedule, and then send the entire category to your spouse’s handheld. When you send a category, the individual entries within the category (contacts, memos, photos, and so on) appear as unfiled items on the receiving... -
Page 463: Sending An Application
CHAPTER 19 Sharing Information Sending an application Tap the Send From pick list to send an application from an expansion card inserted into the expansion slot. Tungsten™ T5 Handheld Select the application you want to send: a. Go to Applications. b. -
Page 464: Using The Send Command With The Versamail ® Application
CHAPTER 19 Sharing Information Using the Send command with the VersaMail You can send information as an attachment to an email message using the Send command. Follow the procedures for sending information, a category, or an application. Select VersaMail the Send With dialog box. The VersaMail application opens, displaying a blank message with the information you want to send as an attachment. -
Page 465: Beaming
Beaming Using the IR port on your handheld, you can beam information from within an application, such as a photo or video, a contact, an appointment, or a task, to other Palm Powered devices. You can For best results when also beam a category of information or even an entire application. - Page 466 CHAPTER 19 Sharing Information The leftmost menu in most applications is named Record. In Contacts, you can create a contact with your own information and select it as your business card by opening the Record Menu and selecting Business Card. Beam your business card to other handhelds by holding down the...
-
Page 467: Beaming A Category
CHAPTER 19 Sharing Information Beaming a category Create a category of Calendar events such as your meeting schedule, and then beam the entire category to your business partner’s handheld. When you receive a beamed item, you can file the item in a category using the Receive dialog box. -
Page 468: Beaming An Application
CHAPTER 19 Sharing Information Beaming an application Select the Beam From pick list to beam an application from an expansion card inserted into the expansion slot. Tungsten™ T5 Handheld Select the application you want to beam: a. Go to Applications. b. - Page 469 CHAPTER 19 Sharing Information Tungsten™ T5 Handheld Beam the application: a. Select Beam. b. When the Beam dialog box appears, point your handheld’s IR port directly at the IR port of the other handheld. IR port Wait for the Beam dialog box to indicate that beaming is complete. Done...
-
Page 470: Other Ways Of Sharing Information
• Copy information or an application onto an expansion card inserted into the expansion slot, and view the information by inserting the card into the slot on another Palm Powered device. • Copy information such as a photo or video from your handheld to your computer, or from your computer to your handheld, by synchronizing or using File Transfer (Windows) or Drive Mode (Mac). -
Page 471: Related Topics
CHAPTER 19 Sharing Information Related topics Support Click a link below to learn about these related topics: If you’re having problems with sharing information or Synchronizing with anything else on your handheld, go to Expansion www.palmOne.com/intl/ support. Connecting VersaMail Common Questions Tungsten™... -
Page 472: Chapter 20: Managing Your Expenses
CHAPTER 20 Managing Your Expenses In this chapter Tired of trying to re-create your business trip when you return? Adding an expense Expense makes it easy to keep track of Choosing currency options what you paid for that dinner in New York with your new sales group. -
Page 473: Adding An Expense
CHAPTER 20 Managing Your Expenses Adding an expense Did You Know? Expense is not just for business. Use it to help plan your budget by figuring out how much you spend each month on things like entertainment and dining out. Add an expense simply by writing the first letter of the expense type. - Page 474 CHAPTER 20 Managing Your Expenses Add extra information to your expense items. Select the item and select Details. Then select Note and enter the information. Select Lookup in the Attendees list to pull names from Contacts. Did You Know? After you synchronize, you can send your expense information to a spreadsheet on your...
-
Page 475: Choosing Currency Options
CHAPTER 20 Managing Your Expenses Choosing currency options Expense is even easier to use when you customize the currency list. You can choose what currencies appear in the pick list, and what symbol automatically appears in new expenses, and you can even create your own currency symbol. Customizing the currency pick list Place the currency symbols that you use most often in the currency pick list. -
Page 476: Presetting The Currency Symbol
CHAPTER 20 Managing Your Expenses Cont’d. Presetting the currency symbol Choose which currency symbols appear when you add a new expense. If you’re entering several expenses that all use the same currency, change the preset currency to that symbol to save time. When you’re finished with those expenses, change it again to the... -
Page 477: Creating A Currency Symbol
CHAPTER 20 Managing Your Expenses Creating a currency symbol If the currency you want to use is not in the pick list of countries, you can create your own symbol. Tungsten™ T5 Handheld Choose the default currency: a. Select the Default Currency pick list. - Page 478 CHAPTER 20 Managing Your Expenses Tungsten™ T5 Handheld Create the custom symbol: a. Select a Country box. b. Enter the name of the country and the symbol that you want. c. Select OK, and then select OK again. Done...
-
Page 479: Deleting Expenses
CHAPTER 20 Managing Your Expenses Deleting expenses Delete individual expenses, or an entire category of expenses at once. Deleting an individual expense Tungsten™ T5 Handheld Go to Applications and select Expense Select the expense you want to delete. Delete the item: a. -
Page 480: Deleting An Entire Category Of Expenses
CHAPTER 20 Managing Your Expenses Deleting an entire category of expenses To combine expenses from different categories, rename one category to match the other category’s name. Did You Know? There is another way to delete a category. Select the Category pick list and select Edit Categories. -
Page 481: Customizing The Expense List
CHAPTER 20 Managing Your Expenses Customizing the expense list You can change the appearance of the expense list. Did You Know? Customizing the expense list makes it easy to see how much you spent on each type of expense. For example, to see how much you spent on taxis, sort your expenses by... -
Page 482: Working With Expense On Your Computer
• Transfer expense information to other applications, such as Microsoft Excel, using the Send or Export command in Palm Desktop software To open Expense on your computer, double-click the Palm Desktop icon on the Windows desktop, and then click Expense on the launch bar. -
Page 483: Related Topics
CHAPTER 20 Managing Your Expenses Related topics Support Click a link below to learn about these related topics: If you’re having problems with Expense or anything Moving Around else on your handheld, go to www.palmOne.com/intl/ support. Entering Information Calculator Categories Customizing Tungsten™... -
Page 484: Chapter 21: Performing Calculations
CHAPTER 21 Performing Calculations In this chapter Whether you’re figuring the tip on a restaurant bill, or balancing your Calculator buttons checkbook, it’s always nice to have a Viewing recent calculations calculator on hand. And because it’s part of your handheld, there’s no need Related topics to carry a separate calculator. -
Page 485: Calculator Buttons
CHAPTER 21 Performing Calculations Calculator buttons Use the memory buttons to store and recall a number you enter in multiple calculations. If you make a mistake entering a number in the middle of a calculation, use the CE button to re-enter the number without starting the calculation over. -
Page 486: Viewing Recent Calculations
CHAPTER 21 Performing Calculations Viewing recent calculations View recent calculations to confirm that you entered everything correctly. Did You Know? Viewing recent calculations is helpful when double-checking the math in your checkbook register. Did You Know? Calculator History also has these functions: Clear Select to clear the calculator’s history. -
Page 487: Accessing Different Calculators
CHAPTER 21 Performing Calculations Accessing different calculators Do you need a scientific or financial calculator? Your calculator has a variety of modes that can help you calculate formulas in a number of different areas. Tungsten™ T5 Handheld Go to Applications and select Calculator Access the advanced mode calculators: a. -
Page 488: Related Topics
CHAPTER 21 Performing Calculations Related topics Support Click the links below to learn about these related topics: If you’re having problems with Calculator or anything Moving Around else on your handheld, go to www.palmOne.com/intl/ support. Entering Information Tungsten™ T5 Handheld •... -
Page 489: Chapter 22: Keeping Your Information Private
CHAPTER 22 Keeping Your Information Private In this chapter You probably wouldn’t leave your door unlocked at night, so why should it be Choosing a security level any different with your handheld? Marking information as When you think about the amount of private personal and private information Setting the level of privacy... -
Page 490: Choosing A Security Level
CHAPTER 22 Keeping Your Information Private Choosing a security level There are a variety of security levels available for your handheld. Choose the level that provides the best mix of security and convenience. Activating no security features All entries are accessible to anyone who has your handheld. This includes entries that are marked private, but are not masked or hidden. -
Page 491: Marking Information As Private
CHAPTER 22 Keeping Your Information Private Marking information as private Marking an entry as private is the first step in protecting your info. Tungsten™ T5 Handheld Open an application. Create a new entry, or select the entry that you want to make private. Mark it as private: a. -
Page 492: Setting The Level Of Privacy
CHAPTER 22 Keeping Your Information Private Setting the level of privacy Add further protection to your private entries by setting the privacy level (hidden/masked). Hiding or masking private entries Tungsten™ T5 Handheld Open Security: a. Go to Applications. b. Select Prefs c. -
Page 493: Viewing An Entry That Is Masked
CHAPTER 22 Keeping Your Information Private Cont’d. Viewing an entry that is masked To open a masked entry, select the entry. If you have a password, enter it in the Show Private Records dialog box, and then select OK. When you close a masked entry, it remains masked. Using a password Further protect your hidden or masked entries by creating a password, which is needed to display the contents of hidden/masked entries. -
Page 494: Creating A Password
CHAPTER 22 Keeping Your Information Private Creating a password The best passwords consist of a mix of letters, characters, and numbers. Longer passwords are better than short ones. Any password you create is case-sensitive. Tungsten™ T5 Handheld Open Security: a. Go to Applications. b. -
Page 495: Changing A Password
Keeping Your Information Private Changing a password You can change your password at any time. You must enter the current password before you can change it. ® In Palm Desktop software, you can require password entry for private info to display. - Page 496 CHAPTER 22 Keeping Your Information Private Tungsten™ T5 Handheld Enter your current password: a. Select the Password box. b. Enter the current password, and then select OK. Change your password: a. Select OK. b. Enter a new password, and then select OK. Confirm the password and enter a hint: a.
-
Page 497: Deleting A Password
CHAPTER 22 Keeping Your Information Private Deleting a password You can delete your password at any time. You must enter the current password before you can delete it. Tungsten™ T5 Handheld Select Done. Done Enter your password: a. Select the Password box. b. -
Page 498: Deleting A Forgotten Password
CHAPTER 22 Keeping Your Information Private Deleting a forgotten password If you forget your password, your handheld displays the password hint (if you entered one) to help you remember the password. If you still can’t remember the password, you can delete it from your handheld. -
Page 499: Locking Your Handheld
CHAPTER 22 [ ! ] Before You Begin To use the locking feature, you must first create a password for your handheld. To start your handheld when it is locked, turn it on. Enter your password, and then select Done. Tungsten™... -
Page 500: Locking Your Handheld Automatically
CHAPTER 22 Keeping Your Information Private can restore the information by synchronizing your handheld with your computer. Items on your internal drive are not restored during synchronization. Use File Transfer to replace those items. Locking your handheld automatically Tungsten™ T5 Handheld Open Security: a. - Page 501 CHAPTER 22 Keeping Your Information Private Tungsten™ T5 Handheld Select one of these lock options: Never Always leave your handheld unlocked. When power is off Automatically lock your handheld whenever you turn it off. At a preset time Set a time when your handheld will automatically lock.
-
Page 502: Locking Your Handheld Manually
CHAPTER 22 Keeping Your Information Private Locking your handheld manually Tungsten™ T5 Handheld Open Security: a. Go to Applications. b. Select Prefs c. Select Security. Select Lock. Select Lock Device. Done Lock... -
Page 503: Using Quick Unlock
CHAPTER 22 [ ! ] Before You Begin To use Quick Unlock, you must first create a password for your handheld. You can change a Quick Unlock combination at any time. Follow the same steps you used to create the combination. Tungsten™... - Page 504 CHAPTER 22 Keeping Your Information Private Tungsten™ T5 Handheld Create a Quick Unlock combination sequence: a. Use the 5-way or tap the onscreen navigator to create a combination. For example, you might choose Left-Right-Left as a combination. b. Select OK. Select Done.
-
Page 505: Deleting Your Quick Unlock Combination
CHAPTER 22 Keeping Your Information Private Deleting your Quick Unlock combination Tungsten™ T5 Handheld Open Security: a. Go to Applications. b. Select Prefs c. Select Security. Open the Quick Unlock dialog box: a. Select the Quick Unlock box. b. If necessary, enter your password, and then select OK. Delete the Quick Unlock combination: a. -
Page 506: Encrypting Your Information
CHAPTER 22 [ ! ] Before You Begin To use encryption, you must first create a password for your handheld. Tungsten™ T5 Handheld Keeping Your Information Private Encrypting your information You can encrypt selected information whenever your handheld locks. This means that your information is scrambled so that it cannot be read. - Page 507 CHAPTER 22 Keeping Your Information Private Tungsten™ T5 Handheld Open the Encrypt Data dialog box: a. Select Options. b. Check the Encrypt data when locked box. c. Select Choose Applications. Select the applications you want to encrypt, and then select OK. Continued...
-
Page 508: Limiting The Number Of Password Attempts
CHAPTER 22 Keeping Your Information Private Limiting the number of password attempts Synchronize your You can set the number of incorrect password attempts that are allowed before selected handheld with your information is deleted from your handheld. This feature, called intrusion protection, protects computer frequently to sensitive information from an intruder who uses an automated means to try every possible prevent loss of... - Page 509 CHAPTER 22 Keeping Your Information Private Tungsten™ T5 Handheld Open Security: a. Go to Applications. b. Select Prefs c. Select Security. Set the number of password attempts: a. Select Options. b. If necessary, enter your password, and then select OK. c.
- Page 510 CHAPTER 22 Keeping Your Information Private The number of password attempts must be between 5 and 99. Tungsten™ T5 Handheld Select the information that is deleted after the set number of failed attempts: a. Select the Delete pick list and select one of these options: No Data No information is...
-
Page 511: Related Topics
CHAPTER 22 Keeping Your Information Private Related topics Support Click a link below to learn about these related topics: If you’re having problems with private entries or Moving Around anything else on your handheld, go to www.palmOne.com/intl/ support. Managing Info Customizing Maintaining Common... -
Page 512: Chapter 23: Using Categories To Organize Information
CHAPTER 23 Using Categories to Organize Information In this chapter If you’re like most people, you use your handheld to manage your work life and Adding a category your personal life. Yet these two areas Renaming a category contain so many details: your children’s after-school activities, your conference Deleting a category schedule, your shopping list for the... -
Page 513: Adding A Category
CHAPTER 23 Using Categories to Organize Information Adding a category You can add categories in many applications: Contacts, Expense, Memos, Note Pad, Tasks, and Did You Know? palmOne™ Media. (In palmOne Media, categories are called albums.) Place individual entries into You can have up to these categories to easily get to a group of related items. -
Page 514: Renaming A Category
CHAPTER 23 Using Categories to Organize Information Renaming a category If you want to combine items in different categories, rename one category to the other category name. Did You Know? Some categories, like All and Unfiled, come with your handheld and cannot be changed. -
Page 515: Deleting A Category
CHAPTER 23 Using Categories to Organize Information Deleting a category If you delete a category, the items in that category will move to the Unfiled category. In Expense, you can delete a category, including its contents, with the Purge command. Tungsten™... -
Page 516: Placing Information Into A Category
CHAPTER 23 Using Categories to Organize Information Placing information into a category You can place individual entries into categories within an application. For example, you may want to place some of your contacts into a category called Medical. You can also enter new information into a You may also find it convenient to view applications in groups. - Page 517 CHAPTER 23 Using Categories to Organize Information To place an entry into a different category, simply select a different category from the Category pick list. Tungsten™ T5 Handheld Place the entry into a category: a. Select a category from the Category pick list. b.
-
Page 518: Placing An Application Into A Category
CHAPTER 23 Using Categories to Organize Information Placing an application into a category Tungsten™ T5 Handheld Go to Applications. Open the Category dialog box: a. Open the menus. b. Select Category in the App menu. Place the application into a category: a. -
Page 519: Viewing Information By Category
CHAPTER 23 Using Categories to Organize Information Viewing information by category In Applications view, scroll through the categories by pressing Right or Left on the 5-way navigator. To view all of the applications on your handheld, select the All category. Scroll through the categories in Contacts by repeatedly pressing the... -
Page 520: Related Topics
Moving Around else on your handheld, go to www.palmOne.com/intl/ support. Calendar Media Sharing Tungsten™ T5 Handheld • Opening applications • Using menus Color-coding your events in Calendar Organizing photos or videos into albums Beaming a category to another Palm Powered device... -
Page 521: Chapter 24: Managing Clock Settings
CHAPTER 24 Managing Clock Settings In this chapter Forget your watch? Or just forget to reset it when you landed in Toronto? Checking the current date Neither matters, as long as you have and time your handheld. Not only can you rely Setting the primary location on it for the correct time, but you can Choosing secondary... -
Page 522: Checking The Current Date And Time
CHAPTER 24 Managing Clock Settings Checking the current date and time There are two ways to easily check the date and time: When your handheld is on: • Go to Applications • When your handheld is off, press Center on the 5-way navigator. Your handheld turns on, displays the time, and then turns off after a few seconds. -
Page 523: Setting The Primary Location
CHAPTER 24 Managing Clock Settings Setting the primary location In World Clock, you can set the location, date, and time for a primary location. The settings for this Key Term primary location are used by all of the applications on your handheld. Primary location Typically a city in the time zone in which you live. -
Page 524: Setting The Date And Time For The Primary Location
CHAPTER 24 Managing Clock Settings Setting the date and time for the primary location You can set the date and time in Preferences, as you did during the initial setup of your handheld, Did You Know? or in World Clock. When you change the date and time in one application, it is automatically When the Daylight changed in the other. - Page 525 CHAPTER 24 Managing Clock Settings Tungsten™ T5 Handheld Set the time: a. Select the Set Time box. b. Select the hour and minute Hour boxes, and then select the arrows to change them. Minute c. Select AM or PM, and then select OK.
-
Page 526: Choosing Secondary Locations For Other Time Zones
CHAPTER 24 Managing Clock Settings Choosing secondary locations for other time zones Set World Clock to display the date and time for two other locations. If you have friends, family, or colleagues in another time zone, select a city in their zone as your secondary location. -
Page 527: Modifying The Locations List
CHAPTER 24 Managing Clock Settings Modifying the locations list You can edit the locations list so that the locations you use most often are easy to find. If you know what you’re looking for in a long pick Adding new locations list, use Graffiti®... - Page 528 CHAPTER 24 Managing Clock Settings Tungsten™ T5 Handheld [ & ] OPTIONAL Select each setting you want to change. Name Enter the name of the location. Time Zone Select the time zone for the location. Daylight Saving Time box Check for your handheld to automatically adjust the date and time for Daylight Saving Time in this location.
-
Page 529: Deleting A Location
CHAPTER 24 Managing Clock Settings Deleting a location Tungsten™ T5 Handheld Go to Applications and select World Clock Select the location you want to delete: a. Select a Location pick list. b. Select Edit List. c. Select a location, and then select Remove. -
Page 530: Setting The Alarm Clock
CHAPTER 24 Managing Clock Settings Setting the alarm clock Did You Know? Use World Clock to set an alarm within the next 24 hours. Set alarms outside of this timeframe in Calendar. Did You Know? Remember to put your handheld on local time. If you travel from San Francisco to London, make London your... -
Page 531: Responding To The Alarm Clock
CHAPTER 24 Managing Clock Settings To turn off an alarm before it sounds, select the Alarm box, and then select Alarm Off. Responding to the alarm clock When the World Clock alarm sounds, select one of these three options: OK Cancel the reminder message and return to the current screen. Snooze appears again in five minutes. -
Page 532: Changing The Clock Display
CHAPTER 24 Managing Clock Settings Changing the clock display Tungsten™ T5 Handheld Go to Applications and select World Clock Open the Display Options dialog box: a. Open the menus. b. Select Options, and then select Display Options. Select any of the following options, and then select OK: Show Multiple Locations Display the secondary locations. -
Page 533: Related Topics
CHAPTER 24 Managing Clock Settings Related topics Support Click a link below to learn about these related topics: If you’re having problems with World Clock or anything Moving Around else on your handheld, go to www.palmOne.com/intl/ support. Calendar Customizing Tungsten™ T5 Handheld •... -
Page 534: Chapter 25: Customizing Your Handheld
CHAPTER 25 Customizing Your Handheld In this chapter Although customizing your handheld is optional, it’s like changing the preset Customizing your Favorites View radio stations in your car. Since you’re probably not driving around with the Customizing the Application View dealer’s preset radio stations, why not personalize your handheld, too? Making the screen easier to read... -
Page 535: Customizing Your Favorites View
CHAPTER 25 Customizing Your Handheld Customizing your Favorites View You can personalize your Favorites View by changing the background image to your favorite photo. You can also change the entries to those you use most often. Changing the background photo in Favorites View Use your favorite photo as the background in Favorites View. -
Page 536: Changing Entries In Favorites
CHAPTER 25 Customizing Your Handheld Changing entries in Favorites Did You Know? You can quickly change Change the entries in Favorites View to include the applications, files, folders, or web links you use multiple favorites on a most often. page by selecting Menu on the status bar, and then selecting Edit Favorite Pages. - Page 537 CHAPTER 25 Customizing Your Handheld Tungsten™ T5 Handheld Change the favorite: a. Select the favorite type from the Type pick list: application, file/folder, or web link. b. Select the application from the Original pick list, select to browse to the file or folder, or select to enter the web address you want.
-
Page 538: Customizing The Application View
CHAPTER 25 Customizing Your Handheld Customizing the Application View Use your favorite photo as the background in the Application View. You can also display your application icons in list format with small icons so that you can see more applications without scrolling. - Page 539 CHAPTER 25 Customizing Your Handheld Tungsten™ T5 Handheld Select a photo for the background: a. Check the Background box. b. Select the picture box. c. Select a picture. d. Select Done. e. Adjust the fade setting so that the text is easy to read against the photo. f.
-
Page 540: Making The Screen Easier To Read
CHAPTER 25 Customizing Your Handheld Making the screen easier to read In many applications, you can change the font style to make text easier to read. There are four font styles available. In certain lighting conditions, you may also need to adjust the brightness to read the information on the screen. - Page 541 CHAPTER 25 Customizing Your Handheld Tungsten™ T5 Handheld Open an application. Open the Select Font dialog box: a. Open the menus. b. Select Options, and then select Font. Select the font style you want to use, and then select OK. Small Done Small bold...
-
Page 542: Adjusting The Brightness
CHAPTER 25 Customizing Your Handheld Adjusting the brightness Tungsten™ T5 Handheld Tap System Info on the status bar. Drag the slider to adjust the brightness level, and then tap outside the dialog box. Done Brightness slider... -
Page 543: Changing Screen Colors
CHAPTER 25 Customizing Your Handheld Changing screen colors Choose a new set of text and background colors for all your applications. Tungsten™ T5 Handheld Open Color Theme Preferences: a. Go to Applications. b. Select Prefs c. Select Color Theme. Select a theme, and then select Done. Done... -
Page 544: Changing Handedness Orientation Of The Screen
CHAPTER 25 Customizing Your Handheld Changing handedness orientation of the screen The Handedness preferences enable you to select right-hand or left-hand orientation when you rotate the screen into landscape mode. Tungsten™ T5 Handheld Open Handedness Preferences: a. Go to Applications. b. -
Page 545: Assigning A Button To Your Frequently Used Applications
CHAPTER 25 Customizing Your Handheld Assigning a button to your frequently used applications Tired of going to Applications View to open an application you use frequently? Use the Buttons Preferences screen to reassign the applications associated with the buttons on the front of your handheld and the HotSync For example, if you use Memos often, you can assign Memos to a button so that you don’t have to scroll through Applications View whenever you want to use that application. - Page 546 CHAPTER 25 Customizing Your Handheld Key Term Full-screen pen stroke A stroke that is drawn from the bottom of the input area to the top of the screen. You can use this stroke as a quick way to do a selected task, such ®...
-
Page 547: Setting The Date And Time
CHAPTER 25 Customizing Your Handheld Setting the date and time You can set the date, time, and location for all the applications on your handheld that require this information. You can also select the format in which the date, time, and numbers appear. Selecting a location You can set the current date and time based on your location. - Page 548 CHAPTER 25 Customizing Your Handheld You can rename the location to the city where you live. Select the Name field, and then modify the location name. Tungsten™ T5 Handheld Select the location: a. Select the Location pick list, and select a city in your time zone.
-
Page 549: Resetting The Date And Time
CHAPTER 25 Customizing Your Handheld Resetting the date and time In most cases you won’t need to reset the date and time. However, you may need to do this if you do a hard reset on your handheld. Tungsten™ T5 Handheld Open Date &... - Page 550 CHAPTER 25 Customizing Your Handheld Tungsten™ T5 Handheld Set the date: a. Select the Set Date box. b. Select the arrows to select the current year. c. Select the current month. d. Select the current date. Set the time: a. Select the Set Time box. b.
-
Page 551: Selecting Formats For Dates, Times, And Numbers
CHAPTER 25 Customizing Your Handheld Selecting formats for dates, times, and numbers Would you rather see the time displayed in a 24-hour format, or dates that begin with the month or year? Use the Formats Preferences screen to change these settings and to apply them to all the applications on your handheld. - Page 552 CHAPTER 25 Customizing Your Handheld The country setting changes only the way the date and time look. It doesn’t change your handheld’s time to that country’s time. To do that, go to Date & Time Preferences or to World Clock. Tungsten™...
-
Page 553: Customizing The Way You Enter Information
CHAPTER 25 Customizing Your Handheld Customizing the way you enter information Your handheld lets you choose how you enter information. You can choose the input area or the writing area, choose Graffiti 2 strokes, and create shortcuts to make entering information faster. Did You Know? Customizing the input area You can change the input... -
Page 554: Using The Full-Screen Writing Area
CHAPTER 25 Customizing Your Handheld Using the full-screen writing area Right after you write a character, your handheld interprets a quick tap on the screen as a period character. If you want to tap a button, either wait a few seconds or tap the Full-screen writing icon on the status bar. - Page 555 CHAPTER 25 Customizing Your Handheld Tungsten™ T5 Handheld Position the cursor where you want the characters to appear, and do any of the following: • Write lowercase Graffiti 2 letters anywhere on the left side of the screen. • Write numbers anywhere on the right side of the screen. •...
-
Page 556: Customizing Graffiti 2 Strokes
CHAPTER 25 Customizing Your Handheld Customizing Graffiti 2 strokes There is more than one way to write certain Graffiti 2 characters. Use the Graffiti 2 Preferences screen to select an alternate stroke shape for these characters. Tungsten™ T5 Handheld Open Graffiti 2 Preferences: a. -
Page 557: Setting Up Shortcuts
CHAPTER 25 Customizing Your Handheld Setting up ShortCuts Are you looking for a quicker way to enter information on your handheld? Use ShortCuts to define abbreviations for any words, letters, or numbers that you enter often. You can use your ShortCuts You may want to add a anywhere you enter info with Graffiti 2 writing. - Page 558 CHAPTER 25 Customizing Your Handheld The ShortCut Text can be 45 characters long. That’s long enough for a name whose spelling you always forget or a complex email address. Tungsten™ T5 Handheld Create a ShortCut: a. Select New. b. On the ShortCut Name line, enter the abbreviation.
-
Page 559: Changing Shortcuts
CHAPTER 25 Customizing Your Handheld Changing ShortCuts After you create a ShortCut, you can modify it at any time. To delete a ShortCut, open ShortCuts Preferences and select the ShortCut. Select Delete, select Yes, and then select Done. Tungsten™ T5 Handheld Open ShortCuts Preferences: a. -
Page 560: Correcting Problems With Tapping
CHAPTER 25 Customizing Your Handheld Correcting problems with tapping Is your screen not responding to taps? Are you getting unexpected results when you tap? For Key Term example, when you tap the number keyboard icon, does the Find dialog box open instead? If this Touchscreen Another happens, it’s time to align the screen. -
Page 561: Selecting Sound Settings
CHAPTER 25 Customizing Your Handheld Selecting sound settings Are sounds too soft or too loud? Set the volume levels for the system, game, and alarm tones, or turn sounds off altogether with the Silent profile. You can choose different types of sounds for Calendar, Tasks, and World Clock. -
Page 562: Entering Your Owner Information
CHAPTER 25 Customizing Your Handheld Entering your owner information It’s a good idea to enter information that could help someone contact you if you ever lose your handheld (if there’s enough battery power to turn it on). By default, the Owner Preferences screen In addition to entering contains the information you entered when you installed the CD and set up your handheld, but owner information, you... -
Page 563: Conserving Battery Power
CHAPTER 25 Customizing Your Handheld Conserving battery power You can save battery power by preventing your handheld from turning on accidentally and by adjusting the Power Preferences settings. Preventing your handheld from turning on by accident Does your handheld turn itself on accidentally in your briefcase, pocket, or purse? You can lock the buttons on the front of your handheld to prevent this from happening and to prevent the battery When Keylock is on, your from draining. -
Page 564: Selecting Power-Saving Settings
CHAPTER 25 Customizing Your Handheld Selecting power-saving settings The Power Preferences screen enables you to set power consumption options. Tungsten™ T5 Handheld Select one of these settings, and then select Done. Never Keylock always remains off. Automatic Keylock turns on automatically when you turn off your handheld or when your handheld goes to sleep. - Page 565 CHAPTER 25 Customizing Your Handheld Tungsten™ T5 Handheld Select the pick lists to change any of the following settings, and then select Done. Auto-off after Select how quickly your handheld automatically turns off after a period of inactivity: 30 seconds, 1 minute, 2 minutes, or 3 minutes. On while charging Select whether your handheld stays on continuously when it is connected to the AC charger.
-
Page 566: Connecting Your Handheld To Other Devices
CHAPTER 25 Customizing Your Handheld Connecting your handheld to other devices Connection Preferences let you connect your handheld to other devices. You can use preset connection settings, modify the preset settings, or create your own connection settings from scratch. The list of preset connections varies depending on the applications you’ve added to your handheld. - Page 567 CHAPTER 25 Customizing Your Handheld Tungsten™ T5 Handheld Open the Edit Connection dialog box: a. Select the IR to PC/handheld connection. b. Select Edit. Change the speed setting: a. Select Details. b. Select the Speed pick list and select the appropriate speed. c.
-
Page 568: Creating Your Own Connection Settings
CHAPTER 25 Customizing Your Handheld Creating your own connection settings If none of the preset connection settings are close to what you need, or if you’re already using all the connections as they are, you can create a new connection. To delete a connection that you created, select it on the Connection... - Page 569 CHAPTER 25 Customizing Your Handheld You can also customize Bluetooth connection settings. Tungsten™ T5 Handheld Enter the basic settings: Name Enter a name for your connection settings. This name will appear on the Connection Preferences screen so that you can select your connection later. Connect to Select the type of device you want to connect to: PC, Modem, or Local Area Network.
- Page 570 CHAPTER 25 Customizing Your Handheld Tungsten™ T5 Handheld Enter the details settings: a. Select Details. b. Select the Speed pick list and select the appropriate speed. c. Select the Flow Ctl pick list and select whether the connection uses flow control: Automatic Your handheld determines when to use flow control.
-
Page 571: Connecting Your Handheld To A Mobile Phone
CHAPTER 25 Customizing Your Handheld Connecting your handheld to a mobile phone Phone Preferences let you configure your handheld to exchange messages and dial phone numbers when your handheld is connected to a GSM mobile phone (sold separately). The GSM If your phone doesn’t mobile phone account must also include data services. -
Page 572: Customizing Network Settings
CHAPTER 25 [ ! ] Before You Begin You need the following: • A mobile phone with a Bluetooth radio or an IR port (sold separately) • A wireless service provider account that includes high-speed data services or that supports dial-up connections (additional fees may apply) - Page 573 CHAPTER 25 Customizing Your Handheld Instead of creating a new profile, you can copy an existing profile and change the settings. Select the profile you want to copy, and then open the Service menu and select Duplicate. Did You Know? Most dial-in servers do not accept spaces in the username.
- Page 574 CHAPTER 25 Customizing Your Handheld It’s a good idea to add at Cont’d least three commas before your calling card number to allow for the cue delay. Each comma delays transmission of your calling card number for two seconds. Tungsten™ T5 Handheld b.
-
Page 575: Connecting To Your Service
CHAPTER 25 Customizing Your Handheld Connecting to your service After you set up your Connection and Network Preferences, establishing a connection to your ISP or your company’s network (dial-in server) is easy. To see expanded Service Connection Progress messages, press Down on the 5-way. -
Page 576: Adding Details To A Service Profile
CHAPTER 25 Customizing Your Handheld Adding details to a service profile If you’re using one of the predefined service profiles, you probably need to enter only your username, password, and telephone number. If you’re creating a new service profile, you may need to use the Details dialog box to add more information to your service profile. - Page 577 CHAPTER 25 Customizing Your Handheld Key Term DNS Domain name system. The Internet uses this system to translate the names of host computers into IP addresses. A DNS number identifies the server that handles the translation. Each IP address has four numbers (from 0 to 255) that are separated by periods.
-
Page 578: Deleting A Service Profile
CHAPTER 25 Customizing Your Handheld Deleting a service profile Tungsten™ T5 Handheld Open Network Preferences: a. Go to Applications. b. Select Prefs c. Select Network. Delete the service you want to delete: a. Select the Service pick list and select the service you want to delete. b. -
Page 579: Creating Login Scripts
CHAPTER 25 Customizing Your Handheld Creating login scripts A login script is a series of commands that automates logging in to a network server—for example, your corporate network or your ISP . A login script is associated with a specific service Windows You can also profile created in Network Preferences. - Page 580 CHAPTER 25 Customizing Your Handheld Tungsten™ T5 Handheld Open the Login Script dialog box: a. Select the Service pick list and select the service you want to add a script to. b. Select Details. c. Select Script. Select the End pick list and select one of the following commands from the list: Wait For Tells your handheld to wait for specific characters from the server before executing the next command.
- Page 581 CHAPTER 25 Customizing Your Handheld Cont’d. Tungsten™ T5 Handheld Send Transmits specific characters to the server that you’re connecting to. Send CR Transmits a carriage return or line feed (LF) character to the server. Send User ID Transmits the User Name field from Network Preferences. Send Password Transmits the Password field from Network Preferences.
- Page 582 CHAPTER 25 Customizing Your Handheld Tungsten™ T5 Handheld Complete the script: a. Repeat step 3 until the login script is complete. b. Select OK, and then select OK again. c. Select Done. Done...
-
Page 583: Adding Plug-In Applications
• Compiled into a device executable • Called properly from a login script • Able to return control to a login script after it terminates • Created using a development environment that supports Palm OS Metrowerks CodeWarrior tools. Tungsten™ T5 Handheld ®... -
Page 584: Setting Up Vpn
CHAPTER 25 Customizing Your Handheld Setting up VPN If you want to use your handheld to access your corporate email account or other files on your [ ! ] Before You Begin corporate server, you may need to set up a virtual private network (VPN) on your handheld. A VPN You must purchase and enables you to log in to your corporate server through the company’s firewall (security layer). - Page 585 CHAPTER 25 Customizing Your Handheld Tungsten™ T5 Handheld Set up a VPN account on your handheld: a. Select the Add Account box. b. Follow the instructions to enter the settings provided by your corporate system administrator. c. Select Done. Done...
-
Page 586: Establishing A Vpn Connection
CHAPTER 25 Customizing Your Handheld Establishing a VPN connection Tungsten™ T5 Handheld Open VPN Preferences: a. Go to Applications. b. Select Prefs c. Select VPN. Establish a VPN connection: a. Select a VPN account from the VPN Account pick list. b. -
Page 587: Ending A Vpn Connection
CHAPTER 25 Customizing Your Handheld Ending a VPN connection Tungsten™ T5 Handheld Open VPN Preferences: a. Go to Applications. b. Select Prefs c. Select VPN. Select Disconnect VPN. Done... -
Page 588: Related Topics
CHAPTER 25 Customizing Your Handheld Related topics Support Click a link below to learn about these related topics: If you’re having problems with customization or with Basics anything else on your handheld, go to Moving www.palmOne.com/intl/ Around support. Entering Information Bluetooth Privacy Categories... -
Page 589: Chapter 26: Expanding Your Handheld
CHAPTER 26 Expanding Your Handheld In this chapter A Chinese proverb says, “Life just gives you time and space; it's up to What type of expansion you to fill it. ” But doesn’t it always cards can I use? seem that no matter how much space How can expansion cards you have, you still need more? help me? -
Page 590: What Type Of Expansion Cards Can I Use
CHAPTER 26 Expanding Your Handheld What type of expansion cards can I use? Key Term Your handheld is compatible with SDIO, SD, and MultiMediaCard expansion cards. SDIO expansion cards let you add accessories to your handheld. SD and MultiMediaCard expansion SDIO An acronym for cards let you store information and applications. -
Page 591: Removing An Expansion Card
CHAPTER 26 Expanding Your Handheld Removing an expansion card NOTE must remove this card before you can put a real card into the slot. To prevent damaging the card and the info on it, always wait for your handheld to finish writing to the expansion card before you remove the card from the slot. -
Page 592: Inserting An Expansion Card
CHAPTER 26 Expanding Your Handheld Inserting an expansion card Tungsten™ T5 Handheld Insert the card into the expansion slot with the label side facing the front of the handheld. Push the card in with your thumb until you feel the card “click” in place and hear the confirmation tone. -
Page 593: Opening An Application On An Expansion Card
CHAPTER 26 Expanding Your Handheld Opening an application on an expansion card Did You Know? When you insert an expansion card into the expansion slot, your handheld adds the expansion card to the category list in the upper-right corner of Applications View. You can easily switch You can install between applications installed on your handheld and on the expansion card. -
Page 594: Opening Files On An Expansion Card
CHAPTER 26 Expanding Your Handheld Opening files on an expansion card You can open files on an expansion card when you insert the card into the expansion slot. Use palmOne File Transfer (Windows only) to install applications and transfer folders and files from your Windows computer to an expansion card. -
Page 595: Viewing Card Information
CHAPTER 26 Expanding Your Handheld Viewing card information It’s easy to forget which files you put on a particular expansion card. Use the Card Info application to view the card name and type, available storage space, and a summary of its contents. Reading and writing info on an expansion card Go to Applications and select Card Info... -
Page 596: Renaming A Card
CHAPTER 26 Expanding Your Handheld Renaming a card The expansion card name appears in the category pick list and in other lists that let you choose where to store your info. When you buy a new card, give it a name that helps you remember what’s on the card. -
Page 597: Copying Applications To An Expansion Card
CHAPTER 26 Expanding Your Handheld Copying applications to an expansion card If you use a card reader to view your card on a computer, the file names may differ from the names you see on your handheld. Did You Know? Some applications, such as Media, let you copy or move info between your... -
Page 598: Removing All Information From A Card
CHAPTER 26 Expanding Your Handheld Removing all information from a card Formatting a card removes all of its info and prepares it to accept new applications and files. [ ! ] IMPORTANT backup application and turns the card into a blank memory card. Tungsten™... -
Page 599: Related Topics
Managing Info Tungsten™ T5 Handheld • Exchanging applications and information with other Palm Powered devices by exchanging cards or beaming items between handhelds • Sending applications and information to other Bluetooth using Bluetooth wireless technology on your handheld Adding applications from your computer to an expansion card, and installing other files such as photos, videos, or music ®... -
Page 600: Chapter 27: Maintaining Your Handheld
CHAPTER 27 Maintaining Your Handheld Your handheld is designed to be rugged and reliable and to provide you with years of trouble-free service. Taking care of your handheld helps keep it working properly and ensures that it’s available when you need it. Handheld do’s and don’ts To protect your handheld from damage and ensure reliable performance, follow these guidelines. -
Page 601: Handheld Don'ts
CHAPTER 27 Maintaining Your Handheld • Use only 3.5 mm stereo headphones in your handheld’s headphone jack. • Be sure to get rid of any static electricity buildup before you connect your handheld to any cable or accessory. Handheld don’ts •... - Page 602 CHAPTER 27 Maintaining Your Handheld Reset button If your handheld does not respond after a soft reset, you need to do a hard reset. Tungsten™ T5 Handheld...
-
Page 603: Doing A Hard Reset
Wait for the Palm Powered™ logo to appear, and then release the power button. When you see the message that warns you about erasing all of the info on your handheld, do one of the following: •... -
Page 604: Restoring Your Information After A Hard Reset
CHAPTER 27 Maintaining Your Handheld Restoring your information after a hard reset If you synchronized before doing a hard reset, you can now put that information back on your handheld. However, you may need to re-enter some of your personal settings, as well as your color-coded categories in Calendar. - Page 605 CHAPTER 27 Maintaining Your Handheld Tungsten™ T5 Handheld Set the transfer options: a. Select an application in the Conduit list, and then click Change. b. Select Desktop overwrites handheld. NOTE This change applies only to the next synchronization. c. Click OK. Repeat step 3 for the other applications in the list that you want to restore, and then click Done.
-
Page 606: Related Topics
CHAPTER 27 Maintaining Your Handheld Related topics Support Click a link below to learn about these related topics: If you’re having problems with resets or with anything Managing Info else on your handheld, go to www.palmOne.com/intl/ Customizing support. Tungsten™ T5 Handheld Creating a backup of your information Customizing your handheld again after doing a hard reset... -
Page 607: Chapter 28: Common Questions
1. Click Start on your computer, and then select Run. 2. Click Browse and navigate to your CD-ROM drive. 3. Select Autorun, click Open, and then click OK. I cannot install Palm WINDOWS ONLY • Disable any virus-scanning software on your computer. - Page 608 • Run ScanDisk (or another disk verification tool) on your computer. • Install the latest Windows software updates to your computer. • If you are upgrading from an older Palm Powered device, remove any previous version(s) of Palm Add or Remove Programs.
-
Page 609: Handheld
CHAPTER 28 Common Questions Handheld [ ! ] IMPORTANT handheld voids the warranty and is not recommended under any circumstances. I want to see how much battery life I have left. A battery icon periodically to see if your handheld needs to be recharged. If the battery becomes low, a message appears on the screen prompting you to recharge the battery. - Page 610 CHAPTER 28 Common Questions When I connect my handheld to the AC charger, it does not charge. • Confirm that your handheld is firmly connected to the AC charger. • Confirm that your AC charger is plugged into an AC outlet that has power. A lightning bolt over the battery icon indicates that your handheld is charging.
- Page 611 CHAPTER 28 Common Questions I get a warning message telling me my handheld memory is full. The storage volume refers to your handheld’s program memory. If you get a message that your program memory is full, try the following: When you purge or delete items, you are given the •...
-
Page 612: Moving Around
CHAPTER 28 Common Questions My application is responding slowly. WINDOWS ONLY If you are transferring files using File Transfer and you are working with a large application on your handheld such as a game, the application may perform slowly. Wait until the file transfer is finished to use the application. - Page 613 CHAPTER 28 Common Questions When I tap Menu on the status bar, nothing happens. • Tap the upper-left corner of the screen to try and open the menus. • Align the screen and try tapping Menu again. • If nothing happens, you may be in an application or screen that does not use menus. Switch to a different application and try tapping Menu.
- Page 614 CHAPTER 28 Common Questions The info I entered does not appear in an application. • Check the Categories pick list in the upper-right corner of Applications View. Select All to display all the records for the application. • Did you set private records to be hidden? Check Security Preferences to see that Private Records is set to Show private records.
-
Page 615: Synchronizing
Programs. Go to the palmOne program group and select HotSync Manager. MAC ONLY • Make sure HotSync Manager is enabled: Open the Palm folder and double-click the HotSync Manager icon. On the HotSync Controls tab, be sure Enabled is selected. If it is not, click it. - Page 616 During CD installation, you chose a desktop software application to synchronize with your handheld. You may have chosen Palm Desktop software at that time. But if Microsoft Outlook already contains all of your contacts, appointments, tasks, and notes, you can change your synchronization method so that your handheld synchronizes with Outlook instead.
- Page 617 • Be sure that the application you want is installed. Reinstall the HotSync Manager and make sure that the application is selected. • Reinstall Palm Desktop software and select the option to synchronize with Microsoft Outlook. I can’t synchronize wirelessly using my handheld’s Bluetooth technology.
- Page 618 . Select Setup, and then select the Local tab. Select a port from the If you upgraded from a previous handheld, go to www.palmOne.com/intl/support, in the lower-right corner of your screen, and then select in the Palm folder. From the HotSync menu, select...
- Page 619 CHAPTER 28 Common Questions I can’t open the HotSync Manager. On a Windows computer, uninstall Palm Desktop software from your computer, and then reinstall the software from the software installation CD. On a Mac computer, just reinstall Palm Desktop software.
- Page 620 If you are synchronizing with Outlook, make sure the right profile is selected for the applications you want to synchronize in HotSync Manager. From the Palm Desktop home screen, click the HotSync Manager, and then select Custom.
-
Page 621: File Transfer/Drive Mode
CHAPTER 28 Common Questions File Transfer/Drive Mode I can’t move or copy files using palmOne™ File Transfer. WINDOWS ONLY • Make sure your handheld is connected securely to the USB sync cable, and that the cable is connected to a USB port on the back of your computer. •... - Page 622 CHAPTER 28 Common Questions I made updates to a file on my handheld, but when I synchronize, the changes don’t show up in the file on my computer. If you use File Transfer to send a file to your handheld, any updates you make to the file on your handheld are not included when you synchronize.
-
Page 623: Calendar
CHAPTER 28 Common Questions My handheld and/or the expansion card is not showing up as a drive in Windows Explorer or My Computer when I have the handheld in Drive Mode. WINDOWS ONLY When you turn on Drive Mode, connect your handheld to your computer, and then open My Computer or Windows Explorer, the window you open shows two new drives. -
Page 624: Memos
If you choose to view your memos alphabetically on Palm Desktop software and then synchronize, the memos on your handheld still appear in the order defined in the Preferences setting. In other words, the sort settings you use with Palm Desktop software are not transferred to your handheld. Tungsten™ T5 Handheld... -
Page 625: Note Pad
If you choose to view your notes alphabetically on Palm Desktop software and then synchronize, the notes on your handheld still appear in the order defined in the Preferences setting. In other words, the sort settings you use with Palm Desktop software are not transferred to your handheld. Media I can’t find the Media icon in Applications. -
Page 626: Tasks
CHAPTER 28 Common Questions My music file stutters during playback. WINDOWS ONLY If you are transferring files using File Transfer and you are listening to music files on your handheld, the music playback may stutter. Wait until the file transfer is finished to listen to the music file. - Page 627 CHAPTER 28 Common Questions If your passkey is rejected, your phone may have a preassigned passkey; see the documentation included with your phone for information. The documentation might refer to a Bluetooth connection as a Bluetooth pair, Bluetooth link, or bonded pair. My handheld cannot connect to my mobile phone.
-
Page 628: The Versamail® Application
CHAPTER 28 Common Questions I get an error message when I try to dial a phone number using my handheld. • Make sure that the proper phone driver is installed on your handheld. • You may need to set up a connection with your phone. See the documentation included with your phone for assistance with completing the connection setup process. - Page 629 CHAPTER 28 Common Questions • Service provider settings frequently change. If your email account was working but you are currently experiencing problems, check with your service provider to see if any of the account settings have changed. I am having problems sending and receiving email. •...
- Page 630 My vCard or vCal email attachment isn’t forwarding correctly. WINDOWS ONLY Palm Desktop software provides several features that work with email client software on a Windows computer. For these features to work correctly, the email client software must be properly set up. Follow these steps to check the settings: 1.
-
Page 631: Privacy
CHAPTER 28 Common Questions 5. Click OK. 6. Start the email client software and make sure it is configured as the default MAPI client. Consult the documentation for your desktop email application for more information. Privacy I’ve made records private, but I can’t remember my password to display them. -
Page 632: Sharing
I can’t beam information to another handheld or other device. NOTE • If you are beaming to another Palm Powered device, confirm that your handheld and the other handheld are 4 to 39 inches (approximately ten centimeters to one meter) apart and that the path between the two handhelds is clear of obstacles. -
Page 633: Problems With Incompatible Applications
CHAPTER 28 Common Questions When someone beams information to my handheld, I get a message telling me it is out of memory. • Your handheld requires at least twice the amount of memory available as the info you are receiving. For example, if you are receiving a 30KB application, you must have at least 60KB free. -
Page 634: Finding A Third-Party Application That Is Causing A Problem
If you have multiple third-party applications installed on your handheld or have upgraded from an earlier model of a Palm Powered device, perform the following procedure to remove all third-party applications from your handheld. Once you have removed all of the third-party applications, you can install one application at a time to determine which application is causing the problem. - Page 635 CHAPTER 28 Common Questions 2. Select and drag the Backup folder to the desktop. Make sure you see the Backup folder on the desktop. 3. On a Windows computer, close the palmOne folder. 4. Perform a hard reset. Synchronize your handheld with your computer to restore info to your handheld’s program memory, and use File Transfer (Windows) or Drive Mode (Mac) to restore info to your handheld’s internal drive.
- Page 636 CHAPTER 28 Common Questions Tungsten™ T5 Handheld f. Do one of the following: • If installing the application re-creates your problem, remove the application and contact the application developer for a solution. Continue to reinstall your applications one application at a time to make sure another application is not creating a problem.
-
Page 637: Chapter 29: Getting Help
• Answers to common questions about your handheld and its features • The Palm • The Palm Desktop Software for the Macintosh User’s Guide located in the Documentation folder on your installation CD • The palmOne™ Knowledge Library, accessible at •... -
Page 638: Technical Support
CHAPTER 29 Getting Help Technical support If, after reviewing the self-help resources, you cannot solve your problem, go to www.palmOne.com/intl/support Before requesting technical support, please experiment a bit to reproduce and isolate the problem. When you do contact Technical Support, please provide the following information: •... -
Page 639: Product Regulatory Information
Product Regulatory Information FCC Statement This device complies with part 15 of the FCC rules. Operation is subject to the following two conditions: (1) This device may not cause harmful interference, and (2) this device must accept any interference received, including interference that may cause undesired operation. -
Page 640: Canada - Industry Canada (Ic)
89/336/EEC, RTTE directive 99/5/EC, and Low Voltage Directive, as amended. Declaration of Conformity palmOne, Inc., Declares the Product: Tungsten™ T5 Handheld Zire™ Product Family Tested to Comply With FCC Standards FOR HOME OR OFFICE USE ® Handheld PDA with Bluetooth capability... -
Page 641: Battery Warning
• When in hazardous location, turn off power before replacing or wiring modules, and, • Do not disconnect equipment unless power has been switched off or the area is known to be non- hazardous. Tungsten™ T5 Handheld Tungsten T5 palmOne 400 N. McCarthy Blvd. Milpitas, 95035-5112... -
Page 642: Static Electricity, Esd, And Your Palmone™ Handheld
Varning Eksplosionsfara vid felaktigt batteribyte. Använd samma batterityp eller en ekvivalent typ som rekommenderas av apparattillverkaren. Kassera använt batteri enligt fabrikantens instruktion. Advarsel! Lithiumbatteri—Eksplosionsfare ved fejlagtig håndtering. Udskiftning må kun ske med batteri af samme fabrikat og type. Levér det brugte batteri tilbage tilleverandøren. Varoitus Paristo voi räjähtää, jos se on virheellisesti asennettu. - Page 643 ESD-susceptible equipment Even a small amount of ESD can harm circuitry, so when working with electronic devices, take measures to help protect your electronic devices, including your palmOne™ handheld, from ESD harm. While palmOne has built protections against ESD into its products, ESD unfortunately exists and, unless neutralized, could build up to levels that could harm your equipment.
-
Page 644: Index
INDEX SYMBOLS ! (exclamation points) in Tasks list 234 * (asterisk) characters 118 . (period) character 532 NUMERICS 12-hour clock See clock 12-hour formats 530 24-hour clock 528 24-hour formats 529 – 5-way navigator 19 scrolling application categories 35 abbreviations 535 AC charger 21 accelerating scrolling 43 accented characters 60... - Page 645 See also contacts addressing e-mail 122 text messages 389 adjusting alarm volume 509 brightness 518 modem volume 547 speaker volume 539 Adobe Acrobat Reader xx agenda lists 137 See also Calendar application Agenda View customizing Tasks lists and 233 described 159 opening 159 setting display options for 166 Agenda View icon 159...
- Page 646 setting preferences for 521 setting primary location for 501 setting secondary locations for 504 soft resets and 588 specifying connections for 544 switching between 10 synchronizing 84 transferring information from 79 transferring to expansion cards 96 transferring to handheld 28 uninstalling 589 updating information for 88 updating third-party 8...
- Page 647 BCC option 288 Beam Category command 445 Beam command 444 Beam Contact command 440 Beam dialog box 444 Beam From pick list 446 Beam icon 47 – beaming 20 Birthday icon 161 birthdays 120 blank screen 588 Blazer application See web browser blinking asterisk 304 blinking cursor 66 blocking information 470...
- Page 648 calculators 27 calendar adding appointments to 138 changing events on 154 changing repeat intervals for 154 color-coding appointments 139 customizing 166 displaying appointments for 159 displaying conflicting events in 168 finding overlapping events on 166 opening 172 removing appointments from 156 reserving dates 140 scrolling through 163 selecting dates on 138...
- Page 649 – File Transfer and 99 managing schedules from 172 overwriting information on 90 preinstalled software for 28 removing Palm Desktop software 114 setting up mobile connections for 268 setting usernames and passwords 268 synchronization options for 85 synchronizing with 79...
- Page 650 troubleshooting File Transfer problems troubleshooting synchronization problems 593 updating information from 90 conduit configuration screen 345 Conduit Settings command 14 conduit shortcuts 357 conduits 88 conference calls 146 conferences 145 Confirm note delete check box 251 confirmation messages 251 confirmation tones 570 conflicting events 168 conformity declaration 618 Connect to setting 547...
- Page 651 Drive Mode and 103 – File Transfer and 99 managing schedules from 172 overwriting information on 90 preinstalled software for 28 removing Palm Desktop software 114 Tungsten™ T5 Handheld synchronization options for 85 synchronizing with 79 troubleshooting File Transfer problems troubleshooting synchronization...
- Page 652 Cut command 72 Cut icon 47 cutting text 71 cycling through calendar views 159 daily events 138 daily schedules 161 daily tasks 226 data 114 See also information data entry caution for 20 defined 66 input area for 19 methods for 50 data services 258 databases 107 Date &...
- Page 653 – tasks 231 description fields 138 deselecting options 25 Desktop overwrites handheld option 90 desktop software See also Palm Desktop software overwriting information in 90 removing old 7 updating handheld from 90 desktop software, installing 28 Details dialog box 494...
- Page 654 95 attachments 335 e-mail 286 files 335 images 335 large messages 336 multiple attachments 340 Palm Desktop software 3 photos 119 web pages 412 drafts 312 drained batteries 587 drawing freehand 196 drawing tools 196 Drive Mode defined 27...
- Page 655 synchronizing multiple 358 synchronizing with client 349 testing 290 upgrading 277 e-mail applications 344 e-mail folders 319 e-mail providers 278 See also ISPs eBooks 30 Edit Accounts option 368 Edit Categories command 229 Edit Categories dialog box 150 Edit Connection dialog box 545 Edit currencies command 453 Edit List dialog box 505 Edit menu 71...
- Page 656 displaying information about 27 dummy card 569 formatting 576 getting applications on 112 inserting 20 limitations 573 moving applications to 96 opening applications on 571 opening files on 572 overview 567 preventing damage to 569 related topics for 577 removing 569 removing applications on 113 renaming 574 saving multimedia files on 179...
- Page 657 Find on Page command 401 finding contacts 126 files 96 information 48 overlapping events 166 firewalls 280 flash drive on handheld 75 flow control (connections) 548 Flow Ctl pick list 548 Folder Synchronization Options setting 355 folders 322 Font command 519 font styles 519 –...
- Page 658 disconnecting from HotSync cable 593 do’s and don’ts 578 freeing up space on 109 getting help with 615 getting unexpected results 538 – locking 477 losing 540 maintenance information for 578 naming 257 not making sounds 589 not responding 541 opening 587 protecting 256 recharging battery 4...
- Page 659 20 installation CD 2 installation prerequisites 111 installing additional software 28 applications 28 Palm Desktop software 3 related topics for 17 instant messenger (IM) accounts 122 Int’l button 67 interactive tutorial 7 internal flash drive 75 backing up 100...
- Page 660 synchronizing from 83 IR to a PC/Handheld connection 544 ISP accounts 550 ISPs 255 iTunes transferring songs from CD 208 J2ME files 30 jack (headphone) 20 Java Technologies software 30 JPG files 179 keeping track of expenses 450 key exchange 272 key terms xxii keyboard onscreen types 67...
- Page 661 Mac information creating contacts 135 creating notes 252 creating user profiles 13 described xxi displaying tasks 235 displaying videos 179 entering information 82 handheld system requirements 3 – installing handheld software 7 mobile connections 259 opening calendars 172 synchronizing handheld 87 synchronizing with user profiles 16 transferring MP3 files to handheld 207 troubleshooting problems 586...
- Page 662 Microsoft Exchange accounts 345 Microsoft Internet Explorer See Internet Explorer Microsoft Outlook applications that synchronize 79 transferring into to handheld 77 Microsoft Outlook See Outlook Microsoft Windows systems See Windows information Microsoft Word application 240 Microsoft Word documents 335 Microsoft Word files 26 missing applications 26 missing icons 590 mobile devices 122...
- Page 663 accessing corporate 280 accessing e-mail from 255 closing connections for 553 connecting to 550 corporate e-mail accounts and 279 – creating login scripts for 557 customizing connections for 547 deleting service profiles for 556 dialing in to 544 losing connections to 588 selecting communications protocol for setting IP addresses for 555 setting up connections for 261...
- Page 664 2 transferring info to handheld 77 troubleshooting 585 uninstalling 114 upgrading handhelds and 7 Palm Dialer software. See Dialer application Palm OS applications 33 Palm OS handhelds adding user information to multiple 11 beaming to 173 exchanging memos with 243 Tungsten™...
- Page 665 phone drivers 544 Phone Link Updater application 258 Phone Lookup 68 phone numbers adding speed dial entries for 433 entering 430 getting from contacts 68 organizing emergency 491 redialing 431 sharing 20 temporary storage for 244 phone settings 551 Phone Setup dialog box 258 Phone Setup option 258 phones 272 See also conference calls;...
- Page 666 privacy levels 470 privacy settings applications 49 calendar 154 contacts 136 information 468 memos 243 notes 253 tasks 236 voice memos 396 web pages 422 Private check box 469 – profiles 11 program memory 75 synchronization and 76 viewing contents 599 programs See software;...
- Page 667 109 Graffiti 2 ShortCut strokes 537 information 72 locations 507 mail folders 325 memos 241 notes 251 Palm Desktop software 114 passwords 476 photos 192 playlists 218 private entries 476 Tungsten™ T5 Handheld repeating tasks 231 selection highlight 43...
- Page 668 files 412 information 41 memos 238 notes 245 photos 179 synchronization settings 93 tasks 223 web cookies 422 web pages 413 scheduled sending retry (e-mail) 280 schedules 137 See also appointments; calendar scheduling – appointments 138 auto get mail 300 backup and synchronization 8 events 138 reminders 120...
- Page 669 selection highlight 42 self-help resources 615 Send command 559 Send CR command 559 Send e-mail from Outbox option 354 Send Password command 559 send retry failures 317 Send to Handheld dialog box 97 Send To Handheld droplet 29 Send To palmOne Quick Install command Send User ID command 559 sending e-mail 263...
- Page 670 See also music Sort by date option 195 Sort by name option 195 Sort by option 320 Sort by pick list 250 Sort by type option 195 Sort manually option 195 Sort order option 320 sorting contacts 136 expenses 459 memos 243 notes 250 photos 195...
- Page 671 tab-delimited files 107 tapping application titles 46 arrow icons 25 check boxes 25 command buttons 25 entry boxes 25 menu items 46 problems with 579 screen elements 24 URLs 410 Task Preferences dialog box 224 tasks See also Tasks application adding contact information to 126 adding notes to 223 adding to Tasks list 233...
- Page 672 Undo icon 47 Unfiled category 492 unfreezing handheld 579 uniform resource locators. See URLs uninstalling applications 589 Palm Desktop software 114 unread e-mail messages 159 Unread pick list 320 unrecognized devices 256 unscheduled events 141 unscheduled time slots 168 untimed events 120...
- Page 673 accessing e-mail with 278 adding attachments 341 addressing e-mail 313 backing up mail databases 382 changing default folders 319 changing display options 320 changing e-mail accounts 291 – creating mail folders 324 creating personal signatures 316 deleting accounts 292 deleting e-mail 328 disconnecting from network services displaying account information 356 downloading attachments 335...
- Page 674 entering settings 562 VPN Link 30 VPNs 279 Wait For command 558 Wait For Prompt command 558 waking up handhelds 274 warnings 589 warranty 587 web addresses 398 See also URLs Web browser application saving web pages 413 setting browser options 420 web browsers 420 web pages accessing 398...
- Page 675 transferring to handheld 78 word searches 48 word selection 70 World Clock benefits of 499 changing display for 510 selecting primary location for 525 setting alarms with 153 World Clock icon 27 World Clock, displaying 27 World Wide Web See web pages; web sites Writing area Graffiti 2 input areas 52 writing area 24...
Need help?
Do you have a question about the Tungsten T5 and is the answer not in the manual?
Questions and answers