Table of Contents
Advertisement
Quick Links
Advertisement
Table of Contents
Troubleshooting

Related Manuals for Palm Tungsten T3


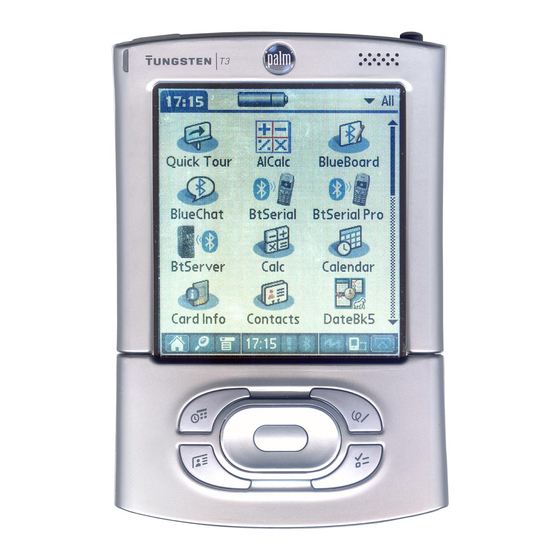
Summary of Contents for Palm Tungsten T3
- Page 1 Handbook for the Palm T u ngsten T3 Handheld...
- Page 2 Palm, Inc. assumes no responsibility for any damage or loss resulting from the use of this handbook. Palm assumes no responsibility for any loss or claims by third parties which may arise through the use of this software. Palm, Inc. assumes no responsibility for any damage or loss caused by deletion of data as a result of malfunction, dead battery, or repairs.
-
Page 3: Table Of Contents
Step 4: Run Palm Setup Wizard ........ - Page 4 Contents Chapter 3: Entering Data on Your Handheld ......21 Using the onscreen keyboards ........21 Using Graffiti Writing in Graffiti 2 input areas .
- Page 5 Removing applications ......... . . 60 Removing Palm™ Desktop software ....... 61 Chapter 5: Using Calendar .
- Page 6 Chapter 8: Using Palm™ Dialer ........
- Page 7 Using phone connections ......... . . 116 Chapter 13: Using Palm™ Photos ....... . 119 Viewing photos .
- Page 8 Setting Tasks Preferences ........145 Chapter 16: Using Palm™ VersaMail™ Personal E-mail Software ..147 VersaMail™...
- Page 9 Options menus ..........235 Chapter 18: Using Palm™ Web Pro ......237 What Web Pro looks like .
- Page 10 Contents Communicating with other users ........246 Sending e-mail .
- Page 11 Chapter 20: Performing HotSync Selecting HotSync setup options ........269 Customizing HotSync application settings .
- Page 12 Contents Color Theme Preferences ......... . . 308 Connection Preferences .
- Page 13 Sounds & Alerts Preferences ........346 System Sound, Game Sound, and Alarm Sound settings .
- Page 14 Contents...
-
Page 15: Chapter 1: Setting Up Your Palm™ Tungsten™ T3 Handheld
Setting Up Your Palm Your new Palm™ Tungsten™ T3 handheld enables you to stay organized and on time by keeping your appointments, contact information, and tasks in one place. You can easily capture your thoughts with the voice recorder and view digital pictures. -
Page 16: Minimum Requirements: Mac Computers
Chapter 1 Setting Up Your Palm™ Tungsten™ T3 Handheld Minimum requirements: Mac computers The minimum requirements for Mac computers are as follows: Mac computer with a PowerPC processor Mac OS 9, version 9.1 or later or Mac OS X, version 10.1.2 through 10.2.6... -
Page 17: Step 1: Connect The Hotsync ® Cradle To The Computer
Step 1: Connect the HotSync Windows NT users cannot use a USB cradle/cable and port. You must IMPORTANT use a cradle with a serial port connection (sold separately). Locate the USB icon and ports on your computer. Plug the USB connector into a USB port on your computer. Connect the adapter cable to the back of the cradle. -
Page 18: Step 3: Set Up Your Handheld
HotSync operation, and registered your handheld. For more information about using Palm Desktop software, see the following: The online help for Palm Desktop software. To access the online help, go to the Help menu in Palm Desktop software. The electronic Palm Desktop Software for the Macintosh User’s Guide. To... -
Page 19: Additional Software
Performing a daily HotSync operation Performing a daily HotSync operation keeps your information current and protects your data. Congratulations! Place your handheld in the cradle and press the HotSync button. Tip: You can also perform a HotSync operation using Bluetooth communication. - Page 20 Chapter 1 Setting Up Your Palm™ Tungsten™ T3 Handheld...
-
Page 21: Chapter 2: Exploring Your Handheld
Your Palm™ Tungsten™ T3 handheld can help you stay organized, on time, and in communication while you are away from your desk. Opening and closing your handheld When your handheld is open, you can access additional controls on the front and back panels. -
Page 22: Locating Front Panel Controls
Chapter 2 Exploring Your Handheld Locating front panel controls Input area Calendar Navigator Application buttons Input area Speaker Screen Speaker Screen Navigator Note Pad Contacts Tasks Application buttons Select and display records on your handheld screen. See “Using the navigator” later in this chapter for additional information, and look for tips throughout this handbook. -
Page 23: Locating Top And Side Panel Components
Locating top and side panel components Expansion card slot Power button Indicator light Headphone jack Microphone Voice Memo button Voice Memo button Microphone Headphone jack Indicator light Power button Expansion card slot Locating top and side panel components Press and hold to record voice memos. An audio input device for applications such as Voice Memo. -
Page 24: Locating Back Panel Components
Enable you to connect optional accessories to your handheld, such as a modem or sled. These accessories are sold separately and are typically available from Palm and third-party developers. “Beaming data” “Resetting your handheld”... -
Page 25: Using The Protective Cover
Universal connector Using the protective cover The cover protects your handheld screen when it is not in use. Center release button Connects your handheld to the cradle, which in turn connects to the back of your computer and through the AC adapter to the wall current. -
Page 26: Adding An Expansion Card
Chapter 2 Exploring Your Handheld Adding an expansion card An expansion card (sold separately) increases the variety of tasks you can do and the amount of space you have for software and data on your handheld. To insert a card: Insert the card into the expansion slot with the label side facing the display. -
Page 27: Elements Of The Handheld Interface
Elements of the handheld interface Like using a mouse to click elements on a computer screen, using the stylus to tap elements on your handheld screen is the basic action you use to get things done on your handheld. The first time you start your handheld, the setup instructions appear on the screen. These instructions include a digitizer screen that aligns the internal circuitry of your handheld with its touch-sensitive screen so that when you tap an element on the screen, the handheld can detect exactly which task you want to perform. - Page 28 Chapter 2 Exploring Your Handheld Check box Menu bar Icons Status bar Previous/next arrows Command button Command buttons Next/previous arrows Scroll bar Tap a check box to select or deselect it. When a check box contains a check mark, the corresponding option is selected and active.
-
Page 29: Displaying Online Tips
Pick list Entry box Displaying online tips Many of the dialog boxes that appear on your handheld contain an online Tips icon in the upper-right corner. Online tips anticipate questions you might have in a dialog box, provide shortcuts for using the dialog box, or give you other useful information. - Page 30 Chapter 2 Exploring Your Handheld To navigate in list screens, do any of the following: Press Up or Down on the navigator to scroll an entire screen of records. Press and hold Up or Down on the navigator to accelerate the scrolling. Press Select in the center of the navigator to insert the selection highlight.
-
Page 31: Using The Status Bar
Using the status bar The status bar gives you access to valuable tools and is accessible in all views. Home Find Menu System information Alert Bluetooth Full-screen Writing Screen rotation Input area Home Find Menu System information Alert Bluetooth Full-screen Writing Screen rotation Tap to display the Home screen. -
Page 32: Changing System Information
Chapter 2 Exploring Your Handheld Input area Changing system information Tap the time icon on the status bar to open the system information dialog box where you can view and change system information. Tap anywhere outside of the dialog box to close it. Using Bluetooth and connecting to the network from the status bar Tap the BlueTooth icon on the status bar to open the Bluetooth dialog box where you can connect to your network service provider and turn on or off your... -
Page 33: Rotating The Screen
Rotating the screen You can toggle between landscape and portrait view by tapping the screen rotation icon. Landscape view is useful for viewing spreadsheets, e-mail, web pages, and photos. You can customize which way the screen rotates in landscape mode by NOTE choosing right- or left-handed rotation. - Page 34 Chapter 2 Exploring Your Handheld...
-
Page 35: Chapter 3: Entering Data On Your Handheld
CHAPTER 3 Entering Data on Your Handheld This chapter explains several ways to enter data on your handheld. Using the onscreen keyboards You can change the input area to display the onscreen keyboard anytime you need to enter text or numbers on your handheld. ®... -
Page 36: Using Graffiti ® 2 Writing
Chapter 3 Entering Data on Your Handheld You can display four different keyboards. ABC - uppercase Tap here to display uppercase keyboard Using Graffiti ® 2 writing Your handheld has Graffiti 2 help that describes the characters and writing procedures for Graffiti 2. This section contains tables of all the Graffiti 2 characters. -
Page 37: Using Full-Screen Writing
The input area has two different Graffiti 2 screens that you can access from the status bar. The two Graffiti 2 screens have designated areas that recognize certain characters. If those characters are written in the wrong area, they are not recognized correctly and an incorrect character is written. -
Page 38: Graffiti 2 Character Set
Chapter 3 Entering Data on Your Handheld Full-screen Writing is turned on and off by tapping the Full-screen Writing button on the status bar. Draw letters on the left side Graffiti 2 character set Graffiti 2 alphabet Draw letters on the abc and ABC writing area Letter Draw capital or uppercase letters in the middle... - Page 39 Draw letters on the abc and ABC writing area Letter Strokes Graffiti 2 numbers Draw numbers on the 123 writing area Number Strokes Letter Strokes Number Strokes Using Graffiti ® 2 writing...
- Page 40 Chapter 3 Entering Data on Your Handheld Punctuation marks Draw these marks on the abc or ABC writing area Mark Period Comma Apostrophe Space Question Exclamation Draw these marks on the 123 writing area Mark Period Comma Tilde Dash — Plus Asterisk Stroke...
- Page 41 Accented characters Draw accents on the 123 writing area Accent Stroke Acute á Grave à Tilde ã Using these accent strokes, you can write the following accented letters: à á â ã ä å è é ê ë ì í î ï ò ó ô õ ö ù ú û ü ÿ ý ñ Symbols and other special characters You can write symbols and other special characters using the Punctuation Shift stroke.
- Page 42 Chapter 3 Entering Data on Your Handheld Enter an additional Punctuation Shift stroke to finish writing the character and to make the character appear more quickly. After the arrow disappears, the symbol appears. Graffiti 2 Gestures Draw gestures on the abc or ABC writing area Gesture Copy Erase...
-
Page 43: Graffiti 2 Shortcuts
For example, you can beam a Contacts entry to a Palm OS equipped with an IR port and that can read vCard data. Records may be truncated when beamed to earlier models of Palm handhelds. NOTE “ShortCuts Preferences”... - Page 44 Palm™ Photos, or Palm™ Web Browser Pro All records of the category currently displayed in Calendar, Contacts, Memos, Note Pad, or Tasks, or all photos in the currently selected in Palm Photos A special Contacts record that you designate as your business card, containing...
-
Page 45: Sending Data
When the Beam Status dialog box appears, point the IR port directly at the IR port of the receiving device. For best results, Palm handhelds should be between 10 centimeters (approximately 4 inches) and 1 meter (approximately 39 inches) apart, and the path between the two handhelds must be clear of obstacles. -
Page 46: Sending Data Using Bluetooth™ Communication
(PIM), such as Microsoft Outlook, to enter information. You can then perform a HotSync operation to synchronize the information on your computer with the information on your handheld. Many of the applications that came with your handheld are also available in Palm Desktop software and in most PIMs, so you ™ communication “Using Bluetooth and connecting to the... -
Page 47: Importing Data
For more information on entering data on your computer, refer to the online Help in Palm Desktop software and the Palm Desktop Software for the Macintosh User’s Guide on the Software Installation CD-ROM. Importing data... -
Page 48: Importing Data From A Mac Computer
Palm Desktop software and on your handheld. For information on how to set up a file link, see the Palm Desktop online Help. Importing data from a Mac computer Palm Desktop software can import data from any applications that can export the... -
Page 49: Using A Portable Keyboard
From the Delimiters pop-up menu, select the appropriate delimiter. Click OK. To add the imported data to your handheld, perform a HotSync operation. See Palm Desktop online Help for more information on importing and exporting data. Using a portable keyboard You can connect a portable keyboard accessory to the universal connector on your handheld so that you can type data directly into your handheld. - Page 50 Chapter 3 Entering Data on Your Handheld...
-
Page 51: Chapter 4: Working With Applications
This chapter explains how to open and switch between applications on your handheld, how to change application settings so they are personalized to your work methods, and how to categorize applications so you view them in related groups. Opening applications You can use the Home screen to open any application installed on your handheld or on expansion card. -
Page 52: Opening Expansion Card Applications
Chapter 4 Working with Applications To open an application on your handheld: Tap the Home icon Tap the icon of the application that you want to open. If you have many applications installed on your handheld, tap the scroll bar to see all your applications. -
Page 53: Categorizing Applications
Categorizing applications You can assign an application to a category and then display a single category or all your applications. By default, your handheld includes system-defined categories, such as All and Unfiled, and user-defined categories, such as Games, Main, and System. In addition, you can create your own user-defined categories. -
Page 54: Selecting Copy Settings
Chapter 4 Working with Applications To copy an application to or from an expansion card: Tap the Home icon Tap the Menu icon Select Copy on the App menu. Tap the Copy From pick list and select Handheld or the card name. If there are multiple cards available, tap the Copy To pick list and select the Handheld or the card name. -
Page 55: Using Menus
Tap Settings. Tap the Sort By pick list and select Name or Size. Tap the Copy Application Only check box to select it if you want to copy only the application files. Leave it deselected if you want to copy both the application file and its associated data file(s). -
Page 56: Graffiti 2 Menu Commands
Chapter 4 Working with Applications In this example, three menus are available: Record, Edit, and Options. The Record menu is selected and shows the selection. Graffiti 2 menu commands Most menu commands have an equivalent Graffiti 2 Command stroke, which is similar to the keyboard shortcuts used to execute commands on computers. -
Page 57: Performing Common Tasks
In SMS, you use a different procedure to create a message. For more information, “Creating messages” In Palm Web Browser Pro, you can either save a web page or bookmark it so you can return to it later. For more information, see To create a record: Select the application in which you want to create a record. -
Page 58: Deleting Records
A confirmation dialog box appears. If you want to save a copy of the deleted item to an archive file in Palm™ Desktop software, be sure that the check box is selected. If you don’t want to save a copy, tap the check box to deselect it. -
Page 59: Categorizing Records
Purging is not available in Contacts, Note Pad, Palm or Memos. You must delete outdated records manually from these applications. In Palm Web Browser Pro, you can purge stored web pages by clearing the cache. “Changing the size and content of the cache”... - Page 60 Chapter 4 Working with Applications To move a record into a category: Select the record you want to categorize. In Contacts only: Tap Edit. Tap Details. Tap the Category pick list to display the list of available categories. Select the category for the record. Tap OK.
-
Page 61: Finding Information
To define a new category: Tap the category pick list in the upper-right corner of the screen or list. Select Edit Categories from the pick list. Tap New. Enter the name of the new category, and then tap OK. In Calendar, you can also select a different color for each category. NOTE Tap OK. - Page 62 Chapter 4 Working with Applications To use Find: Tap the Find icon If you select text in an application before you tap Find, the selected text automatically appears in the Find dialog box. Enter the text that you want to find. Find is not case sensitive.
- Page 63 Press Right on the navigator to move to the next letter box. The Quick Look Up line displays only letters that are a possible match for that position. For example, in the screen shown here, if you enter c in the first box, only the letters a, h, and o appear in the second box.
-
Page 64: Sorting Lists Of Records
Sorting lists of records Sorting is available in applications that have list screens: Contacts, Tasks, Note Pad, Voice Memo, Memos, and Expense. You can also sort photos in Palm Photos. “Creating an album” You can also assign records to categories. See NOTE in this chapter. -
Page 65: Attaching Notes
To sort the Note Pad, Voice Memo, or Memo list manually, tap and drag a note, voice memo, or memo to a new location in the list. To make the list appear in Palm Desktop software as you manually sorted it on your handheld, open the application in Palm Desktop software and click Sort by. -
Page 66: Choosing Fonts
Chapter 4 Working with Applications A small note icon appears at the right side of any item that has a note. To review or edit a note: Tap the Note icon In Calendar, you can also highlight the event that contains the note, press Select on the navigator to open the note, and then press Select on the navigator again to close the note. -
Page 67: Receiving Alerts
Tap the font style you want to use. Tap here for small font Tap OK. Receiving alerts You can receive alerts on your handheld and from Palm Desktop software. You can access Attention Manager by tapping the Alert icon NOTE bar. Receiving alerts on your handheld... -
Page 68: Hiding Or Masking Private Records
Chapter 4 Working with Applications Receiving alerts from Palm Desktop software You can also set an option to receive Calendar event alerts from Palm Desktop software. The feature is disabled by default, so you must enable it within Palm Desktop software. -
Page 69: Installing Applications And Files On A Windows Computer
From My Computer or Windows Explorer, select the file(s) or folder that you want to install. Drag and drop the file(s) or folder onto the Palm Quick Install icon on the Windows desktop. Palm Quick Install displays a confirmation dialog box that shows whether the files will be installed on your handheld or on an expansion card, and you can choose the username to which the files will be installed. - Page 70 Expansion cards may also hold files that are not Palm™ application files. To drag and drop applications or files onto the Palm Quick Install window: Copy or download the application(s) or file(s) you want to install onto your computer.
- Page 71 HotSync operation. If the files still remain in the list, they are not associated with an application on your handheld and cannot be installed. Expansion cards may also hold files that are not Palm application files.
-
Page 72: Palm Quick Install Tips
When you drag and drop a folder, Palm Quick Install looks at files in the first level of subfolders only; it does not look at folders nested inside the subfolders. -
Page 73: Installing Applications And Files On A Mac Computer
To install add-on software on your handheld using a Mac computer: On your Mac computer, copy or download the application you want to install into the Add-on folder in your Palm folder. Double-click the HotSync Manager icon in the Palm From the HotSync menu, select Install Handheld Files. -
Page 74: Removing Applications
This can happen if the file type was not recognized during the HotSync operation. Expansion cards may hold applications that use files other than the Palm application files. For your handheld to recognize such a file, you must first launch the associated application at least once. -
Page 75: Removing Palm™ Desktop Software
Tap Done. Removing Palm ™ Desktop software If you no longer want to use Palm Desktop software, you can remove it from your computer. This process removes only the application files. The data in your Users folder remains untouched. If you remove Palm Desktop software, you also remove the HotSync... - Page 76 Double-click the Palm Desktop Installer icon. From the Easy Install screen, select Uninstall from the pop-up menu. Select the software you want to remove. Click Uninstall. Select the folder that contains your Palm Desktop software files. Click Remove. Restart your computer.
-
Page 77: Chapter 5: Using Calendar
Calendar enables you to quickly and easily schedule appointments or any kind of activity associated with a time and date. You can attach notes to Calendar events and set alarms to remind you when they happen. Certain tasks are common among several handheld applications. For more NOTE information, see Chapter... -
Page 78: Working In Agenda View
Chapter 5 Using Calendar Working in Agenda View The Agenda View shows you your daily appointments and events, Task items in one screen. you can also choose to show messages from your e-mail program. To display the Agenda View: Tap the Agenda View button. Agenda View button Setting Agenda View display options You can customize the Agenda View appearance using the Display Options dialog... -
Page 79: Working In Day View
Working in Day View Day View shows the calendar of your events for an entire day. Day View is the working area of Calendar, where you schedule and remove events, and set alarms. To display the Day View: Tap the Day View button. Day View button Setting Day View display options You can customize the Day View appearance using the Display Options dialog... -
Page 80: Scheduling An Event
Chapter 5 Using Calendar Show Time Bars Show Category Column Scheduling an event When you schedule an event, its description appears on the time line, and its duration is automatically set to one hour. To schedule an event for the current day: Tap the time line that corresponds to the beginning of the event or tap New. - Page 81 Start time highlighted Tap to automatically fill the start and end times Tap to create an untimed event Tap OK. Tap a blank area of the screen to deselect the event. A vertical line appears next to the time, indicating the duration of the event. If two or more events have the same start and end time, the time appears only once.
- Page 82 Chapter 5 Using Calendar – Tap Go To at the bottom of the screen to open the Go to Date dialog box. Select a date by tapping a year, month, and day in the calendar. Previous year After you locate the date, follow the steps for scheduling an event for the current day.
-
Page 83: Scheduling Repeating Or Continuous Events
Scheduling repeating or continuous events The Repeat function enables you to schedule events that recur at regular intervals or that extend over a period of consecutive days. To schedule a repeating or continuous event: Select the event. Tap Details. Tap the Repeat box to open the Change Repeat dialog box. Tap Day, Week, Month, or Year to set how often the event repeats. - Page 84 Chapter 5 Using Calendar To set an alarm for an event: Select the event to which you want to assign an alarm. Tap Details. Tap the Alarm check box to select it. The default setting, 5 Minutes, appears. Tap the pick list to select Minutes, Hours, or Days. Select the 5 and enter any number from 0 to 99 (inclusive) as the number of time units.
-
Page 85: Setting An Event Location
Setting an event location Events can have a location that appears in the Day view and in the Details view. To add an event location: Select an event. Tap Details. Tap Location and enter a location. Tap OK. In Day view, the location appears in parenthesis after the event description. Rescheduling an event You can easily make changes to your schedule with your handheld. -
Page 86: Working In Week View
Chapter 5 Using Calendar Perform one of the following: – To edit a category, select a category and tap Edit. – To create a new category, tap New. The Edit Category dialog box opens. Enter a new name and select a color. Tap OK. -
Page 87: Working In Month View
Tap an event to show a description of the event. Week View button Keep the following points in mind: Tap any day or date that appears at the top of the Week View to move directly to that day without selecting an event. Press Right and Left on the navigator to scroll to the next or previous week. -
Page 88: Setting Month View Display Options
Chapter 5 Using Calendar Keep the following points in mind: Tap a day in Month View to display that day in the Day View. Tap the scroll arrows in the upper-right corner, or press Left or Right on the navigator to move forward or backward a month. Press Select on the navigator to insert the highlight, and then press Left or Right on the navigator to scroll to a specific day. -
Page 89: Working In Year View
Timed Event Untimed Events Daily Repeating Events Working in Year View The Year View screen allows you to view multiple months. To display the Year View: Perform one of the following: – From the Options menu, select Year View. – From the Month View screen, tap the Year Button. Spotting event conflicts With the ability to define specific start and end times for any event, you could schedule events that overlap (an event that starts before a previous event finishes). -
Page 90: Beaming Events
Chapter 5 Using Calendar Beaming events You can share your calendars with family or business associates by beaming events and categories. For more information on beaming, see Chapter To beam an event: Tap the Menu icon Select Beam Event. To beam a category of events: Tap the Menu icon Select Beam Category. -
Page 91: Using Calendar Menus
Using Calendar menus Calendar features that are not explained elsewhere in this book are described here. “Using menus” Record menu Purge Send Event Option menu/Preferences Opens the Preferences dialog box, where you can customize Calendar’s default time display and alarm settings. Start/End Time Alarm Preset Alarm Sound... - Page 92 Chapter 5 Using Calendar...
-
Page 93: Chapter 6: Using Card Info
Card Info enables you to review general information about an expansion card. You can review card contents, rename a card, and format a card. Reviewing Card Information You can view the card name, type, available storage space, and a summary of its contents. -
Page 94: Formatting A Card
Chapter 6 Using Card Info Enter the new name for the card. Tap Rename. Formatting a card Formatting a card destroys all its data and prepares it to accept new applications and data. To format a card: Tap the Home icon Tap the Card Info icon Tap the Menu icon Select Format Card from the Card menu. -
Page 95: Using Card Info Help
Using Card Info help Card Info help is available to explain Card Info features. To access Card Info help: Tap the Home icon Tap the Card Info icon Tap the Menu icon Select Help from the Card menu. Using Card Info help... - Page 96 Chapter 6 Using Card Info...
-
Page 97: Chapter 7: Using Contacts
See chapter for information. Creating a contact You can create contacts on your handheld, or you can use Palm™ Desktop software to create contacts on your computer and then transfer the contacts to your handheld with your next HotSync Chapter “Working with Applications. - Page 98 Chapter 7 Using Contacts To create a new contact: Press the Contacts application button display the Contacts list. Tap New. Tap each field for which you have contact information and enter the information. The features described in the following table help streamline and organize contact data entry.
- Page 99 Field name Feature Birthday To enter contact birthday information, do the following: After you finish entering information, tap Done. To create a contact that always appears at the top of the Contacts list, begin the Last name or Company field with a symbol, as in *If Found Call*. This contact can contain contact information in case you lose your handheld.
-
Page 100: Displaying Additional Contact Fields
Chapter 7 Using Contacts Displaying additional contact fields The Contact Edit screen displays certain fields by default. You can customize the Contact Edit screen to display additional fields that you want. If you display an additional field and leave it blank, the field is not displayed when you return to the Contact Edit screen. - Page 101 To select field types in a contact: Tap the contact that you want to change. Tap Edit. Tap the pick list next to the label you want to change. triangle For phone numbers and e-mail addresses: Select a new label. Select from list For IM accounts: Select the IM service you want to use, or select IM if you do...
-
Page 102: Changing Contact Details
Chapter 7 Using Contacts Changing Contact details The Contact Details dialog box provides a variety of options that you can associate with a contact. To open the Contact Details dialog box: Tap the contact whose details you want to change. You can also use the navigator to open a contact. - Page 103 Quick Connect If you have a compatible GSM mobile phone (sold separately), you can use Quick Connect to select a contact and initiate a related task with one hand, using the navigator. You can also configure which application opens when you choose a specific Contacts record field, and whether to add a prefix to all phone numbers.
- Page 104 Chapter 7 Using Contacts To configure Quick Connect settings: From the Quick Connect dialog box, tap Settings. (Optional) Tap the Number Prefix check box, and then enter a prefix. For example, to dial 1 before all phone numbers, select this check box and enter a “1”...
-
Page 105: Using Contacts Menus
(Optional) Tap the number to edit it. For example, you might want to add an area code, a 1, or a country code to a phone number. Using Contacts menus Contacts menu commands that are not explained elsewhere in this book are described here. - Page 106 Chapter 7 Using Contacts Options menus Preferences Rename Custom Fields About Contacts Opens a dialog box where you can choose Contacts display options. Determines how Contacts appears Remember Last Category. when you return to it from another application. If you select this check box, Contacts shows the last category you selected.
-
Page 107: Chapter 8: Using Palm™ Dialer
Palm™ Dialer is a fast and simple way to use your handheld to dial a telephone number on your mobile phone. The Palm Dialer also allows you to speed-dial frequently called numbers and to log recently called numbers. Your mobile phone plan must be a Global System for Mobile IMPORTANT Communications (GSM) phone in order to use Palm Dialer. -
Page 108: Dialing A Number
Chapter 8 Using Palm™ Dialer Dialing a number Palm Dialer allows you to directly dial a number from your handheld. To dial a number: Tap the telephone number on the keypad. Tap Dial. Redialing the most recently dialed number You can quickly redial the most recently dialed number from the Dialer screen. -
Page 109: Using Speed Dial
Using speed dial Speed dialing allows you to quickly dial ten of your most commonly used numbers. To add a speed-dial entry: Tap Speed. Tap an empty speed-dial button. Enter a name and telephone number. Tap OK. The name appears on the speed-dial button. Tap Done. -
Page 110: Dialing A Number From The Call History List
Chapter 8 Using Palm™ Dialer Dialing a number from the Call History list You can dial a number using the Call History list of 11 of the most recently dialed numbers. To dial a number from the Call History list: Tap History. -
Page 111: Chapter 9: Using Expense
Expense enables you to keep track of your expenses and then transfer the information to a spreadsheet on your computer. Certain tasks are common among several handheld applications. For more NOTE information, see To open Expense: Tap the Home icon Select the Expense icon Adding expense items You can sort your Expense items into categories. -
Page 112: Changing The Date Of An Expense Item
Chapter 9 Using Expense Tap the Expense type pick list and select a type from the list. As soon as you select an expense type, your handheld saves your entry. If you do not select an expense type, it does not save the entry. To attach a note to an entry and work with attached notes, see Chapter Changing the date of an Expense item... -
Page 113: Customizing The Currency Pick List
Select any of the following options: Category Type Payment Currency Vendor and City Attendees Tap OK. Customizing the Currency pick list You can select the currencies and symbols that appear in the Currency pick list. To customize the Currency pick list: Tap the Currency pick list in the Receipt Details dialog box, and then select Edit currencies. -
Page 114: Changing The Default Currency
Chapter 9 Using Expense Tap OK to close the Select Currencies dialog box. Tap OK. Changing the default currency You can select which currency appears by default when you’re entering Expense items. To change your default currency: Open Expense. Tap the Menu icon Select Options, and then select Preferences. -
Page 115: Setting Show Options
After you enter your expenses into the Expense application on your handheld and you perform a HotSync any of the following on your Windows computer. See the Palm Desktop software online help for details. This feature is not available on Mac computers. -
Page 116: Setting The Automatic Fill Preference
Chapter 9 Using Expense Setting the automatic fill preference Automatic fill enables you to select an expense type by writing the first letter of an expense type. For example, if you write the letter T, it enters the “Taxi” expense type. -
Page 117: Chapter 10: Using Memos
Memos provides you with a place to take notes that are not associated with records in Calendar, Contacts, or Tasks. The number of memos you can store depends only on the memory available on your handheld. Certain tasks are common among several handheld applications. For more NOTE information, see To open Memos:... -
Page 118: Reviewing Memos
Chapter 10 Using Memos Reviewing memos The first line of a memo appears in the Memo list. This makes it easy to locate and review your memos. To review a memo: From the Memo list, select the text of the memo. You can also select, review, and move between memos with the navigator. -
Page 119: Chapter 11: Using Note Pad
Note Pad provides a place to take notes in your own handwriting. You can use Note Pad to do everything you might do with a piece of paper and a pencil. Certain tasks are common among several handheld applications. For more NOTE information, see To open Note Pad:... -
Page 120: Reviewing Notes
Chapter 11 Using Note Pad Write the information directly on the handheld screen. Tap the pen selector to select a different pen width, or select the eraser to remove unwanted strokes. (Optional) Select the time at the top of the screen, and then enter a title using ®... -
Page 121: Setting An Alarm For A Note
To set the colors: In the Note Pad list, tap the Menu icon Select Options, and then select Preferences. Tap Color. Tap Pen, and then tap the color of ink you want to use. Tap Paper, and then tap the color of paper you want to use. Tap OK. -
Page 122: Using Note Pad Menus
Chapter 11 Using Note Pad Using Note Pad menus Note Pad features that are not explained elsewhere in this book are described here.See “Using menus” commands. Record menu The Record menu is the same when you’re viewing the Note Pad list and an individual note. -
Page 123: Chapter 12: Using Phone Link
Phone Link helps you configure a connection between your handheld and a compatible mobile phone. You can connect to a compatible mobile phone using any of the following methods: Bluetooth™ technology: Bluetooth mobile phone that is within 10 meters (approximately 30 feet) of your handheld. -
Page 124: Setting Up A Phone Connection
Chapter 12 Using Phone Link Exchange SMS messages: short text messages. See Use Palm™ Dialer to dial numbers on your phone: displayed on your handheld to dial numbers on your GSM mobile phone. See Chapter 8 for more information. A GSM mobile phone, GSM network service, data service, high-speed wireless data service, and an ISP account with a dial-up connection are not included with your handheld. - Page 125 Tap the Model pick list and select your phone model. If your phone model does not appear on the list, either you need to download and install a driver for your phone (see handheld” later in this chapter) or your phone is not supported at this time. Tap Next.
- Page 126 If you need additional information about connecting your phone, refer to the Phone Pairing Handbook at www.palm.com/support When prompted to create a trusted connection, tap Next. Enter a passkey for this connection on your handheld, and then tap OK.
-
Page 127: Configuring Network Service Settings For Your Phone
When the Confirmation dialog box appears, tap Yes. IMPORTANT phone and handheld will not work. Tap Done. The Network Service dialog box appears. Tap Yes, and then follow the instructions in the next section to set up network services for your phone. Configuring network service settings for your phone If you want to use your handheld to connect to the Internet and to send and receive e-mail, you must configure network service settings for your phone. - Page 128 Chapter 12 Using Phone Link Tap the Select your carrier pick list and select your mobile phone carrier. If your mobile phone carrier does not appear on the list, either you need to download and install the settings for your mobile phone carrier (see the phone files on your handheld”...
-
Page 129: Updating The Phone Files On Your Handheld
Bluetooth communication and turn on the Discoverable setting on your handheld. See From the Windows Start menu, select Programs, select Palm Desktop, and then click Phone Link Updater. Follow the instructions on the screen and click Next and Back to navigate between the screens as you do the following: Select your phone’s manufacturer and model. -
Page 130: Using Phone Connections
“Installing files and add-on applications” Perform a HotSync operation. If you need additional information about connecting your phone, refer to the Phone Pairing Handbook for Palm Using phone connections After you update the phone files and configure a link between your handheld and your phone, you are ready to make connections. - Page 131 Activate Bluetooth on your handheld and phone. Make sure your phone is within 10 meters (approximately 30 feet) of your handheld. Launch the application that requires the phone connection. For example, to access the Internet, launch Palm™ Web Browser Pro. Using phone connections...
- Page 132 Chapter 12 Using Phone Link...
-
Page 133: Chapter 13: Using Palm™ Photos
Tap the Photos icon Viewing photos You can use Palm Photos to transfer photos from your computer or receive photos beamed from another device, and then view the photos on your handheld. You can also view photos from an expansion card inserted into your handheld. -
Page 134: Viewing Photos In List View
Chapter 13 Using Palm™ Photos To view photos in Thumbnail view: Tap the Thumbnail icon Thumbnail icon Tap the Album pick list in the upper-right corner, and then select the album you want to view. Tap the thumbnail of the photo you want to view. - Page 135 To view photos in List view: Tap the List icon Tap and drag divider to resize columns List icon Tap the Album pick list in the upper-right corner, and then select the album you want to view. Tap the name of the photo you want to view. Tap anywhere on the screen to return to List view.
-
Page 136: Viewing A Slide Show
Chapter 13 Using Palm™ Photos Viewing a slide show A slide show is a sequential presentation of each of the photos in the current album. The status bar does not display during a slide show. NOTE To view a slide show: Tap the Album pick list in the upper-right corner, and then select the album you want to view. -
Page 137: Rotating Photos
Rotating photos If a photo appears in the wrong orientation, you can rotate the photo. To rotate a photo: Tap the Menu icon Select Photo, and then select Rotate. Tap the photo you want to rotate. Select the new orientation, and then tap Done. Viewing photo information The Photo Details dialog box enables you to view information about a photo and to change the photo name, assign it to an album, add a note about the photo, and... -
Page 138: Creating An Album
Chapter 13 Using Palm™ Photos Creating an album The process for creating a new photo album is identical to the process for creating a new category in your other handheld applications. To create an album: Tap the Album pick list in the upper-right corner. -
Page 139: Copying Photos
Tap Organize. Plus signs appear next to the photos that are part of the selected album. Tap any photos you want to add to the current album. A plus sign appears next to each photo you select. You can also tap and drag to select adjacent photos. Tap any photos you want to remove from the current album. -
Page 140: Renaming Or Deleting An Album
Chapter 13 Using Palm™ Photos Renaming or deleting an album You can rename or delete any of the albums that you create. You cannot rename or delete the Unfiled album. To rename an album: Tap the Album pick list in the upper-right corner. -
Page 141: Deleting Photos
After you perform a HotSync handheld onto your Windows computer, Palm™ Desktop software enables you to do any of the following on your computer. See the Palm Desktop software online Help for details. View photos in various formats: List, Thumbnails, Details, and Editor with a Handheld preview. -
Page 142: Using Palm Photos Menus
Transfer photos to other applications using the Send command or Export command, and import data in popular file formats. For information on working with photos on your Mac computer, open the Palm folder, open the Documentation folder, and double-click the Photo and Audio Readme file. -
Page 143: Chapter 14: Using Sms
SMS enables you to send and receive short text messages using your handheld and a Global System for Mobile Communications (GSM) phone. SMS allows you to receive records associated with other applications, such as Calendar events. You can add such records to the associated application or view the information as a text message. -
Page 144: Using The Navigator In Sms
Chapter 14 Using SMS Using the navigator in SMS You can use the navigator on your handheld to work in SMS. To navigate in SMS list screens: Press Up or Down on the navigator to scroll an entire screen of messages. Press and hold Up or Down to scroll quickly. -
Page 145: Sending And Receiving Messages
Tap the recipient’s name, and then tap Add. To send a message to someone who isn’t in your Contacts list, enter that person’s mobile phone number on the To line. Enter the message text. Connect to your phone. See Tap Send to send the message now, or tap Outbox to send the message later. Tapping Send does not send any of the other messages in your Outbox. -
Page 146: Viewing Messages
Chapter 14 Using SMS Viewing messages SMS stores your messages in five categories: Stores messages downloaded from your phone. Inbox Stores messages waiting to be sent. Outbox Stores messages you deleted. You can restore deleted messages to Trash their original category. Files messages you want to keep. -
Page 147: Working With Draft Messages
To view data messages in your Inbox: Tap the category pick list in the upper-right corner. Tap Inbox. Tap the message you want to view. Tap Yes to add the data to the appropriate application, or tap No to view the raw data. -
Page 148: Adding A Signature To A Message
Chapter 14 Using SMS Edit the message. Tap one of the following: Send Outbox Cancel Adding a signature to a message A signature is text that appears at the end of a message. To define a signature: Tap the Menu icon Tap Options, and then tap Preferences. -
Page 149: Sending Data From Another Application
Sending data from another application Not all applications include a send command. NOTE To send data from another application: Open the record you want to send. Tap the Menu icon Tap Send from the Record menu. (The name of the menu may be different depending on which application you’re sending data from. - Page 150 Chapter 14 Using SMS To view or change SMS Preferences: Tap the Menu icon Tap Options, and then tap Preferences. Change any of the following options: Sort by Show Date Alert Sound Confirm Deleted Message Delete After Transfer Signature Sorts messages in order of one of the following: Alphabetic, Date, Phone Number, and Status.
- Page 151 Tap Details. Change any of the following options: Outgoing SMS message settings may depend on the service offered by NOTE your SMS carrier. Indicates whether messages are deleted from your phone after Leave Messages on you download them to your handheld. To keep messages on your Phone phone after you transfer them to your handheld, select this check box.
-
Page 152: Using Sms Menus
Chapter 14 Using SMS Using SMS menus SMS features that are not explained elsewhere are described here. See menus” Chapter 4 Message menu Send Check Empty Trash Archive Options menu Opens the Phone Lookup dialog box, in which you can select a Phone Lookup mobile phone number where you want to send a message. -
Page 153: Chapter 15: Using Tasks
Tasks is a convenient place to create reminders and prioritize the things you need to do. You can assign a priority level and due date to each task and sort your tasks by due date, priority level, or category. Certain tasks are common among several handheld applications. For more NOTE information, see To open Tasks:... -
Page 154: Setting Priority
Chapter 15 Using Tasks Enter the text of the task. The text can be longer than one line. Tap anywhere onscreen to deselect the task. If no task is currently selected, write in the Graffiti automatically create a new item. Setting priority You can use the priority setting for items to arrange the tasks according to importance or urgency. -
Page 155: Changing Task Details
Changing task details The Tasks Details dialog box enables you to change settings for individual items. To display the Tasks Details dialog box: Tap the text of the item whose details you want to change. You can also select an item with the navigator. See Chapter 2 Tap Details. -
Page 156: Setting An Alarm
Chapter 15 Using Tasks Setting an alarm You can set an alarm before a task is due to remind you to start the task. To set an alarm for a task: Select the task to which you want to assign an alarm. Tap Details. - Page 157 Perform one of the following: – Select a fixed interval from the pick list and tap OK. – Select Daily until. Use the date picker to select an end date and tap OK. – Select Other to open the Change Repeat dialog box and go to step 5. Tap Day, Week, Month, or Year to set how often the task repeats.
-
Page 158: Display Options
Chapter 15 Using Tasks Select Other to open the Change Repeat dialog box. Tap Day, Week, Month, or Year to set how often the task repeats. Tap After Completed. On the Every line, enter a number that corresponds to how often you want the task to repeat. -
Page 159: Setting Tasks Preferences
To use the display filters: Tap filter button. Tap the filter pick list and select the filter type. Date Category Setting Tasks Preferences The Tasks Preferences dialog box enables you to control the which tasks are displayed and how they are sorted. These settings also affect task items displayed in Calendar Agenda view. - Page 160 Chapter 15 Using Tasks Select any of the following settings: Sort by Show Completed Tasks Record Completion Date Show Due Dates Show Priorities Show Categories Alarm Sound Tap OK. Tap the pick list to select the order the tasks display in the Tasks list.
-
Page 161: Chapter 16: Using Palm™ Versamail™ Personal E-Mail Software
With Palm™ VersaMail™ personal e-mail software, you can send, receive, and manage e-mail on your handheld. This chapter describes how to set up different types of e-mail accounts and explains how to use the many e-mail features in the VersaMail application. -
Page 162: Synchronizing An Existing Username
Chapter 16 Using Palm™ VersaMail™ Personal E-mail Software Synchronizing an existing username If you plan to synchronize your Palm Tungsten T3 handheld with an existing username by performing a HotSync operation, you must do so before you enter your e-mail account information in the VersaMail application. If you enter the e- mail account information first and then synchronize your handheld to an existing username, the e-mail account information you entered is overwritten. -
Page 163: Account And Connection Types
Account and connection types Two types of e-mail accounts are supported: You can send and receive e-mail directly to and from your handheld Network: by connecting with an e-mail service provider. Synchronize Only (Windows computers only): manage e-mail between the handheld and a desktop e-mail application, such as Microsoft Outlook, by performing a HotSync operation using the HotSync cradle. - Page 164 Chapter 16 Using Palm™ VersaMail™ Personal E-mail Software You must also have the appropriate prerequisite for the type of connection you want to make, as follows. Connection Type Built-in Bluetooth radio via a mobile phone Built-in Bluetooth radio via a LAN...
- Page 165 Using a corporate e-mail account If you want to access e-mail on your handheld using your corporate e-mail account, you create this account on your handheld in exactly the same way as any other account (see “Creating an e-mail account” exception: for a corporate e-mail account, you may need to set up a virtual private network (VPN).
-
Page 166: Creating An E-Mail Account
Chapter 16 Using Palm™ VersaMail™ Personal E-mail Software You need to set up a VPN to access corporate e-mail in either of the following two situations: Your company’s wireless local area network (LAN) is located outside the firewall. Your company’s wireless LAN is located inside the firewall, but you are trying to access the network from outside the firewall (for example, from a public location or at home). - Page 167 Enter the following: Enter a descriptive name for the account, such as “My Yahoo.” Account Name Tap the Mail Service pick list, and then select the provider to Mail Service which you are connecting. Select Other if your ISP is not listed. Tap the Protocol pick list, and then select POP or IMAP.
- Page 168 Chapter 16 Using Palm™ VersaMail™ Personal E-mail Software To enter the account username and password: Enter the username you use to access your e-mail. This is generally the part of your e-mail address appearing before the @ symbol; it is usually not your entire e-mail address.
- Page 169 Enter the name of your incoming (POP) mail server, such as pop.mail.yahoo.com. If the VersaMail application knows the incoming mail server name based on the mail service you selected, the correct server name is displayed. Enter the name of your outgoing (SMTP) mail server, such as smtp.mail.yahoo.com.
- Page 170 Chapter 16 Using Palm™ VersaMail™ Personal E-mail Software To set mail retrieval server options for a POP or IMAP account: (Optional) Select any of the following: Get unread mail Delete messages on server Leave mail on server (POP account only)
- Page 171 To limit the maximum size of an incoming e-mail message, Maximum Message Size enter the size in kilobytes (KB) for Maximum Message Size. The maximum size of an incoming message is 5KB by default, but you can enter any size up to 2048KB, including attachments.
- Page 172 Chapter 16 Using Palm™ VersaMail™ Personal E-mail Software Tap Next. Adding a signature If you want, you can add a signature to each e-mail message you send. For example, you can enter your name and telephone number so that they appear on each message you send.
- Page 173 Setting advanced outgoing mail options You can set additional outgoing mail options. To set advanced outgoing mail options: (Optional) Select either of the following: The default is 25, the port number most SMTP servers use. If Port Number you are not sure about the correct port number, check with your mail server administrator.
-
Page 174: Editing E-Mail Accounts
Chapter 16 Using Palm™ VersaMail™ Personal E-mail Software Editing e-mail accounts From time to time, you may need to edit information about one of the e-mail accounts you set up. To select the account to edit: Tap the Menu icon Tap the name of the account to edit, and then tap Edit. -
Page 175: Selecting A Different Service For A Given E-Mail Account
Tap Yes in the Delete Account dialog box to delete the account and all associated e-mail messages. Tap OK. After you perform the next HotSync operation, the memory associated with an account and its messages is released. Selecting a different service for a given e-mail account When you set up connections on your handheld (using the Phone Link application on your handheld), you pair each connection with a network service and then select one of these services to be the default for all network activity (sending and... - Page 176 Chapter 16 Using Palm™ VersaMail™ Personal E-mail Software Tap Details. Tap the Always connect using check box. A pick list of available services appears. The currently used connection is displayed by default. Select the connection you want to switch to from the Service pick list.
-
Page 177: Adding Esmtp To An Account
Adding ESMTP to an account Some services require ESMTP authentication to validate your username and password on an SMTP server. If you aren’t sure if your ISP or web e-mail provider supports ESMTP, check with your e-mail provider. To edit an account and add ESMTP: In your Inbox or on another folder screen, tap the Menu icon Select Options. -
Page 178: Troubleshooting Account Access Problems
Chapter 16 Using Palm™ VersaMail™ Personal E-mail Software If you need to enter new information, enter a username and/or tap the Password box and enter a password, and then tap OK. Tap OK. Troubleshooting account access problems Occasionally you may experience problems using an e-mail account after you set it up. - Page 179 To display an account and its Inbox: In your Inbox or on another folder screen, tap the Menu icon Accounts. Tap the name of the account you want from the list. Tap the folders pick list, and then select Inbox if the Inbox is not displayed. Getting e-mail by subject or getting the entire message When you get e-mail messages, you can choose to get the subject only or to get the entire message.
- Page 180 Chapter 16 Using Palm™ VersaMail™ Personal E-mail Software The maximum size of an incoming message is 5KB by default. NOTE (Optional) For IMAP accounts, you have the option of synchronizing IMAP folders from the Get Mail Options dialog box. Wireless IMAP folder...
-
Page 181: Auto Get Mail With Notification
Auto get mail with notification You can set up the VersaMail application to automatically search for new mail on a regular schedule for an e-mail account. The auto get mail feature automatically retrieves new messages and downloads them to your handheld. If auto get downloads any new messages, your handheld notifies you by blinking an indicator light, beeping, or vibrating. - Page 182 Chapter 16 Using Palm™ VersaMail™ Personal E-mail Software Select the Get mail automatically check box. Set schedule options: Interval Start Time End Time Days Tap OK. (Optional) Tap Get Mail. You should perform a manual get mail after setting up a scheduled auto get.
- Page 183 Alternately, if you have configured an e-mail account to synchronize messages between your handheld and your desktop, you can perform a HotSync operation after setting up a scheduled auto get to ensure that only new messages will be retrieved during auto get. See between the handheld and the desktop”...
- Page 184 Chapter 16 Using Palm™ VersaMail™ Personal E-mail Software Setting notification options You can turn the notification sound on or off to notify you when new e-mail arrives. You can choose from a variety of sounds, such as birds, bumble bees, or simply an alarm.
- Page 185 To make your handheld buzz or blink when you get new e-mail: Tap the Home icon Tap the Prefs icon From the General Preferences list, tap Sounds & Alerts. Do any of the following: – To change the volume of the Alarm Sound, tap the Alarm Sound pick list, and then select Low, Medium, High, or Off.
- Page 186 Chapter 16 Using Palm™ VersaMail™ Personal E-mail Software To view the Reminders screen: Tap the blinking asterisk Tap the check box to remove a single reminder from the list The mail icon tells you that this reminder is for an...
- Page 187 Getting, sending, and managing e-mail You can choose to disable notifications for auto get mail failures. See “Setting NOTE notification options” earlier in this chapter for instructions. You can tap the error message or open the VersaMail application for that account for more detailed information on the failed auto get.
- Page 188 Chapter 16 Using Palm™ VersaMail™ Personal E-mail Software Resource issues with auto get mail If you use the auto get mail feature, you should be aware of the following potential resource constraints: Decreased battery life Increased monthly charges To minimize resource concerns, set your interval for e-mail auto get to no more frequently than once per hour.
-
Page 189: Reading E-Mail
Reading e-mail To read e-mail, tap the e-mail message in the Inbox or the folder where the message is located. Alternately, you can use the navigator for one-hand message viewing. To read a message using the navigator: Press Select on the navigator to highlight the first message displayed on the screen, and then press Up or Down to scroll one message at a time to the message you want to read. - Page 190 Chapter 16 Using Palm™ VersaMail™ Personal E-mail Software Plain text and HTML e-mail By default, the VersaMail application is set to receive mail in HTML format. This means that any e-mail messages sent as HTML will be displayed on your handheld...
- Page 191 The display options that you can customize, and the default settings, are as follows: Option Default Sort by Date Sort order Descend Summary view Two-line view Summary view columns Sender, Date, Subject Font Palm 9 Plain Unread message color Black Read message color Black Getting, sending, and managing e-mail Available folders...
- Page 192 Chapter 16 Using Palm™ VersaMail™ Personal E-mail Software To change the sort order: Tap Display. Tap the Sort by pick list, and then select the column name. Tap Descend or Ascend to change the sort order. Tap OK. To select a one-line or two-line view: Tap Display.
- Page 193 To display or hide a column in a folder’s list view: Tap Display. Tap the check box for each column that you want to show. The column options will change depending on whether you choose a one-line or a two-line view. If you select Date, the Date column displays the message time for any NOTE messages received today—that is, any message received after 12:01 A.M.
- Page 194 Chapter 16 Using Palm™ VersaMail™ Personal E-mail Software Tap the Size pick list, and then select the font size you want. Tap the Style pick list, and then select the font style you want. Tap OK. To select colors for read and unread mail: Tap Display.
- Page 195 To change the size of a column in the folder’s list view: Changing column size is available for one-line message view only. NOTE Tap and hold the stylus on the column divider. Drag the column divider to change the width of the column. Tap OK.
- Page 196 Chapter 16 Using Palm™ VersaMail™ Personal E-mail Software Tap the Size pick list, and then select the font size you want. Tap the Style pick list, and then select the font style you want. Tap OK. Moving e-mail between folders You can move one or more e-mail messages between folders.
- Page 197 Tap the message you want to move, press Right on the navigator to open the Message menu, press Down to go to the Move To option, and then press Select to select this option. Alternately, tap the icon to the left of the message, and then tap Move To from the pop-up menu.
- Page 198 Chapter 16 Using Palm™ VersaMail™ Personal E-mail Software To move multiple e-mail messages: Tap the folder that contains the e-mail messages you want to move. Select the messages by tapping to the left of each message icon. To select a group of adjacent messages, drag the stylus to the left of the message icons.
-
Page 199: Creating And Editing Mail Folders
Creating and editing mail folders You can also create new folders so that you can store e-mail messages by subject, person, or project. The VersaMail application has certain existing folders, such as Inbox, Outbox, Drafts, and Trash. The procedure for creating and editing folders varies slightly between POP and IMAP e-mail accounts, as described in the following procedure. -
Page 200: Creating And Sending New E-Mail
Chapter 16 Using Palm™ VersaMail™ Personal E-mail Software – To rename a folder, tap the folder name from the list on the screen, tap Rename, and then enter the new folder name. For IMAP accounts only, select the check box if you also want to rename the folder on the server. When finished, tap OK. - Page 201 When you address a message to several recipients, you do not see all the NOTE recipients on the To list because the list is truncated on the To line. If you tap the To field, a dialog box shows all recipients for the current message. Addressing a message by typing the address You can address a message by entering the complete address.
- Page 202 Chapter 16 Using Palm™ VersaMail™ Personal E-mail Software Alternately, on the New Message screen, tap To and enter the address on the Recipient List screen, and then tap Done. Use the shortcut buttons at the bottom of the screen for quick address entry.
- Page 203 On the Address Lookup screen, tap the address you want, and then tap Add. (Optional) Repeat steps 2 and 3 for each address you want to add. To enter an address in the cc: or bcc: field, tap the field name and follow the steps given for the To field.
- Page 204 Chapter 16 Using Palm™ VersaMail™ Personal E-mail Software Turning Smart Addressing on or off You can turn Smart Addressing on or off in VersaMail Preferences. By default, Smart Addressing is turned on. To turn Smart Addressing on or off in VersaMail Preferences: Tap the Menu icon Tap Advanced.
- Page 205 Tap the area below the Subject line, and then enter the text of your e-mail. To access the editing features available on the Edit menu, tap the Menu icon The first character of each sentence is automatically capitalized for you. (Optional) Tap the Options menu, and then select Add Attachments.
- Page 206 Chapter 16 Using Palm™ VersaMail™ Personal E-mail Software To select automatic send retry: Tap Yes in the dialog box notifying you that manual send has failed. Automatic send retry is not supported for VPN or SSL connections, or for NOTE accounts for which your ISP requires you to log in to the mail server before sending mail.
- Page 207 Modifying messages in the Outbox A message in the Outbox waiting for the next automatic send retry can be edited, moved, or deleted. However, if you edit the message, you will need to perform a manual send in order to send the message. If the manual send fails, you can choose to store the message in the Outbox to await the next automatic send retry.
- Page 208 Chapter 16 Using Palm™ VersaMail™ Personal E-mail Software To create a personal signature: Tap the Menu icon Tap Signature. Tap the Attach Signature check box to select it. Enter your signature information, and then tap OK. Forwarding e-mail You can quickly forward e-mail messages from any folder other than the Outbox folder.
- Page 209 Tap the word To. On the Recipient List screen, enter or look up the recipient address. See the procedure for creating new e-mail earlier in this chapter for more information on addressing messages. (Optional) Enter some text describing the forwarded message. Tap Send to send the message, or tap Outbox to store it in the Outbox.
- Page 210 Chapter 16 Using Palm™ VersaMail™ Personal E-mail Software In the Reply Options dialog box, select options for replying to the sender only or to all e-mail recipients, and for including original message text. Tap OK. Enter a reply. Tap Send to send the message now, or tap Outbox to send it later.
-
Page 211: Working With Urls
Working with URLs You can tap a URL in a received message to view the web page or file associated with the URL. Tapping the URL opens Palm™ Web Browser Pro to view the page or file. You can also tap an embedded e-mail address to open a new message screen with the address in the To field. -
Page 212: Working With Attachments
Chapter 16 Using Palm™ VersaMail™ Personal E-mail Software Depending on whether the received message is displayed in HTML or plain text format, URLs and e-mail addresses appear in slightly different forms, as follows: HTML Plain text Working with attachments You can easily download, view, and send attachments with e-mail messages. - Page 213 You can view and edit the spreadsheet in the same way that you could using the Excel application on your desktop. You can download these files and view them using the Palm™ Graphics files (.jpg, .bmp, .tif, .gif) Photos application on your handheld.
- Page 214 Chapter 16 Using Palm™ VersaMail™ Personal E-mail Software To download an attachment: In the Inbox, tap the message with the attachment. A paper clip icon appears on the message’s icon if the message has an attachment that has been downloaded.
- Page 215 If there is only one viewer registered for the attachment file type, the viewer is shown without a list. Palm OS Tap the name of the attachment you want, and then tap application Install.
- Page 216 Chapter 16 Using Palm™ VersaMail™ Personal E-mail Software Downloading large attachments Downloading and viewing a message with a single attachment that exceeds your maximum message size, or a message with multiple attachments whose total size exceeds your maximum message size, requires some extra steps.
- Page 217 When downloading is complete, the red paper clip icon appears and the More button is no longer displayed. Follow the procedure for viewing an attachment presented earlier in this chapter. To download multiple attachments whose total size exceeds the maximum message size: Tap the red paper clip icon.
- Page 218 Chapter 16 Using Palm™ VersaMail™ Personal E-mail Software On the Attachments screen, select the attachment you want to save, and then tap Save To Card. Tap OK. Repeat steps 3 and 4 for each attachment you want to save. Attaching files from a handheld application You can attach files on your handheld to e-mail messages you send.
- Page 219 To attach a file from a handheld application: Tap the Menu icon , tap Options, and then tap Attachment. Tap the Type pick list, and then select the file type. The VersaMail application displays all file types that reside on your handheld that you are able to attach to an e-mail message.
- Page 220 Chapter 16 Using Palm™ VersaMail™ Personal E-mail Software Repeat steps 2 and 3 for each attachment you want to add, and then tap Done. To delete an attachment from an e-mail message, tap the attached file in the Attachments box, and then tap Delete.
- Page 221 Tap the Type pick list, and then select the file type. The VersaMail application displays all file types that reside on the card. You can select a particular file type, or select All Files to view all files on the card. Tap the file that you want to attach, and then tap Add.
-
Page 222: Deleting Messages
Chapter 16 Using Palm™ VersaMail™ Personal E-mail Software Forwarding an attachment You can include an attachment on any message you forward, up to the maximum message size. To forward a message with an attachment: Tap the folders pick list, and then select the folder that contains the e-mail. - Page 223 Press Down on the navigator to move to the Delete option, and then press Select to delete the message. Alternately, you can tap the message icon next to a selected e-mail message, and then tap Delete, or tap the Tap OK. (Optional) Tap Also delete message(s) on server if you want to delete the messages from the server now.
-
Page 224: Emptying The Trash
Chapter 16 Using Palm™ VersaMail™ Personal E-mail Software If you tap Choose Date, you can select a date from the calendar. Tap Delete. (Optional) Tap Also delete message(s) on server if you want to delete the message from the server now. -
Page 225: Marking Messages As Read Or Unread
To have the trash emptied automatically: Tap the Menu icon Tap Advanced. By default, Auto-Empty Mail from Trash is selected, and the time interval is set at Older Than 1 Week. Tap the pick list, and then select how often you want the e-mail messages automatically emptied from the trash. - Page 226 Chapter 16 Using Palm™ VersaMail™ Personal E-mail Software Tap Mark Read or tap Mark Unread. To mark multiple messages, tap the bullets next to the messages you want, tap the Menu For IMAP accounts only: Tap Handheld to mark the messages as read or unread on your handheld.
-
Page 227: Setting Preferences For Getting And Deleting E-Mail
– Tap Cancel if you want the messages marked during the next HotSync operation or the next time you connect to the server. Because POP servers do not support the read or unread message NOTE feature, the message is in bold or regular typeface for POP accounts on the handheld, but you can’t connect with the server to change the message state. -
Page 228: Adding Or Updating A Contacts Record Directly From A Message
Chapter 16 Using Palm™ VersaMail™ Personal E-mail Software Download Attachments Receive Format Signature Adding or updating a Contacts record directly from a message You can add or update an e-mail address in Contacts directly from the body of a received e-mail message. -
Page 229: Synchronizing E-Mail Between The Handheld And The Desktop
Configuring account settings in HotSync Manager Before synchronizing an e-mail account, you configure the account’s settings in the Palm VersaMail HotSync Conduit. The settings have to be specified only once unless you need to make changes. To start Palm VersaMail HotSync Conduit Click the HotSync Manager icon Select Custom. -
Page 230: Setting Synchronization Options And Account Settings
Chapter 16 Using Palm™ VersaMail™ Personal E-mail Software (Optional) Select the check box Enable Informational Logging if you want the HotSync log to record information, such as errors encountered, about the conduit during a HotSync operation. (Optional) Select the check box Set Selection As Default to make the current settings the default settings for all accounts. - Page 231 Under the account name, click Mail Client Sync Setup. Select the option Check this box to synchronize this mail account when you perform a HotSync operation; otherwise, the account cannot be synchronized. Click the Mail Client pick list and select the desktop e-mail application you will use to synchronize the selected account with your handheld.
- Page 232 Chapter 16 Using Palm™ VersaMail™ Personal E-mail Software Mail Client Microsoft Exchange 5.0 or later Microsoft Outlook 97 or later Microsoft Outlook Express 5.5 or later Action Select a MAPI profile to access the mail server. The conduit displays any existing MAPI profiles in the list. Enter your password for Exchange.
- Page 233 Synchronizing e-mail between the handheld and the desktop Mail Client Action Lotus Notes Enter your Lotus Notes ID and password. Click Browse if you need to locate your Notes ID. If you want to synchronize to a local mail file instead of a server mail file, select the Synchronize to local (replicated) mail file check box.
- Page 234 Chapter 16 Using Palm™ VersaMail™ Personal E-mail Software Mail Client Direct POP connection to server Direct IMAP connection to server Action Select this option to synchronize an account by connecting directly with a POP server. You must enter the information about the server in the VersaMail application on your handheld when you create the e-mail account to access the server.
- Page 235 Mail Client Action If you want to synchronize e-mail for an account that requires ESMTP authentication (for example, Yahoo accounts require ESMTP authentication), you must select the option to use ESMTP on your handheld. See this chapter for details. The conduit does not support SSL for accounts set up as direct POP .
- Page 236 Chapter 16 Using Palm™ VersaMail™ Personal E-mail Software Enter the synchronization options you want: Maximum message size (KB) Days To Synchronize Mail Synchronize unread mail only Download attachments Send e-mail from Outbox Synchronize incoming e-mail Enter the maximum message size from 1 to 2048KB. If the message exceeds the maximum size, the conduit truncates the message.
- Page 237 Synchronizing e-mail between the handheld and the desktop (Optional) If you chose Microsoft Outlook, Microsoft Exchange, Lotus Notes, or Direct IMAP as your mail client, click Folder Synchronization Options. Set folder synchronization options as follows: Click the name of the folder you want. Click in the Synchronize column to the right of the folder name.
- Page 238 Click OK. Click the Save icon Account information screens Two screens in the Palm VersaMail HotSync Conduit provide summary information on your accounts: The Account Overview screen indicates whether the account is active; whether the account has been synchronized and, if so, the last synchronization date; the mail client for this account;...
- Page 239 Click the selected account name. To view the Handheld Settings Overview screen: Under the selected account name, click Handheld Settings. Palm VersaMail HotSync Conduit shortcuts You can use the icons in the toolbar to perform certain tasks quickly, such as saving account configuration settings.
-
Page 240: Synchronizing An Account
Chapter 16 Using Palm™ VersaMail™ Personal E-mail Software Verifying handheld account settings before synchronizing accounts Certain settings you configure on your handheld for an e-mail account must be set correctly for the synchronization process as well. Before configuring an e-mail... - Page 241 (Optional) Select Set Selection As Default to apply the options you selected to all subsequent HotSync operations. Otherwise, the settings apply to the next HotSync operation only. Click OK. Perform a HotSync operation. Synchronizing multiple accounts You can synchronize more than one account during the same HotSync operation. If you want to synchronize both a Microsoft Outlook and a Microsoft Outlook NOTE Express account, you must have Microsoft Outlook set as the default e-mail client on...
-
Page 242: Using Ssl With The Conduit
When you set up an e-mail account, you can choose to use a secure connection (Secure Sockets Layer, or SSL) for sending and receiving e-mail messages. The Palm VersaMail HotSync Conduit supports SSL when synchronizing with an e-mail account only if that account uses one of the following desktop e-mail... -
Page 243: Chapter 17: Using Voice Memo
Voice Memo provides a place for you to record and play back voice memos directly on your handheld. Use your voice memos with alarms as reminder messages and share your voice memos with other people. To open Voice Memo: Press the Voice Memo application button on the side panel of your handheld. Voice Memo opens to display the list of all your voice memos. -
Page 244: Creating A Voice Memo
Chapter 17 Using Voice Memo Creating a voice memo To record a voice memo, you can use the Voice Memo application button or the onscreen controls. To record a voice memo on your handheld: Press and hold the Voice Memo application button IMPORTANT recording. - Page 245 Tap Record. A tone sounds to indicate that recording has started. Record Face your handheld and begin speaking. Tap Pause to stop recording. A tone sounds to indicate that recording has paused. If you use other applications on your handheld while pausing the NOTE recording, press (and release) the Voice Memo application button resume recording later.
-
Page 246: Storing Voice Memos On An Expansion Card
Keep in mind that when you store voice memos on an expansion card, they do not appear in the Voice Memo portion of Palm™ Desktop software after a HotSync operation and are not backed up. So if you give your expansion card to a friend, you do not have another copy of your voice memo(s). - Page 247 To listen to a voice memo: In the Voice Memo list, select the voice memo title. You can also select a voice memo with the navigator. See navigator” Chapter 2 for details. The voice memo begins to play after a few seconds. To start playing immediately, tap Play.
-
Page 248: Setting An Alarm For A Voice Memo
Chapter 17 Using Voice Memo Setting an alarm for a voice memo You can set an alarm for a specific time and date to remind you to follow up on a voice memo. To set an alarm for a voice memo: Select the voice memo to which you want to assign an alarm. -
Page 249: Options Menus
Options menus Preferences Security Details Displays the Voice Memo Preferences dialog box, where you define the sort order for voice memos, the alarm sound, the deletion confirmation setting, and whether to automatically store voice memos on an expansion card if one is present. Displays the Change Security dialog box, where you set a privacy option for all voice memos. - Page 250 Chapter 17 Using Voice Memo...
-
Page 251: Chapter 18: Using Palm™ Web Pro
Palm™ Web Pro is your gateway to the web allowing you to view and save Internet web pages, bookmark web pages, and download files from the Internet. To use Web Pro, you must first configure and establish a connection IMPORTANT with the Internet, such as through a mobile phone. -
Page 252: What Web Pro Looks Like
The rest of the screen displays the content of the web page. You can perform other actions by tapping items in menus. Like in other Palm OS applications, when you select the title bar, it is replaced by the menu bar. For... -
Page 253: Browsing The Web On Your Handheld
To disconnect from the Internet: Tap the Menu icon Tap Disconnect in the Page menu. To connect to the Internet: Tap the Menu icon Select Connect in the Page menu. The Service Connection Progress dialog opens. If the connection is not established, do one of the following: –... -
Page 254: Viewing Different Parts Of A Web Page
Chapter 18 Using Palm™ Web Pro Tap Go. During the short delay while the new page is being downloaded, the title bar displays information about the download process. To visit a web page using the URL Entry field: Tap the URL Entry field at the top of the screen. -
Page 255: Following A Link
Following a link Many web pages contain links, which are text or pictures that when clicked, take you to another web page or to another part of the same page. Like many other web browsers, Web Pro highlights these links by underlining them. To follow a link: Tap the link. -
Page 256: Downloading Files And Pages
Web Pro. Popular file types that Web Pro can download (when native support is present on your handheld) include applications (.prc) and databases (.pdb) for Palm OS software, as well as documents (.doc, .txt, and .pdf), images (.jpeg and .gif), and music files. -
Page 257: Saving A Page
Saving a page You can save a web page to your handheld. To save a web page to your handheld: Open the web page you want to save. Open the menus. Select Save Page from the Page menu. (Optional) Change the page name or category. Tap Save. -
Page 258: Viewing Files On An Expansion Card
Chapter 18 Using Palm™ Web Pro To edit information about a saved page: Open the menus. Select View Saved Pages from the Page menu. Tap the name of the saved page you want to edit. Tap Edit. Edit the information about the saved page: –... -
Page 259: Viewing A File From Another Application
Viewing a file from another application Web Pro also functions as a viewer, enabling you to quickly view certain files while working in other applications. For example, if you read an e-mail message that has an image file attached, tap the image file. If no other application on your handheld is identified to open the image file by default, Web Pro opens so that you can view the image. -
Page 260: Copying And Pasting Text
Chapter 18 Using Palm™ Web Pro To enter a password: Open the web page where you must enter the password. The password field contains the word “Unassigned.” Enter your sign-in name in the appropriate field. Enter your password in the appropriate field and tap OK. -
Page 261: Sending E-Mail
Sending e-mail Some web pages include “mailto” links. You can use these links to send e-mail to others if you use the VersaMail™ application or another application that supports this functionality. For more information on the VersaMail application, see Chapter To send e-mail: Tap a mailto link in a web page. -
Page 262: Bookmarking Your Favorite Pages
Chapter 18 Using Palm™ Web Pro Tap Mail URL. The e-mail application opens. Compose your mail message in the e-mail application. For more information on composing e-mail messages in the VersaMail application, see Tap Send to send the e-mail message now, Outbox to send the e-mail message later, or Cancel. -
Page 263: Editing Information About A Bookmark
To visit a bookmarked page: Do one of the following: – Tap the Bookmark icon – Open the menus, and then select View Bookmarks from the Page menu. Do one of the following: – Tap the name of the bookmarked page you want to visit, and then tap Go. –... -
Page 264: Deleting A Bookmark
Chapter 18 Using Palm™ Web Pro Tap Save. Tap Done. Deleting a bookmark You can delete bookmarks that you no longer want. To delete a bookmark: Press Select on the navigator. Press Up and Down on the navigator to scroll through the list of bookmarks to the bookmark you want to delete. -
Page 265: Viewing A Cached Page
Viewing a cached page Tap a page that appears in the History list next to the cached icon. A dialog box appears, reminding you that you are about to view old content. Do one of the following: – Tap Yes to view the stored version. –... -
Page 266: Changing Display Views
Chapter 18 Using Palm™ Web Pro To change the default size of text: Tap the Menu icon Select Font from the Options menu. Choose font size and check the sample text. When you’re satisfied with your choice, tap OK. Changing display views You can optimize your viewing of a web page on your handheld. -
Page 267: Changing How Images Are Downloaded
Changing how images are downloaded Images in web pages can be very large. If you are accessing the Internet by using a proxy server, you may be able to set options to make web pages download faster by reducing image quality or removing images altogether, or you may choose to have images downloaded so that they appear at their highest quality. -
Page 268: Enabling Or Disabling Autofill
Tap the Home Page box. Enter the URL. To make the page currently displayed in Palm Tungsten T3 your home page, tap Current URL. To select one of the last five home pages you’ve used as your home page, tap the URL pick list and select a URL. -
Page 269: Enabling Or Disabling Cookies
Web Pro supports JavaScript code on web pages. JavaScript is often used on web pages for interactive content. If Web Pro is configured for a Palm-hosted proxy server, JavaScript is enabled by default and can’t be turned off. Enabling or disabling cookies... -
Page 270: Changing The Size And Content Of The Cache
You can change the size of the cache to increase the number of web pages stored, you can choose to clear the cache immediately, or you can choose to clear the cache each time you exit Palm Tungsten T3 so that it starts fresh at the beginning of each session. -
Page 271: Controlling How Web Pro Accesses The Internet
Use one or more of the following options: Clear Cache Clear cache on exit Max. cache size Remember that your handheld has a limited amount of memory. NOTE Choose a cache size that lets you store at least a few pages but still leaves room on your handheld for other data and applications. -
Page 272: Changing Network Preferences
Chapter 18 Using Palm™ Web Pro By default, these options are disabled (that is, there are no checks in the check boxes). Tap OK. Changing Network Preferences Web Pro includes many options you can use to change the way in which you access the network. - Page 273 – To not use a proxy server, tap to remove the checkmark. – To use a proxy server, tap to select it. If you want to use a proxy server other than the default Palm hosted proxy server, enter the appropriate server address and port number.
- Page 274 Chapter 18 Using Palm™ Web Pro...
-
Page 275: Chapter 19: Using World Clock
World Clock enables you to view the current time and date in multiple locations and to set an alarm. To open World Clock: Tap the Home icon Select the World Clock icon You can also open World Clock by tapping the Clock icon upper-left corner of the Graffiti when your handheld is off, you can press Select on the navigator and then tap Go to Clock. -
Page 276: Setting The Primary Location
Chapter 19 Using World Clock When your handheld is off, press Select on the navigator. Your handheld turns on, displays the time, and then turns off after a few seconds. Tap the Home icon Setting the primary location You can use World Clock to select the location, date, and time for the primary location. - Page 277 Tap the arrows to select the current year. Tap to set date Tap the current month. Tap the current date. Tap Done. To set the time: Tap Set Date & Time. Tap the Set Time box. Tap to set time Tap the up or down arrow to change the hour.
-
Page 278: Choosing A Different Primary Location
Chapter 19 Using World Clock Choosing a different primary location If you travel to another location and you want alerts to appear based on local time, you need to change the primary location to update the system time. To change the primary location: Tap the pick list next to the current primary location. - Page 279 To add a location: Tap a Location pick list. Select Edit List. Tap Add. Select a location that is in the same time zone as the city you want to add. Tap OK. (Optional) Tap the Name field and modify the location name. (Optional) Tap the Time Zone box and select a time zone.
-
Page 280: Modifying A Location
Chapter 19 Using World Clock Select the day of the week when daylight saving begins within the selected week. Tap OK. Tap the End box and repeat steps 3 through 8 to select when daylight saving ends. Tap OK. Modifying a location You can edit the location information. -
Page 281: Setting An Alarm
Setting an alarm You can set an alarm to sound during the next 24-hour period. To set an alarm: Tap the box next to the Alarm Tap the time columns to set the hour and minute. Tap OK. When the alarm reminder message appears, do one of the following: Tap OK to permanently dismiss the reminder and return to the current screen. - Page 282 Chapter 19 Using World Clock...
-
Page 283: Chapter 20: Performing Hotsync Operations
If you do not see the HotSync icon, you need to start HotSync Manager: On the Windows desktop, click Start, and then select Programs. Navigate to the Palm Desktop software program group, and select HotSync Manager. Alternatively, you can start the Palm Desktop software, which automatically opens the HotSync Manager. - Page 284 Determines the speed at which data is transferred between your handheld and Palm Desktop software. Try the As Fast As Possible rate first, and adjust downward if you experience problems. This setting allows your handheld to synchronize...
- Page 285 Click OK. To set the HotSync options on a Mac computer: Double-click the HotSync Manager icon in the Palm folder. Click the HotSync Controls tab, and select any of the following options. Activates the transport monitor and prepares your Mac...
-
Page 286: Customizing Hotsync Application Settings
For each application, you can define a set of options that determines how records are handled during synchronization. These options are called a conduit. By default, a HotSync operation synchronizes all files between the handheld and Palm Desktop software. If you are synchronizing data between Microsoft Outlook and your... - Page 287 In general, you should leave the default settings to synchronize all files. The only reason you might want to change these settings is to overwrite data on either your handheld or Palm Desktop software, or to avoid synchronizing a particular type of file because you don’t use it.
-
Page 288: Conducting Cradle/Cable Hotsync Operations
Performing a cradle/cable HotSync operation: Windows computers The first time you synchronize your data, you need to enter user information on Palm Desktop software. After you enter this information and synchronize with your handheld, the HotSync Manager recognizes your handheld and doesn’t ask for this information again. - Page 289 The following steps assume that you have already installed Palm Desktop software. If you have not installed this software, see Wizard” Chapter 1 for instructions. To perform a local HotSync operation on a Windows computer: Place your handheld in the cradle/cable.
-
Page 290: Performing A Direct Hotsync Operation: Mac Computers
Adds a username to your handheld. Creates a folder for the username in the Users folder inside the Palm folder. For example, if you entered Jane Garcia as your user name, a folder named Jane Garcia is created in the Users folder. - Page 291 Place your handheld in the HotSync cradle/cable. Make sure that HotSync Manager is enabled: Double-click the HotSync Manager icon in the Palm folder. Click the HotSync Controls tab, and make sure the Enabled option is selected. Press the HotSync button The HotSync Progress dialog box appears, followed by the Select User dialog box.
-
Page 292: Conducting Ir Hotsync Operations
® In the Select User dialog box, select the user name you entered when you installed the Palm Desktop software, and click OK. The HotSync Progress dialog box reappears, and synchronization begins. Wait for a message on your handheld indicating that the process is complete. - Page 293 Your computer must have an installed infrared driver. If you have an external infrared device attached to your computer, a driver is probably included with the device. Consult the documentation included with the device for information on installing the required driver. Check your computer’s documentation to learn whether the computer supports infrared communication.
-
Page 294: Performing An Ir Hotsync Operation
Position the IR port of your handheld within a couple of inches of the infrared port of your computer. Tap the HotSync icon Operations to start the IR HotSync operation. Tap here to start IR HotSync operation in the Palm folder. Shown with Mac OS X... -
Page 295: Returning To Cradle/Cable Hotsync Operations
To return to local serial cradle/cable HotSync operations on a Mac computer: If necessary, connect the cradle/cable to a serial port on your computer. Double-click the HotSync Manager icon in the Palm folder. In the HotSync Controls tab, select Enabled. -
Page 296: Conducting Modem Hotsync Operations
To perform a modem HotSync operation you need the following: A modem connected to your computer. Palm Desktop software configured for use with the modem. A modem connected to your handheld. A configuration for the kind of modem connection you want to make. - Page 297 In addition, your computer must be on, and it should not be in sleep mode when receiving a call from a remote handheld. Double-click the HotSync Manager icon in the Palm folder. Click the HotSync Controls tab and enable the Transport Monitor, if it is not already enabled.
-
Page 298: Preparing Your Handheld For A Modem Hotsync Operation
Chapter 20 Performing HotSync ® Click the Connection Settings tab. Select the On check box for the modem connection you’re using, and then click Settings. In the Settings dialog box, select Modem as the connection type, if it is not already selected. - Page 299 Tap the pick list below the icon and select a modem configuration. If you need to create a configuration, tap the Menu icon Connection Setup on the Options menu. See Chapter 21 for more information. Tap the Enter phone # field. If you plan to connect to your company’s dial-in server (network modem) instead of connecting to a computer modem, see HotSync operations”...
-
Page 300: Selecting The Conduits For A Modem Hotsync Operation
Chapter 20 Performing HotSync ® Selecting the conduits for a modem HotSync operation The Conduit Setup dialog box on your handheld enables you to define which files and/or applications are synchronized during a modem HotSync operation. You can use these settings to minimize the time required to synchronize data with a modem. -
Page 301: Performing A Modem Hotsync Operation
Bluetooth serial host. Click the HotSync Manager icon Setup. Conducting Bluetooth HotSync operations to dial the Palm Desktop modem and synchronize the “HotSync problems” www.palm.com/support for additional information on in the Windows system tray, and then select... - Page 302 In the HotSync Controls tab, select Enabled. Click the Connection Settings tab, and select the On check box next to bluetooth-pda-sync-port. Close the HotSync Software Setup window. Operations Select the port from the drop-down list in the Palm folder. Shown with Mac OS X...
-
Page 303: Preparing Your Handheld For A Bluetooth Hotsync Operation
Preparing your handheld for a Bluetooth HotSync operation There are a few steps you must perform to prepare your handheld for a Bluetooth HotSync operation. To prepare your handheld for a Bluetooth HotSync operation: Create a trusted pair with your computer. See Chapter 21 Create a connection with your computer. -
Page 304: Conducting Network Hotsync Operations
Everything you need for connecting to your company’s dial-in server (network modem) is included with Palm Desktop software and handheld software. You need to activate the feature, however, on both Palm Desktop software and your handheld. To prepare your Windows computer for a network HotSync operation: Click the HotSync Manager icon From the HotSync Manager menu, select Network. - Page 305 From the HotSync Manager menu, select Setup. Click the Network tab and make sure your user name has a checkmark next to it. If the checkmark is not there, click the check box next to your user name. Click OK. Put your handheld in the cradle/cable, and perform a HotSync operation.
- Page 306 Chapter 20 Performing HotSync ® Tap Select Service. “Network Preferences” NOTE network or Bluetooth connection. Tap Service and select a service. Tap here Tap here Tap Done. Tap the Menu icon From the Options menu, select Conduit Setup. For instructions, see earlier in this chapter.
-
Page 307: Performing A Network Hotsync Operation
Memos archive (*.mpa) Contacts archive (*.aba) Text (*.txt) For information on how to set up a file link, see the Palm Desktop online Help. The File Link feature is not available in Palm Desktop software for Mac. NOTE Creating a user profile... - Page 308 Repeat steps 3 through 5 for each profile that you want to create, and then click OK to return to Palm Desktop software. Select the profile from the User list, and create the data for the profile (such as a company phone list).
-
Page 309: Performing The First Hotsync Operation With A User Profile
To create a user profile on a Mac computer: Open Palm Desktop software. From the User pop-up menu, select Edit Users. Click New Profile. Enter a unique name for the profile, and click OK. Close the Users window. From the User pop-up menu, select the new profile. - Page 310 Select the profile you want to load on the handheld, and click OK. Click Yes to transfer all the profile data to the handheld. The next time you perform a HotSync operation, Palm Desktop software prompts you to assign a username to the handheld.
-
Page 311: Chapter 21: Setting Preferences For Your Handheld
Setting Preferences for Your Handheld Preferences are grouped into three categories: General, Communication, and Personal. Use preferences to do the following: Access the General Preferences screens to customize any of the following settings: Set the location, date, and time. Date & Time Calibrate the screen on your handheld. -
Page 312: Accessing Preferences
Chapter 21 Setting Preferences for Your Handheld Access the Personal Preferences screens to customize any of the following settings: Buttons Color Theme Handedness Owner ShortCuts Accessing Preferences The Preferences screen gives you access to the handheld preferences. Preferences for individual applications are discussed in the application chapters. To open the Preferences screens: Tap the Home icon Tap the Prefs icon... -
Page 313: Turning Bluetooth Communication On And Off
Bluetooth devices. When other users search for Bluetooth devices, your Bluetooth device name appears on their screen as a discovered device. If you do not enter a device name, your handheld sends the default name Palm OS handheld. Bluetooth pick list Bluetooth Preferences... -
Page 314: Setting Device Discovery
Chapter 21 Setting Preferences for Your Handheld To assign a Bluetooth name to your handheld: From the Communications Preferences list, select Bluetooth. Tap the Device Name box. Enter a name for your device. Tap OK. Tap Done. Setting device discovery Discovery is the process that Bluetooth devices use to find each other when they are within range of each other. -
Page 315: Allowing Wakeup
Bluetooth On and Discoverable Yes: and the Discoverable setting is set to Yes, you can receive connections from any Bluetooth device. You are automatically connected with devices with which you have previously formed a trusted pair, but you can refuse invitations to connect with unrecognized devices. - Page 316 Chapter 21 Setting Preferences for Your Handheld To enable wakeup: From the Communications Preferences list, select Bluetooth. Tap the Allow Wakeup pick list and select Yes. Tap Done. To enable wakeup during specific hours: From the Communications Preferences list, select Bluetooth. Tap the Allow Wakeup pick list.
-
Page 317: Adding Trusted Devices
Adding trusted devices When you create a trusted pair, you enter an identical secret code on both devices. This secret code is called a passkey. The passkey enables you to create a list of Bluetooth devices from which you automatically accept communication. If a device with a recognized passkey attempts to communicate with your handheld, it bypasses the discovery and authentication process and automatically accepts the communication. - Page 318 Chapter 21 Setting Preferences for Your Handheld Enter the same passkey on your handheld and the trusted device. Some Bluetooth devices have a built-in passkey; others enable you to choose the passkey; see the documentation included with your Bluetooth device for information.
-
Page 319: Enabling/Disabling The User Cache
Using HotSync Manager software: data with your handheld. See Chapter 20 Access the Internet using Palm for details. Connect to a Palm OS handheld or a computer to “Sending data” Connect to your computer to synchronize “Conducting Bluetooth HotSync operations” for details. -
Page 320: Buttons Preferences
Palm handheld. Some third- party applications, however, may not have been upgraded to be compatible with your new Palm handheld. If you suspect that a third-party application is adversely affecting the operation of your handheld, contact the developer of the application. -
Page 321: Pen Button Preferences
Select the application that you want to assign to each button. The default setting for each button is the HotSync setting, which means that the cradle/cable and optional modem accessories perform their normal HotSync functions. Tap OK twice to return to the Buttons Preferences screen. Tap Done. -
Page 322: Color Theme Preferences
Chapter 21 Setting Preferences for Your Handheld Color Theme Preferences The Color Theme Preferences screen enables you to select a different set of pre- defined colors for your handheld screen. To select a color theme: From the Personal Preferences list, select Color Theme. Select a theme. -
Page 323: Editing Connections
You can also create custom configurations, which include the following: Editing connections The following example shows you how to edit the IR to GSM Phone connection to adjust the communication speed; you can similarly edit other connections or settings or create a custom connection. You can use the IR to GSM Phone A connection between your handheld and Phone to Bluetooth: a Bluetooth phone. - Page 324 Tap OK again to save the configuration. After you create the configuration, you need to set up the HotSync Manager of your Palm Desktop software and the HotSync application of your handheld to perform a modem HotSync operation. Tap here...
-
Page 325: Creating Bluetooth Connections
Creating Bluetooth connections You can use the Connection Preferences screen to create connections to the following types of Bluetooth devices: GSM mobile phones (See for information on connecting to other mobile phones.) For Global System for Mobile Communications (GSM) phones, use Phone Link to quickly establish a connection with a Bluetooth GSM phone. - Page 326 Chapter 21 Setting Preferences for Your Handheld Enter a name for the connection, such as BT to LAN. Tap the Connect to pick list and select Local Network. Tap the Via pick list and select Bluetooth. Make sure the network access point is ready to accept a Bluetooth connection. See the documentation included with the network access point device NOTE for information on how to prepare it to accept a Bluetooth connection.
- Page 327 Connecting to non-GSM phones If you have a non-GSM phone enabled with Bluetooth technology, you can connect with the phone from your handheld to access the Internet and use Internet-based applications such as e-mail or a web browser. To access the Internet and use Internet-based applications, you must subscribe to data services from your mobile phone carrier and must also have an Internet access account.
-
Page 328: Date & Time Preferences
Chapter 21 Setting Preferences for Your Handheld Tap the Device box. The discovery process begins, and the discovery screen appears. When the Discovery Results screen appears, select the phone with which you want to connect, and then tap OK. Create a trusted pair with the phone. See this chapter for details. - Page 329 Tap the arrows to select the current year. Tap to set date Tap the current month. Tap the current date. Tap Done. To set the time: From the General Preferences list, select Date & Time. Tap the Set Time box. Tap the up or down arrow to change the hour.
-
Page 330: Digitizer Preferences
Chapter 21 Setting Preferences for Your Handheld Digitizer Preferences You can recalibrate your screen after a hard reset or if your digitizer drifts. You may need to repeat this process a few times until the calibration registers. To calibrate your handheld screen: From the General Preferences list, select Digitizer. -
Page 331: Graffiti 2 Preferences
Time, date, week start, and numbers formats The Time setting defines the format for the time of day. The time format that you select appears in all applications on your handheld. To select the time, date, week start, and numbers format: From the General Preferences list, select Formats Tap the Time pick list and select a format. -
Page 332: Handedness Preferences
Chapter 21 Setting Preferences for Your Handheld Handedness Preferences The Handedness Preferences enables you to select right-hand or left- hand orientation when you rotate the screen into landscape mode. To select a handedness orientation: From the Personal Preferences list, select Handedness. Tap Left-Handed or Right-Handed. -
Page 333: Network Preferences
Palm™ handheld. Some third-party applications, however, may not have been upgraded to be compatible with your new Palm handheld. If you suspect that a third-party application is adversely affecting the operation of your handheld, contact the developer of the application. -
Page 334: Creating And Selecting Network Service Profiles
Chapter 21 Setting Preferences for Your Handheld Creating and selecting network service profiles Use network service profiles to store the configuration settings for your ISP or a dial-in server. You can create, save, and reuse network service profiles. You can create additional network service profiles from scratch or by duplicating existing profiles and editing information. -
Page 335: Entering A User Name
Entering a user name The User Name setting identifies the name you use when you log in to your ISP or your dial-in server. Although this field can contain multiple lines of text, only two lines appear onscreen. To enter a username: From the Communications Preferences list, select Network. -
Page 336: Selecting A Connection
Chapter 21 Setting Preferences for Your Handheld Enter the password you use to log in to your server. Tap OK. The word “Assigned” appears in the Password field. Tap Done. Selecting a connection Use the Connection setting to select the method you want to use to connect to your ISP or to a dial-in server. -
Page 337: Entering A Prefix
To enter your server phone number: From the Communications Preferences list, select Network. Tap the Phone box. Enter the phone number for your ISP or dial-in server. If you need to enter a prefix or to disable Call Waiting, skip to those procedures. Otherwise, tap OK. -
Page 338: Disabling Call Waiting
Chapter 21 Setting Preferences for Your Handheld Disabling Call Waiting Call Waiting can cause your session to terminate if you receive a call while you are connected. If your telephone has Call Waiting, you need to disable this feature before logging in to your ISP or dial-in server. To disable Call Waiting: From the Communications Preferences list, select Network. -
Page 339: Connecting To Your Service
Tap the Use calling card check box to select it. Select this box to use a calling card Enter your calling card number on the Use calling card line. The Phone Setup dialog box works correctly for AT&T and Sprint NOTE long-distance services. -
Page 340: Lan Access Points
Chapter 21 Setting Preferences for Your Handheld LAN access points A LAN access point enabled with Bluetooth™ technology provides an entry point into a local area network. You can log in to these networks from your handheld to access services such as e-mail and the Internet. LAN access points can be located in private, corporate or in public areas. - Page 341 Enter your username and password for your ISP or network service. See “Entering a user name” details. Tap the Connection pick list and select a connection to a Bluetooth GSM phone, a high-speed wireless data network, or a LAN access point for which you have already created a trusted pair.
- Page 342 Chapter 21 Setting Preferences for Your Handheld Tap Script. Tap End to expand the pick list, and then tap Send. In the Send field, enter the INIT string provided by your wireless operator. Tap OK. High-speed wireless data network services are not available in all locations. If you pass from an area with coverage into one without coverage, you will lose your network connection with no notice.
-
Page 343: Adding Detailed Information To A Network Service Profile
You can do this only if you have previously created a standard connection with your phone. For instructions on creating a standard connection, see phone connection” Adding detailed information to a network service profile If you are using one of the predefined network service profiles, you probably need to enter only your username, password, and telephone number. -
Page 344: Defining Primary And Secondary Dns
Chapter 21 Setting Preferences for Your Handheld Defining primary and secondary DNS The domain name system (DNS) is a mechanism in the Internet for translating the names of host computers into IP addresses. When you enter a DNS number (or IP address), you are identifying a specific server that handles the translation services. -
Page 345: Adding A Login Script
To enter a permanent IP address: Tap the IP Address check box to deselect it and to display a permanent IP address field below the check box. Tap the space to the left of the first period, and then enter the first section of the IP address. - Page 346 Chapter 21 Setting Preferences for Your Handheld To create a login script: Tap Script. Tap the End pick list. Select the command you want from the Command list. If the command requires additional information, a field appears to the right of it for you to enter the information.
-
Page 347: Deleting A Network Service Profile
Called properly from a login script Able to return control to a login script after it terminates Created with the use of a development environment that supports Palm OS software, such as Metrowerks CodeWarrior for Palm™ Platform For additional information on creating plug-in applications, send e-mail to Palm... -
Page 348: Tcp/Ip Troubleshooting
This information could help someone contact you if you ever lose your handheld and there is sufficient battery power to turn it on. By default the Owner Preferences screen contains the information that you supplied when you installed the Palm Desktop software and set up your handheld. -
Page 349: Phone Preferences
If you use Security Preferences to turn off and lock your handheld with a password, the first three lines that you entered in the Owner Preferences appear the next time you turn on your handheld. See chapter for additional information. To customize the Owner Preferences: From the Personal Preferences list, select Owner. -
Page 350: Power Preferences
Chapter 21 Setting Preferences for Your Handheld To set Phone Preferences: From the Communications Preferences list, select Phone. Tap the Connection pick list. Select the appropriate connection for your phone. If you do not see a connection for your phone, see connection”... -
Page 351: Stay On In Cradle
To set the Auto-off after interval: From the General Preferences list, select Power. Tap the Auto-off after pick list. Select the setting you want to use for the automatic shutoff feature: 30 seconds, 1 minute, 2 minutes, or 3 minutes. Tap Done. -
Page 352: Security Preferences
Chapter 21 Setting Preferences for Your Handheld To change the power-off setting: From the General Preferences list, select Power. Tap the Power off when closed check box to select it. Tap Done. Security Preferences Security Preferences help you prevent unauthorized users from viewing entries that you want to protect. - Page 353 Enter the same password a second time, and then tap OK. Tap Done. Changing or deleting a password Once you define a password for your handheld, you can change or delete it at any time. You must enter the current password before you can change or delete it. To change or delete your password: From the General Preferences list, select Security.
- Page 354 Chapter 21 Setting Preferences for Your Handheld You can set your handheld to lock automatically when any one of the following occurs: When you turn off the power At a time you specify After a period of inactivity you specify To set your handheld to lock when you turn it off: From the General Preferences list, select Security.
- Page 355 To set your handheld to lock after a period of inactivity: From the General Preferences list, select Security. Tap the Auto Lock Handheld box, enter your password, and then tap OK. Select After a preset delay. Enter the inactive period, and then select Minute(s) or Hour(s) from the pick list. Tap OK, and then tap Done.
- Page 356 Chapter 21 Setting Preferences for Your Handheld Recovering from a forgotten password If you forget your password, your handheld will display the password hint, if you entered one, to help you remember the password. If you are still unable to remember the password, you can delete it from your handheld.
- Page 357 To hide all private records: From the General Preferences list, select Security. Tap the Current Privacy pick list, and then select Hide Private Records. Tap Hide Private Records Tap OK to confirm that you want to hide private records. Tap Done. To mask all private records: From the General Preferences list, select Security.
-
Page 358: Shortcuts Preferences
Chapter 21 Setting Preferences for Your Handheld To display all private records: From the General Preferences list, select Security. Tap the Current Privacy pick list, and then select Show Private Records. If you do not have a password, hidden and masked records become visible. If you have a password, the Show Private Records dialog box appears. -
Page 359: Editing Or Delete A Shortcut
are available in any of your handheld applications and are backed up on your computer when you perform a HotSync operation. To create a ShortCut: From the Personal Preferences list, select Shortcuts. Tap New. On the ShortCut name line, enter the letters you want to use to activate the ShortCut. -
Page 360: Sounds & Alerts Preferences
Chapter 21 Setting Preferences for Your Handheld Perform one of the following: – Tap Edit, make the changes you want, and then tap OK. – Tap Delete and then tap Yes. Tap Done. Sounds & Alerts Preferences You can choose from three Sound & Alert profiles: Custom Silent All Off... -
Page 361: Alarm Led And Alarm Vibrate Settings
To set the sound settings: From the General Preferences list, select Sound & Alerts. Tap Custom. Tap the System Sound pick list and select the sound level. IMPORTANT tones associated with the HotSync operation. Tap the Game Sound pick list and select the sound level. Tap the Alarm Sound pick list and select the sound level. - Page 362 Chapter 21 Setting Preferences for Your Handheld Tap the Alarm LED pick list and select On or Off. Tap the Alarm Vibrate pick list and select On or Off. Tap Done.
-
Page 363: Appendix A: Maintaining Your Handheld
This appendix provides information on the following: Caring for your handheld Prolonging battery life Resetting your handheld Caring for your handheld Your handheld is designed to be rugged and reliable and to provide years of trouble-free service. Observe the following general tips when using your handheld: Take care not to scratch the screen of your handheld. -
Page 364: Prolonging Battery Life
Appendix A Maintaining Your Handheld Prolonging battery life Note the following considerations for the battery in your handheld: Under normal conditions your handheld battery should remain charged when you place it in the cradle/cable for just a few minutes each day. You can conserve battery life by doing any of the following: –... -
Page 365: Performing A Soft Reset
While holding the power button, use the tip of your stylus or an unfolded paper clip (or similar object without a sharp tip) to gently press and release the reset button. Wait for the Palm Powered™ logo to appear; then release the power button. “Opening and closing your handheld” Reset button “Opening and closing your handheld”... - Page 366 To restore your data from a Windows computer after a hard reset: Click the HotSync icon the taskbar). You can also click the HotSync command on the Palm™ Desktop software menu bar. From the HotSync Manager menu, select Custom. Select the appropriate username from the list.
- Page 367 Click Macintosh overwrites handheld for each conduit. Changing the HotSync setting from the default affects only the next HotSync operation. Thereafter, the HotSync Actions revert to their default settings. To use a new setting on an ongoing basis, click Make Default. Thereafter, whatever you selected as the default setting is used for HotSync operations.
- Page 368 Appendix A Maintaining Your Handheld...
-
Page 369: Appendix B: Frequently Asked Questions
The readme file located in the folder where you installed the Palm™ Desktop software on your Windows computer or on your installation CD for Mac users The Palm Desktop online Help The Palm Desktop Software for the Macintosh User’s Guide located in the... -
Page 370: Software Installation Problems
Install the latest Windows software updates to your computer. If you are upgrading from an older Palm™ handheld, or non-Palm branded handheld, remove any previous version(s) of Palm desktop software using Add or Remove Programs on the Window’s Control Panel. -
Page 371: Operating Problems
My files didn’t install during a ® HotSync operation. I can’t add more files to the Palm™ Quick Install list. When I add a Zip file to Quick Install, no files appear in the Quick Install list. Operating problems Problem I don’t see anything on my... - Page 372 Appendix B Frequently Asked Questions I get a warning message telling me my handheld memory is full. My handheld keeps turning itself off. My handheld is not making any sounds. My handheld’s indicator light is not blinking when alarms occur. My handheld does not vibrate when alarms occur.
-
Page 373: Tapping And Writing Problems
Tapping and writing problems Problem When I tap the buttons or screen icons, my handheld activates the wrong feature. When I tap the Menu icon nothing happens. I can’t get my handheld to recognize my handwriting. Application problems Problem I tapped the Today button, but it does not show the correct date. - Page 374 HotSync operation, the memos on your handheld still appear in the order defined in the Preferences setting. In other words, the sort settings you use with Palm Desktop software are not transferred to your handheld. If you have two or more events with the same start time, the first event created appears as a gray bar, and any subsequent conflicting events appear as a single red bar.
-
Page 375: Hotsync Problems
Check the Windows system tray to make sure the HotSync Manager is running. If it is not, click Start on the Windows taskbar, and then select Programs. Navigate to the Palm Desktop software program group, and select HotSync Manager. You should also see options”... - Page 376 America Online, that uses the serial port you selected in the Setup dialog box. Make a backup copy of your Palm Desktop data, and then reinstall Palm Desktop software. The 8009 error indicates that the Windows registry is corrupt.
- Page 377 America Online, fax or telephony software, or AppleTalk networking, that uses the serial port you selected in the Connection Settings tab. Make a copy of your Palm folder. Uninstall and then reinstall Palm Desktop software. Turn on your handheld, and tap the Home icon the HotSync icon , and then tap Local.
- Page 378 I can’t perform a Bluetooth™ HotSync operation. If you have performed a HotSync operation successfully but you cannot find the data from your handheld on Palm Desktop software, check to see that you have the correct username selected for viewing data.
- Page 379 Your handheld cannot “wake up” a modem that has an auto-off feature. Make sure the modem is connected properly to your computer and is connected to the incoming phone line. For additional modem HotSync troubleshooting tips, go to www.palm.com/support HotSync problems...
- Page 380 Appendix B Frequently Asked Questions I can’t perform an IR HotSync operation. My handheld displays the message “Waiting for sender” when it’s near my computer ’s infrared port. My handheld appears to freeze when I place it near my computer. On a computer running Windows 98, be sure that the HotSync Manager is running, that Infrared is selected on the HotSync Manager menu, and that the Serial Port for...
-
Page 381: Beaming And Sending Problems
Solution If you are beaming to another Palm handheld, confirm that your handheld and the other handheld are between ten centimeters (approximately 4 inches) and one meter (approximately 39 inches) apart and that the path between the two handhelds is clear of obstacles. - Page 382 If you need additional information about connecting your phone, refer to the Phone Pairing Handbook at www.palm.com/support – Make sure the Connection for your mobile phone is selected in the Connection Preferences screen and the Phone Preferences screen.
-
Page 383: Versamail™ E-Mail Software Problems
™ VersaMail e-mail software problems Problem I am having problems accessing my account. I am having difficulty sending and receiving mail using a synchronize-only account. Solution Occasionally you may experience problems using an e-mail account after you set it up. Be sure to follow the account setup procedures in Chapter 16. -
Page 384: Recharging Problems
Then you can follow these steps to restore your private entries: Use the Palm Desktop software and the cradle/cable or infrared communication to synchronize your data. Tap Forgotten Password in Security to remove the password and delete all private records. -
Page 385: Problems With Incompatible Applications
Problems with incompatible applications Palm, Inc. works with developers of third-party add-on applications to ensure the compatibility of these applications with your new Palm Tungsten T3 handheld. Some third-party applications, however, may not have been upgraded to be compatible with your new Palm handheld. - Page 386 To re-install third-party applications one at time: Open the Backup folder Double-click on one .prc file. The Palm™ Quick Install window opens with the .prc file listed. Click Done. Perform a HotSync operation to install the files. See Operate your handheld and try to replicate problem operations.
-
Page 387: Technical Support
Palm handheld. Some third-party applications, however, may not have been upgraded to be compatible with your new Palm handheld. If you suspect that a third-party application is adversely affecting the operation of your handheld, contact the developer of the application. - Page 388 Appendix B Frequently Asked Questions...
-
Page 389: Product Regulatory Information
Responsible Party: Palm Solutions Group 400 N. McCarthy Boulevard Milpitas, California 95035 United States of America (408) 503-7500 Product Regulatory Information Palm™ Tungsten™ T3 Product Family Tested to Comply With FCC Standards FOR HOME OR OFFICE USE... -
Page 390: Faa Statement
Product Regulatory Information Canadian IC Notice To prevent radio interference to the licensed service, this device is intended to be operated indoors and away from windows to provide maximum shielding. Equipment that is installed outdoors is subject to licensing. Canadian ICES-003 Statement This Class B digital apparatus meets all requirements of the Canadian Interference-Causing Equipment Regulations. - Page 391 Importers Name: Palm Germany GmbH Importers Location: Landsberger Strasse 155, D-80687 Munchen, Germany Type of Equipment: Handheld Computer Model Number: Palm Tungsten T3 Year of Manufacture: 2003 I, the undersigned hereby declare that the equipment specified above conforms to the above...
-
Page 392: Battery Warning
Product Regulatory Information Taiwan Statement Article 14: Unless approved, for any model accredited low power radio frequency electric machinery, any company, trader, or user shall not change the frequency, increase the power, or change the features and functions of the original design. Article 17: Any use of lower power radio frequency electric machinery shall not affect the aviation safety and interfere with legal communications. -
Page 393: Index
Dialer 93 Expense 97 font style 53 installing 54–60 Launcher 37 Memos 103 Note Pad 105 opening 38 Palm Photos 119 Palm VersaMail 147 Phone Link 109 plug-in 333 removing 60 sending data from 135 size in kilobytes 373 SMS 129... - Page 394 Index Auto get mail 167 notification options 170 notifications 169 Reminders screen 171 resource issues 174 scheduling 167 VPN connections 152 Autofill, enabling or disabling 254 Automatic fill, in Expense 102 Automatic sending of messages. See Send re- Auto-off delay 336 Background sending of messages.
- Page 395 Calling card, using in phone settings 285, Card Info 79 Caring for the handheld 349 Categories 132 assigning records to 45–46 beaming 29–31 creating 47 default 39, 45 displaying 46, 92, 359 event color codes 71 for bookmarks 248 for saved pages 244 merging 47 renaming 47 sending 32...
- Page 396 Index Cookies definition 255 enabling or disabling 255 Country default setting 316 Cradle connecting to computer 11 for local HotSync operations 275, 281 viewing data from 337 Creating categories 39, 47 Contacts entries 83–85 currency symbols 100 custom fields in Contacts 92 Expense items 97 expense reports 101 notes for records 51...
- Page 397 Download attachments 174 message size 157 messages from phone 131 Downloading files, all types 242 Drafts creating 185 creating in SMS 133 saving 190, 193 Dragging stylus to activate features 307 using the stylus 13 Editing bookmarks 249 records 43–44 saved pages 244 E-mail adding attachments 204–206...
- Page 398 Index Entering data 21–35 importing from other applications 33–35 problems with 359 using the computer keyboard 32 using the onscreen keyboard 21 Envelope icon 174 Error log 216 ESMTP 150 adding to an account 163 Euro in Expense 99, 100 in Graffiti 2 writing 27 in onscreen keyboard 22 Events, Calendar 63...
- Page 399 sending an INIT string 327–328 service limitations 328 Graffiti 2 alphabet 24 Command stroke 42 designated input areas 23 Full-screen Writing 23 input areas 8, 22 menu commands 42 online Help 307 preferences 317 problems using 359 ShortCuts for entering data 344–346 symbols 27 Graphics pick list 253 GSM phones...
- Page 400 Index online Tips 15 Open URL 239 Quick Install 55 Refresh 245 repeating event 69, 143, 144 Stop 242 Tips 15 USB 3 Web 237 Idle timeout of ISP or server connection 329 Images changing download preferences in Web Pro 253 compression 253 copying from web pages 246 IMAP...
- Page 401 42 command toolbar 42 Edit menu 44 Expense 102 Memos 104, 108 menu bar 14, 41 Note Pad 108 Palm Photos 128 SMS 138 status bar button 17 Voice Memo 234 World Clock 267 Microsoft Exchange 5.0 218 Microsoft Outlook...
- Page 402 119 organizing photos 124–125 photo details 123 rotating photos 123 slide show 122 thumbnail view 119 Palm Quick Install 55–58 PalmModem accessory, prerequisite for connection 150 Paperclip icon 174 Passkeys 112 entering to create a trusted pair with a...
- Page 403 367 overview 109–110 Phone preferences Dialer 93 main handheld preferences 335 SMS 129 Photos See Palm Photos Pick lists 15 Plug-in applications 333 POP accounts, APOP synchronization in 220 POP3 accounts 156 adding an account 153 Ports IR on handheld 29, 278...
- Page 404 Index editing 43 Expense 97 fonts 52 hiding private 338, 342 lost 359 masking private 338 Memos 103 notes for 51–52 number of 373 private 342–344 purging 44 sending 32 sorting 50–51 Tasks 139 unmasking individual 344 Refreshing a web page 245 Reminder lists 53 Reminders screen send retry 192...
- Page 405 Serial cradle/cable 271, 279, 281, 309 port 1, 2, 270, 279, 281, 282, 283, 309 troubleshooting 361, 362, 363, 366, 370 Server deleting messages on 210, 213 Service changing in Web Browser Pro 258 selecting for network 320 templates 320, 333 Settings.
- Page 406 Untimed events 68, 70 Upgrading a MultiMail database 148 beaming 247 changing home page 253 e-mailing 247 entering in Palm Web Browser Pro 239 Entry field 238, 240 truncated 245 URLs in e-mail messages 197 cradle/cable 270, 272, 279, 281, 309...
- Page 407 Voice Memo alarms 234 creating voice memos 230–232 listening to voice memos 232–233 menus 234 opening 229 overview 229 reviewing voice memos 232 VPN, access e-mail 151 Web address See URLs Web page displaying old content 257 list of visited 250 refreshing 245 returning to 241 viewing information about 245...
- Page 408 Index...
Need help?
Do you have a question about the Tungsten T3 and is the answer not in the manual?
Questions and answers