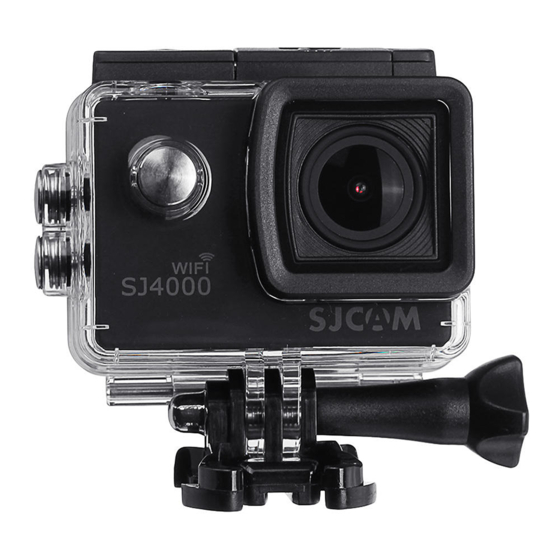
SJCAM SJ4000 User Manual
Hd dv 1.5” lcd screen
Hide thumbs
Also See for SJ4000:
- User manual (77 pages) ,
- Manual (48 pages) ,
- Use and care manual (7 pages)
Summary of Contents for SJCAM SJ4000
- Page 1 SJ4000 HD DV 30FPS 1.5” LCD Screen 1080P Full-HD 1 2 M P User’s Manual SJCAM ©2016 All Rights Reserved...
- Page 2 Having our own factory, controlling the whole production process, and a facility with more than 500 employees, makes us more versatile and able to reach the market fast, ensuring that the highest quality standards are met. It is all about dreams. Dare to join the SJCAM Revolution. -SJCAM CEO...
- Page 3 Congratulations on your new SJCAM Action Camera! We know you re excited to use the SJ4000, please take time to read this Manual before doing anything with it. There s plenty you can do, so you need to familiarize yourself with the features now to get the most out of it.
- Page 4 PARTS OF YOUR CAMERA Mode/Power Button Shutter/Select Button Up/WiFi Button Lens Down Button Opening for Microphone Micro-USB Slot MicroSD Card Slot Mini HDMI Out Port...
- Page 5 Removing the camera from Charging your camera using Charging your battery using the Waterproof Case the MicroUSB cable. an optional external charger. Clasp Release MicroUSB Cable Remove the camera from the Plug the MicroUSB cable to the slot Optionally, remove your battery by waterproof case by sliding the lock on the side of the camera as sliding the lock at the bottom of the...
- Page 6 LEDs will light up, and the into place. To remove, just push it in camera will show as a drive. screen will display the SJCAM logo. gently and the card will eject. Or, transfer data via the app. Turn on Default Mode is Video.
- Page 7 Setup Once the camera is turned on, you can cycle through the Modes The SJ4000 can be used as a Webcam for both (as shown above) by pressing the Power/Mode-select button in front Windows and Mac. Simply plug your camera of the camera repeatedly.
- Page 8 SETUP MENU - Screen 1 of 7 RESOLUTION Changing to a higher resolution will have more detail in your Setup video at the expense of le size. A lower resolution has a smaller lesize > Resolution but will have less details in your video. Conversely, a higher resolution will Loop Recording contain more detail.
- Page 9 SETUP MENU - Screen 2 of 7 VOLUME Adjusts how soft or how loud sound is recorded with your video. Setup > Volume TIME STAMP When enabled, will display the date and time of your recording. TimeStamp TV OUT Enables or disables viewing the screen contents to a TV. TV Out TV Mode TV MODE...
- Page 10 SETUP MENU - Screen 3 of 7 IMAGE SIZE Changes the size of still photos that will be recorded. Of course, Setup the bigger the size the more detailed your pictures are, at the expense of lesize. > Image Size Available only in Photo modes.
- Page 11 SETUP MENU - Screen 4 of 7 EV Exposure Value - Changing EV compensates for the amount Setup of light that is allowed in. You can change this value to a lower setting if the > scene is too bright to compensate, or higher, if it is too dark, but still depends Underwater on your desired e ect.
- Page 12 SETUP MENU - Screen 5 of 7 DATE/TIME Make adjustments to the camera s system date and time. Setup > Date/Time AUTOPOWER OFF Automatically turns the camera o at a preset time. Auto PowerOff Works only if the camera is on standby and not recording. Keypad Tone KEYPAD TONE Beep sound when navigating and selecting items on camera.
- Page 13 SETUP MENU - Screen 6 of 7 Setup LOGO WATERMARK Adds the SJCAM logo at the bottom of your recording. > Logo Watermark WIFI SSID WIFI SSID For changing the WiFi name of your camera. WIFI Password WIFI PASSWORD For changing your camera s WiFi password.
- Page 14 SETUP MENU - Screen 7 of 7 Setup DEFAULT SETTING Restores the camera unit to its factory setting including > Default Setting WiFi Password. Does not erase any data on the memory card. Version VERSION Firmware update version. Please check www.support.sjcamhd.com regularly for newer versions for your camera model.
- Page 15 Included Accessories More accessories available on the sjcamhd.com website, sold separately.
- Page 16 Get the app. Follow Us Download a more detailed version of this manual online. Visit us at www.support.sjcamhd.com...


Need help?
Do you have a question about the SJ4000 and is the answer not in the manual?
Questions and answers