Table of Contents
Advertisement
Advertisement
Table of Contents

Related Manuals for Oregon Scientific Action Cam ATC3K


Summary of Contents for Oregon Scientific Action Cam ATC3K
-
Page 2: Table Of Contents
Review the following pages for technical information, tips and troubleshooting which will allow you to maximize your experience with the ATC3K. PLAY HARD, RECORD EVERYTHING. OREGON SCIENTIFIC and associated trademarks and trade dress are owned by OREGON SCIENTIFIC, Inc. © 2008 OREGON SCIENTIFIC, Inc. All Rights Reserved. Oregon Scientific ATC3K I . -
Page 3: Quick Start
Waterproof Feature The ATC3K camera is waterproof up to 3m (10ft). Oregon Scientific will not assume any responsibility for camera malfunction caused by liquid entering the camera as a result of misuse by the user. - Page 4 Precaution: Follow the steps below to keep the camera waterproof. Step 1: Apply silicon grease (included). Step 2: Ensure both o-rings are attached. Step 3: Replace the cover. Liquid may get inside the camera if the battery cover is not firmly closed •...
-
Page 5: Technical Specifications
• Sensor resolution 640x480 VGA CMOS sensor • Built-in memory 32MB • SD memory card drive supports cards of up to 4GB (not included) • Movie storage: 640 x 480 pixels (30* frames per second) 320 x 240 pixels (30* frames per second) •... -
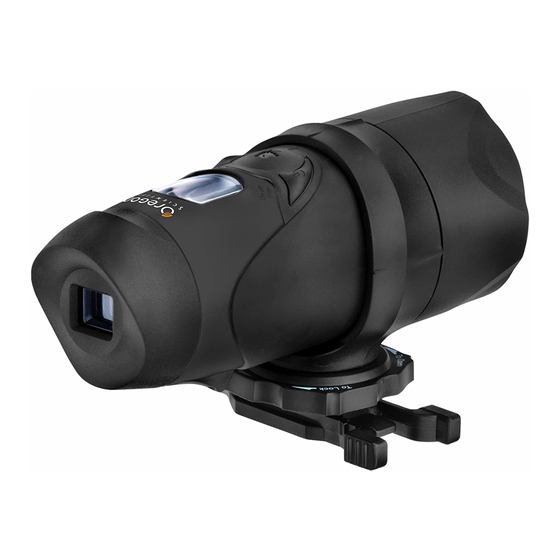
Page 6: Camera Description
1. Lens 2. Camera grip 3. Screw 4. Nut 5. Handlebar grip 6. Helmet grip 7. O-ring 8. USB cable 9. AV cable 10. Rubberized patch 11. Velcro patch 12. Short velcro strap 13. Long velcro strap 14. Silicon rubber head strap 15. -
Page 7: Camera Mounting Description
VI) Camera Mounting Description The camera can be mounted in a number of ways using the straps and the velcro patch provided. Please follow the methods of mounting as suggested below: Fixing the position of the camera a) With the base of the camera facing you, turn the clip clockwise to tighten its position. -
Page 8: Camera Usage
VII) Camera Usage Battery Installation Use Caution, the edge of the base clip may be sharp. When unscrewing the cover make sure the clip is in the same direction as the lens. Observe the following precautions when unscrewing the cover of the camera: 1. - Page 9 SD card insertion/removal Insert: 1. Turn the ATC3K off 2. Unscrew the cover at the end of the unit. 3. Turn the SD card upside down (connect terminals facing up) then insert it carefully and completely until it clicks in place. 4.
-
Page 10: Menu Settings
VIII) Menu Settings 1. Press and hold the Menu button for 2 seconds (one beeping sound) to start selecting options. 2. You can shift through different shooting modes by pressing the Menu button repeatedly. The LCD will show each mode as you press the Menu button 3. -
Page 11: Resolution
Resolution 640 x 480, 320 x 240 pixels resolution To change the resolution, press the Menu button desired resolution icon is displayed on the LCD screen. Press the 'Confirm' button to confirm your selection. This camera allows you to choose from two video resolutions: 640 x 480 and 320 x 240. -
Page 12: Sound Recording
Sound Recording Once you have entered this mode the icon will keep flashing and “LO” will be shown on screen. “LO” means sound is being recorded during filming. Press Menu (one beeping sound) to switch to “OFF”, which means no sound will be recorded. After “OFF”, it will loop back to “HI”... -
Page 13: Sd Memory Card
Setting the Day When adjusting the day, the “D” will be shown. Press the 'Menu button' to adjust the day. Press the 'Confirm' button after which you would be able to adjust the and proceed to setting the time. Setting the Time When adjusting the hour, the “H”... -
Page 14: Connecting To A Computer
This hardware has not passed Windows Logo testing. Users may install the webcam feature but do so at their own risk. By installing the webcam feature users indemnify Oregon Scientific from any software, hardware or virus problems caused as a result of installation. - Page 15 2. Click “I don't have the disc. Show me other options”. 3. Next select “Browse my computer for driver software (advanced)”. 4. After following step 3 you should select browse, CD drive then click next. 5. When the Windows Security pop up window appears click "Install this software anyway"...
- Page 16 Webcam Installation Guide on Windows XP 6. Congratulations, you can now use the webcam function on your ATC3K. Note: Before installing the software please ensure the CD is in the CD drive. 1. With the USB cable inserted and camera on, select C on the LCD screen. A pop-up window will appear.
- Page 17 Logo Testing to verify its compatibility with Windows XP. Click “Continue Anyway”. 5. A new window will appear, click finish. Your installation of the OS Digital Camera is now complete. Repeat these steps again to install the OS Video Camera and to complete the webcam installation.
- Page 18 2. Select “Display a list of the known drivers for this device so that I can choose a specific driver”. 3. On the next window select “Other devices” then click next. 4. On the next window click “have disk” then select the CD drive. 5.
- Page 19 6. Ensure the path name is correct then click OK. 7. Select "OS Digital Camera" then click next. 8. When the next window appears click Next. 9. At this window click the Yes button.
- Page 20 10. Your hardware is now installed. Click finish. 11. Once you click finish the Video Capture Device will begin installing. Repeat the above steps until that has been installed. 12. When in the Win2000 folder in the CD remember to select OSVid, not OSUsb. 13.
-
Page 21: Webcam Usb Mode
XI) Webcam USB mode 1. To use the Webcam function, whilst the mode is in F, press 'Menu' change the mode to C. Press 'Confirm' to select. Once selected the computer will recognize the camera as a webcam. 2. While in either mode, to change to the other, users must disconnect from their PC and reconnect going through the entire selection procedure again. -
Page 22: Troubleshooting
7. Press the Menu button to move the highlight cursor along the function keys. 8. Press the Confirm button when the desired function key is highlighted. 9. To delete one file, select the Delete-One icon and confirm by pressing the Confirm button 10. -
Page 23: Further Help
1-800-853-8883. Our service representatives will be happy to help you. Please note that the Technical Support Team cannot issue or authorize any RMA's or replacements. For an RMA or replacement please contact our Customer Service Department. Oregon Scientific, Inc. 19861 SW 95th Avenue Tualatin, OR 97062, USA Hotline: 1-800-853-8883 Website: www2.oregonscientific.com...
Need help?
Do you have a question about the Action Cam ATC3K and is the answer not in the manual?
Questions and answers