
Related Manuals for Fantasea Line FG9X


Summary of Contents for Fantasea Line FG9X
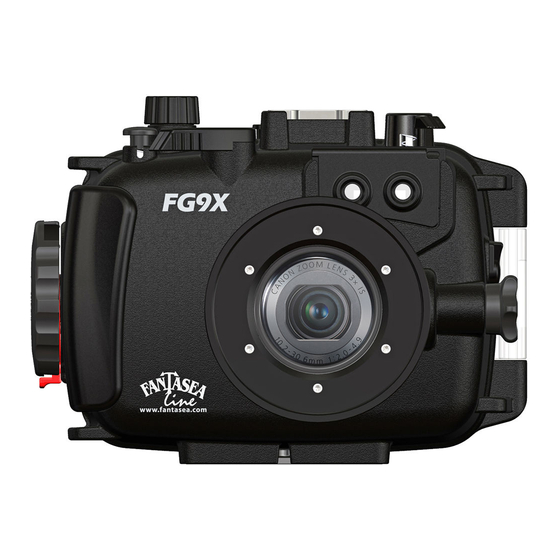
- Page 1 Fantasea Line FG9X Housing (Cat. No. 1397) For Canon PowerShot G9 X Instruction Manual FG9X Housing Instruction Manual 20160409 www.fantasea.com | www.canondive.com...
-
Page 2: Table Of Contents
FANTASEA MOISTURE DETECTOR ......................31 ............................ 32 DENTIFICATION OF ARTS ............................32 ILENCING THE LARM ............................33 EPLACING ATTERIES ..........................34 EPLACING THE LARM CARE & MAINTENANCE .......................... 35 FANTASEA PRODUCT CONSUMER LIMITED WARRANTY ................36 FG9X Housing Instruction Manual 20160409 www.fantasea.com | www.canondive.com... -
Page 3: Disclaimer
While every effort has been made in order to ensure that the information included in this instruction manual is accurate and complete, no liability will be accepted for any errors or omissions. Fantasea Line reserves the right to change product specifications and features described herein at any time without prior notice. -
Page 4: Features & Specifications
Weight of housing with camera underwater (salt water): 74g Dimensions (without accessories): 15.7 x 11.6 x 10.3 cm \ 6.18 x 4.57 x 4.1 inch (W x D x H) Manufacturer’s warranty included FG9X Housing Instruction Manual 20160409 www.fantasea.com | www.canondive.com... -
Page 5: Included In Package
2. Removable flash diffuser 8. O-ring remover 3. Hand lanyard 9. Spare back door O-ring seal 4. Silicone grease 10. Hand strap 5. Anti-glare hood for LCD screen 11. Lens Port Cover 6. Screwdriver FG9X Housing Instruction Manual 20160409 www.fantasea.com | www.canondive.com... -
Page 6: Identification Of Housing Controls & Features
Zoom Lever Mode Dial Flash Push-Down Lever Shutter Release Fiber Optic Cable Plate Mobile Connect Latch Dial (on side) Control Ring Latch Dial Lock Lens Port 3 Tray Mounting Screw Holes (bottom) FG9X Housing Instruction Manual 20160409 www.fantasea.com | www.canondive.com... - Page 7 Always confirm proper shooting mode by referring to the LCD screen (top left corner). 3. Zoom Lever – Turning this control activates the camera zoom button. FG9X Housing Instruction Manual 20160409 www.fantasea.com | www.canondive.com...
- Page 8 If using only one external flash, make sure the second fiber optic cable adaptor remains in its place to block any light coming out of the exposed adaptor hole. FG9X Housing Instruction Manual 20160409 www.fantasea.com | www.canondive.com...
- Page 9 11. Latch Lock (red lever) – This lock ensures the housing’s locking mechanism doesn’t accidently open during the dive. For further instructions, please refer to the sections "Opening the Housing” and “Closing the Housing”. FG9X Housing Instruction Manual 20160409 www.fantasea.com | www.canondive.com...
- Page 10 Note that while some shooting modes share the same Quick Set Menu, others feature a different Quick Set Menu and will require separately setting up the menu layout. When entering camera menus, the Quick Set control can be used to confirm selections. FG9X Housing Instruction Manual 20160409 www.fantasea.com | www.canondive.com...
- Page 11 Note that once the camera built-in flash has been popped up, it can only be disabled by using the Flash Push-Down Lever (no. 5) or through camera menus. Turning the Flash Pop-Up control clockwise will not have any effect on the built-in flash. FG9X Housing Instruction Manual 20160409 www.fantasea.com | www.canondive.com...
- Page 12 20. Playback – Pushing this control activates the camera Playback button, allowing you to enter the playback mode and to review images or videos stored on the memory card. 21. Power On/Off- Pushing this control activates the camera power switch button and turns the camera on/off. FG9X Housing Instruction Manual 20160409 www.fantasea.com | www.canondive.com...
-
Page 13: Canon Powershot G9 X Digital Camera
10. Convenient control ring and mode dial for intuitive manual adjustment 11. ND (Neutral Density) filter for long exposure times and very wide apertures 12. NFC smartphone linking – Simple connectivity to smartphones via Wi-Fi FG9X Housing Instruction Manual 20160409 www.fantasea.com | www.canondive.com... -
Page 14: Setting Up The Housing
Secure the anti-glare hood to the housing by tying its secure string around the same loop – the lower rectangular loop at the bottom left side of the housing. FG9X Housing Instruction Manual 20160409 www.fantasea.com | www.canondive.com... - Page 15 Flash Pop-Up switch on top of it (figure #5). Note that failure to properly install the anti-glare hood on the top rail might result with inability to rotate the Flash Pop-Up switch on top of the anti-glare hood. Figure #5 FG9X Housing Instruction Manual 20160409 www.fantasea.com | www.canondive.com...
-
Page 16: Opening The Housing
4. Note that when opening the housing for the first time or when opening it after airplane trips, increased resistance might be encountered. Therefore, it is important not to lock the housing and to leave it slightly open when transporting by air. FG9X Housing Instruction Manual 20160409 www.fantasea.com | www.canondive.com... -
Page 17: Checking The O-Ring
If there is any debris present, gently wipe the area with a soft cloth in order to cleanse it. 7. Silicone grease must NOT be applied on the white O-ring featured on the back side of the front door. In addition, this white O-ring shouldn’t be removed unless it’s damaged. FG9X Housing Instruction Manual 20160409 www.fantasea.com | www.canondive.com... -
Page 18: Installing The Camera
INSTALLING THE CAMERA Since the FG9X Housing is specifically designed for the Canon G9 X digital camera, installing the camera in the housing is quite simple. 1. Make sure the camera is turned off. 2. Lift the housing Mode Dial so it doesn’t interfere with camera installation (figure #10). -
Page 19: Closing The Housing
Then firmly press the back door against the forward section of the housing. 4. Turn the latch clockwise until the latch clicks. The small red tab should then be pointed towards the bottom of the housing (figure #15). Figure #14 Figure #15 FG9X Housing Instruction Manual 20160409 www.fantasea.com | www.canondive.com... -
Page 20: Removing The Camera From The Housing
2. When opening the housing, it is important to hold it so the lens port is facing down. This will prevent the camera from slipping out of the housing while being opened. FG9X Housing Instruction Manual 20160409 www.fantasea.com | www.canondive.com... -
Page 21: Using The Camera Built-In Flash
In order to remove the flash diffuser from the housing, gently pull it towards the top left corner of the housing at a 45-degree angle until it snaps out of place. Figure #18 FG9X Housing Instruction Manual 20160409 www.fantasea.com | www.canondive.com... -
Page 22: Touch Screen Controls Friendly Guidelines
TOUCH SCREEN CONTROLS FRIENDLY GUIDELINES The FG9X Housing features 5 silvery Touch-Screen Controls on the back door, designed based on a new touch screen technology. These controls provide access to essential contact points on the right side of the camera LCD touch screen. - Page 23 3. Control Ring –In all manual and semi-manual shooting modes, the Control Ring can be used to adjust exposure settings (such as ISO speed, Exposure Compensation, Shutter Speed and Aperture FG9X Housing Instruction Manual 20160409 www.fantasea.com | www.canondive.com...
- Page 24 White Balance item on the Quick Set Menu. o Note that in Video shooting mode, white balance modes can be scrolled using the Control Ring. FG9X Housing Instruction Manual 20160409 www.fantasea.com | www.canondive.com...
- Page 25 Note that once a new flash mode is selected, it also becomes the default one when entering the Flash Mode item on the Quick Set Menu. FG9X Housing Instruction Manual 20160409 www.fantasea.com | www.canondive.com...
-
Page 26: Optional Accessories
The FG9X Housing can be used with underwater slave flashes. These external flashes feature a slave sensor which triggers the external flash to fire in sync with the internal camera flash. - Page 27 Make sure not to damage the fiber optic cable. It’s recommended to apply some silicone grease on the small o-rings of these adaptors, so they can be installed and removed Figure #24 FG9X Housing Instruction Manual 20160409 www.fantasea.com | www.canondive.com...
-
Page 28: Flash & Video Lighting Sets
FLASH & VIDEO LIGHTING SETS A variety of Fantasea flash and video lighting sets are available for the FG9X Housing, enabling you to further enhance your images and videos. These sets include trays, Flex arms, slave flashes, powerful and sturdy yet stylish video lights, fiber optic cables, focus lights, padded bags and more. -
Page 29: Fg9X Housing Accessory System
FG9X HOUSING ACCESSORY SYSTEM Video Light RedEye & PinkEye Slave Flash Color Correction Filters FG9X Housing Flex Arm Flex Arm EyeGrabber Flex Arm Lens Holder SharpEye BigEye Macro Lens Wide Angle Lens Blue Ray Tray FG9X Housing Instruction Manual 20160409 www.fantasea.com | www.canondive.com... -
Page 30: Housing Hand Grip Strap
HOUSING HAND GRIP STRAP The FG9X Housing features two hand strap loops on the “latch” side of the housing, which enable the attachment of an optional hand grip strap for the housing in order to improve hand grip, especially when using the housing during extreme sports activities. -
Page 31: Fantasea Moisture Detector
The moisture detector is a bonus add-on component and not an integral Note! part of the housing. Accordingly, it is not part of the housing warranty coverage. The moisture detector has no warranty coverage. FG9X Housing Instruction Manual 20160409 www.fantasea.com | www.canondive.com... -
Page 32: Identification Of Parts
(figure #32 on the following page). 3. Expose the white electrical plug under the black tape wrap (figure #33 on the following page). 4. Disconnect the electrical wires plug from the alarm unit socket. FG9X Housing Instruction Manual 20160409 www.fantasea.com | www.canondive.com... -
Page 33: Replacing Batteries
8. To secure the battery and make sure it doesn’t fall out of place, wrap the battery compartment area with a small piece of electrical tape. Be careful not to cover the round cylinder which FG9X Housing Instruction Manual 20160409 www.fantasea.com | www.canondive.com... -
Page 34: Replacing The Alarm Unit
6. You can test the Moisture Detector by placing a wet finger over the moisture sensor unit at the bottom of the housing. Once you have confirmed that the alarm is working, gently dry off the moisture sensor unit. This should silence the alarm. FG9X Housing Instruction Manual 20160409 www.fantasea.com | www.canondive.com... -
Page 35: Care & Maintenance
CARE & MAINTENANCE The Fantasea FG9X Housing requires only a minimum amount of care for safe and reliable performance. The following tips will enable you to get the best results: 1. Always rinse your housing in streaming fresh water and if possible soak the housing in a fresh water tub or rinse tank for about 20 minutes after every dive in order to dissolve the salt water crystals from around the controls and openings of the housing. -
Page 36: Fantasea Product Consumer Limited Warranty
13. Always leave the housing slightly open when transporting by air. 14. Never dive with the Fantasea FG9X Housing to a depth greater than 60 meters/200 feet. 15. It is important to carry out the first dive without the camera inside the housing. Check that the watertight seal has not been affected during transport and long periods of storage.
Need help?
Do you have a question about the FG9X and is the answer not in the manual?
Questions and answers