Table of Contents
Advertisement
Quick Links
Order No. 4461
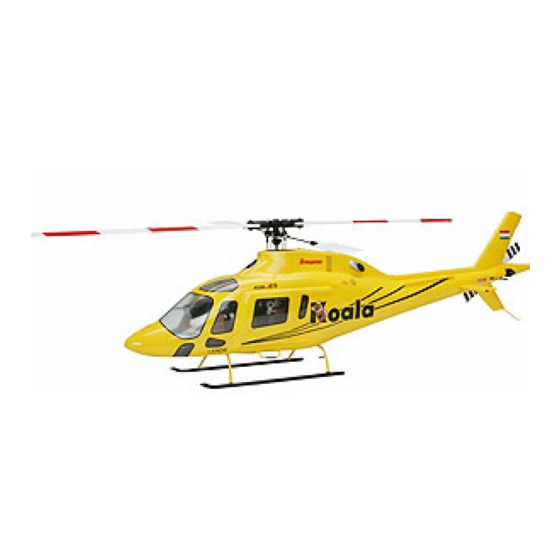
Agusta A119
Koala
Scale fuselage kit for
miniature electric helicopter Micro Star 400
Warning!
The contents of this kit can be assembled to produce a working helicopter, but the model
is by no means a harmless plaything. If assembled incorrectly or handled incompetently
or carelessly it can cause serious injury to persons and damage to property.
You alone are responsible for completing the model correctly and operating it safely. The
kit also includes two further information sheets - SHW 3 and SHW 7 - which include
safety notes and warnings. Please be sure to read them and keep to our recommenda-
tions. They are an essential part of these instructions.
GRAUPNER GmbH & Co. KG D-73230 KIRCHHEIM/TECK GERMANY
Modifications, errors and printing errors reserved.
ID# 53114
10/04
Advertisement
Table of Contents

Subscribe to Our Youtube Channel
Related Manuals for GRAUPNER Agusta A119 Koala


Summary of Contents for GRAUPNER Agusta A119 Koala
- Page 1 Please be sure to read them and keep to our recommenda- tions. They are an essential part of these instructions. GRAUPNER GmbH & Co. KG D-73230 KIRCHHEIM/TECK GERMANY Modifications, errors and printing errors reserved. ID# 53114...
-
Page 2: Foreword
Agusta A119 Koala Foreword The AGUSTA A119 "Koala" is a single-turbine helicopter designed for a wide range of tasks. It is largely based on the familiar twin-engined A109, but is fitted with only one turbine and a robust skid landing gear instead of the fixed or retractable wheeled undercarriage. The capacious cabin provides space for up to seven passengers, 1 tonne of freight or - in the rescue helicopter version - two stretchers. -
Page 3: Warnings
Agusta A119 Koala Warning notes • • • • The contents of this kit can be assembled to produce a working model, but the model is by no means a harmless plaything. If assembled incorrectly or handled incompe- tently or carelessly it can cause serious injury to persons and damage to property. - Page 4 Liability exclusion / Compensation As manufacturers, we at GRAUPNER are not in a position to influence the way you build and set up the model, nor how you install, operate and maintain the radio control system components.
-
Page 5: Table Of Contents
Agusta A119 Koala Contents • Foreword ......... • Warnings ......... • Accessories, extra items required ....... • Building the base plate and landing gear ....• Grundplatte mit Landegestell anfertigen ....• Completing the chassis P.10 ......• Preparing the fuselage shells ...... - Page 6 Agusta A119 Koala Accessories Mechanics and recommended accessories for the AGUSTA A119 Koala Mechanics: MICRO STAR 400 Order No. 4441 Factory-assembled model including motor Order No. 4441.RCU As 4441, plus four servos, speed controller and gyro system Radio control system: see main Graupner catalogue We recommend a radio control system equipped with special helicopter options, or a micro- computer radio control system such as the mc-12, mc-14, mc-15, mc-19, mc / mx-22 or mc-24.
-
Page 7: Building The Base Plate And Landing Gear
Agusta A119 Koala Assembly Preparing the chassis We assume that you have already test-flown your MICRO STAR 400 and set it up correctly. This is important, as access to the components for adjustment and maintenance is greatly restricted when the mechanics are inside the fuselage. - Page 8 Agusta A119 Koala Drill two 2 mm Ø holes in each of the carbon fibre skid tubes, taking care to drill at exactly the same angle: the rear ones should be 22 mm from the end, and the front ones spaced 135 mm from them.
- Page 9 Agusta A119 Koala Measure a point 95 mm from the rear of the original aluminium skid tubes and cut them off at that point; the remaining curved front ends can now be pushed onto the wooden dowels in the carbon fibre skid tubes and glued in place. Align the curved ends so that they are parallel to each other, and check that they form a neat joint with the carbon fibre tubes.
-
Page 10: Completing The Chassis
Agusta A119 Koala Completing the chassis Attach the helicopter chassis (complete with tail boom and boom braces) to the base plate using the four screws with which the original skid landing gear was secured. Attach the speed controller to the underside of the base plate so that the ON / OFF switch is easily accessible when the model is complete. -
Page 11: Preparing The Fuselage Shells
Agusta A119 Koala Preparing the fuselage shells Cut out the vacuum-moulded fuselage shells, working exactly along the marked lines, and sand the cut edges smooth using fine abrasive paper. Using a sharp balsa knife, carefully cut out the rectangular turbine air intakes in the upper part of the fuselage, aft of the main rotor shaft. -
Page 12: Final Trimming Of The Fuselage Shell
Agusta A119 Koala When you are confident that everything lines up correctly and is held securely in place, the rear part of the shells can be glued together in the following areas only: • The top of tail boom along the shaft tunnel, then forward and up to just aft of the main rotor shaft;... -
Page 13: Horizontal Stabilisers
Agusta A119 Koala Slide the tail rotor assembly onto the tail boom again, working from the rear underside, and re- place it in its original position. Trim the opening in the fuselage shell as required to ensure that none of the moving parts fouls the bodywork. -
Page 14: Completing And Painting The Model
Agusta A119 Koala Drill 2 mm Ø holes at the marked points in the tail boom so that the carbon fibre rod can be fitted through them; the rod acts as the horizontal stabiliser joiner and spar. Fit the stabiliser panels on the joiner rod, and check that they are horizontal when viewed from the tail. -
Page 15: General Safety Measures
Agusta A119 Koala General safety measures • Take out adequate third-party insurance cover. • Wherever possible join the local model flying club. At the flying site: • Never fly your model above spectators. • Do not fly models close to buildings or vehicles. - Page 16 Agusta A119 Koala Some basic terms used in model helicopter flying The term "rotary wing machine" indicates that the helicopter’s lift is derived from rotating "wings" which take the form of rotor blades. As a result, a helicopter does not require a minimum for- ward speed in order to fly, i.e.
- Page 17 Agusta A119 Koala this prevents the rotor plane tilting excessively in forward flight. In model helicopters a single hinge shared by both blades has proved an effective solution to the problem. Auto-rotation This term refers to a helicopter flying without motor power. The rotational speed of the main ro- tor can be kept high by setting both blades to negative pitch, and the airflow through the rotor as it descends then keeps the blades turning.
-
Page 18: List Of Parts
Agusta A119 Koala List of parts Part Description Material / dimensions in mm No. off Fuselage shell, right / left Clear plastic, smoked tint 1 each Horizontal stabiliser, bottom shell, Clear plastic, smoked tint 1 each right / left Horizontal stabiliser, top panel,(scrap...
Need help?
Do you have a question about the Agusta A119 Koala and is the answer not in the manual?
Questions and answers