Table of Contents
Advertisement
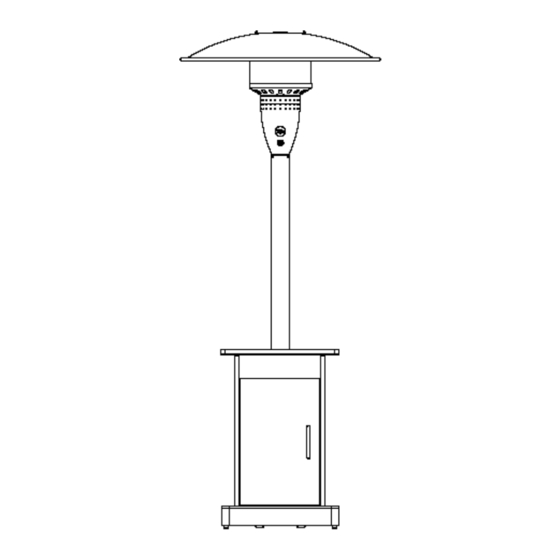
Stainless Steel Patio Heater —L-PH011PSS-2
Propane tank not included
1 AAA battery included
Standard: ANSI Z83.26a-2008/CSA 2.37a-2008, Gas-Fired Outdoor Infrared Patio Heater
Questions, problems, missing parts? Before returning to your retailer, call our customer service
department at 1(866) 578-6569 from 8:30 AM to 5:30 PM EST , Monday-Friday .
Owner's Manual
Warning: For Outdoor Use Only
Warning: For your safety
Chemical known to the State Of California to cause
cancer, birth defects, or other reproductive harm
are created by the Combustion of Propane.
Warning: For your safety.
If you smell gas:
1. Shut off gas to the appliance.
2. Extinguish any open flame.
3. If odor continues, immediately call your gas
supplier or local fire department.
Warning: For your safety
Failure to follow the manual's warning and
instructions can result in severe personal injury,
death, or property damage.
Warning: For your safety
Improper
installation,
services or maintenance can cause injury or
property damage. Read the installation, operation
and maintenance instructions thoroughly before
installing, operating or servicing this equipment.
Warning:
Do not store or use gasoline or
other flammable Vapors and liquids in the vicinity
of this or any other appliance.
An LP-cylinder not connected for use shall not be
stored in the vicinity of this or any other appliance.
1
adjustment,
alteration,
Advertisement
Table of Contents

Related Manuals for Sunjoy L-PH011PSS-2


Summary of Contents for Sunjoy L-PH011PSS-2
- Page 1 Owner’s Manual Stainless Steel Patio Heater —L-PH011PSS-2 Warning: For Outdoor Use Only Warning: For your safety Chemical known to the State Of California to cause cancer, birth defects, or other reproductive harm are created by the Combustion of Propane. Warning: For your safety.
-
Page 2: Table Of Contents
Keep this manual for future reference. Please do not return this product to the store. For technical assistance on assembly or replacement parts call Sunjoy Industries at 1(866) 578-6569 from 8:30 AM to 5:30 PM EST or Email sams@sunjoygroup.com for assistance. -
Page 3: Specification
Max. 150 PSI, Min 5 PSI Introduction Thank you for choosing the Sunjoy Patio Heater as your form of outdoor heating. Please take time to read these instructions thoroughly and follow each step carefully for safe and easy operation. Keep this manual for future reference. Please do not return this product to the store. For technical assistance on assembly or replacement parts call Sunjoy Industries at 1(866) 578-6569 from 8:30 AM to 5:30 PM EST or Email sams@sunjoygroup.com for assistance. -
Page 4: Parts Identification
whenever the cylinder is not in use, only install the type of dust cap on the cylinder valve that is provided with cylinder valve, other types of caps or plugs may result in leakage of propane. 2. Parts Identification 2.1 Tools required: wrench, Magnetic Head Phillips Screwdriver 2.2 Components / Hardware Bag Hardware Bag includes: A Dome... -
Page 5: Assembly Instructions
Base regulator Left shroud Back shroud Rack Weight(wheels are pre-assembled) gas tank protecting wire TIP: Please check above components and hardware before assembling. 3. Assembly Instructions (Please refer to below Diagrams) Step 1. Attach Left and Right Shrouds to Base Align the bolts on the left and right shrouds to the ... -
Page 6: Step 3: Assemble The Door Handle
Step 3. Assemble the door handle Attach the door handle to the door, using 2 Bolts (H3). Insert 2 rubber caps into the holes inside of the door. Q T Y . 2 Step 4. Assemble the Pin Fasten the pin (H10) to the base. -
Page 7: Step 6: Attach The Door To The Base
Step 6. Attach the door to the base Fix the door hinge on the base. Line up the hole at the left bottom of the door with the hinge. Place the door onto the hinge. Line up the hold at the right top of the door with the ... -
Page 8: Step 9: Attach Pole To Top Fence
Step 9. Attach Pole to Top Fence Fix the pole on the top fence with 4 Bolts (H1) , 4 Lock washers (H8). Make sure Pole is perpendicular to Base. QTY. 4 Note: The pole must be perpendicular to Base. Failure to do so will adversely affect burner performance. -
Page 9: Step 12: Attach Dome To Engine
Step 12. Attach Dome to Engine Align holes in Dome with threaded studs on the top of Engine. Secure Dome to Engine with 3 Acorn Nuts (H6). Qty.3 Step 13. Fit cylinder to the shroud Put the cylinder into the shroud, and then block it by the ... -
Page 10: Operation
If the connection is leaking you will see bubbles form. In the case of any leaks, turn off the gas supply, undo the leaking connection, re-connect and try again. If the leak persists consult Sunjoy Industries Customer Service 1 (866) 578 6569 for assistance and advice. -
Page 11: Heat Setting Control
b. Turn the tank valve ON, push control knob in and rotate to PILOT Then push the igniter button until the burner is ignited. If the burner fails to remain lit or becomes extinguished, repeat step b. c. Once the burner has lit, continue to hold the control knob in for 10 seconds, then release. -
Page 12: Maintenance
6. Maintenance To obtain the best performance from your heater make sure you perform the following maintenance activities on a regular basis: Keep exterior surfaces clean. Use warm soapy water for cleaning. Never use flammable or corrosive cleaning agents. Be sure to keep the area around the burner and control assembly dry at all times. -
Page 13: Service
Emitter and dome 8. Service Please do not return this product to the store. For technical assistance on assembly or replacement parts call Sunjoy Industries at 1(866) 578-6569 from 8:30 AM to 5:30 PM EST or Email sams@sunjoygroup.com for assistance. Warning: Use original equipment replacement parts only.
Need help?
Do you have a question about the L-PH011PSS-2 and is the answer not in the manual?
Questions and answers