
Related Manuals for Compak E5 OD


Summary of Contents for Compak E5 OD
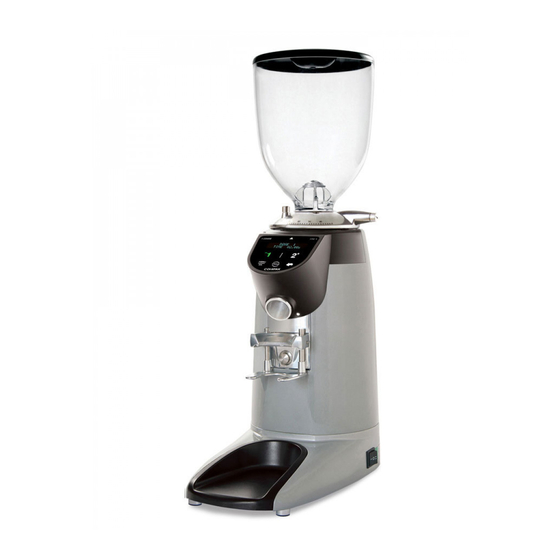
- Page 1 ESSENTIAL ON DEMAND E5 OD E6 OD E8 OD E10 CONIC OD E10 MASTER CONIC OD...
-
Page 2: Table Of Contents
index 1. SAFETY MEASURES 2. DESCRIPTION 3. INSTRUCTIONS 4. IDENTIFICATION 5. TECHNICAL CHARACTERISTICS 6. EXTERNAL COMPONENTS 7. INSTALLATION 8. REGULATION 9. OPERATION 10. CONFIGURATION 11. CLEANING 12. MAINTENANCE 13. EC CONFORMITY... -
Page 3: Safety Measures
1. SAFETY MEASURES NOTE: The manufacturer will not be held responsible for any damages resulting from improper use of the equipment, or for not following the safety measures as outlined below. Safety measures incorporated into our grinders: • Special screw to maintain the hopper fixed in place. •... -
Page 4: Description
SOUND DECIBEL LEVEL The level of sound emitted in different models is: Sound decibel level With coffee E5 OD 65 db E6 OD 65 dB E8 OD 70 dB E10 CONIC OD 68 dB E10 MASTER CONIC OD 68 dB 2. -
Page 5: Instructions
3. INSTRUCTIONS 3.1. This manual is designed to provide the necessary information to correctly install, use and maintain the grinder, as well as to highlight precautions for users to keep in mind. To ensure the best operation of the coffee grinder, please follow the instructions as outlined in this manual. -
Page 6: Technical Characteristics
110 V 220 V 230 V 240 V Model 50 Hz 60 Hz 60 Hz 60 Hz 50 Hz 50 Hz Electrical power E5 OD Spin speed 1.380 1.680 1.700 1.650 1.370 1.390 Electrical power E6 OD Spin speed 1,270... - Page 7 Model E10 CONIC E10 MASTER E5 OD E6 OD E8 OD CONIC OD 2.28 2.65 2.65 Ø Burrs Conic 68 Conic 68 lb/h Production 50Hz* Kg/h 23.5 38.5 38.5 lb/h Production 60Hz* 10,6 17,5 17,5 Kg/h Dose time 50Hz 2.70 1.92...
-
Page 8: External Components
6. EXTERNAL COMPONENTS ORIGINAL INSTRUCTIONS | Ref. quality process 002/03 | v. 12/07/2016 | K06307... -
Page 9: Installation
7. INSTALLATION 7.1. General warnings The person installing the grinder should carefully read this instruction manual before installation. The installation of this machine should be completed by qualified and authorized personnel, and all norms of safety and sanitation should be followed. - Page 10 7.3. Where to use The grinder should be installed on a flat, stable surface. The minimum dimensions of the work space should be as follows: Model E6 OD, E8 OD, E10 MASTER E10 CONIC OD CONIC OD 20.27 25.78 27.55 Height 7.08 9.25...
-
Page 11: Regulation
8. REGULATION 8.1. Adjusting the lower portafilter support In order to ensure the proper distribution of ground coffee in the portafilter, while supporting the portafilter in a hands-free position during dosing, it is possible to adjust the height of the lower portafilter support ( To do this adjustment operation: Loosen the screw ( ) on the lower support (... - Page 12 8.2. Grinder up set Place the hopper ( ) on the grind regulator ( ) and make sure the bean trap ( is in the closed position. Lock the hopper ( ) in place using a flat head screw driver to gently tighten the hopper security screw making it match to the hole at the bean hopper collar ( ) (Fig.
- Page 13 NOTE: Changing grind settings must be done when the grinder is on and burrs are in motion. Not doing this suposes that the burrs will gunk up and cleaning will be required. * It is recommended that the motor be running when adjusting to finer grind setting. This helps to avoid jamming the burrs, which can occur when coffee beans are in the grind chamber, and the grind regulator is adjusted towards fine.
-
Page 14: Operation
• AUTOMATIC / OFF / MANUAL for E10 CONIC ESSENTIAL ON DEMAND (Fig. 7.3.). E10 MASTER CONIC ESSENTIAL ON DEMAND E10 CONIC OD, E6 OD, E5 OD E10 MASTER E8 OD CONIC OD I - 1 AUTOMATIC AUTOMATIC Electrical functions 0 - 0 OFF Manual mode. - Page 15 9.2. Utilization Through the program menu (section 10.3.), it is possible to select three distinct functional modes: AUTOMATIC MODE, PRESLECT MODE and MANUAL MODE. 9.3. AUTOMATIC Mode Selection of doses by lower pulse button ( ) (2 doses / 3 doses version): •...
- Page 16 Once the grind cycle is initiated, it can be paused by pressing the lower activation button ( ). The cycle will pause, and will complete the timed grind cycle as long as the lower activation button is pressed again within 10 seconds. After 10 seconds of inactivity, the grind cycle will reset to the complete cycle time.
- Page 17 9.6. Tamper 9.6.1. Fixed Tamper (Optional) Position the portafilter below the tamper ( ) and push up to tamp the ground coffee (Fig. 8). K06307 | v. 12/07/2016 | Ref. quality process 002/03 | ORIGINAL INSTRUCTIONS...
-
Page 18: Configuration
10. CONFIGURATION 10.1. Display icon guide Access to menu. Value or selection aproval. Return. Up shift in menu. Decrease value. Down shift in menu. Increase value. 10.2. Grind time configurations The grind times can be configured for the Automatic, Preselect and Instant modes. When modifying in one of three modes are updated for all modes simultaneously. - Page 19 10.3. Changing the configuration menu To enter the configuration menú, press the icon. Once in the menu, use the buttons ) to toggle through the menu options, and confirm/choose the desired option with the button. Press the icon to return to the previous option. To exit the menú, press the button until the main menu screen is reached, or simply press nothing for 10 seconds and the menu will reset to the beginning.
- Page 20 ENGLISH ENGLISH ACTIVE FRANÇAIS FRANÇAIS ACTIVE DEUTSCHE DEUTSCHE AKTIV SET UP LANGUAGE ITALIANO ITALIANO ATTIVO PORTUGUESE PORTUGUESE ATIVA ESPAÑOL ESPAÑOL ACTIVO COFFEE COUNTER DOSE 1 01/01/2015 0000000 COFFEE COUNTER ABSOLUTE COFFEE COUNTER DOSE 2 01/01/2015 0000000 COFFEE COUNTER DOSE 3 01/01/2015 0000000 NUMBER OF SINGLE SERVINGS VIEW USAGE DATA...
- Page 21 11. CLEANING 11.1. General cleaning To ensure that the grinder functions properly, and produces the highest quality grind possible, the parts that come into contact with coffee should cleaned periodically. General Cleaning guidelines as follows: • Always turn the main power switch to the off position ( •...
-
Page 22: Cleaning
11.4. Cleaning the grind chamber It is recommended that the grind chamber be cleaned monthly with a cleaner as recommended by Compak. This process will eliminate smelly residues from the coffee remains, which can negatively affect the quality of the brewed coffee. - Page 23 Following these steps will ensure that the grinder is clean and ready for use. We do not recommend the taking apart of the grind assembly unless changing burrs, or removing a blockage/obstruction in the grind chamber. Removal of the grind assembly should be performed by a qualified service technician.
-
Page 24: Maintenance
NOTE: Based on extensive experience and a medium-hard coffee blend, we recommend replacing the burrs following the quantities in next table: Steel Red Speed Lucidate E5 OD 250 Kg E6 OD 300 Kg 2,250 Kg E8 OD 800 Kg 5,000 Kg... - Page 25 For the models with micrometric Parallel system, before removing the grinding adjustment collar ( ), rotate the grind point lock screw ( ) counterclockwise to release it from a locked position (Fig. 11). Rotate the grind regulator clockwise until it is completely unscrewed. Clean the grind chamber and threads of the housing using a soft cloth and vacuum cleaner until all of the oils and residue has been removed.
- Page 26 12.3.1. Models with flat burrs E8 and E6 Position the regulator collar ( ) leaving about 45º between the grind point lock ) and regulator limit stop (Fig. 13). In that position, tighten the regulator screw ( ) on the upper burr carrier and with a T20 Torx screwdriver, as Fig. 10. For the models with the micrometric Parallel system, first make sure that the grind point lock screw ( ) is lined up with the locking foot.
- Page 27 Position the regulator collar ( ) leaving about 15º between the grind point lock screw ( ) and regulator limit stop (Fig. 15). In that position, tighten the regulator ) on the upper burr carrier and with a T20 Torx screwdriver, as Fig. 10. For the models with the micrometric Parallel system, first make sure that the grind point lock screw ( ) is lined up with the locking foot.
- Page 28 12.3.2. Models with conical burrs E10 CONIC MASTER and E10 CONIC Position the regulator collar ( ) leaving about 90º between the grind point lock screw ( ) and regulator limit stop (Fig. 17). In that position, tighten the regulator ) on the upper burr carrier and with a T20 Torx screwdriver, as Fig.
- Page 29 This process should be performed with extreme caution, making sure that there are no coffee particles or debris in the housing threading. Also the placement of the upper burr assembly should be done with caution, making sure it is perfectly level and screwed in patiently.
- Page 30 Access the grinding cavity, removing the grinding adjustment, as explained in section 12.3. Within the grind chamber, the rubber curtain can be changed by removing the screw using the curtain Allen key No. 2 (Using an Allen key with a rounded end we will facilitate the operation).
-
Page 31: Ec Conformity
The Legal Representative Jesús Ascaso Compak Coffee Grinders, s.a. Molí Barri, Parcela B - Pol. Ind. Can Barri - 08415 Bigues i Riells - Barcelona - Spain Ph. 34 93 703 13 00 - Fax 34 93 703 13 23 - www.compak.es...
Need help?
Do you have a question about the E5 OD and is the answer not in the manual?
Questions and answers