Table of Contents
Advertisement
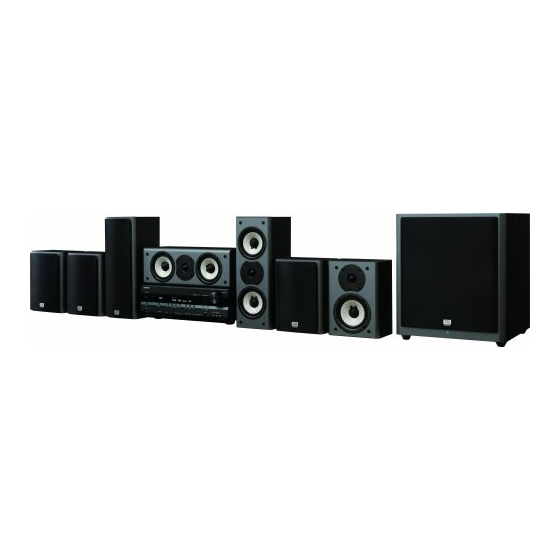
7.1ch THX Certified Digital Surround
Receiver and Speaker Package
HT-S9100THX
AV Receiver (HT-R960)
Front Speakers (SKF-960F)
Center Speaker (SKC-960C)
Surround Speakers (SKM-960S)
Surround Back Speakers (SKB-960)
Powered Subwoofer (SKW-960)
Instruction Manual
Thank you for purchasing this Onkyo product. Please
read this manual thoroughly before making any con-
nections or plugging in your new Onkyo product.
Following the instructions in this manual will enable
you to obtain optimum performance and listening
enjoyment from your new Onkyo product.
Please retain this manual for future reference.
Contents
Introduction ..................................... 2
Connection .................................... 18
Turning On & First Time Setup..... 41
Basic Operation
Playing your AV components ....... 50
Listening to the Radio .................. 54
Using the Listening Modes .......... 59
Advanced Operation ..................... 76
Troubleshooting .......................... 101
E
n
Advertisement
Table of Contents

Related Manuals for Onkyo HT-R960


Summary of Contents for Onkyo HT-R960
- Page 1 Surround Back Speakers (SKB-960) Powered Subwoofer (SKW-960) Instruction Manual Thank you for purchasing this Onkyo product. Please read this manual thoroughly before making any con- nections or plugging in your new Onkyo product. Following the instructions in this manual will enable you to obtain optimum performance and listening enjoyment from your new Onkyo product.
-
Page 2: Important Safety Instructions
WARNING: TO REDUCE THE RISK OF FIRE OR ELECTRIC SHOCK, DO NOT EXPOSE THIS APPARATUS TO RAIN OR MOISTURE. CAUTION: TO REDUCE THE RISK OF ELECTRIC SHOCK, DO NOT REMOVE COVER (OR BACK). NO USER-SERVICEABLE PARTS INSIDE. REFER SERVICING QUALIFIED PERSONNEL. -
Page 3: Precautions
7. Never Touch this Unit with Wet Hands—Never handle this unit or its power cord while your hands are wet or damp. If water or any other liquid gets inside this unit, have it checked by your Onkyo dealer. 8. Handling Notes •... -
Page 4: Speaker Precautions
We, ONKYO EUROPE ELECTRONICS GmbH LIEGNITZERSTRASSE 6, 82194 GROEBENZELL, GERMANY declare in own responsibility, that the ONKYO product described in this instruction manual is in compliance with the corresponding technical standards such as EN60065, EN55013, EN55020 and EN61000-3-2, -3-3. GROEBENZELL, GERMANY... -
Page 5: Package Contents
Package Contents Make sure you have the following items: AV receiver (HT-R960) Remote controller and two batteries (AA/R6) Speaker setup microphone Indoor FM antenna AM loop antenna Front speakers (SKF-960F) Center speaker (SKC-960C) Surround and surround back speakers (SKM-960S/SKB-960) Subwoofer (SKW-960) -
Page 6: Table Of Contents
Connecting a CD Player or Turntable ... 37 Connecting a Cassette, CDR, MiniDisc, or DAT Recorder ... 38 Connecting an RI Dock ... 39 Connecting Onkyo Components ... 40 Connecting the Power Cord ... 40 Turning On the AV Receiver ... 41 Turning On and Standby ... - Page 7 Controlling an RI Dock ...99 Controlling a Cassette Recorder ...100 Troubleshooting ... 101 Specifications ... 105 AV receiver HT-R960 ...105 Speaker Package HTP-960 ...106 Video Resolution Chart ... 107 Onscreen Setup Menu Map ... 108 * To reset the AV receiver to its factory defaults, turn...
-
Page 8: Features
Macrovision. Reverse engineering or disassembly is prohibited. Cinema, THX Music *5 Music Optimizer™ is a trademark of Onkyo Corporation. *6 Re-Equalization and the “Re-EQ” logo are trademarks of THX loudness correction The HT-S9100THX, jointly developed by Onkyo and THX Ltd., provides home theater enthusiasts the... -
Page 9: Getting Started In Five Easy Steps
Getting Started in Five Easy Steps Hookup Connect the speakers and your AV components to the AV receiver. ☞ page 18 Turning On With the hookup complete, you’re ready to switch on. ☞ page 41 First Time Setup A few simple settings to get the very best from your system. Automatic speaker setup ☞... -
Page 10: Getting To Know The Av Receiver
Sets the volume of the AV receiver to –∞ dB, –81 dB, –80 dB through +18 dB (relative display). The volume level can also be displayed as an abso- lute value. See “Volume Setup” on page 87. MASTER VOLUME HT-R960 MASTER VOLUME HT-R960... -
Page 11: Display
Getting to Know the AV Receiver—Continued For detailed information, see the pages in parentheses. PHONES jack (52) This 1/4-inch phone jack is for connecting a stan- dard pair of stereo headphones for private listening. THX button (59) Selects the THX listening mode. SPEAKERS A and B buttons (19, 50) Turn speaker sets A and B on or off. -
Page 12: Rear Panel
This (Remote Interactive) jack can be con- nected to the jack on another Onkyo component for remote and system control. To use , you must make an analog audio connec- tion (RCA) between the AV receiver and the other component, even if they are connected digitally. - Page 13 Getting to Know the AV Receiver—Continued VCR/DVR IN/OUT A video component, such as a VCR or DVR, can be connected here for recording and playback. There are S-Video and composite video input and output jacks for connecting the video signal, and there are analog audio input jacks for connecting the audio signal.
-
Page 14: Speaker Package
Speaker Package Front, Center, Surround, and Surround Back Speakers (SKF-960F, SKC-960C, SKM-960S, SKB-960) ■ Rear SKF-960F SKM-960S/SKB-960 SKC-960C For further information, see the pages in parentheses. Keyhole slots (20) These keyhole slots can be used to wall-mount the speakers. See page 20 for mounting instructions. Speaker terminals (21) These terminals are for connecting the speakers to the AV receiver with the supplied speaker cables. -
Page 15: Subwoofer (Skw-960)
Remote Controller—Continued Subwoofer (SKW-960) ■ Front ■ Rear To wall outlet For further information, see the pages in parentheses. Standby/On indicator Red: Subwoofer in standby mode Blue: Subwoofer on With the Auto Standby function, the SKW-960 automatically turns on when an input signal is detected in Standby mode. -
Page 16: Remote Controller
Displays information about the band, frequency, preset number, and so on. CH +/– button (56) Selects radio presets. Note: • An Onkyo cassette recorder connected via also be controlled in Receiver mode (see page 100). ] and ENTER buttons ] buttons... -
Page 17: Installing The Batteries
Remote Controller—Continued Installing the Batteries To open the battery compartment, press the small lever and remove the cover. Insert the two supplied batteries (AA/R6) in accordance with the polarity diagram inside the battery compartment. Replace the cover and push it shut. Notes: •... -
Page 18: Connecting The Speakers
You can enjoy DVDs featuring Dolby Digital or DTS. With analog or digital TV, you can enjoy Dolby Pro Logic IIx, DTS Neo:6, or Onkyo’s original DSP listening modes. -
Page 19: Speaker Sets A And B
ENTER SETUP RETURN AUX INPUT SETUP MIC VIDEO AUDIO RT/PTY/TP MEMORY TUNING MODE CLEAR HT-R960 AV RECEIVER Indicator Output Set A: 5.1 channels Set B: 2 channels Set A: 7.1 channels Set B: 2 channels No sound Front right speaker... -
Page 20: Surround Back Speakers (Skb
Connecting the Speakers—Continued Wall Mounting the Speakers The speakers can easily be wall mounted by using the keyhole slots. To mount the front or surround speakers vertically, use the keyhole slot shown to hang each speaker on a screw that’s securely screwed into the wall. Front Speakers (SKF-960F) Surround (SKM-960S) and Surround Back Speakers (SKB-960) -
Page 21: Speaker Connection Precautions
Connecting the Speakers—Continued Speaker Connection Precautions Read the following before connecting any speakers: • Disconnect the power cord from the wall outlet before making any connections. • You can connect speakers with an impedance of 8 ohms or higher. If you use speakers with a lower impedance, and use the amplifier at high volume lev- els for a long period of time, the built-in protection circuit may be activated. - Page 22 Connecting the Speakers—Continued The following illustration shows which speaker should be connected to each pair of terminals. If you’re using only one surround back speaker, connect it to the left (L) SURR BACK SPEAKERS terminals. HDMI ASSIGNABLE (CBL/SAT) IN 2 (VCR/DVR) IN 1 (DVD)
-
Page 23: Connecting Antennas
Connecting Antennas This section explains how to connect the supplied indoor FM antenna and AM loop antenna, and how to connect commercially available outdoor FM and AM antennas. The AV receiver won’t pick up any radio signals without any antenna connected, so you must connect the antenna to use the tuner. -
Page 24: Connecting An Outdoor Fm Antenna
Connecting Antennas—Continued Connecting an Outdoor FM Antenna If you cannot achieve good reception with the supplied indoor FM antenna, try a commercially available out- door FM antenna instead. Notes: • Outdoor FM antennas work best outside, but usable results can sometimes be obtained when installed in an attic or loft. -
Page 25: Connecting Your Components
Connecting Your Components About AV Connections • Before making any AV connections, read the manuals supplied with your other AV components. • Don’t connect the power cord until you’ve completed and double-checked all AV connections. Optical Digital Jacks The AV receiver’s optical digital jacks have shutter-type covers that open when an optical plug is inserted and close when it’s removed. -
Page 26: Connecting Audio And Video Signals To The Av Receiver
Connecting Your Components—Continued Connecting Audio and Video Signals to the AV Receiver By connecting both the audio and video outputs of your DVD player and other AV components to the AV receiver, you can switch the audio and video signals simultaneously simply by changing the input source on the AV receiver. : Signal Flow Video Audio... - Page 27 Connecting Your Components—Continued Video Connection Formats Video equipment can be connected to the AV receiver by using any one of the following video connection formats: composite video, S-Video, component video, or HDMI, the lat- ter offering the best picture quality. Video input signals flow through the AV receiver as shown, with composite video, S- Video, and component video sources all being...
-
Page 28: Connecting A Tv Or Projector
Connecting Your Components—Continued Connecting a TV or Projector Step 1: Video Connection Choose a video connection that matches your TV ( , Step 2: Audio Connection Choose an audio connection that matches your TV ( , The onscreen setup menus appear only on a TV that is connected to the HDMI OUT. If your TV is connected to the composite video or S-Video MONITOR OUT, or the COMPONENT VIDEO OUT, use the AV receiver’s own display when changing settings. -
Page 29: Connecting A Dvd Player
Connecting Your Components—Continued Connecting a DVD player Step 1: Video Connection Choose a video connection that matches your DVD player ( , You must connect the AV receiver to your TV with the same type of connection. Step 2: Audio Connection Choose an audio connection that matches your DVD player ( , •... - Page 30 Connecting Your Components—Continued Hooking Up the Multichannel Input If your DVD player supports multichannel audio formats such as DVD-Audio and SACD, and it has a multichannel analog audio output, you can connect it to the AV receiver’s multichannel input. Use a multichannel analog audio cable, or several normal audio cables, to connect the AV receiver’s DVD IN FRONT L/R, CENTER, SURR L/R, SURR BACK L/R, and SUBWOOFER jacks to the 7.1-channel analog audio output on your DVD player.
-
Page 31: Connecting A Vcr Or Dvr For Playback
Connecting Your Components—Continued Connecting a VCR or DVR for Playback With this hookup, you can use the tuner in your VCR or DVR to listen to your favorite TV programs Hint! via the AV receiver, which is useful if your TV has no audio outputs. Step 1: Video Connection Choose a video connection that matches your VCR or DVR ( , connect the AV receiver to your TV with the same type of connection. -
Page 32: Connecting A Vcr Or Dvr For Recording
Connecting Your Components—Continued Connecting a VCR or DVR for Recording Step 1: Video Connection Choose a video connection that matches your VCR or DVR ( source to be recorded must be connected to the AV receiver via the same type of connection. Step 2: Audio Connection Make the audio connection Connection... -
Page 33: Connecting A Satellite, Cable, Terrestrial Set-Top Box, Or Other Video Source
Connecting Your Components—Continued Connecting a Satellite, Cable, Terrestrial Set-top box, or Other Video Source With this hookup, you can use your satellite or cable receiver to listen to your favorite TV programs Hint! via the AV receiver, which is useful if your TV has no audio outputs. Step 1: Video Connection Choose a video connection that matches the video source ( , You must connect the AV receiver to your TV with the same type of connection. -
Page 34: Connecting Components With Hdmi
Connecting Your Components—Continued Connecting Components with HDMI About HDMI Designed to meet the increased demands of digital TV, HDMI (High Definition Multimedia Interface) is a new digital interface standard for connecting TVs, projectors, DVD players, set-top boxes, and other video components. Until now, several separate video and audio cables have been required to connect AV components. -
Page 35: Making Hdmi Connections
Connecting Your Components—Continued Making HDMI Connections Step 1: Use HDMI cables to connect the AV receiver’s HDMI jacks to your HDMI-compatible DVD player, TV, projector, and so on. Step 2: Assign each HDMI IN to an input selector in the HDMI Input Setup (see page 46). ■... -
Page 36: Connecting A Camcorder, Game Console, Or Other Device
VIDEO MEMORY TUNING MODE CLEAR Connection AV receiver AUX INPUT VIDEO AUX INPUT L-AUDIO-R MASTER VOLUME AUX INPUT AUDIO AUDIO HT-R960 AV RECEIVER AUX INPUT VIDEO Signal flow ⇐ ⇐ AUDIO VIDEO OUT Camcorder, game console, etc. Camcorder or console... -
Page 37: Connecting A Cd Player Or Turntable
Connecting Your Components—Continued Connecting a CD Player or Turntable ■ CD Player or Turntable (MM) with Built-in Phono Preamp Step 1: Choose a connection that matches your CD player ( , phono preamp. COAXIAL (CBL/SAT) Connect one or the other. OPTICAL Inputs may (CD) -
Page 38: Connecting A Cassette, Cdr, Minidisc, Or Dat Recorder
Connecting Your Components—Continued Connecting a Cassette, CDR, MiniDisc, or DAT Recorder Step 1: Choose a connection that matches your recorder ( , COAXIAL (CBL/SAT) OPTICAL (CD) Connect one or the other. Inputs may need to be assigned (see page 47) •... -
Page 39: Connecting An Ri Dock
REMOTE CONTROL CBL/SAT If you have an Onkyo DS-A1 RI Dock, connect its video output jack to the AV receiver’s CBL/SAT IN S jack. Notes: • Enter the appropriate remote control code before using the AV receiver’s remote controller for the first time (see page 93). -
Page 40: Connecting Onkyo Components
Connecting Your Components—Continued Connecting Onkyo Step 1: Make sure that each Onkyo component is connected to the AV receiver with an analog audio cable (RCA). Step 2: Make the necessary Step 3: If you connect a MiniDisc recorder, CD recorder, or RI Dock, change the Input Display (see page 48). -
Page 41: Turning On The Av Receiver
If you did, see “HDMI Input Setup” on page 46, “Component Video Input Setup” on page 47, or “Digital Input Setup” on page 47 respec- tively. ■ Did you connect an Onkyo MD recorder, CD recorder, or RI Dock? If you did, see “Changing the Input Display” on page 48. -
Page 42: First Time Setup
3, 9 Turn on the AV receiver and the connected TV. ON/STANDBY On the TV, select the input to which the AV receiver is connected. MASTER VOLUME TUNING PRESET ENTER SETUP RETURN AUX INPUT SETUP MIC VIDEO AUDIO AV RECEIVER HT-R960... - Page 43 First Time Setup—Continued On the SKW-960 Subwoofer, set the OUTPUT LEVEL control to Subwoofer’s “THX POSITION.” rear panel Place the speaker setup micro- phone at measurement point 1 (page 42), and connect it to the SETUP MIC jack. Auto Speaker Setup Please place microphone at center of listening area at ear height.
-
Page 44: Error Messages
First Time Setup—Continued When the measurements are complete, the following screen appears. When the calculations are com- plete, the following screen appears. Review Speaker configuration Subwoofer Front Center Surround Surr Back Surr Back Ch Save Cancel Use the Up and Down [ buttons to select an option, and then press [ENTER]. -
Page 45: Using A Powered Subwoofer
This message appears if saving fails. Try saving again. If this message appears after 2 or 3 attempts, the AV receiver is probably malfunctioning. Contact your Onkyo dealer. Retry: Return to step 2 and try again. Cancel: Cancel the automatic speaker setup. -
Page 46: Hdmi Input Setup
First Time Setup—Continued HDMI Input Setup If you connect a video component to an HDMI IN, you must assign that input to an input selector. For example, if you connect your DVD player to HDMI IN 1, you must assign HDMI IN 1 to the DVD input selector. These are the default assignments. -
Page 47: Component Video Input Setup
First Time Setup—Continued Component Video Input Setup If you connect a video component to a COMPONENT VIDEO IN, you must assign that input to an input selector. For example, if you connect your DVD player to COMPONENT VIDEO IN 2, you must assign COM- PONENT VIDEO IN 2 to the DVD input selector. -
Page 48: Changing The Input Display
TAPE CBL/SAT Note: • DOCK can be selected for the TAPE input selector or CBL/SAT input selector, but not both at the same time. -capable Onkyo MiniDisc to work properly, you must change this setting. 1, 2 1, 2 TUNING... -
Page 49: Automatic Audio Input Selection Setup
ENTER SETUP RETURN AUX INPUT SETUP MIC VIDEO AUDIO AV RECEIVER HT-R960 Note: • You can select a different option for each input selec- tor. Press the [DIGITAL INPUT] but- ton repeatedly to select an option. HDMIx (Auto): This option can be selected when an HDMI input is assigned to an input selector (page 46). -
Page 50: Playing Your Av Components
DIGITAL INPUT RT/PTY/TP MEMORY TUNING MODE CLEAR HT-R960 AV RECEIVER Use the AV receiver’s input selector buttons to select an input source. To select an input source with the remote controller, use its INPUT SELECTOR buttons. To listen to a DVD player connected to the multichannel DVD input (page 30), press the AV receiver’s [MULTI CH] button. -
Page 51: Common Functions
RETURN AUX INPUT SETUP MIC VIDEO AUDIO HT-R960 AV RECEIVER To cancel the sleep timer, press the [SLEEP] button repeatedly until the SLEEP indicator disappears. To check the remaining sleep time, press the [SLEEP] button. Note that if you press the [SLEEP] button while the sleep time is being displayed, you’ll shorten the sleep... -
Page 52: Using Headphones
Common Functions—Continued Using Headphones For private listening, you can connect a pair of stereo headphones (1/4-inch phone plug) to the AV receiver’s PHONES jack. Notes: • Always turn down the volume before connecting your headphones. • While the headphones plug is inserted in the PHONES jack, speakers sets A and B are turned off. -
Page 53: Specifying The Digital Signal Format
flash and there will be no sound. Auto (default): The format is detected automatically. If no digital input signal is present, the corresponding analog input is used instead. MASTER VOLUME TUNING PRESET ENTER SETUP RETURN AUX INPUT SETUP MIC VIDEO AUDIO HT-R960 AV RECEIVER... -
Page 54: Listening To The Radio
RT/PTY/TP MEMORY TUNING MODE CLEAR AV RECEIVER HT-R960 TUNING TUNING MODE The North American model changes FM frequency in 0.2 MHz steps, 10 kHz steps for AM. For other models it’s 0.05 MHz steps for FM and 9 kHz (or 10 kHz) steps for AM. - Page 55 Band Listening mode DISPLAY MASTER VOLUME TUNING PRESET ENTER VCR/DVR CBL/SAT TAPE TUNER SETUP RETURN AUX INPUT SETUP MIC VIDEO AUDIO DISPLAY DIGITAL INPUT RT/PTY/TP MEMORY TUNING MODE MOVIE/TV MUSIC GAME CLEAR LISTENING MODE HT-R960 AV RECEIVER Frequency Preset #...
-
Page 56: Presetting Am/Fm Stations
TAPE TUNER SETUP RETURN AUX INPUT SETUP MIC VIDEO AUDIO DISPLAY DIGITAL INPUT RT/PTY/TP MEMORY TUNING MODE CLEAR AV RECEIVER HT-R960 ] buttons to MASTER VOLUME TUNING PRESET ENTER TAPE TUNER SETUP RETURN AUX INPUT SETUP MIC VIDEO AUDIO DISPLAY... -
Page 57: Using Rds (European Model Only)
Listening to the Radio—Continued Using RDS (European model only) RDS only works in areas where RDS broadcasts are available. When tuned to an RDS station, the RDS indi- cator appears. RDS indicator ■ What is RDS? RDS stands for Radio Data System and is a method of transmitting data in FM radio signals. -
Page 58: Displaying Radio Text (Rt)
AUX INPUT SETUP MIC VIDEO AUDIO DISPLAY DIGITAL INPUT RT/PTY/TP MEMORY TUNING MODE CLEAR HT-R960 AV RECEIVER Listening to Traffic News (TP) You can search for stations that broadcast traffic news. 4, 5 MASTER VOLUME TUNING PRESET ENTER TAPE TUNER... -
Page 59: Using The Listening Modes
SETUP RETURN AUX INPUT SETUP MIC VIDEO AUDIO ■ [GAME] button HT-R960 AV RECEIVER This button selects the listening modes intended for use with video games. ■ [THX] button This button selects the THX listening modes. GAME... -
Page 60: Listening Modes Available For Each Source Format
Using the Listening Modes—Continued Listening Modes Available for Each Source Format Analog and PCM Sources Source format Button Listening Mode Mono Multichannel Neo:6 Dolby PLII Movie/ Dolby PLIIx Movie DolbyEX Neo:6 Cinema THX Cinema Neo:6 THX Cinema Dolby PLII Movie THX Cinema/ [MOVIE/ Dolby PLIIx Movie THX Cinema *3 *5 *6... - Page 61 Using the Listening Modes—Continued Source format Media Button Listening Mode Multichannel Neo:6 DolbyEX Dolby PLII Game/ Dolby PLIIx Game THX Games Neo:6 THX Games [GAME] Dolby PLII Game THX Games/ Dolby PLIIx Game THX *5 *6 Games Dolby PLII Game I/S Games I/S Games AllChStereo FullMono...
- Page 62 Using the Listening Modes—Continued Dolby Digital and Dolby Digital Plus Sources Source format Button Listening Mode Mono DolbyDigital DolbyDigital Plus Neo:6 Dolby PLII Movie/Dolby PLIIx Movie DolbyEX Neo:6 Cinema THX Cinema Neo:6 THX Cinema [MOVIE/TV] Dolby PLII Movie THX Cinema/ Dolby PLIIx Movie THX Cinema Neo:6 Cinema THX Cinema SurroundEX...
- Page 63 Using the Listening Modes—Continued Source format Button Listening Mode DolbyDigital DolbyDigital Plus Neo:6 DolbyEX Dolby PLII Game/Dolby PLIIx Game THX Games Neo:6 THX Games [GAME] Dolby PLII Game THX Games/ Dolby PLIIx Game THX Games Dolby PLII Game I/S Games I/S Games AllChStereo FullMono...
- Page 64 Using the Listening Modes—Continued DTS Sources Source format Button Listening Mode Mono DTS, DTS 96/24 DTS-ES Discrete/Matrix Neo:6 Dolby PLII Movie/Dolby PLIIx Movie DolbyEX Neo:6 Cinema THX Cinema Neo:6 THX Cinema [MOVIE/TV] Dolby PLII Movie THX Cinema/ Dolby PLIIx Movie THX Cinema Neo:6 Cinema THX Cinema SurroundEX I/S Cinema...
- Page 65 Using the Listening Modes—Continued Source format Button Listening Mode DTS, DTS 96/24 DTS-ES Discrete/Matrix Neo:6 DolbyEX Dolby PLII Game/Dolby PLIIx Game THX Games Neo:6 THX Games [GAME] Dolby PLII Game THX Games/ Dolby PLIIx Game THX Games PLII Game I/S Games I/S Games AllChStereo FullMono...
- Page 66 Using the Listening Modes—Continued TrueHD Sources Source format Button Listening Mode Mono TrueHD Neo:6 Dolby PLII Movie/Dolby PLIIx Movie DolbyEX Neo:6 Cinema THX Cinema [MOVIE/TV] Neo:6 THX Cinema Dolby PLII Movie THX Cinema/ Dolby PLIIx Movie THX Cinema Neo:6 Cinema THX Cinema SurroundEX I/S Cinema AllChStereo...
- Page 67 Using the Listening Modes—Continued Source format Button Listening Mode THX Cinema Neo:6 THX Cinema Dolby PLII Movie THX Cinema/ Dolby PLIIx Movie THX Cinema Neo:6 Cinema THX Cinema THX Music Neo:6 THX Music Dolby PLII Music THX Music/ Dolby PLIIx Music THX Music Neo:6 Music THX Music *3 *4 [THX]...
- Page 68 Using the Listening Modes—Continued DTS-HD Sources Button Listening Mode Mono DTS-HD High Resolution DTS-HD Master Audio Neo:6 Dolby PLII Movie/Dolby PLIIx Movie DolbyEX Neo:6 Cinema THX Cinema [MOVIE/TV] Neo:6 THX Cinema Dolby PLII Movie THX Cinema/ Dolby PLIIx Movie THX Cinema Neo:6 Cinema THX Cinema SurroundEX I/S Cinema...
- Page 69 Using the Listening Modes—Continued Source format Button Listening Mode THX Cinema Neo:6 THX Cinema Dolby PLII Movie THX Cinema/ Dolby PLIIx Movie THX Cinema Neo:6 Cinema THX Cinema THX Music Neo:6 THX Music Dolby PLII Music THX Music/ Dolby PLIIx Music THX Music Neo:6 Music THX Music *4 *5 [THX]...
- Page 70 Using the Listening Modes—Continued DTS Express and DSD Sources Button Listening Mode Direct DTS Express Neo:6 Dolby PLII Movie/Dolby PLIIx Movie DolbyEX Neo:6 Cinema THX Cinema Neo:6 THX Cinema [MOVIE/TV] Dolby PLII Movie THX Cinema/ Dolby PLIIx Movie THX Cinema Neo:6 Cinema THX Cinema *4 SurroundEX I/S Cinema...
- Page 71 Using the Listening Modes—Continued Source format Button Listening Mode DTS Express Neo:6 DolbyEX Dolby PLII Game/Dolby PLIIx Game THX Games Neo:6 THX Games [GAME] Dolby PLII Game THX Games/ Dolby PLIIx Game THX Games Dolby PLII Game I/S Games I/S Games AllChStereo FullMono THX Cinema...
-
Page 72: About The Listening Modes
Using the Listening Modes—Continued About the Listening Modes The AV receiver’s listening modes can transform your listening room into a movie theater or concert hall, with high fidelity and stunning surround sound. The illustration shows which speakers are active in each listening mode with 7.1-channel speakers. - Page 73 Using the Listening Modes—Continued DTS-ES Matrix This mode is for use with DTS-ES Matrix soundtracks, that use a matrix-encoded back-channel for 6.1/7.1- channel playback. Use it with DVDs that bear the DTS- ES logo, especially those with a DTS-ES Matrix soundtrack.
- Page 74 Using the Listening Modes—Continued Onkyo Original DSP Modes Mono Movie This mode is suitable for old movies and other mono sources. The center speaker outputs the sound as it is, while reverb is applied to the sound output by the other speakers, giving presence to even mono material.
-
Page 75: Recording
Recording This section explains how to record the input source and how to record audio and video from separate sources. Notes: • The surround sound and DSP listening modes cannot be recorded. • Copy-protected DVDs cannot be recorded. • Sources connected to the multichannel DVD input cannot be recorded. -
Page 76: Adjusting The Listening Modes
Adjusting the Listening Modes Using the Audio Adjust Settings These settings apply to only speaker set A. 2, 3 1, 5 Press the [RECEIVER] REMOTE MODE button, followed by the [SETUP] button. The main menu appears onscreen. If the main menu doesn’t appear, make sure the appropriate external input is selected on your TV. -
Page 77: Dolby Digital
Adjusting the Listening Modes—Continued ■ Dimension With this setting, you can move the sound field forward or backward when using the Dolby Pro Logic IIx Music listening mode. It can be adjusted from –3 to +3. The default value is 0. Higher settings move the sound field backward. -
Page 78: Using The Audio Functions
Adjusting the Listening Modes—Continued Using the Audio Functions You can access various audio functions by pressing the [AUDIO] button. Note: • When the Audio TV Out setting is set to On (page 90), the [AUDIO] button is disabled. Press the [RECEIVER] button, followed by the [AUDIO] button. -
Page 79: Speaker Levels
Adjusting the Listening Modes—Continued ® Audyssey Dynamic EQ ■ DynamicEQ With Audyssey Dynamic EQ, you can enjoy great sound even when listening at low volume levels. Audyssey Dynamic EQ solves the problem of deteriorat- ing sound quality as volume is decreased by taking into account human perception and room acoustics. -
Page 80: Listening Mode Presets
Adjusting the Listening Modes—Continued Listening Mode Presets On the Listening Mode Preset menu, you can specify a default listening mode for each of the audio formats sup- ported by each input selector. The AV receiver will then select the listening mode automatically depending on the format of the input signal. -
Page 81: Advanced Setup
Advanced Setup Speaker Setup This section explains how to check the speaker settings and how to set them manually, which is useful if you change a speaker after performing the automatic speaker setup. Some of the speaker settings are set automatically by the Automatic Speaker Setup function (see page 42). -
Page 82: Speaker Distance
Advanced Setup—Continued Use the Down [ select “Surr Back Ch,” and use the Left and Right [ tons to select 2ch or 1ch. 2ch: Select if two (left and right) surround back speakers are connected. 1ch: Select if one surround back speaker is connected. - Page 83 Advanced Setup—Continued Speaker Levels These settings are set automatically by the Automatic Speaker Setup function (see page 42). You can set the volume level of each speaker so that all speakers can be heard equally at the listening position. Note: •...
-
Page 84: Equalizer Settings
Advanced Setup—Continued Equalizer Settings These settings are set automatically by the Automatic Speaker Setup function (see page 42). Here you can adjust the tone of individual speakers. To set the volume of individual speakers, see page 83. Press the [RECEIVER] REMOTE MODE button, followed by the [SETUP] button. -
Page 85: Thx Audio Setup
Advanced Setup—Continued THX Audio Setup These settings apply to only speaker set A. These settings are not set automatically by the Auto- matic Speaker Setup function (see page 42). Press the [RECEIVER] REMOTE MODE button, followed by the [SETUP] button. The main menu appears onscreen. -
Page 86: Source Setup
Advanced Setup—Continued Source Setup This section explains items on the Source Setup menu. Items can be set individually for each input selector. Press the input selector buttons to select an input source, and then press the [RECEIVER] REMOTE MODE button. Press the [SETUP] button. -
Page 87: Miscellaneous Setup
Advanced Setup—Continued Miscellaneous Setup This section explains items on the Miscellaneous menu. Press the [RECEIVER] REMOTE MODE button, followed by the [SETUP] button. The main menu appears onscreen. If the main menu doesn’t appear, make sure the appropriate external input is selected on your TV. -
Page 88: Hardware Setup
Remote Control ■ Remote ID When several Onkyo components are used in the same room, their remote ID codes may overlap. To differenti- ate the AV receiver from the other components, you can change its remote ID from 1, the default, to 2 or 3. -
Page 89: Analog Multich
Advanced Setup—Continued Changing the Remote Controller’s ID While holding down the [RECEIVER] REMOTE MODE but- ton, press and hold down the [SETUP] button until the Remote indicator lights up (about 3 sec- onds). (3 seconds) Use the number buttons to enter ID 1, 2, or 3. - Page 90 • RIHD, which stands for Remote Interactive over HDMI, is the name of the system control function found on Onkyo components. The AV receiver can be used with CEC (Consumer Electronics Control), which allows system control over HDMI and is part of the HDMI standard.
-
Page 91: Lock Setup
Advanced Setup—Continued TV Control Select Enable to control the AV receiver from an RIHD- compatible TV that’s connected via HDMI. Disable: TV Control disabled. Enable: TV Control enabled. Notes: • Select Disable if your TV is incompatible or you’re not sure about its compatibility. •... -
Page 92: Controlling Other Components
You do not need to enter a remote control code to control these components. For details on controlling these components, see the pages indicated. Onkyo DVD player (page 95) Onkyo CD player (page 98) Onkyo RI Dock with Onkyo cassette recorder with... -
Page 93: Remote Control Codes For Onkyo Components Connected Via
Press the REMOTE MODE button, point the remote controller at the AV receiver, and operate the component. If you want to control an Onkyo component by pointing the remote controller directly at it, or you want to control an Onkyo component that’s not connected via the following remote control codes: •... -
Page 94: Controlling A Tv
(e.g., Dolby Digital or DTS). CLR button Cancels functions, clears entered numbers, or enters the number 12. * RIHD is Onkyo’s name for the CEC (Consumer Elec- tronics Control) system, which is part of the HDMI specification. ] buttons... -
Page 95: Controlling A Dvd Player Or Dvd Recorder
(Blu-ray, TV/DVD combination), you can control your player with the following buttons. The [DVD] REMOTE MODE button is preprogrammed with the remote control code for controlling an Onkyo DVD player. For details on entering a remote control code for a differ- ent component, see page 92. -
Page 96: Controlling A Vcr Or Pvr
Controlling Other Components—Continued PLAY MODE button Selects play modes on components with selectable play modes. CLR button Cancels functions and clears entered numbers. Controlling a VCR or PVR By pressing the REMOTE MODE button that’s been programmed with the remote control code for your VCR (PVR, TV/VCR, DBS/PVR, cable/PVR combination), you can control your video recorder with the following buttons. -
Page 97: Controlling A Satellite Receiver Or Cable Receiver
Controlling Other Components—Continued Controlling a Satellite Receiver or Cable Receiver By pressing the REMOTE MODE button that’s been programmed with the remote control code for your sat- ellite receiver, cable receiver, or DVD recorder (DBS/PVR, cable/PVR combination), you can control that component with the following buttons. -
Page 98: Controlling A Cd Player, Cd Recorder, Or Md Player
CD recorder, or MD player, you can control your player with the following buttons. The [CD] REMOTE MODE button is preprogrammed with the remote control code for controlling an Onkyo CD player. For details on entering a remote control code for a differ- ent component, see page 92. -
Page 99: Controlling An Ri Dock
ON/STANDBY button Turns the iPod on or off. Notes: • This button does not turn the Onkyo DS-A2 or DS-A2X RI Dock on or off. • Your iPod may not respond the first time you press this button, in which case you should press it again. -
Page 100: Controlling A Cassette Recorder
The [TAPE] REMOTE MODE button is preprogrammed with the remote control code for controlling an Onkyo cassette recorder when used with an For details on entering a remote control code for a differ- ent component, see page 92. -
Page 101: Troubleshooting
Onkyo dealer. If you can’t resolve the issue yourself, try resetting the AV receiver before contacting your Onkyo dealer. To reset the AV receiver to its factory defaults, turn it on and, while holding down the [VCR/DVR] button, press the [ON/STANDBY] button. - Page 102 Troubleshooting—Continued The surround back speakers produce no sound • The surround back speakers are not used with all lis- tening modes. Try another listening mode (page 59). • Not much sound may be produced by the surround back speakers with some sources. •...
- Page 103 • With some AV components, certain buttons may not work as expected, and some may not work at all. • To control an Onkyo component that’s connected via , point the remote controller at the AV receiver. Be sure to enter the appropriate remote control code first (page 93).
- Page 104 5 seconds, and then plug it back in again. Onkyo is not responsible for damages (such as CD rental fees) due to unsuccessful recordings caused by this unit’s malfunction.
-
Page 105: Specifications
Specifications AV receiver HT-R960 Amplifier Section Rated Output Power North American: 130 watts minimum continuous power per channel, 8 ohm load, 1 channel driven at 1 kHz, with a maximum total harmonic distortion of 1% (FTC) European: × 7 ch 130 W at 8 ohms, 1 kHz, 1 ch driven (IEC) 210 W (3 Ω, Front) -
Page 106: Powered Subwoofer (Skw
Specifications—Continued Speaker Package HTP-960 ■ Powered Subwoofer (SKW-960) Type: Acoustic suspension Input Sensitivity/ Impedance: 330 mV/100 kΩ Maximum output power: 290 W Frequency response: 20 Hz–100 Hz Cabinet capacity: 49 L (1.73 cubic feet) × Dimensions × × (14-15/16" (incl. grille and projection) Weight: 15.5 kg (34.2 lbs.) Drivers unit:... -
Page 107: Video Resolution Chart
Video Resolution Chart The following tables show how video signals at different resolutions are output by the AV receiver. NTSC Output Input 1080P 1080i 720P 480P ✔ 1080P ✔ 1080i HDMI 720P 480P 480i 1080P ✔ 1080i ✔ COMPONENT 720P ✔... -
Page 108: Onscreen Setup Menu Map
Onscreen Setup Menu Map The onscreen setup menus appear on the connected TV and provide a conve- nient way to change the AV receiver’s various settings. Settings are organized into eight categories on the main menu, most containing a submenu. The onscreen setup menus appear only on a TV that is connected to the HDMI OUT. - Page 109 Memo...
- Page 110 Memo...
- Page 111 Memo...
- Page 112 Unit 1&12, 9/F, Ever Gain PlazaTower 1, 88, Container Port Road, Kwai Chung, N.T., HONG KONG Tel: 852-2429-3118 Fax: 852-2428-9039 http://www.ch.onkyo.com/ SN 29344679 (C) Copyright 2008 ONKYO CORPORATION Japan. All rights reserved. HOMEPAGE http://www.onkyo.com/ I0806-1 * 2 9 3 4 4 6 7 9 *...
Need help?
Do you have a question about the HT-R960 and is the answer not in the manual?
Questions and answers