Table of Contents
Advertisement
Advertisement
Table of Contents

Related Manuals for Epson ELPDC21


Summary of Contents for Epson ELPDC21
- Page 1 Document Camera User's Guide...
-
Page 2: Meaning Of Symbols In The Guide
Meaning of Symbols in the Guide • Symbols for Safety The documentation and this product use graphical symbols to show how to use this product safely. The indications and their meaning are as follows. Make sure you understand and respect these caution symbols to avoid injury to persons or property. Warning This symbol indicates information that, if ignored, could possibly result in personal injury or even death due to incorrect handling. -
Page 3: Safety Instructions
Safety Instructions Read this User's Guide and follow all safety instructions for your document camera. Keep this guide at hand for future reference. Environmental Precautions Warning Do not use or store the document camera or remote control in a hot location, such as near a heater, in direct sunlight, or in a closed vehicle. Thermal damage, fire, or malfunction may occur. - Page 4 Never open any covers on the document camera except as specifically explained in this User's Guide. Never attempt to disassemble or modify the document camera. Refer all repairs to qualified service technicians. Unplug the document camera from the outlet and contact your local dealer or Epson for help under the following conditions: • If smoke, strange odors, or strange noises come from the device •...
- Page 5 Caution Turn off the document camera and unplug it after use. Make sure the power is turned off, the plug is disconnected from the outlet, and all cables are disconnected before moving the document camera. If a malfunction occurs due to static electricity, thunder, and so on, the product begins recovery operations. During recovery operations, do not touch any switches on the product.
- Page 6 Cleaning Precautions Warning Use a dry cloth (or, for stubborn stains, a moist cloth that has been wrung dry) for cleaning. Do not use liquid, aerosol cleaners, or solvents such as alcohol, thinner or benzine. Do not place any containers of liquid on top of or near the document camera. Do not spill liquid or spray fine mist into the document camera.
- Page 7 Battery Precautions Warning Incorrect battery usage may cause batteries to rupture and leak battery fluid, which could result in fire, injury, or corrosion of the remote control. If battery fluid gets in your eyes, do not rub your eyes. Wash them well with clean water and contact a doctor immediately. If battery fluid enters your mouth, rinse immediately with plenty of water and contact a doctor immediately.
-
Page 8: Table Of Contents
Contents Meaning of Symbols in the Guide ....2 Projecting Positioning the Document Camera ......22 Safety Instructions . - Page 9 Problems Connecting a Laptop ........50 Epson Projector Contact List ....... . 51 EUROPE .
-
Page 10: Introduction
Introduction You can use this document camera to capture and project pages from books or other documents, and even three-dimensional objects. You can also use the software supplied to operate the document camera from a computer. -
Page 11: Included Items
Included Items • Remote control with 2 AA batteries • Power cord and adapter • Computer cable • USB cable • EPSON Document Camera Software CD-ROM • Document CD-ROM • Quick Start Guide • Microscope adapter... -
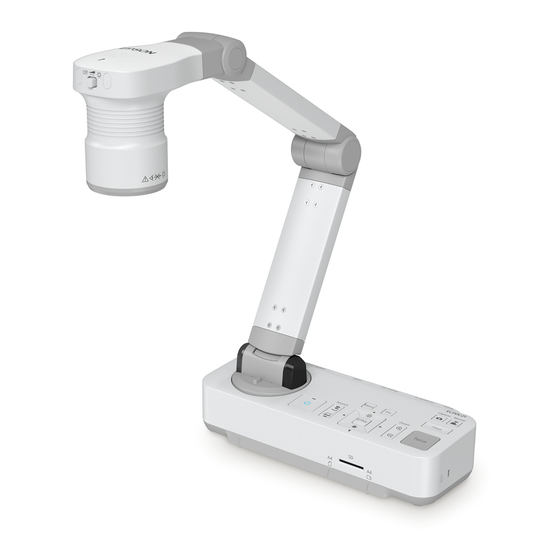
Page 12: Document Camera Parts
Document Camera Parts Name Function Top/Side/Rear Security cable installation Lets you attach a commercially available security point cable to lock the document camera in place. Camera Head Name Function Camera head s "Camera Head" p.12 Remote receiver Receives signals from the remote control. Control panel s "Control Panel"... -
Page 13: Control Panel
Document Camera Parts Name Function Name Function Camera arm Extends or retracts to adjust the height of the camera [Menu] button Opens and closes the menu. head. When the menu screen is displayed, pressing these ] [ ] [ ] buttons selects menu items and setting values. -
Page 14: Interface
Document Camera Parts Interface Base Name Function Power (AC adapter/DC In) Connects the supplied power cord and adapter. port Computer In port Inputs image signals from a computer. Name Function Display Out port Outputs images to image devices such as projectors. Mounting points You can attach the document camera to a table, cart, HDMI port... -
Page 15: Remote Control Buttons
Projector operations Remote Control Name Function [t] power button When used with an Epson projector, turns the projector on or off. You cannot operate the document camera with this button. [A/V Mute] button Turns the video and audio of an Epson projector on or off. - Page 16 Remote Control Buttons Name Function [Brightness] button Adjusts the projected image brightness. [SD Card Viewer] button Projects images and movies on the SD card as a slideshow. Press the [Single] button to display the image on one screen, and press the [Split] button to display two images on the left and right.
-
Page 17: Connecting
Connecting Follow the instructions in this section to set up the document camera. -
Page 18: Connecting The Document Camera Directly To A Projector
Connecting the Document Camera Directly to a Projector You can connect the document camera directly to image devices, such as a the document camera are output from the projector. Only audio from the projector or external monitor, using a computer cable or HDMI cable. SD card is output. - Page 19 Connecting the Document Camera Directly to a Projector • This connection method is only available when the document camera is connected to a computer using a computer cable. If the computer you are using does not have a VGA output port, connect the computer directly to the projector.
-
Page 20: Connecting To A Projector Using A Computer
Connecting to a Projector Using a Computer When the document camera is connected to a computer using a USB cable, you can operate the document camera from the computer. Using the software supplied, you can save images and video, adjust picture quality, zoom, and so on. -
Page 21: Projecting
Projecting... -
Page 22: Positioning The Document Camera
Positioning the Document Camera Raise the camera arm with one hand while holding the base of the camera with your other hand. Rotate the camera arm as shown. Attention Do not try to press the arm flat or fold it backwards. Otherwise, the document camera may be damaged. -
Page 23: Plugging In And Turning On
Plugging In and Turning On Connect the document camera to the projector with a cable before turning Select the appropriate source on the projector depending on the on the document camera. "Connecting" p.17 port to which you connected. Live images from the document camera are projected from the Connect the power cord as shown and plug the cord into a wall projector. -
Page 24: Projecting
Projecting Place your document on the table under the camera head. Align If necessary, you can adjust the brightness of the image using the center of your document with the mark on the side of the the [ ] or [ ] on the document camera or remote control. -
Page 25: Switching The Projected Image
Projecting • You can zoom up to 12x optically and 10x digitally. (When the optical zoom rate reaches the maximum value, it switches to the digital zoom.) When using the optical zoom: ]: Projects images from a computer. ]: Projects images (live or on an SD card) from the document camera. When using the digital zoom: •... -
Page 26: Outputting Images And Sound
Projecting Outputting Images and Sound Freezing an Image When connecting multiple devices to one document camera, the image and Press and release the [Freeze] button on the document camera or the audio are output as follows. remote control to freeze the image. After freezing the image, you can remove your document while leaving its When [ ] is selected using the Source button... -
Page 27: Projecting Through A Microscope
Projecting Projecting Through a Microscope Projected image To display objects as seen through a microscope, use the included Press the [Focus] button on the document camera or the [Auto microscope adapter. Focus] button on the remote control. • Before installing the document camera, make the following settings: - Focus the microscope and adjust the zoom - Press the [Menu] button, and then select Image >... - Page 28 Projecting Adjust the height and angle of the camera head, and then attach it to the microscope adapter. With the microscope's eye piece in the center of the microscope adapter, tighten the three screws on the microscope adapter to secure it in place.
-
Page 29: Turning Off
Turning Off Turn off the document camera after use. Press the [ ] power button on the document camera or remote control. The following message is displayed on the projected image. Press the [ ] power button again. The projected image disappears, and the power indicator turns off. Disconnect the power cord and any other connected cables, and then fold down the camera arm. -
Page 30: Displaying Saved Images As A Slideshow
• If the card is not handled correctly • If a malfunction occurs or during repairs • If damage occurs due to a natural disaster Note that Epson accepts no responsibility for lost or corrupted data, even if the loss occurs during the warranty period. -
Page 31: Saving Images
Saving Images You can save images from the document camera to an SD card as still images. • Images are saved in JPEG format (1920 x 1080). • You can change the background color for the image in Background Color. When White is set and the image is saved, if you print the image on white paper, the area around the image may not stand out. -
Page 32: Recording Movies
Recording Movies You can save images and audio from the document camera to an SD card The recording indicator is lit blue while recording. as movies. • While recording, the elapsed time is displayed at the top right • Movies are saved in AVI format (images: Motion JPEG 720p/30 fps, of the screen. -
Page 33: Displaying A Slideshow (Sd Card Viewer Function)
Displaying a Slideshow (SD Card Viewer Function) You can display images saved on an SD card as a slideshow. You can start a slideshow using the [Enter] button on the This function is unavailable in the following situations: document camera or the remote control. Press the [Enter] button while projecting a live image, and then select Single •... -
Page 34: Dividing The Screen And Displaying Two Images (Split Screen)
Displaying a Slideshow (SD Card Viewer Function) Press the [Enter] button to hide the thumbnails. Displays thumbnails. Thumbnail [ ] button: Displays the previous file. This is not available while a movie is being displayed. This is not displayed while thumbnails are displayed. [ ] button: Displays the next file. -
Page 35: Displaying Live Images And Images On An Sd Card
Displaying a Slideshow (SD Card Viewer Function) Displaying live images and images on an SD card When projecting a live image from the document camera, you cannot display a movie from the SD card. Press the [Split] button on the remote control. Press the [Enter] button to hide the thumbnails. -
Page 36: Displaying Two Images On An Sd Card
Displaying a Slideshow (SD Card Viewer Function) You can also close the slideshow by pressing the [Esc] button when thumbnails are displayed. Displaying two images on an SD card Press the [Menu] button on the document camera or the remote Press the [Split] button on the remote control. -
Page 37: Available Combinations For The Split Screen Function
Displaying a Slideshow (SD Card Viewer Function) Left Source Right Source SD Card Movie SD Card Image Movies cannot be displayed on the right-hand side of the screen. Press the [Enter] button to hide the thumbnails. [ ] button: Displays the previous file. [ ] button: Displays the next file. -
Page 38: Image Adjustments And Effects
Image Adjustments and Effects The document camera provides a full range of image adjustments and effects, including freeze image, black-and-white, and the ability to change the display for color images. -
Page 39: Using The On-Screen Menu
Using the On-screen Menu Press the [Menu] button on the document camera or remote control to view the on-screen menu. See the following for details on each item in the on-screen menu. "On-Screen Menu Table" p.40 The following menu is displayed: Use the [ ] [ ] [ ] buttons to navigate the menu and adjust the settings. -
Page 40: On-Screen Menu Table
On-Screen Menu Table Image Menu Setup Item Explanation/Select White Balance Select the setting according to the lighting in the room where you are using the document camera. Auto : Automatically adjusts the image color according to the display environment. Cloudy: Suitable for use in cloudy weather. Daylight: Suitable for use in fair weather. -
Page 41: Function Menu
On-Screen Menu Table Setup Item Explanation/Select Advanced Makes advanced settings of live image. Exposure: Adjusts the light volume of images. Contrast: Adjusts the difference between bright and dark areas of images. Color Adjustment: Adjusts the reddish and bluish colors of the whole image. Edge Enhancement: Adjusts the emphasis on the contours of the image. - Page 42 On-Screen Menu Table Setup Item Explanation/Select HDMI Link When image devices that support the HDMI CEC standard are connected to the document camera, operations for the document camera and the image device can be linked together. HDMI Link: Set to On to enable the HDMI Link function.
-
Page 43: Sd Card Menu
On-Screen Menu Table SD Card Menu You can only make settings when an SD card has been inserted in the document camera. Setup Item Explanation/Select Single Screen The slideshow starts. Split Screen Split screen projection starts. SD Card Info. Displays information about the SD card. Memory Status: Displays the usage ratio of the SD card. -
Page 44: Using The Computer Software
Using the Computer Software The included software lets you operate the document camera from a computer. The software also lets you capture live images and record them as movies. -
Page 45: Using Easy Interactive Tools
Using Easy Interactive Tools When using the Easy Interactive Tools camera screen, you can display Intel Core2 Duo 1.2 GHz or faster images from the document camera on a computer connected via a USB Recommended: Intel Core i3 or faster cable. -
Page 46: Installing
Select Search on the Charms, and then search for Easy Interactive Tools Ver.X.XX. Turn on your computer. Right-click (press and hold) Easy Interactive Tools Ver.X.XX, and Insert the EPSON Document Camera Software CD-ROM in your then select Uninstall from the app bar. computer. The installer screen is automatically displayed. -
Page 47: Using Other Software
Using Other Software You need to install TWAIN Driver for Epson Document Camera (Ver. 2.00 Right-click (and hold) on TWAIN Driver for Epson Document or later) to use software that supports TWAIN. (Supports Windows only) Camera Ver.X.XX, and then select Uninstall from the application bar. -
Page 48: Solving Problems
Solving Problems... -
Page 49: Problems And Solutions
"Function Menu" p.41 or the nearest service center provided in this guide. "Epson Projector Contact List" p.51 To return all image settings to their initial values, select the Reset menu. -
Page 50: Problems Connecting A Laptop
Problems and Solutions • Images must be DCF-compliant, JPEG files to be displayed, such as • Windows from a digital camera. Do not edit the images, as this may change their Hold down the laptop's Fn key and press the key labeled with format and prevent them from being displayed. -
Page 51: Epson Projector Contact List
Epson Projector Contact List See the following contact list if any problems occur when using the http://www.mrservis.hr document camera outside Japan. CYPRUS See the Web Home Page provided with each contact for the latest contact information. If the country you are in is not provided, see the main home Mechatronic Ltd. - Page 52 Epson Projector Contact List GREECE LUXEMBURG Oktabit S.A. Epson Europe B.V. Branch office Belgium http://www.oktabit.gr http://www.epson.be HUNGARY MACEDONIA Epson Europe B.V. Digit Computer Engineering Branch Office Hungary http://www.digit.com.mk http://www.epson.hu NETHERLANDS IRELAND Epson Europe B.V. Benelux sales office Epson (UK) Ltd.
-
Page 53: Africa
Manufacturer: SEIKO EPSON CORPORATION Address: 3-5, Owa 3-chome, Suwa-shi, Nagano-ken 392-8502 Japan SLOVAKIA Telephone: 81-266-52-3131 Epson EUROPE B.V. Branch Office Czech Republic http://www.epson.com/ http://www.epson.sk Importer: EPSON EUROPE B.V. SLOVENIA Address: Atlas Arena, Asia Building, Hoogoorddreef 5,1101 BA Amsterdam Zuidoost The Netherlands Birotehna d.o.o... -
Page 54: North, Central America & Caribbean Islands
CHILE Epson Chile S.A. COSTA RICA http://www.epson.cl Epson Costa Rica, S.A. http://www.epson.co.cr COLOMBIA Epson Colombia Ltd. MEXICO http://www.epson.com.co Epson Mexico, S.A. de C.V. http://www.epson.com.mx PERU Epson Peru S.A. ECUADOR http://www.epson.com.pe Epson Ecuador http://www.epson.com.ec VENEZUELA Epson Venezuela S.A. U.S.A. http://www.epson.com.ve Epson America, Inc. - Page 55 Epson Projector Contact List http://www.epson.com.cn PHILIPPINES Epson Philippines Co. HONG KONG http://www.epson.com.ph Epson Hong Kong Ltd. http://www.epson.com.hk SINGAPORE Epson Singapore Pte. Ltd. INDIA http://www.epson.com.sg Epson India Pvt., Ltd. http://www.epson.co.in TAIWAN Epson Taiwan Technology & Trading Ltd. INDONESIA http://www.epson.com.tw PT. Epson Indonesia http://www.epson.co.id...
-
Page 56: Notices
Notices... -
Page 57: Specifications
Specifications General Specifications ELPDC21 Product name Dimensions Open (W ^ D ^ H): 270 ^ 328 ^ 502 mm (10.6 ^ 12.9 ^ 19.8 inches) Folded (W ^ D ^ H): 375 ^ 122 ^ 120 mm (14.8 ^ 4.8 ^ 4.7 inches) 1/2.7 inch CMOS sensor... - Page 58 Specifications Input port Computer In port Mini D-Sub15-pin (female) Mini D-Sub15-pin (female) Output port Display Out port Output: SXGA (1280 x 1024)/XGA (1024 x 768)/WXGA (1280 x 800)/HD (1360 x 768)/1080p (1920 x 1080) HDMI port HDMI Output: SDTV (480p)/HDTV (720p, 1080p) USB connector (TypeB) Connector port USB-B port...
-
Page 59: Symbols Indicating The Device Meets The Iec60950-1 A2 Safety
Symbols Indicating the Device Meets the IEC60950-1 A2 Safety Standards The following table lists the meaning of the safety symbols labeled on the Symbol mark Approved Meaning equipment. standards IEC60417 Battery, general Symbol mark Approved Meaning No.5001B On battery powered equipment. To standards identify a device for instance a cover for IEC60417... - Page 60 Symbols Indicating the Device Meets the IEC60950-1 A2 Safety Standards Symbol mark Approved Meaning standards ISO 3864 Contact prohibition To indicate injury that could occur due to touching a specific part of the equipment. Never look into the optical lens while the projector is on.
-
Page 61: General Notice
CPU Boards and Power Supplies used with Class B Personal Computers interference by one or more of the following measures. • Reorient or relocate the receiving antenna. Epson America, Inc. • Increase the separation between the equipment and receiver. Located at: 3840 Kilroy Airport Way •... -
Page 62: Copyrights And Trademarks
HDMI and High-Definition Multimedia Interface are the trademarks or Neither Seiko Epson Corporation nor its affiliates shall be liable to the purchaser of this registered trademarks of HDMI Licensing LLC. product or third parties for damages, losses, costs, or expenses incurred by the...
Need help?
Do you have a question about the ELPDC21 and is the answer not in the manual?
Questions and answers