Table of Contents
Advertisement
Quick Links
EN
BL00963-200
Before You Begin
First Steps
Basic Photography and Playback
Owner's Manual
More on Photography
Thank you for your purchase of this
product. This manual describes how
More on Playback
to use your FUJIFILM REAL 3D W1
digital camera and the supplied soft-
Movies
ware. Be sure that you have read and
understood its contents before using
the camera.
Connections
Menus
For information on related products, visit our website at
Technical Notes
http://www.fujifilm.com/products/index.html
Troubleshooting
Appendix
Downloaded From camera-usermanual.com Fujifilm Manuals
Advertisement
Table of Contents

Related Manuals for FujiFilm FinePix Real 3D W1


Summary of Contents for FujiFilm FinePix Real 3D W1
- Page 1 More on Photography Thank you for your purchase of this product. This manual describes how More on Playback to use your FUJIFILM REAL 3D W1 digital camera and the supplied soft- Movies ware. Be sure that you have read and understood its contents before using the camera.
-
Page 2: For Your Safety
Downloaded From camera-usermanual.com Fujifilm Manuals... -
Page 3: Safety Notes
AC power adapter. Continued use of the camera can fi ed service personnel. uct, ask the service technician to cause a fi re or electric shock. Contact your FUJIFILM dealer. perform safety checks to determine Damage Requiring Service: Unplug this... - Page 4 Do not leave this camera in places subject to extremely high temperatures. Do not leave fi re or electric shock. If the cord is damaged, contact your FUJIFILM dealer. the camera in locations such as a sealed vehicle or in direct sunlight. This can cause a fi re.
- Page 5 AC power adapters contact with liquid crystal. Take the use. This is normal. Use only FUJIFILM AC power adapt- urgent action indicated should any The battery is not charged at ship- ers designated for use with this cam- of the following situations arise: ment.
-
Page 6: Notices
Notes on the Grant To comply with Part 15 of the FCC Rules, this product must be used with a FUJIFILM-specifi ed ferrite-core A/V cable, USB cable, and DC supply cord. Downloaded From camera-usermanual.com Fujifilm Manuals... - Page 7 Trademark Information help prevent potential negative consequences to the en- xD-Picture Card is a trademark of FUJIFILM Corporation. Macintosh, Quick- vironment and human health, which could otherwise be Time, and Mac OS are trademarks of Apple Inc. in the U.S.A. and other caused by inappropriate waste handling of this product.
-
Page 8: About This Manual
Pictures can be stored in the camera’s internal memory or on optional SD and SDHC memory cards. In this manual, SD memory cards are referred to as “memory cards.” For more information, see page 9. Downloaded From camera-usermanual.com Fujifilm Manuals viii... -
Page 9: Camera Q & A
Can I print pictures on my home printer? Printing pictures Can I copy my pictures to my computer? Viewing pictures on a computer Can I copy pictures to a hand-held device? Infrared (IR) * For information on printing C pictures, visit http://fujifilm.com/3d/print/. Downloaded From camera-usermanual.com Fujifilm Manuals... - Page 10 How do I take a group portrait that includes the photographer? Self-timer mode How do I frame pictures with the subject off to one side? Focus lock 29, 30, Can I choose shutter speed or aperture? P, A, and M modes Downloaded From camera-usermanual.com Fujifilm Manuals...
- Page 11 Can I crop unwanted elements out of my pictures? Crop (trimming) Can I make small copies of pictures? Resize Can I copy pictures from internal memory to a memory card? Copy How do I view my pictures on TV? Viewing pictures on TV Downloaded From camera-usermanual.com Fujifilm Manuals...
-
Page 12: Table Of Contents
Basic Photography and Playback k Sort by Date ..................38 Taking C Pictures in Auto Mode .........13 A Deleting Pictures ..............39 Viewing C Pictures ..............18 Shooting and Viewing D Pictures ........19 Taking Pictures in D ..............19 Viewing Pictures in D..............19 Downloaded From camera-usermanual.com Fujifilm Manuals... - Page 13 B FRAME NO................83 D WHITE BALANCE ..............60 D DIGITAL ZOOM (D Only) ..........84 P G COLOR ...............61 o 3DREC ..................84 I PLAYBACK VOLUME ............84 J LCD BRIGHTNESS ..............84 K FORMAT..................85 M AUTO POWER OFF ..............85 Downloaded From camera-usermanual.com Fujifilm Manuals xiii...
- Page 14 Specifi cations ................105 FUJIFILM Digital Camera Worldwide Network ..... 109 3 Caution: Using the FinePix REAL 3D W1 D display is recommended for young children (up to the age of about six) whose visual system is still maturing and for individuals with notable diff erences in vision between their two eyes, who may fi nd it diffi cult or impos- sible to observe the C eff ect.
-
Page 15: Introduction
NP-95 rechargeable AC-5VC AC power battery adapter Attaching the Strap Attach the strap as shown. USB cable Strap 3 Caution To ensure that you do not drop the camera, wear the strap on your wrist. Downloaded From camera-usermanual.com Fujifilm Manuals... -
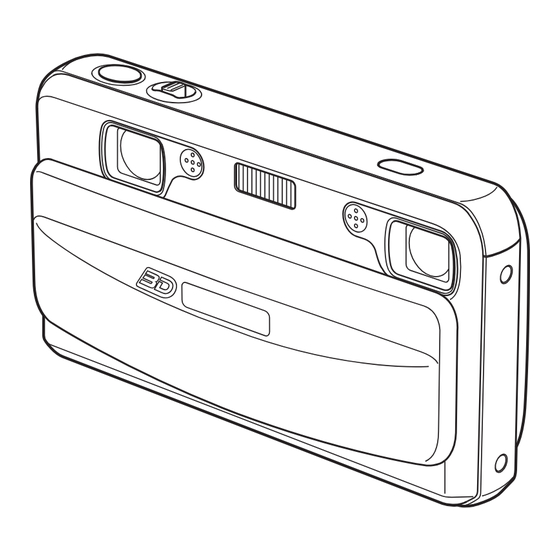
Page 16: Parts Of The Camera
3D button ............13 2 Tip: Monitor Brightness Pressing the m button briefl y increases monitor brightness, making the display easier to see in bright light. Nor- mal brightness is restored when a photograph is taken. Downloaded From camera-usermanual.com Fujifilm Manuals... -
Page 17: Camera Displays
02 02 12 / 31 / 2050 12 / 31 / 2050 10 : 00 AM 10 : 00 AM -1 -1 Note: The indicators actually displayed during shooting and playback vary with camera settings. Downloaded From camera-usermanual.com Fujifilm Manuals... -
Page 18: Inserting The Battery
The battery will slide in easily in the correct orientation; the camera will not turn on if the battery is inserted incorrectly. Downloaded From camera-usermanual.com Fujifilm Manuals... - Page 19 • Do not remove the labels from the battery or attempt to split or peel the outer casing. • The battery gradually loses its charge when not in use. Charge the battery one or two days before use. Downloaded From camera-usermanual.com Fujifilm Manuals...
-
Page 20: Charging The Battery
DEMO MODE option in the setup menu (pg. On (red) Battery charging 81). Battery fully charged Blinks (red) Battery fault The indicator lamp also shows focus, fl ash, exposure, and recording status (pg. 17). Downloaded From camera-usermanual.com Fujifilm Manuals... -
Page 21: Inserting A Memory Card
SanDisk SD and SDHC memory cards have been approved for use in the camera. A complete list of approved memory cards is available at http://www.fujifilm.com/products/digital_cameras/index.html. Operation is not guaranteed with other cards. The camera can not be used with xD-Picture Cards or MultiMediaCard (MMC) devices. - Page 22 • Memory cards may be warm to the touch after be- ing removed from the camera. This is normal and Be sure card is in correct ori- does not indicate a malfunction. entation; do not insert at an angle or use force. Downloaded From camera-usermanual.com Fujifilm Manuals...
- Page 23 Always use the camera to delete pictures from memory cards and internal memory; before editing or renaming fi les, copy them to a computer and edit or rename the copies, not the originals. Downloaded From camera-usermanual.com Fujifilm Manuals...
-
Page 24: Turning The Camera On And Off
M AUTO POWER OFF menu (pg. 85; note that OFF is not available when p QUICK AF is selected for S POWER MANAGEMENT). To turn the camera on, close and reopen the lens cover or press the a button for about a second. Downloaded From camera-usermanual.com Fujifilm Manuals... -
Page 25: Basic Setup
To change the order in which the year, 1.2 Press MENU/OK. month, and day are displayed, highlight the date format and press the selector up or down. 2.2 Press MENU/OK. Downloaded From camera-usermanual.com Fujifilm Manuals... - Page 26 3.1 Press the selector up or down to highlight one of the follow- ing options: • n POWER SAVE: Save battery power. • p QUICK AF: Reduce focusing time, en- suring a quick shutter response. 3.2 Press MENU/OK. Downloaded From camera-usermanual.com Fujifilm Manuals...
-
Page 27: Taking C Pictures In Auto Mode
AUTO PARALLAX CONTROL (pg. 63). Parallax monitor. can still be adjusted manually when ON is selected. AUTO 3 Caution: Excessive Parallax Too much parallax may make it impossible to per- ceive the 3D eff ect. Downloaded From camera-usermanual.com Fujifilm Manuals... - Page 28 105), poorly lit or at the edge of the frame, or if the display is viewed from the side. 2 Tip: Focus Lock Use focus lock (pg. 20) to focus on subjects that are not in the focus frame. Downloaded From camera-usermanual.com Fujifilm Manuals...
- Page 29 Use focus lock (pg. 20) to focus on subjects that will not be in the center of the frame in the fi nal photograph. Downloaded From camera-usermanual.com Fujifilm Manuals...
-
Page 30: Silent Mode
If the camera is unable to focus, the focus frame will turn red, s will be displayed, and the indicator lamp will blink green. Change the composition or use focus lock (pg. 20). Downloaded From camera-usermanual.com Fujifilm Manuals... - Page 31 For information on using the fl ash ted, format error, or other memory when lighting is poor, see page 23. error). 2 Tip: Warnings Detailed warnings appear in the display. See pages 98–101 for more information. Downloaded From camera-usermanual.com Fujifilm Manuals...
-
Page 32: Viewing C Pictures
2 Tip: The Playback Menu view pictures in the order Pictures can also be deleted from the playback menu recorded, left to view pic- (pg. 39). tures in reverse order. Press the shutter button to exit to shooting mode. Downloaded From camera-usermanual.com Fujifilm Manuals... -
Page 33: Shooting And Viewing D Pictures
(Exif 2.2). played. AUTO 100-0001 100-0001 Note that the picture angle of photographs taken Images that were originally recorded in indicated by the absence of a g icon. diff ers from that of images. Downloaded From camera-usermanual.com Fujifilm Manuals... -
Page 34: Focus Lock (Cd)
(AF/AE lock). Press the rest of the way down Press halfway Repeat steps 1 and 2 as desired to refocus before taking the picture. Downloaded From camera-usermanual.com Fujifilm Manuals... - Page 35 Use focus lock (pg. 20) or adjust parallax manually (pg. 13). Downloaded From camera-usermanual.com Fujifilm Manuals...
-
Page 36: F Macro Mode (Close-Ups) D
• The fl ash may fail to light the entire subject at very short ranges. Increase the distance to the subject and try again. • Macro mode is not available in twin camera mode (pg. 31). It is not available during C shooting except in A mode (pg. 33). Downloaded From camera-usermanual.com Fujifilm Manuals... -
Page 37: N Using The Flash (Super Intelligent Flash) (Cd)
Capture both the main subject and the background under low light (note that O (slow sync) brightly lit scenes may be overexposed). M (slow sync with As for slow sync, except that camera minimizes “red-eye.” Available in C only. red-eye reduction) Downloaded From camera-usermanual.com Fujifilm Manuals... - Page 38 (J) is available in auto (K), fi ll fl ash (L), and slow sync (M) modes. Red-eye removal minimizes “red-eye” caused when light from the fl ash is refl ected from the subject’s retinas as shown in the illustration at right. Downloaded From camera-usermanual.com Fujifilm Manuals...
-
Page 39: Using The Self-Timer Cd
Press the shutter button the rest of the way down to start the timer. The display in the monitor shows the number of seconds remaining until the shutter is released. To stop the timer before the picture is taken, press DISP/BACK. Downloaded From camera-usermanual.com Fujifilm Manuals... - Page 40 Be careful not to move until the picture has been recorded. 1 Note The self-timer turns off automatically when the picture is taken, a diff erent shooting mode is selected, playback mode is selected, or the camera is turned off . Downloaded From camera-usermanual.com Fujifilm Manuals...
-
Page 41: Shooting Mode (Cd)
CANCEL CANCEL ing SP in the mode selection menu displays the options listed on the following page; press the selector up or down to highlight the desired scene and press MENU/OK. Downloaded From camera-usermanual.com Fujifilm Manuals... - Page 42 Capture indoor background lighting under low-light conditions. Choose E ANTI-BLUR (picture stabilization) mode for fast shutter speeds that reduce blur caused by ANTI-BLUR camera shake or subject movement. Recommended for photographs of children and pets. Downloaded From camera-usermanual.com Fujifilm Manuals...
-
Page 43: M Manual
The Exposure Indicator The amount the picture will be Press MENU/OK. Shutter speed and under- or over-exposed at cur- aperture will be displayed. rent settings is shown by the ex- posure indicator. Shutter speed Aperture Downloaded From camera-usermanual.com Fujifilm Manuals... -
Page 44: A Aperture Priority Ae
3 Caution If the subject is outside the metering range of the cam- era, the shutter speed display will show “---”. Press the Exposure compensation shutter button halfway to measure exposure again. Aperture Downloaded From camera-usermanual.com Fujifilm Manuals... -
Page 45: P Program Ae
• W 2-SENSITIVITY: The camera sets sensitivity sep- arately for each lens (pg. 32). 3 Caution: B Mode In B mode, the camera dis- plays the view through the left lens only. Be careful not to obstruct the right lens during shooting. Downloaded From camera-usermanual.com Fujifilm Manuals... -
Page 46: Tele/Wide
If lighting is poor, the shot taken with the right lens will be less blurred, while the shot taken with the left lens will have less noise. Downloaded From camera-usermanual.com Fujifilm Manuals... -
Page 47: A Advanced 3D
• B INTERVAL 3D SHOOTING: The camera automatically takes the two shots at a fi xed interval (pg. 35). • A INDIVID. SHUTTER 3D: One shot is taken each time you press the shutter button (pg. 34). Downloaded From camera-usermanual.com Fujifilm Manuals... -
Page 48: A Individ. Shutter 3D
SHOOTING MENU camera is moved between the two shots is SHOOTING MODE between of the distance to the TURN POWER MANAGEMENT SET-UP subject. First shot shown by E Downloaded From camera-usermanual.com Fujifilm Manuals... -
Page 49: B Interval 3D Shooting
SHOOTING MENU SHOOTING MENU MIN. MINIMUM SHOOTING MODE 1.0SEC 3D INTERVAL TIME 1.5SEC TURN 2.0SEC POWER MANAGEMENT 3.0SEC SET-UP 5.0SEC 0SEC Downloaded From camera-usermanual.com Fujifilm Manuals... -
Page 50: Playback Options
D). In C playback, press the Sort by date and S buttons to adjust parallax. Hide indicators for improved C viewing. 1 Note Pictures taken using other cameras are indicated by a m (“gift image”) icon during playback. Downloaded From camera-usermanual.com Fujifilm Manuals... -
Page 51: Playback Zoom
The 3D eff ect may not be visible at high zoom ratios or when the monitor is viewed at an angle. If C pictures appear blurred even after parallax is ad- justed, select D playback. Downloaded From camera-usermanual.com Fujifilm Manuals... -
Page 52: Multi-Frame Playback
Press the selector left or right to scroll through the pictures taken on the highlighted date. Keep the selector pressed to scroll rapidly to the desired frame. Downloaded From camera-usermanual.com Fujifilm Manuals... -
Page 53: A Deleting Pictures
• If a message appears stating that the selected images PLAYBACK MENU are part of a DPOF print order, press MENU/OK to delete PARALLAX CONTROL ERASE BACK the pictures. RED EYE REMOVAL FRAME IMAGE ROTATE ALL FRAMES PROTECT COPY Downloaded From camera-usermanual.com Fujifilm Manuals... - Page 54 DISP/BACK to cancel before all ture). pictures have been deleted CANCEL CANCEL Press DISP/BACK to exit when all the desired pic- (any pictures deleted before tures have been deleted. the button was pressed can not be recovered). Downloaded From camera-usermanual.com Fujifilm Manuals...
-
Page 55: F Recording Movies
If ON is selected for i AUTO PARALLAX CON- TROL (pg. 63), parallax will be adjusted automati- cally when the shutter button is pressed halfway. If OFF is selected, adjust parallax manually before recording begins (pg. 13). Downloaded From camera-usermanual.com Fujifilm Manuals... - Page 56 1 Note Focus is set when recording begins; exposure and white balance are adjusted automatically through- out recording. The color and brightness of the im- age may vary from that displayed before recording begins. Downloaded From camera-usermanual.com Fujifilm Manuals...
-
Page 57: Viewing Movies
Press MENU/OK to pause playback and dis- Adjust play volume controls. Press the selector volume up or down to adjust the volume; press MENU/OK again to resume playback. Downloaded From camera-usermanual.com Fujifilm Manuals... -
Page 58: Viewing Pictures On Tv
TV; use the television volume controls to adjust the volume. 1 Note Image quality drops during movie playback. 3 Caution When connecting the cable, be sure the connectors are fully inserted. Downloaded From camera-usermanual.com Fujifilm Manuals... -
Page 59: Printing Pictures Via Usb (D Only)
1 Notes • Print pictures from internal memory or a memory card that has been formatted in the camera. • Default printer page size and print quality settings are used when printing via direct USB connection. Downloaded From camera-usermanual.com Fujifilm Manuals... -
Page 60: Printing Selected Pictures
If printing is interrupted, press a to turn the camera CANCEL off and then on again. Press MENU/OK to start printing. Disconnecting the Camera Confi rm that the above message is not displayed and turn the camera off . Disconnect the USB cable. Downloaded From camera-usermanual.com Fujifilm Manuals... -
Page 61: Printing The Dpof Print Order
In the PictBridge display, press DISP/ BACK to open the PictBridge menu. Press the selector up or down to CANCEL highlight u PRINT DPOF. Press MENU/OK to start printing. PICTBRIDGE PRINT WITH DATE PRINT WITHOUT DATE PRINT DPOF Downloaded From camera-usermanual.com Fujifilm Manuals... -
Page 62: Creating A Dpof Print Order
MODE MENU ing on pictures. ber of copies to the number of faces detected. IR COMMUNICATION SLIDE SHOW PRINT ORDER ( DPOF ) WITH DATE WITHOUT DATE WITHOUT DATE: Print pictures without RESET ALL date. Downloaded From camera-usermanual.com Fujifilm Manuals... - Page 63 RESET DPOF OK? taining a print order created by another camera, the message shown at right will be displayed. Pressing MENU/OK cancels the CANCEL CANCEL print order; a new print order must be created as described above. Downloaded From camera-usermanual.com Fujifilm Manuals...
-
Page 64: Viewing Pictures On A Computer
3 Caution For information about Windows 7, visit http://www.fujifilm.com/support/download/camera/software/. Other versions of Windows are not supported. Operation is not guaranteed on home-built computers or computers that have been upgraded from earlier versions of Windows. - Page 65 Installation is now complete. Proceed to “Connecting the Camera” on page 52. Note that the Windows CD may be required when the camera is connected for the fi rst time. Downloaded From camera-usermanual.com Fujifilm Manuals...
-
Page 66: Connecting The Camera
How to Use FinePixViewer in the rectly to the computer; do not use a USB hub FinePixViewer Help menu. or keyboard. 1 Note The camera will not turn off automatically while connected to a computer. Downloaded From camera-usermanual.com Fujifilm Manuals... - Page 67 • The user bears all applicable fees charged by the the contents carefully before clicking OK. phone company or Internet service provider when using services that require an Internet connection. Downloaded From camera-usermanual.com Fujifilm Manuals...
-
Page 68: Ir Communication
• For information on supported infrared devices, consult the compatibility information for this camera at the fol- lowing website: http://fujifilm.com/products/digital_cameras/support/ir.html. • C images can only be transmitted to supported devices. Play images back in D before transmitting them to other devices. Downloaded From camera-usermanual.com Fujifilm Manuals... -
Page 69: Sending Pictures To Other Devices
TRANSMITTING DATA TRANSMITTING DATA IR COMMUNICATION CANCEL TRANSMISSION COMPLETED will appear in TRANSMIT RECEIVE CANCEL the monitor when transmission is complete. Press the selector left or right to dis- play a picture you wish to send. Downloaded From camera-usermanual.com Fujifilm Manuals... -
Page 70: Receiving Pictures From Other Devices
• Image size may be reduced for transmission. O - and P -size pictures are converted to size Q (pg. 59). • Movies can not be shared via infrared. C pictures displayed in D are converted to JPEG for transmission; otherwise, C pictures are transmitted in C format. Downloaded From camera-usermanual.com Fujifilm Manuals... -
Page 71: Using The Menus: Shooting Mode
Press MENU/OK to select the high- COLOR lighted option. Press the selector up or down to highlight the desired menu item. Press the selector right to display op- tions for the highlighted item. MODE MENU AUTO IMAGE QUALITY FINE NORMAL Downloaded From camera-usermanual.com Fujifilm Manuals... -
Page 72: F-Mode Menu Options
SETTING APERTURE — — modes A (pg. 30). Adjust exposure for bright, dark, or high-contrast scenes in EXP. COMPENSATION — — mode P (pg. 31). 1 Note Some options are not available in all shooting modes. Downloaded From camera-usermanual.com Fujifilm Manuals... -
Page 73: N Iso
(pg. 104) is shown to the right of the image quality icon in the display. 1 Note Image quality is not reset when the camera is turned off or another shooting mode is selected. Downloaded From camera-usermanual.com Fujifilm Manuals... -
Page 74: T Image Quality
• Auto white balance is used with the fl ash. Turn the fl ash off (pg. 23) to take pictures at other settings. • Results vary with shooting conditions. Play pictures back after shooting to check colors in the monitor. Downloaded From camera-usermanual.com Fujifilm Manuals... -
Page 75: P G Color
• P G COLOR is not reset when the camera is turned off or another shooting mode is selected. • Depending on the subject, the eff ects of aF-CHROME may not be visible in the monitor. Downloaded From camera-usermanual.com Fujifilm Manuals... -
Page 76: Using The Shooting Menu
Press the selector up or down to highlight the desired menu item. Press the selector right to display op- tions for the highlighted item. SHOOTING MENU FACE DETECTION CONTINUOUS POWER MANAGEMENT POWER SAVE AUTO PARALLAX CONTROL QUICK AF SET-UP Downloaded From camera-usermanual.com Fujifilm Manuals... -
Page 77: Shooting Menu Options
(pg. 13). ON/ OFF Perform basic camera setup such as choosing a language M SET-UP W/X/Y/Z/V — and setting the time and date (pg. 78). 1 Note Some options are not available in all shooting modes. Downloaded From camera-usermanual.com Fujifilm Manuals... -
Page 78: Face Detection (D Only)
When red-eye removal is on, pictures are processed to (pg. 76). reduce red-eye before being recorded. Select ON for B SAVE ORG IMAGE in the setup menu (pg. 80) to save unprocessed copies of pictures created with red- eye removal. Downloaded From camera-usermanual.com Fujifilm Manuals... -
Page 79: Rcontinuous
1 Notes • The fl ash turns off automatically. The previously-se- lected fl ash mode is restored when OFF is selected for R CONTINUOUS. • Frame rate varies with shutter speed. Downloaded From camera-usermanual.com Fujifilm Manuals... -
Page 80: C Photometry
CENTER and use focus and is particularly eff ective for landscapes and lock; pg. 20). portraits of subjects dressed in black or white. Press halfway Focus frame Downloaded From camera-usermanual.com Fujifilm Manuals... -
Page 81: S Power Management
• n POWER SAVE does not take eff ect when Intelligent Face Detection is on. • If OFF is selected for M AUTO POWER OFF, changing the option selected for S POWER MANAGEMENT resets M AUTO POWER OFF to 5 MIN (pg. 85). Downloaded From camera-usermanual.com Fujifilm Manuals... -
Page 82: Using The Menus: Playback Mode
PRINT ORDER ( DPOF ) Press the selector up or down to highlight the desired option. Press the selector up or down to highlight the desired menu item. Press MENU/OK to select the high- lighted option. Downloaded From camera-usermanual.com Fujifilm Manuals... -
Page 83: F-Mode Menu Options
Intelligent Face detection. MULTIPLE Display several pictures at once. 3D FADE images fade in from D to C . 1 Note The camera will not turn off automatically while a slide show is in progress. Downloaded From camera-usermanual.com Fujifilm Manuals... -
Page 84: Using The Playback Menu
Create cropped copies of pictures (pg. ERASE G CROP BACK RED EYE REMOVAL 76). FRAME IMAGE ROTATE ALL FRAMES PROTECT O RESIZE Create small copies of pictures (pg. 77). COPY M SET-UP Perform basic camera setup (pg. 78). Downloaded From camera-usermanual.com Fujifilm Manuals... -
Page 85: Parallax Control (C Only)
• The amount of time needed to process the image varies with the number of faces detected. • Copies created with B RED EYE REMOVAL are indi- cated by a e icon during playback. Downloaded From camera-usermanual.com Fujifilm Manuals... -
Page 86: C Image Rotate (D Only)
To rotate a picture, play the picture back and se- tion (to exit without rotating the pic- lect C IMAGE ROTATE in the playback menu. ture, press DISP/BACK). The next time the picture is played back, it will automatically be rotated. Downloaded From camera-usermanual.com Fujifilm Manuals... -
Page 87: D Protect
Press DISP/BACK to exit 3 Caution when the operation is complete. Protected pictures will be deleted when the memory card or internal memory is formatted (pg. 85). Downloaded From camera-usermanual.com Fujifilm Manuals... -
Page 88: E Copy
COPY INTERNAL MEMORY CARD FRAME CARD INTERNAL MEMORY ALL FRAMES CANCEL Downloaded From camera-usermanual.com Fujifilm Manuals... - Page 89 • DPOF print information is not copied (pg. 48). play the desired picture. Press MENU/OK to copy the picture. Repeat steps 1–2 to copy additional images. Press DISP/BACK to exit when the operation is complete. Downloaded From camera-usermanual.com Fujifilm Manuals...
-
Page 90: G Crop
If the picture was shot with CROP CROP Intelligent Face Detection (pg. 64), g will be displayed in the monitor. Press the R button FACE CROPPING FACE CROPPING to zoom in on the selected CANCEL CANCEL face. Downloaded From camera-usermanual.com Fujifilm Manuals... -
Page 91: O Resize
To create a small copy of a picture, play the picture back and select O RESIZE in the playback menu (pg. 70). Press the selector up or down Press MENU/OK to select the high- to highlight a STANDARD or lighted option. b SMALL. Press MENU/OK to copy the picture at the selected size. Downloaded From camera-usermanual.com Fujifilm Manuals... -
Page 92: The Setup Menu
1.3 Press the selector right to dis- 2.2 Press the selector down to en- play the setup menu. ter the menu. SET-UP IMAGE DISP. 1.5 SEC FRAME NO. CONT. SAVE ORG IMAGE ILLUMINATION DIGITAL ZOOM 3DREC MPO+JPEG Downloaded From camera-usermanual.com Fujifilm Manuals... -
Page 93: Adjust Settings
BACKGROUND COLOR GUIDANCE DISPLAY 3.2 Press the selector right to dis- play options for the highlighted item. SET-UP FORMAT ENGLISH 5 MIN AUTO POWER OFF 2 MIN 2 MIN TIME DIFFERENCE BACKGROUND COLOR GUIDANCE DISPLAY Downloaded From camera-usermanual.com Fujifilm Manuals... -
Page 94: Setup Menu Options
2 MIN TIME DIFFERENCE Set the clock to local time (pg. 86). BACKGROUND COLOR Choose a color scheme for menus and cursors. — — GUIDANCE DISPLAY Choose whether to display tool tips. ON / OFF Downloaded From camera-usermanual.com Fujifilm Manuals... - Page 95 If ON is selected when the camera is powered by an AC pow- DEMO MODE er adapter, a demo will play when the camera is turned on. ON / OFF Press the shutter button to exit demo mode. Downloaded From camera-usermanual.com Fujifilm Manuals...
-
Page 96: Aimage Disp
Not available in C or B mode or when an option other than OFF is selected for R CONTINUOUS (pg. 65). • OFF: Pictures are not automatically displayed after shooting. Downloaded From camera-usermanual.com Fujifilm Manuals... -
Page 97: Bframe No
• If the frame number reaches 999-9999, the shutter release will be disabled (pg. 100). • Selecting R RESET (pg. 81) resets B FRAME NO. to CONTINUOUS but does not reset frame numbering. • Frame numbers for pictures taken with other cameras may diff er. Downloaded From camera-usermanual.com Fujifilm Manuals... -
Page 98: D Digital Zoom (D Only)
Optical zoom Optical zoom Digital Press the selector up or down zoom LCD BRIGHTNESS to choose display brightness 3 Caution and press MENU/OK to select. Digital zoom produces lower quality images than opti- cal zoom. CANCEL Downloaded From camera-usermanual.com Fujifilm Manuals... -
Page 99: K Format
• Do not open the battery-chamber cover during for- To reactivate the camera after it has turned off auto- matting. matically, open the lens cover or press the a button for about a second (pg. 10). Downloaded From camera-usermanual.com Fujifilm Manuals... -
Page 100: N Time Difference
+, –, hours, or min- After changing time zones, check that the utes; press up or down to edit. date and time are correct. The minimum increment is 15 minutes. 1.4 Press MENU/OK when settings are complete. Downloaded From camera-usermanual.com Fujifilm Manuals... -
Page 101: R 3D Caution Disp
C and press MENU/OK to select. Positive values raise display). the left lens. • OFF: C enabled with no warning displayed af- ter prolonged use. • NOT 3D DISP: C disabled. Downloaded From camera-usermanual.com Fujifilm Manuals... -
Page 102: Optional Accessories
Optional Accessories The camera supports a wide range of accessories from FUJIFILM and other manufacturers. ■ ■ Digital Viewers Digital Viewers ■ ■ Audio/Visual Audio/Visual FinePix REAL 3D V1 (sold separately) TV (available from third-party suppliers) ■ ■ Computer Related... -
Page 103: Accessories From Fujifilm
Optional Accessories Accessories from FUJIFILM Accessories from FUJIFILM The following optional accessories are available from FUJIFILM. For the latest information on the acces- sories available in your region, check with your local FUJIFILM representative or visit http://www.fujifilm. com/products/digital_cameras/index.html. Rechargeable Rechargeable... -
Page 104: Caring For The Camera
Any remaining stains can be removed by wiping ter, motor, transformer, or magnet gently with a piece of FUJIFILM lens-cleaning pa- • in contact with volatile chemicals such as pesti- per to which a small amount of lens-cleaning fl uid cides has been applied. -
Page 105: Troubleshooting
The battery has reached the end of its charging the battery does The battery has been charged many times. life. Purchase a new battery. If the battery still not charge. fails to charge, contact your FUJIFILM dealer. Downloaded From camera-usermanual.com Fujifilm Manuals... - Page 106 Cancel macro mode. not focus. The subject is not suited to autofocus. Use focus lock. Macro mode is Macro mode is not available in the current Close-ups Choose a diff erent shooting mode. not available. shooting mode. Downloaded From camera-usermanual.com Fujifilm Manuals...
- Page 107 Shoot in bright light. — Wrong subject The selected subject is closer to the center Recompose the picture or turn face detection selected. of the frame than the main subject. off and frame the picture using focus lock. Downloaded From camera-usermanual.com Fujifilm Manuals...
- Page 108 Turn the camera off before connecting the Pictures are not AC power adapter. Leaving the camera on Recording Power was interrupted during shooting. — recorded. can result in corrupted fi les or damage to the memory card or internal memory. Downloaded From camera-usermanual.com Fujifilm Manuals...
- Page 109 The speaker is obstructed. Hold the camera correctly during playback. — Selected pictures Some of the pictures selected for deletion are Remove protection using the device with Deletion are not deleted. protected. which it was originally applied. Downloaded From camera-usermanual.com Fujifilm Manuals...
- Page 110 The date is not printed. AC power Demo slides are Press the shutter button to exit demo and ON is selected for s DEMO MODE. 6, 81 adapter displayed. select OFF for s DEMO MODE. Downloaded From camera-usermanual.com Fujifilm Manuals...
- Page 111 4–5, 6, Temporary camera malfunction. and reconnect the AC power adapter. If the function as expected. problem persists, contact your FUJIFILM dealer. No sound. The camera is in silent mode. Turn silent mode off . Downloaded From camera-usermanual.com Fujifilm Manuals...
-
Page 112: Warning Messages And Displays
The memory card contacts require cleaning. sage is repeated, format the memory card (pg. 85). If the message persists, replace the memory card. Camera malfunction. Contact a FUJIFILM dealer (pg. 108). PROTECTED CARD The memory card is locked. Unlock the memory card (pg. 7). - Page 113 Incompatible memory card. Use a compatible memory card. Camera malfunction. Contact a FUJIFILM dealer (pg. 108). b MEMORY FULL a MEMORY FULL The memory card or internal memory is full; Delete pictures or insert a memory card with more free pictures can not be recorded or copied.
- Page 114 The picture can not be printed using DPOF. — F CAN NOT SET DPOF Movies can not be printed using DPOF. — CAN NOT ROTATE The picture can not be rotated. — F CAN NOT ROTATE Movies can not be rotated. — Downloaded From camera-usermanual.com Fujifilm Manuals...
- Page 115 JFIF-JPEG or Exif-JPEG format. If it does not, the pictures can not be printed. Downloaded From camera-usermanual.com Fujifilm Manuals...
-
Page 116: Glossary
Glossary 3D movie format: FUJIFILM has extended the generic Motion JPEG format to create an AVI movie fi le format that supports 3D. 3D movie fi les have the extension “*.AVI” and can be played back on the camera in 3D with stereo sound. - Page 117 Digital cameras can mimic this adjustment by processing images according to the color of the light source. This process is known as “white balance.” Downloaded From camera-usermanual.com Fujifilm Manuals...
-
Page 118: Internal Memory/Memory Card Capacity
1200 2380 2110 4150 3330 6500 114 min. 224 min. 224 min. 433 min. * Total length of all movie fi les. Individual movies can not exceed 2 GB, regardless of capacity of memory card. Downloaded From camera-usermanual.com Fujifilm Manuals... -
Page 119: Specifi Cations
Auto parallax off : Approx. 1.3 m/4.3 ft.–infi nity (wide angle; point of convergence at 2 m/6.6 ft.); 4.1 m/13.5 ft.–infi nity distance ( (telephoto; point of convergence at 6.5 m/21.3 ft.) Auto parallax on (as measured by FUJIFILM): Approx. 1 m/3.3 ft.–infi nity (wide angle); 2 m/6.6 ft.–infi nity (telephoto) Downloaded From camera-usermanual.com Fujifilm Manuals... - Page 120 , slow sync with red-eye removal (red-eye removal on) Monitor 2.8-in., 230k-dot color LCD monitor; frame coverage approx. 100% Movies Frame size 640 × 480 (memory card only) or 320 × 240 pixels; 30 fps; stereo sound; zoom not available Downloaded From camera-usermanual.com Fujifilm Manuals...
- Page 121 Approx. 260 g/9.2 oz., excluding batteries, accessories, and memory cards Shooting weight Approx. 300 g/10.6 oz., including batteries and memory card Operating conditions Temperature: 0 °C to +40 °C (+32 °F to +104 °F) Humidity: 80% or less (no condensation) Downloaded From camera-usermanual.com Fujifilm Manuals...
- Page 122 European countries and China. Notices • Specifi cations subject to change without notice. FUJIFILM shall not be held liable for damages resulting from errors in this manual. • Although the monitor is manufactured using advanced high-precision technology, small bright points and anomalous colors (particularly in the vicinity of text) may appear.
-
Page 123: Fujifilm Digital Camera Worldwide Network
C. Hellmund & Cia Sa Technical support & repairs TEL 0212-2022300 hellmund@hellmund.com EUROPE Austria Fuji Film Oesterreich Technical support & repairs TEL 0043 1 6162606/51 or 52 kamera.service@fujifilm.at Belgium Belgian Fuji Agency Technical support & repairs TEL 3210242090 info@fuji.be Croatia I&I d.o.o. - Page 124 0,14 EUR pro Minute aus dem deutschen Festnetz, abweichende GmbH Preise aus Mobilfunknetzen möglich,Stand bei Drucklegung. Greece FUJIFILM HELLAS S.A. Technical support & repairs TEL 0030 210 9404100 fujifilm@fujifilm.gr Hungary Fujifi lm Hungary Ltd. Technical support TEL 3612389410 fujifilm@fujifilm.hu Repair service...
- Page 125 TEL 46 8 506 141 45 kamera@fujifilm.se Repair service TEL 46 8 506 141 00 kameraverkstaden@fujifilm.se Switzerland / Fujifi lm (Switzerland) AG Technical support & repairs TEL +41 44 855 5154 RepairCenter@fujifilm.ch Liechtenstein The Netherlands FUJIFILM Electronic Imaging Technical support TEL +31(0)102812500 helpdesk@fujifilm-digital.nl...
- Page 126 TEL 632-7436601~06 info@yklcolor.com digital@yklcolor.com Repair service TEL 632-7436601~06 techop_services@yklcolor.com Singapore FUJIFILM (Singapore) Pte Ltd Technical support & repairs TEL 65-6380 5557 service@fujifilm.com.sg South Korea Korea Fujifi lm Co., Ltd. Technical support TEL +82-2-3282-7363 photo@fujifilm.co.kr Yonsan AS Center (Fujidigital) Repair service TEL +82-2-701-1472 1bowl@hanmail.net...
- Page 127 Memo Downloaded From camera-usermanual.com Fujifilm Manuals...
- Page 128 7-3, AKASAKA 9-CHOME, MINATO-KU, TOKYO 107-0052, JAPAN Downloaded From camera-usermanual.com Fujifilm Manuals http://www.fujifilm.com/products/digital_cameras/index.html...
Need help?
Do you have a question about the FinePix Real 3D W1 and is the answer not in the manual?
Questions and answers