Advertisement
Quick Links
User
Manual
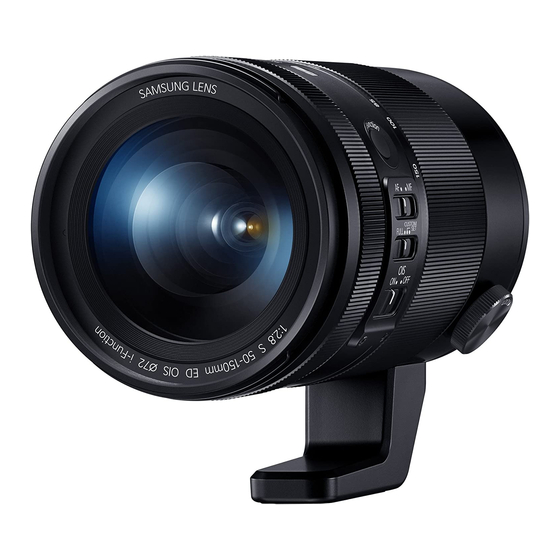
NX 50-150mm F2.8 S ED OIS
ENG / SPA / FRE
This User Manual has been specially designed to guide you through the basic functions and features of your device.
Please read the User Manual carefully to ensure safe and correct use.
A
B
1
@
2
!
#
3
0
4
5
9
6
7
$
8
C
D
F
G
English
Before Using This Device
Thank you for purchasing the Samsung Lens. The illustrations used
in this manual may differ from the actual items. For best performance
when using this lens, you must keep the camera's firmware up-to-
date. Visit www.samsung.com to download the firmware.
Special Features
With an ultra-fast F2.8 maximum aperture and 35 mm equivalent
77–231 mm focal range the lens is suitable for multiple uses, such
as sport, wildlife and portrait photography.
Unpacking
Lens, Lens cap, Lens mount cover, Hood, Tripod mount collar,
Case, User manual (Optional Item: Filter)
Layouts
A
(See illustration
)
The lens
1 Lens hood mount index 2 Focus ring 3 i-Function button
4 Zoom ring 5 Tripod ring locking dial 6 Tripod ring
7 Lens mount index 8 Lens contacts 9 Tripod collar connection
0 OIS switch ! Custom Focus Range Limiter switch
@ AF/MF switch
The tripod mount collar
# Tripod connection $ Tripod mount collar lock dial
Attaching and Removing the Lens
AD68-08613A (1.1)
► To attach the lens,
1
Remove the lens cap, lens mount cover, and body cap.
2
Align the red mark on the lens with the red mark on the
camera body. Then, rotate the lens as shown in the illustration
until it locks into place. (See illustration
► To remove the lens, press and hold the lens release button, and
then rotate the lens as shown in the illustration. (See illustration
Using the Zoom Ring
Set the composition of the photo (the focal distance of the lens) by
rotating the zoom ring on the lens.
When you use the zoom function, focus can be slightly changed.
Adjust the focus again before you capture a photo.
1
Using i-Function
When you press the i-Function button on the lens, you can set the
aperture value, exposure value, shutter speed, white balance, or
D-a
ISO. (See illustration
) For more information about i-Function,
refer to the camera manual.
Setting the Focus Method
Set the AF/MF switch on the lens to AF or MF. (See illustration
Auto Focus (AF): The focus is adjusted automatically when you
half-press [Shutter].
Manual Focus (MF): The focus can be adjusted manually by
rotating the focus ring.
E
Using the Custom Focus Range Limiter
Function
You can adjust the focus quickly and precisely by setting the range
for the focus distance. Set the Custom Focus Range Limiter switch
on the lens to an option. (See illustration
FULL: The focus is adjusted to between the minimum focus
distance and infinity.
CUSTOM: The focus is adjusted within the range you set manually.
If your camera does not allow you to set the focus distance range,
the focus is automatically set between 2.4 m-infinity.
SET: You can set the focus distance range manually.
• See the table below to view the options available for specific models.
Model
NX10, NX5, NX11, NX100, NX200,
NX210, NX1000, NX1100, NX20,
H
NX mini series, Galaxy NX
NX300, NX300M, NX2000, NX3000,
NX30
* The focus is adjusted to between the minimum focus distance and
infinity.
** The focus is adjusted to within 2.4 m-infinity.
Using the Optical Image Stabilization (OIS)
Function
The user can minimize the shaking of camera by using the OIS
function. Set the OIS switch on the lens to ON. (See illustration
Using a Lens Hood
(See illustration
To prevent deterioration of image quality by blocking out
unnecessary light, use a lens hood. When you are not using the
lens hood it can be reverse-mounted on the lens for storage.
When you use a flash in situations where the distance between
the subject and the camera is close, the flash light may be partially
blocked by the lens or a lens hood. To ensure proper lighting,
remove the lens hood or adjust the distance between the camera
and subjects.
Using a Tripod
Connecting the tripod to the lens
You can connect the tripod directly to the tripod collar connection
on the lens. If you connect the tripod to the camera, the camera
and the tripod may be unbalanced and can fall. Ensure that the
tripod is connected to the lens.
Depending on the tripod, if you connect the lens to it directly, the
zoom ring function may not be available.
Connecting to the tripod mount collar
1
Attach the tripod mount collar to the tripod collar connection
on the lens.
2
Rotate the tripod mount collar lock dial in the direction of the
LOCK arrow until it locks in place. (See illustration
3
Connect the tripod to the tripod connection on the tripod
mount collar.
To disconnect the tripod mount collar from the lens, rotate the tripod
mount collar lock dial in the opposite direction of the LOCK arrow.
Ensure that you hold the lens and the camera when connecting or
disconnecting the tripod mount collar.
Changing the photo's composition using the tripod
mount collar
B
)
When you connect the tripod to the tripod mount collar, you
can use the tripod ring to quickly and easily change the photo's
C
)
composition.
1
Loosen the tripod ring locking dial by rotating it in the opposite
direction of the LOCK arrow.
2
Adjust the camera's position, horizontally and vertically, until
you have composed your photo. (See illustration
3
Rotate the tripod ring locking dial in the direction of the LOCK
arrow to lock it in place. (See illustration
H
)
Using a Filter (optional)
Before putting a filter on the lens, make sure it is compatible.
Refer to "Specifications" for compatible filter size.
• A filter is a precise optical product. Keep away from dust, dirt,
or scratches. Also, do not try to mount two or more filters at the
same time. Doing so may deteriorate the image quality and cause
vignetting (a reduction of an image's brightness or saturation at
D-b
)
the periphery as the viewing angle of the lens is hidden).
• In case of a thick framed filter, the vignetting can occur with a
wide-angle lens.
Specifications
Lens Name
NX 50-150mm F2.8 S ED OIS
Focal Length
50–150 mm
Focal Length in 35 mm Equivalent
77–231 mm
Lens Construction-Elements
20
D-b
)
Lens Construction-Groups
13
ED Elements
4
XHR Elements
1
Angle of View
31.4°–10.7°
Maximum Aperture
F2.8
Minimum Aperture
F22
Number of Diaphragm Blades
9
Minimum Focus Distance (Wide)
0.7 m
Option
Minimum Focus Distance (Tele)
0.98 m
FULL
CUSTOM
SET
Maximum Magnification
0.13X
Lens Hood
Included
O
X*
X*
Optical Image Stabilizer
Yes
Mount Type
Samsung NX Mount
X*
O
X**
Filter Size
72 mm
Max. Diameter
81 mm
Length
154 mm
Weight (Lens Only, Approx.)
880 g
Operating Temperature
0–40 °C
Operating Humidity
5–85 %
Specifications may change without notice for better performance.
D-b
)
E
)
State of California Proposition 65 Warning (US only)
WARNING : This product contains chemicals known to the
State of California to cause cancer and birth defects or other
reproductive harm.
Español
Antes de usar este dispositivo
Gracias por adquirir la lente Samsung. Las ilustraciones usadas en
el manual del usuario pueden ser diferentes de los elementos reales.
Para obtener un mejor rendimiento al usar esta lente, deberá mantener
el firmware de la cámara actualizado. Entre www.samsung.com para
descargar el firmware.
Funciones especiales
Su apertura máxima ultrarrápida F2.8 y su distancia focal de 77–231 mm
equivalente a 35 mm la hacen adecuada para numerosos usos, incluidos
los deportes, la naturaleza y la fotografía de retratos.
Desembalaje
Lente, tapa de la lente, tapa de montaje de la lente, cubierta, cuello del
orificio para el montaje del trípode, funda, manual de uso (Término
opcional: Filtro)
Diseños
A
(Ver ilustración
)
La lente
1 Índice de montaje de la tapa de la lente 2 Anillo de enfoque
3 Botón i-Function 4 Anillo de zoom
5 Selector de bloqueo del anillo del trípode 6 Anillo del trípode
F
)
7 Índice de montaje de la lente 8 Contactos de la lente
9 Conexión del cuello del trípode 0 Interruptor OIS
! Interruptor del limitador de distancia focal personalizada
@ Interruptor AF/MF
El cuello del orificio para el montaje del trípode
# Conexión del trípode $ Selector de bloqueo del cuello del orificio
para el montaje del trípode
Colocar y retirar la lente
► Para colocar la lente,
1
Retire la tapa de la lente, la tapa de montaje de la lente y la
cubierta del cuerpo.
2
Haga coincidir la marca roja de la lente con la marca roja del
cuerpo de la cámara. Luego gire la lente como se muestra en la
ilustración hasta que quede fija en su posición.
B
(Ver ilustración
)
► Para retirar la lente, mantenga pulsado el botón de traba de la lente y
G
)
luego gire la lente como se muestra en la ilustración. (Ver ilustración
Usar el anillo de zoom
Establezca la composición de la foto (la distancia focal de la lente)
girando el anillo de zoom de la lente.
Al usar la función de zoom, el enfoque podría cambiar levemente.
Vuelva a ajustar el enfoque antes de capturar una foto.
Uso de i-Function
Cuando pulsa el botón de la i-Function situado sobre la lente, puede
ajustar el valor de apertura, el valor de exposición, la velocidad del
D-a
obturador, el balance de blancos, o la ISO. (Ver ilustración
) Para
más información acerca de la i-Function, consulte el manual de la cámara.
Establecer el método de enfoque
Configure el interruptor AF/MF de la lente en AF o MF.
D-b
(Ver ilustración
)
Uso del enfoque automático (AF): El enfoque se ajusta
automáticamente si presiona [Obturador].
Uso del enfoque manual (MF): Es posible ajustar el foco manualmente
girando el anillo de enfoque de la lente.
Usar la función del limitador de distancia
focal personalizada
Puede ajustar el enfoque con rapidez y precisión configurando el rango
de distancia focal. Ajuste a una de las opciones el interruptor del limitador
D-b
de distancia focal personalizada situado en la lente. (Ver ilustración
FULL: El enfoque se ajusta entre la distancia mínima de enfoque y el
infinito.
CUSTOM: El enfoque se ajusta dentro del intervalo que usted defina
manualmente.
Si su cámara no le permite ajustar el rango de distancia del foco, el
foco se ajustará automaticamente entre 2.4 m-infinidad.
SET: Puede configurar el rango de distancia de enfoque manualmente.
• Consulte la tabla siguiente para ver las opciones disponibles para
modelos específicos.
Opción
Modelo
SET
FULL CUSTOM
NX10, NX5, NX11, NX100, NX200, NX210,
NX1000, NX1100, NX20, NX mini series,
X*
O
X*
Galaxy NX
NX300, NX300M, NX2000, NX3000, NX30
X*
O
X**
* El enfoque se ajusta entre la distancia mínima de enfoque y el infinito.
** El enfoque se ajusta dentro de la distancia mínima de 2,4 m infinito.
Cómo usar la función de estabilización de
imagen óptica (OIS)
El usuario puede minimizar el movimiento de la cámara utilizando la función
OIS. Ajuste el interruptor OIS de la lente en ON. (Ver ilustración
D-b
)
Usar una cubierta de la lente
E
(Ver ilustración
)
Para prevenir que se deteriore la calidad de la imagen bloqueando la luz
innecesaria, utilice una cubierta de la lente. Cuando no use la cubierta de
la lente, podrá colocarla en reverso sobre la lente para guardarla.
Si usa el flash en situaciones en las cuales la distancia entre el
objetivo y la cámara es corta, la luz del flash podría verse bloqueada
parcialmente por la lente o la cubierta de la lente. Para garantizar la
iluminación correcta, retire la cubierta de la lente o ajuste la distancia
entre la cámara y los objetivos.
Usar un trípode
Conectar el trípode a la lente
Puede conectar el trípode directamente a la conexión del cuello del
trípode situada sobre la lente. Si conecta el trípode a la cámara, la
cámara y el trípode pueden quedar desequilibrados y caerse. Asegúrese
de que el trípode esté conectado a la lente.
En función del trípode, si conecta la lente directamente al trípode, es
posible que la función de anillo de zoom no esté disponible.
Conexión al cuello del orificio para el montaje del trípode
1
Conecte el cuello del orificio para el montaje del trípode a la
conexión para el cuello del trípode situada sobre la lente.
2
Rote el selector de bloqueo del cuello del orificio para el montaje
del trípode en la dirección de la flecha LOCK hasta que quede
bloqueado en su lugar. (Ver ilustración
F
)
3
Conecte el trípode a la conexión para el trípode situada en el
cuello del orificio para el montaje del trípode.
Para desconectar de la lente el cuello del orificio para el montaje del
trípode, rote el selector de bloqueo del cuello del orificio para el montaje
del trípode en dirección opuesta a la flecha LOCK.
Asegúrese de que sujeta la lente y la cámara mientras conecta o
desconecta el cuello del orificio para el montaje del trípode.
Cómo cambiar la composición de la fotografía usando
el cuello del orificio de montaje del trípode
Cuando conecte el trípode al cuello del orificio para el montaje del
C
trípode, podrá usar el anillo del trípode para cambiar fácil y rápidamente
)
la composición de la fotografía.
1
Afloje el selector de bloqueo del anillo del trípode rotándolo en
dirección contraria respecto a la flecha LOCK.
2
Ajuste la posición de la cámara, en sentido horizontal o vertical,
hasta que haya compuesto su fotografía. (Ver ilustración
G
)
3
Rote el selector de bloqueo del anillo del trípode en la dirección
H
de la flecha LOCK para bloquearlo en su lugar. (Ver ilustración
)
Usar un filtro (opcional)
Antes de colocar un filtro en la lente, asegúrese de que sea compatible.
Consulte "Especificaciones" para ver los tamaños de filtro compatibles.
• Un filtro es un producto óptico preciso. Manténgalo lejos del polvo,
la suciedad o los arañazos. Además, no intente montar dos o más
filtros al mismo tiempo. Si lo hace podría deteriorar la calidad de
la imagen y provocar un efecto de viñeta (la reducción del brillo o
la saturación de una imagen en la periferia, ocultando el ángulo
de visión del lente).
• En el caso de los filtros de marco ancho, el efecto viñeta se puede
producir con una lente de ángulo amplio.
Especificaciones
Nombre de la lente
NX 50-150mm F2.8 S ED OIS
Distancia focal
50–150 mm
Distancia focal en equivalente a
77–231 mm
35 mm
)
Construcción de la lente -
20
Elementos
Construcción de la lente - Grupos
13
Elementos ED
4
Elementos XHR
1
Vista angular
31,4°–10,7°
Apertura máxima
F2.8
Apertura mínima
F22
Número de láminas del diafragma
9
Distancia mínima de enfoque (Wide) 0,7 m
Distancia mínima de enfoque (Tele)
0,98 m
Amplificación máxima
0,13X
Cubierta de la lente
Incluida
Estabilizador de imagen óptica
Sí
Tipo de montaje
Montaje Samsung NX
Tamaño del filtro
72 mm
Diámetro máximo
81 mm
Distancia
154 mm
Peso (Sólo lentes, Aprox.)
880 g
Temperatura de funcionamiento
0–40 °C
Humedad de funcionamiento
5–85%
Las especificaciones pueden cambiar sin aviso previo para un
mejor rendimiento.
Advertisement

Related Manuals for Samsung NX 50-150mm F2.8 S ED OIS


Summary of Contents for Samsung NX 50-150mm F2.8 S ED OIS
- Page 1 (Ver ilustración the subject and the camera is close, the flash light may be partially Thank you for purchasing the Samsung Lens. The illustrations used Gracias por adquirir la lente Samsung. Las ilustraciones usadas en Para prevenir que se deteriore la calidad de la imagen bloqueando la luz blocked by the lens or a lens hood.
- Page 2 • Samsung is not responsible for any damage incurred by using other • Samsung no es responsable de los daños causados por el uso con lentes de otros • Pour utiliser l’objectif de manière sûre, installez-le ou désinstallez-le lorsque l’appareil photo fabricantes.