Table of Contents
Advertisement
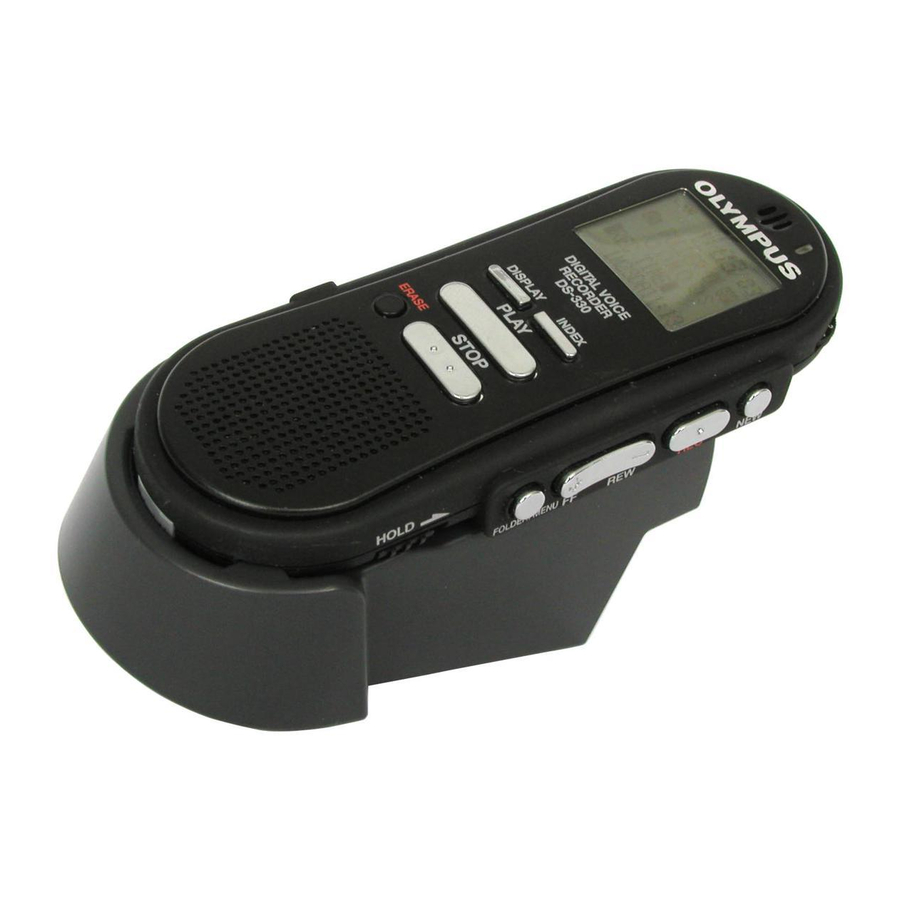
DIGITAL VOICE
RECORDER
DS-330
ON LINE
INSTRUCTIONS
Thank you for purchasing an Olympus
Digital Voice Recorder.
Please read these instructions for information about using
the product correctly and safely.
Keep the instructions handy for future reference.
To ensure successful recordings, we recommend that
you test the record function and volume before use.
1
Advertisement
Table of Contents

Related Manuals for Olympus DS-330


Summary of Contents for Olympus DS-330
- Page 1 DIGITAL VOICE RECORDER DS-330 ON LINE INSTRUCTIONS Thank you for purchasing an Olympus Digital Voice Recorder. Please read these instructions for information about using the product correctly and safely. Keep the instructions handy for future reference. To ensure successful recordings, we recommend that...
-
Page 2: General Precautions
For Safe and Correct Usage Before using your new recorder, read this manual carefully to ensure that you know how to operate it safely and correctly. Keep this manual in an easily accessible location for future reference. • The warning symbols indicate important safety related information. - Page 3 1 remove the batteries immediately while being careful not to burn yourself, and; 2 call your dealer or local Olympus representative for servicing. AC Adapter Warning • Do not attempt to disassemble, repair or modify the AC adapter in any way.
-
Page 4: Main Features
Main Features The recorder stores highly compressed DSS format voice messages in 16 MB integrated flash memory. The recorder supports two recording modes, SP (Standard Playback) mode or LP (Long Playback) mode. ( P.18) • Continuous recording time is approximately 2 hours and 35 minutes in SP mode and approximately 5 hours and 30 minutes in LP mode.*... -
Page 5: Table Of Contents
Table of Contents Getting Started Identification of Parts ... 6 Inserting Batteries ... 8 Using the AC Adapter ... 9 Basic operations Recording ... 12 Using the Variable Control Voice Actuator (VCVA) ... 16 Recording Modes ... 18 Microphone Sensitivity ... 19 Other functions Locking Files ... -
Page 6: Identification Of Parts
Identification of Parts 1 2 3 & 1 Built-in microphone 2 Record/Play indicator lamp 3 Microphone jack 4 VOLUME control 5 NEW button 6 REC (Record)/SET button 7 INDEX button 8 REW (Rewind) /– button 9 FF (Fast Forward) /+ button 0 FOLDER/MENU button ! HOLD switch @ Built-in speaker... -
Page 7: Display (Lcd Panel)
Display (LCD Panel) 1 Battery indicator 2 Alarm indicator 3 VCVA(Variable Control Voice Actuator) indicator 4 Record mode indicator 5 Folder 6 Current file 7 Erase lock indicator 8 Character Information display... -
Page 8: Inserting Batteries
Inserting Batteries Notes • Be sure to stop the recorder before replacing the batteries. Unloading the batteries while the recorder is recording, erasing or otherwise accessing an audio file may corrupt the file. If you are recording into a file and the batteries run out, you will lose your currently recorded file because the file header will not be able to close. -
Page 9: Using The Ac Adapter
Using the AC Adapter Plug the optional AC adapter (Olympus Model A321 or A322) into household power outlet and connect the power plug to the recorder’s power connector (DC 3 V) as shown in the illustration. Always stop recording before connection. -
Page 10: Setting Time/Date
Setting Time/Date If you have set the time and date, information as to when an audio file is recorded is stored automatically with that file. The time and date should be set to ease file management tasks. The time and date setting is also needed to perform the alarm playback function. ( P.28) The hour indicator will flash automatically when you load batteries before using the recorder for the first time, or after the recorder hasn't been used for a long time. - Page 11 Set the hour. 1 Press the FF/+ button or REW/– button to set the hour. 2 Press the REC/SET button to accept the hour. Set the minute. 1 Press the FF/+ button or REW/– button to set the minute. 2 Press the REC/SET button to accept the minute.
-
Page 12: Recording
Recording The recorder provides five folders, A, B, C, D and E, and each message recorded in a folder is saved as a Digital Speech Standard (DSS) file. These five folders can be selectively used to distinguish the kind of recording; for example, A might be used to store private information, while B might be dedicated to holding business information ( P.32). -
Page 13: Pause Recording
Notes • A beep will sound when remaining recording time reaches 60 seconds, 30 seconds, and 10 seconds while recording. • “MEMORY FULL” or “FOLDER FULL” will be displayed when the memory or file capacity is full. Delete any unnecessary files before recording any further( P.24) or transfer voice files to your computer using DSS Player Software. -
Page 14: Overwrite Recording
Recording Overwrite Recording You can overwrite a previously recorded file from any point within the file. Note that the overwritten recordings will be erased. ······················································································································································ Notes • You can pause and resume overwrite recording by pressing the REC/SET button. • You cannot select a different mode than that of the original file before overwrite recording. ( P.18) Choose and play the file you want to overwrite. -
Page 15: Insert Recording
Insert Recording Additional recordings can be inserted into previously recorded files. ······················································································································································ Notes • You can pause and resume insert recording by pressing the REC/SET button. • The recording time and date of the file into which recording has been inserted is updated to the time and date of when the inserted recording was recorded. -
Page 16: Using The Variable Control Voice Actuator (Vcva)
Using the Variable Control Voice Actuator (VCVA) When the microphone senses that sounds have reached a preset volume, the built-in Variable Control Voice Actuator (VCVA) starts recording automatically, and stops when the volume drops. Particularly helpful for extended recording, the VCVA not only conserves memory by turning off recording during silent periods, but also makes playback more efficient and convenient. - Page 17 ······················································································································································· Notes • The start/stop actuation level also varies depending on the selected microphone sensitivity mode. ( P.19) • To ensure successful recordings, prior testing and adjustment of the start/stop actuation level is recommended. Start the recording. When the sound volume is lower than the preset pause sound level, recording automatically pauses after approximately 1 second, and “STANDBY”...
-
Page 18: Recording Modes
Recording Modes (REC MODE) You can choose between two recording modes: SP (Standard Playback) mode and LP (Long Playback) mode. Once you choose a mode, files are recorded in the selected mode as long as you do not change the mode. The included 16MB integrated flash memory holds approximately 2 hours and 35 minutes in SP mode and approximately 5 hours and 30 minutes in LP mode. -
Page 19: Microphone Sensitivity
Microphone Sensitivity Microphone sensitivity is adjustable to meet recording needs. Using the MICSENS switch, choose between the CONF and DICT positions. CONF : High-sensitivity mode that records sounds in all directions. DICT : Low-sensitivity mode suited for dictation. Notes • If you want to clearly record dictation, switch to DICT mode and place the internal microphone close (5 to 10 cm) to the speaker. -
Page 20: Playing
Playing You can start playing a file at any point. Press the PLAY button to start playback. The record/play indicator lamp glows green. a Current playback time b Total recording time of the file being played Adjust the VOLUME control to your liking. - Page 21 Playback Operation functions Fast Press the PLAY button once while playing Playback a file. → The recorder plays back at approximately (F.PLAY) 50% faster than normal rate. Slow Press the PLAY button once while fast Playback playing back. → The recorder plays back at approximately (S.PLAY) 25% slower than normal rate.
-
Page 22: Continuous Playback (All Play)
Continuous Playback (ALL PLAY) When a file finishes playing back, the next file is played without stopping until it reaches the last file in the folder. Press and hold the FOLDER/ MENU button for 1 second or longer. The menu opens. ( P.41) Press the FF/+ or REW/–... -
Page 23: Noise Cancel Function
Noise Cancel Function If recorded sound is difficult to hear because of noisy surroundings, adjust the Noise Cancel setting level. Noise will be reduced in the file when it's played back for clearer sound quality. ······················································································································································ Notes • If you set Noise Cancel to "LOW" or "HI", the setting remains valid until it's set to "OFF". •... -
Page 24: Erasing One File At A Time
Erasing Erasing One File at a Time A selected file can be erased from a folder. ······················································································································································ Notes • If the ERASE button is not pressed within the 8 seconds after “FILE ERASE?” starts flashing, the recorder will revert to stop status. •... -
Page 25: Erase All Files From A Folder
Erase All Files from a Folder All files in a folder can be erased simultaneously, except for locked files. ( P.29) ······················································································································································ Notes • If the ERASE button is not pressed within the 8 seconds after “ALL ERASE?” starts flashing, the recorder will revert to stop status. -
Page 26: Locking Files
Locking Files (LOCK) Locking a file keeps important data from being accidentally erased. Locked files are not erased when you choose to erase all files from a folder. ( P.25) 2,4,6 ······················································································································································ Notes • You cannot append, overwrite, or insert recordings into locked files. ( P.12-15) •... -
Page 27: Index Marks
Index Marks Index marks can be incorporated into a file during recording or playback to make it easy to locate interesting information. ······················································································································································ Notes • Up to 16 index marks can be set in a file. Attempting to set more index marks will cause “INDEX FULL” to appear on the display. -
Page 28: Alarm Playback Function
Alarm Playback Function (ALARM) The alarm playback function can be set to play a selected file at a pre-set time. 2,4,6 Press the FOLDER/MENU button to choose a folder. Press the FF/+ or REW/– button to choose the file to be played when the alarm sounds. -
Page 29: The Menu
7,9,11 8,10 ······················································································································································ Notes • The alarm playback function can be set for only one file at a time. • The alarm will sound at the scheduled time every day unless the alarm playback setting is cleared. • If you wish to change the file for alarm play, first turn the alarm settings “OFF”, then make any desired new alarm settings. -
Page 30: Lcd Contrast Adjustment
LCD Contrast Adjustment (CONTRAST) If the display is difficult to see because of environmental conditions and temperature, you can adjust the contrast using this function to easily see the LCD display (display contrast). Display contrast can be adjusted in 10 levels. Press and hold the FOLDER/ MENU button for 1 second or longer. -
Page 31: Backlight
Backlight (BACKLIGHT) The backlight for the recorder will be activated for approximately 10 seconds each time a button is pressed. You can select whether or not you would like to use the backlight. Press and hold the FOLDER/ MENU button for 1 second or longer. -
Page 32: Assigning Folder Names
Assigning Folder Names (FolderName) You can give each of the five A to E folders a name with up to 8 characters. Frequently used words such as "dictation (DICT.)", "meeting (MEETING)" and "schedule (SCHEDULE)" are pre-set in a template. 2,4,6 Press and hold the FOLDER/ MENU button for 1 second or longer. - Page 33 Recorder buttons that are used to input characters Button Push REC/SET Press once To input the selected character and advance the input position. Press and hold Confirms folder name or file comment. FF/+ Press once Selects character to be input: forward. Press and hold Skips forward quickly through characters.
- Page 34 Assigning Folder Names (FolderName) Available characters Type of Characters Folder name input Template File comment input Large caps Small caps Numerics Symbols ······················································································································································ Notes • The folder naming process ends automatically when the eighth character is set. • If you input more than 8 characters, "OVERFLOW" appears on the display. •...
-
Page 35: Assigning File Comments (Comment)
Assigning File Comments (COMMENT) You can add comments of up to 100 characters to each recorded file. If you include the date, time, and other information, you can easily find files without replaying them. Press and hold the FOLDER/ MENU button for 1 second or longer. -
Page 36: Moving Files Across Folders
Moving Files Across Folders A recorded file can be transferred from one folder to another. The file is added at the end of existing files in the destination folder. 1,2,3 Choose the file you want to move and play it. Press the FOLDER/MENU button while playing the file. - Page 37 ······················································································································································ Notes • If the destination folder is full (a maximum of 199 files), “FOLDER FULL” appears on the display and files cannot be transferred to it. • The file transfer process is aborted if you press the STOP button or leave the recorder idle for 8 seconds after you choose a destination folder.
-
Page 38: System Sounds (Beep)
System Sounds (BEEP) The recorder beeps to alert you to button operations or warn you of errors. System sounds may be turned off. ······················································································································································ Note If the alarm playback function has been set, the alarm will sound at the scheduled time even if system sounds are turned off. -
Page 39: Lcd Display Information
LCD Display Information This recorder is capable of switching views on its LCD display. If you press the DISPLAY button while stopped or while playing back a file, the LCD display will switch and you can confirm file information and various recorder settings. * If a comment contains many characters, it will scroll horizontally to display the complete comment. -
Page 40: Formatting The Recorder (Format)
Formatting the Recorder (FORMAT) If you format the recorder, all function settings will return to their defaults*. All files** stored in the recorder will be deleted. If you have important files that you want to save, connect the recorder to a computer and transfer those files from the recorder to the computer before formatting the device. -
Page 41: Menu List
Menu List Press and hold the FOLDER/MENU button for 1 second or longer. Record mode setting ( P.18). Selection REC MODE between SP and LP modes. VCVA setting ( P.16). Switch between ON VCVA (enabled) and OFF (disabled). Locking files setting ( P.26). Selection LOCK between ON (locked) and OFF (unlocked). -
Page 42: Using Dss Player Software
Using DSS Player Software By connecting the recorder to your PC, you will be able to use DSS Player in the following ways: • Play and archive voice files from your PC. • Send voice mail by sending an attached voice file with e-mail.* •... - Page 43 Macintosh iMac/ iBook/ Power Mac G3,G4/ PowerBook G3 (The computer must support a standard USB port.) Operating System: Mac OS 8.6/9.0/9.1/9.2/10.1 RAM: 16 MB or more Hard drive space: 5 MB or more Drive: 2x or faster CD-ROM drive Display: 800 x 600 pixels or more, 256 colors or more USB port: One free port...
-
Page 44: Installing Software
• If you are running Windows 2000 /XP (Professional only) on a network, you need to log on as an administrator. Windows Insert Olympus DSS Player into the CD-ROM drive. The installation program will start automatically. Once the program starts, jump to step 4. - Page 45 Select a program menu folder. You may change the program menu folder to another one, such as [Start Up]. To accept the default folder, click on [Next]. Authorizing the start of file copying. Confirm all “Current Settings”. To accept them, click on [Next]. Note To change the program menu folder or installation folder, click on [Back].
- Page 46 Installing Software Macintosh Insert DSS Player for Mac into the CD-ROM drive. Double-click on CD icon. Double-click on the desired language to select it. Double-click on DSS Player for Mac Installer icon. The installation program will start. Click on [Continue] when the DSS Player for Mac opening screen appears.
-
Page 47: Uninstall Software
Windows Exit DSS Player. Click on the [Start] button, select [Programs], then [Olympus DSS Player 2002]. (in Windows XP, click on the [Start] button, select [All Programs], then [Olympus DSS Player 2002].) Click on [Uninstall Olympus DSS Player 2002]. - Page 48 Uninstall Software Macintosh Exit DSS Player. Double-click the Macintosh HD icon. If you use OS10.1, proceed to step 5. Delete the following eight drivers from Function Enhancement in the System Folder: (OS 8,9 only) “DSS10USBDriver” “DSS10USBShim” “DSS1USBDriver” “DSS1USBShim” “DSSFSUSBDriver” “DSSFSUSBShim” “DSSUSBDriver”...
-
Page 49: Using Online Help
Using Online Help To open Online Help, do either of the following: (Windows) • Click on the [Start] button, select [Programs], then [Olympus DSS Player 2002], then click on [Help]. • While DSS Player is running, choose [Contents] from the [Help] menu. -
Page 50: Connecting To Your Pc
Connecting to Your PC Be sure to finish installing DSS Player before connecting the recorder. If you connect the recorder before installing DSS Player, the “Add New Hardware Wizard” dialog box will open. If this happens, click on [Cancel] to exit the wizard, then install DSS Player. Once you connect the recorder to your PC, the included USB cable will supply the power so you will not have to use batteries or an AC adapter with the recorder. - Page 51 Hook ······················································································································································ Notes • Do not needlessly touch the connection point on the front of the cradle (at the low end), as that may cause damage resulting in a bad connection. • Release the HOLD switch. ( P.9) Connecting to your PC using the cradle Place the recorder on the cradle Insert end A of the USB cable to your PC's USB port or USB hub.
-
Page 52: Running Dss Player
Click on the [Start] button, select [Programs], then [Olympus DSS Player 2002]. (in Windows XP, click on the [Start] button, select [All Programs], then [Olympus DSS Player 2002].) Click on [Olympus DSS Player 2002]. About automatic startup By connecting the recorder to your PC, you can automatically start an application. - Page 53 Macintosh To start DSS Player for Mac, follow these steps: It is assumed that DSS Player for Mac has been installed. For installation instructions, see Installing DSS Player for Mac. ( P.46) Start your Macintosh. Connect the recorder to your For cable connection instructions, see “Connecting to Your PC”.
-
Page 54: Window Names
Window Names (Windows) 1 Play Control Bar Control buttons to play and stop voice files. 2 Dictation Folder Window Will display the directory structure of the DSS, WMA, WAVE (Windows only) and AIFF (Macintosh only)-format files stored on your PC's hard disk. (Macintosh) 3 Device Manager Window Will display the directory structure of the... -
Page 55: Import Voice Files To Your Pc
Import Voice Files to Your PC Importing voice files to your PC from the recorder is called downloading. With DSS Player, there are three ways to download voice files to your PC: • Download Selected Files Download one or several voice files to your PC. •... - Page 56 Import Voice Files to Your PC Download the voice file. (Windows) From the [Download] menu, click on [Download Selected Files]. (Macintosh) From the [Tools] menu, click on [Download Selected Files]. Download complete. Once the transmission screen closes and the record/play indicator lamp on the recorder goes dark, the downloading is completed.
-
Page 57: Play A Voice File
Play a Voice File Select the folder. Select the folder that contains the voice file you would like to play. The illustration shows that to select from among voice files already downloaded, Folder A in the Dictation Folder window was selected. Select the voice file. -
Page 58: Upload Voice Files To The Recorder
Upload Voice Files to the Recorder DSS Player has a feature to enable you to upload DSS-format voice files from your PC to the recorder. Select the folder. Select the folder that contains the voice file to upload from the Dictation Folder window. Select the voice file. -
Page 59: Direct Recording On Pc And Editing On Pc
Direct Recording on PC and Editing on PC Windows If you want to record and edit voice files using your PC, open the [Remote Edit] window while the recorder is connected to your PC ( P.50). You can easily create new files, insert recordings, overwrite recordings, edit index marks, and do other tasks. - Page 60 Direct Recording on PC and Editing on PC Macintosh You can record voice files from a Digital Voice Recorder directly to a computer. With a Digital Voice Recorder connected, choose the [Direct Record to PC] command from the [Tools] menu. Recording a new file Set recording.
-
Page 61: Start Recording
Start recording. Click on [Start] in the recording setup window. Recording will start. You can only change the sound quality and sensitivity settings before recording. Stop recording. Click on [Stop] in the Record Window. Converting File Formats to AIFF Files* Choose the [Save as] from the [File] menu. -
Page 62: Send Voice Files With E-Mail
(Windows) The default folder is set to C:\Program Files\Olympus\DSS Player 2002\Message\Folder A (or B, C, D, E). (Macintosh) By default,voice files are stored on Macintosh HD: DSS Player for Mac: Message Folder: Folder A (or B, C, D, E). -
Page 63: Change A Folder Name
Changing a Folder Name Changing a folder name in the Voice Folder window (Windows) You can change a folder name using the [Rename Folder] command from the [Edit] menu. A folder name can be up to 20 characters long and cannot use \ /:*?"<>|. (Macintosh) Choose the [Rename Folder] command from the [File] menu. -
Page 64: Editing A Template
Editing a Template You can edit folder name and file comment templates in DSS Player in the [Edit & Upload Templates] window and transfer them to the recorder. Templates downloaded from the recorder can also be edited. (Windows) Select [Edit & Upload Templates] from [Download] to open the [Edit and Upload Template] window. -
Page 65: Using Voice Recognition Software (Optional)
Click the [ViaVoice] button of [IBM ViaVoice VoiceCenter], then select [Tool] and [Analyze My Voice]. The [ViaVoice User Wizard] window appears. Select [Olympus DSS File] in the [Device] list box, then click the [Next] button. The [Audio Setup Wizard] window opens. -
Page 66: Using The Usb Cable
When the [Selecting a Sound Card] window appears, select [USB Audio Device] for [Input] and follow the instructions on screen. (Select [Microphone Control (DS-330)] for Windows XP.) During audio setup or while enrolling, please input voice data from the recorder. - Page 67 Executing Voice Recognition Select the folder. Select the folder containing the voice file you want to process with voice recognition from the Dictation Folder window. Select the voice file. Select the desired voice file to process with voice recognition from the Voice File List Box.
- Page 68 Using Voice Recognition Software (optional) Notes on Recording For Voice Recognition When recording voices for use in voice recognition, set up your DSS recorder as follows to facilitate recognition. • Set the microphone sensitivity to "DICT". ( P.19) • Set the recording mode to "SP". ( P.18) •...
-
Page 69: Usb Microphone/Usb Speaker
For Windows XP Select [Control panel] → [Sound, Voice, and Audio Device] → [Sound and Audio Device] → [Audio] tab, and chose [Microphone Control (DS-330)] from among the recording devices. ······················································································································································ Notes • USB speaker can be switched using [Control Panel], in the same manner as the USB microphone. -
Page 70: Other Information Alarm Message List
KP4. ( P.18) This is a malfunction, so go to the store where you purchased the recorder or an Olympus service station for repair. This is a malfunction, so go to the store where you purchased the recorder or an Olympus service station for repair. -
Page 71: Troubleshooting
Set the microphone sensitivity to CONF mode and try again. ( P.19) Erase unnecessary index marks. P.27) Unlock the file. ( P.26) Use the Olympus A321 (for US, Canada) or A322 (for Europe except U.K) AC adapter (Oprional). Switch to the right folder. - Page 72 Troubleshooting Symptom Probable cause Cannot use Noise Cancel function is set to "LOW" or "HI". Fast Playback or Slow Playback A file is being played back in Fast Playback or Slow Noise Cancel Playback mode. function doesn't work Some PCs and USB hubs may not provide sufficient Cannot power.
-
Page 73: Accessories (Optional)
Accessories (optional) External microphone: ME9*/11* A lavalier omnidirectional microphone that clips to clothing. Use to record your own voice or people near you. Conference microphone: ME7 A highly sensitive directional microphone (shotgun microphone). Use to record speakers at a distance. Headset: E102 Stereo headset for your PC. -
Page 74: Specifications
Specifications Recording format ... DSS (Digital Speech Standard) Input level ... –70 dBv Sampling frequency SP mode: ... 12 kHz LP mode: ... 8 kHz Overall frequency response SP mode: ... 300 to 5,000 Hz LP mode: ... 300 to 3,000 Hz Recording time SP mode: ... -
Page 75: Technical Assistance And Support
Technical Assistance and Support The following are for only technical questions and support about OLYMPUS recorder and software. N Technical Hotline Number in the U.S. and Canada 1-888-553-4448 N User Support E-mail address in the U.S. and Canada distec@olympus.com N Technical Hotline Number in Europe... - Page 76 (Letters) Postfach 10 49 08. 20034 Hamburg. Germany. http://www.olympus.com DS-330 DIGITAL VOICE RECORDER OLYMPUS AMERICA INC. 2 Corporate Center Drive, Melville, NY 11747-3157, U.S.A. 800-622-6372 Das „CE“ Zeichen bestätigt die übereinstimmug mit den Europäischen Bestimmungen für Betriebssicherheit und...
Need help?
Do you have a question about the DS-330 and is the answer not in the manual?
Questions and answers