Olympus LS-11 Instructions Manual
Linear pcm recorder
Hide thumbs
Also See for LS-11:
- Manual (88 pages) ,
- Manuel du propriétaire (86 pages) ,
- Quick manual (4 pages)
Table of Contents
Advertisement
LINEAR PCM RECORDER
LS-11
Linear PCM Recorder
INSTRUCTIONS
Thank you for purchasing an Olympus Digital Voice Recorder. Please read these instructions for information
about using the product correctly and safely. Keep the instructions handy for future reference.
To ensure successful recordings, we recommend that you test the record function and volume
before use.
EN
Advertisement
Table of Contents

Related Manuals for Olympus LS-11


Summary of Contents for Olympus LS-11
- Page 1 Linear PCM Recorder INSTRUCTIONS Thank you for purchasing an Olympus Digital Voice Recorder. Please read these instructions for information about using the product correctly and safely. Keep the instructions handy for future reference. To ensure successful recordings, we recommend that you test the record function and volume...
- Page 2 • Any liability for passive damages or damage of any kind occurred due to data loss incurred by a defect of the product, repair performed by the third party other than Olympus or an Olympus authorized service station, or any other reason is excluded.
- Page 3 INDEX Table of Contents Safe and Proper Usage Getting Started About Recording About Playback Menu Setting Using the Recorder on Your PC Other Information P.22 P.32 P.41 P.61 P.77...
-
Page 4: Table Of Contents
Introduction Table of Contents ...4 Safe and Proper Usage ...6 Getting Started Main Features ...8 Identification of Parts ...9 Display (LCD Panel) ... 10 Inserting Batteries ...11 Using the AC Adapter ... 12 Power Supply ...13 HOLD ...13 Setting Time and Date [Time & Date] ...15 Changing the Time and Date ... - Page 5 Table of Contents Other Information Alarm Message List ...77 Troubleshooting ...78 Technical Assistance and Support ...80 Accessories (optional) ...81 Specifications ...82...
-
Page 6: Safe And Proper Usage
Any liability for passive damages or damage of any kind occurred due to data loss incurred by a defect of the product, repair performed by the third party other than Olympus or an Olympus authorized service station, or any other reasons is excluded from the Olympus’s liability. - Page 7 1 remove the batteries immediately while being careful not to burn yourself, and; 2 call your dealer or local Olympus represen- tative for service. Safe and Proper Usage AC Adapter Warning •...
-
Page 8: Getting Started
Supports high capacity recording media. Starting with its 8 GB built-in flash memory, can also record onto an SD Card (commercially available) (☞ P.17).. Check the Olympus website regarding SD cards which are confirmed operation with this recorder (☞ P.80). Getting Started ●... -
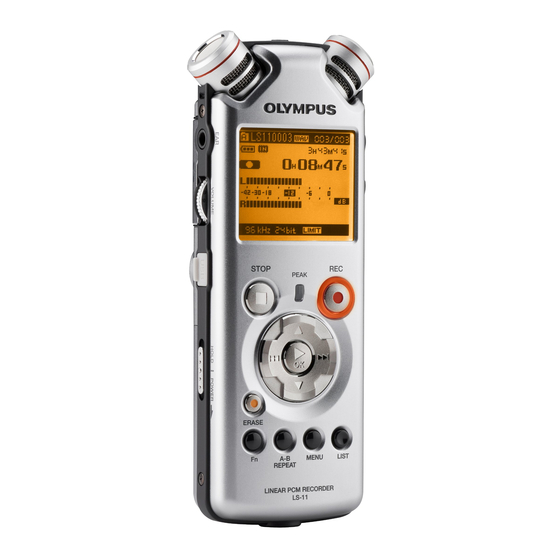
Page 9: Identification Of Parts
Identification of Parts & 1 REMOTE jack Connect the receiver for the exclusive remote control set RS30W (optional). This enables operation of the main unit’s record and stop functions through the remote control. 2 Built-in stereo microphone (R) Built-in stereo microphone (L) 4 LINE IN jack 5 MIC jack 6 REC LEVEL dial... -
Page 10: Display (Lcd Panel)
Display (LCD Panel) Folder List Display 1 Root folder indicator Folder indicator Recording media indicator or folder indicator/ Root folder name/ Current file number/ Total number of recorded files in the folder 2 Folder name 3 Guide indicator File List Display 1 Folder/ File indicator Folder name/ Current file number/ Total number of recorded files in the folder... -
Page 11: Inserting Batteries
Ni-MH Rechargeable Battery Ni-MH rechargeable batteries B-01 4PE (optional) from Olympus can be used in the recorder. Use them with the Olympus Ni-MH Rechargeable Battery Charger B-90SU (optional) (For U.S.A. and Canada) or BU-90SE (optional) (For Europe) -
Page 12: Using The Ac Adapter
• Manganese battery may not be used in this recorder. • When changing batteries, AA alkaline batteries or Olympus Ni-MH Rechargeable Batteries are recommended. • Be sure to turn off power of the recorder before replacing the batteries (☞ P.13). Unloading the batteries while the recorder is in use may cause a malfunction such as corrupting the file, etc. -
Page 13: Power Supply
Power Supply When the recorder is not being used, turn the power off to reduce battery consumption to a minimum. Even if the power is turned off, existing data, mode settings, and clock settings will be maintained. Turning On the Power: While the recorder’s power is off, slide the POWER/HOLD switch in the direction indicated by the arrow. - Page 14 Notes • If you press any button in HOLD mode, the clock display flashes for 2 seconds, but it will not operate the recorder. • If HOLD is applied during playback (record- ing), operation is disabled with the playback (recording) state unchanged (When playback has ended and the recording has ended due to the remaining memory being used up, it will stop).
-
Page 15: Setting Time And Date [Time & Date]
Setting Time and Date [Time & Date] If you set the time and date beforehand, the information when the file is recorded is automatically stored for each file. Setting the time and date beforehand enables easier file management. When you use the recorder for the first time after purchasing it, or when the batteries have been inserted without the device hav- ing been used in a long time, the [Set Time &... -
Page 16: Changing The Time And Date
Note • If you press the `/OK button during the setup operation, the recorder will save the items that were set to that point. Changing the Time and Date While the recorder is during stop mode, press and hold the STOP 4 button to display the Time and Date, Remaining Memory and File Format. -
Page 17: Inserting And Ejecting A Card
Inserting and Ejecting a Card This recorder can be used with commercially available SD Cards as well as the built-in flash memory. Inserting a Card 2 3 button `/OK button While the recorder is during stop mode, open the card cover. Face the card the correct way and insert it into the card slot as shown in the diagram. -
Page 18: Ejecting A Card
When the SD Card is write protected, there will be a display reading [SD Card Locked]. Before inserting the card, turn off the write protection function. Check the Olympus website regard- ing SD cards which are confirmed operation with this recorder (☞ P.80). -
Page 19: Notes On The Folders
Notes on the Folders The built-in flash memory or the SD Card can be used for the recording media. Regardless of the recording media, voice files and music files are separated into folders for voice recordings and folders for music playback that are organized in a branching tree-style and saved. -
Page 20: About The Folder For Music Playback
About the Folder for Music Playback When transferring music files to the device using Windows Media Player, a folder is automatically created within the music playback folder which has a layered structure as shown in the diagram below. Music files that are in the same folder can be rearranged in preferential order and replayed (☞... -
Page 21: Selecting The Folders And Files
Selecting the Folders and Files Change folders while the operation is stopped. For information on the layered structure of the folders, see the section entitled “Notes on the Folders” (☞ P.19, P.20). Operation of the folders for music playback Folder list display Folder list display 2 or 3 button Select the artist folder... -
Page 22: About Recording
Before Recording Getting Ready Affix the windscreen: Start recording after attach the windscreen (included within) to the microphone. The noise may occur even if a windscreen is at- tached when forcing wind blows against a microphone. Turn the Microphone Toward the Original Sound Source Turn the built-in stereo microphone in the direction that you would like to record. -
Page 23: Recording
Recording Before starting recording, select a folder between [A] to [E]. These five folders can be selectively used to distinguish the kind of recording; for ex- ample, Folder [A] might be used to store private information, while Folder [B] might be dedicated to holding business information. - Page 24 Actually producing the sound you would like to record: • When a loud sound is produced the level meter will swing all the way over to the right while recording and the [PEAK] indicator light will turn on. When this happens the sound will be recorded in a distorted man- ner since the recording level is too high.
- Page 25 • When remaining recording time is less than 60 seconds, the [PEAK] indicator light starts flashing in amber. When the recording time is decreasing to 30 or 10 seconds, the light flashes faster. • [Folder Full] will appear when the folder capacity is full.
- Page 26 Recommended settings by recording condition The recorder is set up so that it can perform high quality recording equivalent to that of a music CD right away. The various functions relating to recording can be configured in detail to suit the recording conditions. Recording settings Indoor musical...
-
Page 27: Listening While Audio Is Recorded
Listening While Audio is Recorded If you start recording after inserting the earphone into the EAR jack on the recorder, you can hear the sound being recorded. The recording monitor volume can be adjusted by using the VOLUME dial. Connect the earphone to the EAR jack on the recorder. -
Page 28: Adjusting The Voice Sync Level For Recording
[HIGH]: This is a highly sensitive mode which can record surrounding noises. [LOW]: This is the standard level of microphone sensitivity. Select this mode for cases where the volume of the source sound is high, such as a band performance. Note •... - Page 29 Press the REC s button and prepare to record. [Level Fixed?] will flash on the display. • To use voice sync recording, set [V-Sync. Rec] on and set the detection time (☞ P.44). Press the 9 or 0 button to adjust the voice sync level.
-
Page 30: Recording From External Microphone Or Other Devices
Recording from External Microphone or Other Devices The external microphone and other devices can be connected and the sound can be recorded. Connect as follows by the device to be used. • Do not plug and unplug devices into the recorder’s jack while it is recording. - Page 31 Recording the Sound of Other Devices with This Recorder: The sound can be recorded when connecting to the audio output terminal (earphone jack) of the other device, and the LINE IN jack of the recorder with the connecting cord KA334 (included within) for dubbing.
-
Page 32: About Playback
Playback The recorder can playback WAV, MP3 and WMA format files. To playback a file recorded with other machines, you need to transfer (copy) it from a computer. STOP 4 button 2 3 button 9 0 button `/OK button Select the folder which contains the files to be played back (☞... - Page 33 PCM format. WAV files other than these cannot be played back. • This recorder is compatible with Microsoft Corporation DRM9, but not with DRM10. • It is possible to playback the WMA files which are created by the Olympus Digital Voice Recorder. Playback...
- Page 34 Forwarding While the recorder is during stop mode in the file display, press and hold the 9 button. • [ ] will appear on the display. • If you release the 9 button, it will stop. Press the `/OK button to start playback from where it was stopped.
-
Page 35: Playback Through Earphone
Index marks cannot be added to WMA files, MP3 files or files made by recorders other than Olympus IC recorders. However, temp marks can be added to temporarily mark locations to which you wish to listen. -
Page 36: How To Begin Segment Repeat Playback
Clearing an index mark or a temp mark: Locate the index or temp mark you want to clear. Press the 9 or 0 button to select the index or temp mark to erase. While the index or temp number ap- pears for approximately 2 seconds on the display, Press the ERASE button. - Page 37 Press the A-B REPEAT button at the point you want to start segment repeat playback. ] will flash on the display • Fast forwarding and rewinding (☞ P.29) can be conducted when [ ] is flashing in the same manner as during normal playback, and you can quickly proceed as far as the end position (☞...
-
Page 38: Erasing
Erasing Erasing One File at a Time A selected file can be erased from a folder. 2 3 button 9 0 button `/OK button ERASE button Select the folder which contains the files you want to erase (☞ P.19 to P.21). -
Page 39: Press The `/Ok Button
Press the 2 button to select [All Erase]. Press the `/OK button. • The display changes to [All Erase!] and erasing will start. [Erase Done] is displayed when the files are erased. Partially erase a file Only a PCM file recorded in the recorder can be partially erased. - Page 40 Press the ERASE button again. • [Partial Erase Start Position] and [Partial Erase End Position] on the display flash alternately. When the lights are flashing, playback continues and you can rewind or fast-forward as usual and fast-forward to the end of erase. If the file reaches the end during the flashing of the lights, that will be the position where erase ends.
-
Page 41: Menu Setting
Menu Setting Method Items in menus are categorized by tabs, so select a tab first and move to a desired item to quickly set it. You can set each menu item as follows. 2 3 button 9 0 button `/OK button MENU button While the recorder is during stop mode, press the MENU button. - Page 42 Press the 2 or 3 button to change the setting. Press the `/OK button to complete the setting. • You will be informed that the settings have been established via the screen. • Pressing the 0 button without pressing the `/OK button will cancel the settings and return you to the previous screen.
- Page 43 4 Rec Menu Rec Mode The recorder can record in the linear PCM format. High resolution recording at a high sampling rate and high bit rate equivalent or superior to that of a music CD is possible. Moreover, it also supports the MP3 and WMA formats. 1.
-
Page 44: Plug-Inpower
4 Rec Menu (Continued) Rec Monitor Plug-inPower V-Sync. Rec Select whether or not to output audio while recording from the earphone jack. Setting: [On]: Enables the recording monitor function. Sound will be output from the EAR jack. [Off]: Disables this function. Sound will not be output from the EAR jack. •... -
Page 45: Play Mode
4 Play Menu Play Mode There are six play modes. You can select whether to play by file or folder, or all files stored in the recorder. Setting: [File]: Stop after playing back the current file. [File Repeat]: Play the current file repeatedly. [Folder]: Play files continuously in the current folder until the last file and stop. - Page 46 4 LCD/Sound Menu Backlight Contrast Language 4 Memory Menu MemorySelect Memory Info. Format The display will remain lit for about 10 (Initial setting) seconds when a button on the recorder is pressed. Setting: [5 seconds] [10 seconds] [30 seconds] [60 seconds] [Always on]: Set the length of time that the backlight will remain lit.
-
Page 47: Usb Settings
4 Others Lock Locking a file keeps important data from being accidentally erased. Locked files are not erased when you select to erase all files from a folder (☞ P.38). Setting: [On]: Locks the file and prevents it from being erased. [Off]: Disables this function. - Page 48 4 Others (Continued) Fn Setting When functions are registered in the Fn button, each time the Fn button is pressed, you can set or change the menu of registered function. Setting: [Off]: No functions will be allocated to the button. [Index] (☞...
-
Page 49: Menu Reset
4 Others (Continued) Menu Reset This returns the functions back to their initial settings (factory default). Setting: [Start]: Returns the settings to their initial values. [Cancel]: Takes you back to the [Others]. • After resetting the settings, the time settings and file numbers will be preserved from before the reset and will not return to their initial settings. - Page 50 Menu Setting Method Setting menu during recording Setting menu during playback Function Setting Function Setting Play Mode Rec Level Zoom Mic Reverb Play EUPHONY Rec Monitor Menu Menu To menu item To menu item Plug-inPower options options Backlight Backlight LCD/ LCD/ Sound Sound...
-
Page 51: Formatting The Recorder [Format]
Formatting the Recorder [Format] If you format the recorder, all files will be removed and all function settings will return to defaults except date and time settings. Transfer any important files to a computer before formatting the recorder. 2 3 button 9 0 button `/OK button MENU button... - Page 52 Press the `/OK button. Press the 2 button to select [Start]. Press the `/OK button. • After the [Data will be cleared] message is on for two seconds, [Cancel] will turn on. Press the 2 button again to select [Start]. Press the `/OK button.
- Page 53 • When the recorder is formatted, all the saved data, including locked files and read-only files, are erased. • After formatting, recorded audio file names may start from [0001]. • When returning the settings for the functions to their initial settings, use [Menu Reset] (☞...
-
Page 54: Rearranging Files [Replace]
Rearranging files [Replace] You can move a file in a folder to change the order of playback. First select the folder (file) for which you want to change the playback order. 2 3 button 9 0 button `/OK button MENU button Select the folder for which you would like to rearrange the song order (☞... - Page 55 Press the `/OK or 9 button. • The cursor will flash to confirm that the file can be moved. Press the 2 or 3 button to select the location to move it to. Press the `/OK button to complete the setting.
-
Page 56: Moving Files [File Move]
Moving Files [File Move] Files saved in the built-in memory or the SD card can be moved or copied within the memory. Files can also be moved or copied between memory. 2 3 button 9 0 button `/OK button MENU button Select the folder where the file you want to move or copy is saved. - Page 57 Press the `/OK or 9 button. [File Move] will appear on the display Press the 2 or 3 button to choose the position to move or copy the file to. [Move to Built-in]: Move a file in the built-in memory or SD card to another folder within the built-in memory.
- Page 58 Notes • The recorder cannot copy when the memory capacity is not sufficient. • The recorder cannot move or copy when the number of file exceeds 199. • Do not remove the batteries during moving or copying. This may damage the datas. •...
-
Page 59: Splitting Files [File Divide]
Splitting Files [File Divide] PCM files recorded in this recorder can be split. Files with large capacities and long recording times can be split so that they are easier to manage and edit. 2 3 button 9 0 button `/OK button MENU button Select the PCM file you want to split, play or fast-forward the file and stop... - Page 60 Press the `/OK or 9 button. Press the 2 or 3 button to select [File Divide]. Press the `/OK or 9 button. • [Dividing!] will be displayed and file splitting will start. Splitting is completed when [File divide completed] is displayed. Press the MENU button to close the menu screen.
-
Page 61: Using The Recorder On Your Pc
Using the Recorder on Your PC By being connected to a PC, the recorder enables you to do the following: • You can transfer files recorded with this recorder to a computer, play them back, and manage them by using Windows Media Player or iTunes (☞... -
Page 62: Connecting To Your Pc
Operating Environment Copyright and Copyright Protection Feature (DRM) By the Copyright Act, any voice/music files and music CDs downloaded from the Internet without the copyright holder’s permission may not be reproduced, distributed, publicized/re-publicized on the Internet, or converted into WMA or MP3 files for the purpose of commercial business or sale. -
Page 63: Disconnecting From Your Pc
[Connect (Storage)] is appeared on recorder if the USB cable is connected Note • Be sure to use the attached dedicated cable for the USB connection cable. If any other company’s cable is used, it cause problems. Also, please do not connect this dedicated cable to any other company’s product. -
Page 64: Transfer The Voice Files To Your Pc
Transfer the Voice Files to Your PC The 5 voice folders of this recorder are appeared as [ DSS_ FLDA], [ DSS_ FLDB], [ DSS_ FLDC ], [DSS_FLDD] and [DSS_FLDE], and the recorded voice files are saved in these folders. Windows Connecting the recorder to your PC (☞... -
Page 65: Using Windows Media Player
Using Windows Media Player By using Windows Media Player, music files from music CDs or language study CDs can be imported to your PC (☞P.66) and music files that you have bought from any music distribution sites can be easily transferred to the recorder to play (☞P.67).The files recorded on the recorder can be transferred to your PC and can be copied to CD (☞P.70). -
Page 66: Copying Music From Cd
Copying Music from CD Insert CD into the CD-ROM drive, and start Windows Media Player. From the Features taskbar, click [Rip] menu. • After clicking [Rip] menu, click [View Album Info] for Windows Media Player 10 as necessary. • If Internet connectivity is available, CD information is searched. -
Page 67: Transferring Music File To The Recorder
Transferring Music File to the Recorder You can transfer the music files saved in your PC to this recorder. For how to copy the music files from the CD to your PC, see “Copying Music from CD” (☞ P.66). Windows Media Player 11 Connect the recorder to a PC, and start Windows Media Player. - Page 68 Select the desired category from [Library] on the left, and select music files or albums to transfer to the recorder, and Drag & Drop them in [Sync List] on the right. Click [Start Sync]. • The file is transferred to the recorder. Windows Media Player 10 Connect the recorder to a PC, and start Windows Media Player.
- Page 69 • To transfer the files by using Windows Media Player 9, check the Olympus website. • If the music files are transferred to the recorder until it reaches to the maximum memory, the message [Cannot make the system file.
-
Page 70: Copying Voice File To The Cd
Copying Voice File to the CD You can transfer the voice files in the recorder to your PC and copy them to CD. For how to copy the voice files from the recorder to your PC, see “Transfer the Voice Files to Your PC” (☞ P.64). Windows Media Player 11 Insert the blank CD-R/RW into the CD-R/RW drive, and start... - Page 71 Windows Media Player 10 Insert the blank CD-R/RW into the CD-R/RW drive, and start Windows Media Player. From the Features taskbar, click [Burn] menu. • Click [Burn] as needed after clicking [Edit Playlist] menu. • You can change the order of tracks by Drag &...
-
Page 72: Using Itunes
Using iTunes By using iTunes, music files from music CDs or language study CDs can be imported to your PC (☞P.73) and music files that you have bought from any music distribution sites can be easily transferred to the recorder to play (☞P.74).The files recorded on the recorder can be transferred to your PC and can be copied to CD (☞P.75). -
Page 73: Copying Music From Cd
Copying Music from CD Insert the CD into the CD-ROM drive, and start iTunes. Click [iTunes] { [Preferences]. Click [Advanced] tag. Click [Importing] to set the file format and bit rate for copying music files to your PC, and click [OK]. -
Page 74: Transferring Music File To The Recorder
Transferring Music File to the Recorder You can transfer the music files saved in your PC to this recorder. For how to copy the music files from the CD to your PC, see “Copying Music from CD” (☞ P.73). Connect the recorder to a PC, and start iTunes. -
Page 75: Copying Voice File To The Cd
Copying Voice File to the CD You can transfer the voice files in the recorder to your PC and copy them to CD. For how to copy the voice files from the recorder to your PC, see “Transfer the Voice Files to Your PC” (☞ P.64). Insert the CD-R/RW into the CD- R/RW drive, and start iTunes. -
Page 76: Using As External Memory Of The Pc
Using as External Memory of the PC In addition to its uses as an IC recorder and a music player, this recorder can also be used as external memory for a computer by storing data from a computer and reading it back out. With the recorder connected to your PC, you can download data from the memory to your PC and upload data stored on your PC to the memory. -
Page 77: Other Information
P.21, P.23). Erase unnecessary files (☞ P.38). This is a malfunction, so go to the store where you purchased the recorder or an Olympus service station for repair (☞ P.80). Remove the SD card then put it again (☞ P.17 to P.18). -
Page 78: Troubleshooting
Troubleshooting Symptom N o t h i n g a p p e a r s o n t h e display Won’t start Unable to record No sound picked up by the built-in microphone Unable to record through an external microphone No playback tone heard Recording level too low... - Page 79 Symptom Voice files are not recorded The connected external microphone is in stereo monaural. Cannot find the recorded Wrong recording media or folder. Voice File The recorder was shaken during record- ing. The recorder was placed near a cell phone or fluorescent lamp while recording Noise heard during playback or during playback.
-
Page 80: Technical Assistance And Support
Technical Assistance and Support The following are contact information for technical support for Olympus recorders and software only. s Technical Hotline Number in the U.S. and Canada 1-888-553-4448 s User Support E-mail address in the U.S. and Canada distec@olympus.com s Technical Hotline Number in Europe... -
Page 81: Accessories (Optional)
Accessories (optional) Accessories exclusive to the Olympus IC recorder can be purchased directly from Online Shop on our company’s website. Sales of accessories are different according to the country. Stereo microphone: ME51S The ME51S stereo microphone comes in a set with an extension cord and a clip.The built-in... -
Page 82: Specifications
Specifications General points 4 Recording format: Linear PCM (Pulse Code Modulation) MP3 (MPEG-1/MPEG-2 Audio Layer3) WMA (Windows Media Audio) 4 Input level: MIC SENSE HIGH/LOW switch is set to [HIGH]: - 59 dBv MIC SENSE HIGH/LOW switch is set to [LOW]: - 39 dBv LINE IN jack input: - 6 dBv... - Page 83 Guide to recording times 4 Linear PCM format: Recording Built-in flash mode memory (8 GB) 512 MB 96 kHz 24 bit 3 h. 50 min. 10 min. 96 kHz 16 bit 5 h. 50 min. 20 min. 88.2 kHz 24 bit 4 h.
- Page 84 Linear PCM format Notes • The above values are strictly rough guides. • Battery life is measured by Olympus. It varies greatly according to the type of batteries used and the conditions of use. Built-in stereo microphone (During recording mode) 96 kHz 24 bit 13 h.
- Page 85 Model Number : LS-11 Trade Name : DIGITAL VOICE RECORDER Responsible Party : OLYMPUS IMAGING AMERICA INC. Address : 3500 Corporate Parkway, P.O. Box 610, Center Valley, PA 18034-0610, U.S.A. Telephone Number :1-888-553-4448 This device Complies with Part 15 of the FCC Rules. Operation is subject to the following two conditions: (1) This device may not cause harmful interference, and (2) this device must accept any interference received, including interference that may cause undesired operation.
- Page 86 Shinjuku Monolith, 3-1 Nishi-Shinjuku 2-chome, Shinjyuku-ku, Tokyo 163-0914, Japan. Tel. +81 (0)3-3340-2111 http://www.olympus.com 3500 Corporate Parkway, P.O. Box 610, Center Valley, PA 18034-0610, U.S.A. Tel. 1-888-553-4448 http://www.olympusamerica.com (Premises/Goods delivery) Wendenstrasse 14-18, 20097 Hamburg, Germany. Tel. +49 (0)40-237730 (Letters) Postfach 10 49 08. 20034 Hamburg, Germany.
Need help?
Do you have a question about the LS-11 and is the answer not in the manual?
Questions and answers