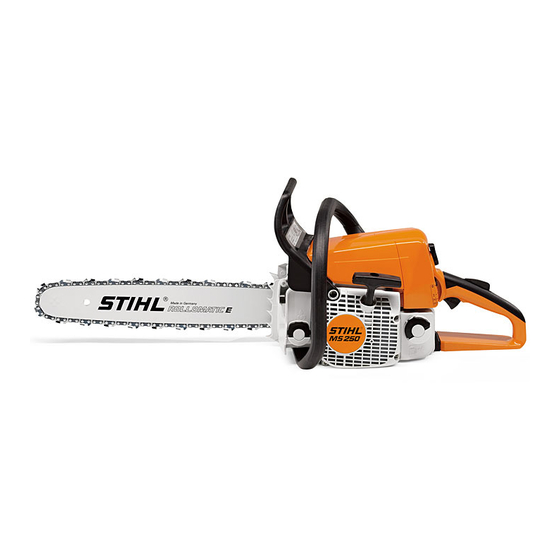
Stihl MS250 Manual
Hide thumbs
Also See for MS250:
- Instruction manual (128 pages) ,
- Service manual (74 pages) ,
- Instruction manual (56 pages)
Table of Contents
Advertisement
3DSANDS.COM TECHNICAL LITERATURE EXAMPLE
THIS IS AN EXAMPLE FOR SHOWING 3DSANDS TECHNICAL ILLUSTRATION
ABILITIES AND TECHNICAL WRITING ONLY!
USE INFORMATION AT YOUR OWN RISK.
REMOVING AND REPLACING TWO DIFFERENT SIZE BARS, SAW CHAINS, AND CHAIN
SPROCKETS ON A STIHL
MS 250 CHAINSAW
®
3DSANDS.COM © 2015
Advertisement
Table of Contents

Summary of Contents for Stihl MS250
- Page 1 THIS IS AN EXAMPLE FOR SHOWING 3DSANDS TECHNICAL ILLUSTRATION ABILITIES AND TECHNICAL WRITING ONLY! USE INFORMATION AT YOUR OWN RISK. REMOVING AND REPLACING TWO DIFFERENT SIZE BARS, SAW CHAINS, AND CHAIN SPROCKETS ON A STIHL MS 250 CHAINSAW ® 3DSANDS.COM © 2015...
- Page 2 Your STIHL MS250 owners manual will inform you on how to tighten the saw chain. ® You might want to look at your STIHL MS250 owners manual for a refresher course ®...
- Page 3 The saw will not operate long in this condition and will eventually cease to quit working. During the procedure a sprocket cover will be removed with a STIHL wrench. If you ®...
- Page 4 REMOVING AND REPLACING TWO DIFFERENT SIZE BARS, SAW CHAINS, AND CHAIN SPROCKETS ON A STIHL MS 250 CHAINSAW ® 3DSANDS.COM © 2014 DISENGAGE THE CHAIN. 1. Grasp the hand guard. Hand Gaurd 2. Pull the hand guard towards the rear of the saw and listen for the discernible clicking sound of the chain brake disengaging.
- Page 5 REMOVING AND REPLACING TWO DIFFERENT SIZE BARS, SAW CHAINS, AND CHAIN 3DSANDS.COM © 2014 SPROCKETS ON A STIHL MS 250 CHAINSAW ® REMOVE THE 1/4” BAR AND 1/4” SAW CHAIN. 3DSANDS.COM © 2014 Bar Studs 5. Hold the bar near the bar plate. Pull the bar and chain away from the tensioning peg and the bar studs at the same time.
- Page 6 REMOVE AND OIL THE BEARING. 11. Remove the bearing from the crankshaft. 12. Apply STIHL® lithium grease to the bearing. 13. Put the bearing back on the crankshaft post. WARNING: It is essential that the bearing is replaced!
- Page 7 REMOVING AND REPLACING TWO DIFFERENT SIZE BARS, SAW CHAINS, AND CHAIN 3DSANDS.COM © 2014 SPROCKETS ON A STIHL MS 250 CHAINSAW ® 3DSANDS.COM © 2014 PERSPECTIVE VIEW Sprocket sighting INSTALL THE 1/8” CHAIN SPROCKET. line slot location on 1/8” chain 14.
- Page 8 REMOVING AND REPLACING TWO DIFFERENT SIZE BARS, SAW CHAINS, AND CHAIN SPROCKETS ON A STIHL MS 250 CHAINSAW ® 3DSANDS.COM © 2014 17. Position the ends of pilers on the C-clip and the edge of the washer. Close the C-clip back onto the post.
- Page 9 REMOVING AND REPLACING TWO DIFFERENT SIZE BARS, SAW CHAINS, AND CHAIN 3DSANDS.COM © 2014 SPROCKETS ON A STIHL MS 250 CHAINSAW ® 3DSANDS.COM © 2014 22. Place the chain around the sprocket and then drape the chain along the top edge the bar and around the bar nose sprocket.
- Page 10 REMOVING AND REPLACING TWO DIFFERENT SIZE BARS, SAW CHAINS, AND CHAIN SPROCKETS ON A STIHL MS 250 CHAINSAW ® 3DSANDS.COM © 2014 26. Ensure that the chain is still able to move freely inside the bar track. If the chain does not move loosen the bolts until chain moves freely.
- Page 11 • If the sprocket cover does not go on easily remember it only has one tab that fits into the saw. The top of the sprocket cover rests on the top lip of interior. REFERENCE • ‘‘STIHL-MS-210-230-250-Instruction-Manual.’’ Sept. 2013. Web. 09 Sept. 2013. 3DSANDS.COM © 2014 3DSANDS.COM © 2015...


Need help?
Do you have a question about the MS250 and is the answer not in the manual?
Questions and answers