Table of Contents
Advertisement
DIGITAL CAMERA
FE-290/X-825
Instruction
Manual
( Thank you for purchasing an Olympus digital camera. Before you start to use your new camera, please
read these instructions carefully to enjoy optimum performance and a longer service life. Keep this manual
in a safe place for future reference.
( We recommend that you take test shots to get accustomed to your camera before taking important
photographs.
( In the interest of continually improving products, Olympus reserves the right to update or modify
information contained in this manual.
( The screen and camera illustrations shown in this manual were produced during the development stages
and may differ from the actual product.
Quick Start Guide
Get started using your
camera right away.
Button operations
Menu operations
Printing pictures
Using OLYMPUS Master
Getting to know your
camera better
Appendix
Advertisement
Table of Contents

Related Manuals for Olympus FE-290


Summary of Contents for Olympus FE-290
-
Page 1: Using Olympus Master
Instruction Manual ( Thank you for purchasing an Olympus digital camera. Before you start to use your new camera, please read these instructions carefully to enjoy optimum performance and a longer service life. Keep this manual in a safe place for future reference. -
Page 2: Table Of Contents
Contents Quick Start Guide Button operations Menu operations Printing pictures Using OLYMPUS Master Getting to know your camera better Appendix P. 3 Test out the functions of the camera buttons by following along with the P. 11 illustrations. Learn about the menus that control the functions and settings for basic P. -
Page 3: Quick Start Guide
Items not shown: Instruction Manual (this manual), warranty card. Contents may vary depending on purchase location. Attach the strap ( Pull the strap tight so that it does not come loose. Strap USB Cable AV Cable Lithium Ion Battery (LI-42B) OLYMPUS Master 2 CD-ROM... -
Page 4: Prepare The Camera
Prepare the camera a. Charge the battery. AC Wall Outlet ( Battery comes partially charged. b. Insert the battery and the xD-Picture Card (optional) into the camera. Power Cable Charging Indicator Red light on: Charging Light off: Charging complete (Charging time: Approx. 5 hours) Lithium Ion Battery Battery Charger... - Page 5 Battery lock knob (To remove the battery, press the battery lock knob in the direction of the arrow. Contact area Notch ( With this camera, you can take pictures without inserting the optional xD- Picture Card™ (hereinafter referred to as “the card”). If you take pictures without inserting the card, the pictures will be stored in the internal memory.
-
Page 6: Turn The Camera On
Turn the camera on This explains how to turn on the camera in shooting mode. a. Set the mode dial to h. Still picture shooting modes The camera determines the optimum settings for shooting pictures. The camera automatically sets the optimum aperture value and shutter speed. This function reduces the blur incurred by a moving subject, or camera shake when taking pictures. -
Page 7: Set The Date And Time
Set the date and time About the date and time setting screen MENU Cancels the setting a. Press the OF/< and NY buttons to select [Y]. • The first two digits of the year are fixed. b. Press the Y# button. c. - Page 8 Set the date and time d. Press the Y# button. e. Press the OF/< and NY buttons to select [D]. f. Press the Y# button. g. Press the OF/< and NY buttons to select the hours and minutes. • The time is displayed in the 24-hour format. h.
-
Page 9: Take A Picture
Take a picture a. Hold the camera. Horizontal grip b. Focus. Shutter Button (Press Halfway) c. Shoot. Shutter Button 1/1000 F2.7 1/1000 F2.7 HQ 3072 3072 × 2304 2304 When the focus and exposure are locked, the green lamp lights up, and the shutter speed and aperture value are displayed. -
Page 10: Review Your Pictures
Review your pictures a. Press the q button. Displays the previous image Erase pictures a. Press the X& and Y# buttons to display the picture you want to erase. b. Press the /S button. c. Press the OF/< button, select [YES], and press H. q button Arrow pad Displays the next image... -
Page 11: Button Operations
Button operations o button Power on: Camera turns on in shooting mode. • Lens extends • Monitor turns on Shutter button Shooting still pictures Set the mode dial to a setting other than n, and lightly press the shutter button (halfway). The green lamp lights when the focus and exposure are locked (focus lock), and the shutter speed and aperture value are displayed (only when the mode dial is set to h, P, h). -
Page 12: H Shooting Pictures Using Digital Image Stabilization
q button (Playback) The last picture taken is displayed. • Press the arrow pad to view other pictures. • Use the zoom lever to switch between close-up playback and index display. • Press H to delete the information display shown for 3 seconds during single-frame playback. -
Page 13: N Recording Movies
R Follow the shooting guide for setting Follow the shooting guide displayed on the screen to set the S H O O T I N G G U I D E 1 / 3 target items. Brightening subject. • Press m to display the shooting guide again. Shooting into backlight. -
Page 14: Erasing Pictures
X& button Press X& in shooting mode to select the macro mode. Press H for setting. Macro off & Macro on Super macro NY button Press NY in shooting mode to select on or off for the self-timer. Press H for setting. Self-timer off Self-timer on •... -
Page 15: Zoom Lever
Zoom lever Shooting mode: Zooming in on your subject Optical zoom: 4× Digital zoom: 4× (optical zoom × digital zoom: Max. 16×) Zoom out: Turn the zoom lever to the W- side. 3072 3072 × 2304 2304 Playback mode: Switching the picture display Zooming while shooting/Close-up playback 3072 3072... -
Page 16: Menu Operations
Menu operations m button About the menus Press m to display the top menu on the monitor. • The contents displayed on the top menu differ according to the mode. Top menu (Still picture shooting mode) IMAGE IMAGE IMAGE QUALITY QUALITY QUALITY CAMERA... -
Page 17: Using The Menus
Using the menus This explains how to use the menus with the [8] (warning sound) setting as an example. Set the mode dial to a setting other than R. Press m to display the top menu. Press Y to select [SETUP], and press H. •... -
Page 18: Image Quality
4 CAMERA MENU R (still picture) R (movie) PANORAMA SETUP SETUP SETUP SILENT SILENT * An Olympus xD-Picture Card MODE MODE is required. Compression Application • This is useful for printing large images on full-size paper. compression • This is useful for performing computer... - Page 19 RESET Restore shooting functions back to default settings. /YES Functions for returning the settings to the original when the reset function is executed Function AUTO & IMAGE QUALITY M NIGHT+PORTRAIT AUTO R (still picture) R (movie) f (Scene) Shooting pictures by selecting a scene according to the situation The scene selection screen displays sample images and the shooting mode to best suit the situation.
-
Page 20: Silent Mode
PANORAMA ... Creating a panoramic picture Panorama shooting lets you create a panoramic picture, using the OLYMPUS Master software on the provided CD-ROM. An Olympus xD-Picture Card is required for panorama shooting. Y: The next picture is X: The next picture is Connects pictures from left to right Use the arrow pad to specify at which edge you want to connect the pictures;... -
Page 21: Playback Menu
SLIDESHOW Press H to start the slideshow. • Only the first frame of each movie is displayed. • To cancel the slideshow, press H or m. MOVIE PLAY Select [MOVIE PLAY] from the top menu, and press H to play [ IN IN ] back the movie. - Page 22 ... Rotating pictures +90° / 0° / -90° [ I N ] EXIT +90° Select a picture with XY, and select [+90°]/[0°]/[-90°] with ON to rotate pictures. You can rotate several frames in succession..Adding sound to still pictures [ I N ] BACK MENU...
-
Page 23: All Erase
VIEW FAVORITE ... • Select [VIEW FAVORITE] to display pictures registered in MY FAVORITE. Use the arrow pad to browse pictures. • Press m to select [ADD FAVORITE] or [SLIDESHOW]. ADD FAVORITE SLIDESHOW SLIDE- SLIDE- FAVORITE FAVORITE EXIT EXIT SHOW SHOW EXIT EXIT... -
Page 24: Print Order
• Make sure there is no card inserted in the camera when formatting the internal memory. • Be sure that the card is inserted in the camera when formatting the card. • Before using non-Olympus cards or cards which have been formatted on a computer, you must format them with this camera. - Page 25 PIXEL MAPPING ... Adjusting the image processing function The pixel mapping feature allows the camera to check and adjust the CCD and image processing functions. It is not necessary to operate this function frequently. Approximately once a year is recommended. Wait at least one minute after taking or viewing pictures to allow the pixel mapping function to perform properly.
- Page 26 ... Setting the date and time The date and time is saved with each image, and is used in the file name. If the date and time are not set, the [X] screen is displayed each time the camera is turned on. MENU Cancels the setting VIDEO OUT...
-
Page 27: Printing Pictures
Printing pictures Direct printing (PictBridge) Using the direct printing function By connecting the camera to a PictBridge-compatible printer, you can print out pictures directly. Select the pictures you want to print and the number of prints on the camera’s monitor. To find out if your printer is compatible with PictBridge, refer to the printer’s instruction manual. - Page 28 Press OF/<. • Printing starts. • When printing is finished, the picture selection screen is displayed. To print another picture, press XY to select a picture, and press OF/<. • When you are finished, disconnect the USB cable from the camera with the picture selection screen displayed. Disconnect the USB cable from the camera.
-
Page 29: Selecting The Picture To Print
Selecting a print mode PRINT P R I N T M O D E S E L E C T ALL PRINT PRINT ALL PRINT MULTI PRINT MULTI PRINT ALL INDEX ALL INDEX EXIT MENU PRINT ORDER Setting the print paper SIZE P R I N T P A P E R [ IN ]... -
Page 30: How To Make Print Reservations
Select [PRINT], and press H. • Printing starts. • When printing is finished, the [PRINT MODE SELECT] screen is displayed. To cancel printing TRANSFERRING CANCEL Screen during data transfer In the [PRINT MODE SELECT] screen, press • A message is displayed. Disconnect the USB cable from the camera. -
Page 31: Single-Frame Reservation
To use print services without using DPOF • Pictures stored in the internal memory cannot be printed at a photo store. The pictures need to be copied to a card before taking them. g “BACKUP Copying pictures in the internal memory to the card” (P. 24) Single-frame reservation Follow the operation guide to make a print reservation for a selected picture. -
Page 32: All-Frame Reservation
All-frame reservation Reserves all the pictures stored on the card. The number of prints is set at one print per picture. Press m in the playback mode and display the top menu. Select [PRINT ORDER] Select the date and time setting, and press H. The pictures are printed without the date and time. -
Page 33: Using Olympus Master
Using OLYMPUS Master Overview Using the USB cable provided with your camera, you can connect the camera and computer and download (transfer) the images to your computer using the OLYMPUS Master software, also provided with the camera. Prepare the following items before starting. -
Page 34: Install The Olympus Master Software
Before installing the OLYMPUS Master software, please confirm that your computer is compatible with the following system requirements. For newer operating systems, please refer to the Olympus web site as shown on the back cover of this manual. Operating environment... - Page 35 • When the component installation screen is displayed, click “OK”. Click “Next” and follow the on-screen instructions. • When the OLYMPUS Master licensing agreement is displayed, read the agreement and click “Yes” to proceed with the installation. When the user information screen is displayed, enter your “Name”, select your...
-
Page 36: Connecting The Camera To A Computer
• Connecting the camera to a computer via a USB hub may cause unstable operation. In this case, do not use a hub, but connect the camera directly to the computer. • Images cannot be transferred to your computer with OLYMPUS Master if [PC] is selected in Step 3, Y is pressed and [MTP] is selected. -
Page 37: Downloading And Saving Images
Displaying camera images on a computer Downloading and saving images Click “Transfer Images” window, and then click “From Camera” • The window for selecting the pictures you want to transfer from the camera is displayed. All the images in the camera are displayed. -
Page 38: Viewing Still Pictures And Movies
Double-click the movie thumbnail that you want to see in the browse window. • OLYMPUS Master switches to the edit window and the first frame of the movie is displayed. To play back the movie, click “Play” bottom of the screen. -
Page 39: To Increase The Number Of Languages
To increase the number of languages Please take care that your battery is fully charged! Make sure that your computer is connected to the Internet. Plug the USB cable into the USB port on the computer. Plug the other end of the USB cable into the camera’s USB connector. •... -
Page 40: Getting To Know Your Camera Better
Getting to know your camera better Shooting tips and information Tips before you start taking pictures The camera does not turn on even when a battery is loaded The battery is not charged • Charge the battery with the charger. The battery is temporarily unable to function because of the cold •... -
Page 41: Subjects That Are Difficult To Focus On
Shooting tips Focusing on the subject There are several ways to focus, depending on the subject. When the subject is not in the center of the frame • Place the subject in the center of the frame, lock the focus on the subject, and then recompose your picture. -
Page 42: Taking Pictures Of A Subject Against Backlight
The picture is too grainy There are several factors that can cause the picture to appear grainy. Using the digital zoom to take close-up pictures • With the digital zoom, part of the image is cropped and enlarged. The greater the magnification, the grainier the picture appears. -
Page 43: Increasing The Number Of Pictures That Can Be Taken
(15 frames/sec.) Using a new card • If you use a non-Olympus card or a card used for another application, such as a computer, use the [FORMAT] function to format the card. g “MEMORY FORMAT (FORMAT) Formatting the internal memory or card” (P. 24) -
Page 44: Functions That Cannot Be Selected From Menus
Lamp indicators This camera uses several lamps to indicate the camera status. Lamp Self-timer lamp Card access lamp Green lamp of the monitor Lit: The focus and exposure are locked. Extending the useful life of the battery • Performing any of the following operations when not actually taking pictures can deplete the battery power. -
Page 45: To Return The Settings Of Functions To Default Settings
There are several ways you can view the entire picture on the computer screen. View the picture using image browsing software • Install the OLYMPUS Master 2 software from the provided CD-ROM. Change the monitor setting • The icons on the computer desktop may be rearranged. For details of changing the settings on your computer, refer to the computer’s instruction manual. - Page 46 Monitor indication The card has no available memory and cannot store CARD FULL any new data. There are no pictures in the internal memory or on the NO PICTURE card. There is a problem with the selected picture and it cannot be played back on PICTURE ERROR this camera.
-
Page 47: Functions Available In Shooting Modes And Scenes
Functions available in shooting modes and scenes Some functions cannot be set in certain shooting modes. For more details, refer to the table below. Functions available in shooting modes Shooting mode Function & Zoom IMAGE QUALITY – R (still picture) –... -
Page 48: Appendix
LI-40C charger before use. ( The provided rechargeable battery usually takes approximately 5 hours to charge. ( This camera uses a charger specified by Olympus. Do not use any other type of charger. Using your charger and AC adapter abroad ( The charger and AC adapter can be used in most home electrical sources within the range of 100 V to 240 V AC (50/60Hz) around the world. - Page 49 Representative plug of power supply cord of countries/regions around the world A Type B Type BF Type (American Type) (British Type) (British Type) The representative supply voltage and plug type are described in this chart. Depending on the area, different types of plugs and supply voltages are used. Attention: Power cord meeting demands from each country shall be used.
-
Page 50: The Card
Useful use of the accessories The card Pictures can be recorded on the optional card. The internal memory and card are the camera’s media for recording pictures, similar to film in a film camera. Pictures recorded to the internal memory or card can be easily erased on the camera or processed using a computer. -
Page 51: General Precautions
CAUTION: TO REDUCE THE RISK OF ELECTRICAL SHOCK, DO NOT REMOVE COVER (OR BACK). NO USER-SERVICEABLE PARTS INSIDE. REFER SERVICING TO QUALIFIED OLYMPUS SERVICE PERSONNEL. An exclamation mark enclosed in a triangle alerts you to important operating and maintenance instructions in the documentation provided with the product. -
Page 52: Handling The Camera
Follow these important guidelines to prevent batteries from leaking, overheating, burning, exploding, or causing electrical shocks or burns. DANGER • The camera uses a lithium ion battery specified by Olympus. Charge the battery with the specified charger. Do not use any other chargers. • Never heat or incinerate batteries. -
Page 53: Caution For Usage Environment
• Never store batteries where they will be exposed to direct sunlight, or subjected to high temperatures in a hot vehicle, near a heat source, etc. • To prevent causing battery leaks or damaging their terminals, carefully follow all instructions regarding the use of batteries. -
Page 54: Legal And Other Notices
Battery Handling Precautions • This camera uses a lithium ion battery specified by Olympus. Do not use any other type of battery. For safe and proper use, read the battery’s instruction manual carefully before using it. • If the battery’s terminals get wet or greasy, camera contact failure may result. Wipe the battery well with a dry cloth before use. -
Page 55: Copyright Notice
Olympus. No liability is assumed with respect to the use of the information contained in these written materials or software, or for damages resulting from the use of the information contained therein. -
Page 56: For Customers In North And South America
For customers in North and South America For customers in USA Declaration of Conformity Model Number : FE-290/X-825 Trade Name : OLYMPUS Responsible Party : Address : 3500 Corporate Parkway, P.O. Box 610, Center Valley, PA 18034-0610, U.S.A. Telephone Number : 484-896-5000... -
Page 57: Specifications
Number of effective pixels : 7,100,000 pixels Image pickup device : 1/2.5" CCD (primary color filter), Lens : Olympus lens 4.55 to 18.2 mm, f2.7 to 5.4 Photometric system : Center-weighted metering Shutter speed : 1 to 1/2000 sec. : 0.4 m (1.3 ft.) to ) (W), 0.6 m (2.0 ft.) to ) (T) (normal) - Page 58 (Lithium ion battery (LI-42B) Product type Standard voltage Standard capacity Battery life Operating environment Temperature Dimensions Weight (Battery charger (LI-40C) Power requirements Output Charging time Operating environment Temperature Dimensions Weight Design and specifications subject to change without notice. : Lithium ion rechargeable battery : DC 3.7 V : 740 mAh : Approx.
-
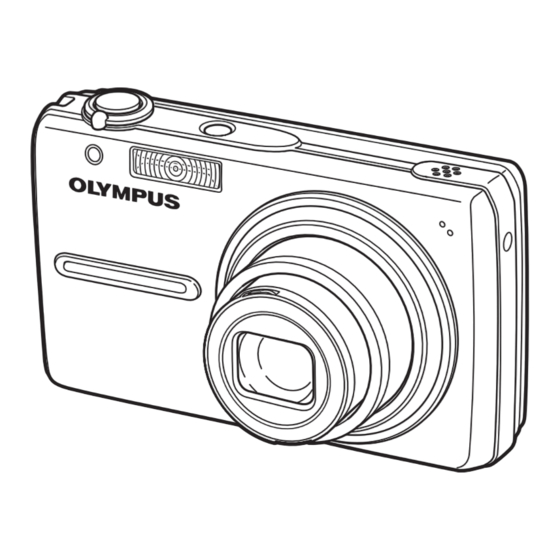
Page 59: Names Of Parts
Names of Parts Camera o button gP. 11 Shutter button gP. 11 Strap eyelet gP. 3 Connector cover/Multi-connector/ DC-IN jack gP. 26, 27, 36 Monitor gP. 25 X& button (Macro mode) gP. 14 Battery/card compartment cover gP. 4 Zoom lever gP. -
Page 60: Shooting Mode
Monitor Symbols & Icons (Shooting Mode 1/1000 1000 F2.7 3072 3072× Still pictures Item 1 Shooting mode 2 Self-timer 3 Shutter speed 4 Aperture value 5 Exposure compensation -2.0 – +2.0 6 Battery check 7 Green lamp 8 Flash standby Camera movement warning/flash charge 9 Silent mode... -
Page 61: Playback Mode
(Playback Mode 3072 × 2304 3072 F2.7 F2.7 1/1000 1/1000 ISO 400 ISO 400 ’07 07.12 12.10 10 12 100 - 0004 Still pictures Item 1 Battery check e = full power, f = charge the battery 2 Current memory [IN] (Playing back the picture in the internal memory), [xD] (Playing back the picture in the card) <×10... - Page 62 Monitor brightness adjustment s ... 25 MOVIE PLAY ... 21 MULTI PRINT... 29 Multi-connector ... 26, 27, 36 MY FAVORITE... 22 NTSC ... 26 Number of storable still pictures... 43 OLYMPUS Master... 33, 36 Operation guide ... 16, 28 Optical zoom ... 13, 15...
- Page 63 P ... 6 PAL ... 26 PANORAMA ... 20 PC... 33, 36 PictBridge ... 27 Picture rotation y... 22 PIXEL MAPPING ... 25 Playback mode q ... 10, 12, 15, 61 Playback mode menu q ... 20 Playback on a TV... 26 Playing time/Total recording time ...
- Page 64 Memo...
- Page 65 Memo...
- Page 66 Memo...
- Page 67 Memo...
- Page 68 Printed in China VS314401...
Need help?
Do you have a question about the FE-290 and is the answer not in the manual?
Questions and answers