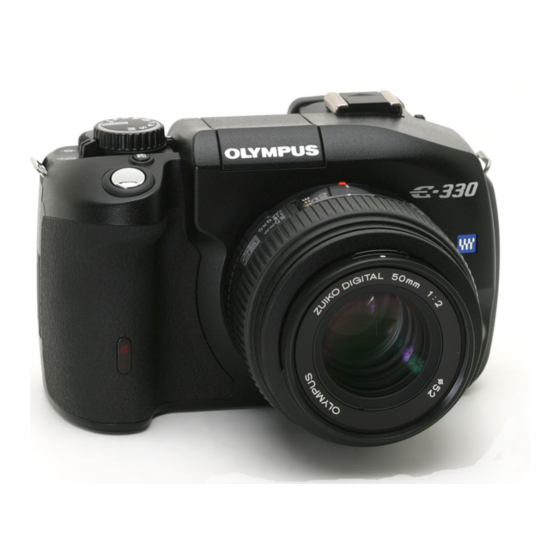
Olympus E-330 Basic Manual
Olympus digital camera manual e-330
Hide thumbs
Also See for E-330:
- Advanced manual (196 pages) ,
- Specification sheet (6 pages) ,
- Specifications (4 pages)
Table of Contents
Advertisement
Advertisement
Table of Contents

Related Manuals for Olympus E-330


Summary of Contents for Olympus E-330
- Page 1 ENGLISH FRANÇAIS ESPAÑOL DEUTSCH...
-
Page 2: Table Of Contents
OLYMPUS Master software ........ -
Page 3: Getting Started
• Attach the strap correctly as shown above so that the camera does not fall off. If the strap is attached incorrectly and the camera falls off, Olympus is not responsible for any damage. -
Page 4: Loading The Battery
Getting started Make sure that the camera’s power switch is set to OFF. Push the battery compartment lock slightly towards battery compartment cover. Load and push the battery in until it is locked by the battery lock. Close the battery compartment until a click is heard. -
Page 5: Attaching A Lens To The Camera
Attaching a lens to the camera Remove the body cap from the camera and the rear cap from the lens. Rear cap Align the lens attachment mark (red) on the camera with the alignment mark (red) on the lens, then insert the lens into the camera’s body. -
Page 6: Inserting A Card
Getting started Open the card cover and insert the card. Compact Flash/Microdrive Insert the card’s contact area into the slot as far as it can go. CF card slot • For usable cards, gADVANCED MANUAL (P. 163). • Do not push the card in with a pen or similar hard or pointed object. •... -
Page 7: Removing The Card
Removing the card Remove the card after the card access lamp light goes off. Card access lamp Compact Flash/Microdrive • Press the eject button all the way in and let it pop out, then press it all the way in again. -
Page 8: Preparations
Remaining power level: High. Blinks in the viewfinder. Your digital camera’s power consumption varies greatly depending on usage and operating conditions. Under some operating conditions, the camera may turn off without warning when the battery power is low. Dust reduction function operation The dust reduction function is automatically activated when the camera is turned on. -
Page 9: Date/Time Setting
Date/time setting Date and time information is recorded on the card together with the images. The file No. is also included with the date and time information. Be sure to set the correct date and time before using the camera. Press the MENU button. -
Page 10: Shooting
Shooting Viewing through the viewfinder to take a picture Set the mode dial to P. Place the AF frame on the subject while viewing through the viewfinder. AF frame Viewfinder Adjust the focus. Press the shutter button gently (halfway). • The focus is locked when a beep tone is sounded. -
Page 11: Taking A Picture While Viewing The Monitor
Taking a picture while viewing the monitor You can also take a picture while viewing the monitor to confirm your composition. Pressing the u (live view) button displays the subject on the monitor. • The A/B button can be used to confirm the composition as well as to adjust the focus. -
Page 12: Playback/Erasing
Playback/Erasing Pressing the q (playback) button displays the last picture taken. q button Each time you rotate the control dial towards U, the image is enlarged in steps of 2x - 14x. Playback the image you want to erase and press the S (erase) button. Select [YES] and press the i button to erase. -
Page 13: Viewing And Editing Images On The Computer
Viewing and editing images on the computer The provided CD-ROM includes the OLYMPUS Master software for image editing and management. Install on your computer to view, edit or manage the pictures taken with the camera. Installing the OLYMPUS Master Insert the provided CD-ROM into the CD-ROM drive. -
Page 14: Basic Operation
Basic operation Pictures can sometimes appear blurred as a result of moving the camera while the shutter button is being pressed. To prevent the camera from moving, hold the camera firmly with both hands while keeping your elbows at your sides. When taking pictures with the camera in the vertical position, hold the camera so that the flash is positioned above the lens. -
Page 15: Mode Dial
Mode dial Set to the targeted mode and turn on the camera. You can also change the dial mode position after turning on the camera. P: Allows you to shoot using an optimum aperture and shutter speed that the camera sets. A: Allows you to set the aperture manually for shooting. -
Page 16: Buttons Used During Shooting Mode
Basic operation Buttons used during shooting mode Frequently used functions during shooting can be easily set. 1 q (Playback) button Switches to the play mode. 2 u (Live view) button Displays the subject on the monitor while shooting. 3 #UP button Activates the built-in flash. -
Page 17: Operations Using The Control Panel
Operations using the control panel Press the i button, use dial to set. i button Item Battery check Shutter speed Exposure compensation indicator Exposure level indicator Flash intensity level indicator Aperture value Exposure mode Exposure compensation value Date and time Auto bracketing Noise reduction Live view... -
Page 18: Menu Function
Menu function Pressing the MENU (menu) button displays the menu on the monitor. Use the arrow pad to select and set. Erase all the images taken. Press the MENU button. to select [ then press d. Use ac to select [ALL ERASE], then press the i button. -
Page 19: Olympus Master Software
Olympus web site (http://www.olympus.com). Upgrade (OLYMPUS Master Plus) You can upgrade your software to OLYMPUS Master Plus using the “upgrade” button on the “OLYMPUS Master” main menu. You need to have the OLYMPUS Master installed in a computer with an internet connection. -
Page 20: Specifications
Product type Total no. of pixels Shutter Product type Shutter : Single-lens reflex digital camera with interchangeable lens system : Zuiko Digital, Four Thirds System Lens : Four Thirds mount : Approx. twice the focal length of the lens : 4/3 type Live MOS sensor : Approx. - Page 21 Auto focus Product type : TTL phase-contrast detection system Focusing point : 3-point multiple AF (left, center, right) AF luminance range : EV 0 - EV 19 Selection of focusing point: Auto, Optional AF illuminator : The built-in flash provides light. (light can also be provided by an external electronic flash.) Exposure control Metering system...
-
Page 22: Battery/Charger Specifications
Specifications Flash Synchronization Flash control mode External flash attachment : Hot shoe External connector USB connector/AV connector (Multi-connector) Power supply Battery Dimensions/weight Dimensions Weight Operating environment Temperature Humidity Specifications Battery/charger specifications BLM-1 Li-ion battery MODEL NO. Product type Nominal voltage Nominal capacity No. -
Page 23: Safety Precautions
CAUTION: TO REDUCE THE RISK OF ELECTRICAL SHOCK, DO NOT REMOVE COVER (OR BACK). NO USER-SERVICEABLE PARTS INSIDE. REFER SERVICING TO QUALIFIED OLYMPUS SERVICE PERSONNEL. Lightning flash with an arrowhead, enclosed in a triangle, alerts you to the presence of uninsulated voltage points inside the product which could cause a serious electrical shock. -
Page 24: Handling The Camera
Safety precautions Foreign Objects, Liquid Spillage — To avoid personal injury caused by fire or electrical shock from contact with internal high voltage points, never insert a metal object into the product. Avoid using the product where there is a danger of spillage. - Page 25 A fire or electric shock may result. If the camera is accidentally dropped in water, or if liquid is spilled into the camera, stop using it, allow it to dry, and then remove the battery. Contact the nearest authorized Olympus service center.
-
Page 26: Battery Handling Precautions
Do not pull on the charger’s cable or add another cable to it. Be sure to connect or disconnect the charger’s cable while holding the power plug. If the following cases occur, stop using and contact an Olympus dealer or authorized customer support center. - Page 27 Contact your dealer or an authorized Olympus service center. Continued use may result in fire or electric shock. If the battery leaks fluid onto your clothing or skin, remove the clothing and flush the affected area with clean, running cold water immediately.
- Page 28 Do not pull on the charger’s cable or add another cable to it. Be sure to connect or disconnect the charger’s cable while holding the power plug. If the following cases occur, stop using and contact an Olympus dealer or authorized customer support center.
-
Page 29: For Customers In Europe
For customers in Europe “CE” mark indicates that this product complies with the European requirements for safety, health, environment and customer protection. “CE” mark cameras are intended for sales in Europe. This symbol [crossed-out wheeled bin WEEE Annex IV] indicates separate collection of waste electrical and electronic equipment in the EU countries.
Need help?
Do you have a question about the E-330 and is the answer not in the manual?
Questions and answers