Table of Contents
Advertisement
Available languages
Available languages
A TASTE OF THE FUTURE
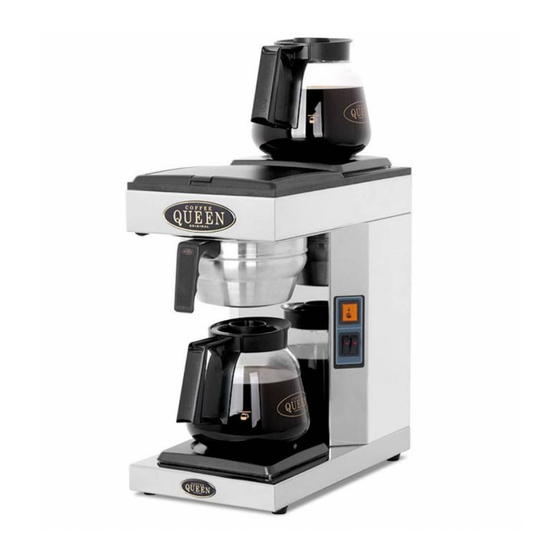
COFFEE QUEEN
Automatisk Kaffebryggare / Automatic Coffee brewer
Energisnål automatisk kaffebryggare.
Kapacitet max.1,8 liter
Lätt att installera och använda
Service manual
A-2
S_E_SE_GB
Bryggning i kanna
med automatisk vattenpåfyllning
Brewing in pot
with automatic water filling
Din återförsäljare / Your retail dealer
...............................................................................
...............................................................................
...............................................................................
Power saving coffee machines.
Capacity 1,8 litres
Simple installation and easy to use.
Rev. 071023
Advertisement
Chapters
Table of Contents

Related Manuals for Coffee Queen A-2


Summary of Contents for Coffee Queen A-2
- Page 1 A TASTE OF THE FUTURE Service manual COFFEE QUEEN S_E_SE_GB Automatisk Kaffebryggare / Automatic Coffee brewer Bryggning i kanna med automatisk vattenpåfyllning Brewing in pot with automatic water filling Energisnål automatisk kaffebryggare. Power saving coffee machines. Kapacitet max.1,8 liter Capacity 1,8 litres Lätt att installera och använda...
-
Page 2: Table Of Contents
1. Innehåll. 1. Innehåll 2. Allmänt 3. Funktionsbeskrivning 4. Installation och igångsättning 5 - 6 5. Skölja och fylla upp vattensystemet 6. Bryggning av kaffe 7- 9 7. Inställning: Programmering av elektronik 7. Inställning: Vattenmängd och bryggtid 8. Skötselråd 11- 12 9. -
Page 3: Allmänt
2. Allmänt. Tack för att ni valt en Coffee Queen kaffebryggare A2 med automatisk vattenpåfyllning och som vi hoppas att ni får mycket gläjde av! Maskinen skall anslutas korrekt för Din egen säkerhets skull. Läs igenom bruksanvisningen innan du använder maskinen. -
Page 4: Funktionsbeskrivning
3. Funktionsbeskrivning. Övre värmeplatta ON - OFF knapp ON - OFF För bryggning och Övre värme- nedre värmeplatta platta Display Blinkar vid bryggning. Lyser med fast sken när bryggning är klar. Full kanna 12 koppar Halv kanna 6 koppar Alternativt 4 - 12 koppar. -
Page 5: Installation Och Igångsättning
4. Installation och igångsättning. 4.1. Placera maskinen på ett plant vattentätt underlag. 4.2. Anslut till Kallvattenledning med medföljande slang. Anslut lämpligen till en avstängningskran. Trycket ska vara 14,5 - 72,5 PSI (1 - 5bar) för en bra funktion OBS! Anslut stickproppen till ett separat jordat vägguttag. 230 V, 10 ampere. -
Page 6: Skölja Och Fylla Upp Vattensystemet
4. Installation och igångsättning. Övre värmeplatta 4.3. Slå på manöverbrytare för nedre värmeplattor och övre värmeplattor. Kontrollera att lamporna i knapparna tänds och att plattorna blir varma. Slå sedan av manöverbrytarna. Nedre värmeplatta 5. Skölja och fylla upp vattensystemet. 5.1. Gör första bryggningarna med endast vatten. -
Page 7: Bryggning Av Kaffe
6. Bryggning av kaffe. 6.1. Placera ett 90mm filter i filterhållaren. 6.2. Häll i en portion kaffe 95 - 125 gram för full bryggning . Denna dosering gäller för 12 koppar eller liknande. (malning mellan kok och brygg) s.k.restaurangmalning. Bred ut kaffet jämnt i filtret. 6.3. - Page 8 6. Bryggning av kaffe. 6.5. Bryggning klar. Under tiden som maskinen brygger kaffe blinkar displayen. När bryggningen är klar lyser displayen med ett fast sken och du hör en signal. Kaffe klart! 6.6. Välja hel eller halv bryggning i kanna. Bryggning av full kanna, bryggning av halv kanna eller välja antalet koppar.
-
Page 9: Inställning: Programmering Av Elektronik
6. Bryggning av kaffe. 6.7. Bryggning genom eget val av antal koppar. Du kan brygga valfritt antal koppar kaffe genom att välja antal koppar min. 4 upp till max. 12 koppar. Öka antal koppar. Minska antal koppar. Starta bryggningen. / stoppa bryggning. Dosering av kaffemängden gör du nu enligt eget behov och smak. -
Page 10: Inställning: Vattenmängd Och Bryggtid
7. Inställning av vattenmängd och bryggtid. 7.1. Om vattenmängden är fel: Justera med hjälp av den elektroniska knappsatsen. 7.1.1 Tryck ned knapparna samtidigt i mer än 5 sekunder tills du hör 2 ljudsignaler. displayen visar 0. 7.1.2 Öka eller minska vattenmängd/inloppstid 1 steg 5%. -
Page 11: Skötselråd
8. Skötselråd Före varje bryggning Skölj kannan. OBS!! Maskinen får ej överspolas eller nedsänkas i vatten. Varje dag. Diska kannan och filterhållaren med rengöringsmedel för kaffemaskiner. Torka rent spridarmunstycket och området runt detsamma,samt värmehällen. Använd endast en mjuk trasa och flytande rengöringsmedel som inte repar. -
Page 12: Skötselråd
8. Skötselråd Varje vecka Avkalkning. Häll 50 ml avkalkningsmedel för kaffemaskiner i kannan och fyll den helt med kallt vatten. Häll sedan blandningen av vatten och avkalkningsmedel i maskinen och genomför en bryggning utan pappersfilter och kaffe i filterhållaren. LÅT MEDLET VERKA I 30 MIN. Töm och skölj kannan. -
Page 13: Viktigt
9. Viktigt Viktigt Gör inte ingrepp i bryggaren. Felaktiga åtgärder kan leda till personskador och funktionsfel. Bryggaren bör stå på ett plant underlag för att den skall arbeta tillfredsställande. Bryggaren skall placeras på ett vattentätt underlag så att eventuellt utläckande vatten blir synligt. Se till att det inte bildas veck på... -
Page 14: Kontroll/Åtgärd
10. Kontroll/Åtgärd. Symptom Kontroll/Åtgärd. A. Strömbrytare tänds inte. Kontrollera anslutningen till vägguttaget/arbetsbrytaren. Kontrollera säkringen till väggutaget/arbetsbrytaren (10 amp). Kontrollera om värmeplatta blir varm, om så är fallet byt manöverbrytare. Kontrollera anslutningen till manöverbrytare. B. Värmeplatta blir ej varm Kontrollera anslutningen till elementet . fastän manoverbrytare tänds. -
Page 15: Sprängskiss
11. Sprängskiss Tank Flottör Lock Hållare mikrobrytare Värmeplatta komplett Värmeplatta komplett Filterhållare för kaffefilter 90mm Serveringskanna 1,8L 1 2 3 4 5 6 7 8 9 0 1 2 3 4 5 6 7 8 9 0 1 2 3 4 5 6 7 8 9 0 1 2 1 2 3 4 5 6 7 8 9 0 1 2 3 4 5 6 7 8 9 0 1 2 3 4 5 6 7 8 9 0 1 2 1 2 3 4 5 6 7 8 9 0 1 2 3 4 5 6 7 8 9 0 1 2 3 4 5 6 7 8 9 0 1 2 1 2 3 4 5 6 7 8 9 0 1 2 3 4 5 6 7 8 9 0 1 2 3 4 5 6 7 8 9 0 1 2 1 2 3 4 5 6 7 8 9 0 1 2 3 4 5 6 7 8 9 0 1 1 2 3 4 5 6 7 8 9 0 1 2 3 4 5 6 7 8 9 0 1 2 3 4 5 6 7 8 9 0 1 2 1 2 3 4 5 6 7 8 9 0 1 2 3 4 5 6 7 8 9 0 1 2 3 4 5 6 7 8 9 0 1 2 1 2 3 4 5 6 7 8 9 0 1 2 3 4 5 6 7 8 9 0 1 2 3 4 5 6 7 8 9 0 1 2 1 2 3 4 5 6 7 8 9 0 1 2 3 4 5 6 7 8 9 0 1 2 3 4 5 6 7 8 9 0 1 2 1 2 3 4 5 6 7 8 9 0 1 2 3 4 5 6 7 8 9 0 1 1 2 3 4 5 6 7 8 9 0 1 2 3 4 5 6 7 8 9 0 1 2 3 4 5 6 7 8 9 0 1 2 1 2 3 4 5 6 7 8 9 0 1 2 3 4 5 6 7 8 9 0 1 2 3 4 5 6 7 8 9 0 1 2 1 2 3 4 5 6 7 8 9 0 1 2 3 4 5 6 7 8 9 0 1 2 3 4 5 6 7 8 9 0 1 2 1 2 3 4 5 6 7 8 9 0 1 2 3 4 5 6 7 8 9 0 1 2 3 4 5 6 7 8 9 0 1 2 1 2 3 4 5 6 7 8 9 0 1 2 3 4 5 6 7 8 9 0 1 1 2 3 4 5 6 7 8 9 0 1 2 3 4 5 6 7 8 9 0 1 2 3 4 5 6 7 8 9 0 1 2 1 2 3 4 5 6 7 8 9 0 1 2 3 4 5 6 7 8 9 0 1 2 3 4 5 6 7 8 9 0 1 2 1 2 3 4 5 6 7 8 9 0 1 2 3 4 5 6 7 8 9 0 1 2 3 4 5 6 7 8 9 0 1 2 1 2 3 4 5 6 7 8 9 0 1 2 3 4 5 6 7 8 9 0 1 2 3 4 5 6 7 8 9 0 1 2 1 2 3 4 5 6 7 8 9 0 1 2 3 4 5 6 7 8 9 0 1... -
Page 16: Reservdelslista
12. Reservdelsförteckning. Benämning Beställn. nr. Detalj.nr. ( antal detaljer) Värmeplatta kpl. 120811 Lock 1204012 1204013 Hetvattenslang 1505041 Spridarmunstycke 1204016 Plasttank kompl. 1204015 Tank, flottör, sil, lock, hållare mikrobryt. Mikrobrytare 160821 Dräneringsslang 1505062 Inloppsslang 1505022 Överhettningsskydd 160212-03 Kallvattenslang kompl. 1031503 Bryggelement kpl. 1205101 Slangklämma 16,4 140339... -
Page 17: Elschema
13. Elschema B1 Huvudbrytare/brytare för element E1 S2 Signallampa för brytare B2 B2 Brytare för element E2 E1 Nedre underhållsvärmeelement B3 Mikrobrytare för element E3 E2 Övre underhållsvärmeelement B4 Aut. Överhettningsskydd för element E3 E3 Bryggelement B5 Man. Överhettningsskydd för element E3 V1 Magnetventil för vattenpåfyllning S1 Signallampa för brytare B1... - Page 18 1. Table of contents 1. Table of contents 2. General 3. Functions 4. Installation and start 21- 22 5. Rinsing and filling up water system 6. Brewing of coffee 23- 25 7. Adjusting: Programming of electronic box 7. Adjusting: Water and brew time 8.
-
Page 19: General
2. General. We congratulate to your choice of a Coffee Queen coffee brewer A2. Please read this manual before you take the machine into operation for the first time. The manual contents important instructions for a safe and proper use. -
Page 20: Functions
3. Functions. Upper hot plate ON - OFF button ON - OFF For brewing and Upper lower hot plate hot plate Display Blinking when brewing. Full pot 12 cups Half pot 6 cups or 4 - 12 cups. Starts brewing Lower hot plate... -
Page 21: Installation And Start
4. Installation and start. 4.1. Place the machine on a flat level and waterproof surface. 4.2. Connect to cold water feed with connection tube supplied. Connection to a closable valve is recommended. Water pressure shall be 14,5 - 72,5 PSI (1 - 5 bar) for a correct operation CAUTION! Connect the plug to a separate wall socket. -
Page 22: Rinsing And Filling Up Water System
4. Installation and start. 4.3. Upper hotplate Turn on control switches for upper hotplate and lower hotplate. Ensure that the lamps turn on and that the hot plates get warm. Lower hotplate Then turn off control switches. 5. Rinsing and filling up water system. 5.1. -
Page 23: Brewing Of Coffee
6. Brewing of coffee. 6.1. Place a 90mm filter in the filter holder. 6.2. Add coffee 95 - 125 gram , restaurant / catering grounded coffee). This is recommended for full brewing 12 cups. Make sure that the coffee is evenly spread. 6.3. - Page 24 6. Brewing of coffee. 6.5. Brewing ready. During the brewing display is blinking. When brewing is ready you hear a signal and the display will lit. Coffee Ready! 6.6. Choose a full or a half brewing in pot. When first starting up coffee brewer. Coffee brewer is programmed to brew a full pot of coffee, (12 cups).
-
Page 25: Adjusting: Programming Of Electronic Box
6. Brewing of coffee. 6.7. Choose amounts of cups. To choose your own amounts of cups, min. 4 cups to max. 12 cups. Increase amounts of cups Decrease amounts of cups. Starts brewing. / stop brewing. NOTE! If you will start a second brewing, keep the first pot at the required temperature by placing on the upper hot plate. -
Page 26: Adjusting: Water And Brew Time
7. Adjusting water amount and brewing time. 7.1. If the amount of water is wrong: Adjust. 7.1.1 Press the buttons at same time in 5 seconds. The buzzer beeps twice. Display shows 0. 7.1.2 Increase decrease amount of water. 1 step = 5%. 7.1.3 Confirm setups by press 7.1.4 Display shows 12 and machine is ready to use. -
Page 27: Maintenance
8. Maintenance. Before each brewing. Rinse the decanter. CAUTION! The machine should not be submerged in water or washed in a dishwasher Each day. Wash the pot and the filterholder with liquid solution for coffee machines. Clean the spray nozzle and the surrounding area. - Page 28 8. Maintenance. Each week. Deliming. Pour 50 ml deliming agent in the pot and fill it up with cold water. Pour the mixture in the machine and proceed with a brewing without filter and coffee. ALLOW DELIMING AGENT TAKE EFFECT IN 30 MINUTES. 3.
-
Page 29: Important
9. Important Important. Do not make any alterations to the machine. Such measures may cause personal injury and the machine to fail. The machine should stand on a flat surface so that it will function properly. The machine should be placed on a water-proof surface so that any leakage is easily noticeable, make sure there is no bendage on the connection tube when machine is pushed into its place. -
Page 30: Possible Solutions
10. Possible solutions. Fault Possible Solution A. Switch does not lit. Check plug connection to wall socket. Check fuse in plug. Check if hot plate becomes warm, if so replace switch. B. Hot plate does not become Check connection to element. warm although switch is lit. -
Page 31: Exploded View
11. Exploded View Tank Float Strainer Cover Holder microswitch Hot plate complete Hot plate complete Filterholder for coffee filter 90mm Glass decanter 1,8L... -
Page 32: Spare Parts List
12. Spare parts list. Description Art. no. Detail no. ( amount per unit) Hot plate complete 120811 Cover 1204012 Strainer 1204013 Hot water hose 1505041 Spray nozzle 1204016 Plastic tank complete 1204015 Tank Float Strainer Cover Holder, mikroswitch Micro switch 160821 Drain hose 1505062... -
Page 33: Electrical Diagram
13. Electrical diagram B1 Main switch/switch for element E1 S2 Lamp for switch B2 B2 Switch for element E2 E1 Bottom hot plate element B3 Microswitch for element E3 E2 Upper hot plate element B4 Aut. High limit for element E3 E3 Brewing element B5 Man. - Page 34 än av oss rekommenderat. FÖR SERVICE Vänligen kontakta din återförsäljare Din återförsäljare / Your retail dealer ................................................COFFEE QUEEN AB, Box 960, 671 29 ARVIKA, besöksadress; Korpralsv 1B, Tel vxl; +46 (0)570-47700, Fax; +46 (0)570-47719 E-mail: info@coffeequeen.se www.coffeequeen.se Art. nr. 1704207...
Need help?
Do you have a question about the A-2 and is the answer not in the manual?
Questions and answers