Table of Contents
Advertisement
Quick Links
Advertisement
Table of Contents

Related Manuals for Fujitsu ETERNUS CS800


Summary of Contents for Fujitsu ETERNUS CS800
- Page 1 ETERNUS CS800 V3.2 User Guide English...
- Page 3 English ETERNUS CS800 User Guide V3.2 Edition October 2015...
-
Page 4: Copyright And Trademarks
Microsoft®, Microsoft Windows®, and Windows Server® are U.S. registered trademarks of Microsoft Corporation. Linux is a registered trademark of Linus Torvalds. Fujitsu and the Fujitsu Logo are trademarks of Fujitsu Limited. All hardware and software names used are trademarks of their respective manufacturers. -
Page 5: Table Of Contents
2.1.3 Remote Replication of Backup Data Providing Automated Disaster Recovery Protection 2.1.4 Configurable Storage Presentation 2.2 Features and Benefits 2.3 What’s New in ETERNUS CS800 S6 with Software V3.2 2.3.1 ETERNUS CS800 S6 Hardware 2.3.2 ETERNUS CS800 S6 V3.2 Software 2.4 Components ETERNUS CS800 S6 System 2.4.1 Entry... - Page 6 3.1.2 Server Rear View - Connectors and Indicators 3.1.3 Connecting the servers to the mains 3.1.4 ETERNUS CS800 S6 - Entry System 3.1.4.1 PCI Cards for ETERNUS CS800 S6 Entry 3.1.5 ETERNUS CS800 S6 - Scale System 3.1.5.1 PCI Cards for ETERNUS CS800 S6 Scale 3.1.6 Indicators on the PCI Cards...
- Page 7 Content 4 Rack Requirements 5 Installing the ETERNUS CS800 S6 Modules 5.1 Locating the Mounting Position 5.2 Installing the components in the rack 5.2.1 Installation of the Server Module in a PRIMECENTER Rack 5.2.2 Installing a Storage Module in the Rack 5.3 Cabling the ETERNUS CS800 S6 System...
- Page 8 10.4.1 Replicating OST Data 10.4.2 Storage Servers 10.4.3 LSU 10.4.4 Manage Users 10.4.5 Manage Remote Users 10.4.6 Target IP Mapping 10.4.7 ETERNUS CS800 Accent 10.4.8 OST Client Plug-In 10.5 Replication Configuration 10.6 PTT Configuration 10.6.1 Physical Device Discovery 10.6.2 Backup Application Specific 10.7 Scheduler...
- Page 9 Content 10.10 Contacts 10.10.1 Company 10.10.2 Primary and Secondary 11 Replication 11.1 ETERNUS CS800 Replication Overview 11.2 Replication Send 11.3 Receive NAS 11.4 Receive VTL 11.5 Actions 11.6 Reports 12 Status 12.1 ETERNUS CS800 Overview 12.2 Hardware 12.3 Performance 12.4 Disk Usage 12.5 VTL Status...
- Page 10 17.1.2 Procedure of Storage Expansion starting with 16TB 17.1.3 Procedure of Storage Expansion starting with 24TB or more 17.2 Storage Expansion - Scale 18 System Specifications S6 18.1 Additional Specifications 19 Integration in Firewall Environments 20 ETERNUS CS800 3.2 Open-Source Software Index ETERNUS CS800...
-
Page 11: Introduction
Modules" on page 81 and chapter "Initial Configuration, Connecting with the Network" on page 107 describe all steps to install the hardware for the ETERNUS CS800 S6 system and the initial software configuration. Chapter "Remote Management" on page 133 describes how to use the management... - Page 12 Chapter "Integration in Firewall Environments" on page 495 provides a summary of firewall ports, which must be opened for correct function of the ETERNUS CS800. Chapter "ETERNUS CS800 3.2 Open-Source Software" on page 497 provides Open- Source Code.
-
Page 13: Support And Help
1 Introduction Related documents and order number The Order Number for the User Guide is U41840-J-Z125-8-76. The following documents are also available for ETERNUS CS800 systems: Order Document Title Document Description Number A26361- Safety Notes and Lists Fujitsu’s general safety and regulatory... -
Page 14: Technical Support
If you have an active support agreement, you may contact your service provider. If you do not have an active support agreement, contact your Fujitsu sales representative to purchase a service contract or updates. ETERNUS CS800... -
Page 15: Customer Service
"Storage Products > ETERNUS DX > ETERNUS DX100 S3". To get information of the server component, select: "Industry Standard Servers > Rack server > PRIMERGY RX2540 M1". Worldwide end-user product warranty For information the Fujitsu worldwide end-user standard limited product warranty look at: http://support.ts.fujitsu.com/warranty/index.asp?lng=COM&Level1=&LNID=1 ETERNUS CS800... -
Page 16: Important Information
For safety instructions see also the manual Safety notes and other important information. This system meets the relevant safety regulations for IT equipment. If you have any questions about whether you can install the ETERNUS CS800 system in the intended environment, please contact your sales outlet or our customer service team. CAUTION! The actions described in this manual shall be performed by technical specialists. -
Page 17: Installation And Operation
Always connect the system components and the attached peripherals to the same power circuit. Otherwise you run the risk of losing data if, for example, the ETERNUS CS800 server unit is still running but a storage subsystem fails during a power outage. -
Page 18: Working With Cds/Dvds And Cd/Dvd Drives
Damaged and imbalanced CDs/DVDs can break at high drive speeds (data loss). Under certain circumstances, sharp CD/DVD fragments can pierce the cover of the CD/DVD drive (equipment damage) and can fly out of the device (danger of injury, particularly to uncovered body parts such as the face or neck). ETERNUS CS800... -
Page 19: Laser Information
All batteries containing pollutants are marked with a symbol (a crossed-out garbage can). In addition, the marking is provided with the chemical symbol of the heavy metal decisive for the classification as a pollutant: Cd Cadmium Hg Mercury Pb Lead ETERNUS CS800... -
Page 20: Modules With Electrostatic-Sensitive Devices
Do not clean any interior parts yourself; leave this job to a service technician. Do not use any cleaning agents that contain abrasives or may corrode plastic. Ensure that no liquid enters the system. Ensure that the ventilation areas of the device are clear. ETERNUS CS800... -
Page 21: Other Important Information
The statement for other products will appear in the accompanying documentation. WARNING! This is a class A product. In a domestic environment this product may cause radio interference in which case the user may be required to take adequate measures. ETERNUS CS800... - Page 22 Consult the dealer or an experienced radio/TV technician for help. Fujitsu is not responsible for any radio or television interference caused by unauthorized modifications of this equipment or the substitution or attachment of connecting cables and equipment other than those specified by Fujitsu.
-
Page 23: Notes On Installing Devices In The Rack
Environmental Protection Environmentally-friendly product design and development This product has been designed in accordance with the Fujitsu standard for "environmentally friendly product design and development". This means that key factors such as durability, selection and labeling of materials, emissions, packaging, ease of dismantling and recycling have been taken into account. - Page 24 This directive sets the framework for returning and recycling used equipment and is valid across the EU. When returning your used device, please use the return and collection systems available to you. Further information can be found at http://www.ts.fujitsu.com/recycling ETERNUS CS800...
-
Page 25: Typographic Conventions
1 Introduction Details regarding the return and recycling of devices and consumables within Europe can also be found in the "Returning used devices" manual, via your local Fujitsu branch or from our recycling center in Paderborn: Fujitsu Recycling Center D-33106 Paderborn Tel. -
Page 27: System Description
System Description This chapter describes the features and build-up of the ETERNUS CS800 system. The chapter consists of the following sections: "Overview" on page 28 "Features and Benefits" on page 29 "What’s New in ETERNUS CS800 S6 with Software V3.2" on page 30 "Components ETERNUS CS800 S6 System"... -
Page 28: Overview
Remote Replication of Backup Data Providing Automated Disaster Recovery Protection With the ETERNUS CS800, users can transmit backup data from a remote site to a central, secure location to reduce or eliminate media handling. ETERNUS CS800 replication is asynchronous, automated, and operates as a background process. -
Page 29: Features And Benefits
2 System Description The NAS and OST presentation are available on all ETERNUS CS800 models. The VTL presentation is available on models with FC (Fibre Channel) option. Features and Benefits The ETERNUS CS800 system provides the following features and benefits: Leading performance and scalable capacity. -
Page 30: What's New In Eternus Cs800 S6 With Software V3.2
Samba 4 and SMB3 - Samba 4 will auto-negotiate with the client up to SMB3. Components ETERNUS CS800 S6 System An ETERNUS CS800 S6 system consists of a server component, which is the PRIMERGY RX2540 M1 server, and of storage components, which are up to three optional ETERNUS JX40 S2 for ETERNUS CS800 S6 Entry and ETERNUS DX100 S3 for ETERNUS CS800 S6 Scale. -
Page 31: Entry
ETERNUS JX40 S2 storage modules with either 6 or 12 x 3.5" 2TB SATA hard disks (7,200 rpm) per JX40 building up one to six additional RAID 6 (4+2) disk groups for backup data. Figure 2: Front View of an Entry System (Example) ETERNUS CS800... -
Page 32: Scale
2.4 Components ETERNUS CS800 S6 System 2.4.2 Scale This version provides a midrange amount as well as fast network throughput and full data storage facility. It includes the following features: 1 server unit with 2 CPUs (8 cores / 16 threads each) and 256GB RAM Backup capacity between 32 and 352TB (ETERNUS DX100 S3 with optionally up to 10 expansion modules, field upgradeable). -
Page 33: Capacity Of Eternus Cs800 S6 Configurations
2 System Description Figure 3: Front View of a Scale System (Example) 2.4.3 Capacity of ETERNUS CS800 S6 Configurations Name Disk Minimum Capacity Increment Maximum Size Capacity steps Capacity Entry 2 TB 8 TB 2 x 8 TB 24 TB... -
Page 34: Data Reduction
Solutions patented data deduplication technology to dramatically increase the role that disk can play in data protection. With ETERNUS CS800 solutions, users can retain 10 to 50 times more backup data on fast recovery disk than with conventional arrays. This advantage allows IT departments to cost-effectively retain months of backup data on disk for faster, more reliable restores and more data recovery points. -
Page 35: Space Reclamation
When subsequent backup jobs occur, the data deduplication engine searches for new data entering the ETERNUS CS800 and uses a variable length compression algorithm to compare new data to existing data in the block pool. -
Page 36: Storage Presentation
This allows backup applications to recognize and integrate a ETERNUS CS800 system into a data center environment just like one or more physical tape libraries. ETERNUS CS800 provides a number of tape drive and library emulations... -
Page 37: Network Attached Storage (Nas)
Figure 4: Virtual Tape Library (VTL) 2.8.2 Network Attached Storage (NAS) The ETERNUS CS800 system has the ability to serve as a NAS backup system (see "Network Attached Storage (NAS)" on page 37) where the following protocols are supported: "CIFS Protocol" on page 37 "NFS Protocol"... -
Page 38: Nfs Protocol
2.8 Storage Presentation Active Directory Support The ETERNUS CS800 supports ADS (Active Directory Services) as well as ACLs (Access Control Lists). This provides the following benefits: Compatibility with CIFS domains - NAS shares are able to join CIFS domains and use domain authentication. -
Page 39: Openstorage (Ost)
Figure 6: OpenStorage (OST) Example Path to tape (PTT) The path to tape (PTT) capability allows writing data stored in the ETERNUS CS800 to a tape library which is attached to an FC port of the ETERNUS CS800 system. With path to ETERNUS CS800... -
Page 40: Eternus Cs800 Advanced Reporting
2.10 ETERNUS CS800 Advanced Reporting tape, backup data can be moved directly from the ETERNUS CS800 system to a tape library without the need to travel through a backup host. A common use case for PTT is to create removable media for long term storage. Path to tape is available on all ETERNUS CS800 models with FC port option. - Page 41 ETERNUS CS800 settings do not match, your system may become inaccessible through the switch. Performance Guidelines The throughput and resilience of a ETERNUS CS800 depends on various parameters, such as on the model and configuration level (Entry/Scale, interfaces, the number of disk drives)
-
Page 43: Hardware Description
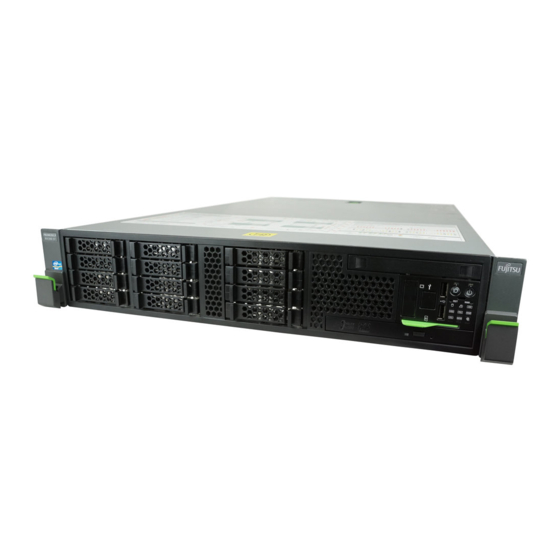
ETERNUS CS800 S3 User Guide. Server The server systems used by ETERNUS CS800 S6 is PRIMERGY RX2540 M1 that provides control for the ETERNUS CS800 S6 software (operating system and software applications). All ETERNUS CS800 S6 systems have one server. - Page 44 3.1 Server Figure 8: ETERNUS CS800 Scale servers' front view The figure below shows the indicators, buttons and connectors on the front panel modules of the ETERNUS CS800. Figure 9: Front panel indicators and buttons The table below describes each item.
- Page 45 CSS concept. If the event is still acute after a power failure, the indicator is activated after the restart. The indicator also lights up in standby mode. ETERNUS CS800...
- Page 46 If the event is still acute after a power failure, the indicator is activated after the restart. The indicator also lights up in standby mode. HDD/SSD activity Flashes green indicator when an internal drive is being accessed. ETERNUS CS800...
- Page 47 After connecting the server to the mains it takes about 60 seconds until the server enters the standby mode. Table 1: Front panel indicators, buttons and connectors ETERNUS CS800...
-
Page 48: Server Rear View - Connectors And Indicators
3.1 Server 3.1.2 Server Rear View - Connectors and Indicators This chapter describes the rear view of the servers including connectors and indicators. Figure 10: Rear view of the ETERNUS CS800 Item Description Redundant power supplies Power supply indicator Lights up yellow) when the server is switched off, but mains voltage is present (standby mode). - Page 49 Connectors and indicators on the I/O panels Figure 11: I/O panel connectors and indicators The first table below describes the connectors on the I/O panels of the ETERNUS CS800 servers (1, 2, ... in the figure above). The second table contains the indicators located on the rear side I/O panels of the servers (marked with A,B,...).
- Page 50 (CSS component) orange flashing CSS component failure ID indicator blue on server has been highlighted using ServerView Operations Manager or the ID button on the front panel for easy identification blue flashing local monitor is not active ETERNUS CS800...
- Page 51 The system is OK. If the event is still acute after a power cycle, the indicator is activated after the restart. Table 4: Indicators on the I/O panel For detailed information on the ETERNUS CS800 S6 see PRIMERGY RX2540 M1 manual. ETERNUS CS800...
-
Page 52: Connecting The Servers To The Mains
3.1.3 Connecting the servers to the mains The ETERNUS CS800 servers are equipped with two hot-plug power supply units. If one power supply unit is defective, then the other guarantees unimpaired operation. Each hot-plug power supply unit can be replaced during operation. - Page 53 All data and signal cables must have sufficient shielding. The use of cable type S/FTP Cat5e or better is recommended. Use of unshielded or badly shielded cables may lead to increased emission of interference and/or reduced fault-tolerance of the device. ETERNUS CS800...
-
Page 54: Eternus Cs800 S6 - Entry System
Figure 13: Entry System - front , with JX40 S2 Option Figure 14: Entry System - front, without JX40 S2 Option 3.1.4.1 PCI Cards for ETERNUS CS800 S6 Entry Entry with JX40 S2 Option Figure 15: Entry System, no option variant... - Page 55 4 x 1 Gb/s 2 x 10 Gb/s external Ethernet and RAID Fibre Channel card Ethernet Ethernet RAID controller controller with 8 Gb/s Fibre Channel option Table 5: Usage of PCI Slots - Entry System, with JX40 S2 option ETERNUS CS800...
- Page 56 Figure 19: Entry System, no option variant Figure 20: Entry System with 10 Gb/s Ethernet Figure 21: Entry System with 8 Gb/s Fibre Channel Figure 22: Entry System with 8 Gb/s Fibre Channel and with 10 Gb/s Ethernet ETERNUS CS800...
- Page 57 2 x 8 Gb/s Riser 4 x 1 Gb/s 2 x 10 Gb/s Gb/s Fibre Channel option RAID Fibre Channel card Ethernet Ethernet controller Table 6: Usage of PCI Slots - Entry System, without JX40 S2 option ETERNUS CS800...
-
Page 58: Eternus Cs800 S6 - Scale System
Scale System configuration. Figure 23: Scale System - front 3.1.5.1 PCI Cards for ETERNUS CS800 S6 Scale Figure 24: Scale System, no option / FC option variant Figure 25: Scale System with 1 Gb/s Ethernet option... -
Page 59: Indicators On The Pci Cards
Gb/s RAID card card Ethernet Fibre Ethernet Ethernet Fibre Ethernet Fibre controller option Channel Channel Channel Table 7: Usage of PCI Slots - Scale System 3.1.6 Indicators on the PCI Cards Figure 27: Indicators on the PCI Cards ETERNUS CS800... - Page 60 Flashes in case of input/output activity with 4 Gb/s. LED 3 (amber) Link/Activity indicator Lights up amber if a 1 Gb/s link exists. Flashes in case of input/output activity with 1 Gb/s. Table 8: Indicators on the PCI Cards ETERNUS CS800...
-
Page 61: Storage Modules
3 Hardware Description Storage Modules The Entry model of ETERNUS CS800 S6 with a capacity of more than 24TB uses up to three ETERNUS JX40 S2 storage modules as backup data storage. The Scale model of ETERNUS CS800 S6 uses ETERNUS DX100 S3 storage modules as backup data storage. -
Page 62: Eternus Jx40 S2 Rear View
Specifies the installation location of the storage subsystem. Table 9: Status and meanings of each LED (operation panel of JX40 S2 module) 3.2.2 ETERNUS JX40 S2 Rear View This chapter describes the rear view of JX40 S2 storage module, which includes connectors and indicators. ETERNUS CS800... - Page 63 SAS OUT link green The link between the SAS OUT port and the destination port has been established. SAS OUT fault amber The link between the SAS OUT port and the destination port is in error status. ETERNUS CS800...
- Page 64 Each power supply unit contains fans. Figure 33: Power supply unit (PSU) of the ETERNUS JX40 S2 Explanation Inlet: This inlet is used to connect a power cord. PSU switch: This switch is used to turn on and off the AC power supply. ETERNUS CS800...
-
Page 65: Eternus Dx100 S3 Base Module - Front View
3.2.3 ETERNUS DX100 S3 Base Module - Front View The Scale model of ETERNUS CS800 S6 uses ETERNUS DX100 S3 storage modules as backup data storage. There are two variants of the ETERNUS DX100 S3 storage modules: a storage base module (controller enclosure) which is connected to the server... - Page 66 READY green The ETERNUS DX is available for use.. Table 12: Status and Meanings of Each LED (Operation Panel - Base Module) For detailed information on ETERNUS DX100 S3 storage module see ETERNUS DX100 S3 storage module manuals. ETERNUS CS800...
-
Page 67: Eternus Dx100 S3 Base Module - Rear View
3.2.4 ETERNUS DX100 S3 Base Module - Rear View This chapter describes the rear view of ETERNUS DX100 S3 base module, which includes connectors and indicators. Figure 36: Rear view of DX100 S3 controller enclosure Figure 37: Controller Module ETERNUS CS800... - Page 68 Data is being sent or received via the LAN port (for operation management). LAN LINK green The link between the LAN port (for operation management) and the destination has been established. Figure 38: Status and Meanings of Each LED (Controller) ETERNUS CS800...
- Page 69 The power supply unit or the fan in the power supply unit is in error status. Table 13: Status and meanings of each LED (power supply unit) For detailed information on ETERNUS DX100 S3 storage module see ETERNUS DX100 S3 storage module manuals. ETERNUS CS800...
-
Page 70: Eternus Dx100 S3 Expansion Modules - Front View
ETERNUS DX100 S3 expansion module is optional and goes just with Scale model only. ETERNUS DX100 S3 storage expansion modules are used in the ETERNUS CS800 S6 system to provide additional capacity (backup data storage). Each storage expansion module contains 12 3.5-inch NL-SAS hard disk drives in the front (in the same way as the storage base module) and two I/O modules as well aspower supplies (with fans) in the rear. -
Page 71: Eternus Dx100 S3 Expansion Modules - Rear View
ETERNUS DX100 S3 Expansion Modules - Rear View This chapter describes the rear view of ETERNUS DX100 S3 storage expansion modules, which includes connectors and indicators. Figure 42: Rear view of DX100 S3 drive enclosure Figure 43: Rear view of DX100 S3 - I/O module ETERNUS CS800... - Page 72 Table 15: Status and meanings of each LED (I/O module of the ETERNUS DX100 S3 drive enclosure) Power Supply Unit (PSU) The power supply unit transforms input AC power from a power socket to DC power and supplies power to each component. Each power supply unit contains fans. ETERNUS CS800...
- Page 73 The power supply unit or the fan in the power supply unit is in error status. Table 16: Status and meanings of each LED (power supply unit) For detailed information on ETERNUS DX100 S3 storage module see ETERNUS DX100 S3 storage module manuals. ETERNUS CS800...
-
Page 74: Hard Drive Carrier
Slow flashing: HDD Rebuild (the data is being restored after changing a drive) Fast flashing: HDD Identify Four fast blinks/pause: HDD Predicted Fault Two fast flashes/pause: HDD Hot Spare (Hot spare drive active. The corresponding drive has failed). Table 17: 2.5" Hard Drive Disk Indicator ETERNUS CS800... - Page 75 HDD module is not correctly inserted) Table 18: 3.5" Hard Drive Disk Indicator If a drive fails, you will be notified by an admin alert in the remote management pages (see "Admin Alerts" on page 433). ETERNUS CS800...
-
Page 76: Turning On And Shutting Down The System
10 seconds and/or send a corresponding control signal. The storage modules are not switched off by shutting down the ETERNUS CS800 S6 via the remote management pages. If you want to switch off the storage modules completely, wait until the server has shut down, then press the Power ON/OFF button of the storage base module(s) for several seconds until the READY LED does not glow any more. -
Page 77: Locating The Serial Number
3 Hardware Description Locating the Serial Number You will need the serial number at various times. If you contact Fujitsu support provide the ETERNUS CS800 S6 serial number. You can locate the system serial number on the Home page of the remote management console. -
Page 79: Rack Requirements
Rack Requirements It is recommended to install the ETERNUS CS800 S6 system in a controlled or restricted area to prevent access by untrained personnel. In addition, it is recommended that system installation is performed only by qualified IT personnel. The tables below contain the rack requirements for the ETERNUS CS800 S6 components. - Page 80 The rack systems from Fujitsu (PRIMECENTER Rack) support the installation of ETERNUS CS800 S6 components. Installation in most current rack systems from other manufacturers is also supported. To ensure proper ventilation, any unused areas in the rack must be sealed using dummy covers.
-
Page 81: Installing The Eternus Cs800 S6 Modules
Installing the ETERNUS CS800 S6 Modules It is recommended to install the ETERNUS CS800 system in a controlled or restricted area to prevent access by untrained personnel. In addition, it is recommended that system installation is performed only by qualified IT personnel. -
Page 82: Locating The Mounting Position
5.1 Locating the Mounting Position Locating the Mounting Position The ETERNUS CS800 S6 system is designed to fit in a standard 19" wide rack. It is important for the chassis installation to locate the hole pattern in the rack rails. You must allow 2 HU (3.5") of vertical space for the server module and 2 HU (3.5") of vertical space for... - Page 83 5 Installing the ETERNUS CS800 S6 Modules an appropriate free space (2 to 6 HU) for storage expansion with up to three modules (see the figure below for a graphical representation). The maximum length of the cable between the server and the first JX40 S2 module (JX40-1) is 3.5m and the cables between the JX40 S2 modules have a...
- Page 84 2 DX100 S3 expansion module on the DX100 S3 base DE-2 3 DX100 S3 expansion module on the DX100 S3 base DE-3 10th DX100 S3 expansion module on the DX100 S3 base DE-a Table 21: Numbering of the Storage Modules for a Scale System ETERNUS CS800...
-
Page 85: Installing The Components In The Rack
At least two people are needed to position the server into/out of the rack. The rack can tip over when more than one unit is removed. The ETERNUS CS800 system may not occupy the top height unit of the rack (38 HU/42 HU PRIMECENTER Rack), as otherwise boards or fans cannot be replaced even with the plug-in module fully extended. - Page 86 (see delivery pack). Put the unlocking tool into the holes of the toothed levers. Press the toothed levers together in the direction of arrow and pull simultaneously the hook as far as it will go. ETERNUS CS800...
- Page 87 5 Installing the ETERNUS CS800 S6 Modules Mounting the rail systems Figure 53: Fit the Left Support System in the PRIMECENTER Rack CAUTION! When using telescopic rails, the rack must be protected against tilting. 1. Identify the right and the left rail (see label or imprint on the rail).
- Page 88 3. Fold down the server (3) while pressing the rails inwards to the server sides. Ensure that all rack mounting bolts (6 or 8) are properly seated in the mounting points on the telescopic rails and that the locking bars engage (4). ETERNUS CS800...
-
Page 89: Installing A Storage Module In The Rack
5 Installing the ETERNUS CS800 S6 Modules Completing installation Figure 55: Sliding the server into the rack 1. Release the locking mechanism of both rails (1). 2. Push the server as far as it will go into the rack (2) until the Quick Release Levers (QRL) engage (3). - Page 90 4. Insert the pins of the left slide rail in the 1st and 3rd holes from the bottom of the support bracket (see 1 in figure "Inserting the Pins of the Left Slide Rail" on page 91 ETERNUS CS800...
- Page 91 1. Install the JX40 S2 / DX100 S3 Storage Module in the rack. CAUTION! If the ETERNUS CS800 uses multiple storages modules: Double check the identifier (label) of the module to ensure the correct order of the modules, see figure "Labels on Front and Rear of the Storage Expansion Module"...
-
Page 92: Cabling The Eternus Cs800 S6 System
118846&intFehlercode=0&NavIDs= Cabling the ETERNUS CS800 S6 System This chapter provides cabling diagrams for the different ETERNUS CS800 S6 configurations. In order to set up the mains connection of the system with phase redundancy, the two power supply units of each module must be connected to two different phases or to two different circuits of the rack installation. - Page 93 The service port of the CS800 should not be connected to the LAN. CS800 Labelsheet Together with each ETERNUS CS800 S6 a label sheet is delivered. The stickers on it are intended to label the storages modules and their power cables (CE, DE-x, JX40-x) as well as the internal LAN and FC cables to connect the DX100 to the server of the Scale model.
-
Page 94: Entry System Without Eternus Jx40 S2 Option
5.3 Cabling the ETERNUS CS800 S6 System DE-6 DE-6 DE-6 DE-6 DE-6 DE-6 DE-7 DE-7 DE-7 DE-7 DE-7 DE-7 DE-8 DE-8 DE-8 DE-8 DE-8 DE-8 DE-9 DE-9 DE-9 DE-9 DE-9 DE-9 DE-a DE-a DE-a DE-a DE-a DE-a LAN Cabling (SCALE) Serv. - Page 95 5 Installing the ETERNUS CS800 S6 Modules Figure 60: Entry System without 8 Gb/s Fibre Channel and without 10 Gb/s Ethernet Figure 61: Entry System with 8 Gb/s Fibre Channel Figure 62: Entry System with 10 Gb/s Ethernet ETERNUS CS800...
-
Page 96: Entry System With Eternus Jx40 S2 Option
5.3 Cabling the ETERNUS CS800 S6 System Figure 63: Entry System with 8 Gb/s Fibre Channel and with 10 Gb/s Ethernet Proceed as follows to connect theETERNUS CS800 S6 Entry: 1. Connect a power cable to each power supply of the server. - Page 97 5 Installing the ETERNUS CS800 S6 Modules Figure 64: Entry System without 8 Gb/s Fibre Channel and without 10 Gb/s Ethernet ETERNUS CS800...
- Page 98 5.3 Cabling the ETERNUS CS800 S6 System Figure 65: Entry System with 8 Gb/s Fibre Channel Figure 66: Entry System with 10 Gb/s Ethernet ETERNUS CS800...
- Page 99 5 Installing the ETERNUS CS800 S6 Modules Figure 67: Entry System with 8 Gb/s Fibre Channel and with 10 Gb/s Ethernet Proceed as follows to cable the system: 1. Connect a power cable to each power supply of the components.
-
Page 100: Scale System
3. Connect the LAN ports and optionally the iRMC port to the appropriate networks. At least one of the LAN ports must be connected. 4. If your ETERNUS CS800 also provides FC ports: Connect them to the SAN or directly to the appropriate devices. - Page 101 5 Installing the ETERNUS CS800 S6 Modules 1. Connect the MNT LAN ports of both DX100 controller modules to the server: Figure 68: LAN connection between server and DX100 controller enclosure a. CM#0 MNT port has to be connected to the left onboard LAN port (LAN1 at LoM).
- Page 102 5.3 Cabling the ETERNUS CS800 S6 System Figure 69: FC connection between server and DX100 controller enclosure a. CM#0 CA#1 port 0 has to be connected to the upper port of the PCI FC card in slot b. CM#1 CA#1 port 0 has to be connected to the upper port of the PCI FC card in slot...
- Page 103 5 Installing the ETERNUS CS800 S6 Modules "ETERNUS DX100 S3 reverse cabling with two to ten drive enclosures" on page 104 depicting the cabling with a top down arrangement of the modules. Figure 70: ETERNUS DX100 S3 cabling with one drive enclosure...
- Page 104 5.3 Cabling the ETERNUS CS800 S6 System Figure 71: ETERNUS DX100 S3 reverse cabling with two to ten drive enclosures The following step by step instructions can be used to verify or to plug the cables: a. The SAS port of CE CM#0 must be connected to the SAS IN port of DE-1 IOM#0.
- Page 105 5 Installing the ETERNUS CS800 S6 Modules CAUTION! Double check the cabling. Do not continue if you are not absolutely sure that the cabling is correct. Otherwise booting up the device could damage the existing configuration with the result of data loss.
- Page 106 2. Connect the LAN ports and optionally the iRMC port to the appropriate networks. At least one of the LAN ports must be connected. 3. If your ETERNUS CS800 also provides FC support: Connect the FC ports to the SAN or directly to the appropriate devices.
-
Page 107: Initial Configuration, Connecting With The Network
You will need a notebook and an Ethernet cable to do the initial setup. CAUTION! If you attempt to install multiple ETERNUS CS800 systems at the same time, an IP address conflict can occur because each system is configured with the same default IP addresses (10.1.1.1 for the system and 10.17.21.199 for the iRMC). - Page 108 The same rules apply as above. Information on Background Initialize is displayed under the Status menu item of the ETERNUS CS800 Web GUI (Status > Hardware > Details > Storage Arrays), see chapter "Accessing Remote Management" on page 133...
-
Page 109: Connecting The Notebook With The Server
(for example, Local Area Connection), and click Properties. c. Select Internet Protocol (TCP/IP) in the list of connections, then click Properties. The Internet Protocol (TCP/IP) Properties window displays (see figure below). d. Select Use the following IP Address and then enter the following information: ETERNUS CS800... -
Page 110: Running The Getting Started Wizard
6.3.1 Login, Welcome, License Agreement "Supported Browsers" on page 133 for information about the browsers supported by the ETERNUS CS800 Web GUI. Proceed as follows: 1. On the notebook: a. Open a supported Web browser. b. Type 10.17.21.1 in the Address box. - Page 111 2. On the Login page: a. Select Administrator. b. Type for the password. spcc c. Click Login. 3. ETERNUS CS800 Welcome page displays (see figure below). Click Next. Figure 77: ETERNUS CS800 Welcome Page 4. ETERNUS CS800 License Agreement page displays. ETERNUS CS800...
- Page 112 6.3 Running the Getting Started Wizard Scroll down to the bottom of the page and click I have read and accept this License Agreement (see figure below). Figure 78: ETERNUS CS800 Licence Agreement Page 5. The ETERNUS CS800Access Control page displays. ETERNUS CS800...
-
Page 113: Access Control
Access Control Figure 79: Access Control page Initially only two accounts are enabled for access to the ETERNUS CS800 S6 system: The GUI Administrator and the SSH CLI Service account. It is necessary to specify a new password for both accounts. -
Page 114: Network Configuration
6.3 Running the Getting Started Wizard 6.3.3 Network Configuration Figure 80: Network Configuration ETERNUS CS800... - Page 115 6 Initial Configuration, Connecting with the Network Using the Network page, each physical Ethernet port in the ETERNUS CS800 can be configured as a separate device. In addition, you can create bonded devices (logical ports) consisting of two or more physical ports of the same link speed (1GbE or 10GbE). For each port or device, you can specify the MTU (Maximum Transmission Unit) frame size.
- Page 116 To see a list of reserved IP address ranges, click the quick tip icon [?] located near the IP address field. Hostname The hostname of the ETERNUS CS800. The Hostname cannot be blank and must contain only letters [ A–Z, a–z ], numbers [ 0–9 ], and hyphens [ - ].
- Page 117 The DNS Suffix Search List and DNS IP Addresses cannot be modified if the ETERNUS CS800 is currently joined to a Windows domain. To disjoin a Windows domain, see "Disjoining a Workgroup or Domain" on page 210 Configuring Bonding Details Under IP Address Configuration >...
- Page 118 Changing the bonding mode on the switch before saving these settings and rebooting may result in the loss of network connectivity to the system. ETERNUS CS800...
- Page 119 4. Click Update to save the changes you made to the Bonding Details table. (Clicking Update does not yet apply the new network settings to the ETERNUS CS800.) 5. Click Undo to revert to all current Bonding Details changes to the last update.
- Page 120 3. Click Update to save the changes you made to the Interface Details table. (Clicking Update does not yet apply the new network settings to the ETERNUS CS800.) 4. Click Undo to revert to all current Interface Details changes to the last update.
- Page 121 The maximum allowed number of VLAN tag IDs is 64. If you attempt to add more than 64 VLAN tag IDs, an error displays. To maintain connectivity, the switch ports connected to the ETERNUS CS800 must be configured to accept the correct VLAN tag ID.
- Page 122 The gateway of the ETERNUS CS800. (This is usually not the same as the default gateway.) 5. If necessary, specify NAT (Network Address Translation) settings for the interface: If the ETERNUS CS800 is a replication target and is behind a NAT router, you must configure a NAT IP Address. NATed...
- Page 123 Select to allow all types of traffic (management, replication, and data). Additional Information If the ETERNUS CS800 is configured for source or target replication, you should configure at least one interface to allow replication traffic (select Repl or Any) before applying changes to network settings.
- Page 124 5. Click Update to save the changes you made to the Routing Details table. (Clicking Update does not yet apply the new network settings to the ETERNUS CS800.) 6. Click Delete to remove IP routing information for the selected interface. Or click Undo to revert all current Routing Details changes to the last update.
- Page 125 ETERNUS CS800 to an IP address in another subnet by means of a destination gateway. Responses from the destination are routed back to the ETERNUS CS800 using the gateway specified for the interface in the IP Address Table section.
- Page 126 The source ETERNUS CS800 management/data IP address, the source ETERNUS CS800 replication IP address, and the target ETERNUS CS800 IP address are all on the same subnet (192.168.10.x). To make sure the replication segment is used when communicating with the target ETERNUS CS800, you must add a host route in the Routing Details section on the source ETERNUS CS800.
- Page 127 ETERNUS CS800 IP address is on a different subnet (192.168.20.x) To make sure the replication segment is used when communicating with the target ETERNUS CS800, you must add a network route in the Routing Details section on the source ETERNUS CS800.
-
Page 128: Date & Time
A red border indicates a port is configured but is not connected to a network. Click Update Port View to update the information on the diagram. 6.3.4 Date & Time The Date & Time page allows you to set the system date and time of the ETERNUS CS800. ETERNUS CS800... - Page 129 6 Initial Configuration, Connecting with the Network Figure 89: Date & Time Page To set the system date and time: ETERNUS CS800...
-
Page 130: Confirm Settings & Reboot
Settings the New System Time using the drop-down boxes. 2. In the Timezone drop-down box, select the time zone where the ETERNUS CS800 is located. 3. Next to Time Format, select the format to use when displaying times (24 hours or 12 hours). - Page 131 6 Initial Configuration, Connecting with the Network Figure 90: Confirm Settings A message appears that after clicking yes, your changes will be applied and the system will reboot automatically (see figure below). Click Yes. ETERNUS CS800...
- Page 132 6.3 Running the Getting Started Wizard Figure 91: Confirm Page ETERNUS CS800...
-
Page 133: Remote Management
Access the remote management console using a Web browser on a workstation that is on the same network as the ETERNUS CS800. Supported Browsers Web browser software is not included with the ETERNUS CS800. You must obtain and install it separately. The ETERNUS CS800 remote management console supports the following Web browsers:... - Page 134 1. Launch a supported Web browser on a workstation that has network access to the ETERNUS CS800. 2. In the browser address box, type the IP address of the ETERNUS CS800, and then press <Enter>. The Login window displays (see "Login Window"...
- Page 135 Passwords can be changed on the Access Control page (see "Access Control" on page 337). 4. Click Login. 5. If a security banner message has been specified for the ETERNUS CS800, click Accept. For information about specifying a security banner message, see "Security Notice" on page 355.
- Page 136 ETERNUS CS800 administrator. CAUTION! More than one Administrator can log on to the ETERNUS CS800 at a time. If two Administrators attempt to make configuration changes on the same page at the same time, it is possible that one Administrator’s changes will overwrite the other’s.
-
Page 137: The Remote Management Console
7 Remote Management The Remote Management Console After you log on to the ETERNUS CS800, the remote management console displays. The remote management console includes the following features: System Banner The system banner displays at the top of the remote management console (see "System... - Page 138 Figure 95: Help Menu Low Space Management As disk capacity is used and free disk space approaches low levels, the ETERNUS CS800 automatically responds as detailed in the table below. When the ETERNUS CS800 enters the Low Space state, space reclamation and compaction are automatically started to free up disk space (see "Space Reclamation"...
- Page 139 7 Remote Management When the ETERNUS CS800 enters the Critical Reserve Space state, backup ingest is stopped, and target replication to the system is paused. Backup ingest and target replication resume when the ETERNUS CS800 exits the Critical Reserve Space state.
- Page 140 During a blockpool verify operation, the banner displays the Attention state. Clicking Attention displays the message: A previous unclean shutdown of the ETERNUS CS800 has required a data verification to commence. While in this condition the ETERNUS CS800 is operational, but performance may be severely degraded.
- Page 141 7 Remote Management Main Menu The main menu displays on the left side of the ETERNUS CS800 remote management console (see "Main Menu" on page 141). Click a menu item to display the corresponding management page. To access Advanced Reporting, click the link below the main menu. Fujitsu Technology...
- Page 142 Management pages related to VTL (virtual tape library) and Fibre Channel status and configuration do not display for ETERNUS CS800 NAS configurations. Similarly, management pages related to NAS (network attached storage) and OST (OpenStorage technology) do not display for ETERNUS CS800 VTL configurations.
- Page 143 7 Remote Management Figure 97: Remote Management Pages Map ETERNUS CS800...
-
Page 145: Configuration Wizards
Wizard" on page 147). Multi-Protocol configurations only) Helps you configure the ETERNUS CS800 to present its storage as one or more VTL (Virtual Tape Library) partitions for use with a backup application (VTL and (see "VTL Wizard" on page 155). - Page 146 8.1 Configuration Wizards Overview Wizard Description Helps you configure the ETERNUS CS800 to present its storage as one or more OST (OpenStorage) storage servers for use with a backup application (NAS and (see "OST Wizard" on page 162). Multi-Protocol configurations...
-
Page 147: Nas Wizard
Windows or UNIX/Linux network, and if necessary helps you join the ETERNUS CS800 to a Windows domain. Then the wizard guides you through the process of adding one or more NAS shares to receive backup data. - Page 148 8.2 NAS Wizard Figure 99: NAS Wizard: About Step 2: Protocol 1. Select the type of host the ETERNUS CS800 will present NAS shares to (see "NAS Wizard: Protocol" on page 149): Windows (CIFS) - All hosts that will interact with the ETERNUS CS800 run Windows.
- Page 149 Continue with "Step 5: Add Share" on page 153. 1. Select an option for joining the ETERNUS CS800 to the Windows network (see "NAS Wizard: Windows" on page 151): Active Directory - Add the ETERNUS CS800 to a Windows network using Active...
- Page 150 IP address of the PDC. Organization Unit (Optional) Enter the name of the organizational unit in the domain. The ETERNUS CS800 will become a member of this organization Administrator Name Enter Administrator or any user that has the right to join the domain.
- Page 151 8 Configuration Wizards Figure 101: NAS Wizard: Windows Step 4: Share Access 1. Do one of the following depending on whether the ETERNUS CS800 is joining a Windows Workgroup or an Active Directory Domain: Windows Workgroup Enter information about the workgroup user: User Enter the name of the workgroup user.
- Page 152 Fully Qualified User or Group Name Enter the administrator's user or group name. 2. Click Add. 3. (Optional) To add additional workgroup users or share administrators, repeat Steps 1–2. 4. Click Next to continue. Figure 102: NAS Wizard: Share Access ETERNUS CS800...
- Page 153 (Optional) Enter a brief description of the share. Enable deduplication Select the check box to enable data deduplication. Fujitsu Technology Solutions recommends that you enable data deduplication to optimize disk usage. Data deduplication is enabled by default. You cannot enable or disable data deduplication after the share is added.
- Page 154 2. To make changes to a NAS share you added, first select the share and click Delete to delete the share. Then click Previous to return to the previous step and add a new share. 3. After you have confirmed all settings, click Finish. The wizard configures the ETERNUS CS800 with the settings you selected. ETERNUS CS800...
-
Page 155: Vtl Wizard
Figure 104: NAS Wizard: Confirm VTL Wizard The VTL wizard provides guided assistance for configuring the ETERNUS CS800 to present its storage as one or more VTL (Virtual Tape Library) partitions for use with a backup application. The wizard guides you through the process of adding one or more VTL partitions, adding virtual media, discovering hosts, and mapping partitions to hosts. - Page 156 Library Model Select the library model emulated by the partition. The library model determines the inquiry string returned to the host by the ETERNUS CS800. The following library models are available: Fujitsu CS-TL ADIC Scalar 100, ADIC Scalar i2000, or ADIC Scalar...
- Page 157 Enable deduplication Select the check box to enable data deduplication. Fujitsu Technology Solutions recommends that you enable data deduplication to optimize disk usage.
- Page 158 For example, if you enter AA, the cartridges are numbered AA0000, AA0001, AA0002, and so on. If you enter a starting barcode with less than 6 characters, zeroes are appended to the barcode to make it 6 characters long. ETERNUS CS800...
- Page 159 "VTL Wizard: Discover Remote Hosts" on page 160). A host is made known to the ETERNUS CS800 if you enter the host ID on this page, or if the host logs on to one or more Fibre Channel target ports.
- Page 160 8.3 VTL Wizard If you do not see the world wide name (WWN) of the host, make sure the host is connected to a Fibre Channel port on the ETERNUS CS800 and click Discover Remote Hosts again. The Backpanel Locations section displays a graphical representation of the Fibre Channel and Ethernet ports as they appear on the rear of the system.
- Page 161 SAN. The CCL is accessible to hosts only through LUN 0. CAUTION! If you are not sure if you should use CCL, contact Fujitsu Technology Solutions Customer Support before you enable this option. 3. Click Add.
-
Page 162: Ost Wizard
Figure 110: VTL Wizard: Confirm OST Wizard The OST wizard provides guided assistance for configuring the ETERNUS CS800 to present its storage as one or more OST (OpenStorage) storage servers for use with a backup application. The wizard guides you through the process of adding one or more OST storage servers, configuring LSUs (logical storage units), and adding OST users. - Page 163 1. Under Add Storage Server, enter information about the storage server (see "OST Wizard: Add Storage Servers" on page 165): Name Enter the name of the storage server. CAUTION! Do not use an underscore ( _ ) in the name of the storage server. ETERNUS CS800...
- Page 164 Concurrent Optimized Duplication is disabled by default. If enabled, as data is written to the storage server, it is simultaneously replicated to the target ETERNUS CS800. When optimized duplication or Automatic Image Replication subsequently occurs, the operation is more efficient because a portion of the required data has already been replicated to the target storage server.
- Page 165 LSU Name - Enter the name of the LSU. Physical Capacity - Enter the physical capacity of the LSU (1 to 1048576 GB). 2. Click Add. The LSU displays in the LSUs Added table. ETERNUS CS800...
- Page 166 The user displays in the Users Added table. 3. (Optional) To add additional users, click Add and then repeat Steps 1–2. To remove a user, select it in the Users Added table and click Delete. 4. Click Next to continue. ETERNUS CS800...
- Page 167 Select the incorrect item and click Delete to remove it, and then add a new item. 3. After you have confirmed all settings, click Finish. The wizard configures the ETERNUS CS800 with the settings you selected. ETERNUS CS800...
- Page 168 169). On the download page, download the correct OST Plug-in for your backup application and operating system. Also on the download page, click Installation Instructions, to download the OST Plug-in Installation Instructions. Follow the instructions to install the OST Plug-in on your media server. ETERNUS CS800...
-
Page 169: Replication Wizard
The Replication wizard provides guided assistance for configuring the ETERNUS CS800 to send replicated data to another ETERNUS CS800 system as part of disaster recovery plan. The wizard can also help you configure the ETERNUS CS800 to receive replicated data from another ETERNUS CS800 system. - Page 170 At any time while using the wizard, you can click Previous to return to the previous step. Figure 117: Replication Wizard: About Step 2: System 1. If data on this ETERNUS CS800 will be replicated to another ETERNUS CS800 system, enter target information under Target (see "Replication Wizard: System" on page 172).
- Page 171 ETERNUS CS800 to the target. This may be different than the actual network IP address of the source ETERNUS CS800. If the target system is at ETERNUS CS800 2.1 Software or higher, this field is not required. If the target system is at ETERNUS CS800 2.0.1.x Software or below, then you must enter the IP address by which the target system recognizes the source system.
- Page 172 For help adding NAS shares to the system, use the NAS Configuration Wizard (see "NAS Wizard" on page 147). 2. To configure the share to replicate its data to another ETERNUS CS800 system, enter the following information under Send: a. Select the Enable replication for selected share check box to enable replication for the share.
- Page 173 Select the check box for each replication target you want to replicate the share to. When the share is replicated, its data will be sent to all selected targets. 3. To configure the share to receive replicated data from another ETERNUS CS800 system, enter the following information under Receive: a.
- Page 174 (see "VTL Wizard" on page 155). 2. To configure the partition to replicate its data to another ETERNUS CS800 system, enter the following information under Send: a. Select the Enable replication for selected partition check box to enable replication for the partition.
- Page 175 8 Configuration Wizards 3. To configure the partition to receive replicated data from another ETERNUS CS800 system, enter the following information under Receive: a. (Optional) Select the Enable Cartridge based replication to this ETERNUS CS800 check box to enable Cartridge Based Replication for the partition, and then enter a Sync ID in the box.
-
Page 176: Email Alerts Wizard
Figure 121: Replication Wizard: Confirm Email Alerts Wizard The Email Alerts wizard provides guided assistance for configuring the ETERNUS CS800 to automatically send notifications and reports to selected recipients. The wizard helps you configure an outgoing e-mail server. Then the wizard guides you through the process of specifying e-mail recipients and selecting the notifications and reports to send to the recipients. - Page 177 5. (Recommended) Select the Enable automatic emails to Fujitsu Technology Solutionscheck box to periodically send system configuration and status information to Fujitsu Technology Solutions, including any software upgrades you have installed using the Software Upgrade Utility. Fujitsu Technology Solutions Support can use this...
- Page 178 1. Click Add to add an e-mail recipient. 2. Under Add Email Recipient, enter information about the recipient (see "Email Alerts Wizard: Recipients" on page 180): Name The name of the recipient. Email The e-mail address of the recipient. Address ETERNUS CS800...
- Page 179 High service tickets indicate that a critical problem has occurred and needs to be resolved immediately. The operation and performance of the ETERNUS CS800 are degraded, and there is a risk of system failure or data loss. High and Medium - Send e-mail notifications for High and Medium service tickets.
- Page 180 If necessary, click Previous to return to a previous step to make changes (see "Email Alerts: Confirm" on page 181). 2. After you have confirmed all settings, click Finish. The wizard configures the ETERNUS CS800 with the settings you selected. ETERNUS CS800...
-
Page 181: Ais Connect
AIS Connect The AISConnect wizard provides guided assistance for configuring and enabling the connection to the AIS server in the Fujitsu Support Centre in order to provide call-home and dial-in services. Completing the AISConnect Wizard is strongly recommended in order to guarantee fast support actions in case of hardware failures and other system failures. - Page 182 8.7 AIS Connect AISConnect uses the HTTP protocol to connect via the Internet to the Fujitsu Support Centre. AISConnect allows to configure a HTTP proxy in order to connect from a corporate network to the Internet. Please ask your network administrator about what proxy and what proxy authentication to use.
- Page 183 NTLM (NT LAN Manager) authentication. Username - Enter the username to use for proxy authentication. Password - Enter the password to use for proxy authentication. Country - Select the country where the ETERNUS CS800 is located. 2. Click Next. Figure 127: AISConnect Wizard: Proxy Step 3: Confirm After you have confirmed all settings, click OK.
- Page 184 8.7 AIS Connect Figure 128: AISConnect Wizard: Confirm ETERNUS CS800...
-
Page 185: Home Page
"Replication " on page 191 "Current Activity " on page 194 Home Page Overview The first page that displays after you log on to the ETERNUS CS800 remote management console is the Home page (see "Home Page" on page 186). Use the Home page to see important performance information at a glance, including disk usage, data reduction statistics, and replication activity. -
Page 186: System Overview
9.2 System Overview Figure 129: Home Page System Overview The ETERNUS CS800 System Overview on the Home page (see "ETERNUS CS800 System Overview" on page 186) displays the following information about the system: Figure 130: ETERNUS CS800 System Overview ETERNUS CS800... -
Page 187: Disk Usage
The hostname of the ETERNUS CS800. Click to change the hostname (see "Network" on page 319). IP Address The IP address of the ETERNUS CS800. Click to change the IP address (see "Network" on page 319). Version The software version installed on the ETERNUS CS800. - Page 188 (right side of meter) indicates available disk space. The left side of the meter changes color based on the amount of remaining free disk space and the state of the ETERNUS CS800. For more information, see "Low Space Management" on page 138.
-
Page 189: Data Reduction Statistics
189) displays the following information about the results of data reduction: Figure 132: Data Reduction Statistics Overview Data Reduction Information Description Data Size Before Reduction The original, native size of all data that has been processed by the data deduplication and compression engines. ETERNUS CS800... - Page 190 The amount of data stored on the ETERNUS CS800 via replication from another ETERNUS CS800. This does not include incoming data from ETERNUS CS800, or incoming data from Failback replication. Shares & Partitions The amount of data stored on the ETERNUS CS800 via local I/O.
-
Page 191: Replication
Send Settings & Cumulative Statistics The Send Settings & Cumulative Statistics section displays statistics for all data sent from the system since system installation or since Send cumulative replication statistics were last cleared by clicking Clear Send on the Replication Actions page. ETERNUS CS800... - Page 192 In addition, make sure that the system is an allowed replication source on the target (see "Replication Configuration" on page 270). Failed - (Red) A replication job was not completed. Internal Error - (Red) An error occurred during replication. ETERNUS CS800...
- Page 193 Receive Settings Description Information Source System The number of source systems configured to replicate data to the ETERNUS CS800. Click to specify replication sources (see "Replication Configuration" on page 270). Actual Data Received The amount of data actually received over the network during replication or failback.
-
Page 194: Current Activity
Current Activity The Current Activity overview on the Home page (see "Current Activity Overview" on page 194) displays the following information about system activity that occurred in the previous minute: Figure 134: Current Activity Overview ETERNUS CS800... - Page 195 The system replication throttle currently in effect (in KB/s or MB/s). When a Throttle constant throttle is enabled, the ETERNUS CS800 limits the amount of data it sends during source replication so that it does not exceed the specified bandwidth. Click to enable or disable system throttling (see "Replication...
- Page 196 Ethernet In (OpDup) - The amount of data received by all Ethernet ports (in MB/s). This amount represents the reduced size of the data protected by the ETERNUS CS800 (after deduplication and compression on the media servers). OpDup Bandwidth Reduction - The percentage by which network bandwidth utilization was reduced by using Optimized Duplication.
- Page 197 For more detailed information about all system activity, see "ETERNUS CS800 Overview" on page 407. ETERNUS CS800 Accent activity displays only if ETERNUS CS800 Accent is currently enabled or was previously enabled (see "ETERNUS CS800 Accent" on page 268). ETERNUS CS800...
-
Page 199: Configuration
" System" on page 319 " Contacts" on page 359 10.1 Configuration Overview The Configuration page allows you to configure the features of the ETERNUS CS800, including storage presentation, data replication, system settings, and notifications. To access the Configuration page, click the Configuration menu. -
Page 200: Nas Configuration
10.2 NAS Configuration 10.2 NAS Configuration The NAS page allows you to configure the ETERNUS CS800 to present its storage capacity as NAS (network attached storage) shares that are compatible with standard backup applications. You can create NAS shares for use with Windows or Linux networks. You can also join the ETERNUS CS800 to a Windows domain or workgroup and manage users. - Page 201 "Deleting a NAS Share" on page 206). NAS Shares List The NAS Shares List section displays the following information for all NAS shares on the ETERNUS CS800: Shares The number of shares that have been added to the system. Maximum The maximum number of shares that can be added to the system.
- Page 202 Adding a NAS Share Add a NAS share to present the storage capacity of the ETERNUS CS800 as a NAS share that is compatible with standard backup applications. You can add up to 128 shares. When you add a share, you must specify whether it uses the NFS protocol (for Linux networks) or the CIFS protocol (for Windows networks).
- Page 203 Description (Optional) Enter a brief description of the share. Hide from network (CIFS shares only) Select the check box to hide the share browsing from network browsing. If selected, you cannot see the share when browsing the network. ETERNUS CS800...
- Page 204 10.2 NAS Configuration Enable data Select the check box to enable data deduplication. Fujitsu deduplication Technology Solutions recommends that you enable data deduplication to optimize disk usage. Data deduplication is enabled by default. You cannot enable or disable data deduplication after the share is added.
- Page 205 Select the check box to make the share read only. If selected, you cannot write to the share. Hide from network (CIFS shares only) Select the check box to hide the browsing share from network browsing. If selected, you cannot see the share when browsing the network. ETERNUS CS800...
- Page 206 If you delete a share configured for Directory/File Based Replication on the source ETERNUS CS800, the share is not automatically deleted on the target ETERNUS CS800. If you do not want to retain the share on the target ETERNUS CS800, you can manually delete it.
-
Page 207: Windows Domain
Windows network, you must first join the ETERNUS CS800 to a workgroup or a domain. After you join the ETERNUS CS800 to a workgroup or a domain, CIFS shares are available for use on the Windows network. - Page 208 Directory. After you join a domain, CIFS shares are available for use on the Windows network. Before joining a Windows domain, make sure the date and time on the ETERNUS CS800 is correct and is synchronized with the Active Directory Services (ADS) server (see "Date &...
- Page 209 10 Configuration recommends using the same NTP server for the ETERNUS CS800 and the ADS server to keep them synchronized. To join a Windows domain: 1. Enter the following information about the Windows domain: Domain Type Select Active Directory. Domain/Workgroup Name Enter the domain name.
-
Page 210: Share Access
CS800 is joined to a Windows workgroup, or manage share administrators when the ETERNUS CS800 is joined to a Windows domain using Active Directory. You can add users or administrators, change user privileges, and delete users or administrators. Available users or administrators can be granted access to NAS shares configured for the CIFS protocol. - Page 211 No if they do not.) Description A brief description of the workgroup user (if available). If the ETERNUS CS800 is joined to a Windows domain using Active Directory, the Share Administrators section displays the following information about share administrators: User or Group Name The fully qualified name of the user or group.
- Page 212 Select the check box to add the workgroup user to the Privileges Windows Administrators group. This allows the workgroup user to override certain permissions settings and prevents the workgroup user from being locked out of shares or directories. 3. Click Apply. ETERNUS CS800...
- Page 213 You cannot edit a share administrator. Instead, delete the share administrator, then add a new share administrator. To edit a workgroup user: 1. Select the user and click Edit. The Edit Workgroup User page displays (see"Edit Workgroup User Page" on page 214 the figure below) ETERNUS CS800...
- Page 214 Delete a workgroup user or share administrator if the user or administrator no longer needs to access CIFS shares. To delete a workgroup user or share administrator, select the user or administrator and click Delete. You can select multiple users or administrators to delete at once. ETERNUS CS800...
-
Page 215: Advanced Setting
10 Configuration ADS Share Permissions To manage user access to CIFS shares when the ETERNUS CS800 is joined to a Windows domain, use the MMC (Microsoft Management Console). Log onto the MMC on the domain controller and access a share's properties to set share permissions for users. -
Page 216: Vtl Configuration
Enable SMB Server signing - (Disabled by default) SMB server signing improves security on Windows networks by requiring clients to provide a security signature to connect to a server. If the ETERNUS CS800 is joined to a Windows domain that is configured to require signing, you should enable SMB server signing. -
Page 217: Partitions Summary
"Deleting a VTL Partition" on page 223). Change the mode of a partition (see "Changing Partition Mode" on page 224). Partition List The Partition List section displays the following information for all VTL partitions on the ETERNUS CS800: ETERNUS CS800... - Page 218 Click a column heading to sort the rows in the table by that column. Click the column heading again to reverse the sort order. Click the Information button [i] next to a partition to display detailed information about the partition and recent replication activity. ETERNUS CS800...
- Page 219 10 Configuration Adding a VTL Partition Add a VTL partition to present the storage capacity of the ETERNUS CS800 as a VTL partition that is compatible with standard backup applications. You can add up to 64 partitions. When you add a partition, you must specify the type of physical library to emulate and configure virtual tape drives and storage slots.
- Page 220 Select the library model emulated by the partition. The library model determines the inquiry string returned to the host by the ETERNUS CS800. (The library model does not restrict the number of slots or drives in a partition because library emulation is not a representation of a physical library.)
- Page 221 Enable deduplication - Select the check box to enable data deduplication. Fujitsu Technology Solutions recommends that you enable data deduplication to optimize disk usage. Data deduplication is enabled by default. You cannot enable or disable data deduplication after the partition is added.
- Page 222 Number of Virtual Tape Drives options can be changed. Library Model Select the library model emulated by the partition. The library model determines the inquiry string returned to the host by the ETERNUS CS800. The following library models are available: Models Fujitsu CS-TL...
- Page 223 If you delete a partition configured for Cartridge Based Replication on the source ETERNUS CS800, the partition is not automatically deleted on the target ETERNUS CS800. If you do not want to retain the partition on the target ETERNUS CS800, you can manually delete it.
-
Page 224: Media
Media The Media page allows you to manage virtual tape cartridges in VTL partitions on the ETERNUS CS800. Backup applications can write data to virtual tape cartridges just as they would to physical media. To access the Media page, on the VTL page, click the Media tab. - Page 225 For example, if 50 I/E slots are available, you cannot create more than 50 cartridges if the initial location is set to I/E Slot. Number of Media The number of cartridges to create in the partition. ETERNUS CS800...
- Page 226 VTL partitions. You can also configure cartridges to be write protected to prevent access. To access the Media Actions page, on the Media page, click the Actions tab (see "Media Actions Page" on page 227). ETERNUS CS800...
- Page 227 The table displays the following information for all virtual tape cartridges in the partition: Barcode The barcode number of the cartridge. Type The cartridge type. Partition The partition where the cartridge is located. The write protect status of the cartridge (Write Enabled or Write Protected). ETERNUS CS800...
- Page 228 Exported - Virtual media with no data that has been exported from a partition. Media has to be in this state before it can be deleted from the ETERNUS CS800. Pool - The type of cartridge pool such as application, cleaning, service, or unknown.
- Page 229 If you do not create and associate a host access group with a partition, the virtual devices are not visible from the host, and drives cannot be destinations for move operations (see "Remote Host Access" on page 233). CAUTION! Moving a virtual tape cartridge might disrupt backup jobs. ETERNUS CS800...
- Page 230 6. Select the cartridge to move from the source location. If necessary, use the controls at the bottom of the table to navigate between multiple pages of results. Select the number of rows to display in the Show drop-down box. ETERNUS CS800...
- Page 231 If you unload a virtual tape cartridge from a drive while a backup to that drive is in progress, the backup job will fail. To access the Media Unload page, on the Media page, click the Unload tab (see "Media Unload Page" on page 232). ETERNUS CS800...
- Page 232 Barcode Filter box and click Apply Filter. Use a hyphen (-) to indicate a range, and use an asterisk (*) to indicate a wildcard. Separate multiple entries with commas, and do not use spaces. ETERNUS CS800...
-
Page 233: Remote Host Access
You can also add or edit groups, and delete groups. Host access groups allow backup hosts to access virtual devices on a ETERNUS CS800. A host access group is associated with a partition, a host (a Fibre Channel initiator on the SAN), and a target (a Fibre Channel port on the ETERNUS CS800). - Page 234 Group" on page 237). Remote Host Mapping And Groups The Remote Host Mapping & Groups section displays the following information for all host access groups on the ETERNUS CS800: Group Name The name of the group. Remote Host The host (initiator) associated with the group.
- Page 235 Adding a Remote Host Access Group Add a host access group to associate a VTL partition with a host (a Fibre Channel initiator on the SAN) and a target (a Fibre Channel port on the ETERNUS CS800). To add a host access group: 1.
- Page 236 SAN. The CCL is accessible to hosts only through LUN 0. CAUTION! If you are not sure if you should use CCL, contact Fujitsu Technology Solutions Customer Support before you enable this option. 4. Select the check boxes for the media changer and tape drives to add to the host access group.
- Page 237 SAN. The CCL is accessible to hosts only through LUN 0. CAUTION! If you are not sure if you should use CCL, contact Fujitsu Technology Solutions Customer Support before you enable this option. 3. Select the check boxes for the media changer and tape drives to add to the host access group.
- Page 238 1. Click Discover Remote Hosts to list all hosts that are known to the ETERNUS CS800. A host is made known to the ETERNUS CS800 if you enter the host ID on this page, or if the host logs on to one or more Fibre Channel target ports.
- Page 239 A mapped (green) status indicates the host is currently logged on to one or more Fibre Channel target ports. Select one or more targets and click Reset Target(s) to initiate a Fibre Channel reset on the selected ports. A reset causes the ports to go through LIP (Loop Initialization Protocol). ETERNUS CS800...
- Page 240 A mapped (green) status indicates the host is currently logged on to one or more Fibre Channel target ports. Each target Fibre Channel port is displayed, along with the partition and virtual media changer and tape drives (VMC and VTDs) mapped to the port. ETERNUS CS800...
-
Page 241: Ost Configuration
10 Configuration 10.4 OST Configuration The OST page allows you to configure the ETERNUS CS800 to present its storage capacity as storage servers using OpenStorage (OST) technology. You can add one or more Logical Storage Units (LSUs) to a storage server. Storage servers and LSUs are compatible with backup applications that support OST, such as Symantec NetBackup and Symantec Backup Exec. - Page 242 Automatic Image Replication). If enabled, data on an LSU is automatically Replication replicated to a remote LSU that resides on a ETERNUS CS800 in a different (AIR) NetBackup domain. The timing of the duplication, as well as the backup images that are duplicated, are determined by the storage lifecycle policies (SLPs) configured in NetBackup.
- Page 243 To automatically replicate (duplicate) all data on an LSU to a remote LSU that resides on a ETERNUS CS800 in a different NetBackup domain: 1. On the target system, add the source system to the list of allowed replication sources.
-
Page 244: Storage Servers
CS800. You can view information about existing storage servers, add or edit storage servers, and delete storage servers. To access the Storage Servers page, on the OST page, click the Storage Servers tab (see "Storage Servers Page" on page 244). Figure 160: Storage Servers Page ETERNUS CS800... - Page 245 "Deleting a Storage Server" on page 251). Storage Server List The Storage Server List displays the following information for all storage servers on the ETERNUS CS800: Storage The number of storage servers that have been added to the system. Servers Maximum The maximum number of storage servers that can be added to the system.
- Page 246 Windows system can generate four data streams in parallel. Adding a Storage Server Add a storage server to present the storage capacity of the ETERNUS CS800 as LSUs that are compatible with backup applications that support OST. You can add up to 100 storage servers.
- Page 247 Do not use an underscore ( _ ) in the name of the storage server. OST storage server names are not case-sensitive. For example, if you create a storage server named ost1, you cannot create another storage server named OST1 because the system considers the names to be the same. ETERNUS CS800...
- Page 248 Duplication target ETERNUS CS800. When optimized duplication or Automatic Image Replication subsequently occurs, the operation is more efficient because a portion of the required data has already been replicated to the target storage server.
- Page 249 6. (Optional) Select the Enable Automatic Image Replication check box to automatically replicate (duplicate) data on the LSU to a remote LSU on another ETERNUS CS800. Automatic Image Replication (AIR) is disabled by default. If enabled, data on an LSU is automatically replicated to a remote LSU that resides on a ETERNUS CS800 in a different NetBackup domain.
- Page 250 Remote The OST user credentials to use for authentication on the remote (target) User ETERNUS CS800. The selected remote user must match a local user on the Configuration > OST > Manage Users page on the target ETERNUS CS800 (see "Manage Users"...
- Page 251 Duplication target ETERNUS CS800. When optimized duplication or Automatic Image Replication subsequently occurs, the operation is more efficient because a portion of the required data has already been replicated to the target storage server.
-
Page 252: Lsu
10.4.3 The LSU page allows you to manage the logical storage units (LSUs) contained on OST storage servers on the ETERNUS CS800. You can view information about existing LSUs, add or edit LSUs, and delete LSUs. To access the LSU page, on the OST page, click the LSU tab (see "LSU Page"... - Page 253 Windows system can generate four data streams in parallel. Adding an LSU Add an LSU to a storage server to present the storage capacity of the ETERNUS CS800 as an LSU that is compatible with backup applications that support OST. You can add an LSU with a specific capacity, or you can add an LSU that uses the available capacity of the ETERNUS CS800.
- Page 254 10.4 OST Configuration To add an LSU to a storage server: 1. Click Add. The Add Logical Storage Unit page displays (see "Add Logical Storage Unit Page" on page 254). Figure 164: Add Logical Storage Unit Page ETERNUS CS800...
- Page 255 4. (Optional) Select the Enable Automatic Image Replication check box to automatically replicate (duplicate) data on the LSU to a remote LSU on another ETERNUS CS800. Automatic Image Replication (AIR) is disabled by default. If enabled, data on an LSU is automatically replicated to a remote LSU that resides on a ETERNUS CS800 in a different NetBackup domain.
- Page 256 6. If Automatic Image Replication is enabled, specify the following information: Remote The name of the remote storage server (on the target ETERNUS CS800) to Storage replicate data to. The source ETERNUS CS800 and target ETERNUS Server CS800 must reside in different NetBackup domains.
- Page 257 3. (Optional) Select the Enable Automatic Image Replication check box to automatically replicate (duplicate) data on the LSU to a remote LSU on another ETERNUS CS800. Automatic Image Replication (AIR) is disabled by default. If enabled, data on an LSU is automatically replicated to a remote LSU that resides on a ETERNUS CS800 in a different NetBackup domain.
- Page 258 5. If Automatic Image Replication is enabled, specify the following information: Remote The name of the remote storage server (on the target ETERNUS CS800) to Storage replicate data to. The source ETERNUS CS800 and target ETERNUS Server CS800 must reside in different NetBackup domains.
-
Page 259: Manage Users
OST. After you create the OST user credentials, enter them in the backup application to authenticate OST devices on the media server. When using OST Automatic Image Replication (AIR), the remote user credentials specified on the source ETERNUS CS800 must match the local user credentials on the target (remote) ETERNUS CS800. - Page 260 Enter the name of the authenticated user. New Password Enter the password for the authenticated user. Confirm New Password Enter the password again to confirm it. Description (Optional) Enter a brief description of the authenticated user. 3. Click Apply. ETERNUS CS800...
-
Page 261: Manage Remote Users
The Manage Remote Users page allows you to create and manage remote users for use with OST Automatic Image Replication (AIR). You must configure at least one remote user before you can enable Automatic Image Replication for an LSU (see "Adding an LSU" on ETERNUS CS800... - Page 262 253). When using OST Automatic Image Replication (AIR), the remote user credentials specified on the source ETERNUS CS800 must match the local user credentials on the target (remote) ETERNUS CS800. To access the Manage Remote Users page, on the OST page, click the Manage Remote Users tab (see "Manage Remote Users Page"...
- Page 263 Add a remote user to create OST user credentials for use with OST AIR. When you enable Automatic Image Replication for an LSU, you specify a remote user. The remote user credentials on the source ETERNUS CS800 must match the local user credentials on the target (remote) ETERNUS CS800.
- Page 264 If you are editing a remote user, you cannot change the User name. New Password Enter the password for the remote user. Confirm New Password Enter the password again to confirm it. Description (Optional) Enter a brief description of the remote user. 3. Click Apply. ETERNUS CS800...
-
Page 265: Target Ip Mapping
IP address to the specified replication IP address instead. This can be necessary if the target ETERNUS CS800 is configured with different network interfaces (and therefore different IP addresses) for data and replication traffic (see "Network"... - Page 266 Target Replication IP - The replication IP address to which the data IP address is mapped. By default, items in the list are grouped by target replication IP address. To turn off grouping, click the arrow to the right of a column heading and clear the Show in groups check box. ETERNUS CS800...
- Page 267 Edit a mapped IP address to route traffic sent to the target data IP address to a different replication IP address. To edit a mapped IP address: 1. Select the mapped IP address and click Edit. The Edit Target Data IP Mapping window displays (see "Edit Target Data IP Mapping" on page 268). ETERNUS CS800...
-
Page 268: Eternus Cs800 Accent
Solutions’s ETERNUS CS800 Accent software accelerates backups and reduces network bandwidth requirements by distributing deduplication between the backup server and the ETERNUS CS800. OST data sent from the media server to the ETERNUS CS800 can be encrypted using AES (Advanced Encryption Standard) encryption methods. -
Page 269: Ost Client Plug-In
10.4.8 OST Client Plug-In Use the OST Client Plug-In page to download the Fujitsu Technology Solutions OST Plug- OST (OpenStorage) technology allows Symantec NetBackup and Backup Exec to seamlessly integrate with the ETERNUS CS800. Using OST, NetBackup and Backup Exec... -
Page 270: Replication Configuration
The Replication Configuration page allows you to configure and manage replication targets and allowed replication sources on the ETERNUS CS800. A source sends replicated data to 1 or 2 targets, and a target receives replicated data from up to 10 sources. An ETERNUS CS800 can act as both a source and a target. - Page 271 10 Configuration you must specify a NAT IP address for the ETERNUS CS800 on the Network page (see "Configuring Interface IP Addresses" on page 326). To access the Replication Configuration page, click the Configuration menu, and then click the Replication tab (see "Replication Configuration Page"...
- Page 272 "Replication" on page 363. Source IP The IP address that is used to uniquely identify the source ETERNUS CS800 to the target. Encryption The type of encryption used when sending replicated data to the target system (None, 128-bit, or 256-bit).
- Page 273 10 Configuration Additional Information Before you can add a replication target, you must add the ETERNUS CS800 to the list of allowed replication sources on the target ETERNUS CS800 (see "Adding a Replication Source" on page 278). To add a new target when two targets are already configured, first delete one target (see "Deleting a Replication Target"...
- Page 274 ETERNUS CS800 to the target. This may be different than the actual network IP address of the source ETERNUS CS800. If the target system is at ETERNUS CS800 2.1 software or higher, the Source IP field is not required. If the target system is at ETERNUS CS800 2.0.1 software or below, then you must enter the IP address by which the target system recognizes the source system.
- Page 275 4. In the Source IP Address box, enter the IP address that is used to uniquely identify the source ETERNUS CS800 to the target. This may be different than the actual network IP address of the source ETERNUS CS800.
- Page 276 10.5 Replication Configuration Deleting a Replication Target Delete a replication target if the ETERNUS CS800 no longer needs to send replicated data to that target. After the target system is deleted, the ETERNUS CS800 will no longer send replicated data to that system.
- Page 277 32 KB/s. The highest value you can set is 125 MB/s for 1GbE and 500 MB/s for 10GbE. 4. Click Apply. CAUTION! Do not set the maximum allowed bandwidth to a value that is lower than necessary. If the maximum allowed bandwidth is set to the lowest value, large replication jobs may fail. ETERNUS CS800...
- Page 278 ETERNUS CS800. You must add a source system to the list of allowed replication sources on the target ETERNUS CS800 before you configure the source ETERNUS CS800 to send replicated data to the target. The ETERNUS CS800 can receive replicated data from up to 10 sources.
- Page 279 Deleting a Replication Source Delete a system from the list of replication sources if it will no longer send replicated data to the ETERNUS CS800. After the source system is deleted, the ETERNUS CS800 will no longer accept replicated data from that system.
-
Page 280: Ptt Configuration
NDMP V4. OST path to tape (also called Direct To Tape) allows you to use Symantec NetBackup to copy LSUs from a storage server on the ETERNUS CS800 to a physical tape library. Additional Information Path to tape is available only on the ETERNUS CS800 Multi-Protocol configuration. - Page 281 (Tape drives only) The drive type of the drive. Tasks Use the Physical Device Discovery page to perform the following tasks: To discover an attached physical tape library and tape drives, click Scan. Attached physical libraries display in the list. ETERNUS CS800...
-
Page 282: Backup Application Specific
EMC NetWorker 8.1 and later do not support Backup Application Specific Path to Tape. Oracle Secure Backup ASG-Time Navigator You must dedicate a partition within the ETERNUS CS800 for use with NetBackup Direct to Tape (Path to Tape). The partition cannot be shared with another backup application. CAUTION! The virtual media changer and tape drives must be assigned to the backup server (on the SAN) being used for Backup Application Specific path to tape functionality. - Page 283 "Adding a Backup Application Specific User" on page 284). Edit a backup application specific user (see "Editing a Backup Application Specific User" on page 285). Delete a backup application specific user (see "Deleting a Backup Application Specific User" on page 286). ETERNUS CS800...
- Page 284 To add a backup application specific user: 1. Click Add. The Add Backup Application Specific User page displays (see "Add Backup Application Specific User Page" on page 284). Figure 184: Add Backup Application Specific User Page ETERNUS CS800...
- Page 285 To edit a backup application specific user: 1. Select the user and click Edit. The Edit Backup Application Specific User page displays (see "Edit Backup Application Specific User Page" on page 285). Figure 185: Edit Backup Application Specific User Page ETERNUS CS800...
-
Page 286: Scheduler
You can select multiple users to delete at once. 10.7 Scheduler The Scheduler page allows you to manage scheduled events on the ETERNUS CS800, including replication and replication throttling, e-mail reports, healthchecks, and space reclamation. With schedules, you specify when certain events should occur, and the system automatically performs those events at the specified time. - Page 287 Share or Partition for Replication" on page 290). Configure replication throttle events (see "Scheduling Replication Throttling" on page 291). Configure the ETERNUS CS800 to send status and configuration reports (see "Scheduling E-mail Reports" on page 292). Configure the ETERNUS CS800 to run healthchecks (see "Scheduling Healthchecks"...
- Page 288 Then click and drag in the row for the share or partition to schedule. The new event must begin after the current time, which is indicated by the dotted vertical line. ETERNUS CS800...
- Page 289 4. Specify options specific to the type of event. See the following sections: "Scheduling a Share or Partition for Replication" on page 290 "Scheduling Replication Throttling" on page 291 "Scheduling E-mail Reports" on page 292 "Scheduling Healthchecks" on page 292 "Scheduling Space Reclamation" on page 293 ETERNUS CS800...
- Page 290 3. In the Target drop-down box, select the replication target you want to replicate the share or partition to. 4. Click OK. 5. (Optional) Specify when and how often the event reoccurs (see "Setting Recurrence for a Scheduled Event" on page 293). 6. Click Apply. ETERNUS CS800...
- Page 291 If the maximum allowed bandwidth is set to the lowest value, large replication jobs may fail. During the replication throttle event, the ETERNUS CS800 will limit the amount of data it sends during source replication so that it does not exceed the specified bandwidth. After the replication throttle event ends, the ETERNUS CS800 will no longer throttle the sending of source replication data (until the next replication throttle event occurs).
- Page 292 10.7 Scheduler cause discrepancies between the specified maximum bandwidth and observed traffic. If the ETERNUS CS800 is configured to use a bonded network interface for replication traffic, load balancing is determined independently by the bonding mode selected for the interface (see "Network"...
- Page 293 Also, recurrence is required. 3. Click Apply. Scheduling Space Reclamation During space reclamation, the ETERNUS CS800 deletes unneeded tags from the blockpool to free up disk space. Schedule space reclamation regularly to make sure there is enough disk space to store data.
-
Page 294: Notifications
The event or series is deleted from the schedule and will no longer occur. 10.8 Notifications The Notifications page allows you to manage the methods the ETERNUS CS800 uses to send notifications. The ETERNUS CS800 can send notifications by e-mail, or using SNMP (Simple Network Management Protocol). - Page 295 You can add, edit, and delete e-mail recipients, and you can specify the types of notifications to send. To enable the ETERNUS CS800 to send e-mail, you must specify an outgoing e- mail server (see "Email" on page 294).
- Page 296 Add an e-mail recipient to send notifications about administration alerts or service tickets to the recipient by e-mail. To add an e-mail recipient: 1. Click Add. The Add Email Recipient page displays (see "Add Email Recipient Page" on page 297). ETERNUS CS800...
- Page 297 10 Configuration Figure 189: Add Email Recipient Page 2. Enter information about the recipient: Name The name of the recipient. Email The e-mail address of the recipient. Address ETERNUS CS800...
- Page 298 High service tickets indicate that a critical problem has occurred and needs to be resolved immediately. The operation and performance of the ETERNUS CS800 are degraded, and there is a risk of system failure or data loss. High and Medium - Send e-mail notifications for High and Medium service tickets.
- Page 299 Figure 190: Edit Email Recipient Page 3. Enter information about the recipient: If you are editing an e-mail recipient, you cannot change the Name. Name (Optional) Select a different e-mail recipient to edit. Email The e-mail address of the recipient. Address ETERNUS CS800...
- Page 300 5. Click Apply. Deleting an E-mail Recipient Delete an e-mail recipient if you no longer want the ETERNUS CS800 to send e-mail notifications to the recipient. To delete an e-mail recipient, select the recipient and click Delete. You can select multiple recipients to delete at once.
- Page 301 4. (Recommended) Select the Enable automatic emails to Fujitsu Technology Solutionscheck box to periodically send system configuration and status information to Fujitsu Technology Solutions, including any software upgrades you have installed using the Software Upgrade Utility. Fujitsu Technology Solutions Support can use this...
- Page 302 Test The Email Test page allows you to send a test e-mail to verify that e-mail notifications are correctly configured on the ETERNUS CS800. To access the Email Test page, on the Email page, click the Test tab (see "Email Test Page"...
- Page 303 To enable the ETERNUS CS800 to send e-mail, you must specify an outgoing e- mail server (see "Server"...
- Page 304 10.8 Notifications Enter the e-mail addresses of up to four recipients in the boxes, and then click Apply. When the ETERNUS CS800 generates scheduled e-mail reports, they will be sent to the specified addresses. On Demand The On Demand page allows you to manually generate a status data or configuration data report.
-
Page 305: Snmp
Management Information Bases (MIBs) and return this data to the SNMP requesters. You can configure the ETERNUS CS800 to act as an agent and send traps to a specified destination. You can also add SNMP community information. To access the SNMP page, on the Notifications page, click the SNMP tab. - Page 306 The traps the ETERNUS CS800 sends to the destination (Failure, Warning, Traps Informational, Available, or Unavailable). Adding a Destination Add an SNMP destination to send traps from the ETERNUS CS800 to the destination. You can add up to 5 destinations. To add a destination: ETERNUS CS800...
- Page 307 2. Enter information about the destination: Enter the IP address of the system that will receive the traps generated by Address the ETERNUS CS800. Additional Information When entering IP addresses, never use an address that is in a reserved IP address range. To see a list of reserved IP address ranges, click the quick tip icon [?] located near the IP address field.
- Page 308 4. Click Apply. Editing a Destination Edit an SNMP destination to change the name of the destination or the types of traps the ETERNUS CS800 sends to the destination. To edit a destination: 1. Select SNMP destination and click Edit.
- Page 309 4. Click Apply. Deleting a Destination Delete an SNMP destination if you no longer want the ETERNUS CS800 to send traps to the destination. To delete a destination, select the destination and click Delete. You can select multiple destinations to delete at once.
- Page 310 The name of the community. IP Address The IP address of the community. Network Mask The network mask of the community. Access Type The access type of the community (Get or Get/Set). Community Status The status of the community (Enabled or Disabled). ETERNUS CS800...
- Page 311 10 Configuration Adding a Community Add an SNMP community to include the ETERNUS CS800 in a group of devices that are monitored by a common management station. If no communities are defined, the SNMP agent is not accessible. To add a community: 1.
- Page 312 Edit an SNMP community to change the IP address or access type for the community. You can also enable or disable the community. To edit a community: 1. Select SNMP destination and click Edit. The Edit SNMP Community page displays (see "Edit SNMP Community Page" on page 313). ETERNUS CS800...
- Page 313 Allows access from any client with address 10.40.xx.xx 255.255.0.0 Additional Information If you define a single community and set both the IP address and network mask to 0.0.0.0 (or leave both blank), then IP address-based access control is disabled. In ETERNUS CS800...
- Page 314 6. Click Apply. Deleting a Community Delete an SNMP community if you no longer want the ETERNUS CS800 to belong to a group of devices that are monitored by a common management station. To delete a community, select the community and click Delete.
-
Page 315: Ais Connect
Registering the ETERNUS CS800 system with the Fujitsu Service Centre. AISConnect uses the HTTP protocol to connect via the Internet to the Fujitsu Support Centre. AISConnect allows to configure a HTTP proxy in order to connect from a corporate network to the Internet. - Page 316 10.8 Notifications To register the ETERNUS CS800 system with the Fujitsu Support Centre, please place a service request at the Fujitsu Service Desk (http://ts.fujitsu.com/support/servicedesk.html) The AISConnect page consists of 4 tabs: "Proxy" on page 316 "Control" on page 317 "Remote Access Policies" on page 318 "Smart Poll"...
- Page 317 Enter the user name for proxy authentication. Password Enter the password for proxy authentication. Country Select the country where your ETERNUS CS800 is located. Table 23: AISConnect Information Control Use the Control page to stop or start the AISConnect service.
- Page 318 318). Figure 204: AIS Remote Access Policies Remote access policies must be enabled for a Fujitsu support specialist to remotely connect to the system using SSH or HTTP. If remote access policies are disabled, remote connection using SSH or HTTP is not possible.
-
Page 319: System
10 Configuration Figure 205: AIS Smart Poll Page Activate Smart Poll only if you are instructed to do so by a Fujitsu support specialist. To activate Smart Poll: 1. From the AISConnect page, click the Smart Poll tab. 2. When instructed to do so by a Fujitsu support specialist, click Smart Poll. - Page 320 Because of this, you might not see a confirmation page informing you that the new settings have been saved. To access the Network page, on the System page, click the Network tab (see "Network Configuration" on page 321). ETERNUS CS800...
- Page 321 10 Configuration Figure 206: Network Configuration ETERNUS CS800...
- Page 322 10.9 System Configuring the Network Using the Network page, each physical Ethernet port in the ETERNUS CS800 can be configured as a separate device. In addition, you can create bonded devices (logical ports) consisting of two or more physical ports of the same link speed (1GbE or 10GbE). For each port or device, you can specify the MTU (Maximum Transmission Unit) frame size.
- Page 323 Specifying a default gateway is optional if all access is local to a particular subnet. For example, if the ETERNUS CS800 and all of its clients are on the same subnet, you do not need to specify a default gateway.
- Page 324 10.9 System The DNS Suffix Search List and DNS IP Addresses cannot be modified if the ETERNUS CS800 is currently joined to a Windows domain. To disjoin a Windows domain, see "Disjoining a Workgroup or Domain" on page 210. Configuring Bonding Details Under IP Address Configuration >...
- Page 325 4. Click Update to save the changes you made to the Bonding Details table. (Clicking Update does not yet apply the new network settings to the ETERNUS CS800.) 5. Click Undo to revert to all current Bonding Details changes to the last update.
- Page 326 9000 The jumbo MTU frame size of 9,000 bytes is used. (For best performance, make sure the entire network path to the ETERNUS CS800 is configured to use 9000 MTU.) 3. Click Update to save the changes you made to the Interface Details table. (Clicking Update does not yet apply the new network settings to the ETERNUS CS800.)
- Page 327 The maximum allowed number of VLAN tag IDs is 64. If you attempt to add more than 64 VLAN tag IDs, an error displays. To maintain connectivity, the switch ports connected to the ETERNUS CS800 must be configured to accept the correct VLAN tag ID.
- Page 328 The IP address of the interface. Address Netmask The network mask of the interface. Gateway The gateway of the ETERNUS CS800. (This is usually not the same as the default gateway.) 5. If necessary, specify NAT (Network Address Translation) settings for the interface: If the ETERNUS CS800 is a replication target and is behind a NAT router, you must configure a NAT IP Address.
- Page 329 Select to allow all types of traffic (management, replication, and data). Additional Information If the ETERNUS CS800 is configured for source or target replication, you should configure at least one interface to allow replication traffic (select Repl or Any) before applying changes to network settings.
- Page 330 5. Click Update to save the changes you made to the Routing Details table. (Clicking Update does not yet apply the new network settings to the ETERNUS CS800.) 6. Click Delete to remove IP routing information for the selected interface. Or click Undo to revert all current Routing Details changes to the last update.
- Page 331 ETERNUS CS800 to an IP address in another subnet by means of a destination gateway. Responses from the destination are routed back to the ETERNUS CS800 using the gateway specified for the interface in the IP Address Table section.
- Page 332 The source ETERNUS CS800 management/data IP address, the source ETERNUS CS800 replication IP address, and the target ETERNUS CS800 IP address are all on the same subnet (192.168.10.x). To make sure the replication segment is used when communicating with the target ETERNUS CS800, you must add a host route in the Routing Details section on the source ETERNUS CS800.
- Page 333 ETERNUS CS800 IP address is on a different subnet (192.168.20.x) To make sure the replication segment is used when communicating with the target ETERNUS CS800, you must add a network route in the Routing Details section on the source ETERNUS CS800.
-
Page 334: Date & Time
10.9.2 Date & Time The Date & Time page allows you to set the system date and time of the ETERNUS CS800. You can specify a Network Time Protocol (NTP) server to synchronize the system time with, or you can manually enter the date and time. - Page 335 10 Configuration Figure 215: Date & Time Page To set the system date and time: ETERNUS CS800...
- Page 336 Settings the New System Time using the drop-down boxes. 2. In the Timezone drop-down box, select the time zone where the ETERNUS CS800 is located. 3. Next to Time Format, select the format to use when displaying times (24 hours or 12 hours).
-
Page 337: Security
10 Configuration 10.9.3 Security The Security page allows you to configure security settings for the ETERNUS CS800, including access passwords, SSL settings, and the inactivity timeout. To access the Security page, click the Configuration menu, and then click the Security tab. - Page 338 Service Login SSH Service Allow Secure Shell (SSH) remote access to the ServiceLogin account. To access the Access Control Settings page, on the Security page, click the Access Control tab (see "Access Control Settings Page" on page 339) . ETERNUS CS800...
- Page 339 10 Configuration Figure 216: Access Control Settings Page ETERNUS CS800...
- Page 340 Additional Information Passwords can be up to 32 characters. Alphanumeric characters and special characters are allowed. Loss of this password will require Fujitsu Technology Solutions service support. 2. Click Apply. Enabling GUI Monitor Account Use the GUI password when logging onto the remote management console as a monitor (see "Accessing Remote Management"...
- Page 341 3. Click Apply. Enabling CLI Accounts The CLI accounts provide access to the ETERNUS CS800 command line interface as an administrator or monitor. For more information about using the CLI, see the ETERNUS CS800 Command Line Interface (CLI) Guide.
- Page 342 It is OK to have the same alias for different accounts (CLI Administrator and CLI Viewer). c. Copy and paste the Public Key generated from a SSH key. Additional Information A public key should be in the following form: <key-type> <base64 encoded string> A public key length can be up to 16kb. ETERNUS CS800...
- Page 343 The new key appears in the CLI Administrator or View Available SSH Public Keys table. Figure 219: Available SSH Public Keys Table The Available SSH Public Keys table contains the following information: Alias Name of key. Fingerprint Short sequence of bytes used to identify a public key. ETERNUS CS800...
- Page 344 The updated key appears in the Available SSH Public Keys table. Delete an Alias Name a. Select the check box next to the public key in the Available SSH Public Keys table. b. Click Delete. The Delete Public Key page displays. ETERNUS CS800...
- Page 345 For accounts enabled with both SSH and password authentication, the ETERNUS CS800 system will first attempt SSH authentication . If there are no keys defined or no client key matches, the ETERNUS CS800 system will fall back to password authentication.
- Page 346 3. Click Apply. Enabling SSH Service Account The SSH service account provides SSH remote access to the ETERNUS CS800 system. 1. Under SSH Service, do one of the following steps: Select the Enable SSH Service Login check box to enable SSH service...
- Page 347 Alias must be an alphanumeric string (no spaces or special characters). c. Enter the Public Key generated from a SSH key. Additional Information A public key should be in the following form: <key-type> <base64 encoded string> A public key length can be up to 16kb. ETERNUS CS800...
- Page 348 The new key appears in the Available SSH Public Keys table. Figure 224: Available SSH Public Keys Table The Available SSH Public Keys table contains the following information: Alias Name of key. Fingerprint Short sequence of bytes used to identify a public key. ETERNUS CS800...
- Page 349 The updated key appears in the Available SSH Public Keys table. Delete an Alias Name a. Select the check box next to the public key in the Available SSH Public Keys table. b. Click Delete. The Delete Public Key page displays. ETERNUS CS800...
- Page 350 For accounts enabled with both SSH and password authentication, the ETERNUS CS800 system will first attempt SSH authentication. If there are no keys defined or no client key matches, the ETERNUS CS800 system will fall back to password authentication. 4. Click Apply.
- Page 351 10 Configuration The SSL page allows you to enable or disable SSL on the ETERNUS CS800. You can also install a new SSL certificate to replace the Fujitsu Technology Solutions default SSL certificate. To access the SSL page, on the Security page, click the SSL tab (see "SSL Page"...
- Page 352 Fujitsu Technology Solutions recommends the default Fujitsu Technology Solutions certificate be replaced with your own official certificate specific to your ETERNUS CS800 system. You can install your own custom certificate in order to take advantage of server authentication in addition to encrypted communication.
- Page 353 Data Encryption The Data Encryption page allows you to select the type of encryption to use for OST data transfers. OST data sent from the media server to the ETERNUS CS800 can be encrypted using AES (Advanced Encryption Standard) encryption methods.
- Page 354 Certificate Authority File Rejection List File The certificate and key files installed on the ETERNUS CS800 system must match the files on the OST media server. For more information on certificate and key files, see the OST Plug-in Installation Instructions (6-67074).
- Page 355 You can install new certificate and key files at any time, as long as there are no active network connections between the OST media server and the ETERNUS CS800. 3. Click Apply. To clear all changes without saving them, click Reset. To remove user installed certificate and key files, click Restore Factory Defaults.
- Page 356 Storage Encryption (Scale model only) The Storage Encryption page allows you to set up data encryption for stored user data. Data encryption for stored user data is only available with ETERNUS CS800 Scale models. Encrypting data as it is being written to the drive prevents information leakage caused by fraudulent decoding.
- Page 357 Enable Storage Encryption To enable the Storage Encryption: 1. Select a encryption type "AES" or "Fujitsu" from the pull down list AES: Advanced Encryption Standard (AES: Standard encryption used for information processing by the US federal government)" is a standardized encryption method.
-
Page 358: Fc Initiators And Targets
The Backpanel Locations section displays a graphical representation of the Fibre Channel ports as they appear on the rear of the system. The diagram shows the status of each Fibre Channel port: Mapped Target (green), Unmapped Target (yellow), Active Initiator (blue), or Inactive Initiator (orange). ETERNUS CS800... -
Page 359: Contacts
"Primary and Secondary" on page 360 10.10.1 Company The Company page allows you to enter information about the company and location of the ETERNUS CS800. To access the Company page, on the Contacts page, click the Company tab (see "Company Page" on page 360). -
Page 360: Primary And Secondary
Postal Code Enter the company postal code. Country Enter the company country. ETERNUS CS800 Enter the physical location of the ETERNUS CS800 (for Location example, data center). Support Contract Enter the support contract number for the ETERNUS CS800. 2. Click Apply. - Page 361 Enter the contact fax number. Pager Enter the contact pager number. Street Enter the contact street address. City Enter the contact city. State Enter the contact state. Postal Code Enter the contact postal code. Country Enter the contact country. 2. Click Apply. ETERNUS CS800...
-
Page 363: Replication
The ETERNUS CS800 provides data replication capabilities that you can use as an integral part of a disaster recovery plan. Replication allows you to configure the ETERNUS CS800 to create a copy of your data on another ETERNUS CS800 system at scheduled intervals (or manually as needed). - Page 364 Finally, data can optionally be encrypted before it is transmitted. The ETERNUS CS800 can perform the following types of replication: "Replication" on page 364 "Directory/File or Cartridge Based Replication" on page 365 "OST Optimized Duplication"...
- Page 365 There is no need to first recover the share or partition to access its data. Deletions are automatically propagated from the source system to the target system in order to free up pace on the target. In addition, you can manually initiate a ETERNUS CS800...
- Page 366 If you delete a share configured for Directory/File Based Replication on the source ETERNUS CS800, the share is not automatically deleted on the target ETERNUS CS800. If you do not want to retain the share on the target ETERNUS CS800, you can manually delete it.
- Page 367 "Actions" on page 403 "Reports" on page 406 Task Overview Use the ETERNUS CS800 data replication features to perform the following tasks: Replicate all data on a share or partition to another system where it can be recovered at a later time (see "Task Overview: Setting Up and Performing Replication"...
- Page 368 If you do not configure a replication schedule or manually replicate the share or partition on a regular basis, your data is not protected. While the ETERNUS CS800 continually sends data to the target system in the background to optimize the replication process, a snapshot that preserves the complete structure of your data is sent to the target system only when a scheduled or manual replication job occurs.
- Page 369 1. On the target system, select a received snapshot and perform a recover operation (see "Recovering a Share" on page 383 "Recovering a Partition" on page 394). The share or partition is now available on the target system. ETERNUS CS800...
- Page 370 11.1 ETERNUS CS800 Replication Overview 2. (Optional) Map your backup application to the recovered share or partition on the target system to continue making backups. 3. When the source system is operating correctly again, choose one of the following actions: Failback the share or partition to restore it on the original source system (see "Task...
-
Page 371: Replication Send
VTL partitions. You can replicate shares or partitions on the on the ETERNUS CS800 (the source) to other ETERNUS CS800 systems (the targets). You can also schedule replication, and view the status of current and recent replication jobs. - Page 372 The Replication Jobs list displays replication statistics for all NAS shares or VTL partitions on the ETERNUS CS800 that are eligible for replication. To be eligible for replication, a share or partition must have data deduplication enabled at the time it is created.
- Page 373 Queued The replication job is queued and will continue when the system is ready. Success The replication job was completed successfully. Failed The replication job was not completed. A synchronization job can have one of the following statuses: ETERNUS CS800...
- Page 374 Enable replication for a NAS share or VTL partition to allow the data on the share or partition to be replicated to other ETERNUS CS800 systems (the targets). Disable replication if you do not want to replicate the share or partition to other ETERNUS CS800 systems.
- Page 375 Configure a NAS share or VTL partition for Directory/File or Cartridge Based Replication to automatically replicate files or cartridges to other ETERNUS CS800 systems (the targets). A file is automatically replicated when it is closed or a period of time after it is modified. A cartridge is automatically replicated when it is unmounted.
- Page 376 Replication" on page 390 "Configuring a Target Partition for Cartridge Based Replication" on page 401.) 2. On the source ETERNUS CS800, select the source share or partition and click Configure. The Share or Partition Configure window displays (see "Share or partition Configure Window"...
- Page 377 The synchronization verifies that the same files or cartridges exist in both locations, and that no additional files or cartridges exist in either location. You should perform a synchronization in any of the following situations: ETERNUS CS800...
- Page 378 The Directory/File or Cartridge Based Replication displays replication statistics for shares or partitions that are configured for Directory/File or Cartridge Based Replication (see "Configuring Directory/File or Cartridge Based Replication" on page 375). To view the Directory/File or Cartridge Based Replication Queue: ETERNUS CS800...
- Page 379 Additional Information The contents of the Directory/File or Cartridge Based Replication Queue are dynamic. Because of this, statistics are subject to change if items are added to the queue. ETERNUS CS800...
- Page 380 Target System List The Target System list allows you to configure and manage replication targets on the ETERNUS CS800. Click the arrows at the upper right, or click the top banner row, to expand or collapse the Target System list.
-
Page 381: Receive Nas
To access the Received Snapshots page, on the Receive NAS page, click the Received Snapshots tab (see "Received Snapshots Page" on page 382). ETERNUS CS800... - Page 382 Once 10 snapshots have been saved, the oldest snapshot is deleted to make room for each new snapshot that is received. (To change the maximum number of snapshots retained for each partition, see "Changing the Maximum Number of Snapshots" on page 279 ETERNUS CS800...
- Page 383 (for example, to continue performing backups). When you recover a share, you select a received snapshot. The ETERNUS CS800 uses the snapshot to recreate the share on the target system just as it was at the point in time when the snapshot was saved.
- Page 384 When you failback a share, you select a received snapshot. The ETERNUS CS800 copies the snapshot from the target system back to the source system. You can then perform a recover operation to recreate the share on the source system just as it was at the point in time when the snapshot was saved.
- Page 385 CAUTION! Select 128-bit encryption if you are sending data to an ETERNUS CS800 running a system software version prior to ETERNUS CS800 2.1 Software. AES encryption options are available only if the Data-in-Flight license is installed.
- Page 386 The Recovery Jobs page allows you to view information about snapshot recover operations that were previously completed. To access the Recovery Jobs page, on the Receive NAS page, click the Recovery Jobs tab (see "Recovery Jobs Page" on page 387). ETERNUS CS800...
- Page 387 You can also abort a failback that is currently in progress. To access the Failback Jobs page, on the Receive NAS page, click the Failback Jobs tab (see "Failback Jobs Page" on page 388). ETERNUS CS800...
- Page 388 You can configure a NAS share to receive Directory/File Based Replication data sent from a source system and view replication statistics for the share. For information about creating NAS shares, see "Adding a NAS Share" on page 202. ETERNUS CS800...
- Page 389 Shares Eligible to Receive Directory/File Based Data The Shares Eligible to Receive Directory/File Based Data section displays information for all NAS shares on the ETERNUS CS800 that are eligible to receive Directory/File Based Replication data from a source share. To be eligible to receive Directory/File Based Replication data, a share must have data deduplication enabled at the time it is created.
- Page 390 "Configuring Directory/File or Cartridge Based Replication" on page 375. To configure a target share for Directory/File Based Replication: 1. Select the share and click Edit. The Edit Share Settings page displays (see "Edit Share Settings Page" on page 391). ETERNUS CS800...
- Page 391 5. Click Apply. Unpack Queue Use the Unpack Queue to view Directory/File Replication statistics for data received from the source system. To view the Unpack Queue, select a share and click View Unpack Queue (see "Unpack Queue" on page 392). ETERNUS CS800...
-
Page 392: Receive Vtl
Use the Receive VTL page to perform the following tasks: View received snapshots and recover, failback, or delete snapshots (see "Received Snapshots" on page 393). Manage recovery jobs (see "Recovery Jobs" on page 398). Manage failback jobs (see "Failback Jobs" on page 399). ETERNUS CS800... - Page 393 Recover a partition on the target system (see "Recovering a Partition" on page 394). Failback a partition to the source system (see "Performing a Failback For a Partition" on page 395). Delete a received snapshot (see "Deleting a Snapshot" on page 397). ETERNUS CS800...
- Page 394 (for example, to continue performing backups). When you recover a partition, you select a received snapshot. The ETERNUS CS800 uses the snapshot to recreate the partition on the target system just as it was at the point in time when the snapshot was saved.
- Page 395 Performing a Failback For a Partition Perform a failback of a VTL partition if a source system that was previously unavailable becomes available again. When you failback a partition, you select a received snapshot. The ETERNUS CS800...
- Page 396 11.4 Receive VTL ETERNUS CS800 copies the snapshot from the target system back to the source system. You can then perform a recover operation to recreate the partition on the source system just as it was at the point in time when the snapshot was saved.
- Page 397 "Failback Jobs" on page 399). To delete a snapshot: 1. Do one of the following actions: On the source system, disable replication for the partition associated with the snapshot (see "Enabling Replication For a Share or Partition" on page 374). ETERNUS CS800...
- Page 398 (see "Recovery Jobs Page" on page 398). Figure 251: Recovery Jobs Page The Snapshot Recovery Jobs section displays the following information about recovery jobs: Original Partition Name The name of the partition the snapshot was created from. ETERNUS CS800...
- Page 399 Figure 252: Failback Jobs Page The Snapshot Failback Jobs section displays the following information about failback jobs: Partition Name The name of the partition the snapshot was created from. Destination System The hostname of the system that the snapshot was sent to. ETERNUS CS800...
- Page 400 For information about creating VTL partitions, see "Adding a VTL Partition" on page 219. To access the Cartridge Based page, on the Receive VTL page, click the Cartridge Based tab (see "Cartridge Based Page" on page 400). Figure 253: Cartridge Based Page ETERNUS CS800...
- Page 401 The Partitions Eligible to Receive Cartridge Based Data section displays information for all VTL partitions on the ETERNUS CS800 that are eligible to receive Cartridge Based Replication data from a source partition. To be eligible to receive Cartridge Based Replication data, a partition must have data deduplication enabled at the time it is created.
- Page 402 Unlocked - The partition is allowed to receive new Cartridge Based Replication data. If a partition configured for Cartridge Based Replication is locked on the target system, synchronization jobs may fail on the source system. 5. Click Apply. ETERNUS CS800...
-
Page 403: Actions
Click Refresh to update the statistics in the Unpack Queue. Click OK to return to the Cartridge Based page. 11.5 Actions The Actions page allows you to manage replication activity on the ETERNUS CS800. You can pause the replication service, enable the replication state, and clear performance statistics. - Page 404 Enable or disable the replication state (see "Replication State" on page 405). Clear cumulative replication statistics (see "Replication Performance" on page 405). Replication Service The replication service controls replication and failback traffic on the ETERNUS CS800. You can pause each replication target independently. ETERNUS CS800...
- Page 405 Replication State The replication state applies to all NAS shares or VTL partitions on the ETERNUS CS800 that are eligible for replication (that is, all deduplicated shares or partitions).. The Replication Actions page may appear busy for a few moments when enabling or disabling the replication state.
-
Page 406: Reports
Save the replication report to your local workstation, and then unzip the downloaded file. The report consists of a ZIP file that contains multiple CSV (comma separated value) files. To view the CSV files, open them in a compatible spreadsheet application. ETERNUS CS800... -
Page 407: Status
The Hardware page allows you to view information about the hardware components of the ETERNUS CS800. You can view the overall status of the node as well as detailed status information for components such as the system board, host bus adapters, network ports, and storage arrays. - Page 408 The overall status of all components in the node. Component Name The name of the main component. Click the component name to see detailed information (see "Details" on page 409). Component Status The overall status of the main component. ETERNUS CS800...
- Page 409 Details The Details page allows you to view detailed information about the hardware components of the ETERNUS CS800. To access the Details page, on the Hardware page, click the Details tab. Use the Details page to view information for the following components: "System Board"...
- Page 410 The Host Bus Adapters page allows you to view information about installed Fibre Channel cards and their ports. The Host Bus Adapters page displays only on ETERNUS CS800 configurations that include a Fibre Channel card. To access the Host Bus Adapters page, on the Details page, click the Host Bus Adapters tab (see "Host Bus Adapters Page"...
- Page 411 Network Ports The Network Ports page allows you to view information about Ethernet ports in the system. The ETERNUS CS800 includes three or more Ethernet ports (depending on the configuration). To access the Network Ports page, on the Details page, click the Network Ports tab (see "Network Ports Page"...
- Page 412 Storage Arrays The Storage Arrays page allows you to view information about storage arrays and controllers in the ETERNUS CS800. To access the Storage Arrays page, on the Details page, click the Storage Arrays tab (see "Storage Arrays Page" on page 413).
- Page 413 Normal - (Green) The component is operating correctly. Attention - (Yellow) There is a problem with the component. Failed - (Red) The component has failed. The Components section displays the following information about the components in the selected storage array: ETERNUS CS800...
-
Page 414: Performance
To access the Performance page, click the Status menu, and then click the Performance tab. The Performance page contains the following tabs: "Inline" on page 415 "Ethernet" on page 415 "RAID" on page 417 "Fibre Channel" on page 418 "CPU" on page 420 ETERNUS CS800... - Page 415 Hold the cursor over a bar to display the value of the bar. Ethernet The Ethernet page allows you to view throughput performance for network send and receive activity. To access the Ethernet page, on the Performance page, click the Ethernet tab (see "Ethernet Page" on page 416). ETERNUS CS800...
- Page 416 Select the port to monitor in the Ethernet drop-down box, or select Avg to display an average of all ports. The horizontal axis displays time (0–100 seconds). The vertical axis displays data throughput (0–125 MB/s for 1 GbE ports or 0–1.25 GB/s for 10 GbE ports). ETERNUS CS800...
- Page 417 Use the RAID page to display recent RAID activity in dynamic graphs: The top graph reports data reads and the bottom graph reports data writes. The horizontal axis displays time (0–100 seconds). The vertical axis displays the amount of data read or written (100 OPS/s). ETERNUS CS800...
- Page 418 The Fibre Channel page allows you to view throughput performance for Fibre Channel send and receive activity. The Fibre Channel page displays only on ETERNUS CS800 configurations that include a Fibre Channel card. To access the Fibre Channel page, on the Performance page, click the Fibre Channel tab (see "Fibre Channel Page"...
- Page 419 Values that exceed the maximum value of the vertical axis are shown in lighter green. Each bar on the graph represents approximately 1 second of time. Hold the cursor over a bar to display the value of the bar. ETERNUS CS800...
- Page 420 The horizontal axis displays time (0–100 seconds). The vertical axis displays CPU usage (0–100%). Each bar on the graph represents approximately 1 second of time. Hold the cursor over a bar to display the value of the bar. ETERNUS CS800...
-
Page 421: Disk Usage
Available space is the area that is available for data storage. The Available value is displayed as an amount and as a percentage of the total capacity in the system. Available space is divided into the following categories: ETERNUS CS800... - Page 422 Data before reduction is divided into the following categories: Category Description Incoming The amount of data stored on the ETERNUS CS800 via replication from Replication another ETERNUS CS800. This does not include incoming data from Directory/File or Cartridge Based Replication, or incoming data from Failback replication.
-
Page 423: Vtl Status
Servers amount of data stored in deduplicated OpenStorage (OST) storage servers. This includes incoming data for OST and ETERNUS CS800 Accent. Data After Reduction The Data After Reduction value represents the final, reduced size of all data that has been processed by the data deduplication and compression engines. - Page 424 VTL. You can view information about virtual tapes drives, storage slots, and cartridges. To access the Physical View page, on the VTL Status page, click the Physical View tab (see "Physical View Page" on page 424). Figure 269: Physical View Page ETERNUS CS800...
- Page 425 Click a cartridge to view detailed information about the cartridge. When the storage system is degraded, all tape cartridges are shown in a degraded state. When the storage system has failed or is inaccessible due to failure, all tape cartridges are shown as unavailable. ETERNUS CS800...
- Page 426 (raw) data size because the data is compressed before it is written to the media. Used Percent The amount of currently used space on all cartridges in the partition expressed as a percentage of the total capacity ( [ Used / Capacity ] x 100 ). ETERNUS CS800...
- Page 427 The name of the partition. Click the partition name to display the tape drives in the partition. Click a tape drive to see individual performance information for that drive. Performance (write) The average write speed to the partition in MB/s. ETERNUS CS800...
-
Page 428: Ost Status
ETERNUS CS800. Ethernet The amount of data received by all Ethernet ports (in MB/s). This amount represents the reduced size of the data protected by the ETERNUS CS800 (after deduplication and compression on the media servers). ETERNUS CS800... -
Page 429: Activity Log
ETERNUS CS800. Ethernet The amount of data received by all Ethernet ports (in MB/s). This amount represents the reduced size of the data protected by the ETERNUS CS800 (after deduplication and compression on the media server). Bandwidth... - Page 430 Use the controls at the bottom of the Administrative Activity Log list to adjust the activity log view (see "Activity Log View Controls" on page 431): To view a specific page, type the page number in the box. To update the activity log with latest data, click the Refresh icon. ETERNUS CS800...
- Page 431 Figure 274: Activity Log View Controls Enabling or Disabling Activity Logging By default, activity logging is enabled on the ETERNUS CS800. Use the toolbar above the Administrative Activity Log list to enable or disable activity logging (see "Activity Log View Controls"...
-
Page 433: Alerts
13.2 Admin Alerts The Admin Alerts page allows you to view and work with administration alerts. The ETERNUS CS800 generates an administration alert when the condition of the system has changed, such as going from the offline state to the online state. -
Page 434: Service Tickets
A service ticket contains detailed information about the problem and, if appropriate, steps you can take to resolve it. If the ETERNUS CS800 detects that the problem is resolved, the system automatically closes the service ticket. You can also manually close a service ticket after the problem is corrected. - Page 435 Perform the recommended actions to try to resolve the problem before contacting Fujitsu Technology Solutions customer support. If you are able to resolve the problem, you can close the service ticket.
- Page 436 "Viewing a Service Ticket" on page 437). Send a service ticket to an e-mail address (see "Sending a Service Ticket" on page 439). Close a service ticket that has been resolved (see "Closing a Service Ticket" on page 440). ETERNUS CS800...
- Page 437 (see "Ticket Details" on page 437). The time indicated in the service ticket may not match the ETERNUS CS800 system time. Figure 278: Ticket Details 2. (Optional) Click View Recommended Actions to view instructions for resolving the problem.
- Page 438 Modify a service ticket to add additional information to the ticket, for example, troubleshooting steps you have taken or a record of calls made to Fujitsu Technology Solutions customer support. The additional information is saved with the service ticket and remains associated with the ticket even after it is closed.
- Page 439 Send a service ticket to send the ticket details to an e-mail address. You can also add optional comments to the e-mail. To enable the ETERNUS CS800 to send e-mail, you must specify an outgoing e- mail server (see "Server" on page 300).
- Page 440 1. In the list of service tickets, click the ticket number. 2. Click Analysis at the bottom of the page. 3. The Ticket Analysis section displays at the bottom of the page.. 4. Select the Close Ticket check box. 5. Click Apply. ETERNUS CS800...
-
Page 441: Utilities
"Reboot & Shutdown" on page 457 14.1 ETERNUS CS800 Utilities Overview The Utilities pages to perform maintenance tasks on the ETERNUS CS800, such as generating and downloading diagnostic files, analyzing disk and network performance, managing space reclamation, and securely erasing the system. You can also install license keys, upgrade the system software, and reboot or shut down the ETERNUS CS800. - Page 442 This file contains the diagnostic logs for the storage arrays. To access the Storage Array Diag File page, on the Diagnostics page, click the Storage Array Diag File tab (see "Storage Array Diag File Page" on page 443). ETERNUS CS800...
- Page 443 The Healthchecks page allows you to perform tests that verify the health and integrity of the data deduplication blockpool. You can also enable and disable healthchecks. To configure the ETERNUS CS800 to automatically run the healthchecks at specified intervals, use the Configuration > Scheduler page (see "Scheduling...
- Page 444 You can also enable or disable a healthcheck. The following healthchecks are available: De-Duplication - Checks the overall health of the blockpool. This healthcheck verifies that the metadata in the namespace file and the data tags in the blockpool are correctly in sync. ETERNUS CS800...
- Page 445 Status The status of the healthcheck (Success or Failed). If running a healthcheck results in the Contact Support status, contact Fujitsu Technology Solutions Customer Support for further assistance. To enable or disable a healthcheck: 1. Select the healthcheck and click Edit.
-
Page 446: Analyzer
CAUTION! If a healthcheck fails when it is run, there may be a problem in the blockpool that could cause replication or restore operations to fail. Contact Fujitsu Technology Solutions customer support if a healthcheck fails. 14.3 Analyzer The Analyzer page allows you to analyze the network and disk performance of the ETERNUS CS800. - Page 447 Network Analyzer The Network Analyzer page allows you to analyze network performance by measuring network throughput between the ETERNUS CS800 and another system (such as another ETERNUS CS800 system). To access the Network Analyzer page, on the Analyzer page, click the Network tab.
- Page 448 It takes approximately 5 seconds to refresh the results. Settings The Settings page allows you to enable or disable NetServer on the ETERNUS CS800. NetServer must be enabled on the target ETERNUS CS800 system to perform network analysis with the system (see "Performance"...
-
Page 449: Space Reclamation
During data ingest, reclaimable space is compacted as needed to provide space for new, deduplicated data. If the ETERNUS CS800 is not in Low Space state, compaction starts when used disk space reaches a high level and there is sufficient reclaimable space. Compaction stops when used disk space falls below the high threshold state. - Page 450 185). CAUTION! For correct system operation, space reclamation must be run at regular intervals (at least once a week). Fujitsu Technology Solutions recommends creating a schedule to automatically run space reclamation (see "Scheduling Space Reclamation" on page 293). Because space reclamation can affect system performance, avoid running space reclamation during known backup periods.
- Page 451 Displays Pending when space reclamation is running. Because the ETERNUS CS800 can automatically use reclaimable space to store new deduplicated data, space reclamation statistics may be affected (appear lower) if ingest occurs at the same time as space reclamation.
-
Page 452: Secure Shred
The Secure Shred page allows you to securely and permanently erase sensitive data stored on the ETERNUS CS800. To securely erase data, first delete files on NAS shares or storage servers, or erase tape cartridges on VTL partitions, then start secure shred. During secure shred, all residual data associated with the deleted files or cartridges is securely erased from the disk drives by performing a single-pass overwrite with zeros. - Page 453 The system reboots and begins the secure shred process. This process can take multiple days to complete. 6. To check the status of secure shred, log onto the ETERNUS CS800 to view the limited Secure Shred Mode interface (see "Secure Shred Mode Interface" on page 454).
-
Page 454: Software Upgrades
You must log on as an Admin user to cancel secure shred or reboot the system. Figure 292: Secure Shred Mode Interface 7. Click Reboot to finalize the secure shred process and reboot the ETERNUS CS800. After the ETERNUS CS800 finishes rebooting, you can resume normal system operation. - Page 455 To access the Software Upgrade page, click the Utilities menu, and then click the Software Upgrade tab (see figure below). Figure 293: Software Upgrade Page To upload a new ETERNUS CS800 software image: 1. Click the Browse button to browse the system and locate the new software image. 2. Click Upload.
- Page 456 Reclamation" on page 449). Download a system diagnostics file and transfer the file to a safe repository off the ETERNUS CS800 (see "System Diag File" on page 442). The system diagnostics file can help in resolving problems if they occur.
-
Page 457: Reboot & Shutdown
14.7 Reboot & Shutdown The Reboot & Shutdown page allows you to reboot or shut down the ETERNUS CS800. To access the Reboot & Shutdown page, click the Utilities menu, and then click the Reboot &... - Page 458 Rebooting the system closes the Web browser connection. You must log on again after the system has rebooted. Shutdown Shuts down the ETERNUS CS800. Reset from diagnostic state (Only available when the node is in degraded mode) Restarts the services on the node without rebooting the system.
-
Page 459: Troubleshooting
If the component associated with the problem does not have an open service ticket, the ETERNUS CS800 opens a service ticket for the component and reports the problem in a service ticket. -
Page 460: Checking Hardware Status
The Hardware page allows you to view information about the hardware components of the ETERNUS CS800. You can view the overall status of the node as well as detailed status information for components such as the system board, Fibre Channel adapters, network ports and storage arrays. -
Page 461: Start-Up Problems
15.2.1 Start-up Problems The table below describes problems that can occur during system start-up. Problem Corrective Action FATAL ERROR Contact your Fujitsu Technology Solutions Customer Support Unable to start representative (see "Support and Help" on page 13). SNFS! Message displays. - Page 462 Make sure the power cords are connected to a grounded electrical not power on. outlet and the power switches located on the back of the power supplies are on. If the problem persists, contact your Fujitsu Technology Solutions Customer Support representative to arrange for service (see "Support and Help"...
-
Page 463: Ethernet Network Problems
15 Troubleshooting 15.2.3 Ethernet Network Problems The table below describes corrective actions for problems occurring with the Ethernet network. ETERNUS CS800... - Page 464 Help" on page 13). system. ETERNUS CS800 Try to ping the ETERNUS CS800 system IP address from a host on system is not the same network. If the ping reports round trip times, the ETERNUS visible on the CS800 system is active. If not, check the cables, switches, or hubs Ethernet network.
-
Page 465: Replication Problems
It is possible to enable and schedule a replication when a target schedule replication system has not been configured. The replication will not start until a for NAS even though target system is configured. no target IP configured. Table 27: Replication Problems ETERNUS CS800... -
Page 466: Temperature Problems
ETERNUS CS800 rack or components, or a malfunctioning cooling fan. Use the following procedure if a temperature problem is reported: 1. Check the ambient temperature of the room containing the ETERNUS CS800 system to verify that the temperature falls within the specified range. -
Page 467: Removal Replacement Procedures Crus
CAUTION! Follow the safety instructions in chapter "Important Information" on page 16.1 ETERNUS CS800 S6 Hardware Server PRIMERGY RX2540 M1 1. Removing the defective PSU module Figure 296: Removing the PSU Press in on the green locking latch (1). - Page 468 16.1 ETERNUS CS800 S6 Hardware While keeping the green locking latch pressed, pull the PSU module out of its slot (3). 2. Installing the new PSU module Figure 297: Installing the PSU Insert the PSU module into its slot. Push the PSU module into its slot (1) as far as it will go until the locking latch snaps in place (2).
- Page 469 Connect the mains plug to a grounded mains outlet in the in-house power supply network or a power outlet of the rack socket strip (see also "PRIMECENTER Rack System" assembly guide). Figure 298: Connecting the Server to the Mains Securing power cords Figure 299: Securing power cord ETERNUS CS800...
-
Page 470: Hard Disk Drive
The hard disk drive and installation frame together make up the HDD module. The Hard Disk Drive (HDD) used in the ETERNUS CS800 server is a 2.5" SAS hard disk (10,000 rpm) and 2.5" SATA hard disks (7,200 rpm). -
Page 471: Hdd Removal And Replacement Procedures
HDD Numbering For the numbering of the HDD slots see the figure below. Note that this is the numbering used by the ETERNUS CS800 software, e.g. in Tickets and at the Storage Array Status page of the Remote Management Console. - Page 472 2. Insert the HDD module into a drive bay and carefully push back as far as it will go (1). 3. Close the locking lever to lock the hard disk drive in place (2). 4. If the status of the HDD remains "unknown" after rebuild has finished, contact Fujitsu Customer Support (see "Support and Help"...
-
Page 473: Storage Subsystem
16.2 Storage Subsystem The following chapter applies for ETERNUS CS800 JX40 S2 and ETERNUS CS800 DX100 S3 storage systems. The Hard Disk Drive (HDD) used in the JX40 S2 storage module and in the DX100 S3 is a 3.5"... - Page 474 1. Press the latch of the disk drive and open the lock lever (1). 2. Hold the lock lever and pull the disk drive partway. 3. Take the hard disk drive out of the bay while supporting its bottom (2). ETERNUS CS800...
- Page 475 1. Insert the HDD module into a drive bay and carefully push back as far as it will go (1). 2. Close the locking lever to lock the hard disk drive in place (2). Figure 305: Inserting the 3.5-inch HDD module ETERNUS CS800...
-
Page 477: Storage Expansion
The procedure of storage expansion differs for Entry and Scale models. 17.1 Storage Expansion - Entry The disk capacity of the ETERNUS CS800 S6 Entry model can be enhanced in steps of 2 x 8TB up to a maximum of 24TB. -
Page 478: Procedure Of Storage Expansion Starting With 8Tb
2. If further expansion (to more than 16TB) is intended, continue with the "Procedure of Storage Expansion starting with 16TB" on page 478. 3. Reboot the ETERNUS CS800 via the remote management pages, see "Reboot & Shutdown" on page 457. When the system boots up, a background initialize procedure is started. -
Page 479: Procedure Of Storage Expansion Starting With 24Tb Or More
2. If further expansion (to more than 24TB) is intended, continue with the "Procedure of Storage Expansion starting with 24TB or more" on page 479. 3. Reboot the ETERNUS CS800 via the remote management pages, see "Reboot & Shutdown" on page 457. When the system boots up, a background initialize procedure is started. - Page 480 Using longer cables may cause malfunction with a risk of data loss! The procedure of storage expansion requires a reboot of the ETERNUS CS800 S6 to integrate the new hardware. In general it is possible to connect the additional storage modules and/or to plug in the additional disks while the system is operable.
- Page 481 Figure 314: Label positions of the ETERNUS JX40 S2 / DX100 S3 modules Also affix a label to both ends of the power cables. A label sheet was provided together with the original ETERNUS CS800 S6 delivery. 2. If you decided to switch off the system while working on its hardware (recommended,...
- Page 482 17.1 Storage Expansion - Entry Figure 315: ETERNUS CS800 S6 Entry SAS cabling with up to three JX40 S2 enclosures The SAS IN port of JX40-1 has to be connected to the upper port of the SAS RAID controller in PCI slot 7 of the server. The SAS OUT port of JX40-1 has to be connected to the SAS IN port of JX40-2 and so on.
-
Page 483: Storage Expansion - Scale
7. Turn on both PSU switches on the rear side of each storage module. 8. If the ETERNUS CS800 S6 was shut down prior to adding the new hardware, turn on the server by pressing its power ON/OFF button now. - Page 484 Solutions Customer Service or your local sales office. If you cause a defect on the device by installing or exchanging system expansions that are not released or qualified for ETERNUS CS800 S6, the warranty is invalidated. To add expansion modules make sure that you only use storage expansion modules that are fully equipped and not manually configured.
- Page 485 Label the new expansion module(s) with the always next currently unused identifier. Also affix a label to both ends of their power cables. A label sheet was provided together with the original ETERNUS CS800 S6 delivery. 3. Shutdown the ETERNUS CS800 S6 via the remote management pages (see "Reboot &...
- Page 486 "ETERNUS DX100 S3 cabling with one drive enclosure" on page 486 "ETERNUS DX100 S3 reverse cabling with two to ten drive enclosures" on page 487 depicting the cabling with a top down arrangement of the modules. Figure 318: ETERNUS DX100 S3 cabling with one drive enclosure ETERNUS CS800...
- Page 487 The IOM#1 SAS OUT port of the last DE must be connected to the IOM#1 SAS IN port of the predecessor DE. If there are further DE’s each IOM#1 must be connected in the same way. The IOM#1 OUT port of DE-1 remains unused. ETERNUS CS800...
- Page 488 12. Turn on the server by pressing its power ON/OFF button which is located at the right side of its front panel. 13. Wait at least 15 minutes before starting any further actions. The integration of the added expansion modules takes place automatically, no further actions are required. ETERNUS CS800...
-
Page 489: System Specifications S6
System Specifications S6 This chapter lists characteristics and specifications of the ETERNUS CS800 S6 product. The characteristics and specifications are categorized as follows: System Related Specifications The following tables provide characteristics of the ETERNUS CS800 S6 system. General Characteristics NAS backup... - Page 490 32 TB 352 TB Scale with 4 TB 32 TB 32 TB 320 TB Spare Disks Table 31: Capacity of ETERNUS CS800 S6 Configurations Interfaces Entry Scale Host Ethernet (to Customer 5 x 1GbE 3 x 1GbE LAN) 2 x 10GbE - optional...
- Page 491 There is general compliance with the safety requirements of all European Notes countries and North America. National approvals required in order to satisfy statutory regulations or for other reasons can be applied for on request. Compliance http://globalsp.ts.fujitsu.com/sites/certificates/default.aspx Link Table 36: Compliance with Standards ETERNUS CS800...
-
Page 492: Additional Specifications
Table 38: Selected Storage Module Specifications for ETERNUS JX40 S2 Scale Model Selected Server Specifications Weight 60 + 35 kg per expansion module (up to 410 kg) Disks 16 × 2.5" 900 GB SAS hard disks (10,000 rpm); including 2 Hot Spare ETERNUS CS800... - Page 493 12 x 3.5'' 4TB Nearline SAS hard disks (7,200 rpm) Interface to Server 2 x 8 GbFC (from Storage Base Module) RAID Level 2 × RAID 6 (4 + 2) Table 40: Selected Storage Module Specifications for ETERNUS DX100 S3 ETERNUS CS800...
-
Page 495: Integration In Firewall Environments
Integration in Firewall Environments Firewall ports The following firewall ports must be opened for correct function of the ETERNUS CS800: TCP ports opened for management traffic: 22 (SSH) 80 (HTTP) 161 (SNMP) 162 (SNMP, trap) 443 (HTTPS) 1311 (OpenManage) 8406 (HTTP, jettyd) - Page 496 2049 (NFS, nfsd) 3095 (OST) 3096 (OST) 3097 (OST) 3098 (OST) 3099 (OST) 3100 (OST) 3101 (OST) 3102 (OST) 10000 (NDMP) 10001 (OST) 10002 (OST) 32000 (NFS, lockd) ETERNUS CS800...
-
Page 497: Eternus Cs800 3.2 Open-Source Software
For each component, the associated licenses are provided. Upon request, Fujitsu will furnish a DVD containing source code for all of these open-source modules, both the base CentOS modules and the additional packages listed here. - Page 498 License" on page 589 4.1.2 "GNU General Public License" on page 534 1.5.1 "Go License" on page 569 Image Cropper 1.2.0 BSD-style license ("ETERNUS CS800 3.2 Open- Source Software" on page 497) Inotify-tools 3.14-1 "GNU General Public License" on page 534 version Iozone...
- Page 499 20 ETERNUS CS800 3.2 Open-Source Software ETERNUS Version License Agreement CS800 Component LTTng-UST 2.3.2 "LTTng Tools" on page 571 "GNU General Public License" on page 534version 2 "GNU Lesser General Public License" on page 542 version 2.1 "The MIT License" on page 574...
- Page 500 "The MIT License" on page 574 Quantum_ 08.04.0200 "GNU Lesser General Public License" on page 542 postgresql-odbc version 2.1 Quantum_protobuf 2.4.1 "ETERNUS CS800 3.2 Open-Source Software" on page 497 Quantum_zeromq 3.2.3 "GNU Lesser General Public License" on page 542 version 3 Rootsh 1.5.3 "ETERNUS CS800 3.2 Open-Source Software"...
-
Page 501: License Agreement
20 ETERNUS CS800 3.2 Open-Source Software ETERNUS Version License Agreement CS800 Component UnixODBC 2.3.2 "GNU Lesser General Public License" on page 542 version 2.1 "GNU General Public License" on page 534 version Ace License Copyright and Licensing Information for ACE(TM), TAO(TM), CIAO(TM), DAnCE... - Page 502 DST rules as long as they upgrade their operating systems accordingly. The names ACE(TM), TAO(TM), CIAO(TM), DAnCE(TM), CoSMIC(TM), Washington University, UC Irvine, and Vanderbilt University, may not be used to endorse or promote products or services derived from this source without ETERNUS CS800...
- Page 503 20 ETERNUS CS800 3.2 Open-Source Software express written permission from Washington University, UC Irvine, or Vanderbilt University. This license grants no permission to call products or services derived from this source ACE(TM), TAO(TM), CIAO(TM), DAnCE(TM), or CoSMIC(TM), nor does it grant permission for the name Washington University, UC Irvine, or Vanderbilt University to appear in their names.
- Page 504 Source form, including but not limited to compiled object code, generated documentation, and conversions to other media types. "Work" shall mean the work of authorship, whether in Source or Object form, made available under the License, as indicated by a copyright notice that ETERNUS CS800...
- Page 505 20 ETERNUS CS800 3.2 Open-Source Software is included in or attached to the work (an example is provided in the Appendix below). "Derivative Works" shall mean any work, whether in Source or Object form, that is based on (or derived from) the Work and for which the editorial revisions, annotations, elaborations, or other modifications represent, as a whole, an original work of authorship.
- Page 506 License. You may add Your own attribution notices within Derivative Works that You distribute, alongside or as an addendum to the NOTICE text from the Work, provided that such additional attribution notices cannot be construed as modifying the License. ETERNUS CS800...
- Page 507 20 ETERNUS CS800 3.2 Open-Source Software You may add Your own copyright statement to Your modifications and may provide additional or different license terms and conditions for use, reproduction, or distribution of Your modifications, or for any such Derivative Works as a whole, provided Your use, reproduction, and distribution of the Work otherwise complies with the conditions stated in this License.
- Page 508 License at http://www.apache.org/licenses/LICENSE-2.0 Unless required by applicable law or agreed to in writing, software distributed under the License is distributed on an "AS IS" BASIS, WITHOUT WARRANTIES OR CONDITIONS OF ANY KIND, either express or implied. See the ETERNUS CS800...
- Page 509 20 ETERNUS CS800 3.2 Open-Source Software License for the specific language governing permissions and limitations under the License. Boost Software License Boost Software License - Version 1.0 - August 17th, 2003 Permission is hereby granted, free of charge, to any person or organization obtaining a copy of the software and accompanying documentation covered by this license (the "Software") to use, reproduce, display, distribute,...
- Page 510 LIABLE FOR ANY DIRECT, INDIRECT, INCIDENTAL, SPECIAL, EXEMPLARY, OR CONSEQUENTIAL DAMAGES (INCLUDING, BUT NOT LIMITED TO, PROCUREMENT OF SUBSTITUTE GOODS OR SERVICES; LOSS OF USE, DATA, OR PROFITS; OR BUSINESS INTERRUPTION) HOWEVER CAUSED AND ON ANY THEORY OF LIABILITY, WHETHER IN ETERNUS CS800...
- Page 511 20 ETERNUS CS800 3.2 Open-Source Software CONTRACT, STRICT LIABILITY, OR TORT (INCLUDING NEGLIGENCE OR OTHERWISE) ARISING IN ANY WAY OUT OF THE USE OF THIS SOFTWARE, EVEN IF ADVISED OF THE POSSIBILITY OF SUCH DAMAGE. Common Development And Distribution License Version 1.0 (CDDL-1.0) 1.
- Page 512 Original Software available to a third party under the terms of this License. (d) Notwithstanding Section 2.1(b) above, no patent license is granted: (1) for code that You delete from the Original Software, or (2) for infringements caused by: (i) the ETERNUS CS800...
- Page 513 20 ETERNUS CS800 3.2 Open-Source Software modification of the Original Software, or (ii) the combination of the Original Software with other software or devices. 2.2. Contributor Grant. Conditioned upon Your compliance with Section 3.1 below and subject to third party intellectual property claims, each...
- Page 514 Developer and every Contributor for any liability incurred by the Initial Developer or such Contributor as a result of warranty, support, indemnity or liability terms You offer. 3.5. Distribution of Executable Versions. You may distribute the Executable form of the Covered Software ETERNUS CS800...
- Page 515 20 ETERNUS CS800 3.2 Open-Source Software under the terms of this License or under the terms of a license of Your choice, which may contain terms different from this License, provided that You are in compliance with the terms of...
- Page 516 Initial Developer is not the Participant) and all Contributors under Sections 2.1 and/or 2.2 of this License shall, upon 60 days notice from Participant terminate prospectively and automatically at the expiration of such 60 day notice period, unless if within such 60 ETERNUS CS800...
- Page 517 20 ETERNUS CS800 3.2 Open-Source Software day period You withdraw Your claim with respect to the Participant Software against such Participant either unilaterally or pursuant to a written agreement with Participant. 6.3. In the event of termination under Sections 6.1 or 6.2 above,...
- Page 518 Software, prior Modifications used by a Contributor (if any), and the Modifications made by that particular Contributor. 1.3. "Covered Software” means (a) the Original Software, or (b) Modifications, or (c) the combination of files containing Original Software with files containing Modifications, in each case including portions thereof. ETERNUS CS800...
- Page 519 20 ETERNUS CS800 3.2 Open-Source Software 1.4. "Executable” means the Covered Software in any form other than Source Code. 1.5. "Initial Developer” means the individual or entity that first makes Original Software available under this License. 1.6. "Larger Work” means a work which combines Covered Software or portions thereof with code not governed by the terms of this License.
- Page 520 (1) Modifications made by that Contributor (or portions thereof); and (2) the combination of Modifications made by that Contributor with its Contributor Version (or portions of such combination). ETERNUS CS800...
- Page 521 20 ETERNUS CS800 3.2 Open-Source Software (c) The licenses granted in Sections 2.2(a) and 2.2(b) are effective on the date Contributor first distributes or otherwise makes the Modifications available to a third party. (d) Notwithstanding Section 2.2(b) above, no patent license is granted: (1) for any code that Contributor has deleted from the Contributor Version;...
- Page 522 License. 4.2. Effect of New Versions. You may always continue to use, distribute or otherwise make the Covered Software available under the terms of the version of the License under ETERNUS CS800...
- Page 523 20 ETERNUS CS800 3.2 Open-Source Software which You originally received the Covered Software. If the Initial Developer includes a notice in the Original Software prohibiting it from being distributed or otherwise made available under any subsequent version of the License, You must distribute and make the Covered Software available under the terms of the version of the License under which You originally received the Covered Software.
- Page 524 OTHER COMMERCIAL DAMAGES OR LOSSES, EVEN IF SUCH PARTY SHALL HAVE BEEN INFORMED OF THE POSSIBILITY OF SUCH DAMAGES. THIS LIMITATION OF LIABILITY SHALL NOT APPLY TO LIABILITY FOR DEATH OR PERSONAL INJURY RESULTING FROM SUCH PARTY'S NEGLIGENCE TO THE EXTENT APPLICABLE LAW ETERNUS CS800...
- Page 525 20 ETERNUS CS800 3.2 Open-Source Software PROHIBITS SUCH LIMITATION. SOME JURISDICTIONS DO NOT ALLOW THE EXCLUSION OR LIMITATION OF INCIDENTAL OR CONSEQUENTIAL DAMAGES, SO THIS EXCLUSION AND LIMITATION MAY NOT APPLY TO YOU. 8. U.S. GOVERNMENT END USERS. The Covered Software is a "commercial item,” as that term is defined in 48 C.F.R.
- Page 526 Thus, the terms and conditions of the GNU General Public License Version 2 cover the whole combination. As a special exception, the copyright holders of this library give you permission to link this library with independent modules to produce an ETERNUS CS800...
- Page 527 20 ETERNUS CS800 3.2 Open-Source Software executable, regardless of the license terms of these independent modules, and to copy and distribute the resulting executable under terms of your choice, provided that you also meet, for each linked independent module, the terms and conditions of the license of that module. An independent module is a module which is not derived from or based on this library.
- Page 528 ETERNUS CS800...
- Page 529 20 ETERNUS CS800 3.2 Open-Source Software architecture or science; a performance; a broadcast; a phonogram; a compilation of data to the extent it is protected as a copyrightable work; or a work performed by a variety or circus performer to the extent it is not otherwise considered a literary or artistic work.
- Page 530 License and to the disclaimer of warranties with every copy of the Work You Distribute or Publicly Perform. When You Distribute or Publicly Perform the Work, You may not impose any effective technological measures on the Work that ETERNUS CS800...
- Page 531 20 ETERNUS CS800 3.2 Open-Source Software restrict the ability of a recipient of the Work from You to exercise the rights granted to that recipient under the terms of the License. This Section 4(a) applies to the Work as incorporated in a Collection, but this does not require the Collection apart from the Work itself to be made subject to the terms of this License.
- Page 532 Sections 1, 2, 5, 6, 7, and 8 will survive any termination of this License. b.Subject to the above terms and conditions, the license granted here is perpetual (for the duration of the applicable copyright in the Work). ETERNUS CS800...
- Page 533 20 ETERNUS CS800 3.2 Open-Source Software Notwithstanding the above, Licensor reserves the right to release the Work under different license terms or to stop distributing the Work at any time; provided, however that any such election will not serve to...
-
Page 534: Gnu General Public License
By contrast, the GNU General Public License is intended to guarantee your freedom to share and change free software--to make sure the software is free for all its users. This General Public License applies to most of the Free Software Foundation's software and to ETERNUS CS800... - Page 535 20 ETERNUS CS800 3.2 Open-Source Software any other program whose authors commit to using it. (Some other Free Software Foundation software is covered by the GNU Lesser General Public License instead.) You can apply it to your programs, too. When we speak of free software, we are referring to freedom, not price. Our...
- Page 536 License. (Exception: if the Program itself is interactive but does not normally print such an announcement, your work based on the Program is not required to print an announcement.) ETERNUS CS800...
- Page 537 20 ETERNUS CS800 3.2 Open-Source Software These requirements apply to the modified work as a whole. If identifiable sections of that work are not derived from the Program, and can be reasonably considered independent and separate works in themselves, then this License, and its terms, do not apply to those sections when you distribute them as separate works.
- Page 538 Program at all. For example, if a patent license would not permit royalty-free redistribution of the Program by all those who receive copies directly or indirectly through you, then the only way you could satisfy ETERNUS CS800...
- Page 539 20 ETERNUS CS800 3.2 Open-Source Software both it and this License would be to refrain entirely from distribution of the Program. If any portion of this section is held invalid or unenforceable under any particular circumstance, the balance of the section is intended to apply and the section as a whole is intended to apply in other circumstances.
- Page 540 To do so, attach the following notices to the program. It is safest to attach them to the start of each source file to most effectively convey the exclusion of warranty; and each file should have at least the "copyright" line and a pointer to where the full notice is found. ETERNUS CS800...
- Page 541 20 ETERNUS CS800 3.2 Open-Source Software one line to give the program's name and an idea of what it does. Copyright (C) yyyy name of author This program is free software; you can redistribute it and/or modify it under the terms of the GNU General Public License as published by the Free Software Foundation;...
- Page 542 For example, if you distribute copies of the library, whether gratis or for a fee, you must give the recipients all the rights that we gave you. You ETERNUS CS800...
- Page 543 20 ETERNUS CS800 3.2 Open-Source Software must make sure that they, too, receive or can get the source code. If you link other code with the library, you must provide complete object files to the recipients, so that they can relink them with the library after making changes to the library and recompiling it.
- Page 544 Library or any derivative work under copyright law: that is to say, a work containing the Library or a portion of it, either verbatim or with modifications and/or translated straightforwardly into another language. (Hereinafter, translation is included without limitation in the term "modification”.) ETERNUS CS800...
- Page 545 20 ETERNUS CS800 3.2 Open-Source Software "Source code” for a work means the preferred form of the work for making modifications to it. For a library, complete source code means all the source code for all modules it contains, plus any associated interface definition files, plus the scripts used to control compilation and installation of the library.
- Page 546 Sections 1 and 2 above provided that you accompany it with the complete corresponding machine-readable source code, which must be distributed under the terms of Sections 1 and 2 above on a medium customarily used for software interchange. ETERNUS CS800...
- Page 547 20 ETERNUS CS800 3.2 Open-Source Software If distribution of object code is made by offering access to copy from a designated place, then offering equivalent access to copy the source code from the same place satisfies the requirement to distribute the source code, even though third parties are not compelled to copy the source along with the object code.
- Page 548 However, as a special exception, the materials to be distributed need not include anything that is normally distributed (in either source or binary form) with the major components (compiler, kernel, ETERNUS CS800...
- Page 549 20 ETERNUS CS800 3.2 Open-Source Software and so on) of the operating system on which the executable runs, unless that component itself accompanies the executable. It may happen that this requirement contradicts the license restrictions of other proprietary libraries that do not normally accompany the operating system.
- Page 550 Each version is given a distinguishing version number. If the Library specifies a version number of this License which applies to it and "any ETERNUS CS800...
- Page 551 20 ETERNUS CS800 3.2 Open-Source Software later version”, you have the option of following the terms and conditions either of that version or of any later version published by the Free Software Foundation. If the Library does not specify a license version number, you may choose any version ever published by the Free Software Foundation.
- Page 552 GNU General Public License (Version 3)# Version 3, 29 June 2007 Copyright (C) 2007 Free Software Foundation, Inc. <http://fsf.org/> Everyone is permitted to copy and distribute verbatim copies of this license document, but changing it is not allowed. Preamble ETERNUS CS800...
- Page 553 20 ETERNUS CS800 3.2 Open-Source Software The GNU General Public License is a free, copyleft license for software and other kinds of works. The licenses for most software and other practical works are designed to take away your freedom to share and change the works. By contrast, the GNU...
- Page 554 Propagation includes copying, distribution (with or without modification), making available to the public, and in some countries other activities as well. ETERNUS CS800...
- Page 555 20 ETERNUS CS800 3.2 Open-Source Software To "convey" a work means any kind of propagation that enables other parties to make or receive copies. Mere interaction with a user through a computer network, with no transfer of a copy, is not conveying.
- Page 556 Conveying under any other circumstances is permitted solely under the conditions stated below. Sublicensing is not allowed; section 10 makes it unnecessary. ETERNUS CS800...
- Page 557 20 ETERNUS CS800 3.2 Open-Source Software 3. Protecting Users' Legal Rights From Anti-Circumvention Law. No covered work shall be deemed part of an effective technological measure under any applicable law fulfilling obligations under article 11 of the WIPO copyright treaty adopted on 20 December 1996, or similar laws prohibiting or restricting circumvention of such measures.
- Page 558 Corresponding Source under the terms of this License, in one of these ways: a) Convey the object code in, or embodied in, a physical product (including a physical distribution medium), accompanied by the Corresponding Source fixed on a durable physical medium customarily used for software interchange. ETERNUS CS800...
- Page 559 20 ETERNUS CS800 3.2 Open-Source Software b) Convey the object code in, or embodied in, a physical product (including a physical distribution medium), accompanied by a written offer, valid for at least three years and valid for as long as you offer...
- Page 560 Corresponding Source conveyed, and Installation Information provided, in accord with this section must be in a format that is publicly documented (and with an implementation available to the public in source code form), ETERNUS CS800...
- Page 561 20 ETERNUS CS800 3.2 Open-Source Software and must require no special password or key for unpacking, reading or copying. 7. Additional Terms. "Additional permissions" are terms that supplement the terms of this License by making exceptions from one or more of its conditions. Additional...
- Page 562 60 days after the cessation. Moreover, your license from a particular copyright holder is reinstated permanently if the copyright holder notifies you of the violation by some reasonable means, this is the first time you have received notice of ETERNUS CS800...
- Page 563 20 ETERNUS CS800 3.2 Open-Source Software violation of this License (for any work) from that copyright holder, and you cure the violation prior to 30 days after your receipt of the notice. Termination of your rights under this section does not terminate the licenses of parties who have received copies or rights from you under this License.
- Page 564 If you convey a covered work, knowingly relying on a patent license, and the Corresponding Source of the work is not available for anyone to copy, free of charge and under the terms of this License, through a publicly available network server or other readily accessible means, then you must ETERNUS CS800...
- Page 565 20 ETERNUS CS800 3.2 Open-Source Software either (1) cause the Corresponding Source to be so available, or (2) arrange to deprive yourself of the benefit of the patent license for this particular work, or (3) arrange, in a manner consistent with the requirements of this License, to extend the patent license to downstream recipients.
- Page 566 GNU General Public License, you may choose any version ever published by the Free Software Foundation. If the Program specifies that a proxy can decide which future versions of the GNU General Public License can be used, that proxy's public statement ETERNUS CS800...
- Page 567 20 ETERNUS CS800 3.2 Open-Source Software of acceptance of a version permanently authorizes you to choose that version for the Program. Later license versions may give you additional or different permissions. However, no additional obligations are imposed on any author or copyright holder as a result of your choosing to follow a later version.
- Page 568 If the program does terminal interaction, make it output a short notice like this when it starts in an interactive mode: <program> Copyright (C) <year> <name of author> This program comes with ABSOLUTELY NO WARRANTY; for details type `show w'. ETERNUS CS800...
- Page 569 20 ETERNUS CS800 3.2 Open-Source Software This is free software, and you are welcome to redistribute it under certain conditions; type `show c' for details. The hypothetical commands `show w' and `show c' should show the appropriate parts of the General Public License. Of course, your program's commands might be different;...
- Page 570 The jboss integration module contains some LGPL code. The win32 Java Service Wrapper (v3.2.3) is Copyright (c) 1999, 2006 Tanuki Software, Inc. and 2001 Silver Egg Technology. It is covered by an open license which is viewable at ETERNUS CS800...
- Page 571 20 ETERNUS CS800 3.2 Open-Source Software http://svn.codehaus.org/jetty/jetty/branches/jetty- 6.1/extras/win32service/LICENSE.txt LTTng Tools LTTng Tools licensing David Goulet <david.goulet@polymtl.ca> July 18, 2011 * LGPLv2.1 The library part is distributed under LGPLv2.1. See lgpl-2.1.txt for details. This applies to: -) include/lttng/* -) src/lib/lttng-ctl/* We have some tests LGPL but should not impact anything even if we change them in the future to GPL.
- Page 572 Software, and to permit persons to whom the Software is furnished to do so, subject to the following conditions: The above copyright notice and this permission notice shall be included in all copies or substantial portions of the Software. ETERNUS CS800...
- Page 573 20 ETERNUS CS800 3.2 Open-Source Software * liblttng-ust-ctl/ustctl.c is GPL v2. It is only used by the lttng- sessiond program. This program is free software; you can redistribute it and/or modify it under the terms of the GNU General Public License as published by the Free Software Foundation;...
- Page 574 1. The enclosed software and documentation is made available at no charge in order to advance the general development of high-performance networking products. 2. You may not delete any copyright notices contained in the software or documentation. All hard copies, and copies in source code or object code ETERNUS CS800...
- Page 575 20 ETERNUS CS800 3.2 Open-Source Software form, of the software or documentation (including modifications) must contain at least one of the copyright notices. 3. The enclosed software and documentation has not been subjected to testing and quality control and is not a Hewlett-Packard Co. product. At a future time, Hewlett-Packard Co.
- Page 576 A copy of this license is available in the file LICENSE in the top-level directory of the distribution or, alternatively, at <http://www.OpenLDAP.org/license.html>. OpenLDAP is a registered trademark of the OpenLDAP Foundation. Individual files and/or contributed packages may be copyright by other parties and/or subject to additional restrictions. ETERNUS CS800...
- Page 577 20 ETERNUS CS800 3.2 Open-Source Software This work is derived from the University of Michigan LDAP v3.3 distribution. Information concerning this software is available at <http://www.umich.edu/~dirsvcs/ldap/ldap.html>. This work also contains materials derived from public sources. Additional information about OpenLDAP can be obtained at <http://www.openldap.org/>.
- Page 578 * distribution. * 3. All advertising materials mentioning features or use of this * software must display the following acknowledgment: * "This product includes software developed by the OpenSSL Project * for use in the OpenSSL Toolkit. (http://www.openssl.org/)" ETERNUS CS800...
- Page 579 20 ETERNUS CS800 3.2 Open-Source Software * 4. The names "OpenSSL Toolkit" and "OpenSSL Project" must not be used to * endorse or promote products derived from this software without * prior written permission. For written permission, please contact * openssl-core@openssl.org.
- Page 580 * notice, this list of conditions and the following disclaimer. * 2. Redistributions in binary form must reproduce the above copyright * notice, this list of conditions and the following disclaimer in the * documentation and/or other materials provided with the distribution. ETERNUS CS800...
- Page 581 20 ETERNUS CS800 3.2 Open-Source Software * 3. All advertising materials mentioning features or use of this software * must display the following acknowledgement: * "This product includes cryptographic software written by * Eric Young (eay@cryptsoft.com)" * The word 'cryptographic' can be left out if the rouines from the library * being used are not cryptographic related :-).
- Page 582 Agreement. "Programs" means (a) Java technology applets and applications intended to run on the Java Platform, Standard Edition platform on Java-enabled General Purpose Desktop Computers and Servers; and ETERNUS CS800...
- Page 583 20 ETERNUS CS800 3.2 Open-Source Software (b) JavaFX technology applications intended to run on the JavaFX Runtime on JavaFX-enabled General Purpose Desktop Computers and Servers. "Commercial Features” means those features identified in Table 1-1 (Commercial Features In Java SE Product Editions) of the Java SE documentation accessible at http://www.oracle.com/technetwork/java/javase/documentation/index.html.
- Page 584 9. U.S. GOVERNMENT LICENSE RIGHTS. If Software is being acquired by or on behalf of the U.S. Government or by a U.S. Government prime contractor or subcontractor (at any tier), then the Government's rights in Software and accompanying documentation shall be only those set forth in this Agreement. ETERNUS CS800...
- Page 585 20 ETERNUS CS800 3.2 Open-Source Software 10. GOVERNING LAW. This agreement is governed by the substantive and procedural laws of California. You and Oracle agree to submit to the exclusive jurisdiction of, and venue in, the courts of San Francisco, or Santa Clara counties in California in any dispute arising out of or relating to this agreement.
- Page 586 README File, including but not limited to the Java Technology Restrictions and Limitations on Redistribution of these Supplemental Terms, Oracle grants you a non-exclusive, non-transferable, limited license without fees to reproduce and distribute those files specifically identified as redistributable in the README File ("Redistributables") ETERNUS CS800...
- Page 587 20 ETERNUS CS800 3.2 Open-Source Software provided that: (i) you distribute the Redistributables complete and unmodified, and only bundled as part of Programs, (ii) the Programs add significant and primary functionality to the Redistributables, (iii) you do not distribute additional software intended to supersede any component(s)
- Page 588 Software will see the notice: Use of the Commercial Features for any commercial or production purpose requires a separate license from Oracle. "Commercial Features” means those features identified Table 1-1 (Commercial Features In Java SE Product Editions) of the Java SE documentation accessible at http://www.oracle.com/technetwork/java/javase/documentation/index.html ETERNUS CS800...
- Page 589 20 ETERNUS CS800 3.2 Open-Source Software I. SOURCE CODE. Software may contain source code that, unless expressly licensed for other purposes, is provided solely for reference purposes pursuant to the terms of this Agreement. Source code may not be redistributed unless expressly provided for in this Agreement.
- Page 590 OR BUSINESS INTERRUPTION) HOWEVER CAUSED AND ON ANY THEORY OF LIABILITY, WHETHER IN CONTRACT, STRICT LIABILITY, OR TORT (INCLUDING NEGLIGENCE OR OTHERWISE) ARISING IN ANY WAY OUT OF THE USE OF THIS SOFTWARE, EVEN IF ADVISED OF THE POSSIBILITY OF SUCH DAMAGE. ETERNUS CS800...
- Page 591 20 ETERNUS CS800 3.2 Open-Source Software P7zip License 7-Zip source code License for use and distribution 7-Zip Copyright (C) 1999-2010 Igor Pavlov. Licenses for files are: 1) CPP/7zip/Compress/Rar* files: GNU LGPL + unRAR restriction 2) All other files: GNU LGPL The GNU LGPL + unRAR restriction means that you must follow both GNU LGPL rules and unRAR restriction rules.
- Page 592 If you use this software in a product, an acknowledgment in the product documentation would be appreciated but is not required. 3. Altered source versions must be plainly marked as such, and must not be misrepresented as being the original software. ETERNUS CS800...
- Page 593 20 ETERNUS CS800 3.2 Open-Source Software 4. The name of the author may not be used to endorse or promote products derived from this software without specific prior written permission. THIS SOFTWARE IS PROVIDED BY THE AUTHOR "AS IS" AND ANY EXPRESS OR IMPLIED...
- Page 594 THIS SOFTWARE IS PROVIDED BY THE COPYRIGHT HOLDERS AND CONTRIBUTORS "AS IS" AND ANY EXPRESS OR IMPLIED WARRANTIES, INCLUDING, BUT NOT LIMITED TO, THE IMPLIED WARRANTIES OF MERCHANTABILITY AND FITNESS FOR A PARTICULAR PURPOSE ARE DISCLAIMED. IN NO EVENT SHALL THE COPYRIGHT OWNER OR CONTRIBUTORS BE ETERNUS CS800...
- Page 595 20 ETERNUS CS800 3.2 Open-Source Software LIABLE FOR ANY DIRECT, INDIRECT, INCIDENTAL, SPECIAL, EXEMPLARY, OR CONSEQUENTIAL DAMAGES (INCLUDING, BUT NOT LIMITED TO, PROCUREMENT OF SUBSTITUTE GOODS OR SERVICES; LOSS OF USE, DATA, OR PROFITS; OR BUSINESS INTERRUPTION) HOWEVER CAUSED AND ON ANY THEORY OF LIABILITY, WHETHER IN...
- Page 596 LIABILITY, OR TORT(INCLUDING NEGLIGENCE OR OTHERWISE) ARISING IN ANY WAY OUT OF THE USE OF THIS SOFTWARE, EVEN IF ADVISED OF THE POSSIBILITY OF SUCH DAMAGE. Userspace RCU License Userspace RCU library licensing Mathieu Desnoyers September 3, 2012 ETERNUS CS800...
- Page 597 20 ETERNUS CS800 3.2 Open-Source Software * LGPLv2.1 The library part is distributed under LGPLv2.1 or later. See lgpl-2.1.txt for license details. Refer to the individual file headers for details. LGPL-compatible source code can statically use the library header using : #define _LGPL_SOURCE #include <urcu.h>...
- Page 598 RCU library in a patch submitted on May 8, 2009 from Paul E. McKenney and reviewed by Steven L. Bennett: http://lists.casi.polymtl.ca/pipermail/ltt-dev/2009-May/001584.html I (Mathieu Desnoyers) re-implemented ACCESS_ONCE(), likely(), unlikely() and barrier() from scratch without reference to the original code. commit id : 2dc5fa0f7cfbfb0a64a7a67b39626650e863f16a ETERNUS CS800...
- Page 599 20 ETERNUS CS800 3.2 Open-Source Software Bert Wesarg <bert.wesarg@googlemail.com> approved LGPL relicensing of his patch in an email dated May 13, 2009 : http://lkml.org/lkml/2009/5/13/16 xchg() primitives has been rewritten from a MIT-licensed cmpxchg for Intel and powerpc. They are MIT-licensed and therefore usable in LGPL code.
-
Page 601: Index
Entry with JX40 S2 front Entry without JX40 S2 rear Scale system capacity Entry common problems and solutions components storage expansion installing environmental protection compression ESD 20, configuration ETERNUS CS800 S6 contacts capacity initial components notifications replication scheduler system configuration wizards ETERNUS CS800... - Page 602 JX40 S2 front manage remote users rear manage users storage servers target IP mapping labelsheet licence agreement login Entry indicators modules Scale installing PRIMERGY RX2540 M1 mounting position problems locating Ethernet hardware ETERNUS CS800...
- Page 603 Scale system specifications storage expansion Scale system switching on technical support scheduler troubleshooting serial number turning on system server connecting notebook indicators front indicators rear mains ETERNUS CS800...
- Page 604 Index Typographic conventions utilities analyzer diagnostics reboot & shutdown secure shred software upgrades space reclamation configuration media partitions remote host access wizard AIS connect email alerts replication wizards overview configuration ETERNUS CS800...