APRILIA tuono v4 Owner's Manual
Hide thumbs
Also See for tuono v4:
- Instruction manual (203 pages) ,
- Manual (267 pages) ,
- Owner's manual (254 pages)
Table of Contents
Advertisement
APRILIA WOULD LIKE TO THANK YOU
for choosing one of its products. We have compiled this booklet to provide a comprehensive overview of your vehicle's quality features. Please read it
carefully before riding the vehicle for the first time. It contains information, tips and precautions for using your vehicle. It also describes features, details
and devices to assure you that you have made the right choice. We believe that if you follow our suggestions, you will soon get to know your new vehicle
well and that it will continue to give you satisfactory service for many years to come. This booklet is an integral part of the vehicle and must be handed
over to the new owner in the event of sale.
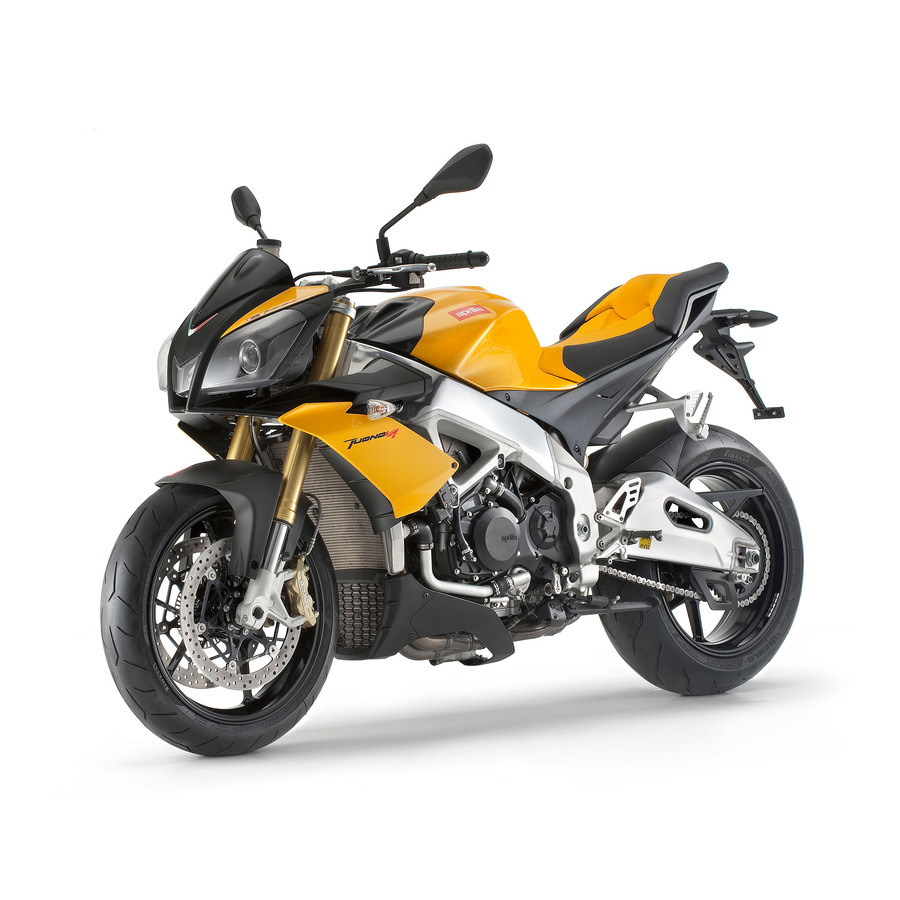
Tuono V4
Ed. 02_05/2012
Advertisement
Table of Contents

Related Manuals for APRILIA tuono v4


Summary of Contents for APRILIA tuono v4
- Page 1 APRILIA WOULD LIKE TO THANK YOU for choosing one of its products. We have compiled this booklet to provide a comprehensive overview of your vehicle's quality features. Please read it carefully before riding the vehicle for the first time. It contains information, tips and precautions for using your vehicle. It also describes features, details and devices to assure you that you have made the right choice.
- Page 2 The instructions given in this booklet are intended to provide a clear, simple guide to using your scooter; it also describes routine maintenance procedures and regular checks that should be carried out on the vehicle at an authorised aprilia Dealer or Workshop. This booklet also contains instructions for simple repairs.
- Page 3 Personal safety Failure to completely observe these instructions will result in serious risk of personal injury. Safeguarding the environment Sections marked with this symbol indicate the correct use of the vehicle to prevent dam- aging the environment. Vehicle intactness The incomplete or non-observance of these regulations leads to the risk of serious damage to the vehicle and sometimes even the invalidity of the guarantee The symbols illustrated above are very important.
-
Page 5: Table Of Contents
Stand..................12 Front fork setting..............71 Reporting of defects that affect safety........12 Steering shock absorber adjustment........73 System a-PRC (Aprilia Performance Ride Control)....13 Justering af greb til forbremse..........74 VEHICLE..................15 Clutch lever adjustment............75 Arrangement of the main components........17 Running in................. - Page 6 Battery removal..............103 Use of a new battery............. 104 Checking the electrolyte level..........105 Charging the battery.............. 105 Long periods of inactivity............106 Fuses..................107 Lamps..................110 Headlight adjustment............. 112 Front direction indicators............114 Rear optical unit................ 114 Rear turn indicators..............115 Number plate light..............
-
Page 7: General Rules
Tuono V4 Chap. 01 General rules... -
Page 8: Foreword
Foreword NOTE CARRY OUT THE MAINTENANCE OPERATIONS AT HALF THE INTERVALS SPECIFIED IF THE VEHICLE IS USED IN WET OR DUSTY AREAS, OFF ROAD OR FOR SPORTING APPLICATIONS. Carbon monoxide If you need to keep the engine running in order to perform a procedure, please ensure that you do so in an open or very well ventilated area. -
Page 9: Hot Components
OFF. DO NOT SMOKE DURING REFUELLING OR NEAR FUEL VAPOUR. AVOID ANY CONTACT WITH NAKED FLAME, SPARKS OR OTHER HEAT SOURCES WHICH MAY CAUSE IGNITION OR EXPLOSION. DO NOT ALLOW FUEL TO DISPERSE INTO THE ENVIRONMENT. KEEP OUT OF THE REACH OF CHILDREN. IF THE VEHICLE FALLS OR IS ON A STEEP INCLINE FUEL CAN LEAK. -
Page 10: Used Engine Oil And Gearbox Oil
FLAME. WHEN CARRYING OUT MAINTENANCE, IT IS ADVISABLE TO WEAR LATEX GLOVES. EVEN THOUGH IT IS TOXIC, COOLANT HAS A SWEET FLA- VOUR WHICH MAKES IT VERY ATTRACTIVE TO ANIMALS. NEVER LEAVE THE COOLANT IN OPEN CONTAINERS IN AREAS ACCESSIBLE TO ANIMALS AS THEY MAY DRINK IT. -
Page 11: Brake And Clutch Fluid
Brake and clutch fluid BRAKE FLUID MAY BE HARMFUL TO PAINTWORK, PLASTIC AND RUBBER. WHEN SERVICING THE BRAKING SYSTEM PROTECT THESE COMPONENTS WITH A CLEAN CLOTH. ALWAYS WEAR PROTECTIVE GOGGLES WHEN SERV- ICING THESE SYSTEMS. BRAKE FLUID IS EXTREMELY HARMFUL TO THE EYES. -
Page 12: Stand
ER HEAT SOURCES. ENSURE ADEQUATE VENTILATION WHEN SERVICING OR RECHARGING THE BATTERY. KEEP OUT OF THE REACH OF CHILDREN. BATTERY LIQUID IS CORROSIVE. DO NOT POUR IT OR SPILL IT, PARTICU- LARLY ON PLASTIC COMPONENTS. ENSURE THAT THE ELECTROLYTIC ACID IS COMPATIBLE WITH THE BATTERY BEING ACTIVATED. -
Page 13: System A-Prc (Aprilia Performance Ride Control)
AQS (Aprilia Quick Shift) This system enables upshifts without using the clutch and without changing the throttle position. key: a-PRC: motorcycle with a-PRC system (Aprilia Performance Ride Control) std: motorcycle without a-PRC system (Aprilia Performance Ride Control) -
Page 15: Vehicle
Tuono V4 Chap. 02 Vehicle... - Page 16 02_01...
-
Page 17: Arrangement Of The Main Components
02_02 Arrangement of the main components (02_02) key: 1. Left side fairing 2. Left turn indicator 3. Horn 4. Left headlamp 5. CLF ECU (Tone wheel reading control unit) (if fitted) 6. Windshield 7. Steering damper (if fitted) 8. Clutch lever 9. - Page 18 21. Left hand passenger footrest 22. Left hand rider footrest 23. Side stand 24. Gear lever 25. AQS (Aprilia Quick Shift) (if fitted) 26. Left hand fairing lug 27. Engine oil radiator 28. Coolant radiator 29. Rear right turn indicator 30.
-
Page 19: Dashboard
50. Rear tone wheel (if applicable) 51. Right hand passenger footrest 02_03 Dashboard (02_03) key: 1. Horn button 2. Turn indicator control 3. MODE Control 4. Clutch control lever 5. High beam flashing switch... -
Page 20: Analog Instrument Panel
6. Ignition switch /steering lock 7. Instruments and gauges 8. Throttle grip 9. Engine stop button 10. Starter button 11. Front brake lever 12. "+" button (if applicable) 13. "-" button (if applicable) Analog instrument panel (02_04, 02_05) key: 1. Rpm indicator 2. -
Page 21: Light Unit
The vehicle is supplied with two keys already programmed. The instrument panel ac- cepts a maximum of four keys at the same time: contact an Official Aprilia Dealer to enable these keys or to disable a key that has been lost. When the vehicle is delivered and approximately ten seconds after the key is set to ON, the instrument panel re- quests a personal five-digit code to be entered. -
Page 22: Digital Lcd Display
• By turning the ignition key to 'KEY ON', the following indicators on the instru- ment panel are lit for two seconds: - The 'Tuono V4' logo - All warning lights • The rpm indicator pointer moves and then goes back to its original position. - Page 23 4) Map selected; 5) ALC (Aprilia Launch Control); 02_09 6) ATC (Aprilia Traction Control); The level is displayed in negative against a black background when AWC (Aprilia Wheelie Control) is active. 7) Speed (speedometer); 8) Information, if available, relative to maps stored in ECU;...
- Page 24 TRIP 1/TRIP 2 MODE (std) 1) Water temperature (displayed either in °C or °F); 2) Gear selected; 3) Clock (in 24H format or in 12H format with no AM/PM indication) or chronometer (selectable from menu). 4) Map selected; 5) Speed (speedometer); 02_11 6) Information, if available, relative to maps stored in ECU;...
- Page 25 Two kilometres after the low fuel warning light turns on, the kilometres travelled with low fuel are shown on the digital display. 02_13 Pressing the centre button of the MODE control while the low fuel warning light is active temporarily deactivates the warning light for 60 seconds. At "KEY-ON"...
-
Page 26: Alarms
Take your vehicle as soon as possible to an Official Aprilia Dealer. In these cases, the control unit activates a safety procedure that limits the vehicle performance so that the rider is able to reach an Official Aprilia Dealer at low speed. 02_17... - Page 27 the maximum torque produced; b) by keeping the engine at idle speed but slightly accelerated (during this operation, the throttle control is disabled). Oil failure In case of failing oil pressure or oil pressure sensor failure, the bulb and the red general warning light turn on the instrument panel.
-
Page 28: Mapping Selection
Turn indicator malfunction When the instrument panel detects a failing turn indicator, the turn indicator warning light flashes twice as fast and the problem is signalled on the digital display. 02_20 Mapping selection (02_21, 02_22, 02_23, 02_24) The engine control unit has three different user-selectable electronic throttle manage- ment maps, which are indicated as follows at the top left of the instrument panel digital display (1) : •... - Page 29 The "S" engine management map is tailored for performance-oriented use. In this mode the vehicle's performance in first and second gear is reduced. 02_22 The "R" engine management map is designed for normal road use. The system re- duces the maximum torque supplied by the engine and smoothly delivers it so as to prevent loss of grip.
- Page 30 The rider may cycle through the different engine maps by pressing the starter button, which may be used to select maps once 5 seconds have elapsed after engine start. CAUTION THE RIDER MAY USE THE STARTER BUTTON TO SELECT MAPS EVEN WITH THE VEHICLE IN MOTION, PROVIDED THAT THE ENGINE IS RUNNING AND THE THROTTLE IS RELEASED.
-
Page 31: Control Buttons
Control buttons (02_25) Trip journal 1 and 2 There are two trip journals available. Press and hold down the MODE control to the left to select the TRIP JOURNAL 1; icon "1" on the DIGITAL DISPLAY turns on. Press and hold down the MODE control to the right to select the TRIP JOURNAL 2; icon "2"... -
Page 32: Advanced Functions
With the vehicle in motion the chronometer functioning is controlled by means of the MODE control central button. Press the central button briefly to start the chronometer. Timekeeping starts when the button is pressed. If the button is pressed again within 15 seconds after starting time- keeping, the chronometer is reset. - Page 33 02_27 MENU (std) - EXIT - SETTINGS - CHRONOMETER - DIAGNOSIS - LANGUAGES. 02_28 SETTINGS The SETTINGS menu consists of the following options: - EXIT - TIME ADJUSTMENT - GEAR SHIFT - BACKLIGHTING - CODE CHANGE...
- Page 34 - CODE RESET - °C / °F - 12/24 h The functions of the settings menu are indicated in the following sections. Once the operation is finished, the instrument panel goes back to the main menu. TIME ADJUSTMENT The clock can be set as follows. The main screen shows the "Hour Adjustment" con- trol.
- Page 35 GEAR SHIFT THRESHOLD The gear shift threshold can be set in this mode. The main screen page shows the message "GEAR SHIFT THRESHOLD". Each time the MODE command is pressed to the right, the threshold value increases by 100 RPM; vice versa, each time the MODE command is pressed to the left, the threshold value decreases by 100 RPM.
- Page 36 02_31 02_32 CODE CHANGE This function is used to modify an old code. Once you have entered this function, the following message is displayed: "ENTER OLD CODE" After recognising the old code, the new code is requested and the display shows the following message: "ENTER NEW CODE"...
- Page 37 Once the operation is finished, the instrument panel shows the SETTINGS menu. If it is the first time a code is stored, only the new code is requested. CODE RESET This function is used to set a new code when the old one is not available; in this case, at least two keys will have to be inserted in the ignition lock.
- Page 38 THIS MODE CAN ONLY BE ACCESSED IF THE ATC (Aprilia Traction Control) SYSTEM IS ACTIVE. This mode allows the rider to set/activate AWC (Aprilia Wheelie Control) level and set ALC (Aprilia Launch Control) levels, with the vehicle at a standstill.
- Page 39 LEVEL "2" IS AN INTERMEDIATE SETTING BETWEEN LEVEL "1" AND LEVEL "3". THE a-PRC SETTING FUNCTION MAY ALSO BE ACCESSED FROM THE RACE DISPLAY MODE BY PRESSING THE MODE SELECTOR BRIEFLY. CHRONOMETER Select the CHRONOMETER option from the configuration menu to access the chro- nometer function.
- Page 40 CALIBRATING To calibrate the a-PRC (Aprilia Performance Ride Control) system, ride for approxi- mately 10 seconds in a straight line on a flat section of road in second gear and at a 02_36 speed of 40 +/- 2 km/h (24.85 +/- 1.24 mph), until the message CALIBRATING is no...
- Page 41 Open the configuration menu to display the DIAGNOSIS option. This menu interfaces with the systems present on the vehicle and diagnoses them. To enable this menu, enter an access code available only from official Aprilia dealers. LANGUAGES Open the configuration menu to access the LANGUAGES function. Select the LAN- GUAGES option to choose the interface language.
-
Page 42: Ignition Switch
Once the operation is finished, the display goes back to the LANGUAGES menu. Ignition switch (02_37) The ignition switch (1) is located on the headstock upper plate. The vehicle is supplied with two keys (one is the spare key). The lights go off when the ignition switch is set to «OFF». NOTE THE KEY ACTIVATES THE IGNITION SWITCH AND OPERATES THE STEERING LOCK. -
Page 43: Locking The Steering Wheel
Locking the steering wheel (02_38) To lock the steering: • Turn the handlebar completely to the left. • Turn the key to «OFF». • Push in the key and turn it anticlockwise (to the left), steer the handlebar slowly until the key is set to «LOCK». -
Page 44: Horn Button
02_40 Horn button (02_41) Press it to activate the horn. 02_41... -
Page 45: Switch Direction Indicators
Switch direction indicators (02_42) Move the switch to the left, to indicate a left turn; move the switch to the right to indicate a right turn. Pressing the switch deactivates the turn indicator. CAUTION IF THE WARNING LIGHT WITH ARROWS FLASHES QUICKLY, IT MEANS THAT ONE OR BOTH TURN SIGNALS LIGHT BULBS ARE BURNT OUT. -
Page 46: High/Low Beam Selector
High/low beam selector (02_43) Press the light switch to turn on the low beam light; press it again to turn on the high beam light. 02_43 Passing button (02_44) Uses the high beam flash in case of danger or emergency. Releasing the switch deactivates the high beam flash. -
Page 47: Start-Up Button
Press this switch to stop the engine. 02_46 System a-PRC (Aprilia Performance Ride Control) (if applicable) a-PRC system (Aprilia Performance Ride Control) Aprilia Performance Ride Control is an engine torque control system that helps im- prove performance and enhance safety for the rider. - Page 48 ATC: Aprilia Traction Control; AWC: Aprilia Wheelie Control; ALC: Aprilia Launch Control; AQS: Aprilia Quick Shift. WARNING AND INDICATOR LIGHTS, KEY - Indicator light off: with system activated with vehicle in motion or system activated after exceeding 5 Km/h (3.1 mph) after key-on;...
- Page 49 Under no circumstances can ATC compensate for any rider error or improper use of the throttle. THE TRACTION CONTROL SYSTEM CANNOT PREVENT FALLS WHILE COR- NERING. ACCELERATING SUDDENLY WHILE THE VEHICLE IS INCLINED OR WITH THE HANDLEBARS TURNED WILL PUT THE VEHICLE IN AN UNSTABLE STATE THAT IS EXTREMELY DIFFICULT TO RECTIFY.
- Page 50 - ATC system working correctly. If the 'ATC system deactivated' indication persists: NOTE SHOULD THIS OCCUR, CONTACT AN aprilia Official Dealer. THE ATC SYSTEM ACTS ON THE REAR WHEEL ON THE BASIS OF INFORMA- TION RECEIVED FROM TONE WHEELS INSTALLED ON BOTH WHEELS. AL-...
- Page 51 NOTE a-PRC SYSTEM SENSORS, WITH HIGH PRECISION OF READING THE TONE WHEELS, CAN GENERATE, WITH MOTORCYCLE AT STANDSTILL AND RUN- NING ENGINE, A km/h (mi) SPEED INDICATION IN THE DIGITAL DISPLAY. SUCH PERFORMANCE IS NORMAL AND DOES NOT CAUSE MALFUNCTIONING OF THE a-PRC SYSTEM.
- Page 52 ONDS, AT THE NEXT KEY-ON, THE ATC SYSTEM MAINTAINS THE PREVIOUS- LY SELECTED SETTINGS. Aprilia Wheelie Control Wheelie control: a system designed to help the rider control wheeling by reducing torque to gently lower the front wheel to the ground.
- Page 53 TO THEIR OWN PREFERENCE IN ACCORDANCE WITH ABILITY, RIDING STYLE AND ROAD CONDITIONS. FOR MORE INFORMATION ON LEVEL SETTINGS, SEE THE RELATIVE PARAGRAPHS FOR EACH INDIVIDUAL FUNCTION. Aprilia Launch Control Launch control: a system designed to help the rider optimise acceleration during standing starts.
- Page 54 CAUTION ALC MUST BE USED WITH EXTREME PRUDENCE AS THERE IS NO FUNCTION TO PREVENT THE MOTORCYCLE FROM FLIPPING IN ANY OF THE THREE POSSIBLE LEVELS. THE SYSTEM IS FOR EXPERT RIDERS AND EXCLUSIVELY FOR TRACK USE. RELEASE THE CLUTCH PROGRESSIVELY TO PREVENT EXCESS SLIPPAGE, WHICH COULD DAMAGE THE MECHANICALS OF THE VEHICLE.
- Page 55 The three systems can therefore be set independently of one another and can function simultaneously. Aprilia Quick Shift A system that enables upshifts without using the clutch and without changing the throttle position.
-
Page 56: Immobilizer System Operation
CAUTION THE IMMOBILIZER SYSTEM CAN MEMORISE UP TO FOUR KEYS. DATA STORAGE OPERATION CAN ONLY BE PERFORMED AT AN Aprilia offi- cial DEALER. DATA STORAGE PROCEDURE CANCELS THE EXISTING CODES. THEREFORE, IF A CUSTOMER WANTS TO PROGRAM SOME NEW KEYS, S/HE SHOULD GO TO THE DEALER TAKING ALL THE KEYS S/HE WANTS TO ENABLE. -
Page 57: Opening The Saddle
Opening the saddle (02_48, 02_49, 02_50, 02_51, 02_52, 02_53) PASSENGER SEAT REMOVAL • Turn the key clockwise. 02_48 • Remove the passenger seat by raising first the end. 02_49 • Complete removal by raising and sliding the passenger seat. 02_50... - Page 58 RIDER SADDLE REMOVAL • Using the Allen key located under the tail fairing / passenger saddle, unscrew and remove the two screws fastening the saddle and remove the saddle from the vehicle. 02_51 02_52 Refitting • Carry out the procedure described above in reverse order. •...
-
Page 59: Glove/Tool Kit Compartment
CAUTION BEFORE LOWERING AND LOCKING THE SADDLE, CHECK THAT THE IGNITION KEY HAS NOT BEEN LEFT THE IGNITION KEY IN THE GLOVEBOX /TOOL KIT. Glove/tool kit compartment (02_54) • The saddle must be removed in order to access the glovebox / toolkit. •... - Page 60 The chassis number is stamped on the right side of the headstock. Chassis No..... ENGINE NUMBER The engine number is printed on the base of the engine crankcase, left hand side. Engine No.....
-
Page 61: Use
Tuono V4 Chap. 03... -
Page 62: Checks
CLE TO ENSURE CORRECT AND SAFE OPERATION. FAILURE TO DO SO MAY LEAD TO SERIOUS PERSONAL INJURY OR DAMAGE TO THE VEHICLE. DO NOT HESITATE TO CONTACT AN OFFICIAL Aprilia DEALER IF YOU DO NOT UNDERSTAND HOW SOME CONTROLS WORK OR IF A MALFUNCTION IS DE- TECTED OR SUSPECTED. - Page 63 brake pads for wear. If necessary top-up with brake fluid. Throttle grip Check that the throttle functions smoothly and can be fully opened and closed in all steering positions. Adjust and/or lubricate necessary. Engine oil Check and/or top-up as required. Wheels/ tyres Check that tyres are in good conditions.
- Page 64 Side stand Check that it slides smoothly and that it snaps back to its rest position upon spring tension. Lubricate couplings and joints if necessary. Check that the side stand safety switch operates correctly. Clamping elements Check that the clamping elements are not loose.
-
Page 65: Refuelling
Refuelling (03_02) To refuel: • Lift the cover (1). • Introduce the key (2) in the fuel tank cap lock (3). • Turn the key clockwise, pull and open the fuel tank lid. Characteristic Fuel capacity (reserve included) 17 l (3.74 UK gal) 03_02 Fuel tank reserve 3.6 l (0.79 UK gal) -
Page 66: Rear Shock Absorbers Adjustment
• Once the key (2) is inserted, press the cap to close it again. • Remove the key (2). • Close the cover (1). MAKE SURE THE CAP IS TIGHTLY CLOSED. Rear shock absorbers adjustment (03_03) The rear suspension consists of a spring-shock absorber unit linked to the frame via uniball joints and to the swingarm via a linkage system. - Page 67 RACING TRACK SETTINGS MUST BE DONE ONLY FOR OFFICIAL COMPETI- TIONS OR SPORTS EVENTS WHICH ARE, IN ALL CASES, AWAY FROM NOR- MAL ROAD TRAFFIC AND WITH THE AUTHORISATION OF THE RELEVANT AUTHORITIES. IT IS STRICTLY FORBIDDEN TO RIDE A VEHICLE SET FOR RACING ON ROADS AND MOTORWAYS.
-
Page 68: Rear Shock Absorbers Setting
CAUTION FOR THE CORRECT SETTING PARAMETERS, READ THE PARAGRAPH "SET- TING THE REAR SHOCK ABSORBER" CAREFULLY. Take your vehicle to an official Aprilia dealer, if necessary. TRY RIDING THE VEHICLE ON THE STREET UNTIL THE OPTIMUM ADJUST- MENT IS OBTAINED. - Page 69 REAR SHOCK ABSORBER - STANDARD ADJUSTMENT FOR USE ON ROAD Length of (preloaded) spring (A) 145 mm (5.71 in) Rebound adjustment, ring nut (1) open (**) 20 clicks from fully closed Compression adjustment, knob (2) open (**) 2 clicks from fully closed REAR SHOCK ABSORBER - RACING ADJUSTMENT RANGE ONLY ON THE RACING TRACK...
-
Page 70: Front Fork Adjustment
Check the tightening of all the elements and the correct operation of the front and rear suspension joints. CAUTION PLEASE CONTACT AN Official Aprilia Dealer TO HAVE THE FRONT FORK OIL CHANGED AND ITS OIL SEALS REPLACED. 03_05 The front suspension consists of a hydraulic fork connected to the headstock by means of two plates. -
Page 71: Front Fork Setting
FOR THE CORRECT SETTING PARAMETERS, READ THE PARAGRAPH "SET- TING THE FRONT FORK" CAREFULLY. Take your vehicle to an official Aprilia dealer, if necessary. Front fork setting (03_06, 03_07, 03_08) TO COUNT THE CLICKS AND/OR TURNS OF SET SCREWS (1 - 2 - 3) ALWAYS START FROM THE MOST RIGID SETTING (SET SCREW FULLY CLOCKWISE). - Page 72 03_07 03_08 FRONT FORK - STANDARD ADJUSTMENT FOR USE ON ROAD Rebound damping adjustment, Unscrew (**) 10 clicks from fully screw (1) closed (*) Compression damping Unscrew (**) 6 clicks from fully adjustment, screw (2) closed (*) Spring preloading, nut (3) screw (*) 5 turns from fully open (**)
-
Page 73: Steering Shock Absorber Adjustment
Stems (A) (***) protrusion from top notches/ 8-12 (2-3 plate (excluding cover) notches/0.32-0.47 in) (*) - Clockwise (**) - Anticlockwise (***) - this type of adjustment may only be made by an aprilia Official Dealer. Steering shock absorber adjustment (03_09) (if applicable) -
Page 74: Justering Af Greb Til Forbremse
The motorcycle has a non adjustable steering damper. No adjustment can be made. 03_09 Justering af greb til forbremse (03_10) The distance between the end of the lever (1) and the hand grip (2) may be adjusted with the set screw (3). •... -
Page 75: Clutch Lever Adjustment
Clutch lever adjustment (03_11, 03_12) The clutch lever clearance (1) may be adjusted with the adjuster screw (3). • Turn the adjuster screw (3) forward to increase clutch lever clearance (1) and check lever function while using the hand grip (2) as you would when riding the vehicle. -
Page 76: Starting Up The Engine
It is recommended, during the first 1000 km (621 mi), not to exceed 7500 rpm and 9500 rpm up 2000 km (1243 mi). AFTER THE SPECIFIED MILEAGE, TAKE YOUR VEHICLE TO AN Official Aprilia Dealer FOR THE CHECKS INDICATED IN THE "PERIODICAL MAINTENANCE"... - Page 77 EXHAUST FUMES CONTAIN CARBON MONOXIDE, AN EXTREMELY HARMFUL SUBSTANCE IF INHALED. NEVER START THE ENGINE IN A CLOSED OR INSUFFICIENTLY VENTILATED SPACE. FAILURE TO OBSERVE THIS WARNING COULD LEAD TO UNCONSCIOUSNESS AND EVEN DEATH DUE TO SUFFOCATION. CAUTION WITH THE SIDE STAND LOWERED, THE ENGINE MAY ONLY BE STARTED WITH THE GEARBOX IN NEUTRAL.
- Page 78 • The rpm indicator (5) will go to the end of the scale for 3 seconds, then it will return to the minimum value. • With the engine operating normally, the number of rpms at which the engine is operating will be displayed instantaneously. IF THE LOW FUEL WARNING LIGHT ON THE INSTRUMENT PANEL TURNS ON, REFUEL THE VEHICLE AT ONCE.
-
Page 79: Moving Off / Riding
AFTER A FEW SECONDS FROM THE ENGINE START-UP, THE START-UP BUT- TON ASSUMES THE MAPPING CHANGE FUNCTION. IF THE ENGINE OIL PRESSURE ICON IS DISPLAYED AND THE GENERAL WARNING LIGHT IS ON, THE OIL PRESSURE IN THE CIRCUIT IS TOO LOW. 03_17 DO NOT SET OFF SUDDENLY WHEN THE ENGINE IS COLD. - Page 80 CAUTION PASSENGERS MUST BE SUITABLY INSTRUCTED ON HOW TO BEHAVE TO PREVENT DANGEROUS SITUATIONS WHEN RIDING. BEFORE SETTING OFF, MAKE SURE THE STAND HAS BEEN COMPLETELY RETRACTED TO ITS POSITION. To start: • Turn on the engine. • Adjust the inclination of the rear-view mirrors to ensure proper visibility. CAUTION WITH THE VEHICLE AT A STANDSTILL, PRACTICE USING THE REAR-VIEW MIRRORS.
- Page 81 GINE OPERATION, IT MEANS THAT THE ENGINE OIL PRESSURE IN THE CIR- CUIT IS TOO LOW. IF THIS OCCURS, STOP THE ENGINE AND CONTACT AN Aprilia Official Dealer. IT IS SUGGESTED TO DOWNSHIFT FROM A HIGHER GEAR TO A LOWER GEAR:...
- Page 82 • When riding downhill and when braking, in order to increase the braking power by using engine compression. • When going uphill, when the engaged gear does not suit the speed (high gear, moderate speed) and the number of engine revs falls. CAUTION DOWNSHIFT ONE GEAR AT A TIME;...
- Page 83 STOP SWITCH TO "OFF" AND CHECK THE COOLANT LEVEL. IF THE TEMPERATURE INDICATION CONTINUES FLASHING AFTER CHECK- ING THE COOLANT LEVEL, CONTACT AN Official Aprilia Dealer. DO TURN THE IGNITION KEY TO "KEY OFF", BECAUSE THE COOLING FANS WOULD STOP REGARDLESS OF THE COOLANT TEMPERATURE, WHICH WOULD CAUSE A FURTHER TEMPERATURE RISE.
-
Page 84: Stopping The Engine
Stopping the engine (03_22) • Release the throttle grip (1) (Pos. A), brake gradually and at the same time "downshift" gears to slow down. Once the speed is reduced, before stopping the vehicle: • Operate the clutch lever (2) so that engine does not shut off. When the vehicle is at a standstill: •... -
Page 85: Catalytic Silencer
CAUTION IF THE VEHICLE FALLS OR IS ON A STEEP INCLINE FUEL CAN LEAK. FUEL USED TO DRIVE INTERNAL COMBUSTION ENGINES IS HIGHLY FLAM- MABLE AND CAN BECOME EXPLOSIVE UNDER CERTAIN CONDITIONS. DO NOT REST THE RIDER OR PASSENGER WEIGHT ON THE SIDE STAND. Catalytic silencer The vehicle has a silencer with a "platinum - palladium - rhodium three-way"... -
Page 86: Stand
Check the muffler/exhaust silencer and the silencer pipes, make sure there are no signs of rust or holes and that the exhaust system works properly. If you not an increase in exhaust noise, take your vehicle to an Official Aprilia Dealer at once. -
Page 87: Suggestion To Prevent Theft
MAKE SURE THAT THE GROUND ON WHICH THE MOTORCYCLE IS PARKED IS STABLE, EVEN AND FREE OF OBSTACLES. Suggestion to prevent theft CAUTION WHEN USING A DISC LOCKING DEVICE, PAY UTMOST ATTENTION TO RE- MOVE IT BEFORE RIDING. FAILURE TO OBSERVE THIS WARNING MAY CAUSE SERIOUS DAMAGE TO THE BRAKING SYSTEM AND ACCIDENTS WITH CON- SEQUENT PHYSICAL INJURIES OR EVEN DEATH. -
Page 88: Basic Safety Rules
Basic safety rules (03_24, 03_25, 03_26, 03_27, 03_28) Follow the instructions given below attentively to avoid injuring persons, damaging property or the vehicle in the event of the rider or the passenger falling off the vehicle and/or the vehicle falling or overturning. When getting on and off the vehicle, make sure nothing is restricting your movements;... - Page 89 CAUTION THE RIDER MUST GET ON THE VEHICLE FIRST AND GET OFF LAST TO BE ABLE TO CONTROL AND BALANCE THE VEHICLE WHILE THE PASSENGER IS GETTING ON OR OFF THE VEHICLE. 03_27 03_28 When getting on and off the vehicle, the passenger must move carefully so as not to cause a loss of stability for vehicle and rider.
- Page 90 NEVER ATTEMPT TO GET OFF THE VEHICLE BY JUMPING OR STRETCHING YOUR LEG TO REACH THE GROUND. THESE ARE INCORRECT PROCEDURES THAT COMPROMISE VEHICLE STABILITY AND BALANCE. CAUTION ANY BAGS OR OBJECTS STRAPPED TO THE REAR OF THE VEHICLE CAN REPRESENT AN OBSTACLE WHILE GETTING ON AND OFF.
- Page 91 • Lift and retract the side stand completely with the left foot. GETTING OFF THE VEHICLE • Select an appropriate parking spot. • Stop the vehicle. • Stop the engine. MAKE SURE THAT THE GROUND ON WHICH THE MOTORCYCLE IS PARKED IS STABLE, EVEN AND FREE OF OBSTACLES.
- Page 92 • Turn the handlebar fully leftwards. • Return the passenger footrests to position. CAUTION MAKE SURE THE VEHICLE IS STABLE.
-
Page 93: Maintenance
Tuono V4 Chap. 04 Maintenance... -
Page 94: Foreword
THIS VEHICLE IS DESIGNED TO DETECT IN REAL TIME ANY MALFUNCTIONS, STORED BY THE ECU AND WHICH CAN BE READ BY MEANS OF THE DIAG- NOSIS SYSTEM SUPPLIED TO THE Aprilia Official Dealer. Engine oil level check (04_01) Check the engine oil level frequently. -
Page 95: Engine Oil Top-Up
• Check via the inspection glass in the crankcase, on the right-hand side of the vehicle, that the oil level is near the upper marking. - Upper marking = Max. level - Lower marking = Min. level CAUTION NEVER ALLOW THE OIL LEVEL TO DROP BELOW THE MINIMUM LEVEL OR FILL ABOVE THE MAXIMUM LEVEL;... -
Page 96: Tyres
Tyres This vehicle is fitted with tyres without inner tubes (Tubeless). CHECK TYRE INFLATION PRESSURE REGULARLY AT AMBIENT TEMPERA- TURE. MEASUREMENTS MAY BE INCORRECT IF TYRES ARE WARM. CHECK PRESSURE MAINLY BEFORE AND AFTER LONG TRIPS. IF THE TYRE PRESSURE IS TOO HIGH, UNEVENNESS IN THE ROAD SURFACE WILL NOT BE CUSHIONED AND WILL BE TRANSMITTED TO THE HANDLEBAR, RESULTING IN AN UNPLEASANTLY HARSH RIDE AND POOR ROAD HOLDING, ESPECIALLY WHEN CORNERING. -
Page 97: Spark Plug Dismantlement
BE CARRIED OUT USING THE SPECIFIC TOOLS AND WITH THE ADEQUATE KNOWLEDGE. IT IS THEREFORE ESSENTIAL TO TAKE YOUR VEHICLE TO AN Official Aprilia Dealer OR SPECIALISED TYRE WORKSHOP TO CARRY OUT THE OPERATIONS ABOVE. NEW TYRES MAY BE COATED WITH A SLIPPERY COATING: RIDE WITH CAUTION DURING THE FIRST KILOMETRES. -
Page 98: Cooling Fluid Level
Cooling fluid level Do not use the vehicle if the coolant is below the minimum level. CAUTION COOLANT IS TOXIC IF INGESTED; CONTACT WITH YOUR EYES OR SKIN MAY CAUSE IRRITATION. IF THE FLUID GETS IN CONTACT WITH THE EYES OR SKIN, RINSE REPEATEDLY WITH PLENTY OF WATER AND SEEK MEDICAL ADVICE. -
Page 99: Coolant Check
CAUTION DO NOT UNSCREW THE RADIATOR CAP WHEN THE ENGINE IS HOT, SINCE COOLANT IS UNDER PRESSURE AND VERY HOT. CONTACT WITH SKIN OR CLOTHES MAY CAUSE SEVERE BURNS AND/OR INJURIES. Coolant check (04_03) • Shut off the engine and wait until it cools off. •... -
Page 100: Checking The Brake Oil Level
Checking the brake oil level Brake fluid check • Rest the vehicle on its stand. • For the front brake, turn the handlebar fully to the right. • For the rear brake, keep the vehicle upright so that the fluid in the reservoir is at the same level with the plug. - Page 101 TO AVOID SPILLING BRAKE FLUID WHILE TOPPING-UP, KEEP THE FLUID LEVEL IN THE RESERVOIR PARALLEL TO THE RESERVOIR EDGE (IN HORI- ZONTAL POSITION). DO NOT ADD ADDITIVES OR OTHER SUBSTANCES TO THE FLUID. IF A FUNNEL OR ANY OTHER ELEMENT IS USED, MAKE SURE THAT IT IS PERFECTLY CLEAN.
- Page 102 IF THE FREE STROKE OF THE BRAKE PEDAL OR THE BRAKE LEVER IS TOO LONG, OR IN THE CASE OF LEAKS, IT MAY BE NECESSARY TO BLEED AIR FROM THE SYSTEM. SHOULD THIS OCCUR, CONTACT AN Official Aprilia Dealer. Rear braking system •...
-
Page 103: Battery Removal
Battery removal (04_06, 04_07) • Make sure that the ignition switch is set to "OFF". • Remove the rider saddle. • Unscrew and remove the two screws (1) using the spanner supplied in the tool kit. • Remove the secondary fuse box (2). •... -
Page 104: Use Of A New Battery
Use of a new battery (04_08, 04_09) CHECK THAT THE BATTERY LEADS AND TERMINALS ARE: - IN GOOD CONDITION (NOT CORRODED OR COVERED BY DEPOSITS); - COVERED BY NEUTRAL GREASE OR PETROLEUM JELLY. CAUTION UPON REFITTING, CONNECT THE LEAD TO THE POSITIVE TERMINAL (+) FIRST AND AFTERWARDS THE LEAD TO THE NEGATIVE TERMINAL (-). -
Page 105: Checking The Electrolyte Level
04_09 Checking the electrolyte level WARNING THE MOTORCYCLE IS SUPPLIED WITH A BATTERY THAT DOES NOT REQUIRE MAINTENANCE OTHER THAN OCCASIONALLY CHECKING THE CHARGING LEVEL. Charging the battery • Remove the battery. • Get an adequate battery charger. • Set the battery charger for the recharge type indicated. •... -
Page 106: Long Periods Of Inactivity
Switch on the battery charger. Characteristic RECHARGE MODES: Recharge - Ordinary Electric Current - 1.0 A Time - 8-10 hours Recharge - Fast Electric Current - 10 A Time - 1 hour Long periods of inactivity IF THE VEHICLE IS INACTIVE LONGER THAN FIFTEEN DAYS, DISCONNECT THE 30A FUSE TO AVOID BATTERY DETERIORATION DUE TO CURRENT CON- SUMPTION BY THE MULTIFUNCTION COMPUTER. -
Page 107: Fuses
NEVER USE A FUSE THAT IS DIFFERENT THAN WHAT IS SPECIFIED TO PRE- VENT DAMAGES TO THE ELECTRICAL SYSTEM OR SHORT CIRCUITS, WITH THE RISK OF FIRE. CAUTION A FUSE THAT BLOWS FREQUENTLY MAY INDICATE A SHORT CIRCUIT OR OVERLOAD. IF THIS OCCURS, CONSULT AN APRILIA Official Dealer. - Page 108 To check: • Set the ignition switch to "OFF" to avoid an accidental short circuit. • Remove the rider saddle. • Open the cover of the auxiliary fuse box (1). • Take out one fuse at a time and check whether the filament (2) is broken. •...
- Page 109 AUXILIARY FUSES DISTRIBUTION A) 5A fuse Stop and running lights relay B) 5A fuse Instrument panel, turn indicators, speed, instrument panel diagnosis, tone wheel ECU (a-PRC) C) 15A fuse Control unit D) 7.5A fuse Control unit E) 15A fuse High beam/low beam, horn. F) 15A fuse Coils, injectors, fuel pump, oxygen sensor and secondary air valve...
-
Page 110: Lamps
current consumers (red and red/ white cables), fan relay. Main fuses are placed in the rear part of the motorcycle, under the passenger seat. CAUTION THERE IS ONE SPARE FUSE (I). Lamps (04_14, 04_15, 04_16, 04_17) It is not necessary to remove the windshield to replace the high / low beam light bulbs. In the front headlight assembly there are: •... - Page 111 HIGH/LOW BEAM LIGHT BULBS • Remove the cover (4) by turning it anticlockwise 04_15 • Remove the connector (5). 04_16 • Release the retainer (6); • Remove the bulb (7); • Replace with a new bulb of the same type. 04_17...
-
Page 112: Headlight Adjustment
Headlight adjustment (04_18, 04_19, 04_20) NOTE IN COMPLIANCE WITH LOCAL LEGISLATION, SPECIFIC PROCEDURES MUST BE FOLLOWED WHEN ALIGNING THE LIGHTS. 04_18 To quickly and easily check the alignment of the front light, place the vehicle on a level surface 10 m (32.8 ft) away from a vertical wall. Turn on the dipped beam light, sit on the vehicle and check that the light beam projected onto the wall is a little below the level of the headlight (about 9/10 of the total height). - Page 113 In order to carry out horizontal adjustment of the light beam: • Rest the vehicle on its stand. • Working from the rear left hand side of the top fairing, adjust both screws simultaneously with a short cross headed screwdriver (2) and (3): - Tightening the left hand screw (2) while simultaneously loosening the right hand screw (3), the light beam moves to the right.
-
Page 114: Front Direction Indicators
• Insert a bulb of the same type adequately. WARNING IF PARABOLE (4) STICKS OUT OF ITS FITTING, INSERT IT AGAIN PROPERLY. 04_21 Rear optical unit This vehicle has a LED taillight; have it replaced at an Official Aprilia Dealer. -
Page 115: Rear Turn Indicators
Slide off and replace the bulb with another of the same type. 04_23 Brake light CAUTION TO REMOVE, CHECK AND REPLACE THE BULB, PLEASE CONTACT AN Official Aprilia Dealer. IF YOU ARE ADEQUATELY TRAINED AND EXPERIENCED, RE- FER TO THE INSTRUCTIONS IN THIS WORKSHOP BOOKLET AVAILABLE ALSO AT ANY DEALER. -
Page 116: Rear-View Mirrors
Rear-view mirrors (04_24, 04_25) • Park the vehicle on its centre stand on safe and level ground. • Move the protection casing (1) (if applicable). HOLD THE REAR-VIEW MIRROR (4) TO AVOID DROPPING IT BY ACCIDENT. • Keep the screw (2) blocked and completely unscrew the nut (3). HANDLE PLASTIC AND PAINTED COMPONENTS WITH CARE, DO NOT SCRATCH OR SPOIL THEM. -
Page 117: Front And Rear Disc Brake
After refitting: • Adjust the rear-view mirror angle correctly. 04_25 Front and rear disc brake (04_26, 04_27, 04_28) CAUTION CHECK BRAKE PADS FOR WEAR MAINLY BEFORE EACH RIDE. 04_26 To perform a quick pad wear check: • Rest the vehicle on its stand. •... -
Page 118: Periods Of Inactivity
If the friction material thickness (even of one front (3) or rear (4) pad) is reduced to a value of about 1.5 mm (0.06 in) (or even if one of the wear indicators is not very visible), contact an Official Aprilia Dealer to have the calliper pads replaced. USE ORIGINAL PADS ONLY. -
Page 119: Cleaning The Vehicle
NOTE PLACE A SUITABLE SUPPORT UNDER THE VEHICLE TO KEEP BOTH WHEELS OFF THE GROUND. • Put the vehicle on the front stand (optional) and on the back stand (optional). • Cover the vehicle (do not use plastic or waterproof materials). After storage NOTE TAKE THE PLASTIC BAGS OFF THE EXHAUST PIPE OPENING. - Page 120 • Special environmental/seasonal conditions (use of salt, anti-icing chemical products on the roads in winter). • Always clean off any smog and pollution residue, tar stains, insects, bird droppings, etc. from the bodywork. • Avoid parking the vehicle under trees. During some seasons, resins, fruits or leaves containing aggressive chemical substances that may damage the paintwork may fall from trees.
- Page 121 To clean off dirt and mud deposited from painted surfaces, soften caked dirt with a low-pressure water jet. Sponge off using a car body sponge soaked in a car body shampoo and water solution (2 - 4% parts of shampoo in water). Then rinse with plenty of water, and dry with a chamois leather.
-
Page 122: Transport
INSTEAD DETERGENTS WITH SURFACE ACTIVE AGENTS NOT EXCEEDING 5% (NEUTRAL SOAP, DEGREASING DETERGENTS OR ALCOHOL). DRY THE SADDLE WELL AFTER CLEANING. CAUTION DO NOT APPLY PROTECTIVE WAX ON THE SADDLE AS IT MAY BECOME SLIP- PERY. After washing lubricate the following components: •... -
Page 123: Chain Backlash Check
IN CASE OF FAILURE, DO NOT TOW THE VEHICLE BUT CONTACT A ROAD ASSISTANCE SERVICE INSTEAD TO HAVE THE INFLAMMABLE FLUIDS DRAINED . Chain backlash check (04_34) To check the clearance: • Shut off the engine. • Rest the vehicle on its stand. •... -
Page 124: Chain Backlash Adjustment
Chain backlash adjustment (04_35, 04_36) If you need to adjust chain tension after the check: • Place the vehicle on its rear service stand (optional). • Loosen the nut (1) completely. • Loosen both lock nuts (4). • Use the adjuster screws (5) to set the chain clearance, ensuring that the references (2-3) match on both sides of the vehicle. -
Page 125: Chain Lubrication And Cleaning
DRY OR RUSTY PARTS. FLATTENED OR JAMMED CHAIN LINKS SHOULD BE LUBRICATED AND GOOD OPERATING CONDITIONS RESTORED. IF REPAIR IS NOT POSSIBLE, CONTACT AN Official Aprilia Dealer TO HAVE IT REPLACED. Chain lubrication and cleaning Never wash the chain with high pressure air/water jets or steam jets or highly flam- mable solvents. - Page 126 NEVER USE THE VEHICLE JUST AFTER LUBRICATING THE CHAIN, AS THE LUBRICANT WOULD BE SPRAYED OUTWARD AND SPREAD OUT IN THE SUR- ROUNDING AREA.
-
Page 127: Technical Data
Tuono V4 Chap. 05 Technical data... - Page 128 IMENSIONS Max. length 2,065 mm (81.30 in) Max. width 820 mm (32.28 in) Max. height (at handlebar) 1,090 mm (42.91 in) Saddle height 826 mm (32.52 in) Wheelbase 1,445 mm (56.89 in) Minimum ground clearance 125 mm (4.92 in) Kerb weight 193 kg (425 lb) Kerb weight 204 kg (449 lb)
- Page 129 Compression ratio 13 : 1 Engine idle speed 1,500 ± 100 rpm Engine revs at maximum speed 12,300 ± 100 rpm Clutch Multiplate clutch with mechanical control lever on left side handlebar Anti- juddering slipper clutch systems Electric Electric starter TIMING SYSTEM Morse chain on intake camshaft, cam to cam gear, bucket tappets...
- Page 130 Cooling system 3-way thermostatic valve, cooling radiator with electric fan and expansion tank Coolant pump Centrifugal bearingless aspirating pump with integrated ceramic gasket Air filter Paper Alternatively: Air filter In cotton APACITY Fuel capacity (reserve included) 17 l (3.74 UK gal) Fuel tank reserve 3.6 l (0.79 UK gal) Engine oil...
- Page 131 EAR RATIOS Primary drive ratio 44 / 73 (with gears) 1st gear ratio 15 /39 (secondary) 2nd gear ratio 16 /33 (secondary) 3rd gear ratio 20 / 34 (secondary) 4th gear ratio 22 /32 (secondary) 5th gear ratio 26 /34 (secondary) 6th gear ratio 27 /33 (secondary) Final drive gear ratio...
- Page 132 RACTION CONTROL a-PRC system (on vehicles with a- (Aprilia Performance Ride PRC) Control), which includes traction control, wheelie control, launch control and clutchless gear shift functions. UEL SYSTEM Fuel Premium unleaded petrol, minimum octane rating 95 (NORM) and 85 (NOMM)
- Page 133 CHASSIS Type Aluminium, dual beam chassis with pressed and cast sheet elements. Steering rake 27° Trail 107 mm (4.21 in) USPENSION Front fork Sachs upside-down stanchions with adjustable hydraulic damping 43mm (1.69 diam. stanchions. Front wheel travel 120 mm (4.72 in) Rear shock absorber Sachs piggyback shock absorber with progressive APS system and...
- Page 134 RAKES Front Double floating disc, Ø 320 mm (12.60 in), radially-mounted calliper with four Ø 32 mm (1.26 in) pistons and two calliper pads Brake pipe in metal braid. Rear disc type -220 mm diam. (8.66 inches), 2-piston callipers - 32 mm diam.
- Page 135 Inflation pressure 1 passenger: 2.3 bar (230 kPa) (33.36 PSI) 2 passengers: 2.5 bar (250 kPa) (36.26 PSI) Rear tyre 190/55 ZR17 (75W) 200/55 ZR17 (78W) (*) 190/50 ZR17 (73W) (*) With these dimensions use only Pirelli Diablo Supercorsa SP tyres. Inflation pressure 1 passenger: 2.5 bar (250 kPa) (36.26 PSI)
- Page 136 Alternator 450 W Main fuses 30 A Auxiliary fuses 5A - 7.5A - 15A ULBS Low-/ high beam light 12 V - 55 W H7 Front daylight running light Turn indicators 12V - 10W (White light) Rear daylight running light / stop light License plate light 12V - 5W...
-
Page 137: Kit Equipment
Fuel reserve NOT ENABLED Kit equipment (05_01, 05_02) • An Allen key is located under the passenger seat, used to remove the saddle fastener screws in order to remove the saddle and allow access to the toolkit compartment. • To remove the passenger seat, see the section Vehicle / Saddle opening. 05_01... - Page 138 The tools supplied are: 1. A toolkit pouch 2. Cross headed screwdriver with non reversible handle 3. 17 mm (0.67 in) open ended spanner 4. 8 - 10 mm (0.31 - 0.39 in) open ended spanner 5. Bent 3 mm (0.12 in) Allen key 6.
-
Page 139: Programmed Maintenance
Tuono V4 Chap. 06 Programmed maintenance... -
Page 140: Scheduled Maintenance Table
Adequate maintenance is fundamental to ensure long-lasting, optimum operation and performance of your vehicle. To this end, Aprilia offers a set of checks and maintenance services (at the owner's expense), that are summarised in the table shown on the following page. Any minor faults must be reported without delay to an Authorised Aprilia Dealer or Sub-Deal- er without waiting until the next scheduled service to solve it. - Page 141 OUTINE MAINTENANCE TABLE Km x 1000 Rear shock absorber (6) Set up (6) Cylinder equalisation Spark plug (6) Drive chain (3) I - L I - L I - L I - L I - L Clutch cable Control cables and controls (6) Sprocket - pinion (6) Rear suspension bearings - linkages Steering bearings and steering clearance (6)
- Page 142 Km x 1000 Brake systems (6) Light circuit Stand switch Safety switches Stop switches Brake fluid (4) Coolant (4) Fork oil (7) Engine oil (6) Light aiming Fork oil seals (6) Anti-vibration buffers Tyres - pressure/wear (2) Wheels (6) Tightening torques (6) Tightening of clutch cover, flywheel and oil sump screws Fault warning light on instrument panel (1) Fuel lines (5)
- Page 143 ECOMMENDED PRODUCTS TABLE Product Description Specifications ENI i-RIDE APRILIA RACING 5W-40 Engine oil Use branded oils with performance equivalent to or exceeding ACEA A3 - API SL - JASO MA - JASO MA2 AGIP MP GREASE Black smooth textured lithium-calcium soap...
- Page 145 TABLE OF CONTENTS Instrument panel: 20 a-PRC setting buttons: 43 Engine oil: 10, 94, 95 Technical data: 127 Advanced functions: 32 Engine stop: 47 Turn indicators: 115 Alarms: 26 Tyres: 96 Maintenance: 93, 139, 140 Maintenance Table: 140 Mirrors: 116 Fork: 70, 71 Battery: 11, 103–105 Fuel: 8...
- Page 146 The reliability of the vehicle also depends on its mechanical conditions. Checking the vehicle before riding it, its regular maintenance and the use of original Aprilia spare parts only are essential factors! For information on the nearest Official Dealer and/or Service Centre consult our website: www.aprilia.com...
Need help?
Do you have a question about the tuono v4 and is the answer not in the manual?
Questions and answers