Nortel BCM50 Installation And Maintenance Manual
Nortel networks telephone system installation and maintenance guide
Hide thumbs
Also See for BCM50:
- Configuration manual (568 pages) ,
- Installation and maintenance manual (335 pages) ,
- Administration manual (191 pages)

Subscribe to Our Youtube Channel
Related Manuals for Nortel BCM50


Summary of Contents for Nortel BCM50
- Page 1 Return to Menu BCM50 Installation and Maintenance Guide Part No. N0027152 01 08 April 2005...
- Page 2 Nortel Networks. Trademarks *Nortel, Nortel (Logo), the Globemark, and This is the way, This is Nortel (Design mark) are trademarks of Nortel Networks. *Microsoft, MS, MS-DOS, Windows, and Windows NT are registered trademarks of Microsoft Corporation.
-
Page 3: Software License
THE TERMS OF THIS LICENSE. IF YOU DO NOT AGREE TO THE TERMS OF THIS LICENSE, RETURN THE UNUSED SOFTWARE AND THE ASSOCIATED DOCUMENTATION TO NORTEL NETWORKS THROUGH A NORTEL NETWORKS AUTHORIZED DISTRIBUTOR WITHIN FIVE (5) DAYS OF YOUR ACQUISITION OF THE SOFTWARE FOR A REFUND. - Page 4 License. If NORTEL NETWORKS (i) claims a material breach of this License, and (ii) provides written notice of such claimed material breach to CUSTOMER and (iii) observes that such claimed material breach remains uncorrected and/or unmitigated more than thirty (30) days following CUSTOMER’s receipt of written notice specifying in reasonable detail...
-
Page 5: Table Of Contents
To measure the insertion loss from the analog device to the CO...121 Configuring the BCM50 system ....... . . 123 Using Telset Administration to set the basic parameters . - Page 6 To connect the BCM50a main unit to the WAN ...157 Testing basic BCM50 functionality ......159 To test the main unit ...159...
- Page 7 To insert the new hard disk ...198 To insert the new fan ...200 To insert the new router card...201 To close the main unit case ...201 To connect the cables ...203 To return the BCM50 system to operation...203 BCM50 Installation and Maintenance Guide...
- Page 8 Task List N0027152 01 N0027152 01...
- Page 9 Getting started with BCM50 ........
- Page 10 Installing the BCM50 system ........
- Page 11 Installing the wiring field card (optional) ....... . 88 Installing the BCM50 unit on a desktop or shelf ......89 Next step .
- Page 12 Chapter 12 Configuring the BCM50 system ....... . . 123 Initial parameters overview .
- Page 13 Connecting the BCM50 system to the LAN ....... . 154...
- Page 14 Contents Opening the main unit case ..........192 Removing an internal component .
- Page 15 Index ............241 BCM50 Installation and Maintenance Guide...
- Page 16 Contents N0027152 01 N0027152 01...
-
Page 17: Regulatory Information
Regulatory information Refer to the following sections for regulatory information on the BCM50 system: • “North American regulatory information” • “International regulatory information” on page 22 North American regulatory information This Class A device complies with Part 68 & Part 15 of the FCC Rules and ICES-003 Class A Canadian EMI requirements. -
Page 18: Federal Communications Commission (Fcc) Notice
But if advance notice isn’t practical, the telephone company will notify you as soon as possible. You will also be advised of your right to file a complaint with the FCC, if you believe it is necessary. -
Page 19: Important Safety Instructions
(servicing) instructions in the literature accompanying the product. When using your telephone equipment, basic safety precautions should always be followed to reduce risk of fire, electric shock and injury to persons, including the following: Read and understand all instructions. -
Page 20: Use Of A Music Source
Danger: Risk of shock. Read and follow installation instructions carefully. Ensure the BCM50 is not powered and that all telephone/data cables are removed prior to opening the BCM50 unit in the field. If installation of additional hardware and /or servicing is required, disconnect all telephone cable connections prior to unplugging the BCM50 modules. -
Page 21: Enhanced 911 Configuration
Electrical shock hazards from the telecommunication network and AC mains are possible with this equipment. To minimize risk to service personnel and users, the BCM50 system must be connected to an outlet with a third-wire ground. Service personnel must be alert to the possibility of high leakage currents becoming available on metal system surfaces during power line fault events near network lines. -
Page 22: International Regulatory Information
This is a class A product. In a domestic environment this product may cause radio interference in which case the user may be required to take adequate measures. Hereby, Nortel declares that BCM50 units, with Model No. NT9T61XX, NT9T62XX, NT9T64XX, and NT9T65XX, are in compliance with the essential requirements and other relevant provisions of Directive 1999/5/EC. -
Page 23: Safety
Warning: Risk of shock. Ensure the BCM50 is unplugged from the power socket and that any telephone or network cables are unplugged before opening the BCM50. Read and follow installation instructions carefully Warning: Only qualified persons should service the system. -
Page 24: Itu Standardization Compliance
BCM50, CSC USB Port • BCM50, CSC Ethernet Port including optional Ethernet Hub Ports ITU standardization compliance The following list provides voice/data applications and telephony support for BCM50: • G.711 and G.729AB codecs • V.27ter, V.29, and V.17 data modem modulation supported (T.38 fax control gateway) •... -
Page 25: Getting Started With Bcm50
The BCM50 Installation and Maintenance Guide describes how to install, configure, and maintain the BCM50 system. Purpose The concepts, operations, and tasks described in the guide relate to the hardware of the BCM50 system. This guide provides task-based information on how to install the hardware components and perform basic configuration tasks. -
Page 26: Organization
Three types of main units are available: • BCM50 (Telephony and basic data) The BCM50 main unit provides call processing and simple data networking functions. It also provides connections for telephones, Public Switched Telephone Network (PSTN) lines, and a LAN. -
Page 27: Bcm50 Features
• Small system rackmount shelf: A shelf designed for mounting up to four BCM50 units into a standard 19-inch equipment rack. An optional patch panel is available, which provides RJ-45 connectors for all BCM50 main unit trunk and station interfaces. The patch panel includes a terminal block to connect the auxiliary equipment. -
Page 28: Symbols And Conventions Used In This Guide
Chapter 1 Getting started with BCM50 Symbols and conventions used in this guide These symbols are used to highlight critical information for the BCM50 system: Caution: Alerts you to conditions where you can damage the equipment. Danger: Alerts you to conditions where you can get an electrical shock. -
Page 29: Related Publications
BCM50 Keycode Installation Guide (N0016865) BCM50 Administration Guide (N0016868) BCM50 Installation & Maintenance Guide (N0027152) BCM50 ISDN Device Installation & Configuration Guide (N0027268) BCM50 IP Telephone Installation and Configuration Guide (N0027269) BCM50 Device Configuration Guide (N0027146) BCM50 First Time Installation and Configuration Guide (N0027149) - Page 30 BCM50 LAN CTE Configuration Guide (N0027154) BCM50 Networking Configuration Guide (N0027156) BCM50 System Overview (N0027157) BCM50 Analog Device Installation and Configuration Guide (N0035159) BCM50 Telset Administration Guide (N0027176) BCM50 Unified Messaging Installation and Maintenance Guide (N0027179) BCM50a Integrated Router Configuration Guide (N0027181)
-
Page 31: How To Get Help
Chapter 1 Getting started with BCM50 CallPilot Telephone Administration Guide (N0027331) Central Answering Position (CAP) User Guide (P0603480) Hospitality Features Card (N0027326) i2050 Software Phone Installation Guide (N0022555) IP Phone 2001 User Guide (N0027313) IP Phone 2002 User Guide (N0027300) - Page 32 Chapter 1 Getting started with BCM50 Presales Support (CSAN) Telephone: 1-800-4NORTEL (1-800-466-7835) Use Express Routing Code (ERC) 1063# EMEA (Europe, Middle East, Africa) Technical Support - CTAS Telephone: *European Free phone 00800 800 89009 European Alternative: United Kingdom Africa Israel Calls are not free from all countries in Europe, Middle East, or Africa.
- Page 33 Australia 1-800-NORTEL (1-800-667-835) India 011-5154-2210 Indonesia 0018-036-1004 Japan 0120-332-533 Malaysia 1800-805-380 New Zealand 0800-449-716 Philippines 63-2-580-5561 Singapore 800-616-2004 South Korea 0079-8611-2001 Thailand 001-800-611-3007 All others +61-2-8870-8800 Chapter 1 Getting started with BCM50 BCM50 Installation and Maintenance Guide...
- Page 34 Chapter 1 Getting started with BCM50 N0027152 01 N0027152 01...
-
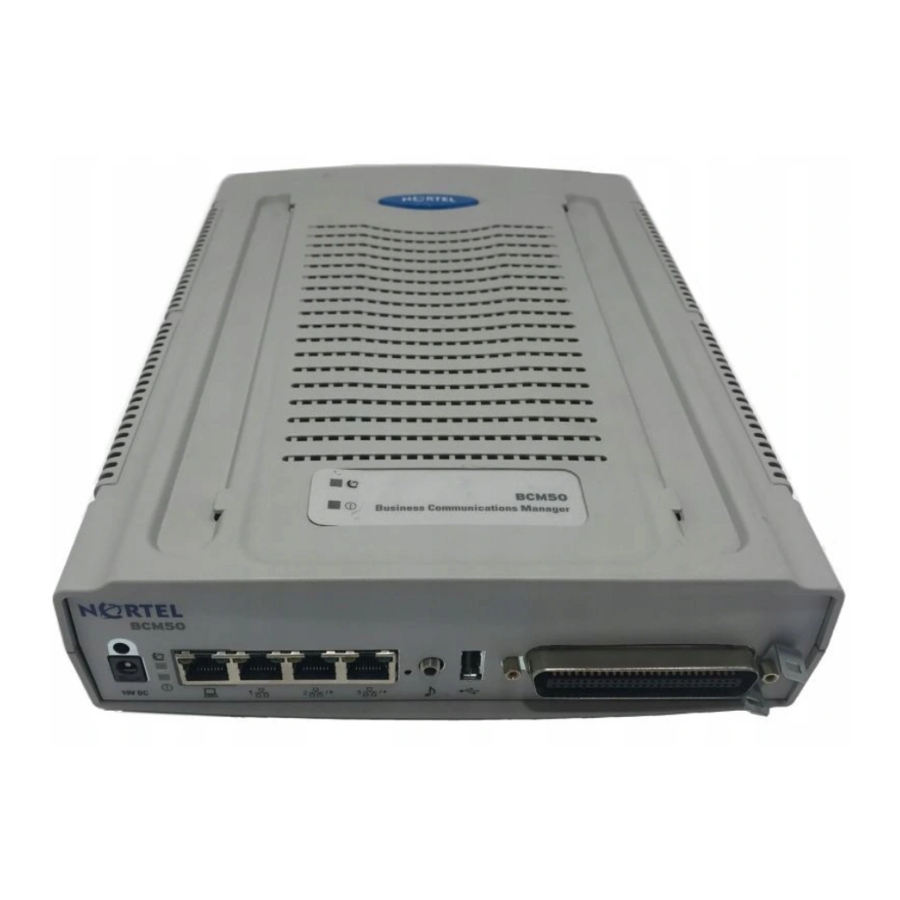
Page 35: Introducing The Bcm50 Hardware
(auxiliary ringer, page relay, page output, and music source). The BCM50 main unit does not have a router, but it does have 4 LAN ports: one is the OAM port for technicians, and the other three are for basic LAN connectivity. See page •... - Page 36 Chapter 2 Introducing the BCM50 hardware Figure 1 BCM50 main unit ports and connectors (port 0) Retention clip mounting hole Power Figure 2 BCM50a main unit ports and connectors Retention clip mounting hole Power (port 0) Figure 3 BCM50e main unit ports and connectors...
- Page 37 3) ports can also provide connections to the Ethernet switch internal to the main unit. If the BCM50 system does not have expansion units connected to these ports, you can use them to connect additional devices to the LAN.
-
Page 38: Expansion Unit And Media Bay Modules
Chapter 2 Introducing the BCM50 hardware Expansion unit and media bay modules In addition to a main unit, the BCM50 system can have up to two expansion units. An expansion unit connects to the main unit and provides additional functionality. Refer to for expansion unit port locations and descriptions. -
Page 39: Media Bay Modules
To connect an MBM to the BCM50 system, you must install the MBM in the expansion unit, then connect the expansion unit to the main unit. See more information on installing a expansion unit. Warning: Make sure the power supply to the expansion unit is disconnected before inserting or removing a media bay module (MBM). -
Page 40: Trunk Media Bay Modules
Trunk media bay modules Trunk media bay modules connect telecommunications lines to the BCM50 system. Table 3 lists the types of trunk media bay modules that are available for the BCM50 system. Table 3 Trunk MBMs Module type “Digital trunk media bay module”... -
Page 41: Digital Trunk Media Bay Module
Each BRI ISDN loop you connect adds two telephone lines to the BCM50 system. Therefore, each BRIM adds a maximum of eight lines to the BCM50 system through the four RJ-48C jacks on the faceplate. The LEDs beside each RJ-48C jack are on when the ISDN line is active. -
Page 42: Station Media Bay Modules
The Global Analog Trunk Module (GATM) provides an interface for four or eight analog public switched telephone network lines. This module supports both pulse and tone dialing, as well as Caller ID and Disconnect Supervision in selected markets throughout the world. -
Page 43: Digital Station Media Bay Module
“Analog station media bay modules” Digital station media bay module The digital station media bay modules (DSM) support digital telephones on the BCM50 system. This section describes the DSM16+ and DSM32+ media bay modules (see The digital station media bay modules have the following characteristics: •... - Page 44 Chapter 2 Introducing the BCM50 hardware Figure 11 4x16 faceplate LEDS and connectors Analog station media bay modules The analog station media bay modules (ASM8, ASM8+, and GASM) can connect to a maximum of eight analog telecommunication devices. These devices are standard analog telephones, cordless telephones, fax machines, answering machines, or modems.
- Page 45 Analog loop resistance 1300 ohms on terminal side for (7200 m of voice applications 0.5-mm wire or (cable only) 26000 ft of 24 AWG wire) Chapter 2 Introducing the BCM50 hardware ASM8 ASM8+ ± ± 20 Hz 1 Hz 20 Hz ±...
-
Page 46: Bcm50 Hardware
“Wiring field card (WFC)” on page 48 Rackmount shelf To rackmount a BCM50 unit (main unit or expansion unit), you need a rackmount shelf. The rackmount shelf mounts in a standard 19-inch equipment rack. The BCM50 unit then clips into the tabs on the rackmount shelf. -
Page 47: Patch Panel
If the BCM50 system includes additional units, you can clip another unit to a second set of tabs on the rackmount shelf. You can clip additional units to tabs on the top of the other units (see 13). Figure 13 Rackmount shelf installed in equipment rack Patch panel The BCM50 patch panel simplifies the connections of lines and extensions to the main unit. -
Page 48: Wiring Field Card (Wfc)
Chapter 2 Introducing the BCM50 hardware Figure 15 Wallmount bracket Wiring field card (WFC) The wiring field card (WFC) simplifies the connections of lines and extensions to the main unit. The WFC installs into the cable management tray of the wallmount bracket and connects to the RJ-21 telephony connector through a 50-pin header. -
Page 49: Bcm50 Components
The power supply adapter cord is for international (non-North American) BCM50 users. It connects to the power supply on one end and to the (C-14) BCM50 power bar on the other end. You require one power supply adapter cord for each power supply you want to connect to the power bar. -
Page 50: Uninterruptable Power Supply
If you connect a UPS to a running system, the UPS will not function. The USB port on the UPS uses a different communication speed than the USB port on the BCM50 system. Due to this difference, you must use an industry-standard USB hub (USB 1.1-compatible) to connect the UPS data connection to the BCM50 system. -
Page 51: Hard Disk
Cooling fan The main units have a single cooling fan. The expansion unit has two cooling fans (see Figure 19 Cooling fan Chapter 2 Introducing the BCM50 hardware “Replacing an internal component” on page BCM50 Installation and Maintenance Guide Hard disk Figure 19). -
Page 52: Rj-21 Telephony Connector
When you use the page output to connect an external paging amplifier, you also use the page relay. The page relay connects to a floating relay contact pair. The BCM50 system uses the page relay to control the external paging amplifier. -
Page 53: Router Card
The BCM50e main unit has a router card that uses an Ethernet interface to connect to a WAN edge device (for example, an external ADSL modem or cable modem). The BCM50a main unit has a router card that uses an ADSL interface to connect the BCM50 system to the Internet Service Provider (ISP). -
Page 54: Telephones And Adapters
Business telephones and adapters connect to the RJ-21 telephony connector on the main unit and to the MBMs installed in the expansion units. The BCM50 system supports Business Series Terminal sets, IP Telephony-based sets, and analog telephony devices. The IP Phones 2001, 2002, 2004, and the IP Softphone 2050 have separate installation and operations documentation. - Page 55 Chapter 2 Introducing the BCM50 hardware The following telephones and devices can be used with the BCM50 system: Digital Phone 7100 — one-line display, one memory button without indicator. Digital Phone 7000 (not shown) (International only) — four memory buttons, without display or indicators.
- Page 56 Has 6-line text display with a row of display keys on the eighth display line. Also has six memory keys with indicators. The 2004 can be used to call through any type of BCM50 line. IP Phone 2001 (not shown) — connects through an IP link to the BCM50.
-
Page 57: Accessories
(CAP) when the 7316E is connected to five or more KIMs. Can also be used to extend the loop length between a telephone or terminal and the BCM50 system from 1,000 to 2,600 feet. You must use a dedicated cable to connect the two locations. - Page 58 Chapter 2 Introducing the BCM50 hardware N0027152 01 N0027152 01...
-
Page 59: Viewing The Bcm50 System Leds
“Media bay module LEDs (expansion units only)” on page 64 System status LEDs The two system status LEDs on the BCM50, BCM50a, and BCM50e main units, show the current state of the BCM50 system. You can view the system status LEDs on the faceplate and on the top of the main unit (see 20). -
Page 60: Lan Port Leds
Solid Green Solid Red During BCM50 system startup or reboot, the system status LEDs move through a sequence of state changes. In general, if either the power LED or status LED is yellow, the system is initializing and is not ready for service. - Page 61 Any LED Flashing The LAN port is sending or receiving network data. The frequency of the flashes increases with increased traffic. Chapter 3 Viewing the BCM50 system LEDs LAN port Expansion port BCM50 Installation and Maintenance Guide LAN port LEDs...
-
Page 62: Adsl Router Leds (Bcm50A Only)
Chapter 3 Viewing the BCM50 system LEDs ADSL router LEDs (BCM50a only) The three ADSL router LEDs on the faceplate of the BCM50a main unit monitor router status, data, and DSL. Figure 22 Figure 22 ADSL router LEDs on the BCM50a main unit... -
Page 63: Ethernet Router Leds (Bcm50E Only)
WAN port green Any WAN port Flashing Both WAN port LEDs Chapter 3 Viewing the BCM50 system LEDs Description The router card is functioning properly. The router card is not ready or has malfunctioned. The router card is rebooting. The WAN port is operating at 10 Mb/s. -
Page 64: Media Bay Module Leds (Expansion Units Only)
Description The MBM does not have power, or there is a failure of the MBM power converter. BCM50 to expansion unit failure or system initialization. Hardware is working, but there is an operational problem such as: • no link to main unit is detected •... -
Page 65: Dtm Leds
Receive alarm Receive error Transmit alarm Transmit error All LEDS Flashing Chapter 3 Viewing the BCM50 system LEDs Descriptions Refer to “Media bay module LEDs (expansion units only)” Refer to “Media bay module LEDs (expansion units only)” The T1, ETSI, or PRI trunks are out of service because a loopback test is running or the DTM is initializing. -
Page 66: Brim Leds
Chapter 3 Viewing the BCM50 system LEDs BRIM LEDs The BRIM has one additional LED beside each RJ-48C jack. These LEDs are on when the ISDN line is active. Figure 26 Figure 26 BRIM LEDs Power LED Status LED Table 15 describes the functions of the BRIM LEDs. -
Page 67: Determining Dhcp Server Configuration And Ip Address
DHCP server is configured using the Router Configuration page. For more information on configuring the DHCP server, refer to settings” on page 138. The BCM50 system can have a main unit with or without an integrated router: • “BCM50 main unit (no integrated router)” •... -
Page 68: If An External Dhcp Server Is Present
The DHCP server on the integrated router supplies the information (primary and secondary TPS server information, VLAN ids) to the IP Phones enabling them to connect to the BCM50. If the IP address of the integrated router is changed, then the IP address reserved for the BCM50 is automatically changed. -
Page 69: To Disable The Dhcp Server On The Main Unit
From the Configuration tab, click the Data Services folder to expand it. Select DHCP Server from the Data Services folder. Select the General Settings tab. It is normally selected by default. Select Disabled from the drop-down list to disable the DHCP server. BCM50 Installation and Maintenance Guide... - Page 70 Chapter 4 Determining DHCP server configuration and IP address N0027152 01 N0027152 01...
-
Page 71: Installing The Bcm50 System
Chapter 5 Installing the BCM50 system To install a BCM50 system, you must install a BCM50 main unit, any expansion units required, and the telephony components. Figure 27 Table 16 on page 72 Figure 27 BCM50 installation overview Chapter 5 Installing the BCM50 system provide an overview of the installation process. - Page 72 Chapter 5 Installing the BCM50 system Table 16 BCM50 installation overview (Sheet 1 of 2) Tasks Description Prepare for installation Verify these requirements: • environmental • electrical • site telephony wiring Get required equipment Ensure you have these items: and tools •...
- Page 73 Table 16 BCM50 installation overview (Sheet 2 of 2) Tasks Description Install telephones and These telephones can be installed: peripherals • System telephones • Emergency telephone • IP Phones • T7406 cordless system Install an ATA2 Perform the steps to install an ATA2: •...
- Page 74 Chapter 5 Installing the BCM50 system N0027152 01 N0027152 01...
-
Page 75: Checking The Installation Prerequisites
Checking the installation prerequisites Before you install a main unit or expansion unit, do the following: • Determine the location for the BCM50 units, telephones, and other equipment based on spacing and electrical requirements. • Order the required trunks from the central office. -
Page 76: Site Telephony Wiring Requirements
Danger: Risk of electric shock The safety of this product requires connection to an outlet with a third-wire ground. Use only with the supplied BCM50 power supply and a three-wire power outlet. Caution: Check ground connections Ensure that the electrical ground connections of the power utility, telephone lines, and internal metal water pipe system, if present, are connected together. -
Page 77: Analog Loop
• telephones • cabling for connections between hardware units You can connect a maximum of two expansion units to a BCM50 system. Each expansion unit can contain one MBM. Note: You require keycodes for some hardware to function. Optional equipment... -
Page 78: Other Hardware And Tools
Chapter 6 Checking the installation prerequisites Other hardware and tools You need the following equipment to install a BCM50 unit: • mounting hardware (either a rackmount shelf, a wallmount bracket per unit, or four rubber feet per unit) • Phillips screwdriver #2 •... -
Page 79: Installing The Main Unit
This section describes how to install the main unit. You can install the main unit in an equipment rack, on a wall, or on a desktop. Figure 28 shows the steps required to install the main unit. Figure 28 Overview of installing the main unit BCM50 Installation and Maintenance Guide... -
Page 80: Unpacking The Main Unit
If you need to better secure a BCM50 unit, use the screws provided (four per unit) to screw the BCM50 to the rack. This is known as a hardened installation. For a hardened installation, install only two units per rack –... -
Page 81: To Install The Rackmount Shelf In An Equipment Rack
Installing the BCM50 unit on the rackmount shelf The rackmount shelf has slots molded into its surface that allow you to attach the BCM50 units to the shelf. By attaching the BCM50 units to these slots, you can prevent them from accidently being knocked off the rackmount shelf. -
Page 82: To Install The Bcm50 Unit On The Rackmount Shelf
To install the BCM50 unit on the rackmount shelf Place the BCM50 unit on the rack so that the feet of the unit are in the depressions in the shelf. Move the unit forward until the feet touch the front side of the depressions. -
Page 83: To Install A Bcm50 Unit On Top Of Another Unit
Insert the power supply retention clip into the BCM50 unit. Place the BCM50 unit on top of the other unit. Make sure the feet of the unit are in the slots on the top of the unit and in front of the slots (see Slide the unit back until it clicks in place on the slots. -
Page 84: To Install The Bcm50 Wallmount Bracket
Chapter 7 Installing the main unit Installing the BCM50 unit on the wall To wallmount a BCM50 unit, you need a wallmount bracket. The wallmount bracket is attached to the wall, and the BCM50 unit is connected to the wallmount bracket. If the BCM50 system includes additional units, you need a wallmount bracket for each unit. - Page 85 Prepare the wallmount bracket by removing the alignment tabs: • If this is the only unit in the BCM50 system, remove the alignment tabs on the right side of the wallmount bracket. • If this is the last unit on a BCM50 system with multiple units, remove the alignment tabs on the left side of the wallmount bracket.
-
Page 86: To Install The Bcm50 Unit On The Wallmount Bracket
Insert the power supply retention clip into the BCM50 unit. Slide the wallmount lock fully to the right (unlock position). See Figure 33 Wallmount lock in unlock position Align the feet on the BCM50 unit with the four holes in the wallmount bracket (see on page 87). - Page 87 Install the BCM50 power supply using a method appropriate for your environment. The power supply must be within 1.5 m (5 feet) of the BCM50 unit and within 1.5 m (5 feet) of the ac power outlet (wall outlet or UPS).
-
Page 88: To Install The Wfc
Chapter 7 Installing the main unit Repeat step 8 for each BCM50 power supply. Installing the wiring field card (optional) You install the optional wiring field card (WFC) in the cable management tray of the main unit. To install the WFC Clear the WFC installation area of all cables. -
Page 89: To Install The Bcm50 Unit On A Desktop Or Shelf
Installing the BCM50 unit on a desktop or shelf To mount a BCM50 unit on a desktop or shelf, attach the supplied rubber feet to the bottom of the unit. If the BCM50 system includes additional units, you can set the additional units beside, or stack them on top of, the first unit. -
Page 90: Next Step
Install the power supply next to the BCM50 unit. The power supply must be within 1.5 m (5 feet) of the BCM50 unit and within 1.5 m (5 feet) of the ac power outlet (wall outlet or UPS). -
Page 91: Installing An Expansion Unit
Chapter 8 Installing an expansion unit Adding a expansion unit increases the capacity of your BCM50 system by providing a method of adding a media bay module (MBM). Each MBM you add increases the number of public switched telephone network (PSTN) trunks or extensions that you can connect to the BCM50 system. -
Page 92: Unpacking The Expansion Unit
• four rubber feet • the BCM50 First Time Installation and Configuration Guide (N0027149) Visually inspect the components for any damage that may have occurred during shipping. If you find any damage, contact your Nortel representative. Warning: Make sure the power supply to the expansion unit is disconnected before inserting or removing an MBM. -
Page 93: Verifying The Media Bay Module Switch Settings
6 5 4 3 2 1 1 2 3 4 5 6 Rear view of the media bay module 40. Refer to “To set GASM dip switches” on page 94 for more information. BCM50 Installation and Maintenance Guide Figure 40). Module is right-side up... -
Page 94: To Set Gasm Dip Switches
ON — Enhanced mode (firmware downloading supported) OFF — if you want the GASM to download the firmware when the firmware version in the BCM50 is different than the version in the GASM (default) ON — if you want the GASM to download the firmware whenever there is a cold start of the BCM50 OFF —... -
Page 95: To Install A Media Bay Module (Mbm)
“Installing the BCM50 unit on the wall” on page 84 • “Installing the BCM50 unit on a desktop or shelf” on page 89 Next step If you are installing a second expansion unit on the system, repeat the procedures in this section for the second expansion unit. - Page 96 Chapter 8 Installing an expansion unit N0027152 01 N0027152 01...
-
Page 97: Connecting The Cables To The Bcm50 System
This section describes how to connect the telephone lines, telephony devices, and power to the BCM50 system. Figure 41 shows the steps required to connect the cables to the BCM50 system. Figure 41 Overview of connecting cables to the BCM50 system Chapter 9 Connecting the cables to the BCM50 system... -
Page 98: Connecting The Expansion Unit
Chapter 9 Connecting the cables to the BCM50 system Refer to the following sections for information on connecting the cables to the BCM50 system: • “Connecting the expansion unit” • “Connecting the power supply” on page 100 • “Connecting the lines and extensions” on page 102 •... -
Page 99: To Connect An Expansion Unit
LEDs on the expansion unit port light up, while the LEDs on the main unit port go out. Figure 43 Connecting the expansion unit to the BCM50 Main Unit Expansion unit 1 Chapter 9 Connecting the cables to the BCM50 system... -
Page 100: Connecting The Power Supply
For more information about the UPS, refer to “Uninterruptable power supply” on page When connecting a UPS, you must use a USB hub between the UPS and the BCM50 system. Note: For the UPS to function correctly, it must be connected before the BCM50 system is powered up. -
Page 101: To Connect A Power Supply Using A Ups
To connect a power supply using a UPS Mount the UPS within 1.5 meters (5 feet) of the BCM50 units. The UPS must be close enough to the BCM50 units that the power supply can be connected to both the UPS and the BCM50 units. -
Page 102: Connecting The Lines And Extensions
Chapter 9 Connecting the cables to the BCM50 system Note: Use only the power supply that is approved by Nortel for use with the BCM50 units. Rotate the retention clip so that it locks the power supply cord in place. -
Page 103: Wiring Warnings
These leakage currents normally flow safely to protective earth ground through the power cord. However, if the ac power is unplugged prior to disconnecting the cables from the BCM50 units, this hazard can occur. -
Page 104: To Connect The Lines And Extensions
• If this is the center unit on a BCM50 system with more than two units, remove the side breakout from both sides of the cable management door. Plug the RJ-21 connector into the RJ-21 telephony connector on the main unit. -
Page 105: To Connect Telephone Lines To Dtm, Brim, Or 4X16 Mbms
Connect the other end of the cable to the telephone company demarcation blocks of the building. If you are connecting telephone lines to a 4x16 or BRIM, repeat steps 2 to 4 for each line you are connecting. Warning: If the network ISDN is a U-loop, the BRIM must be connected only to an NT1 provided by the service provider. -
Page 106: To Connect Analog Telephone Lines To The Gatm4 Or Gatm8
Chapter 9 Connecting the cables to the BCM50 system • If your BCM50 system has another expansion unit, repeat this procedure if you are adding more telephone lines or proceed to page 106 if you are adding extensions. • If your BCM50 system does not have another expansion unit, proceed to auxiliary equipment”... -
Page 107: Connecting The Auxiliary Equipment
If you are connecting extensions to a DSM32, repeat steps 2 to 5 for the second RJ-21 connector. Select the appropriate option for your system: • If your BCM50 system has another expansion unit, repeat this procedure if you are adding more extensions or proceed to page 105 if you are adding telephone lines. -
Page 108: To Install An Auxiliary Ringer
Chapter 9 Connecting the cables to the BCM50 system To install an auxiliary ringer Use the installation instructions that came with the ringer hardware to install the auxiliary ringer. Connect the ringer generator to the auxiliary ringer output pair on the RJ-21 telephony connector. -
Page 109: Connecting An External Music Source
If you are finished adding auxiliary equipment, proceed to Connecting an external music source Use this procedure to connect an external music source to the BCM50 system. You can use any customer-supplied, approved, low power device as a music source. A music source includes equipment such as a radio with a high impedance earphone jack. -
Page 110: To Connect The Music Source Using The Music Source Jack
Chapter 9 Connecting the cables to the BCM50 system To connect the music source using the music source jack Connect the miniature jack of the music source output (3.5 mm mono audio jack) to the music source input on the BCM50 main unit (see... -
Page 111: To Connect The Cables To The Wiring Field Card (Optional)
Use a small slotted screwdriver to unscrew the wire hole screws on top of the terminal block. Insert the bare wire ends (¼” or 6mm) in the appropriate holes on the sides of the terminal block. Chapter 9 Connecting the cables to the BCM50 system “Connecting an auxiliary ringer” on page BCM50 Installation and Maintenance Guide “Connecting an external paging... -
Page 112: Next Step
Connect the wires (digital telephones, analog telephones, and analog trunks) to the patch panel. Connect cables to the main unit as required. Next step After you have connected the cables to the BCM50 system, you can configure the initial parameters. Refer to “Installing telephones and peripherals” on page 113 configuring these parameters. -
Page 113: Installing Telephones And Peripherals
(MBM) you are using. The BCM50 system creates default settings for the telephone DN records when it is first initialized. The settings are based on which telephony profile you chose. To change these settings, use the Element Manager application. -
Page 114: To Install The Emergency Telephone
(CTM) / global analog trunk module (GATM). You can use the emergency telephone to make calls when there is no power to the BCM50 system. To install an emergency telephone on the BCM50 system, connect a single line analog telephone to the auxiliary port on the CTM/GATM. -
Page 115: Installing Ip Phones
Installing IP Phones The BCM50 system supports IP Phones 2001, 2002, and 2004, and the IP Softphone 2050. The system can be set to automatically assign DNs to the IP Phones. The auto-assign feature assigns DNs starting at 353 to 322. - Page 116 Chapter 10 Installing telephones and peripherals N0027152 01 N0027152 01...
-
Page 117: Installing The Analog Terminal Adapter
This section provides installation instructions for the analog terminal adapter 2 (ATA2) or ATA. The ATA2 connects a standard analog voice device or data communication device to the BCM50 system through a digital station module. Examples of analog voice devices are analog telephones and answering machines. -
Page 118: Analog Data Device
Chapter 11 Installing the analog terminal adapter Analog data device The ATA2 connects a standard analog data device, such as a fax or modem, to the BCM50 system. Figure 47 shows an installation overview for connecting a data communication device through an ATA2 to the BCM50 system. -
Page 119: To Connect The Ata2
To mount the ATA2 on a wall When using 0.5 mm wire (24 AWG), select a location within 800 m (2600 ft.) of the BCM50. Allow 12.5 cm (5 in.) clearance for the line jack, terminal jack, and power supply connector. -
Page 120: To Measure The Insertion Loss From The Co To The Analog Device
For example, Hewlett-Packard 4935A Transmission Test Set. To measure the insertion loss from the CO to the analog device Establish a connection to the 1 mW, 1 kHz, CO service line with an analog telephone attached to the ATA2. -
Page 121: To Measure The Insertion Loss From The Analog Device To The Co
Note: The tone must be greater than - 10 dB (for example: - 9 dB is acceptable). To measure the insertion loss from the analog device to the CO Establish a connection to a silent termination on the CO service line with an analog telephone attached to the ATA2. - Page 122 Chapter 11 Installing the analog terminal adapter N0027152 01 N0027152 01...
-
Page 123: Configuring The Bcm50 System
BCM50 parameters. Figure 52 Overview of configuring the basic BCM50 parameters For simplicity, the task of configuring the basic BCM50 parameters is divided into two parts: • “Initial parameters overview” on page 124 •... -
Page 124: Initial Parameters Overview
Chapter 12 Configuring the BCM50 system Initial parameters overview The initial parameters are the required parameters that can be configured using Telset Administration, Element Manager, or the Startup Profile. See parameters. Table 20 Initial parameters Parameters Telset Administration Keycode Feature 9*8 > Keycode IP address: Feature 9*8 >... -
Page 125: Startup Parameters Overview
• User ID • Group • Description • Callback number Chapter 12 Configuring the BCM50 system for a list of the startup parameters. Element Manager Configuration > System > Identification (ID set automatically) Configuration > System > Date and Time Configuration >... - Page 126 Chapter 12 Configuring the BCM50 system N0027152 01 N0027152 01...
-
Page 127: Using Telset Administration To Set The Basic Parameters
You cannot set all the basic parameters using Telset Administration. Therefore, after configuring the initial parameters, you must use Element Manager to set the startup parameters. Refer to “Configuring the startup parameters” on page Refer to the BCM50 Telset Administration Guide (N0027176) for more information on Telset Administration. Figure 53 shows an overview of using Telset Administration to set the basic parameters. -
Page 128: To Enter The Keycodes
Press SHOW to view the keycodes. • Use the soft keys to modify existing keycodes for your system. Refer to the BCM50 Keycode Installation Guide (N0016865) for details on how to retrieve and enter the keycodes for your system. To configure the IP address Select Feature 9*8 from a two-line display telephone. -
Page 129: To Configure The Modem
Guide (N0027156). To select the region You set the Region using Feature **PROFILE from a two-line display telephone. Refer to the BCM50 Telset Administration Guide (N0027176) for information on using Telset Administration to set this parameter. BCM50 Installation and Maintenance Guide... -
Page 130: To Select The Telephony Startup Template And Startdn
You set the Template and Start DN using Feature **STARTUP from a two-line display telephone. Note: This is available for only 15 minutes after system bootup. Refer to the BCM50 Telset Administration Guide (N0027176) for information on using Telset Administration to set this parameter. -
Page 131: Next Step
Element Manager. Next step After you configure the initial parameters using Telset Administration, you must configure the startup parameters using Element Manager. Refer to “Configuring the startup parameters” on page for more information. BCM50 Installation and Maintenance Guide... - Page 132 Chapter 13 Using Telset Administration to set the basic parameters N0027152 01 N0027152 01...
-
Page 133: Using Element Manager To Set The Basic Parameters
“Configuring the initial parameters” on page 135 • “Configuring the startup parameters” on page 137 Refer to the BCM50 Administration Guide (N0016868) for more information on how to use Element Manager. Figure 54 shows an overview of using Element Manager to set the basic parameters. -
Page 134: To Download And Install Element Manager
Ethernet port on your computer. The DHCP-enabled computer is assigned IP address 10.10.11.2. (255.255.255.252). Open a web browser and enter the IP address 10.10.11.1 (BCM50 OAM port IP address). The Enter Network Password dialog box opens. Enter the following username and password:... -
Page 135: To Enter The Keycodes
Subnet mask Default gateway Note 1: If a DHCP Server is present on the network, then the BCM50 becomes a DHCP client. Note 2: If any of the attributes are modified, then the Element Manager session is disconnected. Click Ok. -
Page 136: To Configure The Modem
Select Modem from the Administrator Access folder. Select or deselect the Enable modem checkbox, depending on your system requirements. For more information on modem configuration, refer to the BCM50 Networking Configuration Guide (N0027156). To configure the start-up template for telephony services Note: This procedure erases all the telephony programming that is currently on BCM50 the system. -
Page 137: To Enter A Name For Your System
Enter the number of rings you want CallPilot to wait before answering lines. Click Install. Configuring the startup parameters Use the following procedures to configure the startup parameters for the BCM50 using Element Manager: • “To enter a name for your system”... -
Page 138: To Configure The Date And Time Settings
Year Time zone To configure DHCP server settings Note: This procedure is applicable only to a BCM50 main unit. If you have a BCM50a main unit or BCM50e main unit, the integrated router automatically disables the DHCP server. Refer to the BCM50a Integrated Router Configuration Guide (N0027181) or the BCM50e Integrated Router Configuration Guide (N0027182) to configure DHCP server settings on the BCM50a or BCM50e main units. -
Page 139: To Configure Ip Phones
Global password If the Enable Global Registration Password checkbox is selected, enter the password the installer enters on the IP telephone to connect to the system. If this field is left blank, no password prompt occurs during registration. Auto-assign DNs If set to ON, the system assigns an available DN as an IP terminal requests registration. -
Page 140: To Configure Snmp Settings
Chapter 14 Using Element Manager to set the basic parameters Tip: To automatically configure IP Phones with DNs assigned: Once the IP Phones are operational, set enable registration to OFF. You can configure other attributes on the IP Terminal Global Settings tab depending on the requirements for your system. -
Page 141: To Configure The Snmp Manager List
Enter a password for this account. Telset User ID (numeric) If the user performs administration through the telset interface, enter a number for the user ID. Telset Password (numeric) Enter a password for the Telset User ID. Table Table BCM50 Installation and Maintenance Guide... -
Page 142: Next Step
Chapter 14 Using Element Manager to set the basic parameters Table 30 Add Account attributes (Sheet 2 of 2) Attribute Callback number Callback passcode Click Ok. Repeat steps 4 to 6 to create more user accounts. Next step After you set the basic parameters, proceed to page 149. -
Page 143: Using The Startup Profile To Configure Parameters
You create the Startup Profile using the Startup Profile template (a Microsoft Excel template). You then use a USB storage device to transfer the Startup Profile data to the BCM50 main unit. Loading the Startup Profile adds approximately 5 minutes to the time for the BCM50 to boot. -
Page 144: Startup Profile Requirements
USB device icon, and selecting FAT32 reformatting. This destroys any data you had on the USB. Note: The Startup Profile works only on a BCM50 system that has no keycodes loaded. After the keycodes are loaded, the Startup Profile does not work. This condition prevents unintentional overwriting of the parameters of a configured system. -
Page 145: To Download The Startup Profile Template
Ethernet port on your computer. The DHCP-enabled computer is assigned IP address 10.10.11.2. (255.255.255.252). Open a web browser and enter the IP address 10.10.11.1 (BCM50 OAM port IP address). The Enter Network Password dialog box opens. Enter the following username and password:... -
Page 146: To Load The Startup Profile Data Onto The Bcm50 System
Disconnect the power supply from the main unit. Insert the USB storage device into the USB port on the main unit. If the BCM50 system has a UPS, insert the USB storage device into the Linux-compatible USB hub. Connect the power supply to the BCM50 system. -
Page 147: Next Step
After the keycodes are loaded, the Startup Profile does not work. This condition prevents unintentional overwriting of the parameters of a configured system. Remove the USB storage device from the USB port on the BCM50 or the USB hub. Note: Make sure the bootup sequence is complete before removing the USB storage device from the BCM50 system. - Page 148 Chapter 15 Using the Startup Profile to configure parameters N0027152 01 N0027152 01...
-
Page 149: Completing The Initial Installation (Optional)
Chapter 16 Completing the initial installation (optional) This section provides information on completing the initial installation of your BCM50 system. These options are described for informative purposes and do not have to be completed. Figure 56 shows an overview of completing the initial installation. -
Page 150: To Configure The Mbm(S)
To configure the MBM(s) Open Element Manager and connect to your BCM50 system. From the Configuration tab, click the Resources folder to expand it. Select Telephony Resources from the Resources folder (see Figure 57 Telephony Resources page From the Modules section, select the expansion unit that you want to configure. -
Page 151: Configuring Modem Settings
Checking for software updates Nortel frequently updates the BCM50 software. Therefore, a standard part of any installation is to ensure your system has the latest version of the software. Refer to the BCM50 Administration Guide (N0016868) for information on checking for and installing software updates. -
Page 152: Customizing Security Policies
Customizing security policies You configured a system password and security settings during the basic configuration of your BCM50 system. Depending on your needs, you can choose to perform further configuration of the security policies. Refer to the BCM50 Administration Guide (N0016868) for information on customizing the security policies. -
Page 153: Connecting The Bcm50 System To The Lan And Wan
Chapter 17 Connecting the BCM50 system to the LAN and WAN This section describes how to connect the LAN and WAN cables to the BCM50 system. Figure 58 shows the steps required to connect the data networking cables to the BCM50 system. -
Page 154: Connecting The Bcm50 System To The Lan
Chapter 17 Connecting the BCM50 system to the LAN and WAN Connecting the BCM50 system to the LAN On a main unit, three RJ-45 connectors support LAN connections and one OAM port. On the BCM50a main unit and BCM50e main unit, six RJ-45 connectors support LAN connections and one OAM port. -
Page 155: To Connect The Bcm50 System To The Lan
BCM50 system (Router card LAN ports, Expansion port, or expansion unit LAN port). Repeat step 3 for each IP device you want to connect to the LAN using the BCM50 switch. If you are installing a BCM50a or BCM50e, proceed to WAN”... -
Page 156: To Connect The Bcm50E Main Unit To The Wan
WAN port on both types of router card. Figure 60 WAN port on a BCM50 main unit WAN port WAN port Refer to the following sections for information on connecting the BCM50 to the WAN: • “To connect the BCM50e main unit to the WAN” •... -
Page 157: To Connect The Bcm50A Main Unit To The Wan
ADSL service provider. Follow your service provider's instructions on how to connect the splitter. Next step After you have connected the cables to the BCM50 system, you can test the system. Refer to “Testing basic BCM50 functionality” on page 159 system. - Page 158 Chapter 17 Connecting the BCM50 system to the LAN and WAN N0027152 01 N0027152 01...
-
Page 159: Testing Basic Bcm50 Functionality
Chapter 18 Testing basic BCM50 functionality This section describes how to test the BCM50 system. Refer to the following sections for information on testing and troubleshooting the BCM50 system: • “To test the main unit” • “To test the main unit (without a valid keycode)” on page 160 •... -
Page 160: To Test The Main Unit (Without A Valid Keycode)
To test the expansion unit Use the following test to ensure the expansion unit is operating properly: Make sure that the BCM50 system has fully booted. Refer to LEDs” on page 59 Check the power and status LEDs on the MBM that is inserted in the expansion unit. Both LEDs should be solid green. -
Page 161: To Troubleshoot The Expansion Unit
MBM. Reboot the system to ensure that the BCM50 main unit is functioning correctly. If the programming is incorrect, use the Backup and Restore Utility to load a recent backup of system programming. -
Page 162: To Test A Trunk Mbm
Chapter 18 Testing basic BCM50 functionality To test a trunk MBM Go to an extension that has access to one of the lines on the MBM. Select the line or line pool to which the line belongs. Check for dial tone. -
Page 163: To Determine Why There Is No Dial Tone At The Ata2
BCM50 hardware and ATA2. Reset to factory settings This section describes how to reset the BCM50 system to the factory settings or a stable working condition using the reset switch (see modifications can be made. -
Page 164: To Perform A Level 1 And Level 2 Reset
As you press the reset switch, the LEDs blink in a pre-defined fashion to guide and confirm user input. The various states of the power and status LEDs indicate the following: • A blinking power LED indicates a “user input window” – the BCM50 system is waiting for user input. •... - Page 165 LED flashes faster than the upper LED. Note 2: All times in this figure are approximate. Chapter 18 Testing basic BCM50 functionality Level 1 reset pending Perform level 1 reset Level 2 reset confirm System is ready...
- Page 166 Chapter 18 Testing basic BCM50 functionality Table 32 Level 1 reset Step User action Power LED Solid yellow Boot the system Solid yellow Flashing yellow Press reset switch Solid red Wait five seconds Flashing red Solid red Press reset switch...
-
Page 167: Replacing The Bcm50 System Components
Chapter 19 Replacing the BCM50 system components This section provides an overview of how to replace the BCM50 system components. Figure 63 shows the steps required to replace the BCM50 system components. Figure 63 Overview of replacing the BCM50 system components Refer to the following chapters for information on replacing the BCM50 components: •... - Page 168 Chapter 19 Replacing the BCM50 system components N0027152 01 N0027152 01...
-
Page 169: Replacing A Power Supply
This chapter describes the procedure for replacing a power supply. Figure 64 shows an overview of replacing a power supply. Figure 64 Overview of replacing the BCM50 power supply Refer to the following sections for information on replacing a power supply: •... -
Page 170: To Shut Down The System
Before you disconnect the power supply, read the warnings about connecting network lines in “Wiring warnings” on page To remove the power supply Remove the telephony and data networking lines from the BCM50 units. These lines include: • the RJ-21 telephony connector on the main unit •... -
Page 171: To Connect The New Power Supply
Returning the system to operation Check if the system programming is still intact. If not, use Element Manager to restore the system programming. For information about restoring system data, refer to the BCM50 Administration Guide (N0016868). Chapter 20 Replacing a power supply supply”. - Page 172 Chapter 20 Replacing a power supply N0027152 01 N0027152 01...
-
Page 173: Replacing A Main Unit
Chapter 21 Replacing a main unit There are three types of main units available: the BCM50, the BCM50a, and the BCM50e. This chapter describes the procedure for replacing a main unit. Figure 65 shows an overview of replacing a main unit. -
Page 174: To Shut Down The System
“Installing the new main unit” on page 176 Preparing the system for maintenance In most cases, if the BCM50 main unit is faulty, the system will already be shut down. If this is the case, proceed to “To disconnect the... -
Page 175: To Remove A Rackmounted Main Unit
“Removing the main unit”. “To disconnect the cables” on page “Installing the new main unit” on page “To disconnect the cables” on page “Installing the BCM50 unit on the wall” on page BCM50 Installation and Maintenance Guide 174. 176. 174. -
Page 176: To Remove A Desktop Mounted Main Unit
Lift the main unit off of the table and set it on a flat, clean, static-free surface. Continue to the next step, Installing the new main unit Use one of the following procedures to install the new BCM50 main unit: • “Installing the BCM50 unit on the rackmount shelf” on page 81 •... -
Page 177: To Return The System To Operation
If you are using a right-angle RJ-21 connector, use the screw on the left side of the connector to secure the left side of the connector. To secure the right side of the connector, use a cable tie to fasten the 25-pair cable to the anchor on the BCM50 main unit. 12 Continue with “To return the system to... - Page 178 Chapter 21 Replacing a main unit N0027152 01 N0027152 01...
-
Page 179: Replacing A Media Bay Module
Refer to the following procedures to replace an MBM: • “To remove the MBM” on page 180 • “To insert the new MBM” on page 181 • “To return the system to operation” on page 181 Chapter 22 Replacing a media bay module BCM50 Installation and Maintenance Guide... -
Page 180: To Remove The Mbm
Chapter 22 Replacing a media bay module To remove the MBM Use Element Manager to disable the MBM you are removing. Refer to the BCM50 Administration Guide (N0016868) for more information on disabling an MBM. If the expansion unit is wall-mounted, it must be removed from the wallmount bracket before removing the MBM. -
Page 181: To Insert The New Mbm
Reconnect the power supply cable. Refer to page 101. Connect the telephone line and extension cables to the port on the front of the new MBM. Refer to “Connecting the lines and extensions” on page If the new MBM is a different type of module (for example, you replaced a DSM16 with a 4x16), you must make any additional connections to the MBM before continuing. - Page 182 Chapter 22 Replacing a media bay module N0027152 01 N0027152 01...
-
Page 183: Replacing An Expansion Unit
Replacing an expansion unit This chapter describes the procedure for replacing an expansion unit. Figure 68 shows an overview of replacing an expansion unit. Figure 68 Overview of replacing an expansion unit Chapter 23 Replacing an expansion unit BCM50 Installation and Maintenance Guide... -
Page 184: To Disconnect The Expansion Unit Cables
To disconnect the expansion unit cables Use Element Manager to disable the media bay module (MBM) that is installed in the expansion unit you are removing. Refer to the BCM50 Administration Guide (N0016868) for more information. Disconnect the expansion cable from the expansion port on the expansion unit. -
Page 185: To Remove A Rackmounted Expansion Unit
Lift the expansion unit off of the table or other unit and set it on a flat, clean, static-free surface. Continue to the next step, “Removing the Chapter 23 Replacing an expansion unit 180. 186. MBM”. BCM50 Installation and Maintenance Guide 184. 184. 184. -
Page 186: To Remove The Mbm
Chapter 23 Replacing an expansion unit Removing the MBM After you have removed the expansion unit, use the following procedure to remove the MBM from the expansion unit. To remove the MBM Attach one end of a grounding strap to your wrist and the other end to a grounded metal surface. -
Page 187: To Connect The Cables
You must connect the power cord to a grounded outlet before connecting the telephony and data networking cables to the system. Use Element Manager to enable the MBM. Refer to the BCM50 Administration Guide (N0016868) for more information on enabling an MBM. - Page 188 Chapter 23 Replacing an expansion unit Set the basic configuration parameters. Refer to for more information. N0027152 01 N0027152 01 “Configuring the BCM50 system” on page...
-
Page 189: Replacing An Internal Component
Failure to do so can result in damage to the equipment. Figure 70 Overview of replacing an internal component Chapter 24 Replacing an internal component shows an overview of replacing an internal component. BCM50 Installation and Maintenance Guide... -
Page 190: To Shut Down The System
If there is no recent backup, use Element Manager to back up the system data. For information about backing up the system data, refer to the BCM50 Administration Guide (N0016868). In Element Manager, from the Administration tab, click the Utilities folder to expand it. -
Page 191: To Disconnect The Cables
To disconnect the cables Remove the 25-pair cable from the RJ-21 telephony connector on the front of the BCM50 main unit. Remove the Ethernet cable from the LAN port. If the main unit is a BCM50a or BCM50e, remove the Ethernet cable or ADSL line from the WAN port and the Ethernet cables from the Router card LAN ports. -
Page 192: To Remove A Wallmounted Main Unit
To open the main unit case Danger: Electrical shock warning. Disconnect the power cord, telephone cables and network cables before opening the BCM50 main unit. Attach one end of a grounding strap to your wrist and the other end to a grounded metal surface. - Page 193 Figure 71 BCM50 case screws Turn the BCM50 unit over so that the top of the unit is facing up. While holding the bottom of the BCM50 case, slide the top of the case back to disengage the locking clips (see...
-
Page 194: Removing An Internal Component
Chapter 24 Replacing an internal component Figure 72 Remove the top of the case Lift the top of the case off of the BCM50 unit. Continue with the next step, Removing an internal component Use one of the following procedures to remove the component: •... -
Page 195: To Remove The Hard Disk
Lift the hard disk and hard disk bracket out of the main unit and place them on a flat, clean, static-free surface. Remove the four screws that secure the hard disk to the hard disk bracket (see page 196). Chapter 24 Replacing an internal component for the location of the cable. BCM50 Installation and Maintenance Guide Figure 74 on... -
Page 196: To Remove The Fan
Chapter 24 Replacing an internal component Figure 74 Hard disk and bracket screws Remove these screws Lift the hard disk off of the hard disk bracket and set it on a flat, clean, static-free surface. Continue to the next step, To remove the fan Attach one end of a grounding strap to your wrist and the other end to a grounded metal surface. -
Page 197: To Remove The Router Card
Lift the router card over the top of the LED pipes and place it on a flat, clean, static-free surface. Continue to the next step, “Inserting the new component” on page Chapter 24 Replacing an internal component 198. “Opening the main unit case” on page 198. BCM50 Installation and Maintenance Guide... -
Page 198: To Insert The New Hard Disk
Chapter 24 Replacing an internal component Inserting the new component Use one of the following procedures to insert the new component: • “To insert the new hard disk” • “To insert the new fan” on page 200 • “To insert the new router card” on page 201 Caution: Use only a Nortel-approved replacement part. - Page 199 (see 77 on page 200). Chapter 24 Replacing an internal component Insert screws 195. Using other screws may Figure 73 on page 195 Figure 73 on page 195 BCM50 Installation and Maintenance Guide for the location of Figure...
-
Page 200: To Insert The New Fan
Ensure the fans are oriented such that the airflow is out of the unit. Note: Ensure the label of the new fan faces the back of the BCM50 unit. Airflow is out of the chassis as indicated by the arrows imprinted on the fan. -
Page 201: To Insert The New Router Card
Chapter 24 Replacing an internal component “To insert the new hard disk” on page case”. “To remove the router card” on page 197 “To close the main unit case”. BCM50 Installation and Maintenance Guide 198. Figure 78 on page 202). -
Page 202: Installing The Main Unit
“Installing the BCM50 unit on the rackmount shelf” on page 81 • “To install the BCM50 unit on the wallmount bracket” on page 86 • “To install the BCM50 unit on a desktop or shelf” on page 89 N0027152 01 N0027152 01 192. Do not use any other screws. -
Page 203: To Connect The Cables
To return the BCM50 system to operation Check the Power and Status LEDs on the main unit. After the BCM50 has finished starting up, both LEDs should be lit solid and green. If either LED is not lit solid and green, there is a problem with the main unit. - Page 204 Set the basic configuration parameters. Refer to for more information. Warning: When you restart the system, all digital telephony, IP clients/voice mail, and VoIP ports are not available until the system services restart. N0027152 01 N0027152 01 “Configuring the BCM50 system” on page...
-
Page 205: Appendix A
Appendix A RJ-21 telephony connector wiring chart You can connect 4 analog telephone lines, 4 analog telephony devices, and 12 digital telephones to the RJ-21 telephony connector. Figure 79 shows the RJ-21 telephony connector on a BCM50. Figure 79 RJ-21 telephony connector on a BCM50... - Page 206 No connection Brown-Red Red-Slate Auxiliary Ringer Slate-Red Black-Blue Page Relay Blue-Black Black-Orange Page Output Orange-Black Black-Green Music Source Green-Black Black-Brown Digital telephone Brown-Black Black-Slate Digital telephone Slate-Black Yellow-Blue Digital telephone Blue-Yellow Yellow-Orange Digital telephone Orange-Yellow Yellow-Green Digital telephone Green-Yellow Yellow-Brown...
-
Page 207: Appendix B
Appendix B LAN ports wiring chart All BCM50 units have LAN ports as follows: • The BCM50 has three LAN ports. • The BCM50a has six LAN ports. • The BCM50e has six LAN ports. • The expansion unit has one LAN port. - Page 208 Appendix B LAN ports wiring chart Table 35 lists the wiring details for the LAN ports. Table 35 LAN port wiring Signal + Receive Data (Rx+) – Receive Data (Rx–) + Transmit Data (Tx+) No connection No connection – Transmit Data (Tx–) No connection No connection N0027152 01...
-
Page 209: Appendix C
Appendix C WAN ports wiring chart Two BCM50 main units, the BCM50a and the BCM50e, have a Router card. On the BCM50a, the WAN port is an RJ-11 port. On BCM50e, the WAN port is an RJ-45 port. Figure 81 shows the WAN ports for the BCM50a and BCM50e. - Page 210 Appendix C WAN ports wiring chart Table 37 RJ-45 WAN port wiring Signal + Receive Data (Rx+) – Receive Data (Rx–) + Transmit Data (Tx+) No connection No connection – Transmit Data (Tx–) No connection No connection N0027152 01 N0027152 01...
-
Page 211: Appendix D
Appendix D Expansion ports wiring chart Two of the four RJ-45 connectors on the BCM50, the BCM50a, and the BCM50e are designated as Expansion ports (see connect network devices to the LAN. Figure 82 Expansion ports on a BCM50 and an expansion unit... - Page 212 Appendix D Expansion ports wiring chart Table 38 Expansion port wiring (Sheet 2 of 2) Signal – FS256 Receive Data + FS256 Receive Data N0027152 01 N0027152 01...
-
Page 213: Appendix E
Appendix E DTM wiring chart The digital telephone line is connected to the Digital Trunk Module (DTM) through the RJ-48c jack on the front of the media bay module (MBM) (see Figure 83 DTM RJ-48C port Table 39 Table 40 list the wiring details for the RJ-48C port. - Page 214 Appendix E DTM wiring chart N0027152 01 N0027152 01...
-
Page 215: Appendix F
RJ-45 ports. Signal on system side No connection No connection No connection No connection BCM50 Installation and Maintenance Guide Appendix F BRIM wiring chart 1 2 3 4 5 6 7 8 RJ-45 pin out... - Page 216 Appendix F BRIM wiring chart Table 42 BRIM line numbering Default line numbers on Port number Expansion port 1 065 – 066 067 – 068 069 – 070 071 – 072 N0027152 01 N0027152 01 Default line numbers on Expansion port 2 095 –...
-
Page 217: Appendix G
Appendix G GATM wiring chart Analog telephone lines are connected to the GATM4 or GATM8 through the RJ-21 connector on the front of the media bay module (MBM) (see Figure 85 GATM RJ-21 connector RJ-21 connector Table 43 lists the wiring details for the RJ-21 connector on the GATM4. - Page 218 Appendix G GATM wiring chart Table 43 GATM4 RJ-21 connector wiring (Sheet 2 of 2) Line Connection Ring Note: The AUX port supports full data speeds. When the line is in use by an analog device, the icon is lit on the phone to indicate it is in use.
- Page 219 1 goes active (powered by the CO). Default line numbers on Wire color Expansion port 1 Black-Slate — Slate-Black Violet-Brown — Brown-Violet Violet-Slate — Slate-Violet BCM50 Installation and Maintenance Guide Appendix G GATM wiring chart Default line numbers on Expansion port 2 — — —...
- Page 220 Appendix G GATM wiring chart N0027152 01 N0027152 01...
-
Page 221: Appendix H
Appendix H 4x16 wiring charts You can connect up to 4 analog telephone lines and up to 16 digital telephones to the 4x16 media bay module (MBM). The analog telephones lines are connected to the 4x16 through the RJ-11 jacks (labeled 1 to 4) on the front of the MBM. - Page 222 Appendix H 4x16 wiring charts Table 46 4x16 default line numbering Default line number on Port number Expansion port 1 Table 47 lists the wiring details for the RJ-21 connector on the 4x16. Table 47 4x16 RJ-21 connector wiring (Sheet 1 of 2) Connection Ring Ring...
- Page 223 No connection Default DN on Wire color Expansion port 1 Black-Brown Brown-Black Black-Slate Slate-Black Yellow-Blue Blue-Yellow Yellow-Orange — Orange-Yellow Violet-Slate — Slate-Violet BCM50 Installation and Maintenance Guide Appendix H 4x16 wiring charts Default DN on Expansion port 2 — —...
- Page 224 Appendix H 4x16 wiring charts N0027152 01 N0027152 01...
-
Page 225: Appendix I
RJ-21 connectors RJ-21 pin out Default DN on Expansion port 1 Default DN on Expansion port 2 DSM16 or Lower DSM32 Upper DSM32 RJ-21 RJ-21 BCM50 Installation and Maintenance Guide Figure DSM32 DSM16 or Lower DSM32 Upper DSM32 RJ-21 RJ-21... - Page 226 Appendix I DSM16 and DSM32 wiring charts Table 48 DSM16 and DSM32 RJ-21 connector wiring (Sheet 2 of 2) Connection Wire color White-Slate Ring Slate-White Red-Blue Ring Blue-Red Red-Orange Ring Orange-Red Red-Green Ring Green-Red Red-Brown Ring Brown-Red Red-Slate Ring Slate-Red Black-Blue Blue-Black Ring...
-
Page 227: Appendix J
Default DN on Wire color Expansion port 1 White-Blue Blue-White White-Orange Orange-White White-Green Green-White White-Brown Brown-White White-Slate Slate-White Red-Blue Blue-Red Red-Orange Orange-Red Red-Green Green-Red Red-Brown Brown-Red BCM50 Installation and Maintenance Guide RJ-21 pin out Default DN on Expansion port 2 — —... - Page 228 Appendix J ASM8, ASM8+, and GASM wiring chart Table 49 ASM RJ-21 connector wiring (Sheet 2 of 2) Connection No connection — No connection N0027152 01 N0027152 01 Default DN on Wire color Expansion port 1 Violet-Slate Slate-Violet Default DN on Expansion port 2 —...
-
Page 229: Appendix K
“Regional caller ID display formats” on page 231 • “Regional companding law” on page 231 • “Regional media bay module availability” on page 231 • “Regional PRI line protocol support” on page 232 • “Restriction filter defaults” on page 236 BCM50 Installation and Maintenance Guide... -
Page 230: Regional Language Default Values
Appendix K System region attributes Regional language default values Table 50 lists the languages available for each region and the order in which the languages are set as default. Table 50 Default languages by region Region • Australia • United Kingdom •... -
Page 231: Regional Caller Id Display Formats
“Installing telephones and peripherals” on page Region • Hong Kong • North America • Germany • Italy • Global • Norway • Holland • • Spain ASM8/ 4x16 ASM8+/ GASM BCM50 Installation and Maintenance Guide 113. • Sweden • Switzerland • United Kingdom GATM... -
Page 232: Regional Pri Line Protocol Support
Appendix K System region attributes Table 53 Media bay module availability by region (Sheet 2 of 2) Region Hong Kong Italy North America Norway Spain Sweden Switzerland United Kingdom Note: The ASM8 is available in North America only. Regional PRI line protocol support Table 54 shows the PRI line protocol support by region. -
Page 233: Isdn Line Services
Call Charge Rate Indication • Call Offer (CCRD) • Loop avoidance • Executive Intrusion • Three Party • Route Optimization BCM50 Installation and Maintenance Guide • DASS2 • DPNSS • SL-1 • ETSI QSIG 300 239 • ISDN ETSI 300 403 •... -
Page 234: Define Time Zones By Country And Language
Define time zones by country and language Time zones are based on the actual time zone where the BCM50 is located. The Time Zone dropdown list on the initialization screen, allows you to choose a compatible time zone. If your exact location is not on the list, choose the one with the time zone closest to you. -
Page 235: System Defaults
00:00 end 00:00 Service 5 start 00:00 end 00:00 Service 6 start 00:00 end 00:00 Default disabled BCM50 Installation and Maintenance Guide Global United Kingdom 120 msec 120 msec 80 msec 100 msec disabled enabled a-law EBI a-law EBI... -
Page 236: Restriction Filter Defaults
Appendix K System region attributes Table 58 Region defaults (Sheet 2 of 2) Functionality DRT Delay Handsfree Pickup Group Held Line Remind Delay Allow Redirect Transfer Callback ONN Blocking Release reason text Restriction filter defaults Some profiles have default restriction dialing filters. Table 59 Default dialing restrictions, by profile Restriction Restriction/... -
Page 237: Digital Trunk Types
16 kbits/s. The D-channel is used primarily to carry call information. Like loop start trunks, BRI lines can be configured as manual-answer or auto-answer. DASS2 (British) Trunk provides multi-line IDA interconnection to the British Telecom network. Appendix K System region attributes Description BCM50 Installation and Maintenance Guide... -
Page 238: Callpilot Regions
E1 lines. For example, corporate offices separated geographically can be linked over DPNSS lines to other BCM50 systems, bypassing the restrictions of the PSTNs to which they may be connected. This allows connected BCM50 systems to function like a private network. - Page 239 Regions False True Australia CALA Caribbean Denmark Europe Germany Global Holland Hong Kong Italy North America Norway Spain Sweden Switzerland Appendix K System region attributes Max local National Number number length Length BCM50 Installation and Maintenance Guide Maximum CLID display...
- Page 240 Appendix K System region attributes N0027152 01 N0027152 01...
-
Page 241: Index
114 SAPS cable 57 Central America, supported languages 230 companding laws, by region 231 configuration 149 Element Manager 133 overview 124 Telset Admin 127 conventions, guide 28 button options 28 buttons 28 command line 28 BCM50 Installation and Maintenance Guide... - Page 242 20 cordless 7406 56 data devices, using ATA 2 118 data transmission requirements, ATA2 118 dedicated cable 57 DHCP BCM50 main unit 67 DHCP server BCM50a, BCM50e 68 configuration 67 dialing plan profile defaults 236 digital lines, 4x16 42...
- Page 243 MBM 38 configuring 150 default DNs 222, 227 default line numbers 213, 216, 218, 222 installing 95 overview 39 replacing 179 switches 93 wiring chart 213, 215, 217, 221, 225, 227 media bay modules BCM50 Installation and Maintenance Guide Index...
- Page 244 Index availability by regions 231 memory button 7000 55 7100 55 7208 55 7316 55 7316E 55 music on hold copyright 20 music source permission 20 wiring on telephony connector 206 network equipment registration 21 networking WAN card 53 North American components 43, 55 one-line display 7100 55 7208 55...
- Page 245 DSM16 225 DSM32 225 DTM 213 expansion port 211 expansion unit 211 GATM4 217 GATM8 217 LAN port 207 main unit 209, 211 WAN port 209 wiring field card (WFC) 88 wiring requirements 76 BCM50 Installation and Maintenance Guide Index...
- Page 246 Index N0027152 01 N0027152 01...
Need help?
Do you have a question about the BCM50 and is the answer not in the manual?
Questions and answers